Author: Darleen Vance

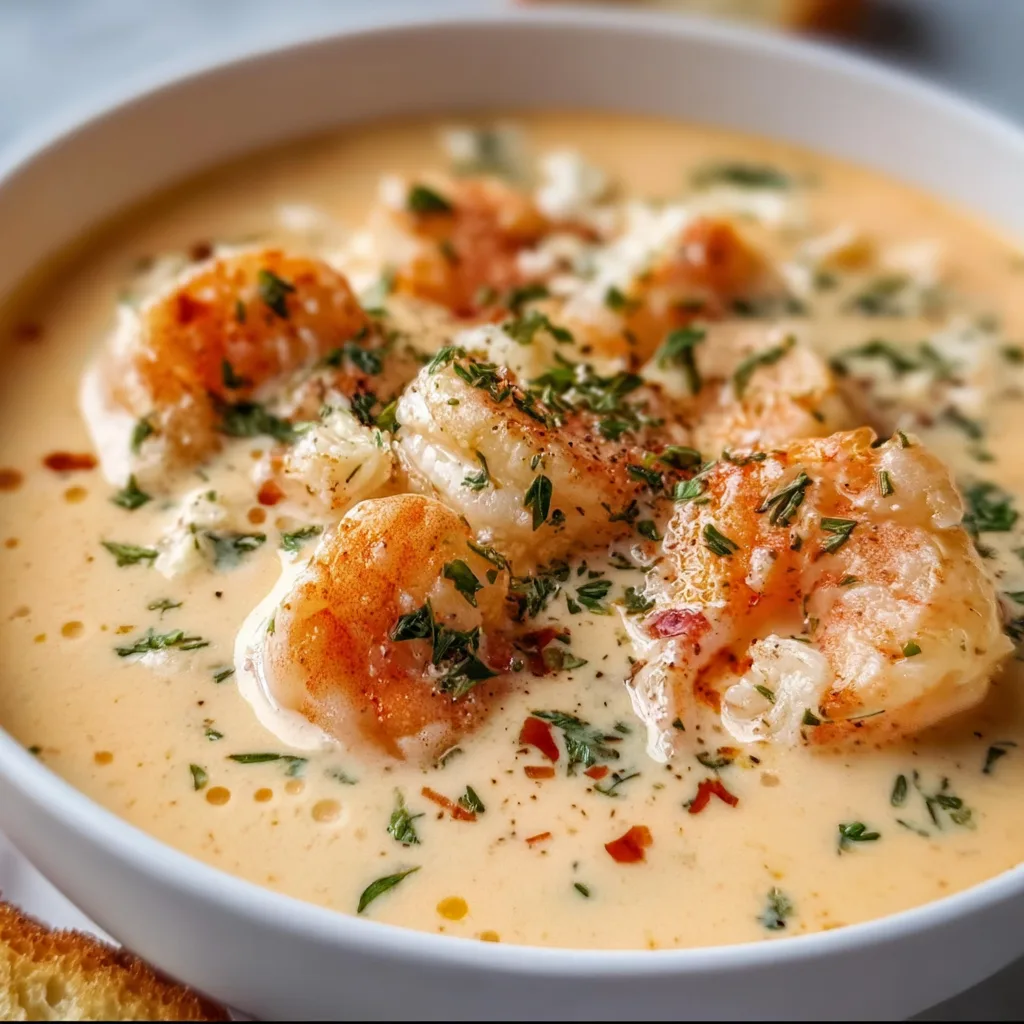
  • Creamy Crab and Shrimp Bisque: Irresistibly Rich & Comforting Soup

    Creamy Crab and Shrimp Bisque: Irresistibly Rich & Comforting Soup

    Creamy Crab and Shrimp Bisque: Irresistibly Rich & Comforting Soup

    Creamy Crab and Shrimp Bisque is the ultimate comfort food that wraps you in a warm, velvety hug on chilly evenings. The first time I made this luxurious bisque, the aroma of seafood and herbs filled my kitchen, transporting me straight to a seaside bistro. There’s something magical about the way the sweet crab meat and tender shrimp mingle with the rich, creamy broth that makes this dish truly special. I promise this recipe will become your new favorite way to treat yourself and impress guests with minimal effort but maximum flavor.

    Recipe

    Why You’ll Love This Creamy Crab and Shrimp Bisque

    Restaurant-Quality Flavor at Home

    This bisque delivers a restaurant-worthy experience without the hefty price tag. The secret lies in building layers of flavor—sautéing aromatic vegetables until fragrant, deglazing with a splash of sherry, and simmering everything with seafood stock before blending to silky perfection. I love how the sweet crab and shrimp shine through without being overwhelmed by the cream. The subtle hint of brandy or cognac adds that special something that makes guests wonder what your secret ingredient might be. It’s sophisticated yet surprisingly simple.

    Perfect for Any Occasion

    Whether you’re planning an intimate dinner for two or hosting a holiday gathering, this Creamy Crab and Shrimp Bisque fits the bill perfectly. It’s elegantly versatile enough to serve as a stunning starter in small cups or as the main event in larger bowls with crusty bread. I’ve served this at Christmas Eve dinners and casual Sunday suppers alike, always to rave reviews. The bisque can be made ahead and gently reheated, making it ideal for entertaining when you want to enjoy your guests instead of being stuck in the kitchen.

    Essential Tips & Tricks

    Selecting the Best Seafood

    The quality of your seafood makes all the difference in this bisque. I recommend using lump crab meat rather than claw meat for its sweeter flavor and more substantial texture. When selecting shrimp, look for wild-caught varieties when possible—they have a more pronounced flavor than farm-raised. If using frozen shrimp, thaw them completely and pat dry before adding to the bisque. Save those shells! Simmering them in your stock adds incredible depth. For a budget-friendly option, check out my Mexican Corn Chicken Soup which uses similar techniques.

    Perfecting the Texture

    Achieving that silky-smooth consistency is what elevates a good bisque to a great one. I use an immersion blender for convenience, but a traditional blender works too—just be careful with the hot liquid and blend in batches. For the ultimate velvety texture, strain the bisque through a fine-mesh sieve after blending. This extra step removes any fibrous bits from the vegetables. Add the cream gradually while the soup is off the heat to prevent curdling, and always save some seafood to add at the end for those delicious chunks in each spoonful.

    Serving Ideas & Creative Variations

    Elegant Garnishing Techniques

    The final presentation takes this bisque from delicious to Instagram-worthy. I love finishing each bowl with a small mound of fresh crab meat in the center, a light drizzle of good olive oil, and a sprinkle of minced chives or microgreens. For special occasions, a single butter-poached shrimp perched on the edge of the bowl makes a dramatic statement. A tiny swirl of cream and a dusting of smoked paprika adds beautiful color contrast. Serve in warmed bowls to keep the bisque hot longer—a trick I learned from my grandmother that makes all the difference.

    Exciting Flavor Variations

    While the classic recipe is divine, don’t be afraid to experiment with flavor profiles. Adding a tablespoon of curry powder creates an unexpected but delightful Indian-inspired version. For a Southwestern twist, stir in roasted corn kernels and a dash of chipotle powder. Lobster can be substituted for or added to the crab and shrimp for an even more luxurious bisque. For a lighter option similar in technique, my New England Clam Chowder offers another seafood comfort classic that’s worth trying when you’re in the mood for something different.

    Storage & Troubleshooting Guide

    Proper Storage Techniques

    This bisque keeps beautifully when stored properly. Refrigerate leftovers in an airtight container for up to 3 days—the flavor actually improves overnight as the ingredients meld together. For longer storage, freeze the base without the cream or seafood for up to 2 months. When ready to serve, thaw overnight in the refrigerator, then gently reheat on the stovetop, adding fresh cream and seafood during the last few minutes. Never bring the soup to a rolling boil after adding cream, as this can cause separation. Instead, heat it slowly until just steaming.

    Fixing Common Issues

    If your bisque is too thin, simmer it uncovered for a few more minutes to reduce and concentrate the flavors. Conversely, if it’s too thick, thin it with a little extra seafood stock or even a splash of white wine. Should the bisque break or look grainy, whisk in a tablespoon of cold cream off the heat. For a bisque that lacks depth, try adding a teaspoon of tomato paste or a splash of fish sauce—both are secret weapons for boosting umami. And remember, seasoning should be adjusted at the end, as the saltiness of seafood varies greatly.

    Frequently Asked Questions

    Can I make Creamy Crab and Shrimp Bisque ahead of time?

    Yes! Make the base a day ahead, then reheat gently and add the cream and seafood just before serving for the freshest flavor and texture.

    What can I substitute for sherry in this recipe?

    White wine works well, or use equal parts apple cider vinegar and chicken broth. For non-alcoholic options, try seafood stock with a splash of lemon juice.

    How can I make this bisque dairy-free?

    Replace heavy cream with full-fat coconut milk and butter with olive oil. The flavor profile will change slightly but remains delicious with a tropical note.

    What’s the difference between bisque and chowder?

    Bisques are smooth, cream-based soups traditionally made with shellfish, while chowders are chunky with visible pieces of seafood, vegetables, and often potatoes.

    Is it possible to use imitation crab in this Creamy Crab and Shrimp Bisque?

    While real crab meat provides the best flavor, imitation crab can work in a pinch. Mix it with real shrimp to maintain some authentic seafood flavor.

    Final Thoughts

    This Creamy Crab and Shrimp Bisque is more than just a recipe—it’s an experience to be savored. The rich, velvety texture paired with sweet seafood creates a moment of pure indulgence that’s worth every minute spent preparing it. I find myself making this bisque whenever I need a bit of comfort with a touch of luxury. Whether it’s for a special celebration or simply because you deserve something wonderful, this bisque delivers on all fronts. For more delicious recipes, follow me on Pinterest.
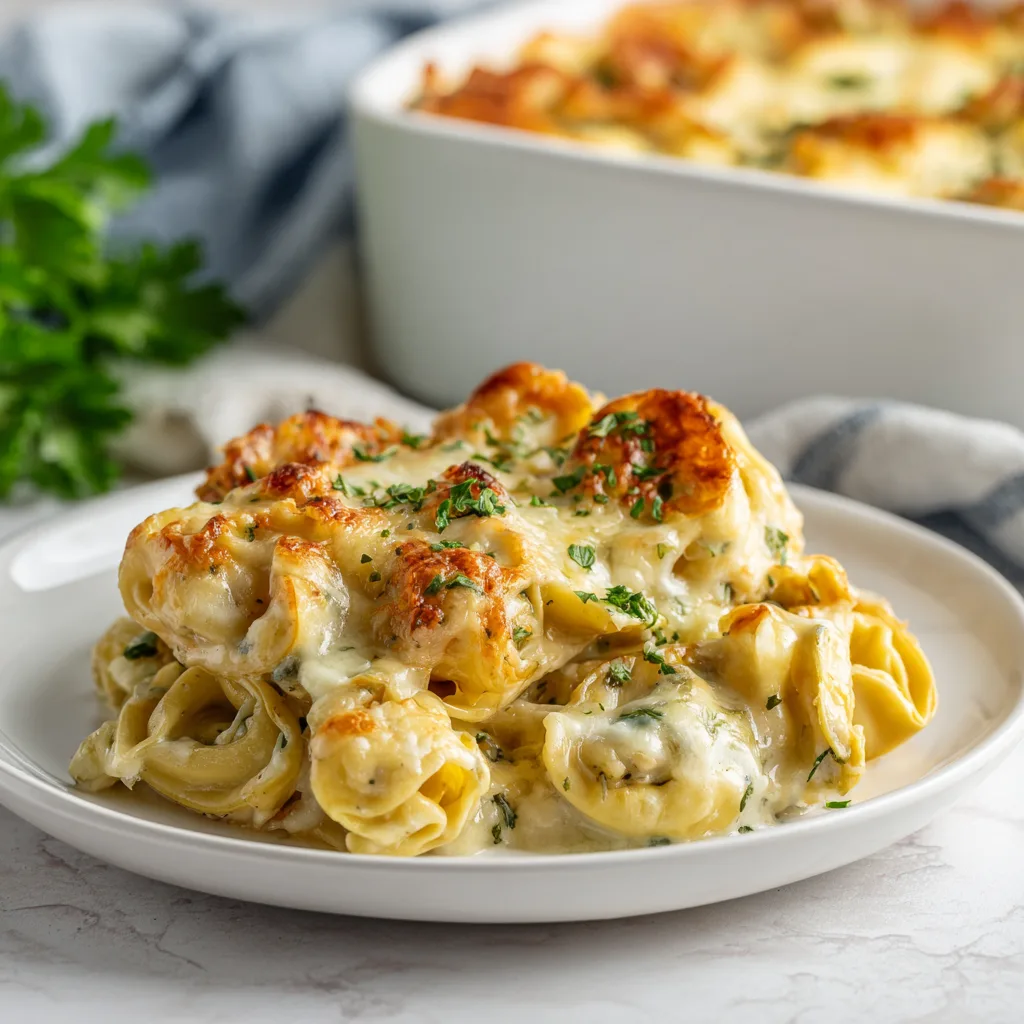
  • Alfredo Tortellini Bake Recipe: Irresistibly Cheesy & Comforting!

    Alfredo Tortellini Bake Recipe: Irresistibly Cheesy & Comforting!

    Alfredo Tortellini Bake Recipe: Irresistibly Cheesy & Comforting!

    This Alfredo Tortellini Bake transforms ordinary cheese tortellini into something truly magical. The first time I made this creamy, cheesy wonder, my kitchen filled with an aroma so enticing that my husband appeared within minutes, hovering hopefully near the oven. There’s something about the combination of tender pasta pillows swimming in velvety alfredo sauce, topped with a golden, bubbly cheese crust that speaks directly to the soul. It’s become my go-to comfort dish when friends drop by unexpectedly or when I need a foolproof dinner that satisfies everyone at the table. If you’re looking for a dish that feels special but requires minimal effort, this creamy pasta bake is exactly what you need.

    Recipe

    Why You’ll Love This Alfredo Tortellini Bake

    Perfect Comfort Food for Any Occasion

    There’s something almost magical about pulling a bubbling Alfredo Tortellini Bake from the oven. The way the cheese stretches as you scoop out that first serving, releasing wisps of garlic-scented steam, is pure kitchen poetry. I’ve served this at everything from casual Friday night dinners to holiday gatherings, and it never fails to elicit sighs of contentment. The contrast of textures – from the tender pasta to the creamy sauce to the slightly crispy top – creates a sensory experience that feels like a warm hug. Plus, it’s substantial enough to be a main dish yet elegant enough for special occasions.

    Quick Assembly with Maximum Flavor

    What I adore most about this Alfredo Tortellini Bake is how it delivers gourmet results with minimal effort. On busy weeknights when I’m juggling work deadlines and household tasks, I can have this assembled in under 15 minutes. The refrigerated tortellini is already filled and cooked, meaning half the work is done for you! The sauce comes together while the oven preheats, and then everything gets tossed together in a baking dish. The oven does the rest of the work, transforming simple ingredients into a dish that tastes like you spent hours in the kitchen.

    Essential Tips & Tricks

    Perfecting Your Alfredo Sauce

    The heart of any great Alfredo Tortellini Bake is its silky, rich sauce. I learned through many (delicious) trials that the key is low, gentle heat and constant attention. Rushing this step leads to broken, grainy sauce – a culinary heartbreak I wouldn’t wish on anyone! Use a heavy-bottomed pan and keep the heat medium-low. Add your garlic first until fragrant, then butter and cream, letting them meld before gradually incorporating the freshly grated cheese. Pre-shredded cheese contains anti-caking agents that prevent proper melting, so always grate your own for the creamiest results. A pinch of nutmeg adds that special something that guests can never quite identify.

    Choosing the Right Tortellini

    Not all tortellini are created equal, and selecting the right kind makes a significant difference in your final Alfredo Tortellini Bake. I prefer using fresh refrigerated tortellini over frozen or dried varieties for their superior texture and flavor. The cheese-filled options work beautifully with alfredo sauce, creating layers of cheesy goodness. However, don’t be afraid to experiment with spinach, mushroom, or even prosciutto-filled varieties for different flavor profiles. If you’re feeling ambitious, try the homemade big mac wraps for a completely different but equally satisfying meal next time!

    Serving Ideas & Creative Variations

    Perfect Pairings for a Complete Meal

    An Alfredo Tortellini Bake is rich and satisfying, so I like to balance it with lighter sides. A crisp green salad with a tart vinaigrette cuts through the creaminess perfectly. For something warm, try roasted asparagus or honey garlic butter roasted carrots – the slight sweetness complements the savory bake wonderfully. For bread lovers, a crusty Italian loaf or garlic bread is non-negotiable for sopping up extra sauce. When serving for guests, I place the baking dish on a wooden board with fresh herbs scattered around for a rustic presentation that always impresses without extra work.

    Exciting Flavor Twists to Try

    While classic Alfredo Tortellini Bake is divine, adding your personal touch makes it special. My family goes wild when I add crispy bacon bits and caramelized onions for a smoky-sweet dimension. For a vibrant twist, stir in sun-dried tomatoes and fresh spinach just before baking – the colors are gorgeous, and the flavors complement the creamy sauce perfectly. Seafood lovers can add sautéed shrimp or lump crab meat for an elevated version worthy of special occasions. For heat seekers, a sprinkle of red pepper flakes or a swirl of pesto adds complexity without overwhelming the dish’s comforting nature.

    Storage & Troubleshooting Guide

    Proper Storage for Leftovers

    If you’re fortunate enough to have leftover Alfredo Tortellini Bake (a rare occurrence in my home!), proper storage ensures it remains delicious for round two. Allow the bake to cool completely before transferring to an airtight container – this prevents condensation that can make the pasta soggy. Refrigerate for up to three days maximum; cream-based dishes don’t hold well for longer periods. When reheating, add a splash of milk or cream to revive the sauce, which tends to thicken when chilled. For individual portions, microwave gently at 70% power, stirring halfway through for even heating.

    Fixing Common Alfredo Issues

    Even experienced cooks occasionally encounter challenges with Alfredo sauce. If your sauce appears curdled or separated, don’t panic! Lower the heat immediately and whisk in a tablespoon of cold cream to help it re-emulsify. For sauce that’s too thick, thin it gradually with warm milk until you reach your desired consistency. Too thin? A slurry of cornstarch and cold water works wonders. If your baked tortellini seems dry after baking, it likely needs more sauce next time – the pasta absorbs liquid as it bakes. Always make about 25% more sauce than you think you’ll need for a perfectly creamy result.

    Frequently Asked Questions

    Can I make Alfredo Tortellini Bake ahead of time?

    Yes! Assemble up to 24 hours ahead, cover tightly with foil, and refrigerate. Add 10-15 minutes to the baking time when cooking from cold, and remove the foil halfway through for a golden top.

    What cheese works best for the topping?

    A combination of mozzarella for stretch and parmesan for flavor creates the perfect golden crust. For extra indulgence, add a sprinkle of fontina or provolone.

    Can I freeze Alfredo Tortellini Bake?

    While possible, cream-based sauces can separate when frozen. If freezing, do so before baking, use full-fat ingredients, and thaw completely in the refrigerator before baking.

    How do I know when my Alfredo Tortellini Bake is done?

    Look for bubbling around the edges, a golden-brown top, and an internal temperature of 165°F. The sauce should be thickened but still creamy.

    What’s the secret to a non-grainy Alfredo sauce for my tortellini bake?

    Use room temperature cream cheese, heat gently, and add freshly grated parmesan gradually off the heat. Never boil the sauce, as high temperatures cause separation.

    Final Thoughts

    This Alfredo Tortellini Bake has saved countless dinner dilemmas in my home and created just as many special memories around my table. There’s something beautifully comforting about serving a dish that’s simultaneously simple and spectacular. The way faces light up at that first bite – the moment of cheesy, creamy bliss – makes every bit of effort worthwhile. Whether you’re cooking for picky eaters or gourmet food lovers, this versatile bake adapts to your needs while remaining undeniably delicious. I hope it brings the same joy to your table as it has to mine! For more comfort food inspiration, visit our Pinterest page.

  • Juicy Chicken Shawarma Wraps That’ll Blow Your Taste Buds Away!

    Juicy Chicken Shawarma Wraps That’ll Blow Your Taste Buds Away!

    Juicy Chicken Shawarma Wraps That'll Blow Your Taste Buds Away!

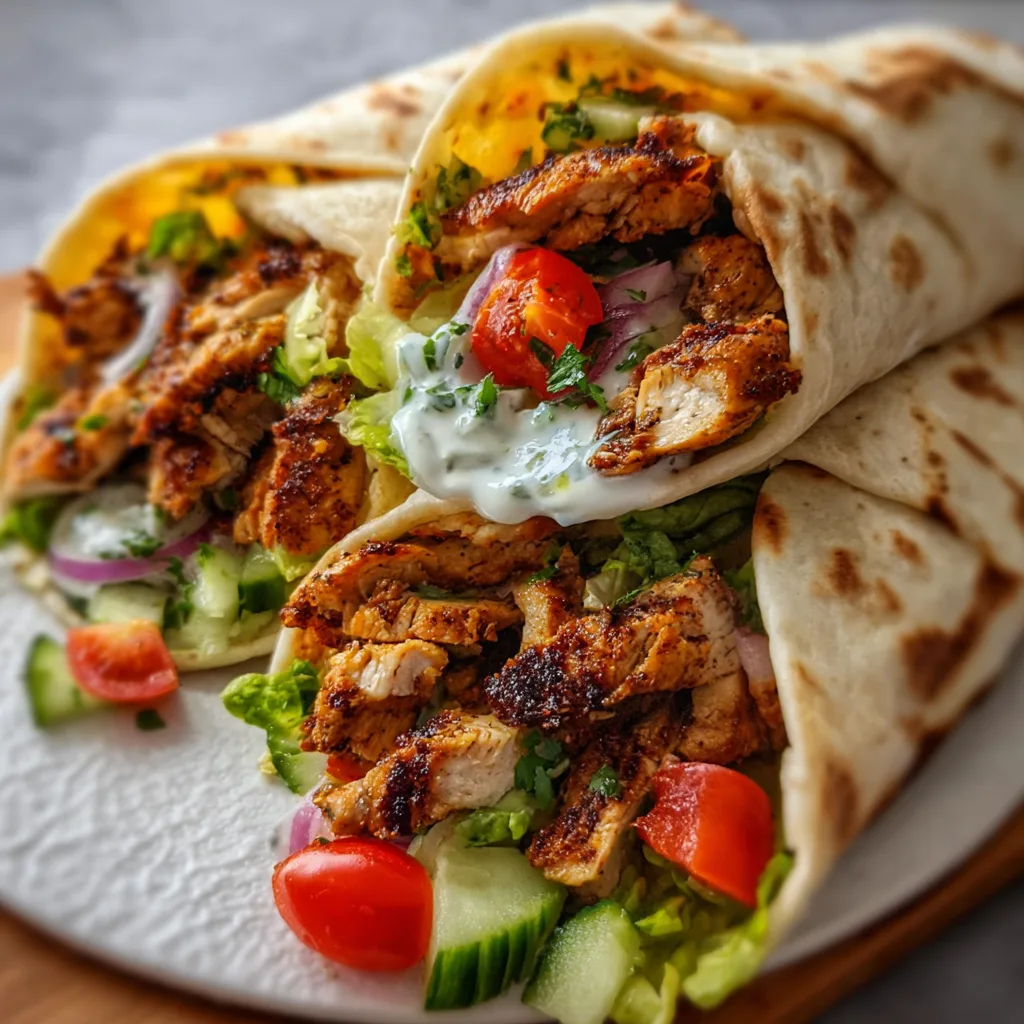
    Juicy Chicken Shawarma Wraps are my absolute weeknight dinner hero! There’s something magical about that tender, spice-infused chicken nestled in warm flatbread with creamy sauce dripping down your fingers. I discovered this recipe after a particularly chaotic Monday when takeout wasn’t an option, and now it’s on permanent rotation in our house. The aromatic blend of spices fills my kitchen with the most incredible scent that makes everyone drift in asking, “What smells so good?” Trust me, these homemade wraps deliver all the flavor of your favorite Mediterranean spot but with the satisfaction of making it yourself!

    Recipe

    Why You’ll Love This Juicy Chicken Shawarma Wraps

    Perfect Balance of Flavors and Textures

    The magic of these Juicy Chicken Shawarma Wraps lies in their perfect harmony of flavors. Tender chicken thighs marinated in a blend of warm spices like cumin, coriander, and smoked paprika create a depth that store-bought seasoning just can’t match. What I adore most is how the yogurt in the marinade works double-duty—tenderizing the meat while creating those irresistible charred edges when cooked. The contrast between the warm, spiced meat and the cool, tangy sauce creates a sensory experience that makes your taste buds dance with every bite!

    Quick and Customizable for Any Diet

    These wraps are incredibly versatile and can be adapted to fit practically any dietary preference. Need gluten-free? Swap the pita for lettuce wraps or gluten-free tortillas. Watching carbs? Serve the shawarma over a bed of crisp greens instead. The chicken itself takes just 25 minutes of actual hands-on time, with most of the magic happening during the marination. I’ve made these for picky eaters, health-conscious friends, and even my mother-in-law (the ultimate test!)—and they’re always a hit. The recipe scales beautifully for meal prep too!

    Essential Tips & Tricks

    Mastering the Marinade

    The key secret to truly juicy chicken shawarma is giving it proper marinating time. While you can get away with 30 minutes when you’re in a rush, letting those thighs bathe in the spice mixture overnight transforms them completely. I learned this the hard way after making a last-minute batch that was good but not great. The yogurt tenderizes the meat while the lemon juice adds brightness. For maximum flavor penetration, make small slits in larger chicken pieces before marinating. And don’t toss that marinade—strain it and reduce it down for an incredible drizzling sauce!

    Perfect Cooking Technique

    Finding the right cooking method makes all the difference between dry chicken and succulent, juicy shawarma. I prefer high-heat cooking to get those beautiful charred edges while keeping the inside tender. Whether you’re using a cast-iron skillet, grill pan, or outdoor grill, resist the urge to constantly flip the chicken—let it develop that beautiful crust. For the ultimate texture, try the sheet pan technique where you broil the marinated chicken for the final 2-3 minutes. This creates those authentic crispy edges that mimic traditional vertical rotisserie cooking!

    Serving Ideas & Creative Variations

    Building the Ultimate Shawarma Wrap

    The assembly process is where you can really make these wraps shine. Start by warming your flatbread—this step is non-negotiable! Cold pita with hot chicken is a missed opportunity. Layer a schmear of garlicky yogurt sauce first (this creates a moisture barrier), then add your shawarma chicken, followed by crisp vegetables for contrast. I love thinly sliced red onion soaked in ice water for 5 minutes to remove the bite, along with cucumber, tomatoes, and fresh herbs. For an extra touch, add pickled elements like turnips or banana peppers for brightness that cuts through the richness.

    Global Fusion Inspirations

    Don’t be afraid to take your shawarma in unexpected flavor directions! My favorite twist combines traditional shawarma with Mexican-inspired elements like avocado, lime crema, and pickled jalapeños. For a Greek variation, add feta, olives, and tzatziki. Asian-fusion shawarma works surprisingly well with sriracha mayo, pickled carrots, and cilantro. The beauty of these wraps is their adaptability—the spiced chicken provides a fantastic foundation for creative experimentation. I’ve even served the chicken over rice bowls with roasted vegetables for a heartier dinner option!

    Storage & Troubleshooting Guide

    Make-Ahead and Meal Prep Strategies

    These shawarma wraps are meal prep champions when properly stored. The marinated chicken (uncooked) keeps beautifully for up to 2 days in the refrigerator, actually improving in flavor. For cooked chicken, store in an airtight container for 3-4 days, but keep it separate from your fresh toppings and sauces. To reheat without drying out, sprinkle with a few drops of water before microwaving covered, or better yet, quickly sear in a hot pan to revive the exterior crispness. For the ultimate convenience, pre-portion your toppings in containers so you can assemble fresh wraps in minutes!

    Fixing Common Shawarma Mishaps

    Even the most experienced cooks encounter shawarma challenges occasionally. If your chicken turns out dry, it’s likely from overcooking—chicken thighs are forgiving but not invincible! Next time, use a meat thermometer and remove from heat at 165°F (74°C). For bland results, your marinade might need more time to penetrate or simply more seasoning—don’t be shy with those spices! Soggy wraps happen when hot chicken steams the bread; let the meat rest briefly before assembly and consider a thin layer of hummus as a moisture barrier. Lastly, if your wraps fall apart, double-wrap them in parchment paper for structural support!

    Frequently Asked Questions

    Can I make Juicy Chicken Shawarma Wraps with chicken breast instead of thighs?

    Yes! While thighs stay juicier, breasts work well if you don’t overcook them. Marinate longer (at least 3 hours), cook to just 165°F, and let rest before slicing against the grain for tenderness.

    What’s the best way to warm flatbread for shawarma?

    For perfect flatbread, lightly sprinkle with water and warm in a dry skillet for 30 seconds per side. Alternatively, wrap in foil and heat in a 300°F oven for 5 minutes until soft and pliable.

    Can I freeze the marinated chicken for later?

    Absolutely! Freeze marinated chicken for up to 3 months in freezer-safe bags. The marinade continues to tenderize slowly while frozen, and it makes for an incredibly quick dinner option.

    How can I make these wraps spicier?

    Add cayenne pepper or red pepper flakes to the marinade. For customizable heat, serve with harissa paste or hot sauce on the side so everyone can adjust to their preference.

    What sides pair well with Juicy Chicken Shawarma Wraps?

    Traditional accompaniments include tabbouleh, hummus, or a simple Greek salad. For a heartier meal, try roasted vegetables, lemon rice, or crispy chickpeas for added texture.

    Final Thoughts

    These Juicy Chicken Shawarma Wraps have become my go-to recipe when I want to impress without stressing. There’s something deeply satisfying about creating such bold, complex flavors with relatively simple ingredients. The way the spices bloom and the chicken caramelizes creates a meal that feels special, even on an ordinary Tuesday. I hope you’ll give these shawarma wraps a try and make them your own with whatever ingredients speak to you. Don’t forget to share your creations on Pinterest – I’d love to see your personal spin on this versatile favorite!

  • 30-Minute Chicken Fried Rice Recipe That Will Blow Your Mind!

    30-Minute Chicken Fried Rice Recipe That Will Blow Your Mind!

    30-Minute Chicken Fried Rice Recipe That Will Blow Your Mind!

    This 30-Minute Chicken Fried Rice has been my weeknight savior more times than I can count! There’s something magical about transforming simple ingredients into a dish that tastes like it came straight from your favorite takeout spot. The first time I made this for my family, my kitchen filled with that irresistible aroma of garlic and soy sauce, and my daughter actually put down her phone to ask what smelled so amazing! If you’re looking for quick comfort food with minimal cleanup, this recipe is about to become your new best friend.

    Recipe

    Why You’ll Love This 30-Minute Chicken Fried Rice

    Perfect for Busy Weeknights

    This 30-minute miracle truly delivers on its promise! I remember one particularly chaotic Tuesday when soccer practice ran late, homework was piling up, and everyone was hangry. I managed to whip this up while simultaneously helping with math problems, and dinner was on the table before anyone had a meltdown. The beauty lies in its simplicity—pre-cooked rice, leftover chicken, and whatever veggies are hiding in your crisper drawer come together in one pan for minimal cleanup. It’s the ultimate no-stress meal that feels like you put in way more effort than you actually did.

    Customizable to Your Family’s Tastes

    One of my favorite things about this versatile dish is how easily it adapts to picky eaters and dietary preferences. My husband loves extra sriracha drizzled on top, while my youngest prefers hers with extra carrots and no peas. You can swap chicken for shrimp or tofu, use brown rice instead of white, or go veggie-heavy when you’re craving something lighter. The base recipe creates the perfect canvas for whatever modifications your family needs. I’ve even made a breakfast version with scrambled eggs and bacon that disappeared in minutes!

    Essential Tips & Tricks

    The Secret to Restaurant-Quality Rice

    The absolute key to amazing fried rice is starting with cold, day-old rice. Fresh rice contains too much moisture and turns mushy when stir-fried. I often make extra rice with dinner the night before, knowing I’ll transform it the next day. If you’re in a pinch, spread freshly cooked rice on a baking sheet and pop it in the freezer for 15-20 minutes while prepping other ingredients. Another game-changer is using a wok or large skillet with plenty of surface area, allowing the rice to get that coveted crispy texture in spots without steaming.

    Prep Before You Begin

    Nothing ruins the flow of a quick meal like realizing you still need to chop veggies while your garlic burns in the pan. Taking 5-10 minutes for mise en place (fancy term for getting everything ready) makes the actual cooking process smooth and stress-free. I arrange my ingredients in small bowls near the stove—proteins in one, veggies in another, and sauce components ready to go. This organization prevents that frantic cabinet-digging for soy sauce while your rice overcooks. Trust me, this simple habit transformed my cooking experience and keeps this truly a 30-minute meal!

    Serving Ideas & Creative Variations

    Family-Style Presentation

    There’s something wonderfully communal about serving this crowd-pleaser family-style. I love bringing the entire skillet to the table, garnished with fresh green onions, cilantro, and lime wedges for squeezing. Set out small bowls of toppings like crushed peanuts, sriracha, and extra soy sauce so everyone can customize their portion. For a fun twist, hollow out pineapple halves and serve the rice inside—it adds a tropical sweetness and makes for an impressive presentation. Pair with honey garlic butter roasted carrots for a complete meal that feels special without extra work.

    Global Flavor Variations

    While the classic version is delicious, changing up the flavor profile can transport your taste buds around the world! For Thai-inspired rice, add a tablespoon of red curry paste and finish with fresh basil and lime. Korean fried rice comes alive with a tablespoon of gochujang and a fried egg on top. Mexican-style works beautifully with cumin, chili powder, corn, and black beans. My personal favorite twist is adding diced pineapple, cashews, and a splash of coconut milk for a tropical version that tastes like vacation. These variations keep the dish exciting even when it appears on your menu regularly.

    Storage & Troubleshooting Guide

    Proper Storage for Leftovers

    If you’re lucky enough to have leftovers (which rarely happens in my house!), proper storage ensures they remain delicious. Allow the rice to cool completely before transferring to airtight containers—this prevents condensation that can make your rice soggy. Refrigerated fried rice stays fresh for 3-4 days and reheats beautifully in a skillet with a splash of water to restore moisture. For longer storage, portion the rice into freezer-safe bags, press flat to remove air, and freeze for up to 3 months. These frozen packets are lifesavers for emergency lunches—just thaw overnight in the fridge before reheating.

    Fixing Common Issues

    Even the most foolproof recipes sometimes need troubleshooting. If your fried rice turns out too soggy, spread it on a baking sheet and pop it in a 350°F oven for 5-10 minutes to dry out excess moisture. For rice that’s too dry or separate, a small drizzle of sesame oil and gentle folding can restore the perfect texture. If you accidentally over-salted (we’ve all been there!), add more veggies or a squeeze of fresh lime juice to balance the flavors. Remember that fried rice is forgiving—I’ve rescued many batches by adjusting seasonings or adding an extra scrambled egg to bring everything together.

    Frequently Asked Questions

    Can I use fresh rice instead of day-old rice?

    Fresh rice tends to become mushy in fried rice. If you must use it, spread it on a baking sheet and refrigerate for 30 minutes or freeze for 15 minutes to remove excess moisture before cooking.

    What’s the best protein for 30-Minute Chicken Fried Rice?

    While chicken is classic, shrimp cooks even faster (2-3 minutes). Tofu, beef strips, or leftover roast pork all work beautifully. Use what you have on hand to keep it quick and convenient.

    How can I make this recipe vegetarian?

    Simply omit the chicken and substitute with extra vegetables, edamame, or cubed firm tofu. Use vegetable broth instead of chicken broth and ensure your soy sauce is vegetarian.

    Can I prep ingredients ahead of time?

    Absolutely! Chop all vegetables and protein up to 2 days ahead and store in the refrigerator. Having pre-chopped ingredients makes this truly a 15-minute cooking process.

    Why does my rice stick together when cooking?

    This usually happens with rice that’s too fresh or wet. Make sure your rice is completely cooled and dry before stir-frying, and use enough oil to coat the grains properly.

    Final Thoughts

    This 30-Minute Chicken Fried Rice has saved countless evenings in my home, and I hope it brings the same delicious simplicity to yours. There’s something deeply satisfying about creating a meal that’s faster than delivery, healthier than takeout, and brings everyone to the table with smiles. The beauty of this recipe lies in its adaptability—make it your own, experiment with flavors, and enjoy the process. For more quick dinner inspiration, follow me on Pinterest where I’m always sharing new weeknight wonders!

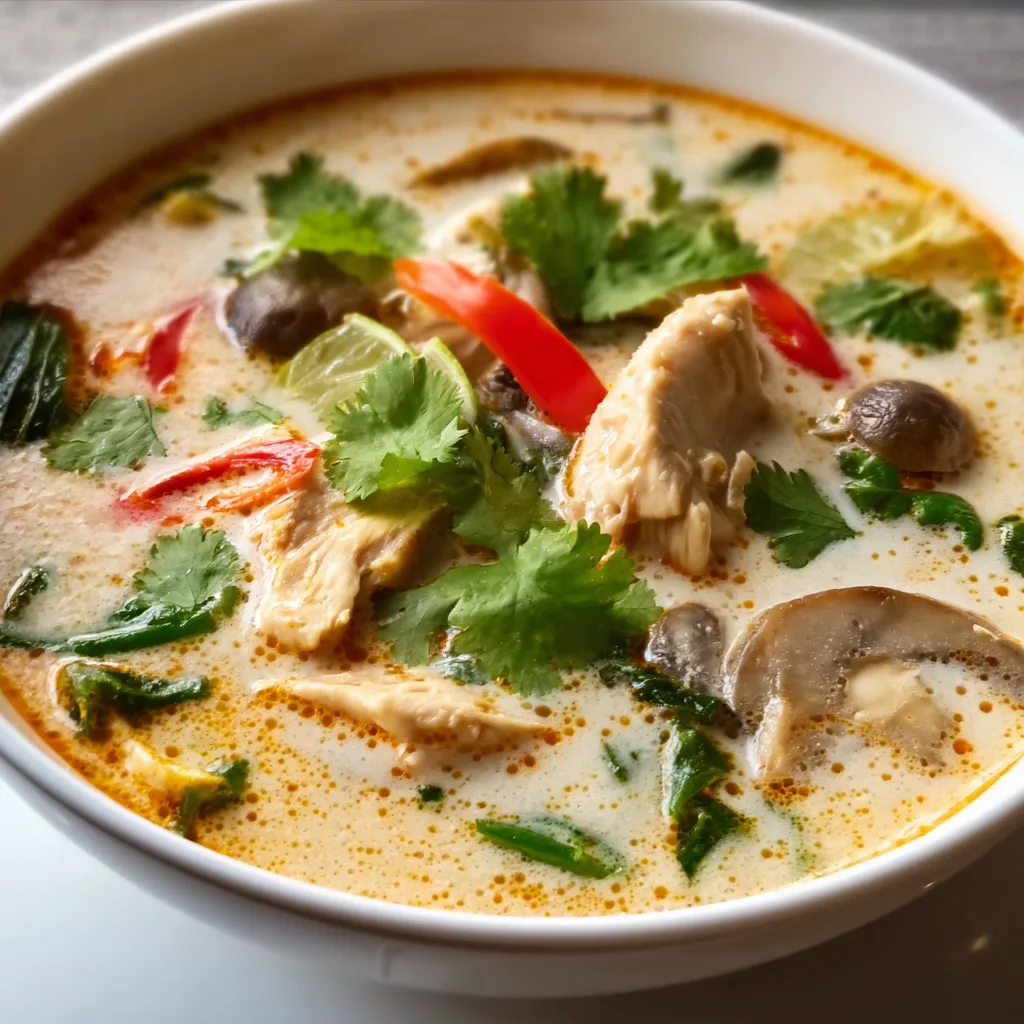
  • Tom Kha Gai: Irresistible Thai Coconut Soup That Warms Your Soul

    Tom Kha Gai: Irresistible Thai Coconut Soup That Warms Your Soul

    Tom Kha Gai: Irresistible Thai Coconut Soup That Warms Your Soul

    Tom Kha Gai: Flavorful Thai Coconut Soup has been my absolute comfort food obsession since I first tasted it during a rainy evening in Thailand years ago. This aromatic soup balances creamy coconut milk with bright lime, fragrant lemongrass, and tender chicken in a dance of flavors that feels like a warm hug in a bowl. There’s something magical about that first spoonful—the way the galangal and kaffir lime leaves infuse the broth with their distinctive perfume. I’ve perfected this recipe through countless Sunday afternoons, and I’m thrilled to share my version that brings authentic Thai flavors right to your kitchen.

    Recipe

    Why You’ll Love This Tom Kha Gai: Flavorful Thai Coconut Soup

    A Symphony of Thai Flavors

    The beauty of Tom Kha Gai lies in its perfect balance of five essential Thai taste elements: creamy, spicy, sour, salty, and slightly sweet. The velvety coconut milk creates a luxurious base while lemongrass, galangal, and kaffir lime leaves infuse the broth with their aromatic essence. I still remember my first attempt—standing in my kitchen with fresh lemongrass in hand, that citrusy scent filling the air as I crushed it with my knife handle. The fragrance alone transported me back to those steamy Bangkok food stalls where I first fell in love with this soup.

    Quick & Nourishing Comfort

    This soup comes together in just 30 minutes yet tastes like it’s been simmering all day. It’s my go-to when I need something deeply satisfying but don’t have hours to spend in the kitchen. The protein from tender chicken pieces combined with the healthy fats from coconut milk makes this soup surprisingly filling. On cold evenings when my bones feel chilled or when seasonal sniffles hit, this soup’s warming properties work like natural medicine—the ginger and chilies provide that gentle heat that seems to radiate through your entire body.

    Essential Tips & Tricks

    Ingredient Authenticity Matters

    Don’t skip the galangal—it’s different from ginger and provides that distinctive flavor that makes Tom Kha Gai authentic. If you can’t find fresh, look for frozen options at Asian markets. Kaffir lime leaves are another non-negotiable; their citrusy aroma is irreplaceable. I once tried substituting regular lime zest and while tasty, it wasn’t the same magical experience. For the coconut milk, always choose full-fat for that silky texture that makes this soup so luxurious. Check out these honey garlic butter roasted carrots for another dish where ingredient quality truly elevates the final result.

    Perfect Texture & Timing Techniques

    The secret to perfectly tender chicken is adding it after your broth has developed flavor. I slice my chicken against the grain into thin pieces that cook quickly without becoming tough. Another game-changing technique: don’t let the soup boil aggressively after adding coconut milk—a gentle simmer preserves that silky texture without separation. I learned this the hard way after watching my first batch break into an oily mess! For mushrooms, add them just 5 minutes before serving so they maintain their texture while absorbing the aromatic broth.

    Serving Ideas & Creative Variations

    Traditional & Modern Accompaniments

    Serve your Tom Kha Gai with a small bowl of jasmine rice on the side—the fragrant grains soak up the coconut broth beautifully. I love setting out little dishes of fresh lime wedges, sliced Thai chilies, and cilantro so everyone can customize their bowl. For a complete Thai-inspired meal, pair with a simple cucumber salad dressed with rice vinegar and a touch of sugar. The cooling crunch creates a perfect counterpoint to the soup’s warmth, much like how Mexican Corn Chicken Soup benefits from fresh, contrasting garnishes.

    Exciting Flavor Adaptations

    While traditional Tom Kha Gai features chicken, this recipe welcomes delicious variations. Try swapping chicken for plump shrimp or firm tofu for a vegetarian version. For a heartier meal, I sometimes add thinly sliced sweet potatoes or a handful of rice noodles. My favorite weekend adaptation includes adding a splash of makrut lime-infused vodka for adults—a trick I discovered during a cooking class in Chiang Mai. The alcohol cooks off, leaving behind an intensified citrus note that elevates the entire dish to restaurant quality.

    Storage & Troubleshooting Guide

    Proper Storage Methods

    Store leftover Tom Kha Gai in an airtight container in the refrigerator for up to 3 days. The flavors actually intensify overnight, making it even more delicious the next day! I often make a double batch specifically for leftovers. For freezing, I recommend storing just the broth without the coconut milk and chicken—then add fresh elements when reheating. When ready to serve again, gently warm over medium-low heat, never boiling, to preserve the soup’s silky texture and prevent the coconut milk from separating.

    Common Issues & Solutions

    If your soup lacks depth, you likely need more umami elements. Try adding an extra tablespoon of fish sauce or a splash of mushroom broth. Soup too spicy? Don’t reach for water—it won’t help! Instead, add more coconut milk to mellow the heat while maintaining flavor balance. If your coconut milk separates (appearing grainy or oily), lower the heat immediately and whisk gently until reincorporated. I’ve rescued many pots this way! Remember that authentic Tom Kha Gai should have a slight oily sheen from the coconut cream—this is normal and desirable.

    Frequently Asked Questions

    What’s the difference between Tom Kha Gai and Tom Yum soup?

    Tom Kha Gai features coconut milk as its base, creating a creamy, rich soup, while Tom Yum is a clear, broth-based soup. Both share similar aromatics like lemongrass and kaffir lime leaves, but Tom Kha Gai has a milder, sweeter profile.

    Can I make Tom Kha Gai: Flavorful Thai Coconut Soup vegetarian?

    Absolutely! Substitute the chicken with firm tofu or mushrooms and use vegetable broth instead of chicken broth. Replace fish sauce with soy sauce or coconut aminos for that umami element while keeping it completely plant-based.

    Where can I find ingredients like galangal and kaffir lime leaves?

    Asian grocery stores typically carry these items fresh. Many mainstream supermarkets now stock them in international sections. Alternatively, look for them frozen or dried online—they’ll still provide authentic flavor.

    How spicy is traditional Tom Kha Gai?

    Traditional Tom Kha Gai is moderately spicy with a pleasant warmth rather than overwhelming heat. You can easily adjust the spice level by adding more or fewer Thai chilies based on your preference.

    Can I make this soup ahead for a dinner party?

    Yes! Prepare the broth with aromatics a day ahead, then reheat gently and add the coconut milk and chicken shortly before serving. This actually improves the flavor while saving you time.

    Final Thoughts

    Tom Kha Gai: Flavorful Thai Coconut Soup represents everything I love about cooking—transformative ingredients, balanced flavors, and the power to transport us to distant places through taste. There’s something deeply satisfying about creating this aromatic masterpiece in your own kitchen, watching as simple ingredients become something greater than their parts. I hope this recipe brings you the same joy and comfort it’s brought me over the years. Whether you’re seeking warmth on a chilly evening or wanting to impress dinner guests with your Thai cooking skills, this soup delivers every time. Don’t forget to check out more recipes at Pinterest for more inspiration!

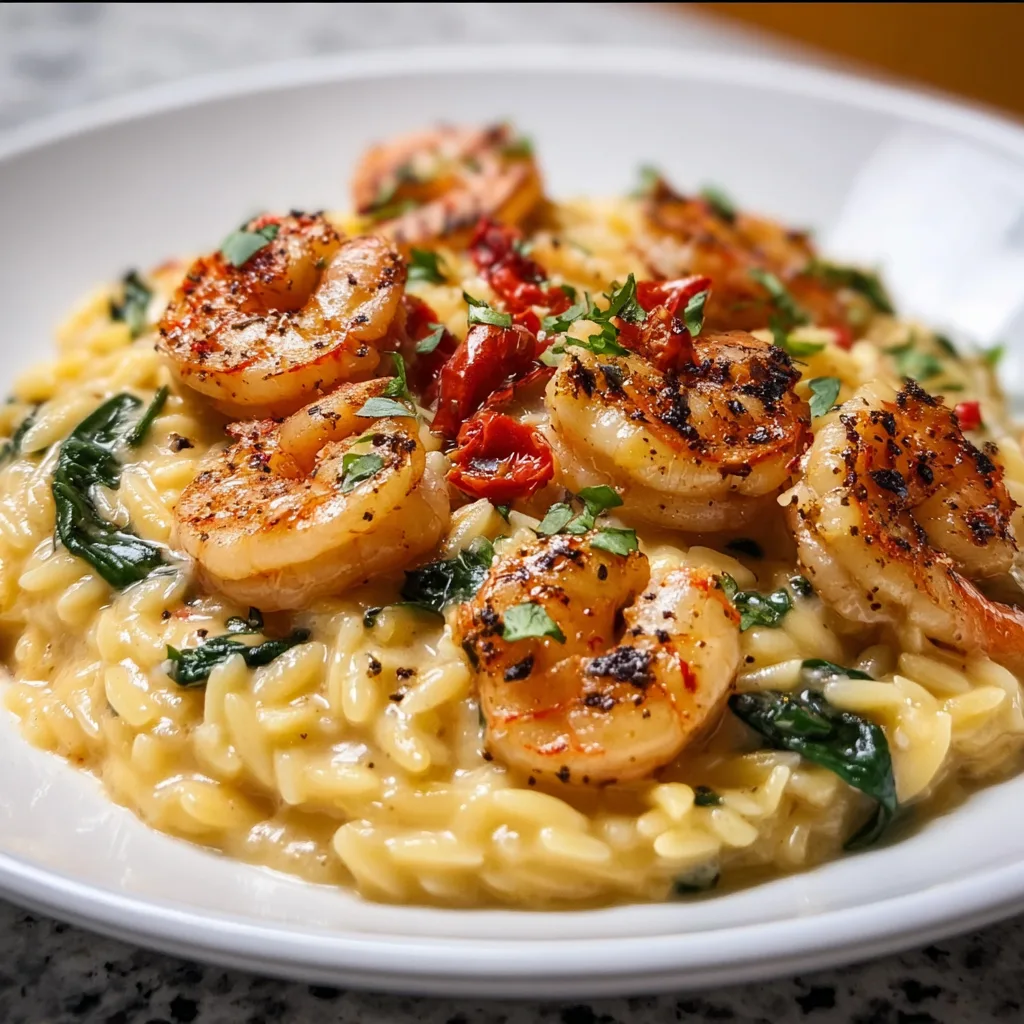
  • Creamy Garlic Orzo Tuscan Shrimp Recipe That’ll Wow Your Taste Buds!

    Creamy Garlic Orzo Tuscan Shrimp Recipe That’ll Wow Your Taste Buds!

    Creamy Garlic Orzo Tuscan Shrimp Recipe That’ll Wow Your Taste Buds!

    Creamy Garlic Orzo Tuscan Shrimp is my absolute go-to when I want to impress dinner guests without spending hours in the kitchen. This one-pan wonder combines plump, juicy shrimp with velvety orzo pasta, all swimming in a luscious garlic-infused cream sauce that’s punctuated with sun-dried tomatoes and wilted spinach. I first created this dish on a rainy Sunday when my sister dropped by unexpectedly. The way her eyes lit up after the first bite told me everything I needed to know – this recipe was a keeper! If you love the rich flavors of Tuscan cuisine with minimal cleanup, this easy weeknight meal will become your new favorite.

    Recipe

    Why You’ll Love This Creamy Garlic Orzo Tuscan Shrimp

    Perfect Balance of Flavors and Textures

    This dish is a sensory delight that hits all the right notes. The orzo absorbs the creamy sauce while maintaining just enough bite, creating the perfect canvas for the star ingredients. The shrimp adds that wonderful seafood sweetness that pairs magnificently with the punchy garlic and rich cream. What makes this truly special is the balance between the bright acidity from the sun-dried tomatoes and the earthy freshness of wilted spinach. I’ve found that letting the flavors meld for just a minute before serving creates that restaurant-quality taste that makes everyone think you’ve been cooking all day.

    Quick One-Pan Convenience

    Who doesn’t love a one-pan wonder? This Creamy Garlic Orzo Tuscan Shrimp comes together in just 30 minutes, making it perfect for busy weeknights when you’re craving something special but don’t have hours to spend in the kitchen. I’ve streamlined the process so that the orzo cooks directly in the sauce, absorbing all those incredible flavors while creating the creamiest texture imaginable. The cleanup is minimal – just one pan to wash! On those evenings when I’ve had a long day but still want something that feels indulgent, this dish has saved me countless times while still delivering that wow factor.

    Essential Tips & Tricks

    Perfecting Your Shrimp

    The secret to restaurant-quality shrimp is proper preparation and timing. Always pat your shrimp completely dry before seasoning – this ensures a beautiful sear rather than steamed shrimp. I learned this the hard way after one too many batches of rubbery disappointments! Season generously with salt and pepper, and consider adding a pinch of red pepper flakes for subtle heat. When cooking, give them space in the pan and resist the urge to move them around. Two minutes per side is usually perfect – they should be pink with a slight C-shape, not tightly curled (which indicates overcooking). For this recipe, I actually remove them slightly before they’re done as they’ll finish cooking in the sauce.

    Creating the Creamiest Sauce

    The velvety texture of this sauce comes from building flavors in layers. Start by sautéing minced garlic in butter until fragrant but not browned – about 30 seconds is all you need. Deglaze with a splash of white wine or chicken broth, scraping up any flavorful bits from the bottom of the pan. When adding your cream, reduce the heat to prevent curdling, and let it reduce slightly before adding the orzo. For an extra dimension of flavor, try incorporating a few tablespoons of cream cheese – it adds incredible richness and helps stabilize the sauce. Remember to stir frequently as the orzo cooks to prevent sticking and ensure even cooking.

    Serving Ideas & Creative Variations

    Elegant Presentation Options

    Transform this weeknight wonder into a dinner party showstopper with thoughtful presentation. Serve your Creamy Garlic Orzo Tuscan Shrimp in shallow, wide bowls to showcase all the beautiful components. A light sprinkle of microgreens or fresh herbs adds a pop of color and freshness – I love using basil chiffonade or a few sprigs of dill. For special occasions, consider a dramatic tableside finish by drizzling high-quality olive oil and adding a final crack of black pepper. A small wedge of lemon on the side lets guests adjust the acidity to their preference. When I served this at my last dinner gathering, I added edible flowers around the rim – it was both Instagram-worthy and delicious!

    Exciting Flavor Variations

    The beauty of this dish is its adaptability to different flavor profiles. For a Mediterranean twist, add kalamata olives, artichoke hearts, and crumbled feta in the final minutes of cooking. Seafood lovers might appreciate swapping the shrimp for seared scallops or adding a handful of steamed mussels. For a heartier version, incorporate Italian sausage alongside the shrimp. Vegetarians can skip the seafood entirely and double up on vegetables – roasted bell peppers, zucchini, and mushrooms make excellent substantial additions. I’ve even made a fall-inspired version with butternut squash and sage that was absolutely divine for a cozy autumn dinner.

    Storage & Troubleshooting Guide

    Proper Storage for Leftovers

    Storing this creamy delight properly ensures you can enjoy it for days to come. Allow leftovers to cool completely before transferring to an airtight container – I prefer glass containers as they won’t absorb flavors or stain from the tomatoes. Refrigerate for up to three days, but be aware that the orzo will continue to absorb liquid, making it thicker when chilled. When reheating, add a splash of chicken broth or cream to restore the silky consistency. For best results, reheat gently on the stovetop over medium-low heat rather than microwaving, which can make the shrimp tough. If you know you’ll have leftovers, consider slightly undercooking the shrimp initially so they won’t overcook during reheating.

    Fixing Common Issues

    Even experienced cooks occasionally encounter texture troubles with creamy pasta dishes. If your sauce breaks or looks curdled, lower the heat immediately and whisk in a tablespoon of cold cream or cream cheese until smooth. For sauce that’s too thick, gradually add warm broth until you reach your desired consistency. If it’s too thin, a slurry of cornstarch and cold water can help thicken it without affecting the delicate flavors. Finding your orzo undercooked but running out of liquid? Add hot broth a quarter cup at a time until perfectly al dente. Overcooked shrimp can’t be fixed, so it’s always better to err on the side of undercooking and allow the residual heat to finish the job.

    Frequently Asked Questions

    Can I make Creamy Garlic Orzo Tuscan Shrimp ahead of time?

    Yes, but with some adjustments. Prepare the dish up to the point of adding the shrimp, refrigerate, then reheat gently and add freshly cooked shrimp just before serving. This prevents overcooked, rubbery shrimp while maintaining the creamy texture.

    What can I substitute for heavy cream to make this lighter?

    Try half-and-half mixed with 2 tablespoons of cream cheese for body. For dairy-free options, full-fat coconut milk works wonderfully and adds a subtle sweetness that complements the shrimp beautifully.

    Can I use frozen shrimp for this recipe?

    Absolutely! Thaw completely and pat very dry before cooking. I actually keep frozen shrimp on hand specifically for this dish when I need a quick but impressive dinner solution.

    Is there a gluten-free alternative to orzo?

    Substitute gluten-free orzo or arborio rice. With rice, you’ll need to adjust cooking time and liquid amounts—start with an extra half cup of broth and check frequently for doneness.

    How do I prevent my Creamy Garlic Orzo Tuscan Shrimp sauce from breaking?

    Keep heat moderate, never boiling. Add cold dairy products gradually while whisking constantly. If it starts to separate, remove from heat immediately and whisk in a tablespoon of cold cream.

    Final Thoughts

    This Creamy Garlic Orzo Tuscan Shrimp has become my signature dish for good reason – it strikes that perfect balance between sophisticated flavors and comforting simplicity. There’s something magical about watching someone take that first bite and seeing their eyes close in appreciation. Whether you’re cooking for a special someone or treating yourself after a long day, this recipe delivers restaurant-quality results with minimal effort. The combination of creamy orzo, garlicky sauce, and perfectly cooked shrimp creates a dish that feels like a warm hug on a plate. Don’t forget to check out more of my favorite seafood recipes on Pinterest for endless inspiration!

  • Cinnamon Roll Muffins: Irresistibly Soft & Gooey Bites You’ll Crave!

    Cinnamon Roll Muffins: Irresistibly Soft & Gooey Bites You’ll Crave!

    Cinnamon Roll Muffins: Irresistibly Soft & Gooey Bites You’ll Crave!

    Cinnamon Roll Muffins combine the irresistible swirl of cinnamon rolls with the convenience of grab-and-go muffins, creating a breakfast treat that’s perfect for busy mornings. The first time I made these for my family, the kitchen filled with that warm, spicy aroma that instantly makes a house feel like home. There’s something magical about the ribbon of cinnamon sugar dancing through each tender muffin, topped with a drizzle of cream cheese glaze that slowly melts into every crevice. If you love classic cinnamon flavors but need something quicker, these muffins are your new best friend.

    Recipe

    Why You’ll Love These Cinnamon Roll Muffins

    Perfect Balance of Flavors and Textures

    These Cinnamon Roll Muffins deliver everything you crave about traditional cinnamon rolls but in a fraction of the time. The tender muffin base has just the right amount of vanilla flavor, creating the perfect canvas for that bold cinnamon swirl. I love how each bite offers a different experience – sometimes you get more of the soft, cakey exterior, and other times you hit a pocket of melty cinnamon sugar that makes your taste buds dance. The cream cheese glaze adds that final touch of indulgence, transforming these from simple muffins into something truly special.

    Quick and Easy Morning Solution

    Unlike traditional cinnamon rolls that require multiple rises and hours of preparation, these muffins come together in about 30 minutes. I’m definitely not a morning person, but even I can handle mixing a simple batter and creating a quick cinnamon swirl before my first cup of coffee kicks in. The best part? Your kitchen will smell absolutely heavenly, and everyone will think you’ve been slaving away since dawn. These have become my secret weapon for holiday mornings when I want something special but need to conserve my energy for the day ahead.

    Essential Tips & Tricks

    Mastering the Perfect Swirl

    The signature cinnamon swirl is what makes these muffins truly special, and getting it right is easier than you might think. Start by making sure your cinnamon-sugar mixture has enough butter to create that gooey, caramelized texture we all love. When adding the swirl, resist the urge to overmix – you want distinct ribbons, not a uniform batter. My favorite technique is to fill each muffin cup halfway, add a generous spoonful of cinnamon mixture, then top with remaining batter and another sprinkle of cinnamon sugar before using a toothpick to create figure-eight swirls.

    Achieving the Ideal Texture

    For perfectly tender muffins, the mixing method matters tremendously. Combine your dry ingredients thoroughly, then mix your wet ingredients separately before bringing them together. The key is to stir just until combined – overmixing develops gluten and creates tough, dense muffins. I learned this the hard way after serving what felt like cinnamon-flavored hockey pucks to my in-laws! For extra insurance against dryness, add a tablespoon of sour cream or Greek yogurt to your batter – it creates incredible moisture without affecting the flavor.

    Serving Ideas & Creative Variations

    Elevating Your Breakfast Spread

    These Cinnamon Roll Muffins shine as the centerpiece of a thoughtful breakfast or brunch spread. Serve them slightly warm to maximize that fresh-baked experience – about 10 seconds in the microwave works perfectly if they’ve cooled. I love pairing them with fresh fruit for a pop of color and freshness that balances the richness. For special occasions, create a muffin board with various spreads like whipped butter, honey, or additional cream cheese frosting. My family goes crazy when I include these alongside a savory egg casserole for weekend brunches.

    Seasonal Twists and Additions

    The basic Cinnamon Roll Muffin recipe welcomes creative adaptations throughout the year. During apple season, fold in diced apples tossed with extra cinnamon for an autumn-inspired treat. For a holiday version, add orange zest to the batter and a splash of bourbon to the glaze. When I’m feeling indulgent, I’ll add a chocolate drizzle over the cream cheese glaze for an extra layer of decadence. You can even incorporate chopped nuts like pecans or walnuts into the cinnamon swirl mixture for added texture and a nutty flavor dimension.

    Storage & Troubleshooting Guide

    Keeping Muffins Fresh

    To maintain the perfect texture of your Cinnamon Roll Muffins, proper storage is essential. For short-term storage (1-2 days), keep them in an airtight container at room temperature. The cream cheese glaze means they shouldn’t be left out longer than that. For longer storage, refrigerate them for up to 5 days. I’ve found that placing a paper towel beneath and on top of the muffins absorbs excess moisture and prevents sogginess. These muffins also freeze beautifully – wrap each one individually in plastic wrap, then store in a freezer bag for up to 3 months.

    Fixing Common Baking Issues

    Even experienced bakers encounter occasional challenges with muffins. If your muffins don’t rise properly, check if your baking powder is fresh – it loses potency after about 6 months. For muffins that stick to the liners, try spraying the liners lightly with cooking spray before filling. If your cinnamon swirl sinks to the bottom, try tossing the cinnamon-sugar mixture with a teaspoon of flour before adding it to the batter. And if your muffins dome too much or overflow, remember to fill your muffin cups only about 2/3 full to allow room for expansion.

    Frequently Asked Questions

    Can I make Cinnamon Roll Muffins ahead of time?

    Absolutely! Prepare the batter and refrigerate overnight. In the morning, give it a gentle stir, fill your muffin cups, add the cinnamon swirl, and bake. You can also bake them completely and freeze for up to 3 months.

    How do I know when my Cinnamon Roll Muffins are done baking?

    Insert a toothpick into the center – it should come out clean or with a few moist crumbs, but no wet batter. The tops should be golden brown and spring back when lightly touched.

    Can I make these muffins without the cream cheese glaze?

    Yes! They’re delicious even without glaze. Alternatively, try a simple powdered sugar glaze, a drizzle of maple syrup, or just a light dusting of powdered sugar.

    What’s the best way to reheat frozen Cinnamon Roll Muffins?

    Thaw overnight in the refrigerator, then microwave for 10-15 seconds or warm in a 300°F oven for 5-7 minutes. This restores that fresh-baked texture and aroma.

    Can I use alternative flours in my Cinnamon Roll Muffins recipe?

    You can substitute up to half the all-purpose flour with whole wheat flour for a nuttier flavor. For gluten-free versions, use a 1:1 gluten-free baking blend that contains xanthan gum.

    Final Thoughts

    These Cinnamon Roll Muffins have become a staple in my baking repertoire, striking that perfect balance between special treat and everyday feasible. There’s something deeply satisfying about creating something that looks and tastes impressive without requiring professional baking skills. The way they fill your home with that unmistakable cinnamon aroma is worth the minimal effort alone. I hope these muffins bring as much joy to your kitchen as they have to mine! For more delicious breakfast inspiration, visit our Pinterest board where we share new recipes weekly.

  • Taco Soup Recipe: Irresistibly Cozy & Bursting with Flavor!

    Taco Soup Recipe: Irresistibly Cozy & Bursting with Flavor!

    Taco Soup Recipe: Irresistibly Cozy & Bursting with Flavor!

    Taco soup is my ultimate comfort food hack when I’m craving those bold Mexican flavors but need something that practically makes itself. The first time I made this hearty one-pot wonder was during a surprise snowstorm when my sister and her kids showed up unannounced. I panicked until I remembered I had ground beef and a pantry full of beans and tomatoes. The kitchen filled with the most incredible aroma as it simmered, and watching everyone go back for seconds made it an instant family classic. This taco soup combines all your favorite taco night ingredients in one steaming, soul-warming bowl.

    Recipe

    Why You’ll Love This Taco Soup

    Perfect One-Pot Simplicity

    There’s something magical about recipes where everything goes into a single pot and transforms into something extraordinary. This taco soup embodies that effortless cooking philosophy we all crave on busy weeknights. I love how the flavors meld together as they simmer – the ground beef absorbs the taco seasoning, the beans become creamy, and the tomatoes break down into a rich broth. When life gets chaotic (like when my toddler decided painting the dog was a good idea), having a recipe that delivers maximum flavor with minimal effort feels like a culinary superpower.

    Customizable for Every Taste

    What makes taco soup truly special is how easily it adapts to your preferences. The basic framework stays the same, but you can adjust the heat level, protein choice, or veggie mix to suit your family’s tastes. My husband prefers it extra spicy with jalapeños, while my youngest needs a milder version. I often make a big batch with the spices on the gentler side, then offer hot sauce, fresh jalapeños, and extra chili powder at the table so everyone can customize their own bowl to perfection.

    Essential Tips & Tricks

    Mastering the Flavor Base

    The secret to exceptional taco soup lies in properly developing that flavor foundation. Always take time to brown your ground beef thoroughly, breaking it into small, even crumbles. This creates those delicious caramelized bits that infuse the entire soup with richness. I learned the hard way that rushing this step results in bland soup! After browning the meat, sauté your onions and garlic in the same pot to absorb all those savory drippings. This simple technique elevates your soup from good to “can-I-please-have-your-recipe” territory that my Mexican corn chicken soup fans always rave about.

    Smart Seasoning Strategy

    The key to perfectly seasoned taco soup is layering flavors throughout the cooking process. Start with quality taco seasoning (homemade is best, but a good store-bought blend works too). Add most of it to the meat while browning, allowing it to bloom in the fat and coat every morsel. Reserve a portion to stir in during the final minutes of cooking – this two-stage approach creates depth while preserving those vibrant spice notes. Taste before serving and adjust with salt, lime juice, or a splash of hot sauce to brighten all the flavors.

    Serving Ideas & Creative Variations

    Build-Your-Own Taco Soup Bar

    Transform serving time into an interactive experience with a toppings bar that lets everyone customize their bowl. I arrange small dishes filled with diced avocado, sour cream, shredded cheese, crushed tortilla chips, lime wedges, and fresh cilantro. This approach is perfect for entertaining – guests love creating their perfect combination, and it makes the meal feel special without extra cooking effort. For family movie nights, we love pairing our loaded soup bowls with these cheesy garlic chicken wraps for the ultimate comfort food feast.

    Seasonal and Dietary Adaptations

    This versatile soup easily transforms to accommodate seasonal ingredients and dietary needs. In summer, I fold in fresh corn kernels and diced zucchini during the last few minutes of cooking. For a lighter version, substitute ground turkey or chicken for the beef and use low-sodium broth. Need a vegetarian option? Skip the meat entirely and add an extra can of black beans or pinto beans plus diced mushrooms for that satisfying umami quality. The plant-based version is surprisingly hearty and perfect for Meatless Mondays.

    Storage & Troubleshooting Guide

    Freezer-Friendly Techniques

    Taco soup is a meal-prep champion that actually improves with time as the flavors meld together. After cooling completely, portion it into airtight containers, leaving about an inch of headspace to allow for expansion. Label with the date and freeze for up to 3 months. For easy single servings, freeze individual portions in silicone muffin trays, then transfer the frozen soup “pucks” to freezer bags. This method lets you thaw exactly what you need—perfect for those solo lunch emergencies when you’re craving something homemade but short on time.

    Fixing Common Soup Issues

    Even experienced cooks occasionally need to troubleshoot their soup. If your taco soup seems too watery, remove the lid and simmer for 10-15 minutes to reduce and concentrate the flavors. Too thick? Add chicken broth or even a splash of tomato juice to thin it out. If you accidentally over-seasoned (like I did when my toddler “helped” with the chili powder), add a peeled, diced potato to absorb excess salt, or stir in a spoonful of sour cream to balance the heat. Remember that acid brightens flavors, so a squeeze of lime juice often brings everything into perfect harmony.

    Frequently Asked Questions

    Can I make taco soup in a slow cooker?

    Absolutely! Brown the meat and onions first, then transfer to your slow cooker with remaining ingredients. Cook on low for 6-8 hours or high for 3-4 hours for deep, developed flavors.

    Is taco soup freezer-friendly?

    Yes! It freezes beautifully for up to 3 months. Cool completely before freezing in airtight containers, leaving headspace for expansion. Thaw overnight in the refrigerator before reheating.

    Can I make taco soup vegetarian?

    Definitely. Replace meat with an extra can of beans or crumbled tofu, use vegetable broth instead of beef, and ensure your taco seasoning is vegetarian-friendly.

    How do I adjust the spice level of my taco soup?

    Control heat by adjusting the amount of chili powder, using mild RO-TEL tomatoes, or omitting jalapeños. Serve hot sauce on the side for those who enjoy extra spice.

    What’s the difference between taco soup and chili?

    Taco soup typically has a thinner, more broth-based consistency than chili and includes distinctive taco seasoning flavors plus corn and often ranch seasoning.

    Final Thoughts

    This taco soup has become my culinary safety net—the recipe I turn to when time is short but I still want to serve something hearty and satisfying. There’s something deeply comforting about ladling steaming taco soup into bowls on a chilly evening, watching family members customize their portions with favorite toppings. The way it fills the house with its spicy aroma signals that good things are coming. For more cozy recipes like this one, follow me on Pinterest where I’m always sharing new comfort food inspirations.