Author: Darleen Vance

  • Cajun Chicken Tortellini with Garlic Sauce: Irresistibly Creamy & Spicy!

    Cajun Chicken Tortellini with Garlic Sauce: Irresistibly Creamy & Spicy!

    Cajun Chicken Tortellini with Garlic Sauce: Irresistibly Creamy & Spicy!

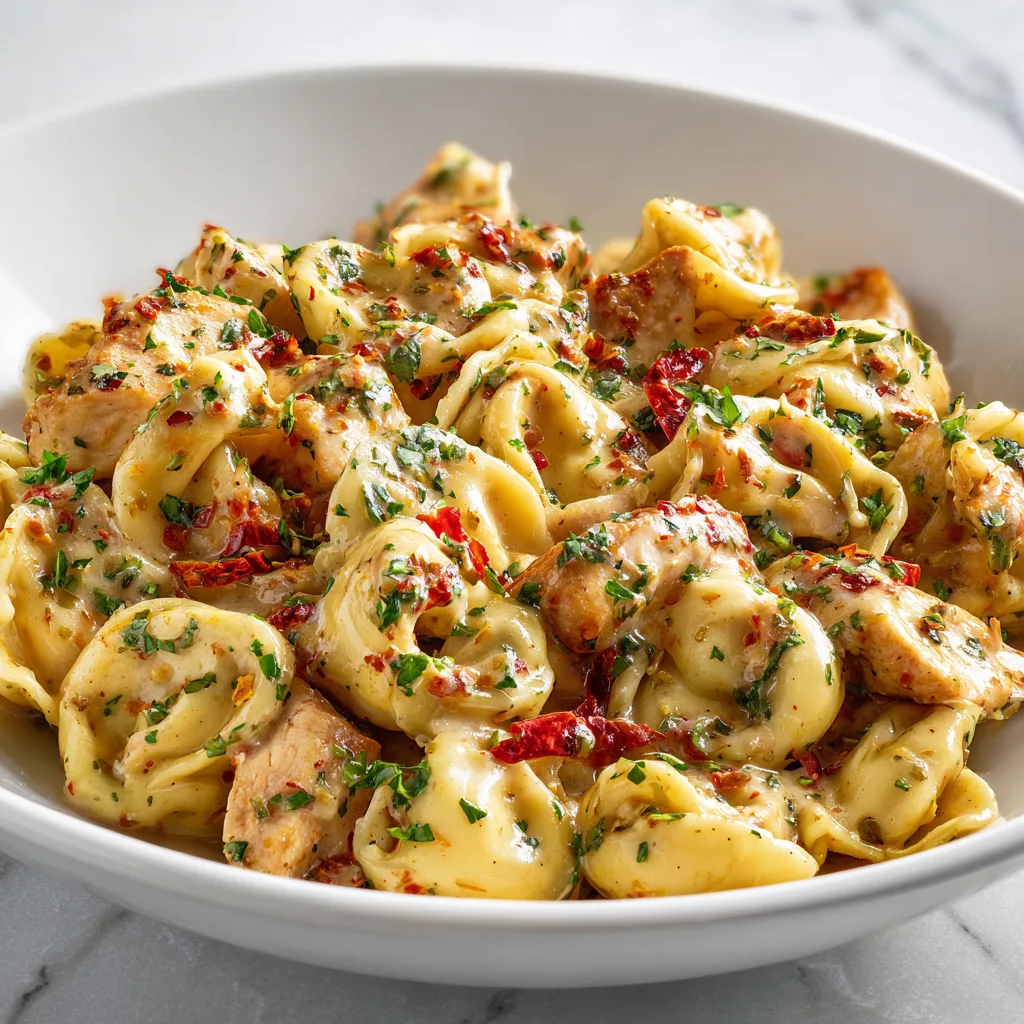
    Cajun Chicken Tortellini with Garlic Sauce has become my absolute go-to for those nights when I crave something bold yet comforting. The first time I made this dish, the aroma of sizzling Cajun spices filled my kitchen and instantly transported me back to that little restaurant in New Orleans where I fell in love with Cajun cuisine. There’s something magical about how the creamy garlic sauce mellows the spicy kick of the seasoned chicken, all wrapped around pillowy cheese tortellini. This recipe strikes that perfect balance between impressive and approachable – exactly what you need for both weeknight dinners and special occasions.

    Recipe

    Why You’ll Love This Cajun Chicken Tortellini with Garlic Sauce

    Perfect Balance of Flavors

    This dish is a symphony of contrasting elements that somehow work in perfect harmony. The bold Cajun spices bring heat and depth, while the creamy garlic sauce provides a velvety counterpoint that soothes the palate. I love how the cheese-filled tortellini adds another layer of richness without overwhelming the dish. The first time my husband tried it, he paused mid-bite with that look of pure food bliss – you know the one! It’s that magical combination of spicy, creamy, and savory that makes your taste buds dance with every forkful. Plus, it comes together in about 30 minutes, making it perfect for busy evenings.

    Impressive Yet Simple

    Don’t let the complex flavors fool you – this Cajun Chicken Tortellini with Garlic Sauce is surprisingly straightforward to prepare. I’ve served it at impromptu dinner parties and watched guests assume I’d spent hours in the kitchen. The truth? It’s mostly a one-pan wonder with minimal prep work. The tortellini cooks separately while you focus on perfecting that succulent Cajun chicken and silky garlic sauce. Even kitchen novices can nail this recipe on the first try. I’ve found it’s the perfect “level-up” dish when you’re tired of the same old pasta recipes but don’t want to tackle anything too complicated after a long day.

    Essential Tips & Tricks

    Mastering the Cajun Spice Level

    Finding the right spice balance is crucial for this dish. I recommend starting with store-bought Cajun seasoning for consistency, but don’t be afraid to make your own blend once you’re comfortable. The key is to season the chicken generously, but remember that the cream sauce will temper the heat. For spice-lovers, add a pinch of cayenne to your Cajun mix; for milder palates, cut the Cajun seasoning with a bit of paprika. Always taste and adjust as you go! I learned this the hard way after once creating a dish so spicy my eyes watered with each bite. Now I add spices incrementally and taste test along the way.

    Perfecting the Garlic Sauce

    The garlic sauce is the crowning glory of this dish, and getting it right makes all the difference. Start by gently sautéing minced garlic until fragrant but not brown – burned garlic will ruin the sauce with bitterness. When adding cream, lower your heat to prevent curdling and stir constantly. For extra depth, deglaze the pan with a splash of white wine after cooking the chicken, scraping up all those flavorful browned bits. This technique elevates the sauce from good to restaurant-quality, similar to what I do in my Cheesy Shrimp Scampi Pasta Bake. Allow the sauce to reduce slightly until it coats the back of a spoon for the perfect consistency.

    Serving Ideas & Creative Variations

    Perfect Pairings

    This Cajun Chicken Tortellini with Garlic Sauce shines brightest with thoughtfully chosen sides. I love serving it with a simple arugula salad dressed with lemon juice and olive oil – the peppery greens and bright acidity cut through the richness beautifully. Garlic bread is another no-brainer companion; there’s something irresistible about using it to soak up that extra sauce! For a more substantial meal, roasted vegetables like asparagus or Brussels sprouts add color and texture. When entertaining, I start with a light appetizer like my Creamy Crab and Shrimp Bisque to set the tone for a Cajun-inspired feast that always impresses my guests.

    Exciting Twists

    Don’t be afraid to make this recipe your own with creative variations! Swap chicken for plump shrimp or even andouille sausage for an authentic New Orleans twist. Vegetarians can substitute meaty portobello mushrooms seasoned with the same Cajun spices. For a lighter version, use half-and-half instead of heavy cream and add extra vegetables like bell peppers, spinach, or cherry tomatoes. One of my favorite modifications is adding a handful of fresh corn kernels and diced red peppers for sweetness and crunch. The versatility of this dish means you can adapt it to whatever ingredients you have on hand while maintaining that signature Cajun-garlic flavor profile.

    Storage & Troubleshooting Guide

    Proper Storage Methods

    Cajun Chicken Tortellini with Garlic Sauce stores remarkably well, making it perfect for meal prep enthusiasts. Refrigerate leftovers in an airtight container for up to 3 days. The flavors actually deepen overnight, creating an even more delicious lunch the next day! If freezing, I recommend storing the sauce and pasta separately – frozen tortellini can become mushy when reheated. For best results, slightly undercook the pasta if you know you’ll be storing it. When reheating, add a splash of chicken broth or cream to revitalize the sauce, as it tends to thicken considerably in the refrigerator. Gentle heat is key to preventing the cream sauce from separating.

    Common Issues & Solutions

    Even experienced cooks encounter challenges with cream-based sauces. If your sauce breaks or curdles, lower the heat immediately and whisk in a tablespoon of cold cream to stabilize it. For sauce that’s too thick, thin it gradually with pasta water – the starch helps maintain creaminess. Too thin? Simmer gently until it reduces to your desired consistency. If your tortellini sticks together, don’t panic! A drizzle of olive oil and gentle tossing usually separates them. And for those times when the Cajun seasoning becomes overwhelming, balance it with a squeeze of lemon juice or a dollop of sour cream to tame the heat without compromising flavor.

    Frequently Asked Questions

    Can I make Cajun Chicken Tortellini with Garlic Sauce ahead of time?

    Yes! Prepare the chicken and sauce up to 2 days ahead, storing separately from the pasta. Cook the tortellini fresh when ready to serve, then combine and reheat gently to prevent the sauce from breaking.

    What can I substitute for heavy cream in this recipe?

    Half-and-half or evaporated milk work well as lighter alternatives. For dairy-free options, full-fat coconut milk provides similar richness, though it will add a subtle coconut flavor.

    How spicy is this Cajun Chicken Tortellini with Garlic Sauce?

    The spice level is customizable! As written, it’s moderately spicy. Reduce the Cajun seasoning by half for a milder version or add cayenne pepper to increase heat.

    Can I use frozen tortellini?

    Absolutely! No need to thaw – simply cook according to package directions, usually adding 1-2 minutes to the cooking time. Drain well before adding to the sauce.

    What wine pairs best with this dish?

    A crisp Sauvignon Blanc complements the creamy sauce, while a light Pinot Noir works well with the Cajun spices. For non-alcoholic options, sparkling water with lemon balances the richness.

    Final Thoughts

    This Cajun Chicken Tortellini with Garlic Sauce has become more than just a recipe in my household – it’s a celebration of bold flavors that never fails to bring smiles around my dinner table. I love how it transforms ordinary ingredients into something truly special without requiring culinary school expertise. There’s something deeply satisfying about creating a dish that balances heat, creaminess, and comfort so perfectly. Whether you’re cooking for a special someone or simply treating yourself after a long day, this recipe delivers that restaurant-quality experience right in your home kitchen. Find more inspiration for your next culinary adventure on Pinterest!

  • Pesto Chicken Flatbreads: Irresistibly Delicious & Ready Fast!

    Pesto Chicken Flatbreads: Irresistibly Delicious & Ready Fast!

    Pesto Chicken Flatbreads: Irresistibly Delicious & Ready Fast!

    Pesto Chicken Flatbreads are my absolute go-to when I need a quick yet impressive dinner that never fails to delight. There’s something magical about that first bite—warm, crispy flatbread topped with garlicky pesto, tender chicken, and melty cheese that stretches with each pull. I discovered this recipe during a hectic week when my kitchen creativity was running on empty, and it’s been a lifesaver ever since. The vibrant basil aroma fills my kitchen, instantly transporting me to sunnier days. Whether you’re hosting friends or craving a restaurant-quality meal at home, these flatbreads deliver big flavor with minimal effort.

    Recipe

    Why You’ll Love These Pesto Chicken Flatbreads

    Perfect Balance of Flavors and Textures

    The magic of these pesto chicken flatbreads lies in their perfect harmony of flavors. The herbaceous pesto creates a bright, garlicky base that pairs beautifully with juicy chicken and creamy mozzarella. I love how the edges of the flatbread crisp up while the center stays tender. That contrast between the crunchy crust and the soft, cheesy topping creates a textural wonderland in every bite. The first time I made these, my kitchen filled with the most intoxicating aroma of basil and roasted garlic—instantly transporting me to a little Italian café I once visited on vacation.

    Quick Weeknight Solution

    When life gets chaotic (which, let’s be honest, is most weeknights), these flatbreads are my time-saving hero. From start to finish, you can have them on the table in under 30 minutes. I often use rotisserie chicken to make the process even speedier. Last Wednesday, after a particularly exhausting workday, I managed to throw these together while simultaneously helping with homework and feeding the dog. The beauty is in their simplicity—store-bought flatbreads, pre-made pesto, and leftover chicken come together to create something that tastes like you spent hours in the kitchen. Pure weeknight magic.

    Essential Tips & Tricks

    Selecting the Perfect Ingredients

    Choosing the right components makes all the difference in elevating these flatbreads from good to absolutely unforgettable. For flatbreads, I recommend naan or pita as they provide the perfect sturdy base while still maintaining that lovely chew. When it comes to pesto, homemade is divine, but a high-quality store-bought version works beautifully when time is tight. Look for one with vibrant color and real Parmesan. For chicken, rotisserie is my go-to, but leftover grilled chicken brings a lovely smoky element. The cheese deserves attention too—fresh mozzarella offers those gorgeous melty puddles, while a sprinkle of aged Parmesan adds sharp complexity.

    Perfecting Your Technique

    The difference between good and great pesto chicken flatbreads often comes down to technique. First, don’t skip pre-toasting your flatbreads for 2-3 minutes before adding toppings—this prevents soggy centers. Spread your pesto thinly but completely to the edges for flavor in every bite. When arranging chicken, tear it into small pieces rather than large chunks for better distribution and easier eating. If adding vegetables like cherry tomatoes or red onions, slice them paper-thin so they cook quickly. Finally, a light drizzle of olive oil right before baking adds a beautiful sheen and helps everything caramelize perfectly.

    Serving Ideas & Creative Variations

    Complementary Side Dishes

    These flatbreads shine as the star of your meal, but the right sides can create a truly memorable spread. A simple arugula salad with lemon vinaigrette provides a peppery contrast to the rich flatbreads—the bright acidity cuts through the cheese beautifully. On cooler evenings, a small bowl of tomato soup makes for cozy dipping. For casual gatherings, I arrange the flatbreads alongside marinated olives, roasted red peppers, and a good balsamic glaze for drizzling. When I’m feeling extra, I’ll whip up some garlic butter and brush it on the edges of the flatbreads for a restaurant-worthy touch that makes everyone think I’ve spent hours in the kitchen.

    Creative Twists on the Classic

    While the classic pesto chicken flatbread is divine, experimenting with variations keeps this recipe exciting in your rotation. Try swapping traditional basil pesto for sun-dried tomato pesto paired with feta and kalamata olives for a Mediterranean twist. For a fall version, substitute sage-walnut pesto, roasted butternut squash, and chicken with a sprinkle of crispy pancetta. Vegetarian guests? Replace chicken with roasted portobello mushrooms or crispy chickpeas. I once made a breakfast version with pesto, scrambled eggs, and prosciutto that disappeared in minutes at a brunch gathering. The flatbread base is essentially a blank canvas—I encourage you to play with seasonal ingredients and whatever’s lingering in your fridge.

    Storage & Troubleshooting Guide

    Proper Storage Methods

    Storing these flatbreads properly ensures they remain just as delicious for round two. For leftover assembled flatbreads, let them cool completely before wrapping individual portions in aluminum foil and refrigerating for up to 3 days. Reheat in a 350°F oven for 7-8 minutes until warmed through—microwaving will make them soggy. If you’re meal prepping, I recommend storing components separately: keep cooked chicken, pesto, and grated cheese in separate containers, then assemble and bake when ready to eat. The pesto may darken slightly in storage, but a splash of lemon juice brightens it right up. For longer storage, freeze assembled but unbaked flatbreads flat on a baking sheet, then transfer to freezer bags.

    Troubleshooting Common Issues

    Even experienced cooks encounter the occasional flatbread fail, but most issues have simple solutions. If your flatbreads turn out soggy in the middle, you likely added too much pesto or didn’t pre-toast the bread. Next time, use a lighter hand with wet toppings and give the flatbread a 2-minute head start in the oven. For flatbreads that burn before the cheese melts, your oven temperature is likely too high—try 375°F instead of 425°F and position the rack in the middle of the oven.

    If your cheese isn’t browning nicely, a quick minute under the broiler works wonders, but watch carefully! Lastly, if toppings slide off when serving, let the flatbreads rest 2-3 minutes after baking to allow the cheese to set.

    Frequently Asked Questions

    Can I make these Pesto Chicken Flatbreads ahead of time?

    Absolutely! Prepare all components in advance and store separately. You can even assemble them on the flatbreads and refrigerate for up to 8 hours before baking. Just add an extra minute or two to the baking time if cooking from cold.

    What’s the best cheese to use for flatbreads?

    Fresh mozzarella offers that classic stretchy pull, but a combination of mozzarella and Parmesan creates wonderful depth. For something different, try provolone, fontina, or even a sprinkle of goat cheese for tangy contrast.

    Can I use homemade flatbread instead of store-bought?

    Definitely! Homemade flatbread adds a wonderful rustic touch. Just ensure it’s not too thin or it may become overly crisp. Par-bake homemade dough for about 5 minutes before adding toppings.

    How can I make these flatbreads gluten-free?

    Use gluten-free flatbreads or naan as your base. Many grocery stores now carry excellent options. Ensure your pesto is gluten-free (most are naturally) and double-check any pre-seasoned chicken ingredients.

    What’s the best way to reheat leftover pesto chicken flatbreads?

    Reheat in a 350°F oven for 5-7 minutes until warmed through. Avoid microwaving as it makes the flatbread soggy. A quick toast in a skillet over medium heat also works wonderfully.

    Final Thoughts

    These Pesto Chicken Flatbreads have rescued countless dinners in my home, transforming ordinary evenings into something special with minimal effort. There’s a certain magic in creating something so satisfying from such simple ingredients. I love how versatile they are—elegant enough for entertaining yet simple enough for a Tuesday night dinner. The bright herbaceous notes of the pesto, the savory chicken, and that irresistible melted cheese create a combination that never fails to bring smiles to the table. For more delicious inspiration, check out my Pinterest board where I’m always adding new flatbread variations and complementary recipes.

  • Creamy Garlic Parmesan Chicken Pasta Recipe That Will Wow You!

    Creamy Garlic Parmesan Chicken Pasta Recipe That Will Wow You!

    Creamy Garlic Parmesan Chicken Pasta Recipe That Will Wow You!

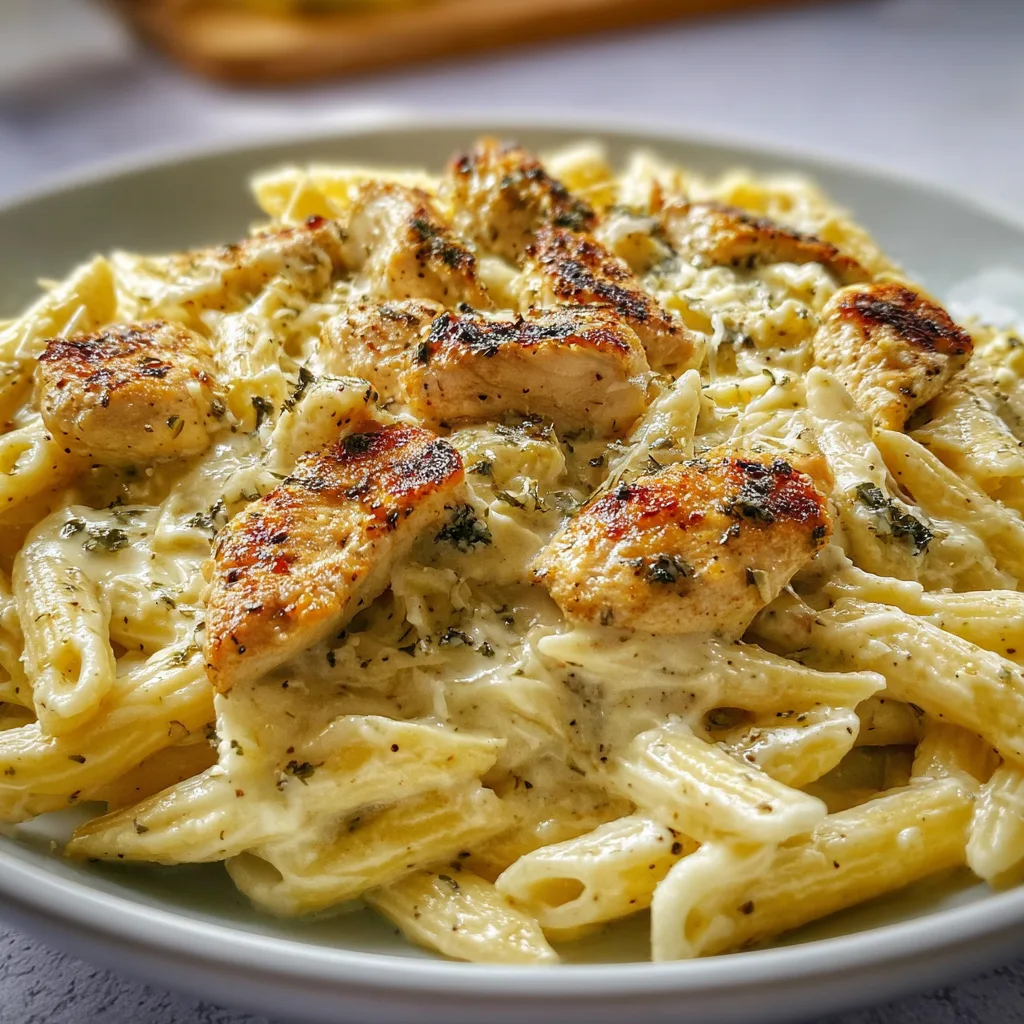
    Creamy Garlic Parmesan Chicken Pasta is one of those magical comfort dishes that never fails to bring everyone to the table with eager anticipation. The first time I made this for my family, the kitchen filled with the intoxicating aroma of roasted garlic and melting cheese that had my husband wandering in from the garage before I even called for dinner! There’s something about the velvety sauce coating each strand of pasta, tender chicken bites, and that perfect punch of Parmesan that makes this dish a regular request in my home. If you’re looking for a restaurant-quality pasta that’s actually simple to make, you’ve found your new favorite recipe at Recipes Darleen.

    Recipe

    Why You’ll Love This Creamy Garlic Parmesan Chicken Pasta

    Perfect Balance of Flavors and Textures

    This pasta dish hits all the right notes with its creamy richness balanced by the sharp bite of fresh Parmesan. The garlic infuses the sauce with depth without overwhelming, while the tender chicken adds satisfying protein. I love how the sauce clings to every piece of pasta, ensuring flavor in each forkful. What makes this dish special is how the ingredients harmonize—the slight nuttiness of toasted garlic, the silky texture of the cream sauce, and that unmistakable Parmesan umami that makes your taste buds dance. It’s comfort food elevated to something that feels indulgently special.

    Quick Weeknight Miracle

    On those evenings when I’m juggling work deadlines and my son’s soccer practice, this 30-minute wonder saves dinner time. The beauty of Creamy Garlic Parmesan Chicken Pasta is that it delivers gourmet flavor without complicated techniques. I can prep the chicken while the pasta boils, make the sauce while the chicken cooks, and suddenly dinner is ready! The ingredients are simple pantry staples you likely already have on hand. When my daughter proclaimed this “better than restaurant pasta,” I knew this recipe would become part of our regular rotation. It’s deceptively simple but tastes like you spent hours in the kitchen.

    Essential Tips & Tricks

    Mastering the Perfect Sauce

    The secret to a silky-smooth sauce lies in patience and temperature control. Always reduce your heat before adding Parmesan to prevent graininess, and grate your cheese fresh rather than using pre-packaged varieties that contain anti-caking agents. I learned this the hard way when my first attempt separated into an oily mess! Another game-changer: reserve about ½ cup of starchy pasta water before draining. This liquid gold helps the sauce cling to the pasta and maintains the perfect consistency. For extra flavor depth, try roasting whole garlic heads until caramelized, then squeezing the sweet cloves into your sauce like I do in my Creamy Tomato Garlic Pasta.

    Chicken Preparation Secrets

    For the juiciest chicken pieces, avoid the common mistake of overcrowding your pan. Cook in batches if necessary—this ensures each piece gets a beautiful golden sear rather than steaming. I season my chicken generously with salt, pepper, and a touch of Italian herbs before cooking. Another tip: slice your chicken against the grain into even pieces about ¾-inch thick for quick, uniform cooking. The difference between dry, rubbery chicken and tender, succulent bites often comes down to these simple details. Remember to let your chicken rest for a few minutes after cooking before slicing to keep those precious juices locked in.

    Serving Ideas & Creative Variations

    Perfect Pairings for a Complete Meal

    Serve this hearty pasta with a crisp side salad dressed with lemon vinaigrette to cut through the richness. Garlic bread might seem redundant with a garlic pasta, but trust me—the textural contrast of crusty bread against creamy pasta is divine! For a lighter touch, roasted asparagus or broccolini adds color and nutrition. When entertaining, I elevate the presentation by serving in a large, shallow bowl with fresh herbs scattered on top and extra Parmesan at the table. Wine pairing tip: a crisp Pinot Grigio or light Chardonnay complements the creamy flavors beautifully, similar to what I recommend with my Alfredo Tortellini Bake.

    Creative Twists to Keep It Exciting

    Transform this versatile base recipe by adding sautéed mushrooms for earthy depth or sun-dried tomatoes for sweet-tart pops of flavor. Spinach or kale can be stirred in during the final minutes for color and nutrition. For a seafood variation, substitute shrimp for chicken and add a pinch of red pepper flakes. When I’m feeling indulgent, I mix in crispy bacon bits and a drizzle of truffle oil just before serving. For a lighter version, try using half-and-half instead of heavy cream and adding extra vegetables. The beauty of this dish is its adaptability—I’ve made it countless different ways based on what’s in my refrigerator.

    Storage & Troubleshooting Guide

    Proper Storage for Leftovers

    Store any leftover Creamy Garlic Parmesan Chicken Pasta in airtight containers in the refrigerator for up to 3 days. The sauce will thicken considerably when chilled, which is completely normal. When reheating, add a splash of milk or chicken broth to restore the creamy consistency. I find that gentle reheating on the stovetop works better than microwaving, which can make the sauce separate. For meal prep, you can prepare the components separately—cook the pasta al dente, store the sauce, and cook the chicken—then combine when ready to serve. This prevents the pasta from absorbing too much liquid and becoming overly soft.

    Troubleshooting Common Issues

    If your sauce breaks or becomes grainy, the most common culprit is high heat. Lower the temperature immediately and whisk in a tablespoon of cold cream to help it re-emulsify. For a sauce that’s too thin, simmer gently until it reaches your desired consistency, or create a slurry with a teaspoon of cornstarch mixed with cold water. If it’s too thick, gradually add reserved pasta water until perfect. Bland sauce? Don’t be shy with seasonings—a pinch more salt, fresh cracked pepper, or even a dash of nutmeg can transform the flavor profile. Remember that Parmesan varies in saltiness, so always taste before adding additional salt. These simple fixes have saved many of my pasta dinners!

    Frequently Asked Questions

    Can I make Creamy Garlic Parmesan Chicken Pasta ahead of time?

    Yes, but store components separately. Cook pasta al dente, refrigerate sauce and chicken separately, then combine and reheat gently on the stove with a splash of cream or broth to refresh the sauce.

    What pasta shapes work best with this creamy sauce?

    Fettuccine, linguine, and pappardelle are ideal as their flat surfaces hold the sauce well. Shaped pastas like penne, rigatoni, or farfalle also work beautifully as the sauce clings to their ridges and fills their hollows.

    Can I use pre-cooked rotisserie chicken to save time?

    Absolutely! Simply shred or dice the rotisserie chicken and add it to the sauce during the final few minutes of cooking just to warm through. This is my go-to shortcut on busy weeknights.

    Is there a dairy-free alternative for this recipe?

    You can substitute coconut cream for heavy cream and nutritional yeast for Parmesan. The flavor profile will change slightly, but you’ll still achieve a creamy, savory sauce with garlic notes.

    How do I prevent my Creamy Garlic Parmesan Chicken Pasta sauce from separating?

    Cook over medium-low heat, add cheese gradually while off direct heat, and stir constantly. If it does separate, whisk in a tablespoon of cold cream off the heat until smooth.

    Final Thoughts

    This Creamy Garlic Parmesan Chicken Pasta has become my ultimate crowd-pleaser, perfect for both everyday dinners and special occasions. The combination of tender chicken, al dente pasta, and that velvety garlic Parmesan sauce creates a dish that feels like a warm hug at the end of a long day. What I love most is how adaptable it is—make it as written for classic comfort or add your own twist with seasonal ingredients. Don’t forget to save this recipe and explore more pasta inspirations on Pinterest for your next dinner masterpiece!

  • Sausage Southern Cornbread Stuffing That Will Steal Hearts!

    Sausage Southern Cornbread Stuffing That Will Steal Hearts!

    Sausage Southern Cornbread Stuffing That Will Steal Hearts!

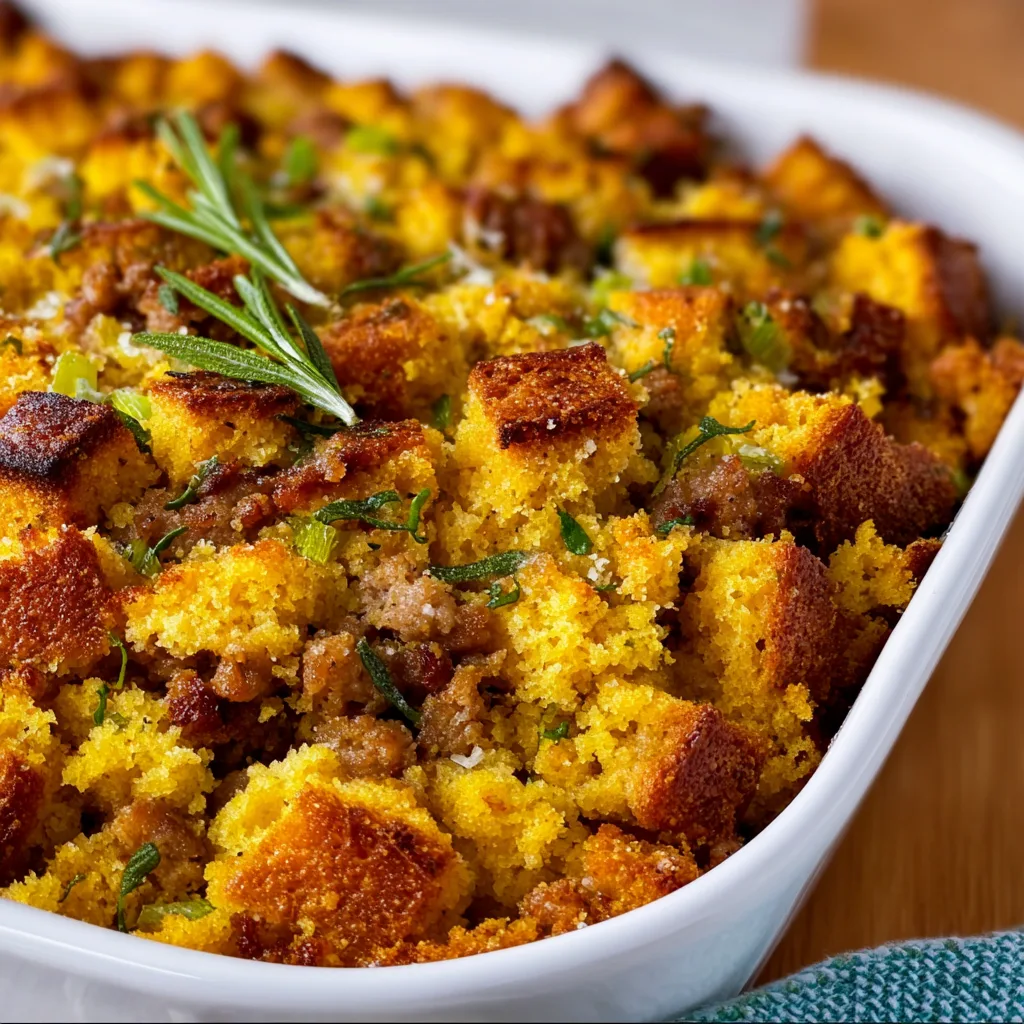
    Sausage Southern Cornbread Stuffing brings together the heartwarming flavors of the South in one spectacular holiday side dish. The first time I made this for my family’s Thanksgiving, the kitchen filled with aromas of sage, sausage, and sweet cornbread that practically pulled everyone in from the living room! There’s something magical about how the savory sausage mingles with the slightly sweet cornbread, creating that perfect balance that makes this stuffing absolutely irresistible. If you’re looking for a showstopper side that honors Southern tradition while bringing something special to your table, this recipe deserves a spot in your holiday rotation.

    Recipe

    Why You’ll Love This Sausage Southern Cornbread Stuffing

    The Perfect Balance of Flavors and Textures

    The magic of this stuffing lies in its incredible texture contrast – crispy edges with a tender, moist center that soaks up all those savory flavors. The cornbread provides a subtle sweetness that perfectly complements the rich, savory sausage. I love how the herbs bloom in the butter, releasing their aromatic oils and infusing every bite. When you take that first forkful, you’ll experience layers of flavor – from the earthy sage to the slight heat from the sausage. It’s a beautiful harmony that makes this dish so much more than just a side – it becomes a centerpiece!

    Make-Ahead Friendly for Stress-Free Holidays

    One of my favorite things about this Sausage Southern Cornbread Stuffing is how wonderfully it fits into busy holiday planning. You can prepare the cornbread up to 2 days ahead and let it dry out (which actually improves the texture!). The vegetable and sausage mixture can be cooked a day before, then simply combined with the cornbread and baked when you’re ready. This time-saving approach means less kitchen chaos on the big day. I’ve even assembled the entire dish the night before, refrigerated it, and baked it the next day with perfect results – just add a few extra minutes to the baking time!

    Essential Tips & Tricks

    Getting the Cornbread Base Just Right

    For truly authentic Sausage Southern Cornbread Stuffing, the cornbread foundation is crucial. I recommend using a homemade cornbread that’s not too sweet – you want it to complement the savory elements, not compete with them. Make it a day ahead and let it dry out slightly, or bake fresh cornbread and toast the cubes in the oven for about 20 minutes. The cornbread should be firm enough to hold its shape when mixed with the other ingredients but not so dry that it turns to dust. Finding that perfect balance creates the ideal foundation that absorbs the flavors without turning mushy – a common pitfall that’s easily avoided with this method.

    Perfecting the Moisture Level

    The trickiest part of making stuffing is achieving that perfect moisture balance – too dry and it’s unpleasant, too wet and it’s soggy. I’ve found that 2½ cups of broth per 8 cups of cornbread cubes works beautifully, but don’t be afraid to adjust based on your cornbread’s density. Add broth gradually, stirring gently after each addition. The mixture should feel moist but not soggy – when you press a handful together, it should hold its shape but still crumble apart easily. For extra insurance against dryness, cover the dish with foil for the first 25 minutes of baking, then uncover to achieve those irresistibly crispy edges, just like in my Cheesy Chicken and Spinach Casserole.

    Serving Ideas & Creative Variations

    Perfect Pairings for Your Holiday Table

    This Sausage Southern Cornbread Stuffing shines as a standout side dish that pairs beautifully with both traditional and unexpected mains. It’s a natural companion to roast turkey or chicken, but don’t hesitate to serve it alongside a glazed ham or even a beef roast. The savory-sweet profile complements practically any protein! For a complete holiday spread, I love serving it with cranberry sauce, roasted root vegetables, and a simple green salad dressed with vinaigrette – the acidity cuts through the richness perfectly. For a casual dinner, it even works wonderfully alongside my Quick Flavorful Pepper Steak for a delicious fusion meal.

    Regional Twists to Make It Your Own

    One thing I adore about this stuffing is how easily it adapts to regional flavors. For a Cajun twist, add andouille sausage instead of breakfast sausage and incorporate bell peppers and a dash of cayenne. Going Southwestern? Mix in some roasted green chiles and substitute pepper jack for any cheese you’re adding. For an Appalachian variation, incorporate diced apples and chopped pecans for a delightful sweet-savory contrast. I’ve even made a coastal version with oysters and a bit of Old Bay seasoning that was absolutely divine! These regional adaptations honor the Southern roots while creating something uniquely yours.

    Storage & Troubleshooting Guide

    Proper Storage for Leftovers

    Leftover Sausage Southern Cornbread Stuffing is a treasure that deserves proper care! Allow it to cool completely before transferring to airtight containers. It will keep in the refrigerator for up to 4 days, though the texture is best within the first 2 days. For longer storage, freeze individual portions in freezer-safe containers for up to 3 months. The key to preserving texture when reheating is adding a splash of broth before covering with foil and warming in a 325°F oven until heated through. For quick reheating, the microwave works in a pinch, but you’ll lose some of the textural contrast that makes this stuffing so special.

    Fixing Common Stuffing Problems

    Even experienced cooks occasionally encounter stuffing issues, but they’re easy to remedy! If your stuffing turns out too dry, simply drizzle warm broth over the top and return it to the oven, covered, for about 10 minutes. For stuffing that’s too wet, spread it on a baking sheet and bake uncovered at 350°F until it reaches your desired moisture level. If the top is browning too quickly during baking, loosely cover with foil. And if you find the flavor needs a boost, don’t hesitate to sprinkle in additional herbs or a dash of poultry seasoning – sometimes the cornbread can absorb more seasoning than expected, especially if it’s particularly dry or dense.

    Frequently Asked Questions

    Can I make Sausage Southern Cornbread Stuffing vegetarian?

    Absolutely! Substitute the sausage with a plant-based alternative or sautéed mushrooms with a dash of smoked paprika. Use vegetable broth instead of chicken broth, and you’ll still get that wonderful flavor profile.

    How far in advance can I prepare this stuffing?

    You can prepare the components up to 2 days ahead. Make the cornbread, let it dry, and cook the sausage mixture. Store separately, then combine and bake on the day of serving.

    What’s the best type of sausage to use for Southern Cornbread Stuffing?

    I recommend sage-flavored breakfast sausage for authentic flavor. Italian sausage works well too, but the sage variety complements the cornbread beautifully.

    Can I stuff this inside my turkey instead of baking separately?

    For food safety reasons, I recommend baking this stuffing separately. If you do stuff your bird, ensure both turkey and stuffing reach 165°F before serving.

    My cornbread stuffing falls apart when serving. How can I fix this?

    Let your baked stuffing rest for 10-15 minutes before serving. This allows it to set up and hold together better when portioned.

    Final Thoughts

    This Sausage Southern Cornbread Stuffing has become my signature holiday dish – the one friends and family request year after year. There’s something profoundly satisfying about watching people close their eyes with that first bite, savoring the perfect balance of textures and flavors that only cornbread stuffing can deliver. Whether you’re continuing a Southern tradition or starting a new one, this recipe brings warmth and comfort to any table. I’d love to see your creations on Pinterest – tag me and share your own special twist on this beloved classic!

  • Crock Pot Creamy Chicken Parmesan Soup – Irresistibly Cozy & Delicious!

    Crock Pot Creamy Chicken Parmesan Soup – Irresistibly Cozy & Delicious!

    Crock Pot Creamy Chicken Parmesan Soup – Irresistibly Cozy & Delicious!

    Crock Pot Creamy Chicken Parmesan Soup is my absolute comfort food triumph that came to life during one particularly chilly Sunday afternoon. I had chicken breasts waiting to be transformed and a craving for something that would wrap around me like a warm hug. The slow cooker did all the heavy lifting while I curled up with a book, occasionally catching whiffs of garlic and herbs dancing through my kitchen. This velvety soup brings together tender chicken, melty Parmesan, and Italian seasonings in a way that feels both indulgent and nourishing. It’s become my go-to recipe when I want to impress without the stress, much like my Creamy Cowboy Soup for those who love hearty meals with minimal effort.

    Recipe

    Why You’ll Love This Crock Pot Creamy Chicken Parmesan Soup

    A Weeknight Wonder That Delivers

    This Crock Pot Creamy Chicken Parmesan Soup is the answer to busy weeknights when you crave something homemade but don’t have time to hover over the stove. I love how the slow cooker transforms simple ingredients into something that tastes like it took hours of active cooking. The chicken becomes incredibly tender, practically melting into the rich, velvety broth. There’s something magical about walking through your door after a long day to the aroma of garlic, herbs, and Parmesan that’s been simmering all day, knowing dinner is essentially ready.

    Restaurant-Quality Flavor with Minimal Effort

    The depth of flavor in this soup rivals anything you’d order at your favorite Italian restaurant. The combination of sweet onions, aromatic garlic, and Italian herbs creates a foundation that supports the star ingredients without overwhelming them. What I particularly love is how the Parmesan cheese melts into the broth, creating silky ribbons of flavor that coat each spoonful. It’s that perfect balance of creamy comfort with bright tomato acidity that keeps you coming back for “just one more” ladle.

    Essential Tips & Tricks

    Mastering the Creamy Base

    The secret to a perfectly creamy soup without any curdling or separation lies in when you add certain ingredients. Always add the heavy cream and Parmesan during the final 30 minutes of cooking. This timing is crucial – it prevents the dairy from breaking down during the long cooking process while still allowing enough time for flavors to meld beautifully. For extra richness, I sometimes stir in a tablespoon of cream cheese along with the heavy cream. This adds body and a subtle tanginess that elevates the entire dish.

    Chicken Preparation Matters

    For the most tender chicken in your Crock Pot Creamy Chicken Parmesan Soup, resist the urge to use frozen chicken breasts. While technically safe in a slow cooker, they release excess moisture that can dilute your carefully crafted flavors. Instead, use fresh chicken or properly thawed pieces. I prefer cutting the chicken into 1-inch cubes before adding them to the pot – this ensures even cooking and eliminates the need to shred later. For maximum flavor absorption, lightly season the chicken pieces with salt and pepper before adding them to the pot.

    Serving Ideas & Creative Variations

    Perfect Pairings for a Complete Meal

    This soup deserves thoughtful accompaniments that complement its creamy richness. My favorite pairing is a rustic garlic bread with a crispy exterior and soft interior – perfect for dipping into that velvety broth. For a lighter option, a simple arugula salad with lemon vinaigrette provides a peppery contrast that cuts through the richness. When serving for guests, I present the soup in hollowed-out sourdough bread bowls for that wow factor. The bread gradually soaks up the soup, becoming an edible part of the meal that no one can resist.

    Customizing Your Soup Experience

    The beauty of this Crock Pot Creamy Chicken Parmesan Soup is how adaptable it is to different preferences. For a heartier version, add cooked pasta (I recommend small shapes like orzo or ditalini) during the last 15 minutes. Vegetable lovers can boost the nutritional value by stirring in baby spinach or kale just before serving – they’ll wilt perfectly in the hot soup. For a spicy kick, add red pepper flakes or try substituting some of the Parmesan with pepper jack cheese for a fusion twist that will surprise your taste buds.

    Storage & Troubleshooting Guide

    Keeping Leftovers at Their Best

    This soup makes fantastic leftovers, but proper storage is key to maintaining that creamy texture. Allow the soup to cool completely before transferring to airtight containers. It will keep in the refrigerator for up to 3 days. When reheating, do so gently over low heat, stirring frequently to prevent separation. I find that adding a splash of fresh cream during reheating helps restore the original silky texture. For longer storage, you can freeze portions for up to 2 months, though the texture may change slightly upon thawing.

    Fixing Common Soup Issues

    If your soup turns out thinner than you’d prefer, there are several easy fixes. My go-to solution is to create a quick slurry with 1 tablespoon cornstarch mixed with 2 tablespoons cold water, then slowly stir it into the simmering soup. For a richer flavor correction, try adding more freshly grated Parmesan (never the pre-grated kind, which contains anti-caking agents). If your soup seems too thick, simply thin it with a bit of chicken broth. Remember that the soup will continue to thicken as it cools, so adjust accordingly.

    Frequently Asked Questions

    Can I use boneless chicken thighs instead of breasts?

    Absolutely! Chicken thighs work beautifully and often provide more flavor and moisture. Just trim excess fat first and expect a slightly richer result that many soup lovers actually prefer.

    How can I make this Crock Pot Creamy Chicken Parmesan Soup gluten-free?

    Replace regular flour with a 1:1 gluten-free flour blend for thickening, and double-check your chicken broth and Italian seasoning for hidden gluten. The rest of the ingredients are naturally gluten-free.

    Can I prep this the night before?

    Yes! Combine all ingredients except dairy products in the crock pot insert, cover and refrigerate overnight. In the morning, place in the cooker base and proceed with the recipe.

    What’s the best cheese to use?

    Freshly grated Parmesan provides the most authentic flavor, but a mixture of Parmesan and Romano adds complexity. Avoid pre-shredded varieties as they contain anti-caking agents that prevent proper melting.

    Can I make this soup dairy-free?

    Substitute coconut cream for heavy cream and nutritional yeast for Parmesan cheese. The flavor profile will change slightly, but you’ll still achieve a creamy, satisfying result.

    Final Thoughts

    This Crock Pot Creamy Chicken Parmesan Soup has become my cold-weather lifeline – the recipe friends constantly request and family members have come to expect when they visit during winter months. There’s something about the combination of tender chicken, rich broth, and melted Parmesan that speaks directly to the soul. I’ve watched even the pickiest eaters go back for seconds, and nothing makes me happier than seeing empty bowls around my table. For more cozy recipes that bring people together, visit my Pinterest collection where I’m always adding new comfort food inspirations.

  • Upside Down Orange Cake Recipe That Will Wow Your Taste Buds!

    Upside Down Orange Cake Recipe That Will Wow Your Taste Buds!

    Upside Down Orange Cake Recipe That Will Wow Your Taste Buds!

    This Upside Down Orange Cake Recipe transforms simple ingredients into a showstopping dessert that balances sweet caramelized oranges with tender, buttery cake. The first time I made this for my sister’s birthday brunch, everyone fell silent as they took their first bites – that magical moment when a dessert speaks for itself! The vibrant citrus aroma fills your kitchen while baking, promising the perfect balance of tangy and sweet flavors. Unlike traditional pineapple versions, the orange slices create a stunning sunburst pattern that’s both elegant and rustic. If you enjoy fruit-forward desserts like my cranberry pineapple upside down cake, this citrusy variation will absolutely win your heart.

    Recipe

    Why You’ll Love This Upside Down Orange Cake Recipe

    Perfect Balance of Flavors and Textures

    There’s something utterly magical about the caramelized orange layer that forms on top of this cake. The citrus slices develop a jammy, candied quality as they bake in butter and sugar, creating this gorgeous amber glaze that seeps slightly into the cake. Meanwhile, the cake itself stays incredibly moist with a tender crumb that practically melts in your mouth. I’ve added a hint of cardamom to complement the orange – it’s subtle but adds this warm, aromatic dimension that makes people wonder what your secret ingredient might be. The contrast between the slightly chewy caramelized fruit and the soft, vanilla-scented cake is simply irresistible.

    Simple Ingredients, Impressive Results

    What I adore about this upside down orange cake recipe is how it transforms everyday ingredients into something that looks professionally made. You likely have most items already in your pantry – flour, sugar, eggs, butter – plus some fresh oranges. The technique is straightforward too; no fancy equipment required beyond a basic cake pan. Yet the result is this stunning showstopper that makes everyone think you spent hours in the kitchen. I’ve brought this to potlucks and family gatherings, and it consistently earns more compliments than desserts that took three times the effort. It’s that perfect recipe to keep in your back pocket for when you need something special without the stress.

    Essential Tips & Tricks

    Perfecting the Orange Layer

    The secret to a picture-perfect upside down orange cake lies in how you prepare the fruit layer. I recommend slicing your oranges about 1/4-inch thick – too thin and they’ll disintegrate, too thick and they won’t caramelize properly. Remove as much of the white pith as possible since it can add bitterness. When arranging the slices, slightly overlap them in a pretty pattern, knowing they’ll shrink a bit during baking. For the caramel base, melt the butter and sugar together until just combined – don’t let it brown yet as it will continue caramelizing in the oven. This foundation is what creates that gorgeous sticky-sweet topping that makes everyone swoon.

    Achieving the Perfect Cake Texture

    The cake portion deserves just as much attention as the pretty orange top! For an exceptionally tender crumb, make sure all refrigerated ingredients come to room temperature before mixing. This creates a smoother batter and more even rise. When incorporating the dry ingredients, use a gentle hand – overmixing activates gluten and leads to a tough cake. I like to alternate adding dry ingredients and liquid (orange juice and milk) to maintain the perfect consistency. For an extra moist result, add 2 tablespoons of Greek yogurt to your batter – it’s my little secret that makes all the difference without altering the flavor.

    Serving Ideas & Creative Variations

    Elegant Presentation Options

    This upside down orange cake creates quite the impression when served warm with a dollop of whipped cream gently melting into the caramelized fruit. For special occasions, I like to dust the edges with powdered sugar and garnish with fresh mint leaves for a color contrast that makes the orange really pop. If you’re feeling particularly fancy, warm some orange marmalade and brush it over the fruit layer for an extra glossy finish that catches the light beautifully. Serve slices on warmed plates with a light drizzle of honey and a sprinkle of toasted almonds. The cake pairs wonderfully with afternoon tea or as the sweet finale to a Mediterranean-inspired dinner.

    Seasonal and Dietary Adaptations

    The beauty of this recipe is how easily it adapts to different flavor profiles and dietary needs. For a tropical twist, substitute half the oranges with thinly sliced pineapple or add a sprinkle of shredded coconut to the batter. Blood oranges create a stunning ruby-hued version perfect for Valentine’s Day or winter gatherings. For gluten-free guests, swap in a quality gluten-free flour blend – I’ve tested this substitution multiple times with excellent results. To reduce sugar, try using coconut sugar in the caramel layer and reducing the cake sugar by 1/4 cup. The natural sweetness of the oranges helps compensate for any reduction.

    Storage & Troubleshooting Guide

    Keeping Your Cake Fresh

    This upside down orange cake maintains its delicious moisture for several days when stored properly. Once completely cooled, cover the cake with a cake dome or place it in an airtight container at room temperature for up to 2 days. For longer storage, refrigerate for up to 5 days, though the texture is best within the first 72 hours. I recommend bringing refrigerated slices to room temperature before serving to revive that soft, tender crumb. If you want to freeze portions, wrap individual slices tightly in plastic wrap and then foil, and freeze for up to 3 months. Thaw overnight in the refrigerator and warm gently in the microwave for 15-20 seconds.

    Solving Common Baking Issues

    If your cake doesn’t release easily from the pan, don’t panic! This is the most common issue with upside down cakes. First, make sure you’ve let it cool for exactly 10 minutes – not more, not less. Run a thin knife around the edges before inverting. If it’s still stuck, place a warm, damp towel on the bottom of the pan for a minute to loosen the caramelized sugar. For future bakes, try using parchment paper in the bottom of your well-greased pan. If your oranges float or shift during baking, they were likely placed too loosely. Next time, arrange them more snugly and pat them dry before placing them in the caramel mixture.

    Frequently Asked Questions

    Can I use different citrus fruits for this upside down orange cake recipe?

    Absolutely! Mandarins create a sweeter cake, while grapefruit offers a tangy twist. Blood oranges make a stunning ruby-colored top. Just adjust sugar levels slightly depending on the fruit’s natural sweetness.

    How do I prevent the cake from becoming soggy?

    Ensure your orange slices are patted dry before arranging them. Also, let the cake cool in the pan for exactly 10 minutes before inverting – this allows the caramel to set without soaking too far into the cake.

    Can I make this cake a day ahead?

    Yes! It actually develops deeper flavor overnight. Store at room temperature under a cake dome or loosely covered with foil. The caramelized oranges keep the cake moist.

    Why did my caramel harden too quickly?

    Your stovetop heat was likely too high. Melt butter and sugar on low heat, stirring constantly. If it hardens in the pan, warm gently to re-melt before proceeding.

    Is this recipe suitable for high-altitude baking?

    For elevations above 3,500 feet, reduce baking powder by 1/4 teaspoon, increase oven temperature by 25°F, and reduce sugar by 1 tablespoon to maintain proper structure.

    Final Thoughts

    This Upside Down Orange Cake Recipe has become my signature dessert for good reason – it reliably delivers that perfect balance of impressive presentation and comforting, familiar flavors. There’s something almost magical about the moment you flip the cake to reveal that glistening orange crown. The recipe welcomes both beginners and experienced bakers, forgiving small mistakes while teaching valuable techniques. I hope you’ll share your creations with me on Pinterest – seeing your versions of this sunny, citrus-kissed cake always brightens my day!

  • Chicken Shawarma with Yogurt Sauce: Irresistibly Flavorful & Juicy!

    Chicken Shawarma with Yogurt Sauce: Irresistibly Flavorful & Juicy!

    Chicken Shawarma with Yogurt Sauce: Irresistibly Flavorful & Juicy!

    Chicken Shawarma with Yogurt Sauce is one of those magical meals that transports you straight to the bustling streets of the Middle East with just one bite. The tender, marinated chicken wrapped in warm flatbread and drizzled with cooling yogurt sauce has become my go-to when I want to impress without spending hours in the kitchen. I first fell in love with this dish during a rainy Tuesday when the aromatic spices filled my apartment and instantly lifted my mood. If you’re craving something that balances bold flavors with comfort, this recipe is about to become your new obsession.

    Why You’ll Love This Chicken Shawarma with Yogurt Sauce

    Perfect Balance of Flavors and Textures

    There’s something utterly magical about the way the warm spices coat each piece of chicken, creating a gorgeous crust on the outside while keeping the meat incredibly juicy inside. The marinade—a heavenly blend of cumin, paprika, turmeric, and cinnamon—infuses the chicken with layers of flavor that simply can’t be rushed. I love how the tangy yogurt sauce creates the perfect cooling counterpoint to the spiced meat. It’s that beautiful dance between warm spices and cool, creamy sauce that makes each bite a perfect balance of textures and temperatures.

    Quick Prep with Maximum Impact

    Despite its impressive flavor profile, this Chicken Shawarma with Yogurt Sauce is surprisingly weeknight-friendly. The hands-on prep takes just 15 minutes, then your marinade does all the heavy lifting. I’ve found that even a quick 30-minute marinade works in a pinch, though letting it sit overnight truly transforms the dish. What I adore most is how this recipe delivers restaurant-quality results without specialized equipment. No vertical rotisserie needed—just a sheet pan and your trusty oven. It’s the perfect solution when you’re craving something special but don’t have hours to spend in the kitchen.

    Essential Tips & Tricks

    Mastering the Marinade

    The marinade is where the true magic happens in this Chicken Shawarma recipe. For maximum flavor penetration, I recommend slicing your chicken thighs into even strips before marinating—this increases the surface area exposed to those gorgeous spices. A zip-top bag works wonders here; it allows you to massage the marinade into every nook and cranny. Don’t skimp on the lemon juice—it not only adds brightness but also helps tenderize the meat. If you’re short on time, even 30 minutes will work, but overnight marination transforms the chicken into something truly extraordinary.

    Perfecting the Yogurt Sauce

    The yogurt sauce isn’t just a condiment—it’s an essential component that brings the entire dish together. Start with full-fat Greek yogurt for the creamiest, most luscious texture. When mixing your sauce, add the lemon juice gradually while tasting; you want a pleasant tanginess without overwhelming the delicate cucumber and garlic notes. My secret touch is adding a pinch of sumac for a subtle lemony depth that makes guests wonder what your secret ingredient might be. Always make your sauce at least 30 minutes before serving to allow the flavors to meld and develop, resulting in a more complex and satisfying flavor profile.

    Serving Ideas & Creative Variations

    Building the Perfect Shawarma Wrap

    Creating the ultimate shawarma experience is all about thoughtful layering and assembly. Start with warm, slightly charred flatbread—I quickly pass mine over an open flame for 10 seconds per side. Spread a generous layer of yogurt sauce, then add your shawarma chicken, making sure to include some of those crispy bits from the edges. Add thinly sliced red onion, fresh tomatoes, and crisp cucumber for textural contrast. My personal touch is adding a few pickled vegetables for brightness. Finish with a sprinkle of fresh herbs—parsley, mint, or both—before rolling everything into a tight bundle. The key is not overstuffing so it stays intact with each delicious bite.

    Beyond the Wrap: Creative Serving Options

    While traditional wraps are divine, this Chicken Shawarma with Yogurt Sauce shines in so many versatile applications. Try creating a shawarma bowl with fragrant rice, roasted vegetables, and plenty of sauce drizzled over top. For a lighter option, serve over a bed of crisp romaine with cherry tomatoes, cucumber, and crumbled feta for a Mediterranean-inspired salad. When entertaining, I set up a DIY shawarma bar with all the components arranged separately, allowing guests to build their perfect combination. For a fun fusion twist, use the chicken and sauce to top homemade pizza with mozzarella and red onion—the results are surprisingly delicious!

    Storage & Troubleshooting Guide

    Proper Storage for Maximum Freshness

    To maintain the vibrant flavors of your Chicken Shawarma, proper storage is essential. Store the cooked chicken separate from the yogurt sauce in airtight containers in the refrigerator. The chicken will stay delicious for up to 3 days, while the yogurt sauce remains fresh for about 5 days. For meal prep, I recommend storing the components separately—chicken, sauce, and toppings—and assembling just before eating. If freezing, only freeze the marinated raw chicken (up to 3 months) or the cooked chicken without sauce (up to 2 months). The yogurt sauce doesn’t freeze well, so always make that fresh. When reheating, a quick sauté in a hot pan preserves moisture better than microwaving.

    Fixing Common Shawarma Challenges

    Even experienced cooks encounter occasional hiccups, but most shawarma issues have simple solutions. If your chicken turns out dry, it was likely overcooked—next time, check it earlier and remove it from the oven when it reaches 165°F (74°C). For chicken that lacks flavor, your marinade time was probably too short; aim for at least 2 hours, preferably overnight. If your yogurt sauce breaks or becomes watery, it might be due to excess moisture from the cucumber—try salting and draining the cucumber before adding it, or use a thicker Greek yogurt as your base. Should your flatbread crack when rolling, warm it slightly or lightly dampen it with water before filling to increase flexibility.

    Frequently Asked Questions

    Can I make Chicken Shawarma with Yogurt Sauce ahead of time?

    Absolutely! Marinate the chicken up to 24 hours ahead, and prepare the yogurt sauce up to 2 days in advance. Store separately in the refrigerator and assemble just before serving for the freshest experience.

    What’s the best cut of chicken for shawarma?

    Boneless, skinless chicken thighs are ideal as they stay juicy and tender after cooking. Their higher fat content absorbs the marinade beautifully, creating more flavorful results than leaner breast meat.

    Can I make this recipe dairy-free?

    Yes! Substitute the yogurt sauce with a dairy-free alternative using coconut yogurt or tahini sauce. For tahini sauce, blend tahini with lemon juice, garlic, water, and a pinch of salt until smooth.

    How can I make Chicken Shawarma with Yogurt Sauce spicier?

    Add cayenne pepper or red pepper flakes to your marinade. For extra heat in the yogurt sauce, incorporate a finely minced jalapeño or a dash of hot sauce to taste.

    What’s the difference between shawarma and gyro?

    While both are seasoned meat cooked on a vertical rotisserie, shawarma originates from the Middle East with warm spices like cumin and turmeric, while gyro is Greek, typically seasoned with oregano and served with tzatziki sauce.

    Final Thoughts

    This Chicken Shawarma with Yogurt Sauce recipe brings the vibrant flavors of Middle Eastern street food right to your kitchen with surprising ease. What I love most is how it transforms ordinary ingredients into something extraordinary through the magic of spices and technique. The joy on my family’s faces when I bring this to the table reminds me why cooking is such a powerful way to create memories. Whether you’re serving it for a casual weeknight dinner or special gathering, this shawarma recipe delivers restaurant-quality results that will have everyone reaching for seconds. Don’t forget to check out more delicious recipes on our Pinterest page!

  • Delicious Vanilla Berry Cheesecake That Everyone’s Craving!

    Delicious Vanilla Berry Cheesecake That Everyone’s Craving!

    Delicious Vanilla Berry Cheesecake That Everyone’s Craving!

    This Delicious Vanilla Berry Cheesecake is my absolute pride and joy – a dessert that makes me weak in the knees every single time. The first bite takes me back to summer evenings on my grandmother’s porch, where dessert was always the main event. The contrast between the silky vanilla filling and the sweet-tart berry swirl creates a symphony of flavors that dance across your taste buds. I’ve perfected this recipe through countless iterations, and I’m thrilled to finally share my secret technique for achieving that perfect crack-free top and velvety texture that will have your guests begging for the recipe. Let’s dive in!

    Recipe

    Why You’ll Love This Delicious Vanilla Berry Cheesecake

    Perfect Balance of Flavors

    There’s something magical about the combination of creamy vanilla and bright berries that simply works on every level. The richness of the cheesecake base provides the perfect canvas for the fruity swirls to shine. I’ve carefully calibrated the sweetness so neither element overpowers the other. The graham cracker crust adds that necessary textural contrast with its subtle hint of cinnamon and honey notes. When my neighbor Jen first tried this, she closed her eyes and whispered, “I can taste summer in every bite.” That’s exactly the sensation I was aiming for!

    Impressive Yet Achievable

    Don’t let the stunning appearance fool you – this cheesecake is surprisingly approachable for bakers of all skill levels. The step-by-step method I’ve developed eliminates common pitfalls like cracking and sinking centers. The berry swirl looks intricate but requires just a simple technique with a toothpick or skewer. I remember my first attempt at a cheesecake years ago – a complete disaster with more cracks than the Grand Canyon! This recipe changed everything for me. The slow cooling method is truly foolproof, giving you professional-looking results every single time.

    Essential Tips & Tricks

    The Room Temperature Rule

    The single most important secret to cheesecake success is ensuring all your ingredients are at room temperature before you begin. Cold cream cheese will never fully incorporate, leaving you with those dreaded lumps that ruin the silky texture. I learned this lesson the hard way after rushing through preparation for a dinner party. Set your ingredients out at least two hours before baking. The patience pays off! For the berries, fresh is wonderful when in season, but high-quality frozen berries work beautifully too – just be sure to thaw and drain them thoroughly to prevent excess moisture from affecting your cheesecake’s texture.

    The Water Bath Method

    A water bath is non-negotiable for achieving that dreamy texture we all crave. The gentle, moist heat prevents the edges from cooking too quickly and helps maintain an even temperature throughout. Double-wrap your springform pan with heavy-duty aluminum foil to prevent any water from seeping in. I once skipped this step and ended up with a soggy crust that still haunts me! Place the wrapped pan in a larger roasting pan and add hot water halfway up the sides. This simple step makes all the difference between an ordinary cheesecake and one that melts in your mouth like velvet.

    Serving Ideas & Creative Variations

    Seasonal Adaptations

    The beauty of this Delicious Vanilla Berry Cheesecake lies in its versatility throughout the seasons. In summer, fresh strawberries, blueberries, and raspberries create a vibrant topping. Come fall, try incorporating spiced apple or pear compote with a drizzle of caramel. Winter holidays call for cranberry and orange with a hint of cinnamon. The base recipe remains your faithful canvas for creativity! I’ve even created a stunning Christmas version with a white chocolate drizzle and sugared cranberries that became our family’s holiday tradition – the red and white contrast is absolutely showstopping.

    Elegant Presentation Touches

    Elevate your cheesecake with simple but impactful garnishes that transform it from delicious to unforgettable. A light dusting of powdered sugar creates a snow-like effect that’s particularly beautiful over berries. Chocolate curls add sophistication and pair wonderfully with the vanilla base. For special occasions, I love adding edible flowers or gold leaf for a truly spectacular presentation. My daughter’s bridal shower featured mini versions of this cheesecake with candied violet petals – the guests still talk about them years later! Remember, we eat with our eyes first.

    Storage & Troubleshooting Guide

    Proper Chilling and Storage

    The hardest part of making this Delicious Vanilla Berry Cheesecake might be the waiting period. After baking, it needs at least 8 hours in the refrigerator to set properly – overnight is ideal. Store leftovers covered in the refrigerator for up to 5 days, though I’d be shocked if it lasts that long! For freezing, wrap individual slices tightly in plastic wrap, then foil, and freeze for up to 3 months. I always keep a few slices frozen for emergency dessert situations (we all have those, right?). Let frozen slices thaw overnight in the refrigerator for the best texture.

    Rescuing Common Issues

    Even experienced bakers encounter cheesecake challenges, but most are easily fixable. If your cheesecake cracks despite your best efforts, don’t panic! Simply top it with fresh berries or a berry compote – no one will ever know. If your crust seems too crumbly, a quick fix is pressing it more firmly before baking. For a filling that’s too soft, extend refrigeration time or pop it in the freezer for 30 minutes before serving. I once salvaged an undercooked center by transforming the entire dessert into parfaits – my guests thought it was intentional and loved the deconstructed approach!

    Frequently Asked Questions

    Can I make this Delicious Vanilla Berry Cheesecake without a springform pan?

    You can use a regular cake pan lined with parchment paper with long overhanging edges to help lift it out. The presentation won’t be as clean, but the flavor remains divine!

    How do I prevent my cheesecake from cracking?

    Avoid overmixing (which incorporates air), use a water bath, and never skip the slow cooling process. Turn off the oven when done and leave the door slightly ajar for an hour before removing.

    Can I substitute Greek yogurt for some of the cream cheese?

    Absolutely! Replace up to 1/3 of the cream cheese with full-fat Greek yogurt for a lighter texture and slight tanginess that complements the berries beautifully.

    Is this recipe suitable for making mini cheesecakes?

    Yes! Use a muffin tin with liners and reduce baking time to about 20-25 minutes. Perfect for portion control and gatherings.

    How far in advance can I make this cheesecake?

    You can make this cheesecake up to three days ahead. Store it covered in the refrigerator and add any fresh toppings just before serving.

    Final Thoughts

    This Delicious Vanilla Berry Cheesecake has become my signature dessert for good reason – it consistently delivers that perfect balance of impressive presentation and unforgettable flavor. The contrast between the velvety vanilla filling and vibrant berry swirls creates a dessert that’s both visually stunning and incredibly satisfying. I hope you’ll create your own memories around this recipe, perhaps starting a sweet tradition of your own. Don’t forget to share your creations on Pinterest – I’d love to see your personal spin on this beloved classic!