Author: Darleen Vance

  • Lentil Stew with Velvety Mashed Potatoes: Cozy Comfort Food Bliss

    Lentil Stew with Velvety Mashed Potatoes: Cozy Comfort Food Bliss

    Lentil Stew with Velvety Mashed Potatoes: Cozy Comfort Food Bliss

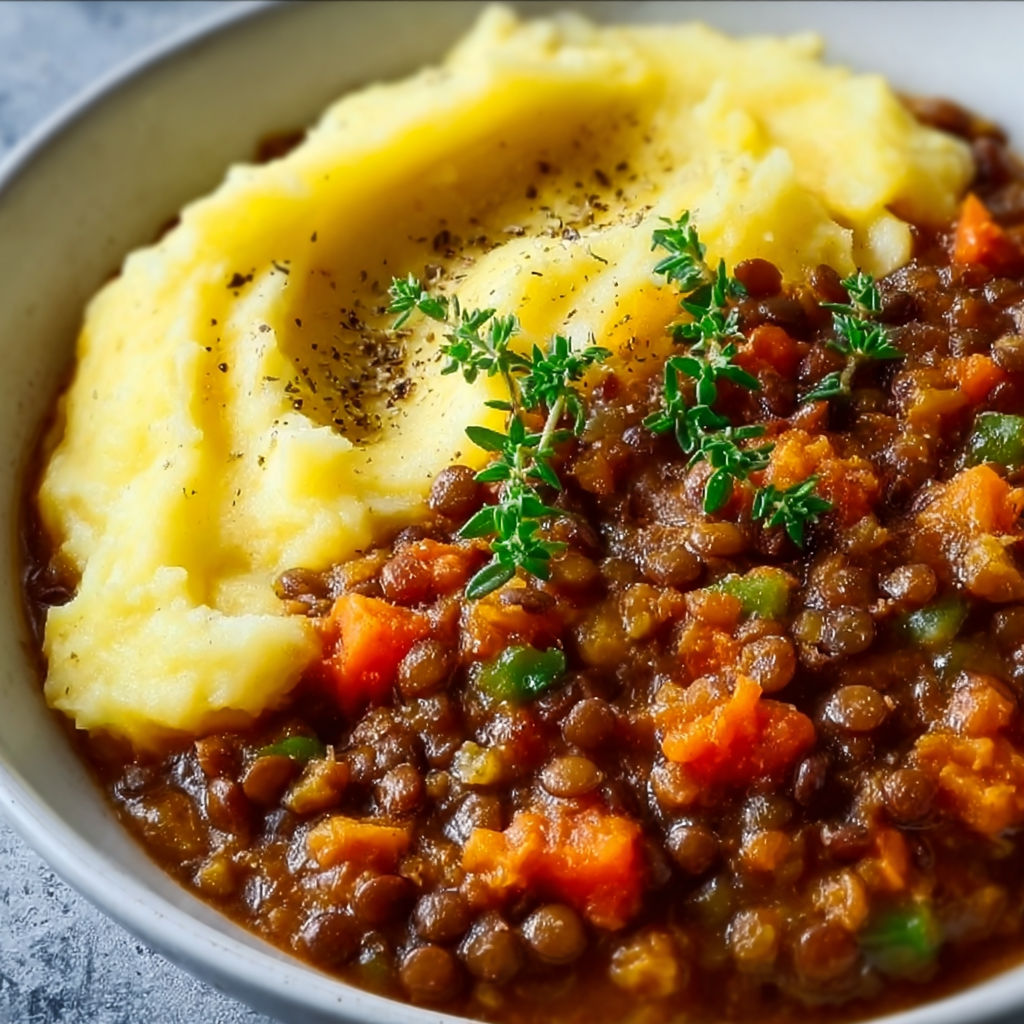
    Lentil Stew with Velvety Mashed Potatoes is my ultimate comfort food creation that wraps you in warmth with every spoonful. The first time I made this, snowflakes were dancing outside my kitchen window, and I needed something that would feel like a hug in a bowl. The hearty lentils simmer with aromatic vegetables until they create a rich, savory base, while the cloud-like mashed potatoes provide the perfect creamy contrast. I’ve perfected this recipe through countless winter evenings, and now it’s become my family’s most requested meal when the temperatures drop. Trust me, this isn’t just dinner—it’s an experience that engages all your senses.

    Recipe

    Why You’ll Love This Lentil Stew with Velvety Mashed Potatoes

    A Nutritional Powerhouse

    This dish isn’t just delicious—it’s incredibly nutrient-dense. The lentils pack a serious protein punch (about 18g per cup!) while providing fiber that keeps you satisfied for hours. I love how the combination of lentils with carrots, celery, and onions creates a complete meal that doesn’t leave you hunting through the pantry an hour later. The potatoes add that comforting starchy element we all crave, but they’re actually loaded with potassium and vitamin C. It’s the rare comfort food that makes your body feel as good as your taste buds.

    Budget-Friendly Comfort

    There’s something deeply satisfying about creating a show-stopping meal from humble ingredients. This lentil stew costs mere pennies per serving—I calculated roughly $1.50 per portion for the entire dish! Yet the depth of flavor rivals restaurant meals costing five times as much. During those end-of-month budget stretches, this recipe has saved me countless times while never feeling like a compromise. The ingredients store beautifully too, making this the perfect pantry meal when grocery day seems far away.

    Essential Tips & Tricks

    The Perfect Lentil Texture

    The secret to extraordinary lentil stew is all in the cooking technique. I learned the hard way that adding salt too early can make lentils tough and unyielding—now I wait until they’re tender before seasoning. For this recipe, brown or green lentils work best as they hold their shape while still becoming tender. A splash of acid (vinegar or lemon juice) added right at the end brightens everything and cuts through the richness. And don’t rush the simmering process—those extra 15 minutes transform good stew into something magical as the flavors meld together.

    Achieving Cloud-Like Mashed Potatoes

    The counterpart to our hearty stew deserves equal attention. For truly velvety potatoes, Yukon Golds are my non-negotiable choice—their natural buttery flavor and creamy texture create the perfect base. Always start potatoes in cold water (never hot!) and add a generous pinch of salt to the cooking water. For the ultimate silky texture, warm your milk and butter together before adding them to the potatoes. Looking for more potato inspiration? My Crockpot Loaded Mashed Potato Casserole takes these principles to new heights.

    Serving Ideas & Creative Variations

    Perfect Pairings

    This lentil stew with velvety mashed potatoes stands beautifully on its own, but sometimes I like to elevate the experience with thoughtful accompaniments. A simple side of quick-pickled red onions adds bright acidity and crunch that cuts through the richness. For special occasions, a crusty sourdough bread for dipping is non-negotiable in my house. A crisp green salad dressed with lemon vinaigrette provides refreshing contrast—try my Mediterranean Lentil Salad for inspiration on complementary flavors that work beautifully with this main dish.

    Seasonal Adaptations

    One reason I return to this recipe year-round is its versatility across seasons. In summer, I fold fresh herbs like basil and oregano into the potatoes and top the stew with garden tomatoes. Fall calls for adding roasted butternut squash cubes and sage. Winter versions might include a splash of red wine and rosemary. Spring brings tender asparagus tips and fresh peas stirred in during the final minutes of cooking. The core recipe remains the same, but these seasonal touches keep it feeling fresh and aligned with what’s available at the market.

    Storage & Troubleshooting Guide

    Make-Ahead and Freezing Tips

    This lentil stew with velvety mashed potatoes is a meal-prep champion. The stew portion actually improves after a day in the refrigerator as the flavors meld together. Store components separately—potatoes in one container, stew in another—for up to 4 days. For freezing, focus on the lentil stew (potatoes can become grainy when frozen). Cool completely before transferring to freezer containers, leaving a half-inch of headspace. Label with the date and use within 3 months for best quality. Thaw overnight in the refrigerator and make fresh potatoes for serving.

    Fixing Common Issues

    Even experienced cooks encounter challenges! If your lentil stew seems too watery, remove the lid and simmer for 10-15 minutes to reduce. Too thick? Add vegetable broth a quarter cup at a time. For gummy potatoes, the likely culprit is over-mixing—next time, use a gentler hand and stop mashing once they’re smooth. Bland flavor is easily fixed with a splash of vinegar, extra herbs, or nutritional yeast for umami depth. Remember that both components can be revived with careful adjustments even after storage.

    Frequently Asked Questions

    Can I use red lentils for this lentil stew with velvety mashed potatoes?

    Red lentils cook much faster and break down completely. While they won’t provide the same texture, they create a creamier stew. Reduce cooking time to 20 minutes and expect a more soup-like consistency.

    Are these mashed potatoes dairy-free?

    They can be! Substitute plant-based butter and warm oat milk or coconut milk for traditional dairy. Add a splash of olive oil for richness. The texture remains wonderfully velvety with these alternatives.

    Can I make this recipe in a slow cooker?

    Absolutely! Add all stew ingredients except vinegar to your slow cooker. Cook on low for 6-7 hours or high for 3-4 hours. Make potatoes separately and add vinegar to stew just before serving.

    What’s the best way to reheat this dish?

    Reheat the stew on the stovetop over medium-low heat with a splash of broth. For potatoes, warm gently with a little extra milk or butter, stirring occasionally to restore creaminess.

    Can I add meat to this vegetarian recipe?

    Yes! Brown 8oz of ground turkey, beef, or Italian sausage before adding the vegetables. This adds protein and a different flavor profile while maintaining the comfort-food appeal.

    Final Thoughts

    This Lentil Stew with Velvety Mashed Potatoes has become more than just a recipe in my kitchen—it’s a reliable friend that shows up when comfort is needed most. The contrast between the hearty, savory lentils and the cloud-like potatoes creates a perfect harmony on your plate and palate. I’d love to see how you make this recipe your own! Share your creations on Pinterest and tag me so I can admire your twist on this beloved dish. Every time I make it, I’m reminded that the most satisfying meals often come from the simplest ingredients.

  • Brownie Bottom Mini Cheesecakes: Irresistibly Decadent Bites!

    Brownie Bottom Mini Cheesecakes: Irresistibly Decadent Bites!

    Brownie Bottom Mini Cheesecakes: Irresistibly Decadent Bites!

    These Brownie Bottom Mini Cheesecakes are my little secret weapon for dinner parties that leave everyone begging for the recipe. Imagine sinking your fork through a cloud of creamy vanilla cheesecake only to discover a fudgy brownie surprise waiting underneath. The contrast between the rich chocolate base and the light, tangy cheesecake topping creates pure magic in every bite. I first made these for my sister’s birthday gathering, and now they’ve become my most-requested dessert. Perfect for special occasions or when you simply need a decadent treat that looks impressive but requires surprisingly little effort.

    Recipe

    Why You’ll Love These Brownie Bottom Mini Cheesecakes

    Perfect Portion Control

    These mini cheesecakes offer the perfect single-serving dessert that satisfies without overwhelming. Each little cake delivers the ideal ratio of brownie to cheesecake in every bite. I love how they eliminate the anxiety of cutting a full-sized cheesecake (we’ve all experienced those messy first slices!). Plus, they’re incredibly versatile for entertaining – serve them on a pretty platter for dinner parties or pack them individually for picnics. The individual portions also mean you can easily freeze extras for those emergency chocolate cravings that inevitably strike at 10 pm on a Tuesday.

    Make-Ahead Convenience

    One of my favorite aspects of these treats is their impressive shelf life. You can prepare them up to three days before serving, making them perfect for busy hosts. The flavors actually develop beautifully as they chill, with the brownie base becoming even more fudgy and the cheesecake layer deepening in flavor. I often make them on Thursday for Saturday gatherings, which frees up my time for other preparations. The mini size also means they thaw quickly if you’ve frozen them, giving you a delicious dessert option even when unexpected guests arrive. Their make-ahead nature has saved my hosting reputation countless times!

    Essential Tips & Tricks

    Perfect Brownie Base

    The secret to a fudgy foundation lies in slightly underbaking your brownie layer. I’ve found that 7-8 minutes is the sweet spot – just enough to set the edges while keeping the center slightly gooey. Room temperature ingredients are non-negotiable here; cold eggs or butter will create a dense, tough brownie instead of that melt-in-your-mouth texture we’re after. For an extra flavor boost, try adding a teaspoon of espresso powder to enhance the chocolate notes without tasting like coffee. This tiny addition amplifies the richness in a way that makes people wonder what your secret ingredient might be.

    Creamy Cheesecake Success

    The key to silky, crack-free cheesecakes is gentle mixing and proper temperature control. Always bring your cream cheese to room temperature before beginning – I place mine on the counter for at least an hour before baking. Overmixing introduces air bubbles that can cause cracks, so mix just until ingredients are combined. For ultimate creaminess, try adding a tablespoon of sour cream to your batter. A water bath isn’t necessary for these minis, but cooling them gradually prevents the dreaded center sink – I turn off the oven and leave the door cracked for 10 minutes before removing them.

    Serving Ideas & Creative Variations

    Seasonal Toppings

    Transform these mini delights throughout the year with seasonal garnishes that keep the recipe fresh and exciting. In summer, nothing beats fresh berries macerated with a touch of sugar and lemon zest – the bright acidity cuts through the richness perfectly. Fall calls for caramel drizzle and toasted pecans, while winter holidays shine with crushed peppermint and chocolate ganache. I recently served these at a spring brunch with lemon curd and fresh blueberries, and my friend’s seven-year-old declared them “better than birthday cake!” For a quick elegant finish, dust with cocoa powder using a small paper doily as a stencil.

    Flavor Twists

    The basic recipe serves as a perfect canvas for creative variations that can match any occasion or craving. Swap the vanilla extract in the cheesecake layer for almond, orange, or even coconut extract for an entirely new profile. For a mocha version, add espresso powder to both layers. My personal favorite twist involves adding crushed Biscoff cookies to the brownie base and a tablespoon of cookie butter to the cheesecake mixture. For a festive touch, fold mini chocolate chips, crushed candy bars, or swirls of fruit preserves into the cheesecake batter before baking.

    Storage & Troubleshooting Guide

    Proper Storage

    These mini cheesecakes maintain their perfect texture when stored properly. Keep them refrigerated in an airtight container for up to five days – though they rarely last that long in my house! For longer storage, freeze them uncovered until solid, then wrap individually in plastic wrap and store in a freezer bag for up to three months. I label mine with the date to avoid mystery desserts. When ready to serve, thaw in the refrigerator overnight or at room temperature for about an hour. Avoid microwaving, which can make the texture grainy and melt the brownie base unevenly.

    Common Pitfalls

    The most frequent issue bakers encounter is sunken centers in their cheesecakes. This typically happens from overmixing (which incorporates too much air) or dramatic temperature changes. Mix just until ingredients combine and cool gradually as described earlier. If your brownie layer is too hard, you likely overbaked it – remember, it will continue cooking slightly when you add the cheesecake batter. For cheesecakes that stick to the pan, make sure you’re properly greasing the cups or using liners. If disaster strikes and they crack, simply top with fresh fruit, whipped cream, or ganache – no one will ever know!

    Frequently Asked Questions

    Can I make Brownie Bottom Mini Cheesecakes without a special pan?

    Absolutely! Standard muffin tins work perfectly with paper or foil liners. For extra easy removal, spray the liners lightly with cooking spray before adding the brownie batter.

    How do I know when the cheesecakes are fully baked?

    They’re done when the edges are set but the centers still have a slight jiggle – about 15-18 minutes. They’ll continue setting as they cool. Overbaking leads to cracks and dry texture.

    Can I use boxed brownie mix for the base?

    Yes! Prepare according to package directions but reduce the water slightly for a fudgier texture. This shortcut works beautifully when you’re short on time.

    Are these freezer-friendly?

    Definitely! Freeze them uncovered until firm, then wrap individually and store in freezer bags for up to 3 months. Thaw in the refrigerator overnight before serving.

    What’s the best way to prevent my Brownie Bottom Mini Cheesecakes from cracking?

    Avoid overmixing, bake at the correct temperature, and cool gradually. Turn off the oven, crack the door, and let them cool 10 minutes before removing them completely.

    Final Thoughts

    These Brownie Bottom Mini Cheesecakes have become my signature dessert for good reason – they combine two beloved classics into one perfect bite while being surprisingly simple to prepare. The contrast between fudgy brownie and creamy cheesecake creates a dessert that feels special enough for celebrations yet approachable enough for weeknight treats. I hope you’ll try them and experience the joy of watching someone take that first bite, eyes widening with delight at the unexpected brownie discovery. Don’t forget to check out more delicious inspiration on Pinterest for your next baking adventure!

  • Honey Mustard Beef Tenderloin Recipe That Will Melt Your Heart!

    Honey Mustard Beef Tenderloin Recipe That Will Melt Your Heart!

    Honey Mustard Beef Tenderloin Recipe That Will Melt Your Heart!

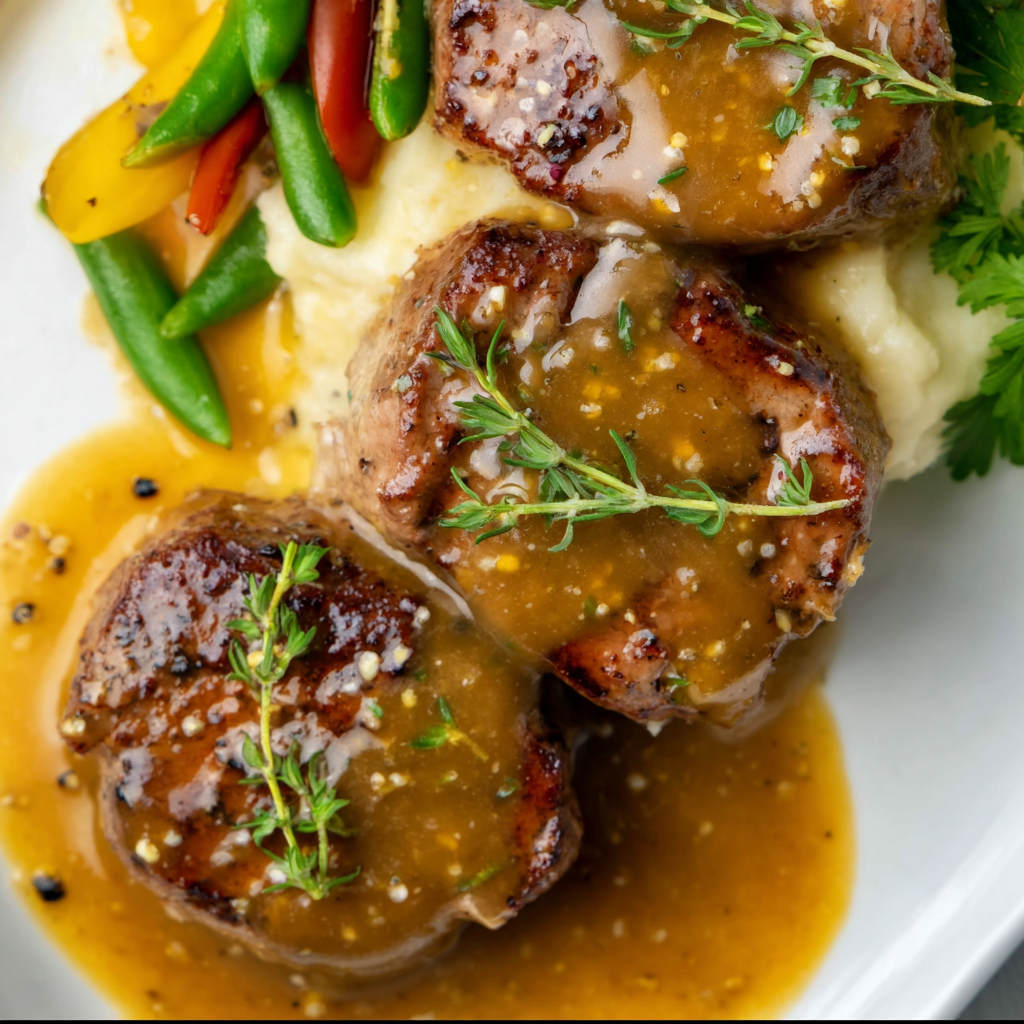
    The perfect Honey Mustard Beef Tenderloin delivers that magical combination of tender, melt-in-your-mouth beef with a sweet-tangy glaze that caramelizes beautifully during roasting. I discovered this recipe during a holiday dinner party where I was desperately trying to impress my in-laws (spoiler: it worked!). The rich, complex flavors from the honey and mustard create an irresistible crust around the buttery-soft tenderloin. This elegant centerpiece dish might look intimidating, but I promise it’s surprisingly simple to master—even for special occasions. If you enjoy the sweet-savory balance in main dishes, you’ll find this honey butter skillet corn recipe offers a similar flavor profile as a delicious side option.

    Recipe

    Why You’ll Love This Honey Mustard Beef Tenderloin

    Perfect Balance of Flavors

    The magic of this dish lies in its perfect harmony of flavors. Sweet honey mellows the pungent Dijon mustard, creating a glaze that’s both sophisticated and comforting. I love how the natural sugars caramelize during roasting, forming a beautiful crust that seals in the juices. The tenderloin itself remains incredibly moist, with that distinctive beef flavor shining through without being overwhelmed by the glaze. Each bite delivers that wonderful contrast between the caramelized exterior and the buttery-soft interior that simply melts on your tongue.

    Impressive Yet Effortless

    Don’t let the elegant appearance fool you—this is one of the most foolproof showstoppers in my recipe collection. I’ve prepared this for everything from holiday gatherings to impromptu dinner parties, and it never fails to draw compliments. The active prep time is minimal (just 15 minutes!), and the oven does most of the work. The beauty of tenderloin is its forgiving nature; the cut is naturally tender and cooks evenly. Even if you’re new to roasting meat, the clear visual cues make it nearly impossible to mess up. It’s the perfect recipe when you need to impress without spending hours in the kitchen.

    Essential Tips & Tricks

    Perfect Temperature Control

    Achieving the ideal doneness is all about temperature precision. I always recommend using a digital meat thermometer inserted into the thickest part of the tenderloin. For medium-rare perfection, remove the roast at 125°F (52°C) as it will continue cooking during rest. For medium, aim for 135°F (57°C). The most critical step is allowing the meat to rest for at least 10-15 minutes before slicing. This resting period lets the juices redistribute throughout the meat, ensuring each slice remains moist and tender. Don’t rush this step—it’s the difference between good and extraordinary results.

    Marinade Magic

    The marinade timing makes a significant difference in flavor development. While you can roast after just 30 minutes of marinating, I’ve found that 2-4 hours creates the perfect flavor infusion without overwhelming the meat’s natural taste. For make-ahead convenience, you can marinate overnight, but I don’t recommend going beyond 24 hours as the mustard’s acidity can start affecting the meat’s texture. When applying the marinade, use your hands to ensure even coverage, getting into all the nooks and crannies. Save a small portion of the marinade before adding it to the raw meat to brush on during the final roasting phase for an extra flavor boost.

    Serving Ideas & Creative Variations

    Perfect Pairings

    This tenderloin pairs beautifully with both rich and fresh sides. For holiday dinners, I love serving it with creamy mashed potatoes and roasted Brussels sprouts with bacon. The potatoes soak up the flavorful drippings while the sprouts provide a slight bitterness that balances the sweet glaze. For lighter meals, try a simple arugula salad with lemon vinaigrette or grilled chicken orzo salad (substitute the chicken with sliced tenderloin). Don’t forget a crusty bread to mop up the delicious sauce! A medium-bodied red wine like Pinot Noir or Merlot complements the flavors without overpowering them.

    Flavor Variations

    While the classic honey-Dijon combination is hard to beat, experimenting with flavor additions can create exciting variations. For a holiday twist, add 1 tablespoon of bourbon to the glaze along with orange zest and a pinch of cinnamon. For a more savory profile, incorporate 2 tablespoons of finely chopped rosemary and cracked black pepper into the marinade. My family loves the Asian-inspired version with 2 tablespoons of soy sauce, 1 tablespoon of grated ginger, and a drizzle of sesame oil added to the base recipe. These variations maintain the dish’s elegant character while offering new flavor experiences.

    Storage & Troubleshooting Guide

    Proper Storage

    Leftover honey mustard beef tenderloin should be properly stored to maintain its quality. Allow the meat to cool completely before refrigerating in an airtight container for up to 3 days. For best results when reheating, slice the tenderloin thinly and warm it gently in a skillet with a splash of beef broth to prevent drying. Alternatively, wrap slices in foil and heat in a 300°F oven until just warmed through. I don’t recommend freezing cooked tenderloin as it can affect the texture, but if necessary, wrap it tightly in freezer paper and use within 2 months, thawing overnight in the refrigerator.

    Common Issues Solved

    The most common challenge with beef tenderloin is uneven cooking. If you notice the thinner end cooking faster, shield it with foil while the thicker portion continues roasting. For a glaze that’s burning too quickly, lower the oven temperature by 25°F and tent the roast with foil. If your tenderloin seems tough, it’s likely overcooked—next time, use a meat thermometer and remove it earlier. For a too-mild flavor, brush additional glaze on the sliced meat before serving, or offer extra honey mustard sauce on the side. Remember that tenderloin is naturally lean, so don’t expect it to be as juicy as fattier cuts.

    Frequently Asked Questions

    What’s the best internal temperature for honey mustard beef tenderloin?

    For medium-rare, aim for 125-130°F before resting (final temp 130-135°F). For medium, remove at 135-140°F (final temp 140-145°F). Always use a meat thermometer for accuracy and let it rest for 10-15 minutes before slicing.

    Can I prepare honey mustard beef tenderloin in advance?

    Yes! You can marinate the tenderloin up to 24 hours ahead. For partially cooking ahead, roast until 10°F below your target temperature, then refrigerate. Finish roasting at 375°F for 15-20 minutes before serving.

    What mustard works best for this recipe?

    Dijon mustard provides the ideal balance of tang and depth. Whole-grain mustard adds interesting texture, while yellow mustard is too mild. For extra kick, mix Dijon with 1 tablespoon of spicy brown mustard.

    How do I carve a beef tenderloin properly?

    Use a sharp carving knife and cut across the grain into ½-inch slices. Remove the kitchen twine before slicing if you tied the roast. For presentation, slice just before serving to keep the meat juicy.

    Can I make honey mustard beef tenderloin for a larger group?

    Absolutely! You can roast multiple tenderloins simultaneously, but don’t overcrowd the pan. Allow 6-8 ounces raw weight per person. Double the marinade ingredients but keep cooking times similar, using a meat thermometer for accuracy.

    Final Thoughts

    This Honey Mustard Beef Tenderloin has become my signature dish for good reason—it strikes that perfect balance between impressive and achievable. The sweet-tangy glaze transforms an already special cut into something truly memorable, while the technique remains approachable enough for any home cook. I love seeing guests’ eyes light up at that first tender bite, knowing the relatively simple preparation behind the scenes. Whether for holidays, celebrations, or simply making an ordinary evening extraordinary, this recipe delivers restaurant-quality results every time. Don’t forget to check out more of my favorite recipes on Pinterest!

  • Sweet Creamed Corn Casserole Recipe That Will WOW Your Family!

    Sweet Creamed Corn Casserole Recipe That Will WOW Your Family!

    Sweet Creamed Corn Casserole Recipe That Will WOW Your Family!

    Sweet creamed corn casserole brings all the comfort of homemade goodness with minimal effort. It’s that perfect side dish where creamy, sweet corn gets transformed into something magical in the oven. Every time I make this casserole, my kitchen fills with the most inviting aroma that takes me back to Sunday dinners at my grandmother’s table. The golden, slightly crisp top gives way to a tender, moist interior that melts in your mouth. If you’re looking for a versatile dish that pairs with practically everything from holiday turkey to weeknight chicken, this sweet creamed corn casserole deserves a permanent spot in your recipe collection.

    Recipe

    Why You’ll Love This Sweet Creamed Corn Casserole

    Perfect Balance of Flavors and Textures

    There’s something utterly satisfying about the sweet-savory balance this casserole achieves. The natural sweetness of corn gets amplified with just a touch of sugar, while the savory elements keep it from venturing into dessert territory. I love how the cornbread mix creates that distinct texture – not quite cornbread, not quite pudding, but somewhere deliciously in between. The edges get slightly crispy while the center stays moist and tender. It’s this textural contrast that makes each bite interesting. My husband, who claims to “not care for corn dishes,” somehow always manages to take second helpings of this one!

    Incredibly Versatile and Crowd-Pleasing

    This sweet creamed corn casserole has been my go-to for potlucks, holiday tables, and weeknight dinners for years. It’s one of those magical recipes that fits any occasion. I’ve served it alongside elaborate holiday roasts and simple grilled chicken alike. The beauty is how it appeals to practically everyone – kids love its sweetness, while adults appreciate the complexity of flavors. I’ve yet to bring it to a gathering where someone doesn’t ask for the recipe! Plus, it can be prepped ahead and baked just before serving, making it perfect for busy hosts who want to impress without the stress.

    Essential Tips & Tricks

    Ingredient Selection Matters

    The quality of your corn makes all the difference in this casserole. I prefer using fresh corn when it’s in season, cutting it straight from the cob for that burst of natural sweetness. Off-season, frozen corn (thawed and drained) works beautifully – often better than canned varieties. For the creamiest texture, don’t skimp on the sour cream or substitute with low-fat versions. That little bit of richness is what gives the casserole its velvety mouthfeel. If you’re feeling indulgent, fold in a half cup of shredded cheddar or pepper jack for a subtle cheesy dimension that complements the sweetness perfectly.

    Perfecting the Bake

    The secret to this casserole’s irresistible texture lies in not overbaking it. You want that perfect sweet spot where the top turns golden and the edges start to brown, but the center maintains its moisture. I recommend checking it 5 minutes before the recipe suggests – every oven has its quirks. For a beautiful presentation and even cooking, use a shallow 2-quart baking dish rather than a deep one. If you notice the top browning too quickly, loosely cover with foil for the remainder of the baking time. Let it rest for 5-10 minutes before serving to allow the casserole to set up properly, just like with this Mexican Street Corn Pasta Salad.

    Serving Ideas & Creative Variations

    Perfect Pairings

    Sweet creamed corn casserole shines brightest when paired with foods that complement its sweetness. I love serving it alongside smoky proteins like grilled chicken, barbecue ribs, or even a simple roasted turkey. The contrast between the sweet casserole and savory, smoky meats creates a beautiful flavor harmony on your plate. For holiday meals, it fits right in with traditional sides like green bean casserole and mashed potatoes. During summer, it’s surprisingly refreshing next to tangy coleslaw and baked beans at a cookout. For a complete meal with minimal fuss, pair it with Honey Butter Skillet Corn for corn lovers!

    Exciting Flavor Twists

    While the classic recipe is perfect as is, I love experimenting with seasonal additions that transform this casserole throughout the year. In summer, fold in diced jalapeños and fresh basil for a vibrant kick. Fall calls for a teaspoon of pumpkin pie spice and some crispy bacon bits folded into the batter. For a holiday version, try adding dried cranberries and a sprinkle of thyme. My family’s favorite variation includes green chilies and a layer of pepper jack cheese on top that gets beautifully bubbly in the oven. Don’t be afraid to make it your own – this recipe provides the perfect canvas for creativity!

    Storage & Troubleshooting Guide

    Proper Storage Solutions

    This sweet creamed corn casserole is one of those rare dishes that maintains its quality when stored properly. After cooling completely, cover tightly with plastic wrap or transfer to an airtight container and refrigerate for up to 4 days. For freezing, I recommend portioning it into smaller containers – it’ll keep for about 2 months. The texture does change slightly upon freezing, becoming a bit more dense, but the flavor remains delicious. To reheat, thaw overnight in the refrigerator if frozen, then warm in a 325°F oven, covered with foil, until heated through (about 20 minutes). A quick 10-second microwave zap works for individual portions too!

    Fixing Common Issues

    If your casserole turns out too wet, it’s likely due to excess moisture in your corn. Always drain canned corn thoroughly or pat thawed frozen corn with paper towels before adding to the mixture. For a casserole that’s too dry, you probably baked it a bit too long – next time, check it earlier and remember it will continue cooking slightly as it rests. If the top browns too quickly while the center remains undercooked, simply cover with foil for the remainder of the baking time. And if you’re looking for a firmer texture overall, try adding an extra egg to the batter – it works as a binder to create more structure.

    Frequently Asked Questions

    Can I make sweet creamed corn casserole ahead of time?

    Absolutely! Prepare the batter up to 24 hours ahead and refrigerate unbaked. Let it sit at room temperature for 30 minutes before baking. You may need to add 5-10 minutes to the baking time if it’s still cold.

    Is sweet creamed corn casserole gluten-free?

    Traditional recipes aren’t gluten-free due to the cornbread mix. However, you can substitute gluten-free cornbread mix and verify your other ingredients are certified gluten-free for an excellent alternative.

    Can I use all canned corn instead of mixing creamed and whole kernel?

    Yes! While I prefer the textural contrast of both types, you can use 2 cans of whole kernel corn (drained) and add 1/3 cup of heavy cream to achieve similar creaminess.

    How do I know when my casserole is done baking?

    Look for golden brown edges and a set center that still has slight jiggle. A toothpick inserted near the center should come out mostly clean with a few moist crumbs.

    Can I make this in a slow cooker instead of baking?

    Yes! Prepare as directed, then cook on LOW for 2-3 hours or until set. You’ll miss the crispy top, but the flavor is still delicious. Brush with melted butter before serving.

    Final Thoughts

    This sweet creamed corn casserole has earned its place as a staple in my recipe collection through years of delighted guests and empty dishes. There’s something special about a recipe that manages to be simple yet impressive, familiar yet exciting with each bite. I find myself turning to it whenever I need a reliable side that I know everyone will love. The way it fills my home with the aroma of comfort food makes the experience of preparing it almost as enjoyable as eating it. Share your creations with me on Pinterest – I’d love to see how your sweet creamed corn casserole turns out!

  • Rotisserie Chicken Tostadas: Irresistibly Crispy & Flavor-Packed!

    Rotisserie Chicken Tostadas: Irresistibly Crispy & Flavor-Packed!

    Rotisserie Chicken Tostadas: Irresistibly Crispy & Flavor-Packed!

    Rotisserie chicken tostadas have become my weeknight dinner superhero, swooping in to save me when I’m craving something crispy, zesty, and utterly satisfying without hours in the kitchen. There’s something magical about that first crunch when you bite into a perfectly toasted corn tortilla loaded with juicy shredded chicken, creamy avocado, and a sprinkle of tangy cotija cheese. I discovered this recipe last summer during a particularly chaotic week when my kitchen renovation left me with just a toaster oven and a desperate need for real food. Now it’s in my regular rotation whenever I need a quick, flavorful meal that makes everyone at the table smile.

    Recipe

    Why You’ll Love These Rotisserie Chicken Tostadas

    Perfect Balance of Flavors and Textures

    The beauty of these tostadas lies in their incredible textural contrast – crispy tortillas that shatter delightfully with each bite, tender strands of rotisserie chicken, creamy avocado, and the fresh crunch of lettuce. The flavor profile hits all the right notes too: savory chicken, bright lime, creamy elements, and that hint of chili heat that makes your taste buds dance. I love how the warm chicken mingles with the cool toppings, creating little pockets of temperature contrast. My husband always reaches for seconds, claiming they remind him of the street food we fell in love with during our trip to Mexico City years ago.

    Quick and Customizable for Any Occasion

    These tostadas come together in under 20 minutes, making them perfect for busy weeknights or impromptu gatherings. The rotisserie chicken does most of the heavy lifting, flavor-wise, while you just assemble and customize. I’ve made these for everything from casual Tuesday dinners to weekend lunch with friends. They’re endlessly adaptable – set up a tostada bar and let everyone build their own creation. My kids love loading theirs with extra cheese and mild salsa, while I pile on the cilantro, jalapeños, and a drizzle of Mexican crema. It’s like having a fiesta on a plate, no matter how ordinary the day might be.

    Essential Tips & Tricks

    Perfecting Your Tostada Base

    The foundation of amazing tostadas is getting those tortillas perfectly crisp. While store-bought tostada shells work in a pinch, making your own delivers superior flavor and texture. Brush corn tortillas lightly with oil on both sides, then bake at 400°F for 5-7 minutes until golden and crisp. The slight curve that forms as they bake creates the perfect cradle for toppings. For extra flavor, sprinkle with a pinch of salt while hot. I learned this trick from my neighbor Rosa, who laughed when she saw me buying pre-made shells. “They should snap like a cracker,” she told me, “not bend like a sad piece of cardboard.” She was absolutely right – homemade makes all the difference.

    Elevating Your Rotisserie Chicken

    Transform ordinary rotisserie chicken into something extraordinary by giving it a quick flavor boost. Shred the chicken into a bowl while still warm, then toss with a mixture of lime juice, cumin, and chili powder. The warm chicken absorbs these flavors beautifully. For extra moisture and flavor, add a splash of chicken broth or the accumulated juices from the container. This simple step elevates the chicken from basic to crave-worthy. I discovered this trick accidentally when trying to revive slightly dry chicken, and now I do it every time. The warm, seasoned chicken creates a perfect contrast to the cool, fresh toppings and makes each bite more satisfying.

    Serving Ideas & Creative Variations

    Family-Style Tostada Bar

    Create a festive, interactive dinner by setting up a tostada bar with all the fixings. Arrange crispy tostada shells, seasoned rotisserie chicken, and bowls of toppings like diced avocado, shredded lettuce, pico de gallo, various cheeses, and sauces. This approach is perfect for feeding a crowd with different preferences. I love watching guests create their own masterpieces, piling toppings high and comparing creations. This setup worked brilliantly at my sister’s casual birthday gathering – everyone customized to their taste, and there was so much joy in the simple act of building dinner together. Pair with some authentic pico de gallo for an extra burst of freshness.

    Global Fusion Variations

    While traditional tostadas are delicious, don’t be afraid to experiment with fusion variations. Try Mediterranean-inspired tostadas with Greek yogurt, cucumber, olives, and feta. Or go Asian-fusion with a slaw of cabbage, carrots, and a peanut sauce drizzle. My personal favorite twist is a breakfast tostada topped with scrambled eggs, rotisserie chicken, avocado, and hot sauce – it’s become my weekend tradition. The crispy base works with countless flavor combinations, making it a versatile canvas for culinary creativity. Last month I surprised my husband with Korean-inspired tostadas using gochujang-glazed rotisserie chicken and quick-pickled vegetables – he declared them “restaurant-worthy.”

    Storage & Troubleshooting Guide

    Keeping Components Fresh

    For make-ahead preparation, store each component separately in airtight containers. The seasoned chicken will stay fresh for 3-4 days in the refrigerator, while prepped toppings like diced tomatoes and shredded lettuce can last 1-2 days. Pre-made tostada shells can be stored in a paper bag at room temperature for up to 3 days – just make sure they’re completely cool before storing to prevent sogginess. I often prep everything on Sunday for quick assembly during the week. If you notice your avocado browning, try this trick: sprinkle with extra lime juice and place plastic wrap directly on the surface to minimize air exposure.

    Solving Common Tostada Troubles

    The most common tostada challenge is the dreaded shell shatter upon first bite. To prevent this, don’t overload your tostadas and take a small bite from the edge first. For soggy shells, ensure your toppings aren’t too wet – drain tomatoes well and pat rinsed beans dry with paper towels. If making your own shells, make sure they’re baked until completely crisp throughout. If serving to guests who are tostada novices, consider breaking the shells into quarters for easier handling. I learned this tip after watching my father-in-law struggle with an overly loaded tostada that exploded across his shirt at a family dinner – smaller pieces would have saved his dignity!

    Frequently Asked Questions

    What’s the difference between a tostada and a taco?

    Tostadas use flat, crispy tortillas as a base with toppings piled on top, while tacos use folded soft or hard tortillas to wrap around fillings. Think of tostadas as open-faced tacos that you eat like a pizza!

    Can I make rotisserie chicken tostadas ahead of time?

    Prepare components separately up to 2 days ahead, but assemble just before serving. Pre-made tostadas will become soggy if stored assembled. Keep shells at room temperature and toppings refrigerated.

    What’s the best way to reheat rotisserie chicken for tostadas?

    Sprinkle chicken with a tablespoon of water or broth, cover loosely with foil, and heat in a 300°F oven for 10-15 minutes. Microwave works too, but might dry out the meat slightly.

    What can I substitute for corn tortillas?

    Use flour tortillas, pita bread, or even large tortilla chips as alternatives. For a low-carb option, try crispy lettuce cups or baked cheese crisps as your tostada base.

    How do I keep my rotisserie chicken tostadas from falling apart?

    Don’t overload your tostada, start with a layer of “sticky” ingredients like refried beans or guacamole to help hold toppings, and take small bites from the edges working inward.

    Final Thoughts

    Rotisserie chicken tostadas have earned their place in my heart as the perfect blend of convenience and satisfaction. They remind me that good food doesn’t have to be complicated – sometimes the simplest combinations create the most joyful eating experiences. I love how they bring people together around the table, encouraging conversation and laughter as everyone assembles their perfect bite. Whether you’re feeding a family on a busy weeknight or hosting friends for a casual gathering, these tostadas deliver big flavor with minimal effort. Find more inspiration for your next meal at Pinterest.

  • Mediterranean Keto Ground Chicken Skillet with Olives & Feta Bliss

    Mediterranean Keto Ground Chicken Skillet with Olives & Feta Bliss

    Mediterranean Keto Ground Chicken Skillet with Olives & Feta Bliss

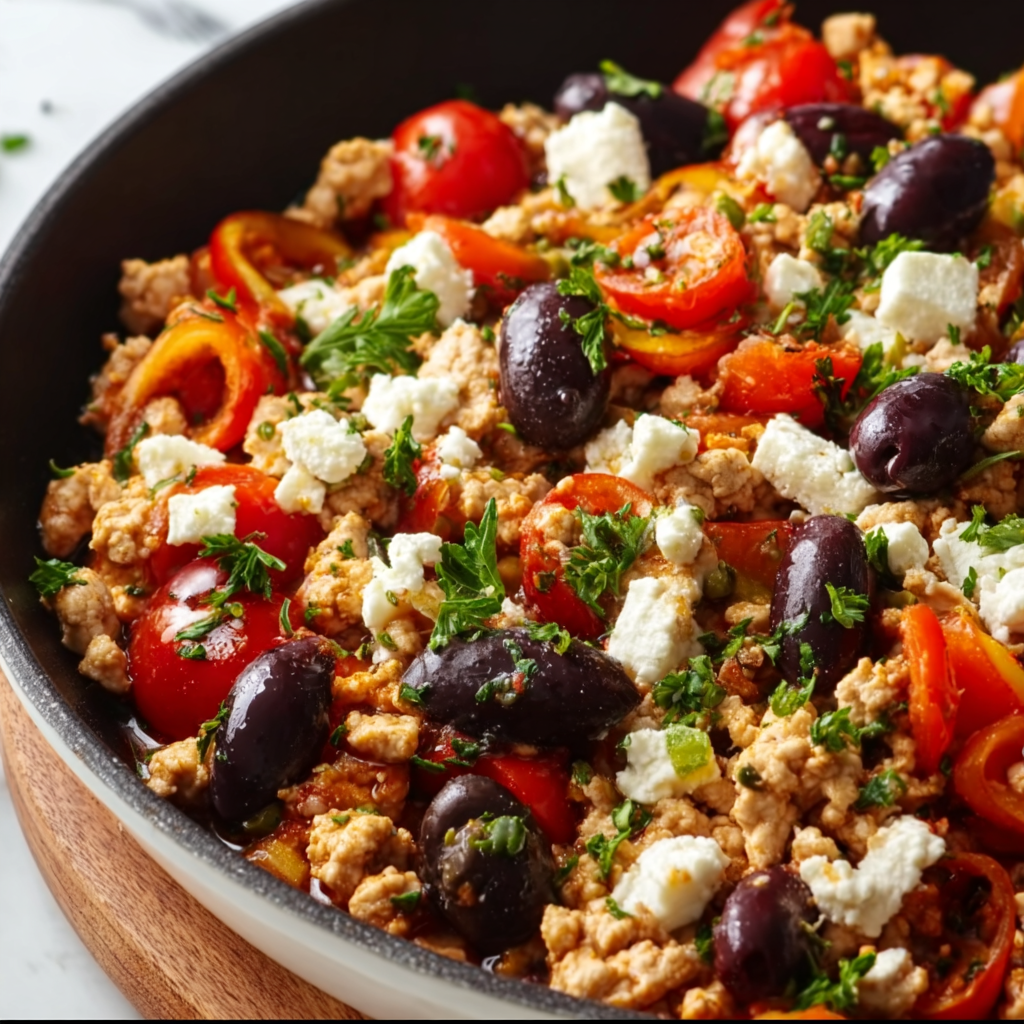
    This Mediterranean Keto Ground Chicken Skillet with Olives and Feta is where cozy comfort meets Mediterranean magic. The first time I made this dish, the kitchen filled with aromas that transported me straight to a seaside taverna, even though I was in my fuzzy socks on a rainy Tuesday. The combination of tender ground chicken, briny olives, and creamy feta creates a flavor symphony that’s both satisfying and keto-friendly. I’ve tweaked this recipe countless times until it reached perfection—simple enough for weeknights but special enough to make any dinner feel like a mini vacation to the Mediterranean.

    Recipe

    Why You’ll Love This Mediterranean Keto Ground Chicken Skillet with Olives and Feta

    Perfect Balance of Flavors and Nutrition

    This skillet delivers everything you want in a keto meal—high protein, healthy fats, and minimal carbs—without sacrificing an ounce of flavor. The ground chicken provides a neutral canvas for the bold Mediterranean ingredients to shine. Each bite offers a different sensation: the saltiness of olives, the tangy creaminess of feta, the aromatic herbs. I love how the olive oil creates a silky texture that makes this dish feel indulgent while still being wholesome. And at less than 7g net carbs per serving, it keeps you firmly in ketosis while feeling anything but restrictive.

    Quick and Versatile One-Pan Wonder

    On those nights when cooking feels like climbing a mountain, this skillet is my saving grace. It comes together in under 30 minutes and dirties just one pan—a true weeknight hero. The ingredients are staples I always have on hand: ground chicken in the freezer, olives and feta that last for ages in the fridge. I’ve made this when hosting impromptu dinner guests and for meal prep Sundays alike. The leftovers actually taste even better as the flavors meld overnight, making it perfect for lunch the next day. It’s become my go-to recommendation for keto beginners looking for meals that don’t feel like a compromise.

    Essential Tips & Tricks

    Maximizing Flavor Development

    The secret to elevating this dish from good to incredible lies in layering flavors methodically. Start by browning the chicken thoroughly—those caramelized bits are flavor gold. Don’t rush this step! I learned the hard way that pale, steamed chicken just doesn’t deliver the same depth. Add the garlic and herbs only after the chicken is browned to prevent burning. For an extra dimension, deglaze the pan with a splash of dry white wine (it cooks off, keeping it keto-friendly) or lemon juice. This lifts all those delicious browned bits from the bottom of the pan, infusing everything with rich, complex flavor.

    Ingredient Selection and Preparation

    The quality of ingredients makes a remarkable difference in this simple dish. Opt for full-fat feta in block form rather than pre-crumbled—it’s creamier and melts beautifully into the hot skillet. For olives, a mix of kalamata and green provides the perfect balance of brininess. Pat your chicken dry before cooking to ensure proper browning, and don’t forget to season generously with salt and pepper. If you’re looking for more Mediterranean-inspired dishes, my Mediterranean Chicken Quinoa Bowl with Broccoli and Tomato uses similar flavor profiles in a higher-carb version.

    Serving Ideas & Creative Variations

    Complementary Side Dishes

    While this skillet is satisfying on its own, pairing it with the right sides elevates the meal to restaurant quality. My favorite keto-friendly companion is roasted cauliflower tossed with olive oil and za’atar—it mimics the satisfaction of potatoes while staying low-carb. A simple Greek salad with cucumber, bell pepper, and a lemon-olive oil dressing adds freshness and crunch. For a more substantial meal, serve over cauliflower rice that’s been sautéed with a touch of garlic and lemon zest. The rice soaks up all those magnificent skillet juices that are too good to waste.

    Exciting Flavor Variations

    The beauty of this recipe lies in its adaptability to whatever you have on hand. For a Spanish twist, swap the oregano for smoked paprika and add chorizo—similar to my Low-Carb Italian Grinder Salad but with different proteins. Create a creamy version by stirring in a few tablespoons of cream cheese or Greek yogurt at the end. For heat lovers, add crushed red pepper flakes or chopped fresh jalapeños. Sometimes I’ll throw in sundried tomatoes (in moderation to keep it keto) or artichoke hearts for extra Mediterranean flair. Fresh herbs make a huge difference—try mint, dill, or basil in addition to oregano.

    Storage & Troubleshooting Guide

    Proper Storage and Reheating

    This Mediterranean skillet stores beautifully, often tasting even better the next day as flavors continue to develop. Store leftovers in an airtight container in the refrigerator for up to 4 days. For meal prep, portion into individual containers for grab-and-go lunches. When reheating, add a splash of water or broth to prevent drying out, and warm gently over medium-low heat. Microwaving works in a pinch, but the stovetop better preserves the texture. For longer storage, this dish freezes well for up to 3 months—just thaw overnight in the refrigerator before reheating.

    Common Issues and Solutions

    If your skillet turns out watery, the most likely culprit is overcrowding the pan, which causes the chicken to steam rather than brown. The solution is cooking in smaller batches or using a larger skillet to give everything room to caramelize properly. For dry chicken, you may have overcooked it or used breast instead of thigh meat—adding a drizzle of olive oil at the end helps restore moisture. If the dish lacks flavor, brighten it with a squeeze of lemon juice and an extra sprinkle of salt. Feta not melting nicely? Try removing the skillet from heat before adding it, letting residual heat gently melt the cheese.

    Frequently Asked Questions

    Is this Mediterranean Keto Ground Chicken Skillet suitable for meal prep?

    Absolutely! It stores beautifully for 3-4 days in the refrigerator and actually improves in flavor overnight as the ingredients meld together. Portion into individual containers for easy grab-and-go meals.

    Can I use ground turkey instead of chicken?

    Yes! Ground turkey works perfectly as a substitute. Just be aware that turkey can be slightly leaner than chicken, so you might want to add an extra drizzle of olive oil to maintain moisture.

    How can I increase the fat content for stricter keto?

    Easy! Add more olive oil, increase the amount of feta, or incorporate some chopped bacon. You could also serve with a side of avocado or a dollop of full-fat Greek yogurt.

    What vegetables can I add while keeping it keto-friendly?

    Zucchini, bell peppers, spinach, and kale all work beautifully without adding significant carbs. Just be mindful of portions with tomatoes and onions, as they contain more carbs.

    Can I make this dish dairy-free?

    Certainly! Omit the feta and add nutritional yeast for a cheesy flavor. Olives, capers, and a generous drizzle of extra virgin olive oil will ensure it remains flavorful and satisfying.

    Final Thoughts

    This Mediterranean Keto Ground Chicken Skillet with Olives and Feta has become more than just a recipe in my kitchen—it’s a reminder that keto eating can be vibrant, satisfying, and full of global flavors. The way the feta melts into little pockets of creamy goodness against the savory chicken and briny olives creates something truly special. Whether you’re a keto veteran or just looking for a healthy, flavorful dinner option, this skillet deserves a spot in your regular rotation. For more recipe inspiration, check out my Pinterest board where I share new keto-friendly ideas weekly.

  • Cheesy Baja Chicken Bell Pepper Skillet | Irresistibly Delicious!

    Cheesy Baja Chicken Bell Pepper Skillet | Irresistibly Delicious!

    Cheesy Baja Chicken Bell Pepper Skillet | Irresistibly Delicious!

    The Cheesy Baja Chicken Bell Pepper Skillet has become my absolute go-to dinner when I need something colorful, flavorful, and ready in under 30 minutes. The first time I made this dish, the aroma of those toasting spices filled my kitchen, and I knew I had stumbled onto something special. There’s something magical about the way the bell peppers soften while still maintaining that perfect bite, all while soaking up the zesty Baja-inspired seasonings. This one-pan wonder combines tender chicken, vibrant peppers, and a blanket of melty cheese that creates the most satisfying weeknight meal you’ll ever taste. Let me show you how to bring this southwestern delight to your table tonight.

    Recipe

    Why You’ll Love This Cheesy Baja Chicken Bell Pepper Skillet

    Quick & Easy One-Pan Wonder

    If you’re anything like me, the words “one-pan” are music to your ears after a long day. This Cheesy Baja Chicken Bell Pepper Skillet comes together in just 25 minutes from start to finish, making it perfect for busy weeknights when you’re tempted to order takeout. The beauty lies in its simplicity—just slice, season, sauté, and sprinkle with cheese. I love how the chicken and peppers cook together, allowing the flavors to meld while saving you from washing multiple pots and pans. The active cooking time is minimal, giving you space to help with homework or simply take a breath after a hectic day.

    Flavor Explosion in Every Bite

    The combination of smoky cumin, chili powder, and garlic creates a depth of flavor that transports me straight to a beachside café in Baja. Last month, when my sister was visiting, she couldn’t believe the complex taste came from such simple ingredients. The bell peppers add a natural sweetness that balances the savory chicken and spices perfectly. When the cheese melts into all the nooks and crannies, it creates these little pockets of creamy goodness that make each forkful an adventure. The lime juice added at the end brightens everything with a zesty punch that makes all the flavors pop.

    Essential Tips & Tricks

    Perfecting Your Peppers

    The secret to this dish is getting your bell peppers just right—tender-crisp is the texture we’re aiming for. I learned this the hard way after overcooking them into mush during my first attempt! Slice them into uniform strips about ¼-inch thick so they cook evenly. I prefer using a mix of red, yellow, and orange peppers for both flavor and visual appeal. Green peppers work too, but they’re slightly less sweet. Make sure your skillet is hot before adding the peppers—that initial sizzle is crucial for developing those lovely caramelized edges while maintaining their structure. Similar to my Mexican Rajas Poblanas, the peppers should still have a slight bite.

    Mastering the Chicken Technique

    For the juiciest chicken, start with uniform-sized pieces cut against the grain. I typically slice boneless, skinless chicken breasts into strips about ½-inch thick, which ensures they cook quickly and evenly. Season the chicken before it hits the pan—this builds a foundation of flavor that permeates throughout cooking. The biggest mistake I see is overcrowding the pan, which causes the chicken to steam rather than sauté. If needed, cook in batches to get that beautiful golden exterior. Let the chicken develop a light crust before stirring—about 2-3 minutes per side. This creates texture contrast and locks in moisture for perfectly tender results.

    Serving Ideas & Creative Variations

    Perfect Pairings

    This Cheesy Baja Chicken Bell Pepper Skillet is delicious on its own, but I love serving it with warm corn tortillas for an interactive meal. My family goes crazy for it when I set out small bowls of toppings—fresh cilantro, diced avocado, sour cream, and lime wedges—letting everyone customize their plate. For a lighter option, serve it over cauliflower rice or alongside a simple green salad dressed with lime vinaigrette. When I’m craving something more substantial, I’ll pair it with cilantro-lime rice or black beans. For a fun weekend twist, try serving it with my Sweet Chili Chicken Bowl components for a fusion fiesta.

    Creative Twists on the Classic

    Don’t be afraid to make this recipe your own! Swap the chicken for ground turkey or beef for a different texture, or use shrimp for a seafood spin (just add them during the last few minutes of cooking). Vegetarians can substitute firm tofu or simply double up on the peppers and add black beans. For a spicier version, add diced jalapeños or a dash of cayenne. I’ve experimented with cheese variations too—pepper jack adds a nice kick, while a Mexican blend creates stretchy cheese pulls that are totally Instagram-worthy. One rainy Sunday, I added a can of fire-roasted tomatoes and some corn kernels, which created a saucier, more stew-like version that was perfect for dipping crusty bread.

    Storage & Troubleshooting Guide

    Proper Storage for Leftovers

    This skillet dish reheats beautifully, making it perfect for meal prep lunches. Store leftovers in an airtight container in the refrigerator for up to 3 days. The flavors actually deepen overnight, making day-two lunches something to look forward to! If you’re planning to freeze portions, do so before adding the cheese—dairy can separate and become grainy when frozen and reheated. When you’re ready to enjoy, thaw overnight in the refrigerator, then reheat in a skillet with a splash of chicken broth to maintain moisture. Add fresh cheese during the last minute of reheating for that gooey texture we all love.

    Troubleshooting Common Issues

    If your peppers are turning out too soft, they’re likely being cooked too long or at too high a temperature. The fix is simple: add them later in the cooking process or use higher heat for a shorter time. For chicken that seems dry, it’s usually overcooked—next time, remove it from the heat when it reaches 165°F internally. If your cheese isn’t melting properly, cover the skillet with a lid for 1-2 minutes to trap the heat. Sauce too watery?

    Let it simmer uncovered for a few extra minutes before adding the cheese. And if the flavors seem flat, a squeeze of lime juice, a sprinkle of salt, or a dash of hot sauce can work wonders to brighten everything up.

    Frequently Asked Questions

    Can I make Cheesy Baja Chicken Bell Pepper Skillet ahead of time?

    Yes! Prepare everything except the cheese up to 2 days ahead. Store in the refrigerator, then reheat in a skillet and add fresh cheese just before serving for the best texture and flavor.

    What’s the best cheese to use for this recipe?

    I recommend a combination of sharp cheddar and Monterey Jack for the perfect melt and flavor. Pepper Jack works beautifully if you prefer a spicier kick.

    Can I use frozen bell peppers?

    While fresh peppers provide the best texture, frozen peppers will work in a pinch. Thaw and drain them thoroughly first, and expect a slightly softer final result.

    Is this Cheesy Baja Chicken Bell Pepper Skillet gluten-free?

    Yes, this dish is naturally gluten-free, making it perfect for those with gluten sensitivities. Just double-check your spice blends for hidden gluten additives.

    How can I make a vegetarian version?

    Replace chicken with black beans, pinto beans, or firm tofu. Add extra vegetables like zucchini or corn for more substance and flavor variety.

    Final Thoughts

    This Cheesy Baja Chicken Bell Pepper Skillet has saved dinner at my house more times than I can count. There’s something deeply satisfying about creating such bold flavors with minimal effort and cleanup. The colorful peppers, tender chicken, and blanket of melted cheese create a dish that feels both comforting and special. I hope this recipe finds its way into your regular rotation, perhaps becoming the meal your family requests on busy weeknights or the dish friends ask about after gatherings. Don’t forget to check out more quick dinner ideas on Pinterest for inspiration!

  • Anti Inflammatory Turmeric Chicken Soup: Heal & Boost Immunity Fast!

    Anti Inflammatory Turmeric Chicken Soup: Heal & Boost Immunity Fast!

    Anti Inflammatory Turmeric Chicken Soup: Heal & Boost Immunity Fast!

    Anti Inflammatory Turmeric Chicken Soup is my ultimate comfort-in-a-bowl remedy whenever my body needs some serious TLC. The golden broth, fragrant with warming spices and vibrant turmeric, has become my go-to solution during those dreary winter days when my joints ache and my immune system needs a boost. I discovered this healing elixir last year when battling a stubborn cold, and it’s since earned a permanent spot in my recipe collection at Recipes Darleen. The magic lies in how the anti-inflammatory properties of turmeric combine with protein-rich chicken and nourishing vegetables to create something that’s both medicinal and utterly delicious.

    Recipe

    Why You’ll Love This Anti Inflammatory Turmeric Chicken Soup

    A Powerhouse of Healing Ingredients

    This soup isn’t just delicious—it’s practically medicinal. The star ingredient, turmeric, contains curcumin, a compound with powerful anti-inflammatory effects that may help reduce joint pain and boost immunity. I’ve paired it with fresh ginger and garlic, creating a trifecta of healing ingredients that work synergistically. Black pepper isn’t just for flavor—it enhances turmeric absorption by up to 2000%! The bone broth base provides collagen and minerals, while protein-rich chicken helps repair tissues. When I’m feeling particularly run-down, this golden elixir feels like it’s healing me from the inside out.

    Quick Comfort Without Sacrificing Flavor

    On those days when my energy is low but I need something nourishing, this soup comes to the rescue. It takes just 30 minutes of active preparation, then simmers to perfection while I rest. The aroma that fills my kitchen—earthy turmeric, fragrant thyme, and sweet onions—provides comfort before I even take the first spoonful. What I love most is how the flavors deepen overnight, making leftovers even more delicious. Unlike many “healthy” recipes that sacrifice taste, this soup delivers rich, complex flavors that satisfy my comfort food cravings while supporting my wellness goals.

    Essential Tips & Tricks

    Mastering the Perfect Turmeric Balance

    Finding the right turmeric amount is crucial—too little won’t provide the anti-inflammatory benefits, while too much creates bitterness. I recommend starting with 1½ tablespoons for a full pot, then adjusting to your taste. Always use fresh turmeric root when possible; it has a brighter, more complex flavor than the powder. Grate it directly into the pot using a microplane for the most even distribution. If using powder, bloom it in oil with your other spices to release its full potential. This technique, similar to what I use in my Cauliflower Chickpea Curry, enhances the turmeric’s flavor profile dramatically.

    Creating the Ultimate Healing Broth

    The broth quality makes or breaks this soup. I prefer homemade bone broth for maximum nutrition and flavor, but a good-quality store-bought version works in a pinch. For an extra immune boost, simmer the broth with chicken bones for 20 minutes before adding vegetables. Don’t rush the sautéing process—allowing onions to caramelize slightly adds remarkable depth. For silky texture, finish with a splash of full-fat coconut milk or a drizzle of olive oil just before serving. This creates a luxurious mouthfeel and helps your body absorb the fat-soluble compounds in turmeric, maximizing the anti-inflammatory benefits.

    Serving Ideas & Creative Variations

    Complementary Sides for a Complete Meal

    This Anti Inflammatory Turmeric Chicken Soup pairs beautifully with crusty sourdough or gluten-free crackers for dipping. For a heartier meal, I sometimes serve it alongside a simple arugula salad dressed with lemon and olive oil—the brightness cuts through the rich soup perfectly. When serving to guests, I love to set up a toppings bar with fresh herbs, lemon wedges, chili flakes, and toasted pumpkin seeds for everyone to customize their bowls. For something different, try it with my Italian Chicken Gnocchi Soup for an impressive soup-tasting dinner that always wows friends.

    Seasonal Adaptations Worth Trying

    I’ve created seasonal variations that keep this recipe exciting year-round. In summer, I lighten it up with zucchini, fresh corn, and lots of herbs like basil and cilantro. Fall calls for hearty root vegetables—sweet potatoes, parsnips, and butternut squash add natural sweetness and extra nutrition. Winter versions get a protein boost from white beans or chickpeas, while spring inspires me to add asparagus, peas, and tender greens. For a vegetarian version, replace chicken with firm tofu or tempeh and use vegetable broth. Each adaptation maintains the core anti-inflammatory benefits while keeping the flavors fresh and aligned with what’s available seasonally.

    Storage & Troubleshooting Guide

    Proper Storage for Maximum Benefits

    This soup stores beautifully, actually improving in flavor after a day in the refrigerator as the spices meld. Refrigerate in airtight glass containers for up to 4 days—I prefer glass as turmeric can stain plastic. For freezing, slightly undercook the vegetables and cool completely before portioning into freezer-safe containers, leaving room for expansion. Frozen soup maintains quality for 3 months. When reheating, do so gently on the stovetop rather than microwaving to preserve the delicate flavors and nutrients. Add fresh herbs just before serving to brighten the reheated soup.

    Fixing Common Soup Issues

    If your soup tastes too bitter, the turmeric might be overpowering. Balance it with a teaspoon of honey or coconut sugar and a splash of lime juice. For thin broth, simmer uncovered to reduce, or blend a cup of the vegetables and return to the pot for natural thickening. If the flavors seem flat, a splash of apple cider vinegar often works wonders to brighten everything. Too spicy? Add coconut milk to temper the heat. Remember that turmeric’s color intensifies over time—what looks perfect today may appear more vibrant tomorrow, but this doesn’t affect the taste or benefits.

    Frequently Asked Questions

    Can I make this Anti Inflammatory Turmeric Chicken Soup in a slow cooker?

    Absolutely! Add all ingredients except fresh herbs to your slow cooker, cook on low for 6-8 hours or high for 3-4 hours, then stir in fresh herbs before serving. The slow cooking intensifies the anti-inflammatory properties.

    Is fresh turmeric necessary or can I use powdered?

    While fresh turmeric provides optimal flavor and benefits, powdered works well too. Use 1 teaspoon of powder for each tablespoon of fresh called for in the recipe.

    Can I make this soup vegetarian?

    Yes! Replace chicken with chickpeas or tofu, and use vegetable broth instead of chicken broth. Add a tablespoon of nutritional yeast for umami depth.

    How can I increase the protein content?

    Add an extra cup of shredded chicken, stir in rinsed canned beans during the last 10 minutes, or top each serving with a soft-boiled egg.

    Will this soup help with my joint inflammation?

    While many people find relief from joint discomfort with regular consumption of turmeric-rich foods, this soup should complement, not replace, medical treatment for inflammatory conditions.

    Final Thoughts

    This Anti Inflammatory Turmeric Chicken Soup has become more than just a recipe in my kitchen—it’s a ritual of self-care I turn to whenever my body needs gentle healing. The golden elixir combines centuries-old wisdom about turmeric’s medicinal properties with modern understanding of nutrition, all wrapped in a package that’s deeply satisfying to both body and soul. Whether you’re fighting off a cold, managing inflammation, or simply craving something nourishing, I hope this soup brings you the same comfort it’s brought me. For more healing recipes, visit my Pinterest collection where I’m always adding new wellness-focused dishes.