Author: Darleen Vance

  • Ground Turkey Rice Bowls with Bang Bang Sauce: Irresistibly Delicious!

    Ground Turkey Rice Bowls with Bang Bang Sauce: Irresistibly Delicious!

    Ground Turkey Rice Bowls with Bang Bang Sauce: Irresistibly Delicious!

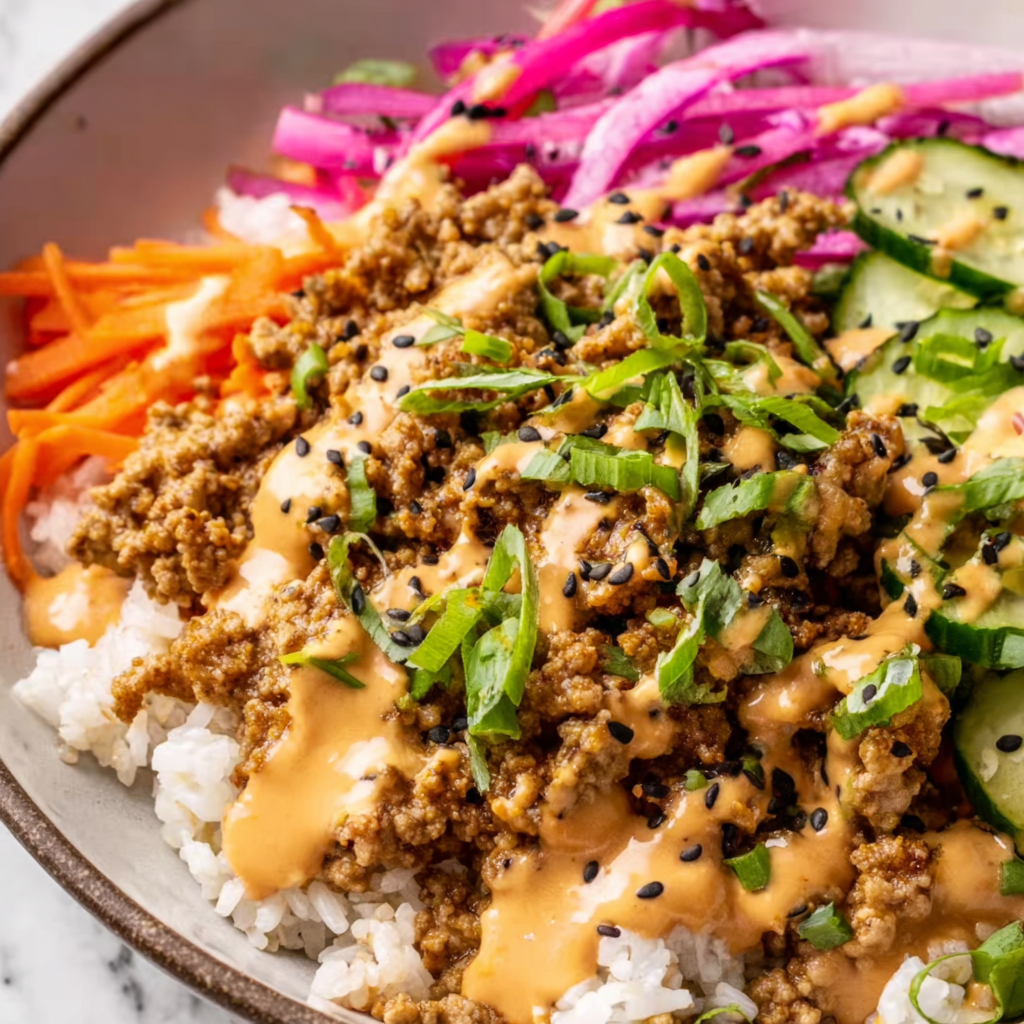
    Ground Turkey Rice Bowls with Bang Bang Sauce are about to become your new weeknight obsession. I discovered this recipe during a particularly chaotic Tuesday when I needed something quick but refused to compromise on flavor. The moment that creamy, spicy bang bang sauce hit the savory ground turkey, I knew I’d found a keeper. These bowls strike that perfect balance between wholesome and indulgent—protein-packed turkey, fluffy rice, crisp veggies, and that irresistible sauce that ties everything together. Think of it as your favorite takeout bowl, but healthier, cheaper, and ready in under 30 minutes. Trust me, your dinner routine needs this recipe in the rotation.

    Recipe

    Why You’ll Love This Ground Turkey Rice Bowls with Bang Bang Sauce

    Perfect Balance of Flavor and Nutrition

    These Ground Turkey Rice Bowls with Bang Bang Sauce deliver serious flavor without the guilt. The lean ground turkey provides ample protein while keeping the fat content reasonable, and you can load up on as many colorful veggies as your heart desires. I love how the spicy-sweet bang bang sauce transforms these simple ingredients into something that feels restaurant-worthy. The best part? You can adjust the heat level to your preference, making it family-friendly or spice-lover approved. My husband, who typically reaches for seconds of anything covered in cheese, went back for more of this instead!

    Quick and Customizable Weeknight Solution

    On those evenings when cooking feels like a chore, this 30-minute meal is your saving grace. The components come together simultaneously—rice simmering in one pot, turkey browning in a pan, and sauce whisked in a bowl. It’s the definition of efficient cooking. Plus, these bowls are endlessly customizable. Swap brown rice for quinoa, add different vegetables based on what’s in your fridge, or double the sauce if you’re like me and believe more is always better. I’ve made this on hectic Mondays and lazy Sundays, and it delivers every single time.

    Essential Tips & Tricks

    Mastering the Perfect Bang Bang Sauce

    The heart of these bowls is undoubtedly the bang bang sauce—that creamy, spicy, slightly sweet concoction that makes everything it touches taste better. For the creamiest texture, use full-fat mayonnaise and make sure your sweet chili sauce is fresh (old bottles tend to crystallize). The key to balanced flavor is adding the sriracha gradually, tasting as you go. I learned this the hard way after once making it too spicy even for my heat-loving palate! For extra tang, add a squeeze of fresh lime juice right before serving. This sauce keeps well in the fridge for up to a week, so consider making a double batch.

    Elevating Your Ground Turkey Game

    Let’s be honest—ground turkey can sometimes be bland, but not with these flavor-boosting techniques. Start by browning your turkey in a hot pan with a touch of oil to develop those delicious caramelized bits. Season generously with garlic powder, onion powder, and a splash of soy sauce while cooking. For an umami boost that will remind you of our Mediterranean Chicken Quinoa Bowl, add a tablespoon of hoisin sauce during the last minute of cooking. And never, ever overcook your turkey—it should just lose its pink color before you remove it from heat.

    Serving Ideas & Creative Variations

    Build-Your-Own Bowl Bar

    Transform dinner into an interactive experience with a DIY bowl bar. Set out the cooked turkey, rice, bang bang sauce, and an array of toppings in separate dishes. Include options like diced avocado, shredded carrots, sliced cucumber, chopped cilantro, lime wedges, and crunchy wonton strips. This approach is perfect for families with varying preferences or when entertaining casual dinner guests. My nieces and nephews absolutely love this approach—they feel like they’re eating at their favorite fast-casual restaurant! The bonus? Everyone gets exactly what they want, and the conversation flows as you build your bowls together.

    Global Flavor Variations

    While the classic bang bang sauce has Asian-inspired flavors, don’t be afraid to experiment with global twists. For a Mediterranean version, season the turkey with oregano and cumin, swap the rice for couscous, and replace the bang bang sauce with tzatziki. Craving Mexican? Try taco seasoning on the turkey, cilantro-lime rice as your base, and top with avocado and salsa. For something similar to my Sweet Chili Chicken Bowl, use a teriyaki glaze instead of bang bang sauce and add pineapple chunks for sweetness. The possibilities are endless, making this recipe a true chameleon in your meal rotation.

    Storage & Troubleshooting Guide

    Meal Prep and Storage Solutions

    These Ground Turkey Rice Bowls with Bang Bang Sauce are meal prep champions. Prepare all components separately and store in airtight containers in the refrigerator for up to 4 days. Keep the sauce separate until ready to serve to maintain optimal texture. When reheating, add a splash of water to the rice before microwaving to restore moisture, and heat the turkey just until warmed through. For freezing, portion the turkey and rice into freezer-safe containers without the sauce or fresh toppings. Thaw overnight in the refrigerator before reheating. I often make a double batch on Sundays, ensuring I have at least two stress-free lunches waiting for me during the workweek.

    Troubleshooting Common Issues

    Even the simplest recipes can hit snags, but these quick fixes will save your dinner. If your turkey turns out dry, stir in a tablespoon of chicken broth or even a little bang bang sauce while reheating. Rice clumping together? Rinse it under cold water before cooking, and fluff with a fork immediately after it’s done. Bang bang sauce too spicy? Add more mayo and a touch of honey to tame the heat. Sauce too thick? Thin with a little water or lime juice. Missing an ingredient? Remember that cooking is flexible—swap green onions for cilantro, frozen vegetables for fresh, or even ground chicken for turkey. The essence of this dish remains delicious regardless of small substitutions.

    Frequently Asked Questions

    Can I make Ground Turkey Rice Bowls with Bang Bang Sauce ahead of time?

    Absolutely! Prepare the components separately and store in the refrigerator for up to 4 days. Keep the sauce separate until serving to maintain texture and freshness. Reheat the turkey and rice gently before assembling your bowls.

    Is there a vegetarian alternative to this recipe?

    Yes! Substitute the ground turkey with crumbled extra-firm tofu or tempeh. Season it the same way and cook until browned for a protein-packed vegetarian version that works beautifully with the bang bang sauce.

    How spicy is the bang bang sauce?

    The spice level is completely customizable. Start with less sriracha (1 teaspoon) for a mild version, or increase to 1-2 tablespoons for serious heat. You control the fire!

    What’s the best rice to use for these bowls?

    Jasmine rice works beautifully for its fragrance and fluffiness, but any rice variety works. Brown rice adds nutritional value, while cauliflower rice creates a lower-carb option.

    Can I use store-bought bang bang sauce instead?

    While store-bought sauce works in a pinch, homemade delivers superior flavor with just 4 ingredients: mayonnaise, sweet chili sauce, sriracha, and honey. It takes just 2 minutes to whisk together!

    Final Thoughts

    These Ground Turkey Rice Bowls with Bang Bang Sauce have become my reliable solution for those nights when I want something satisfying without spending hours in the kitchen. There’s something magical about how a few simple ingredients transform into a meal that feels special enough for company yet easy enough for everyday. I hope this recipe brings the same joy to your kitchen that it has to mine. Don’t forget to check out more bowl inspiration on our Pinterest page where we’re constantly adding new variations to keep your meals exciting!
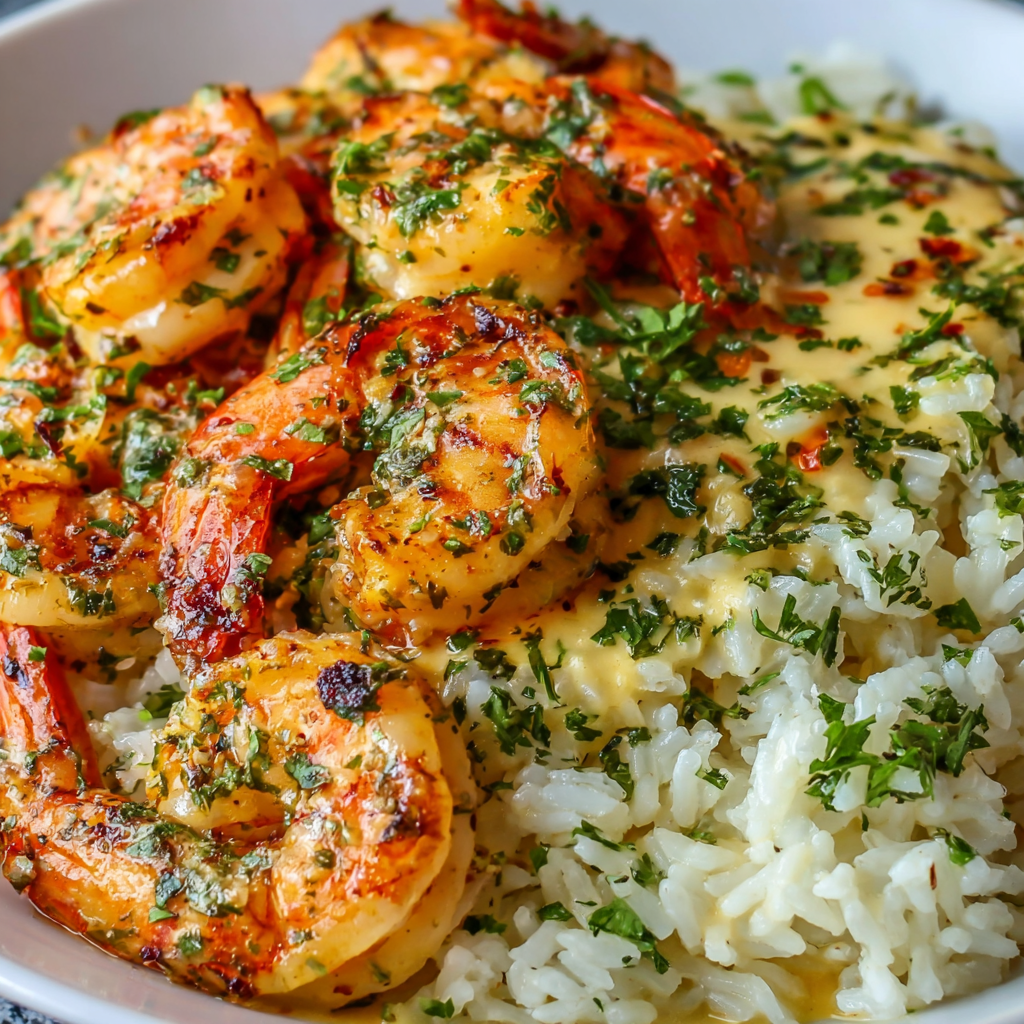

  • Creamy Herb Rice with Garlic Butter Shrimp: Irresistibly Delicious!

    Creamy Herb Rice with Garlic Butter Shrimp: Irresistibly Delicious!

    Creamy Herb Rice with Garlic Butter Shrimp: Irresistibly Delicious!

    The first time I made Creamy Herb Rice with Garlic Butter Shrimp, the aroma filled my kitchen like a warm hug. There’s something magical about the way butter and garlic dance together in the pan, creating that irresistible scent that draws everyone to the table. This dish combines tender rice infused with fresh herbs and velvety cream, topped with succulent shrimp sautéed in a garlicky butter sauce that practically melts in your mouth. Perfect for busy weeknights when you crave something special but don’t have hours to spend in the kitchen.

    Recipe

    Why You’ll Love This Creamy Herb Rice with Garlic Butter Shrimp

    A Complete Meal in One Dish

    This recipe hits all the right notes – creamy comfort balanced with bright herbs and protein-packed shrimp. I love how the starchy rice releases its starches to create that restaurant-quality creaminess without heavy cream (though I won’t judge if you add some!). The garlic butter shrimp cook in minutes, making this a practical weeknight solution when you’re craving something that feels fancy. My husband always does that little eyebrow raise when he smells this cooking—the universal signal that dinner’s going to be good.

    Quick Yet Impressive Results

    What makes this dish special is how it transforms simple ingredients into something that looks and tastes like you spent hours in the kitchen. The visual appeal alone—plump pink shrimp nestled on herb-flecked rice—makes it worthy of company, but it’s easy enough for a Tuesday night. I’ve made this countless times when friends drop by unexpectedly, and the “wow” factor never fails. The best part? You’ll spend just about 30 minutes active cooking time, making this the perfect recipe for busy days when you still want to put something special on the table.

    Essential Tips & Tricks

    Perfecting the Rice Base

    The foundation of this dish is perfectly cooked rice with just the right amount of creaminess. I’ve found that rinsing the rice thoroughly before cooking removes excess starch that can make your dish gummy. For the herbs, fresh is best, but don’t stress if you only have dried—just use about one-third the amount. My secret ingredient? A splash of white wine added to the rice as it toasts adds incredible depth. The aroma that rises from the pan when the wine hits the hot rice is absolutely intoxicating. Check out my Italian Chicken Gnocchi Soup for another comforting recipe with similar flavor notes.

    Shrimp Cooking Secrets

    The key to perfectly cooked shrimp is to watch them closely—they transform from raw to perfect to rubbery in minutes. I always pat my shrimp completely dry before adding them to the hot butter; this ensures they sear rather than steam. The garlic should be added only in the last 30 seconds before the shrimp finish cooking to prevent burning. That momentary sizzle when garlic hits the hot butter is one of my favorite kitchen sounds! For extra flavor, save those shrimp shells and make a quick stock by simmering them while your rice cooks. Strain and use this liquid as part of your cooking liquid for the rice.

    Serving Ideas & Creative Variations

    Complementary Side Dishes

    This Creamy Herb Rice with Garlic Butter Shrimp pairs beautifully with simple sides that won’t compete with its rich flavors. A crisp green salad with a light vinaigrette cuts through the creaminess perfectly. I love serving this with roasted asparagus or broccolini that I pop in the oven while finishing the rice. The slight bitterness of these greens complements the richness of the dish. For a complete seafood feast, check out my Broiled Halibut with Parmesan Butter Topping which would make an impressive multi-course meal for special occasions.

    Exciting Flavor Twists

    Don’t be afraid to make this recipe your own with creative variations. For a Mediterranean twist, add sun-dried tomatoes, olives, and crumbled feta on top. Lemon zest brightens everything beautifully—I sometimes add the zest of a whole lemon when I’m craving something extra vibrant. For a spicy kick, stir in a teaspoon of cajun seasoning or red pepper flakes. My family loves when I add crispy pancetta or bacon bits as a garnish. The smoky, salty crunch against the creamy rice creates an irresistible texture contrast that elevates the entire dish.

    Storage & Troubleshooting Guide

    Proper Storage Methods

    This dish keeps remarkably well when stored properly. Transfer leftovers to an airtight container within two hours of cooking and refrigerate for up to three days. I recommend storing the rice and shrimp separately if possible—this prevents the shrimp from becoming overcooked when reheating. For freezing, the rice base freezes beautifully for up to two months, but I find the texture of shrimp suffers in the freezer. My solution is to freeze just the rice portion and cook fresh shrimp when reheating. The convenience of having the rice ready makes this a fantastic meal prep option.

    Fixing Common Issues

    If your rice turns out too wet, don’t panic! Simply uncover and cook over low heat for a few additional minutes, stirring occasionally. For rice that’s too dry, add a splash of warm broth or cream and gently fold it in. If your garlic burns (we’ve all been there), remove the pan from heat immediately, transfer the shrimp to a clean pan, and start the garlic butter again. The most common shrimp issue is overcooking—they should form a “C” shape when done, not a tight “O” which indicates they’ve gone too far. Remember that carryover cooking continues even after removing from heat.

    Frequently Asked Questions

    Can I use frozen shrimp for this Creamy Herb Rice with Garlic Butter Shrimp?

    Absolutely! Thaw completely and pat dry before cooking. I often keep frozen shrimp on hand specifically for this recipe, making it perfect for last-minute dinner plans.

    What herbs work best in this recipe?

    Parsley, chives, and dill are my favorites. Tarragon adds a lovely anise note, while basil and cilantro work well for different flavor profiles. Use what you have and enjoy!

    Can I make this with brown rice instead?

    Yes, but adjust cooking time (45-50 minutes) and liquid amount (add extra ¼ cup). The nuttier flavor of brown rice creates a delicious variation with added fiber.

    How can I make this dairy-free?

    Substitute olive oil for butter and coconut cream for heavy cream. The flavor profile shifts slightly, but it remains delicious with a tropical undertone.

    Is there a way to make this spicy?

    Add red pepper flakes to the garlic butter or stir in a teaspoon of your favorite hot sauce at the end. Cajun seasoning on the shrimp also creates wonderful heat.

    Final Thoughts

    This Creamy Herb Rice with Garlic Butter Shrimp has become my go-to recipe when I want to impress without stress. There’s something deeply satisfying about creating a dish that looks and tastes complex but comes together with minimal effort. The combination of creamy rice, aromatic herbs, and garlicky shrimp creates a symphony of flavors that feels like a warm hug on a plate. I’d love to see your version if you make it—tag me on Pinterest with your creations!

  • Jalapeno Popper Grilled Cheese: Irresistibly Spicy & Cheesy Bliss

    Jalapeno Popper Grilled Cheese: Irresistibly Spicy & Cheesy Bliss

    Jalapeno Popper Grilled Cheese: Irresistibly Spicy & Cheesy Bliss

    The Jalapeno Popper Grilled Cheese Sandwich transforms an ordinary lunch into something extraordinary. There’s something magical about the way the creamy cheese melts between crispy bread, with spicy jalapenos cutting through the richness. I discovered this combination during a rainy Sunday when my pantry was nearly empty, but my craving for comfort food was at an all-time high. What started as a desperate kitchen experiment has become my go-to indulgence that I’m thrilled to share with you on Recipes Darleen. Get ready for a sandwich that delivers all the flavor of jalapeno poppers in a gloriously gooey grilled cheese format!

    Recipe

    Why You’ll Love This Jalapeno Popper Grilled Cheese Sandwich

    The Perfect Balance of Flavors and Textures

    This sandwich hits all the right notes with its contrasting elements working in perfect harmony. The sharp cheddar and smooth cream cheese create a luscious base, while fresh jalapenos add that distinctive peppery heat that tingles rather than overwhelms. I love how the bread turns golden and crispy, making that satisfying crunch when you bite into it, revealing the molten center inside. The bacon adds a smoky saltiness that elevates everything to new heights. It’s like your favorite jalapeno popper appetizer and grilled cheese had a delicious baby!

    Quick and Adaptable for Any Occasion

    What makes this sandwich truly special is how effortlessly it comes together. In just 15 minutes, you can transform basic ingredients into something that tastes restaurant-worthy. I’ve made this for quick solo lunches and dressed it up for dinner guests who always ask for the recipe. The versatility shines through as you can adjust the heat level by controlling the amount of jalapeno seeds or substitute ingredients based on what’s in your refrigerator. It’s perfect alongside a bowl of Italian Chicken Gnocchi Soup for a complete meal.

    Essential Tips & Tricks

    Mastering the Cheese Blend

    The secret to an exceptional Jalapeno Popper Grilled Cheese lies in the cheese combination. I recommend using room temperature cream cheese so it spreads easily without tearing the bread. Mix it with shredded cheddar rather than slices for better melting and flavor distribution. For an authentic popper experience, add a small handful of Monterey Jack or pepper jack. Always grate your cheese fresh instead of using pre-shredded varieties which contain anti-caking agents that prevent that perfect, stretchy melt. Trust me, those extra two minutes of grating make a world of difference!

    The Perfect Cooking Technique

    Achieving that golden-brown exterior with completely melted cheese inside requires patience and the right technique. Start with a cold pan and heat it slowly with the assembled sandwich—this gives the cheese time to melt as the bread gradually browns. Cover the pan for the first few minutes to trap heat, then uncover to crisp up the exterior. Butter the outside of the bread, not the pan, for even browning. When I’m feeling indulgent, I substitute mayonnaise for butter on the outer sides—it creates an incredible golden crust that will make you swoon, just like in my Mexican Street Corn Pasta Salad.

    Serving Ideas & Creative Variations

    Perfect Pairings for Your Sandwich

    Elevate your Jalapeno Popper Grilled Cheese experience with thoughtfully chosen sides. A simple tomato soup creates the classic comfort food pairing that never disappoints—the acidity cuts through the richness beautifully. For something lighter, try a crisp green salad with vinaigrette. I love serving mine with sweet potato fries and a small ramekin of ranch dressing for dipping both the sandwich and fries. The cooling effect of the ranch against the spicy sandwich creates a delightful temperature and flavor contrast that my family requests weekly!

    Exciting Twists on the Classic Recipe

    The beauty of this sandwich lies in its adaptability. Try adding pulled pork for a hearty variation that transforms it into a complete meal. Vegetarian? Substitute the bacon with crispy fried onions or smoked paprika for that smoky essence. For a breakfast version, add a fried egg with a runny yolk—the way it mingles with the melted cheese is absolutely divine. My personal favorite twist includes sliced avocado and a drizzle of honey, similar to the sweet-savory balance in my Honey Butter Skillet Corn Recipe.

    Storage & Troubleshooting Guide

    Make-Ahead and Leftover Solutions

    While this sandwich is best enjoyed fresh off the pan, there are ways to prepare components in advance for quick assembly. Pre-cook and crumble bacon, storing it in the refrigerator for up to three days. The cream cheese mixture can be prepared a day ahead and kept refrigerated in an airtight container. For leftover assembled sandwiches (though they rarely last in my house!), wrap tightly in foil and reheat in a 300°F oven for 10 minutes. Avoid microwaving as it makes the bread soggy—the oven helps maintain that crucial crispy texture.

    Fixing Common Sandwich Problems

    Even experienced cooks encounter challenges! If your cheese isn’t melting completely before the bread browns too much, lower the heat and cover the pan. For bread that’s too soggy, use slightly stale bread or toast it lightly before assembling. If your sandwich filling keeps sliding out, let it rest for 2 minutes before cutting—this allows the cheese to set slightly. Too spicy? Remove all jalapeno seeds and membranes, or substitute with milder poblano peppers. Not spicy enough? Add a dash of hot sauce to the cream cheese mixture for heat that’s evenly distributed throughout.

    Frequently Asked Questions

    Can I make a Jalapeno Popper Grilled Cheese Sandwich ahead of time?

    For best results, prepare components separately in advance. Pre-cook bacon, mix the cream cheese spread, and grate cheese. Store separately in the refrigerator, then assemble and cook fresh when ready to eat.

    How do I control the spice level?

    Adjust heat by removing seeds and membranes (milder) or keeping them in (spicier). Start with half the recommended jalapenos if you’re sensitive to heat, and taste the cream cheese mixture before assembly.

    What’s the best bread for this sandwich?

    Sourdough or country white bread works wonderfully due to their sturdy texture and neutral flavor. Avoid very soft breads that may become soggy under the weight of fillings.

    Can I make this sandwich vegetarian?

    Absolutely! Skip the bacon or substitute with meat alternatives. Add extra depth with smoked paprika, crispy fried onions, or roasted red peppers for complexity.

    What’s the secret to a perfectly melty Jalapeno Popper Grilled Cheese?

    Cook low and slow! Use medium-low heat, cover initially to melt cheese, then uncover to crisp the exterior. Room temperature ingredients also promote even melting.

    Final Thoughts

    This Jalapeno Popper Grilled Cheese Sandwich represents everything I love about cooking—simple ingredients transformed into something extraordinary through thoughtful preparation. The balance of creamy, spicy, crunchy, and savory elements creates a truly craveable experience. I find myself making this sandwich whenever I need a dose of comfort with a kick of excitement. Whether you’re cooking for yourself or sharing with others, this recipe proves that sometimes the most satisfying meals are also the most straightforward. Don’t forget to check out more delicious recipes on Pinterest!

  • Lemon Pepper Turkey Breast Strips That Will Blow Your Mind!

    Lemon Pepper Turkey Breast Strips That Will Blow Your Mind!

    Lemon Pepper Turkey Breast Strips That Will Blow Your Mind!

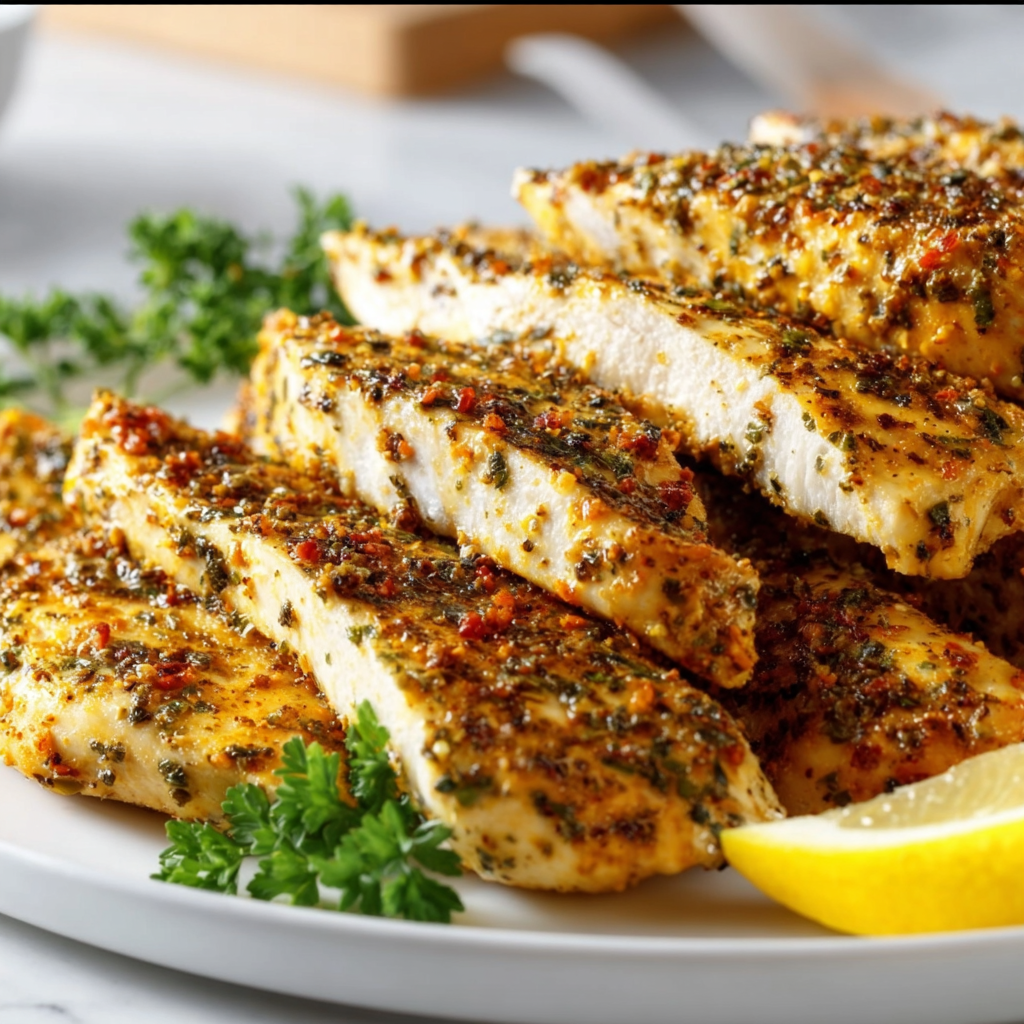
    These zesty lemon pepper turkey breast strips have become my absolute weeknight savior! Tender, juicy, and bursting with bright citrus and peppery notes, they’re the perfect protein that goes from fridge to table in under 20 minutes. I discovered this recipe during a particularly hectic work week when I needed something nutritious yet quick. The aroma of lemon zest and cracked pepper filled my kitchen, and I’ve been making these flavor-packed strips regularly ever since. Whether you’re meal prepping or need a fast dinner solution, these turkey strips deliver maximum flavor with minimal effort.

    Recipe

    Why You’ll Love This Lemon Pepper Turkey Breast Strips

    Perfect Balance of Flavors

    The magic of these strips lies in the perfect harmony between bright lemon and bold pepper. The citrus cuts through the richness of the turkey while the pepper adds that delightful bite that keeps you coming back for more. I’ve found that using fresh lemon zest rather than just juice makes all the difference – it infuses the meat with intense citrus oils that bottled alternatives just can’t match. The pepper creates a beautiful crust when seared, locking in moisture and creating texture contrast that elevates this simple protein to something truly craveable.

    Quick and Nutritious Solution

    On those evenings when cooking feels like a monumental task, these protein-packed strips are my salvation. Turkey breast is naturally lean, making it an excellent choice for health-conscious meals without sacrificing flavor. Each serving delivers approximately 25g of protein with minimal fat, keeping you satisfied for hours. The preparation is wonderfully straightforward – just slice, season, and sear! I often prep the seasoning mix on weekends, which makes weeknight cooking even faster. The entire dish comes together in about 15 minutes, perfect for those nights when hunger and exhaustion are competing for attention.

    Essential Tips & Tricks

    Preparation Secrets

    The key to truly exceptional lemon pepper turkey strips starts with proper turkey preparation. I always slice my turkey breast against the grain into even strips about ½-inch thick – this ensures they cook evenly and remain tender. Pat the meat dry with paper towels before seasoning; this step is crucial for developing that beautiful golden sear. For the most vibrant flavor, use a microplane to zest your lemons directly onto the turkey, allowing the aromatic oils to penetrate the meat. This simple technique transforms an ordinary protein into something that will make your taste buds dance with joy, just like my Mediterranean Chicken Quinoa Bowl.

    Perfect Cooking Technique

    Achieving that ideal golden exterior while maintaining juicy tenderness inside requires careful heat management. I start with a hot pan (cast iron is my favorite) with just a touch of olive oil, then reduce to medium heat once the strips hit the surface. This creates an immediate sear that locks in moisture. The most common mistake is overcooking – turkey breast cooks quickly! Just 2-3 minutes per side is usually sufficient. Look for a temperature of 165°F on an instant-read thermometer. For extra juiciness, I sometimes add a splash of chicken broth and cover the pan for the final minute, creating a gentle steam bath that keeps everything succulent.

    Serving Ideas & Creative Variations

    Versatile Meal Pairings

    These flavor-packed strips are incredibly versatile and pair beautifully with countless sides. My personal favorite is serving them over a bed of lemony orzo with roasted asparagus – the pasta absorbs any juices from the turkey, creating a light sauce that ties everything together. For a lower-carb option, try them atop a crisp Greek salad with cucumber, tomato, and feta. They’re also perfect for meal prep – I’ll often make a double batch on Sunday and use them throughout the week in wraps, grain bowls, or chopped into Italian Chicken Gnocchi Soup for an easy twist. The bright flavors hold up beautifully for 3-4 days in the refrigerator.

    Exciting Flavor Twists

    While the classic lemon-pepper combination is divine, don’t be afraid to experiment with variations. Adding a tablespoon of honey to the seasoning creates a sweet-savory glaze that caramelizes beautifully when cooked. For Mediterranean flair, mix in dried oregano, minced garlic, and a pinch of red pepper flakes. My summer favorite is adding fresh herbs – chopped dill, basil, or thyme folded in just before serving brightens everything. For a more complex profile, try incorporating a teaspoon of Dijon mustard into the seasoning mix. The slight tang complements the lemon perfectly while adding depth that makes these strips feel even more special.

    Storage & Troubleshooting Guide

    Proper Storage Methods

    To maintain the optimal texture and flavor of your lemon pepper turkey strips, proper storage is essential. Allow leftovers to cool completely before transferring to an airtight container lined with a paper towel to absorb excess moisture. Refrigerate for up to 4 days. For longer storage, freeze the strips in a single layer on a parchment-lined baking sheet until solid, then transfer to freezer bags with the air pressed out. This method prevents freezer burn and allows you to grab just what you need. When reheating, avoid the microwave if possible – a quick 2-minute sear in a hot skillet revives the exterior crispness without drying out the meat.

    Common Issues and Solutions

    If your turkey strips turn out dry, you’ve likely overcooked the meat. Turkey breast is lean and cooks quickly – next time, reduce your cooking time by 1-2 minutes per side. For extra insurance against dryness, try brining the strips in a simple salt-water solution for 30 minutes before cooking. If your seasoning isn’t adhering well, ensure you’ve thoroughly patted the meat dry and consider adding a teaspoon of olive oil to help the lemon zest and pepper stick. For strips that lack flavor intensity, remember that fresh ingredients make all the difference – pre-ground pepper and bottled lemon juice simply can’t compete with freshly cracked pepper and just-zested lemon.

    Frequently Asked Questions

    Can I use turkey tenderloins instead of breast for these lemon pepper turkey strips?

    Absolutely! Turkey tenderloins work beautifully and often cook even faster than breast meat. They’re naturally more tender but follow the same cooking guidelines, watching carefully as they may need 1-2 minutes less cooking time.

    How do I prevent the lemon pepper seasoning from burning in the pan?

    Monitor your heat level carefully. Start with medium-high heat for the initial sear, then reduce to medium. Adding a tiny bit of honey to your seasoning mix can also help prevent burning while adding delicious caramelization.

    Can I make this recipe with chicken instead?

    Yes! Chicken breast works perfectly as a substitute. The cooking method remains the same, though thicker chicken breasts might need an additional minute per side to reach 165°F internal temperature.

    How can I make these strips spicier?

    Add cayenne pepper or red pepper flakes to your seasoning mix. Start with ¼ teaspoon and adjust to your preference. For complex heat, try adding a pinch of smoked paprika as well.

    What’s the best way to meal prep these lemon pepper turkey strips for the week?

    Cook a double batch, cool completely, then refrigerate in airtight containers. They maintain their flavor and texture for up to 4 days, making them perfect for quick salads, wraps, or protein-packed snacks.

    Final Thoughts

    These lemon pepper turkey breast strips have become a staple in my kitchen for good reason – they’re the perfect balance of convenience, nutrition, and incredible flavor. The bright citrus notes paired with the bold pepper create a protein option that never feels boring or repetitive. I find myself reaching for this recipe whenever I need a reliable, delicious meal that doesn’t demand hours in the kitchen. Whether you’re cooking for one or feeding a family, these versatile strips adapt to countless meal scenarios. For more inspiration, check out my Pinterest for creative serving ideas!

  • Italian Beef Stew Recipe: Cozy, Hearty Comfort in Every Bite!

    Italian Beef Stew Recipe: Cozy, Hearty Comfort in Every Bite!

    Italian Beef Stew Recipe: Cozy, Hearty Comfort in Every Bite!

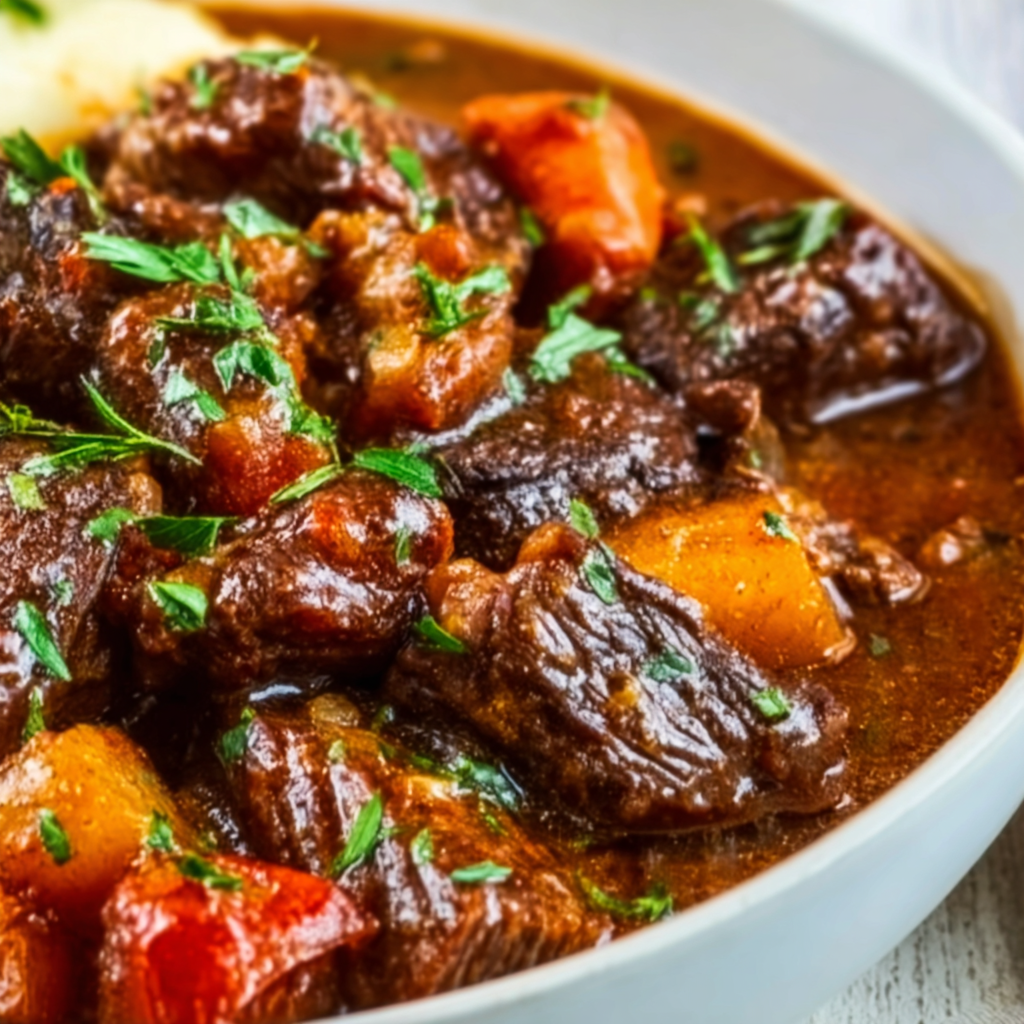
    There’s nothing quite like the rich aroma of Italian Beef Stew simmering away on a cold afternoon. This hearty, soul-warming dish has been my go-to comfort food since my grandmother first taught me to make it on rainy Sundays in her tiny kitchen. The tender chunks of beef, aromatic herbs, and robust tomato base create a perfect harmony of flavors that transport you straight to the Italian countryside. Unlike many stews that can feel heavy, this recipe balances richness with bright notes from fresh herbs and a splash of red wine that elevates every spoonful. Let me show you how to create this unforgettable dish that’s become a cornerstone in my family’s recipe collection.

    Recipe

    Why You’ll Love This Italian Beef Stew

    Perfect One-Pot Comfort Food

    This Italian Beef Stew is the ultimate one-pot wonder that delivers maximum flavor with minimal effort. The beauty lies in its simplicity—just brown the meat, add your vegetables, pour in the liquids, and let everything mingle and develop into something truly magical. I love how the kitchen fills with that unmistakable aroma of herbs and simmering tomatoes about halfway through cooking. The stew develops layers of flavor as it cooks, with the beef becoming fork-tender and absorbing all those wonderful Italian seasonings. Plus, cleanup is a breeze with just one pot to wash, making this perfect for busy weeknights or lazy weekend cooking.

    Versatile and Forgiving

    What I adore about this Italian Beef Stew is how incredibly versatile it is. Don’t have fresh rosemary? Dried works beautifully. Only have ground beef instead of chuck? It’ll still be delicious. The recipe welcomes substitutions and additions based on what you have on hand. I’ve made this with different vegetables depending on the season—summer squash in August, extra mushrooms in fall—and it’s always turned out wonderfully. The forgiving nature of this stew makes it perfect for beginning cooks or those nights when you’re working with pantry staples. And if you accidentally let it simmer a bit too long? No worries—it often tastes even better!

    Essential Tips & Tricks

    Selecting and Preparing the Beef

    Choosing the right cut is crucial for an exceptional Italian Beef Stew. I recommend chuck roast for its perfect balance of meat and fat, which breaks down beautifully during the slow cooking process. Cut the beef into uniform 1½-inch cubes to ensure even cooking. Before adding to your pot, make sure to thoroughly pat the meat dry with paper towels—this is non-negotiable! Damp meat will steam rather than sear, and you’ll miss out on that gorgeous brown crust that adds incredible depth of flavor. Work in batches when browning to avoid overcrowding the pot, which is another common mistake that prevents proper caramelization.

    The Secret to Rich Flavor

    The foundation of exceptional Italian Beef Stew lies in building flavor at every stage. Start by properly deglazing your pot after browning the meat—those browned bits (fond) contain concentrated flavor gold! Use a good-quality dry red wine like Chianti or Sangiovese that you’d actually drink (never cooking wine). Let it reduce slightly before adding other liquids. Another game-changer is adding a parmesan rind during simmering—it melts slowly, infusing the stew with incredible umami depth. For an authentic Italian touch like my Italian Chicken Gnocchi Soup, finish with fresh herbs in the last 10 minutes of cooking, rather than at the beginning.

    Serving Ideas & Creative Variations

    Perfect Pairings

    Italian Beef Stew shines brightest when served with the right accompaniments. My absolute favorite pairing is a crusty loaf of ciabatta bread for sopping up every last drop of that rich gravy—there’s something deeply satisfying about using bread as your utensil! For a complete meal, I love serving it over creamy polenta or alongside roasted garlic mashed potatoes. If you’re looking for a lighter option, a simple arugula salad with lemon vinaigrette provides the perfect peppery contrast to the stew’s richness. For special occasions, I’ll sometimes prepare my High Protein Creamy Beef Pasta as a starter before bringing out this showstopping stew.

    Regional Italian Twists

    While this recipe captures the essence of traditional Italian Beef Stew, each region in Italy has its own delightful variation. For a Tuscan-inspired version, add cannellini beans and kale during the last 30 minutes of cooking. The Northern Italian approach includes more root vegetables like parsnips and turnips, plus a touch of cream for richness. My personal favorite twist is the Sicilian variation with olives, capers, and a hint of orange zest that brightens the entire dish. Sometimes I’ll add pancetta at the beginning for a deeper flavor profile, or incorporate porcini mushrooms for an earthy dimension that complements the beef beautifully.

    Storage & Troubleshooting Guide

    Proper Storage and Reheating

    Like most stews, Italian Beef Stew actually improves with time as the flavors continue to meld. Store leftovers in airtight containers in the refrigerator for up to 4 days, or freeze for up to 3 months. When freezing, leave about an inch of space at the top of your container to allow for expansion. For the best reheating results, thaw frozen stew overnight in the refrigerator, then warm slowly over medium-low heat on the stovetop, adding a splash of beef broth if it seems too thick. Avoid microwaving if possible, as it can make the meat tough. I often make a double batch specifically to freeze individual portions for quick weeknight dinners.

    Fixing Common Issues

    Even experienced cooks occasionally encounter challenges with stew. If your Italian Beef Stew turns out too thin, create a slurry with 1 tablespoon cornstarch mixed with 2 tablespoons cold water, then stir it in during the last 15 minutes of cooking. For stew that’s too thick, simply add more beef broth until you reach your desired consistency. If the meat seems tough, it likely needs more time—contrary to what you might think, tough stew meat usually indicates undercooking, not overcooking. And if your stew tastes flat, try adding a splash of balsamic vinegar or a squeeze of lemon juice just before serving to brighten all the flavors.

    Frequently Asked Questions

    What cut of beef is best for Italian Beef Stew?

    Chuck roast is ideal as it becomes tender and flavorful when slow-cooked. Beef shoulder or bottom round also work well. Look for meat with good marbling for the most succulent results.

    Can I make Italian Beef Stew in a slow cooker?

    Absolutely! Brown the meat and sauté the vegetables first, then transfer everything to your slow cooker. Cook on low for 7-8 hours or high for 4-5 hours until the beef is fork-tender.

    What’s the best wine to use in this recipe?

    Use a dry red wine you’d enjoy drinking like Chianti, Sangiovese, or Montepulciano. The wine’s flavors concentrate during cooking, so quality matters. Avoid “cooking wine” which contains salt and additives.

    Can I make this stew ahead of time?

    Yes! Italian Beef Stew tastes even better the next day as flavors continue to develop. Make it up to 2 days ahead and refrigerate in an airtight container, then gently reheat before serving.

    How can I thicken my stew if it’s too watery?

    Create a cornstarch slurry with 1 tablespoon cornstarch mixed with 2 tablespoons cold water. Stir into simmering stew during the last 15 minutes of cooking until it reaches your desired thickness.

    Final Thoughts

    This Italian Beef Stew has been my culinary companion through countless family gatherings, chilly evenings, and times when I needed the comfort only a truly satisfying meal can provide. There’s something almost magical about how a handful of simple ingredients can transform into something so profoundly nourishing and delicious. I hope this recipe brings the same warmth and joy to your table that it has to mine. The beauty of Italian cooking lies in its respect for quality ingredients and unhurried preparation—values that this stew embodies perfectly. Don’t forget to share your creations on Pinterest and let me know how you made this Italian Beef Stew your own!

  • Spicy Pulled Chicken Tacos That’ll Blow Your Taste Buds Away!

    Spicy Pulled Chicken Tacos That’ll Blow Your Taste Buds Away!

    Spicy Pulled Chicken Tacos That’ll Blow Your Taste Buds Away!

    These Spicy Pulled Chicken Tacos have become my weeknight salvation – tender shredded chicken simmered in a sauce that hits all the right notes of smoky, spicy, and slightly sweet. I first created this recipe during a particularly chaotic Tuesday when I had exactly 30 minutes to get dinner on the table before my daughter’s soccer practice. The kitchen filled with that intoxicating aroma of toasted cumin and chile powder, and I knew I’d found my new go-to. The beauty lies in its simplicity – just a handful of pantry staples transform ordinary chicken into something truly craveable that the whole family devours. If you’re looking for a dinner that delivers big flavor without big effort, these tacos are about to become your new favorite too.

    Recipe

    Why You’ll Love This Spicy Pulled Chicken Tacos

    Perfect Balance of Heat and Flavor

    What makes these tacos truly special is the perfect balance of heat and flavor. I’ve carefully calibrated the spice blend so it delivers warmth without overwhelming your palate. The chipotle powder brings a deep smokiness while the ancho chile offers rich, fruity notes that complement the chicken beautifully. What I love most is how the spices bloom in the hot oil before adding the chicken, releasing their essential oils and creating layers of flavor that store-bought taco seasoning simply can’t match. And if you’re serving little ones or spice-sensitive folks, you can easily dial the heat up or down without sacrificing any of the delicious complexity.

    Quick and Versatile Weeknight Solution

    These Spicy Pulled Chicken Tacos are a weeknight wonder that comes together in under 30 minutes, making them perfect for those evenings when cooking feels like a chore. I often prep the spice mixture on Sunday, so when Wednesday’s dinner panic hits, I’m halfway there already! The versatility is what keeps this recipe in heavy rotation at my house – the tender, flavorful chicken works beautifully in soft tortillas, over rice bowls, or even stuffed into baked potatoes. Last month, I served it over crispy tater tots with melted cheese for an impromptu nacho night that my kids still talk about. It’s truly the ultimate adaptable protein.

    Essential Tips & Tricks

    Achieving Perfect Tender Texture

    The secret to achieving that melt-in-your-mouth texture comes down to two key factors: cooking time and method. I’ve found that boneless chicken thighs deliver consistently better results than breasts because their higher fat content prevents them from drying out during cooking. For the quickest route, use two forks to shred the chicken when it’s about 90% cooked, then return it to the sauce to finish cooking. This allows the meat to absorb more flavor while remaining tender. My personal game-changing discovery was adding just a tablespoon of apple cider vinegar to the sauce – it not only brightens the flavors but helps break down the proteins for that perfect pulled texture.

    Layering Flavors For Maximum Impact

    Creating depth of flavor in these tacos requires thoughtful layering of ingredients. Start by properly toasting your spices in oil until fragrant – this step takes just 30 seconds but makes all the difference. Another trick I swear by is adding a spoonful of tomato paste early in the cooking process and letting it caramelize slightly before adding liquids. This develops a rich umami foundation that supports all the other flavors. For an extra dimension, try stirring in a tablespoon of honey butter at the very end – the subtle sweetness creates a beautiful contrast with the spices and elevates the entire dish to restaurant quality.

    Serving Ideas & Creative Variations

    Build-Your-Own Taco Bar

    Transform dinner into an interactive experience by setting up a build-your-own taco bar. I arrange small bowls filled with toppings like diced avocado, pickled red onions, fresh cilantro, crumbled cotija cheese, and lime wedges. This not only makes serving easier but turns dinner into a fun family activity where everyone customizes their perfect bite. My daughter loves adding mango salsa for sweetness, while my husband piles on authentic pico de gallo for extra freshness and kick. For an elevated touch, warm your tortillas on a dry cast-iron skillet until they develop light char marks – this simple step enhances both texture and flavor dramatically.

    Global Fusion Inspirations

    While these tacos have Mexican roots, they’re wonderfully receptive to global flavor influences. For an Asian-inspired twist, add a tablespoon of grated ginger to the spice mix and top with quick-pickled cucumbers and sriracha mayo. Mediterranean flavors work beautifully too – try incorporating oregano and lemon zest into the chicken, then topping with cucumber, diced tomatoes, and tzatziki sauce. My personal favorite variation happened by happy accident when I was low on ingredients – I added a spoonful of Thai red curry paste to the sauce and topped the tacos with crunchy cabbage slaw and chopped peanuts. The result was absolutely delicious!

    Storage & Troubleshooting Guide

    Making Ahead and Proper Storage

    The pulled chicken mixture is perfect for meal prepping as it actually improves after a day in the refrigerator when the flavors have time to meld. Store the cooled chicken in airtight containers for up to 4 days in the refrigerator, or freeze portions for up to 3 months. When freezing, I add a few tablespoons of the cooking liquid to each portion to prevent it from drying out during reheating. For the freshest taste when serving leftovers, reheat the chicken gently with a splash of chicken broth to restore moisture, and always prepare fresh toppings and warm tortillas just before serving.

    Fixing Common Issues

    If your pulled chicken turns out too dry, the simplest fix is adding a few tablespoons of chicken broth or even a dollop of sour cream to restore moisture. For chicken that’s not flavorful enough, don’t just add more salt – instead, brighten it with fresh lime juice and additional toasted spices to create dimension. If the spice level is too intense, cool it down with avocado, sour cream, or even a drizzle of honey to balance the heat. Remember that the texture should be moist but not soupy – if there’s too much liquid, simmer uncovered for a few minutes to reduce, or add a cornstarch slurry for thicker sauce.

    Frequently Asked Questions

    Can I make Spicy Pulled Chicken Tacos in a slow cooker?

    Absolutely! Place all ingredients in your slow cooker and cook on low for 6-7 hours or high for 3-4 hours. Shred the chicken, return to the sauce, and cook an additional 30 minutes to absorb flavors.

    What’s the best way to warm tortillas for these tacos?

    For corn tortillas, heat a dry skillet over medium-high heat and warm each tortilla 15-20 seconds per side. For flour tortillas, wrap a stack in foil and heat in a 350°F oven for 5-7 minutes.

    How can I make this recipe less spicy?

    Reduce or omit the chipotle powder and cayenne, and use mild chili powder instead. You can also serve with cooling toppings like avocado, sour cream, or Mexican crema.

    Can I use rotisserie chicken for a quicker version?

    Yes! Shred a rotisserie chicken and warm it in the prepared sauce for about 10 minutes. This cuts your cooking time in half while still delivering great flavor.

    What sides pair well with Spicy Pulled Chicken Tacos?

    Try cilantro-lime rice, black beans, Mexican street corn, or a simple green salad. For a complete fiesta, add guacamole and homemade margaritas!

    Final Thoughts

    These Spicy Pulled Chicken Tacos have earned their place in my regular rotation because they deliver maximum flavor with minimum effort – the holy grail of home cooking. What I love most is watching family and friends customize their tacos, creating their perfect bites with all the colorful toppings. The versatility of this recipe means it never gets boring, and the leftovers (if there are any!) make lunch the next day something to look forward to. For more delicious Mexican-inspired recipes, follow me on Pinterest where I’m always sharing new taco night inspirations!

  • Creamy Garlic Butter Beef Pasta: Irresistible Comfort in Every Bite!

    Creamy Garlic Butter Beef Pasta: Irresistible Comfort in Every Bite!

    Creamy Garlic Butter Beef Pasta: Irresistible Comfort in Every Bite!

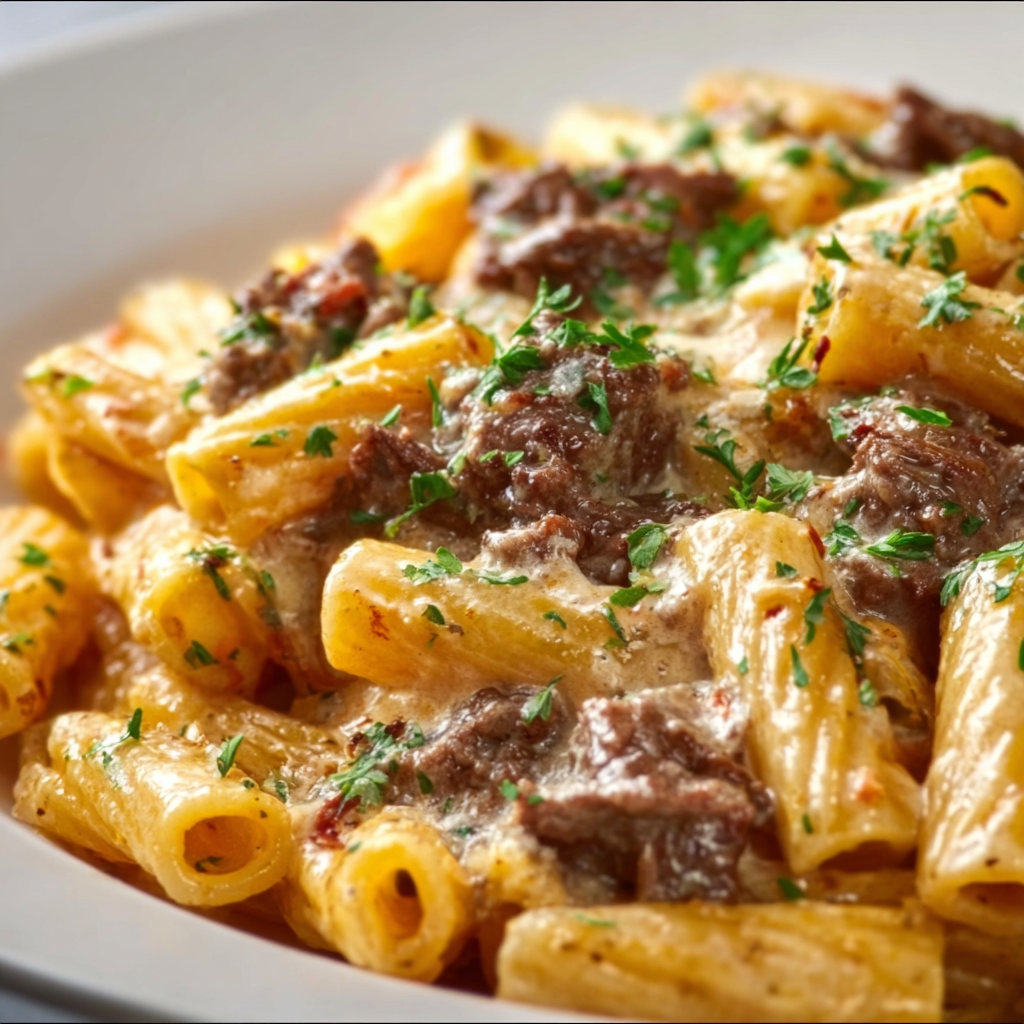
    This Creamy Garlic Butter Beef Pasta combines tender strips of beef with al dente pasta, all wrapped in a velvety garlic butter sauce that will make your taste buds dance. I first created this dish on a chilly Sunday evening when comfort food was calling my name, and it’s been a family favorite ever since. The rich aroma of garlic and butter simmering on the stove still takes me back to that cozy night. If you’re looking for a hearty, satisfying meal that comes together in under 30 minutes, this recipe is about to become your new weeknight hero.

    Recipe

    Why You’ll Love This Creamy Garlic Butter Beef Pasta

    Perfect Balance of Flavors and Textures

    There’s something magical about the combination of tender beef strips and perfectly cooked pasta swimming in a silky garlic butter sauce. The beef provides a satisfying chew while the pasta absorbs all those incredible flavors. I love how the sauce clings to every piece, ensuring each bite delivers that creamy, garlicky goodness. The subtle tang from the cream cheese balances the richness, while a sprinkle of parmesan adds that umami depth that makes your eyes close involuntarily with each forkful. It’s comfort food that feels indulgent without being overly heavy.

    Quick and Easy Preparation

    On those nights when you’re craving something delicious but don’t have the energy for complicated cooking, this one-pot wonder comes to the rescue. From start to finish, you’ll have dinner on the table in under 30 minutes. I can’t count how many busy weeknights this recipe has saved me! The simple ingredient list features pantry staples you likely already have on hand. Even better, the cleanup is minimal since everything comes together in a single pan. It’s the perfect balance of impressive flavor and weeknight practicality that makes this dish a regular in my meal rotation.

    Essential Tips & Tricks

    Beef Selection and Preparation

    Choosing the right cut of beef makes all the difference in this pasta dish. I recommend using sirloin or ribeye for the perfect balance of tenderness and flavor. Slice the beef against the grain into thin strips – this ensures maximum tenderness even with quick cooking. Before adding the beef to your hot pan, pat it dry with paper towels to promote beautiful browning instead of steaming. Season generously with salt and pepper, then cook in batches if necessary. Overcrowding the pan is the enemy of properly seared beef! For an extra flavor boost, try marinating the beef in a tablespoon of Worcestershire sauce for 15 minutes before cooking.

    Perfecting the Creamy Sauce

    The heart of this dish is undoubtedly the velvety garlic butter sauce. For the richest flavor, use real butter – no substitutes here! When adding garlic, cook it just until fragrant (about 30 seconds) to avoid any bitterness. For the creamiest texture, bring your cream cheese to room temperature before adding it to the pan, and whisk continuously as it melts. If your sauce seems too thick, gradually add small amounts of pasta water until you reach your desired consistency. The starchy pasta water works magic in creating a silky-smooth sauce that perfectly coats each pasta strand, just like in restaurant-quality dishes.

    Serving Ideas & Creative Variations

    Complementary Side Dishes

    This creamy beef pasta pairs beautifully with bright, acidic sides that cut through the richness. I love serving it with a simple arugula salad dressed with lemon juice and olive oil – the peppery greens and citrus notes provide the perfect contrast. Roasted asparagus or broccolini also make excellent vegetable companions, adding color and nutrition to your plate. For a complete meal that will impress dinner guests, add some garlic bread or crusty sourdough to mop up every last bit of that heavenly sauce. When entertaining, I serve this pasta family-style in a large, shallow bowl garnished with fresh herbs.

    Exciting Flavor Twists

    Don’t be afraid to make this recipe your own with some creative additions! For a spicy kick, add red pepper flakes or a dollop of chili crisp. Mushroom lovers can sauté cremini or shiitake mushrooms alongside the beef for an earthy dimension. For a Mediterranean twist, stir in sun-dried tomatoes, spinach, and black olives during the final minutes of cooking. Bacon enthusiasts might appreciate crispy pancetta bits sprinkled on top. You can even swap the beef for chicken thighs or plump shrimp if you’re in the mood for something different. The versatile garlic butter sauce works beautifully with virtually any protein or vegetable addition.

    Storage & Troubleshooting Guide

    Proper Storage and Reheating

    This creamy pasta stores surprisingly well, making it perfect for meal prep or planned leftovers. Allow it to cool completely before transferring to airtight containers – this prevents condensation that could make your pasta soggy. Refrigerate for up to 3 days for the best quality. When reheating, add a splash of milk or cream to revive the sauce, as it will thicken considerably when chilled. Warm gently on the stovetop over medium-low heat, stirring frequently to prevent sticking or separation. For single portions, microwave at 50% power in 30-second intervals, stirring between each until heated through. The flavors actually develop beautifully overnight!

    Troubleshooting Common Issues

    If your sauce breaks or appears curdled, don’t panic! Lower the heat immediately and whisk in a tablespoon of cold cream or milk until smooth again. For a sauce that’s too thin, simmer uncovered for a few extra minutes to reduce, or add a cornstarch slurry (1 teaspoon cornstarch mixed with 1 tablespoon cold water) while whisking. If your sauce is too thick, gradually incorporate more pasta water or cream until you reach the desired consistency. Bland sauce? Brighten it with a squeeze of lemon juice or a splash of white wine, and don’t underestimate the power of properly salting your pasta water. Remember that pasta continues absorbing sauce as it sits, so serve promptly for the ideal texture.

    Frequently Asked Questions

    Can I make Creamy Garlic Butter Beef Pasta ahead of time?

    Yes! Prepare the components separately – cook the pasta al dente and refrigerate with a little oil to prevent sticking. Make the beef and sauce, refrigerate, then combine and reheat gently when ready to serve, adding a splash of cream to refresh the sauce.

    What pasta shape works best for this recipe?

    Fettuccine, pappardelle, and linguine are ideal as their flat surfaces capture the creamy sauce beautifully. However, shapes with ridges or hollows like rigatoni or penne also work well by trapping sauce inside.

    Can I use a dairy-free alternative for the cream?

    Absolutely! Coconut cream or cashew cream make excellent substitutes. For the butter, use a high-quality plant-based butter. The sauce won’t be identical but will still deliver a delicious creamy texture.

    How can I add more vegetables to this dish?

    Sauté bell peppers, zucchini, or spinach after cooking the beef, then set aside. Alternatively, roast vegetables separately and fold them in just before serving to maintain their texture and flavor.

    Is there a way to make Creamy Garlic Butter Beef Pasta lower in calories?

    Try using lean beef, light cream cheese, and half-and-half instead of heavy cream. You can also increase the protein-to-pasta ratio and bulk up the dish with extra vegetables for a lighter version.

    Final Thoughts

    This Creamy Garlic Butter Beef Pasta has become my go-to recipe when I want to impress without spending hours in the kitchen. There’s something deeply satisfying about creating a restaurant-quality dish with such simple ingredients. The way the velvety sauce coats each strand of pasta, the tender bites of beef, and the aromatic garlic butter coming together – it’s pure comfort in every forkful. I hope this recipe brings as much joy to your table as it has to mine. For more delicious pasta inspirations, be sure to check out my Pinterest board where I’m always sharing new favorites!

  • Spicy Cajun Chicken and Rice That Will Ignite Your Taste Buds!

    Spicy Cajun Chicken and Rice That Will Ignite Your Taste Buds!

    Spicy Cajun Chicken and Rice That Will Ignite Your Taste Buds!

    There’s something magical about a well-seasoned Spicy Cajun Chicken And Rice that transforms an ordinary weeknight into something special. The first time I made this dish, my kitchen filled with aromas that transported me straight to New Orleans – warm spices, sizzling chicken, and the earthy scent of rice soaking up all that flavor. What I love most about this recipe is how it balances bold Cajun heat with the comforting simplicity of a one-pot meal. Perfect for busy evenings when you want something that feels like a culinary hug but packs a flavorful punch. Ready to bring some Southern comfort to your table? Let’s get cooking!

    Recipe

    Why You’ll Love This Spicy Cajun Chicken And Rice

    Perfect Balance of Flavor and Heat

    The beauty of this Spicy Cajun Chicken And Rice lies in its perfect equilibrium of flavors. The authentic Cajun seasoning brings a warming heat that builds gradually rather than overwhelming your palate. I’ve carefully calibrated the spice level so it delivers that characteristic Louisiana kick without sending you running for water. The tender chicken thighs absorb these flavors beautifully, while bell peppers and celery add fresh, crisp contrast. What makes this dish special is how each bite offers something different – sometimes the smoky paprika comes forward, other times it’s the herbal notes of thyme and oregano.

    One-Pot Convenience

    There’s nothing I appreciate more after a long day than minimal cleanup, which is why this one-pot wonder has become a staple in my kitchen. Everything cooks together – the aromatic trinity of onions, celery, and bell peppers creates a flavorful base, while the rice absorbs all those delicious juices as it simmers. The cooking technique here is foolproof; you’ll build layers of flavor by first browning the chicken, then sautéing vegetables in those same flavorful drippings. This approach means fewer dishes to wash and more concentrated flavor in every grain of rice. It’s the perfect marriage of convenience and culinary excellence!

    Essential Tips & Tricks

    Getting the Rice Perfect Every Time

    The secret to perfect rice in this Spicy Cajun Chicken And Rice is all about the liquid ratio and timing. I always use long-grain rice because it stays fluffy and distinct, unlike short-grain varieties that can become sticky. For foolproof results, maintain a 1:2 ratio of rice to liquid, and resist the urge to peek under the lid while it’s simmering! That trapped steam is essential for even cooking. If you’re finding your rice still has a slight bite after the cooking time, add 2 tablespoons of water, cover, and let it rest off heat for 5 minutes. This gentle steaming will finish the job without making the bottom layer mushy.

    Mastering the Cajun Seasoning

    While store-bought Cajun seasoning works in a pinch, making your own spice blend elevates this dish to restaurant quality. My homemade mix combines paprika, cayenne, garlic powder, onion powder, oregano, thyme, and black pepper – with the flexibility to adjust heat to your preference. The key is toasting your spices in the dry pan for 30 seconds before adding oil – this simple step awakens their essential oils for deeper flavor. For an authentic touch, try adding a pinch of file powder (ground sassafras) if you can find it. Check out my Mediterranean Chicken Quinoa Bowl for another perfectly seasoned one-pot meal!

    Serving Ideas & Creative Variations

    Perfect Pairings and Sides

    This Spicy Cajun Chicken And Rice shines as a complete meal, but a few thoughtful sides can take it to the next level. I love serving it with a cooling element like a simple side salad with creamy avocado or a tangy coleslaw to balance the heat. For a true New Orleans experience, add a basket of warm cornbread with honey butter to soak up the flavorful sauce. When entertaining, I arrange the dish on a large platter surrounded by lemon wedges and fresh chopped parsley – the pop of color makes for a beautiful presentation. The acidic brightness of the lemon cuts through the richness and adds a fresh dimension.

    Exciting Recipe Variations

    The beauty of this recipe is its flexibility – it welcomes creative twists while maintaining its soul-warming essence. Swap chicken for andouille sausage for a more traditional jambalaya feel, or add shrimp during the last 5 minutes of cooking for a seafood version. For a vegetarian take, replace the chicken with hearty portobello mushrooms and double the bell peppers. Need a lower-carb option? Try cauliflower rice instead, adjusting the cooking time down to just 5-7 minutes. For more protein-packed meal ideas, check out my High Protein Creamy Beef Pasta that uses similar flavor-building techniques!

    Storage & Troubleshooting Guide

    Proper Storage and Reheating

    This Spicy Cajun Chicken And Rice actually improves overnight as the flavors meld together, making it perfect for meal prep. Store leftovers in airtight containers in the refrigerator for up to 3 days, or freeze portions for up to 2 months. When reheating, add a splash of chicken broth or water to restore moisture, especially if using the microwave. For best results, reheat gently on the stovetop over medium-low heat, stirring occasionally. The texture of the rice will be slightly different after freezing, but a sprinkle of fresh herbs just before serving brings it back to life beautifully.

    Common Issues and Quick Fixes

    Even experienced cooks occasionally encounter challenges with one-pot rice dishes. If your rice is still hard after the cooking time, your heat may have been too high causing the liquid to evaporate too quickly. The fix? Add ¼ cup of hot broth, cover, and simmer on very low heat for another 5-7 minutes. If your dish turned out too spicy, don’t panic! Serve it with a dollop of cooling yogurt or sour cream to balance the heat. For a too-bland result, a splash of hot sauce or extra Cajun seasoning stirred in at the end works wonders. Remember that rice continues absorbing liquid as it sits, so serve promptly once it’s reached your desired texture.

    Frequently Asked Questions

    Can I use brown rice for this Spicy Cajun Chicken And Rice?

    Yes, but you’ll need to adjust cooking time and liquid. Brown rice typically requires 45 minutes to cook and about 25% more liquid. Consider par-cooking the chicken separately to prevent it from becoming too dry during the extended cooking time.

    What can I substitute for bell peppers if I don’t have any?

    Celery and onions are essential, but you can replace bell peppers with diced zucchini, carrots, or even mushrooms. Add them at the same point in the recipe for similar texture and cooking results.

    Is this recipe gluten-free?

    Yes! This recipe is naturally gluten-free, assuming your Cajun seasoning doesn’t contain any wheat-based additives. Always check store-bought seasoning labels if you’re cooking for someone with celiac disease.

    How can I make a vegetarian version?

    Replace chicken with 2 cups of chickpeas or 12 ounces of diced extra-firm tofu. Add an extra tablespoon of olive oil for richness and use vegetable broth instead of chicken broth.

    Can I make this in an Instant Pot?

    Absolutely! Use the sauté function for browning chicken and vegetables, then add rice and liquid. Cook on high pressure for 5 minutes with 10 minutes natural release for perfect results.

    Final Thoughts

    This Spicy Cajun Chicken And Rice has become my go-to recipe when I want to impress without spending hours in the kitchen. There’s something deeply satisfying about creating such complex flavors from simple ingredients in just one pot. Whether you’re cooking for a quiet family dinner or hosting friends, this dish strikes that perfect balance between comfort and excitement. I’d love to see your creations if you try this recipe – tag me on Pinterest with your spicy masterpiece! The beauty of Cajun cooking is that it’s meant to be shared, savored, and made your own.