Author: Darleen Vance

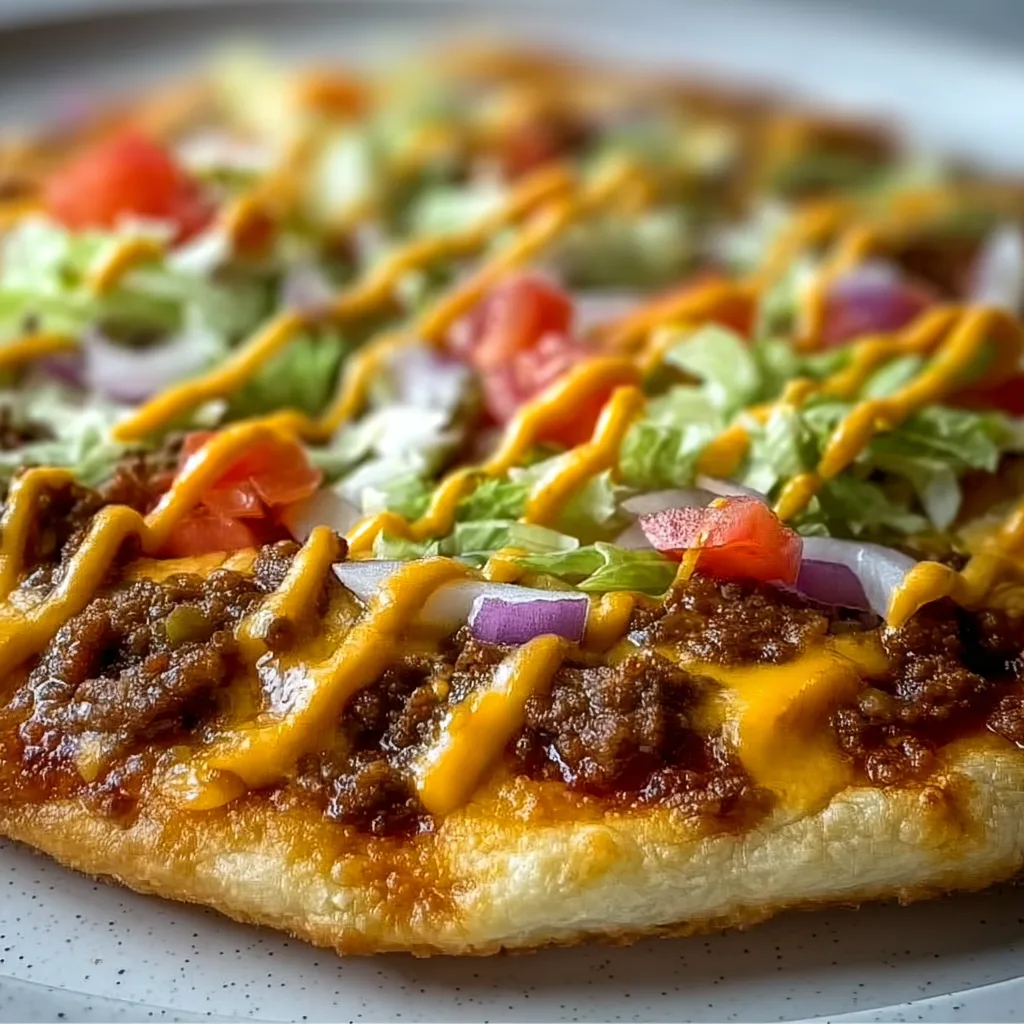
  • Big Mac Pizza Explosion: Irresistible Flavor You Can’t Miss!

    Big Mac Pizza Explosion: Irresistible Flavor You Can’t Miss!

    Big Mac Pizza Explosion: Irresistible Flavor You Can’t Miss!

    Big Mac Pizza combines two of America’s most beloved comfort foods into one irresistible creation that will have your taste buds doing a happy dance! The first time I made this for my family, my kitchen filled with the unmistakable aroma of those classic Big Mac flavors, and everyone gathered around the counter before I could even slice it. This crowd-pleasing mashup features all the iconic components—special sauce, two-layer beef, pickles, onions, lettuce, and sesame seeds—but on a pizza crust instead of a bun. It’s the ultimate weekend indulgence that brings fast food nostalgia right to your dinner table!

    Recipe

    Why You’ll Love This Big Mac Pizza

    Perfect Fusion of Flavors

    The magic of this pizza lies in how faithfully it recreates that unmistakable Big Mac taste. The tangy special sauce (my version uses a blend of mayo, ketchup, pickle relish, and a touch of vinegar) creates that nostalgic first bite feeling. I’ve found that cooking the ground beef with a pinch of mustard powder creates that authentic fast-food flavor that everyone recognizes instantly. When my neighbor’s kids tried this, they couldn’t stop talking about how it tasted “exactly like the real thing, but better!”

    Easy Weekend Project

    Despite its impressive appearance, this Big Mac Pizza is surprisingly straightforward to make. You can use store-bought pizza dough to save time (I often do on busy weeknights) or make your own if you’re feeling ambitious. The toppings come together in about 15 minutes while the oven preheats. What I love most is how this becomes a fun family activity—my kids always fight over who gets to sprinkle the cheese and arrange the pickles. It’s the perfect Friday night project that delivers major wow-factor without complicated techniques.

    Essential Tips & Tricks

    Perfecting the Special Sauce

    The signature sauce is what transforms this from regular pizza into Big Mac magic. For the most authentic flavor, mix 1/2 cup mayo, 2 tablespoons ketchup, 2 tablespoons sweet pickle relish, 1 tablespoon white vinegar, 2 teaspoons sugar, and 1/2 teaspoon garlic powder. Let this mixture chill for at least 30 minutes before spreading on your pizza—I’ve found this rest time makes a huge difference in developing those complex flavors. For extra tang, add a splash of pickle juice from the jar. This sauce is also amazing on burgers and sandwiches!

    The Two-Layer Technique

    For the most authentic Big Mac Pizza experience, use the two-layer approach. First, partially bake your crust for 5 minutes, then spread half the sauce and add half the seasoned beef. Bake for another 7 minutes, then add the remaining sauce, beef, and cheese. This mimics the famous “middle bun” effect of a Big Mac! For the beef, season generously with onion powder, garlic powder, and a touch of smoked paprika. Cook it until just browned—overcooking will make it dry on the pizza.

    Serving Ideas & Creative Variations

    Perfect Pairings

    This Big Mac Pizza shines as the centerpiece of casual gatherings. I serve it with a simple side salad dressed with vinaigrette to balance the richness. For drinks, nothing beats an ice-cold cola or a frothy milkshake to complete the fast-food experience at home. Last Super Bowl Sunday, I cut this pizza into small squares as finger food, and it disappeared faster than any other dish on the table! For a complete themed meal, serve alongside some homemade fries or crispy onion rings.

    Fun Twists on the Classic

    While the traditional Big Mac Pizza is amazing, don’t be afraid to get creative with variations. Try a breakfast version with scrambled eggs and bacon added after baking. For a spicy kick, mix sriracha into the special sauce and add jalapeños. My vegetarian friends love when I substitute the beef with plant-based ground “meat” or seasoned lentils. For a low-carb option, use a cauliflower crust or portobello mushroom caps as mini pizza bases. The special sauce works beautifully with all these adaptations!

    Storage & Troubleshooting Guide

    Keeping It Fresh

    For the best leftover experience, store any remaining Big Mac Pizza in an airtight container in the refrigerator for up to 3 days. I recommend separating layers with parchment paper to prevent sticking. To reheat, use a 325°F oven for 7-10 minutes rather than the microwave—this keeps the crust crispy instead of soggy. The fresh toppings like lettuce should be stored separately and added after reheating. Pro tip: a quick sprinkle of fresh cheese before reheating brings back that melty magic!

    Avoiding Common Pitfalls

    The biggest challenge with Big Mac Pizza is preventing a soggy crust. Always partially bake your pizza dough before adding toppings, and don’t overload with sauce. If using fresh tomatoes, salt and drain them first to remove excess moisture. For the lettuce topping, wait until after baking and just before serving to add it—warm, wilted lettuce ruins the authentic experience! If your cheese isn’t browning nicely, switch to the broiler for the final minute of cooking, but watch carefully to prevent burning.

    Frequently Asked Questions

    Can I make Big Mac Pizza ahead of time?

    Yes! Prepare the components (sauce, cooked beef, chopped toppings) up to 2 days ahead and store separately. Assemble and bake just before serving for the freshest result. Add lettuce and final drizzle of sauce just before serving.

    What’s the best cheese for authentic Big Mac Pizza?

    American cheese delivers the most authentic flavor, but a mix of cheddar and mozzarella works beautifully too. For best results, grate your own cheese rather than using pre-shredded, which contains anti-caking agents.

    Can I freeze leftover Big Mac Pizza?

    Yes, but freeze only the base with meat and cheese (no lettuce or fresh toppings). Wrap tightly in plastic wrap and foil, freeze up to 1 month. Reheat at 375°F from frozen and add fresh toppings after.

    How do I get a crispy crust for my Big Mac Pizza?

    Preheat your oven with a pizza stone or inverted baking sheet at 475°F for at least 30 minutes. For even crispier results, brush the crust edge with olive oil before baking.

    What can I substitute for the special sauce on Big Mac Pizza?

    If you’re in a hurry, Thousand Island dressing makes a decent substitute. For a healthier option, try Greek yogurt mixed with ketchup, relish, and a touch of honey.

    Final Thoughts

    Big Mac Pizza has become my go-to recipe when I want to bring smiles to the dinner table without spending hours in the kitchen. There’s something magical about transforming a drive-thru favorite into a homemade masterpiece that brings everyone together. The combination of familiar flavors in a new format sparks joy and conversation—exactly what sharing food should do! I hope this Big Mac Pizza brings as much happiness to your table as it has to mine. Don’t forget to share your creations on Pinterest!
  • Crab Rangoon Pizza: Irresistible, Crunchy, Creamy Flavor Explosion!

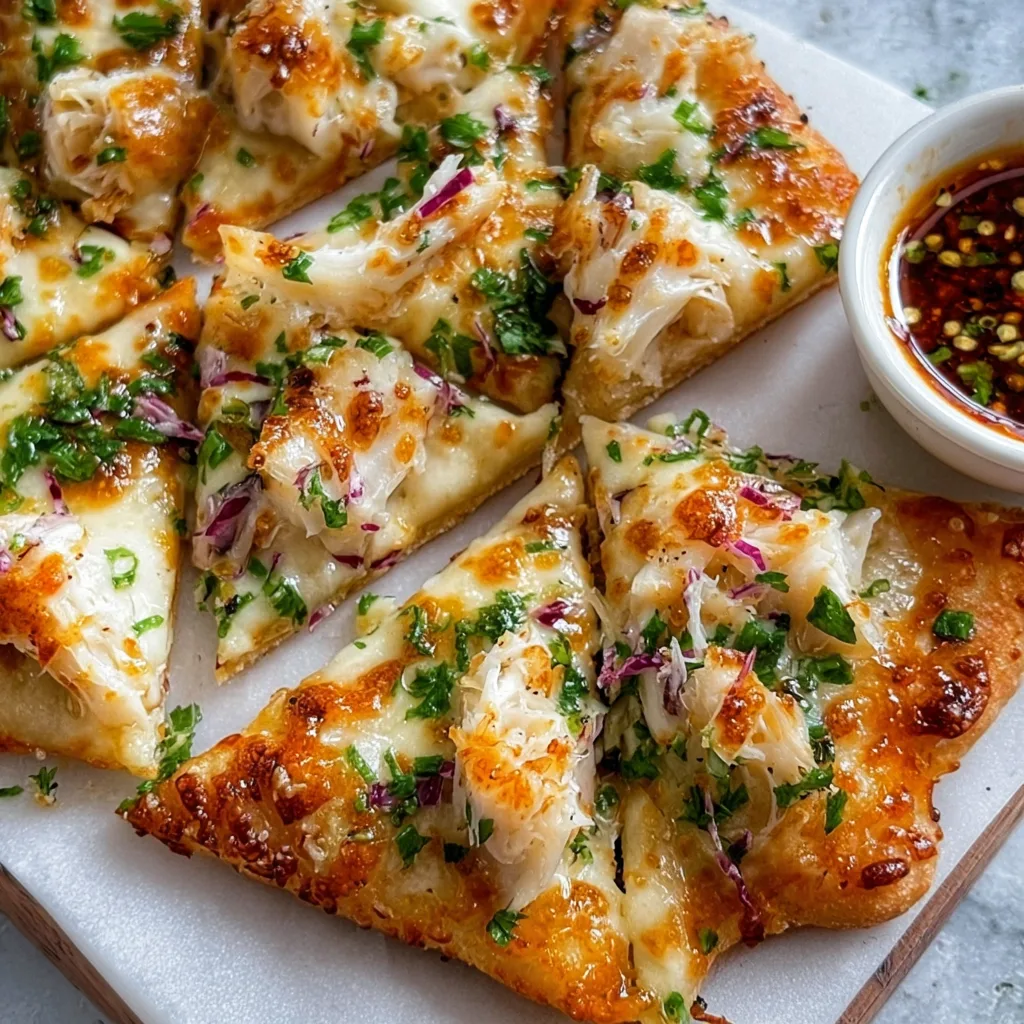
    Crab Rangoon Pizza: Irresistible, Crunchy, Creamy Flavor Explosion!

    Crab Rangoon Pizza: Irresistible, Crunchy, Creamy Flavor Explosion!

    Crab Rangoon Pizza combines two beloved favorites into one irresistible dish that’s guaranteed to wow your taste buds! This fusion masterpiece takes the creamy, savory filling of crab rangoon—that addictive appetizer we all fight over at Chinese restaurants—and transforms it into a mouthwatering pizza topping. The first time I made this for my family game night, the entire pizza disappeared in minutes, with everyone reaching for seconds that didn’t exist! The contrast between the crispy crust, velvety cream cheese spread, and sweet chunks of crab creates a flavor explosion that’s both familiar and excitingly new.

    Recipe

    Why You’ll Love This Crab Rangoon Pizza

    Perfect Party Pleaser

    This Crab Rangoon Pizza is an absolute showstopper at gatherings! The combination of creamy, tangy cream cheese, sweet crab meat, and crispy wonton strips creates a unique flavor profile that guests can’t stop talking about. I served this at my sister’s housewarming party, and it became the conversation piece of the evening. The beautiful presentation with those vibrant green onions scattered on top makes it Instagram-worthy, while the familiar-yet-exotic flavors appeal to both adventurous eaters and comfort food lovers alike. Plus, it’s substantial enough to satisfy hungry guests without being too heavy.

    Quick Weeknight Wonder

    On busy weeknights when you’re craving something special but don’t have hours to spend in the kitchen, this Crab Rangoon Pizza comes to the rescue! Using pre-made pizza dough cuts your prep time dramatically, and the cream cheese spread comes together in minutes. I’ve made this on Wednesday nights when my energy is flagging, and it always revives my midweek cooking enthusiasm. The hands-on time is minimal—just mix, spread, and bake—but the results taste like you spent hours crafting a gourmet meal. The combination of convenience and wow-factor makes this a recipe you’ll return to again and again.

    Essential Tips & Tricks

    Perfecting Your Crust

    The foundation of an exceptional Crab Rangoon Pizza is getting that perfect crust that’s crispy on the outside yet chewy inside. I recommend pre-baking your dough for 3-5 minutes before adding toppings to prevent sogginess from the cream cheese mixture. For an authentic touch, brush the outer edge with sesame oil and sprinkle with sesame seeds before that final bake. Temperature matters tremendously here—a hot oven (425°F) creates that ideal texture. If you’re feeling adventurous, try a deep dish meat lovers pizza pie style base for an even heartier version!

    Balancing Flavors

    The magic of Crab Rangoon Pizza lies in the perfect balance between creamy, savory, sweet and tangy elements. When mixing your cream cheese spread, room temperature cream cheese is non-negotiable for smooth blending. Add a splash of rice vinegar for that subtle tang that makes traditional crab rangoon so addictive. Don’t skimp on the green onions—they provide essential brightness that cuts through the richness. For the crab itself, lump crab meat provides the best texture and flavor, though imitation works in a pinch. Remember that a light hand with garlic prevents overpowering the delicate crab flavor.

    Serving Ideas & Creative Variations

    Perfect Pairings

    Serve your Crab Rangoon Pizza with complementary sides that enhance its Asian-inspired flavors. A simple cucumber salad dressed with rice vinegar and sesame oil provides a refreshing contrast to the rich pizza. Sweet chili sauce served on the side offers a delightful dipping option for those who enjoy a hint of heat. For beverages, a crisp Riesling or light Japanese beer beautifully balances the creamy, seafood notes. When I host dinner parties, I often pair this with crispy cilantro lime chicken sandwiches as an alternative for guests who might not enjoy seafood—the flavor profiles complement each other wonderfully!

    Creative Twists

    Don’t be afraid to put your personal spin on this Crab Rangoon Pizza with some creative variations! Try a wasabi cream cheese base for those who enjoy a hint of heat, or add thinly sliced water chestnuts for extra crunch. For a luxurious upgrade, scatter a few cooked shrimp alongside the crab meat. A drizzle of unagi sauce (eel sauce) adds wonderful caramelized sweetness. For a fun appetizer version, use mini naan breads or English muffins as the base to create bite-sized pizzas. My favorite variation includes a sprinkle of furikake seasoning for an authentic Japanese twist.

    Storage & Troubleshooting Guide

    Proper Storage

    Crab Rangoon Pizza is best enjoyed fresh from the oven when the contrast between the crispy crust and creamy topping is at its peak. If you do have leftovers, store them in an airtight container in the refrigerator for up to two days. To reheat, avoid the microwave which will make the crust soggy. Instead, place slices on a baking sheet in a 350°F oven for 5-7 minutes until heated through. For make-ahead preparation, you can mix the cream cheese topping up to 24 hours in advance and store it covered in the refrigerator, bringing it to room temperature before spreading on your dough.

    Common Pitfalls

    The most common issue with Crab Rangoon Pizza is a soggy middle. To prevent this, don’t overload the center with too much cream cheese mixture. Spread it evenly, leaving a half-inch border around the edge. Another frequent problem is burning the wonton strips—these should be added during the last few minutes of baking or even after the pizza comes out of the oven. If your cream cheese mixture seems too thick to spread easily, add a tablespoon of sour cream to loosen it. And remember that seasoning is crucial—taste your cream cheese mixture before spreading it on the dough to ensure it has enough salt and pepper.

    Frequently Asked Questions

    Can I use imitation crab for Crab Rangoon Pizza?

    Yes! While real crab meat provides the best flavor, imitation crab (surimi) works well and is more budget-friendly. Chop it finely and mix with a dash of fish sauce to enhance its seafood flavor.

    How do I prevent my Crab Rangoon Pizza from getting soggy?

    Pre-bake your crust for 3-5 minutes before adding toppings, don’t overload with cream cheese mixture, and ensure your oven is properly preheated to 425°F for a crisp result.

    Can I make this Crab Rangoon Pizza ahead of time for a party?

    Prepare components separately—pre-bake the crust slightly and refrigerate, mix the cream cheese topping and store covered. Assemble and finish baking just before serving for best results.

    What’s the best dipping sauce for Crab Rangoon Pizza?

    Sweet chili sauce is traditional and delicious, but duck sauce, sweet and sour, or even a sriracha-honey blend work beautifully with the creamy, seafood flavors.

    What’s the secret to authentic Crab Rangoon Pizza flavor?

    The key is balancing cream cheese with subtle seasonings like garlic, green onions, and a touch of Worcestershire sauce, plus using quality crab meat and adding crispy wonton strips for texture.

    Final Thoughts

    This Crab Rangoon Pizza represents everything I love about fusion cooking—it takes familiar flavors and transforms them into something excitingly new. The combination of crispy crust, creamy filling, and sweet crab creates a memorable meal that bridges culinary traditions. Whether you’re hosting friends or treating yourself to a special dinner, this recipe delivers both comfort and sophistication. Don’t forget to check out more creative pizza ideas on Pinterest for endless inspiration! The Crab Rangoon Pizza might just become your new signature dish.

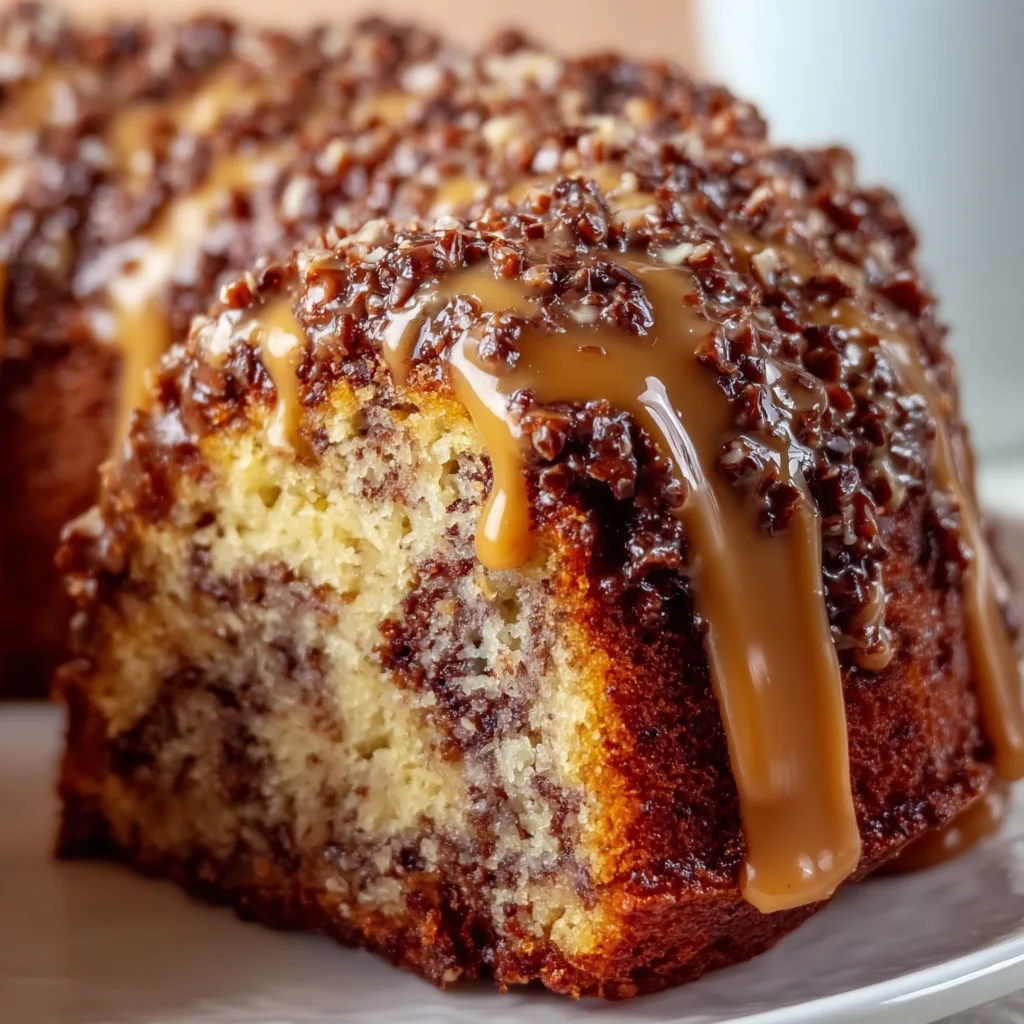
  • German Chocolate Pound Cake with Caramel Nut Glaze – Irresistible!

    German Chocolate Pound Cake with Caramel Nut Glaze – Irresistible!

    German Chocolate Pound Cake with Caramel Nut Glaze – Irresistible!

    The aroma of German Chocolate Pound Cake with caramel nut glaze wafting through my kitchen takes me back to Sunday afternoons at my grandmother’s house. This decadent dessert combines the rich tradition of German chocolate with the comforting density of pound cake, all crowned with a gooey caramel nut glaze that cascades down the sides in the most satisfying way. I’ve spent years perfecting this recipe, balancing the sweetness with just enough cocoa depth to create something truly special. If you’re looking for a showstopper that marries elegance with homey comfort, this cake delivers on all fronts.

    Recipe

    Why You’ll Love This German Chocolate Pound Cake with caramel nut glaze

    Perfect Texture & Flavor Combination

    The magic of this cake lies in its perfect balance of textures—dense, moist pound cake crumb paired with the buttery crunch of pecans and coconut in the glaze. The chocolate flavor is deep without being overwhelming, allowing the caramel notes to shine through. What makes this recipe special is the addition of buttermilk, which creates that signature tanginess that cuts through the richness. I discovered this trick during a baking mishap when I had no sour cream, and now I wouldn’t make it any other way! The slight acidity also helps activate the leavening agents for a better rise.

    Make-Ahead Convenience

    One of the best things about this German Chocolate Pound Cake with caramel nut glaze is how well it keeps—actually improving in flavor after a day! This makes it perfect for entertaining when you want to minimize day-of stress. I often bake the cake portion up to two days ahead, wrap it tightly, and then prepare the caramel nut glaze fresh before serving. The flavors meld beautifully as it sits, with the moisture from the glaze gently infusing the cake. For a dinner party last month, I made everything the day before and simply warmed the glaze slightly before pouring it over—everyone thought I’d spent the whole day baking!

    Essential Tips & Tricks

    Room Temperature Ingredients Matter

    Never underestimate the importance of room temperature ingredients when making this cake. Cold eggs, butter, or buttermilk can cause the batter to separate or bake unevenly. I learned this lesson the hard way after rushing through preparation once and ending up with a lumpy batter that never quite achieved that velvety texture we’re after. Set your ingredients out at least an hour before baking. For the caramel nut glaze, having room temperature butter helps it melt more evenly when combined with the brown sugar. If you’re short on time, place eggs in warm water for 5-10 minutes to quickly bring them to temperature.

    Proper Bundt Pan Preparation

    The heartbreak of a stuck cake is real! For this German Chocolate Pound Cake, thorough pan preparation is non-negotiable. I use a combination method that hasn’t failed me yet: butter every nook and cranny, then dust with cocoa powder instead of flour to maintain the cake’s rich color. Make sure to get into all the detailed crevices of your bundt pan. For extra insurance, let the cake cool for exactly 10 minutes before inverting—any sooner and it might fall apart, any later and it might stick. This technique works beautifully for other dense cakes too, like my Apple Cinnamon Kringle with Vanilla Glaze.

    Serving Ideas & Creative Variations

    Elegant Presentation Options

    Transform this already stunning cake into an unforgettable centerpiece with thoughtful presentation. For special occasions, I place it on a pedestal cake stand and surround the base with fresh seasonal berries or edible flowers. A light dusting of powdered sugar over the glazed cake creates a beautiful contrast against the dark caramel. For a more dramatic effect, drizzle additional chocolate ganache in thin lines across the top, letting it cascade down the sides. The combination of caramel nut glaze and chocolate drizzle creates a marbled effect that’s visually stunning and adds flavor complexity that guests always comment on.

    Flavor Twists Worth Trying

    While traditional German Chocolate Pound Cake with caramel nut glaze is divine, don’t be afraid to experiment with creative variations. Adding 1-2 tablespoons of espresso powder to the cake batter enhances the chocolate flavor without tasting like coffee. For a boozy twist, brush the warm cake with 2-3 tablespoons of dark rum or bourbon before adding the glaze—this pairs wonderfully with the caramel notes. You could also incorporate orange zest into the batter for a bright citrus contrast. For more dessert inspiration, check out my No-Bake German Chocolate Cheesecake which shares similar flavor profiles in a different format.

    Storage & Troubleshooting Guide

    Proper Storage Methods

    To maintain the perfect texture of your German Chocolate Pound Cake with caramel nut glaze, proper storage is essential. At room temperature, cover the cake with a dome or place it in an airtight container for up to 3 days. The caramel glaze acts as a natural preservative, helping the cake stay moist. For longer storage, refrigerate for up to a week, but always bring it to room temperature before serving to restore that melt-in-your-mouth texture. If you’ve made the cake in advance without the glaze, wrap it tightly in plastic wrap, then aluminum foil, and freeze for up to 3 months. Thaw completely before glazing.

    Fixing Common Issues

    Even experienced bakers encounter challenges! If your cake develops a dome top that makes it wobbly when inverted, simply level it with a serrated knife before glazing. For a glaze that’s too thin, add more powdered sugar a tablespoon at a time; if too thick, add warm cream in tiny increments. If your cake cracks, don’t panic—the caramel nut glaze will hide most imperfections. For stubborn stuck spots when unmolding, run a thin knife around the edges and gently tap the pan on the counter. If the glaze crystallizes while cooking, add a teaspoon of corn syrup to stabilize it.

    Frequently Asked Questions

    Can I make this German Chocolate Pound Cake with caramel nut glaze ahead of time?

    Absolutely! The cake actually improves after 24 hours as flavors meld. Make the cake up to 2 days ahead and store at room temperature. Add the glaze a few hours before serving for best results.

    Can I substitute buttermilk in this recipe?

    Yes. Mix 1 tablespoon of white vinegar or lemon juice with enough milk to equal 1 cup. Let stand for 5 minutes before using as a buttermilk substitute.

    Why did my caramel glaze crystallize?

    Crystallization usually happens from sugar crystals forming. Avoid stirring the caramel once it begins to boil, and add 1 teaspoon of corn syrup to prevent crystallization.

    Can this cake be frozen?

    Yes! Freeze the unglazed cake for up to 3 months, well-wrapped. Thaw completely at room temperature, then add fresh glaze before serving.

    Is Dutch-process cocoa necessary?

    Regular unsweetened cocoa works fine, but Dutch-process gives a deeper color and smoother flavor. The cake will be delicious either way!

    Final Thoughts

    This German Chocolate Pound Cake with caramel nut glaze has become my signature dessert for good reason. It strikes that perfect balance between impressive and approachable—something that looks like it took all day but actually comes together with minimal fuss. I love watching guests’ eyes light up at first sight, then close in bliss at first bite. The combination of rich chocolate cake with buttery caramel and crunchy nuts creates an experience that’s greater than the sum of its parts. I hope this recipe finds a special place in your baking repertoire and becomes the centerpiece of your own memorable gatherings. Find more of my favorite recipes on Pinterest.

  • Cheesy Bacon BBQ Chicken That Will Blow Your Taste Buds Away!

    Cheesy Bacon BBQ Chicken That Will Blow Your Taste Buds Away!

    Cheesy Bacon BBQ Chicken That Will Blow Your Taste Buds Away!

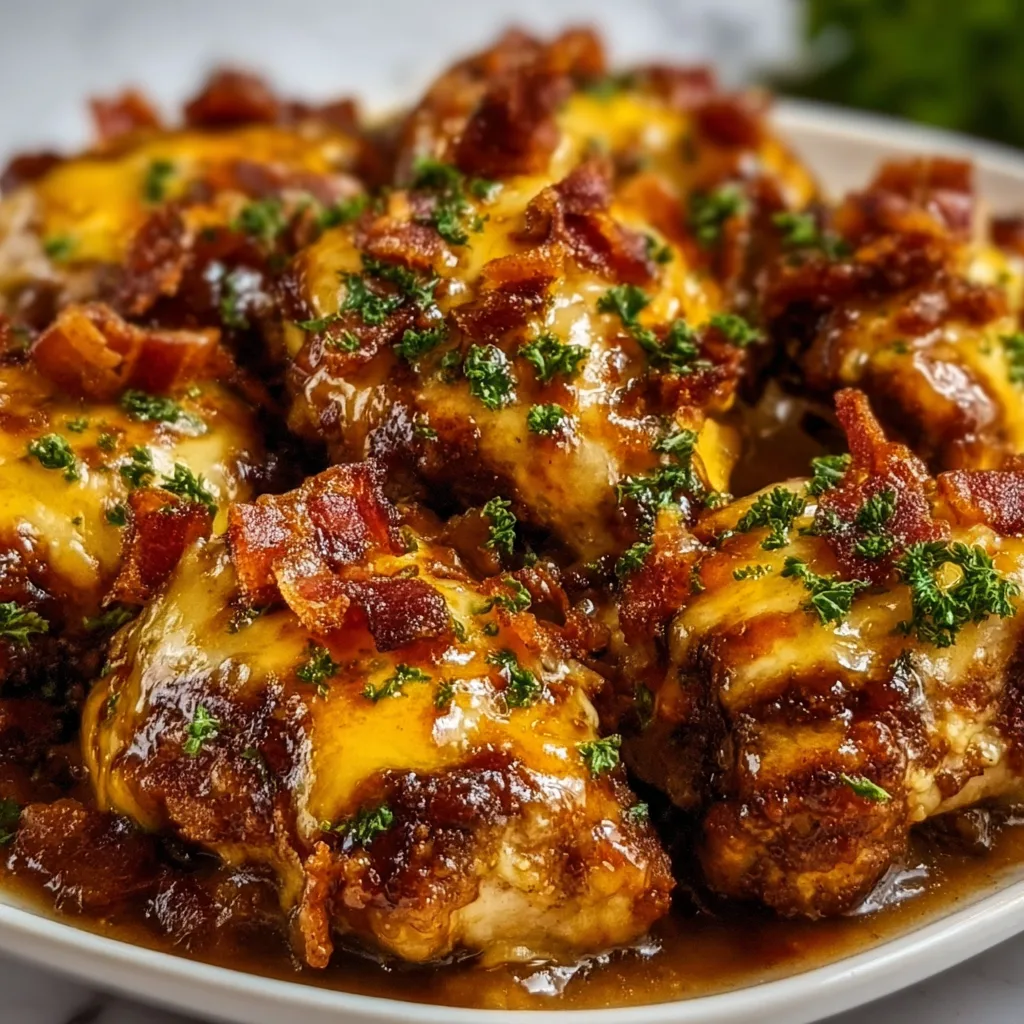
    Cheesy Bacon BBQ Chicken brings together everything I crave when I want comfort food with a kick. The first time I made this dish, my kitchen filled with that irresistible aroma of sizzling bacon and sweet-smoky BBQ sauce that had my family hovering around the stove! The combination of tender chicken smothered in tangy barbecue sauce, topped with crispy bacon and melted cheese creates a flavor explosion that’s impossible to resist. It’s become my go-to recipe for those nights when I want something that feels indulgent but comes together quickly. If you love easy, crowd-pleasing dinners like I do, you’ll find more inspiration at Recipes Darleen.

    Recipe

    Why You’ll Love This Cheesy Bacon BBQ Chicken

    Perfect Balance of Flavors

    There’s something magical about how the sweet-tangy BBQ sauce mingles with the saltiness of bacon and the richness of melted cheese. I still remember the first time my daughter took a bite – her eyes widened with that “where has this been all my life?” expression! The chicken stays incredibly juicy underneath all those toppings, absorbing the flavors as it bakes. What makes this dish special is how each component shines while creating harmony on your plate. The smokiness from the bacon elevates the BBQ sauce, while the cheese adds a creamy texture that brings everything together.

    Quick Weeknight Wonder

    On those hectic weeknights when cooking feels like a chore, this Cheesy Bacon BBQ Chicken has saved me countless times. With just 15 minutes of prep and basic ingredients you probably already have, it’s a lifesaver! I love that I can assemble everything in one pan while helping with homework or catching up on the day. The oven does all the work while filling your home with mouthwatering aromas. And cleanup? Minimal! This recipe hits that sweet spot of being impressive enough for company but simple enough for Monday night dinner when you’re running on empty.

    Essential Tips & Tricks

    Chicken Preparation Secrets

    The foundation of perfect Cheesy Bacon BBQ Chicken starts with properly prepared chicken breasts. I’ve found that pounding the chicken to an even thickness (about ¾ inch) ensures it cooks evenly and stays tender. Season generously with salt and pepper before adding any sauce – this builds flavor from the ground up. For maximum juiciness, let the chicken rest at room temperature for 15 minutes before cooking. Another game-changer is using a meat thermometer to check for doneness (165°F) rather than cutting into it and losing those precious juices. Trust me, these small steps make a world of difference in the final dish!

    Sauce & Topping Mastery

    The magic of this dish lies in how you layer the flavors. Start with a high-quality BBQ sauce as your base – I prefer one with a balance of sweet, tangy and smoky notes. For the bacon, pre-cook it until it’s about 75% done so it finishes perfectly in the oven without getting too crispy. When it comes to cheese, a combination works wonders – sharp cheddar for flavor and mozzarella for that Instagram-worthy cheese pull! For an extra flavor boost, try mixing a tablespoon of honey and a dash of smoked paprika into your BBQ sauce. These little touches elevate your Cheesy Bacon BBQ Chicken to restaurant quality.

    Serving Ideas & Creative Variations

    Perfect Pairings

    Wondering what to serve alongside your Cheesy Bacon BBQ Chicken? I’ve experimented with countless sides, and a few stand out as perfect companions. A crisp, vinegar-based coleslaw provides refreshing contrast to the rich, savory chicken. Buttery mashed potatoes or creamy mac and cheese catch all that delicious sauce – my kids actually fight over who gets to scrape the plate! For a lighter option, roasted asparagus or a simple green salad dressed with lemon vinaigrette balances the meal beautifully. If you’re looking for another crowd-pleaser to add to your repertoire, my Crispy Zucchini Rings make an amazing starter or side.

    Exciting Flavor Twists

    Don’t be afraid to put your own spin on this versatile recipe! Swap traditional BBQ sauce for Korean gochujang BBQ for a spicy-sweet kick that’s absolutely addictive. My brother-in-law introduced this variation at our last family gathering, and now it’s requested every time! For a Hawaiian twist, add a slice of grilled pineapple under the cheese. Vegetarian guests? This works beautifully with portobello mushrooms or cauliflower steaks as the base. You can also play with cheese varieties – pepper jack adds heat, while smoked gouda enhances the bacon’s flavor. These simple substitutions keep the dish exciting while maintaining its comforting essence.

    Storage & Troubleshooting Guide

    Proper Storage Solutions

    Leftover Cheesy Bacon BBQ Chicken (if you’re lucky enough to have any!) needs proper storage to maintain its delicious flavor and texture. Refrigerate promptly in an airtight container for up to 3 days. I like to separate portions with parchment paper to prevent sticking. When reheating, cover loosely with foil in a 325°F oven for about 15 minutes to prevent drying out. The microwave works in a pinch, but you’ll lose some of that wonderful texture. For meal prep, you can assemble everything except the cheese, refrigerate, then bake and add cheese when ready to serve. Freezing is possible but not ideal – the texture of the cheese and bacon changes slightly.

    Common Issues Solved

    Even experienced cooks encounter challenges! If your chicken is turning out dry, the most common culprit is overcooking. Remember that chicken continues cooking slightly after removal from heat. For undercooked bacon, try the partial pre-cooking method I mentioned earlier. If your cheese isn’t melting properly, make sure it’s freshly grated – pre-packaged shredded cheese contains anti-caking agents that affect melting. Sauce sliding off? Pat the chicken completely dry before adding sauce, and consider making shallow cuts in the top of the chicken to help sauce penetrate. Finally, if the bottom of your dish is watery, try searing the chicken briefly before baking to seal in juices.

    Frequently Asked Questions

    Can I use chicken thighs instead of breasts for Cheesy Bacon BBQ Chicken?

    Absolutely! Chicken thighs work wonderfully and often stay juicier. Adjust cooking time to about 5-7 minutes longer, as thighs have more fat and take slightly longer to cook through.

    How do I know when the chicken is fully cooked?

    Use a meat thermometer to check that the internal temperature reaches 165°F at the thickest part. The chicken should be opaque throughout with clear (not pink) juices.

    Can I make this dish ahead of time?

    Yes! Prepare everything up to adding the cheese, refrigerate for up to 24 hours, then bake and add cheese when ready to serve. Add 5-7 minutes to the cooking time if baking from cold.

    What’s the best cheese to use?

    A combination of sharp cheddar and mozzarella gives the perfect balance of flavor and meltability. Monterey Jack, provolone, or colby also work beautifully.

    Is there a way to make Cheesy Bacon BBQ Chicken healthier?

    Use skinless chicken breasts, turkey bacon, reduced-sugar BBQ sauce, and a moderate amount of part-skim cheese. Adding extra vegetables on the side helps balance the meal.

    Final Thoughts

    Cheesy Bacon BBQ Chicken represents what I love most about cooking – creating something that brings people together around the table with smiles and satisfied sighs. The way the flavors meld together creates something greater than the sum of its parts, turning simple ingredients into a memorable meal. I hope this recipe finds a place in your regular rotation, perhaps with your own special twist that makes it uniquely yours. Don’t forget to share your creations on Pinterest – I’d love to see how you make this dish your own! This is comfort food at its finest – easy enough for weeknights but special enough to create lasting memories.

  • Chicken Pillows with Garlic Parmesan Sauce – Irresistibly Crispy & Cheesy!

    Chicken Pillows with Garlic Parmesan Sauce – Irresistibly Crispy & Cheesy!

    Chicken Pillows with Garlic Parmesan Sauce – Irresistibly Crispy & Cheesy!

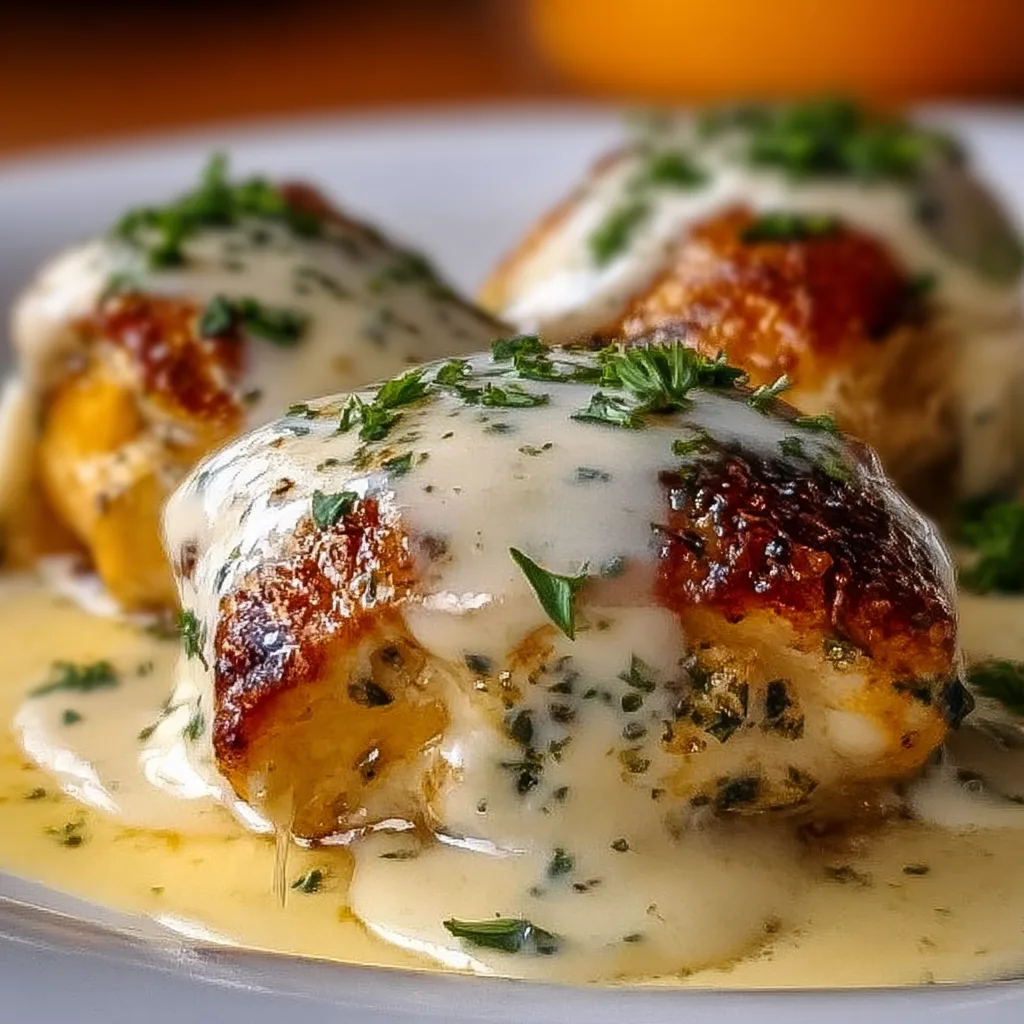
    Chicken Pillows with Garlic Parmesan Sauce are the ultimate comfort food that combines tender, flaky crescent rolls with a creamy chicken filling, all topped with a rich, velvety garlic parmesan sauce that will make your taste buds dance. I discovered this recipe during a snowy weekend when I craved something warm and satisfying that would fill my kitchen with mouthwatering aromas. The pillowy texture against the silky sauce creates a perfect harmony that’s impressive enough for guests yet simple enough for a cozy family dinner. If you love dishes that combine crispy exteriors with creamy fillings, these chicken pillows will become your new favorite.

    Recipe

    Why You’ll Love This Chicken Pillows with Garlic Parmesan Sauce

    Perfect Balance of Textures and Flavors

    There’s something magical about biting into these chicken pillows – the flaky exterior gives way to a creamy, savory center that melts in your mouth. The filling combines tender shredded chicken with cream cheese, creating a velvety mixture that’s seasoned to perfection. What makes these truly special is how the buttery crescent rolls develop a golden crust while baking, creating that irresistible contrast against the creamy chicken filling. I love how the garlic parmesan sauce adds another dimension, with its rich, nutty flavor complementing the mild chicken perfectly. It’s like a warm hug on a plate!

    Make-Ahead Friendly and Versatile

    One of my favorite things about these chicken pillows with garlic parmesan sauce is how meal-prep friendly they are. You can prepare the filling a day ahead, which actually allows the flavors to develop even more deeply. The assembled (unbaked) pillows can be refrigerated for up to 24 hours before baking, making them perfect for busy weeknights or when entertaining. They’re also incredibly versatile – use rotisserie chicken when you’re short on time, or swap in leftover turkey after holidays. I’ve even made a buffalo chicken version by adding hot sauce to the filling that disappeared in minutes at my last gathering!

    Essential Tips & Tricks

    Perfecting the Filling Consistency

    Getting the right consistency for your chicken pillow filling is crucial for that perfect bite. I recommend using a stand mixer with the paddle attachment to blend the cream cheese until smooth before adding your shredded chicken. This prevents lumps and ensures even distribution of flavors. The filling should be thick enough to hold its shape but still easy to work with – if it’s too dry, add a tablespoon of sour cream; if too wet, a sprinkle of breadcrumbs helps firm it up. Season generously with herbs like thyme and parsley, as the crescent dough can mute flavors. Let the filling chill for 15-20 minutes before assembling for easier handling.

    Mastering the Garlic Parmesan Sauce

    The garlic parmesan sauce is what elevates these chicken pillows from good to extraordinary. Start with a roux base (equal parts butter and flour) and cook it until it smells nutty but isn’t browned. This creates the perfect foundation for a silky sauce. Slowly add warm milk while whisking constantly to prevent lumps. For the richest flavor, use freshly grated parmesan – pre-shredded varieties contain anti-caking agents that can make your sauce grainy. If you love creamy garlic shrimp over mashed potatoes, you’ll recognize the similar velvety texture in this sauce. Let it simmer until it coats the back of a spoon before adding your minced garlic and parmesan.

    Serving Ideas & Creative Variations

    Complementary Side Dishes

    These chicken pillows with garlic parmesan sauce pair beautifully with sides that can soak up that delicious sauce. I love serving them with roasted asparagus or a bright green salad with a light vinaigrette to balance the richness. Garlic mashed potatoes make an excellent bed for these pillows, creating the ultimate comfort food experience. For a lighter option, try crispy garlic air fryer broccoli which provides a wonderful textural contrast. When I’m entertaining, I arrange the chicken pillows on a large platter surrounded by colorful vegetables and drizzle the sauce over everything for a stunning presentation that always impresses my guests.

    Exciting Flavor Variations

    While the classic chicken pillows with garlic parmesan sauce are divine, don’t be afraid to experiment with different flavor profiles! Try a Mediterranean version by mixing sun-dried tomatoes, feta, and spinach into the chicken filling. For an Italian twist, incorporate pesto and mozzarella into the filling and serve with marinara instead of the garlic parmesan sauce. My family loves when I make a Mexican-inspired variation with taco-seasoned chicken, green chiles, and pepper jack cheese, topped with a cilantro-lime crema instead of the traditional sauce. The possibilities are endless, and these variations keep this recipe exciting even when it becomes a regular in your meal rotation.

    Storage & Troubleshooting Guide

    Proper Storage and Reheating

    To maintain the delicious texture of chicken pillows with garlic parmesan sauce, proper storage is essential. Refrigerate leftovers in an airtight container for up to 3 days, keeping the sauce separate if possible. When reheating, the microwave works in a pinch, but for best results, warm them in a 300°F oven for 10-15 minutes until heated through. This helps maintain that lovely contrast between the crisp exterior and creamy filling. The sauce may thicken in the refrigerator – simply reheat it gently on the stovetop with a splash of milk, whisking until smooth. For longer storage, freeze the unbaked pillows on a baking sheet before transferring to a freezer bag.

    Troubleshooting Common Issues

    If your chicken pillows are leaking during baking, you likely have too much filling or haven’t sealed them properly. Use about 2-3 tablespoons of filling per crescent roll and pinch the edges firmly, using a little water on your fingertips if needed to help seal. Pale, soggy bottoms usually mean your oven temperature is too low or the baking sheet is overcrowded. Use a preheated oven and consider baking in batches if needed. If your sauce is lumpy, strain it through a fine-mesh sieve and whisk vigorously, or blend it with an immersion blender. Too thick? Add warm milk tablespoon by tablespoon. Too thin? Simmer longer or add a cornstarch slurry.

    Frequently Asked Questions

    Can I make chicken pillows with garlic parmesan sauce ahead of time?

    Yes! Prepare the filling and assemble the pillows up to 24 hours ahead. Store covered in the refrigerator and add 3-5 minutes to the baking time. Make the sauce fresh just before serving for best results.

    What’s the best way to shred chicken for this recipe?

    For the most tender chicken, poach boneless breasts in seasoned broth until they reach 165°F, then shred using two forks or a stand mixer with the paddle attachment on low speed.

    Can I freeze these chicken pillows?

    Absolutely! Freeze unbaked pillows on a baking sheet, then transfer to a freezer bag for up to 3 months. Bake from frozen, adding 10-15 minutes to the cooking time.

    What can I substitute for crescent rolls?

    Puff pastry, pie crust, or homemade biscuit dough all work well. Each creates a different texture but equally delicious results.

    How do I prevent my garlic parmesan sauce from breaking?

    Keep the heat medium-low, add warm (not cold) milk gradually while whisking constantly, and avoid boiling the sauce once the cheese is added.

    Final Thoughts

    These Chicken Pillows with Garlic Parmesan Sauce have become my go-to recipe when I want to impress without spending hours in the kitchen. There’s something truly magical about watching your family’s eyes light up as they bite into that flaky exterior and discover the creamy filling inside. The way the garlic parmesan sauce pools around each pillow creates a dish that feels special enough for celebrations yet comforting enough for everyday meals. I’d love to see your versions on Pinterest – tag me when you make these pillowy bites of heaven!

  • White Russian Poke Cake Recipe That Will Blow Your Mind!

    White Russian Poke Cake Recipe That Will Blow Your Mind!

    White Russian Poke Cake Recipe That Will Blow Your Mind!

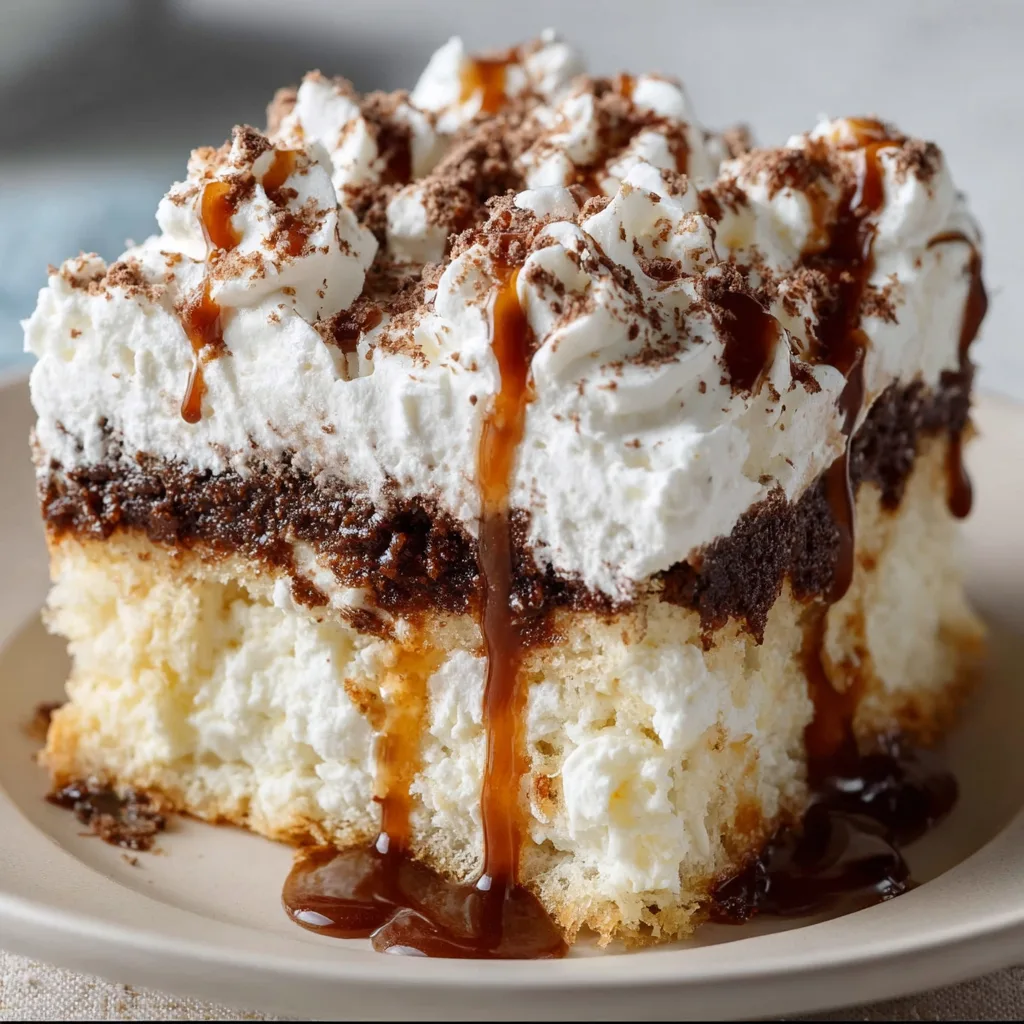
    This White Russian Poke Cake transforms everyone’s favorite cocktail into a decadent dessert that’s guaranteed to wow your guests. Imagine a moist vanilla cake infused with Kahlúa and vodka, then drenched in sweet cream and topped with a cloud of coffee-kissed whipped cream. I first made this for my sister’s 30th birthday, and now it’s requested at every family gathering! The combination of rich coffee liqueur and velvety cream creates a dessert that’s sophisticated yet comforting. Perfect for dinner parties or when you need a grown-up treat that feels a bit special. If you enjoy creative desserts, you’ll find plenty more inspiration at Recipes Darleen.

    Recipe

    Why You’ll Love This White Russian Poke Cake

    Perfect Balance of Flavors

    This White Russian Poke Cake captures the essence of the cocktail in every bite. The coffee liqueur adds depth without overwhelming, while the vodka provides that subtle kick that makes you raise an eyebrow in delight. What I adore most is how the sweet cream soaks into the poked holes, creating these pockets of moisture that keep the cake incredibly tender. It’s sophisticated enough for special occasions but simple enough that you’ll find yourself making it on random Tuesdays just because. The flavor develops overnight, making it perfect for make-ahead entertaining.

    Impressive Yet Effortless

    Don’t let the elegant appearance fool you—this cake is surprisingly easy to prepare. The beauty of poke cakes lies in their forgiving nature; even if your decorating skills aren’t bakery-level (mine certainly aren’t!), the cream topping hides any imperfections. I once made this while simultaneously helping my daughter with homework and taking a work call, and it still turned out gorgeous. The “wow” factor comes from the flavors and textures, not complicated techniques. Your guests will think you spent hours in the kitchen, and I won’t tell them it took just 20 minutes of active time.

    Essential Tips & Tricks

    Getting the Perfect Poke

    The secret to an exceptional White Russian Poke Cake lies in the poking technique. Use something round but not too wide—I find the handle of a wooden spoon creates ideal tunnels for the cream mixture. Space your pokes about 1 inch apart and push almost to the bottom without puncturing the base. Let the cake cool for about 15 minutes after baking—this is crucial! If it’s too hot, it’ll fall apart; too cool, and it won’t absorb properly. Take your time pouring the cream mixture, allowing it to seep into each hole completely before adding more. Patience here transforms a good cake into an unforgettable one.

    Liqueur Substitutions and Adjustments

    The beauty of this White Russian Poke Cake is its adaptability to your taste preferences and audience. For a family-friendly version, simply substitute the Kahlúa with strong coffee mixed with a splash of coffee extract and skip the vodka entirely. The flavor profile remains deliciously similar! If you’re serving adults but want a less boozy version, reduce the liqueur by half. For coffee lovers, try using espresso liqueur for a more pronounced flavor, similar to the rich notes in these Soft Chocolate Chip Cream Cheese Cookies. Remember that most (not all) alcohol cooks off, leaving just the flavor behind.

    Serving Ideas & Creative Variations

    Elegant Presentation Options

    Elevate your White Russian Poke Cake with thoughtful presentation touches that require minimal effort. A light dusting of cocoa powder or finely ground coffee creates a professional finish. For individual servings, try cutting neat squares and placing them on dessert plates with a small dollop of extra whipped cream and a chocolate-covered espresso bean. I served this at my book club, placing each portion on vintage dessert plates with sprigs of mint, and everyone took photos before diving in! For a stunning centerpiece, serve on a cake stand surrounded by chocolate-dipped strawberries or pirouette cookies.

    Seasonal and Flavor Twists

    This versatile White Russian Poke Cake welcomes creative variations that keep it exciting year-round. For a holiday version, add crushed peppermint to the topping and garnish with mini candy canes. Summer calls for a splash of Baileys instead of vodka, paired with fresh berries on top. Chocolate lovers can start with a chocolate cake base instead of vanilla—reminiscent of these decadent No-Bake German Chocolate Cheesecake flavors. My personal favorite twist is adding a thin layer of salted caramel between the cake and whipped cream, creating a sweet-salty contrast that makes taste buds dance.

    Storage & Troubleshooting Guide

    Optimal Storage Methods

    Your White Russian Poke Cake reaches peak flavor after resting in the refrigerator for at least 4 hours, but overnight is ideal. Store leftovers covered in the refrigerator for up to 4 days—though in my house, it never lasts that long! The cake actually improves on day two as the flavors meld together. For longer storage, you can freeze individual slices wrapped tightly in plastic wrap and then foil for up to 2 months. Just thaw overnight in the refrigerator before serving. I don’t recommend freezing the entire cake, as the texture of the topping may change slightly upon thawing.

    Fixing Common Issues

    Even experienced bakers encounter challenges! If your White Russian Poke Cake seems too dry, it likely didn’t absorb enough of the cream mixture. The fix is simple—make a small batch of additional cream mixture and carefully pour it over the problem areas. If your topping is too soft, place the cake in the freezer for 15-20 minutes before serving to firm it up. For a cake that’s too soggy, leave it uncovered in the refrigerator for an hour to allow some moisture to evaporate. Remember that poke cakes are meant to be moist, so embrace that beautiful texture rather than fighting against it!

    Frequently Asked Questions

    Can I make this White Russian Poke Cake alcohol-free?

    Absolutely! Substitute Kahlúa with strong coffee mixed with 1 teaspoon vanilla extract and a dash of coffee extract. Skip the vodka entirely or replace with additional cream for moisture.

    How far in advance can I make this cake?

    You can prepare this cake up to 2 days ahead. In fact, it improves after sitting overnight as the flavors develop and meld together beautifully.

    Can I use a different type of cake mix?

    Yes! Chocolate cake works wonderfully with the White Russian flavors. Yellow cake or even spice cake can create interesting flavor variations.

    Why is my whipped topping sliding off?

    Make sure your cake is completely cooled before adding the topping. Whip the cream to stiff peaks, and consider stabilizing it with 1 tablespoon of instant pudding mix.

    How do I know when I’ve poked enough holes?

    Aim for holes about 1 inch apart across the entire surface. You should have approximately 30-40 holes depending on your cake size.

    Final Thoughts

    This White Russian Poke Cake brings together the beloved flavors of a classic cocktail in a dessert that’s both sophisticated and comforting. I love how it bridges the gap between casual get-togethers and special occasions with its elegant presentation and irresistible taste. Every time I make it, I’m reminded that the best recipes are those that bring people together around the table, creating moments of joy and connection. Whether you’re celebrating something special or simply treating yourself, this cake delivers a slice of happiness that lingers long after the last crumb is gone. Find more inspiration at Pinterest.

  • Gouda & Mushroom Stuffed Chicken: Irresistibly Juicy & Delicious!

    Gouda & Mushroom Stuffed Chicken: Irresistibly Juicy & Delicious!

    Gouda & Mushroom Stuffed Chicken: Irresistibly Juicy & Delicious!

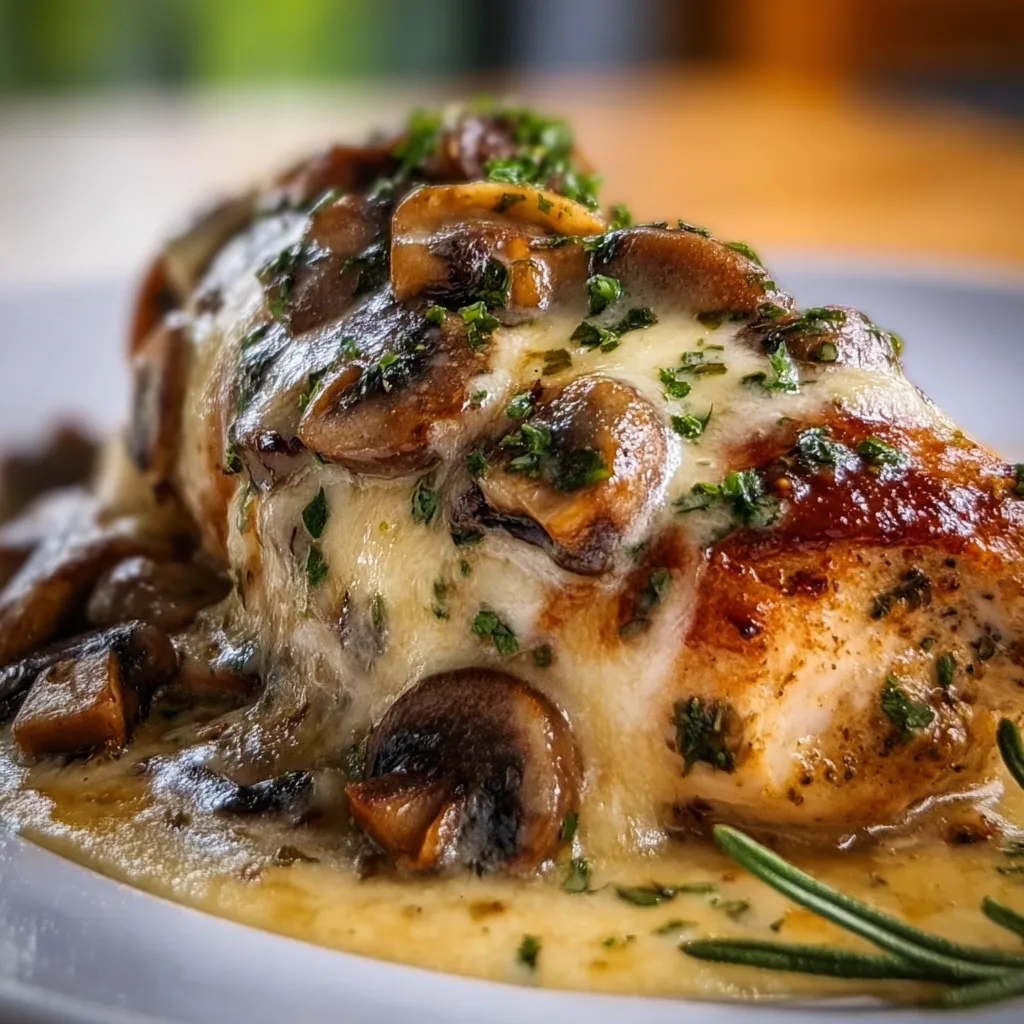
    Gouda & Mushroom Stuffed Chicken transforms ordinary chicken breasts into a gourmet experience that’s surprisingly simple to prepare. The first time I made this for my family, the kitchen filled with the earthy aroma of sautéed mushrooms and melting cheese that had everyone hovering near the oven! There’s something magical about cutting into a perfectly cooked chicken breast to reveal a pocket of creamy, melted Gouda and savory mushrooms. If you’re looking to elevate your weeknight dinner routine, this recipe belongs in your regular rotation.

    Recipe

    Why You’ll Love This Gouda & Mushroom Stuffed Chicken

    A Perfect Balance of Flavors and Textures

    The combination of smoky Gouda and earthy mushrooms creates a flavor profile that’s simply irresistible. The cheese melts into a creamy pocket while the mushrooms provide a meaty texture that complements the tender chicken perfectly. I love how the natural juices from the mushrooms keep the chicken moist during cooking. Plus, the golden-brown exterior creates that satisfying crisp bite that gives way to the succulent interior. It’s that contrast of textures that makes this dish so special and keeps my family requesting it week after week.

    Impressive Yet Surprisingly Simple

    Don’t let the elegant presentation fool you—this Gouda & Mushroom Stuffed Chicken is actually quite straightforward to prepare. The butterfly technique for creating the pocket is simpler than it looks, and I’ve included detailed instructions to guide you through it. Even on busy weeknights, I can have this on the table in under 45 minutes. The wow factor is undeniable when you serve these beautiful stuffed chicken breasts, making it perfect for both casual family dinners and entertaining guests who will think you spent hours in the kitchen.

    Essential Tips & Tricks

    Mastering the Perfect Stuffing Technique

    Creating the perfect pocket for your Gouda & Mushroom Stuffed Chicken starts with a sharp knife and a steady hand. I find that butterflying the chicken breast and then creating a deeper pocket works best—just be careful not to cut all the way through! Pre-cooking the mushroom mixture is essential to remove excess moisture and concentrate flavors. Allow your filling to cool slightly before stuffing to prevent the cheese from melting prematurely. Secure with toothpicks if needed, but remember to remove them before serving! This technique works beautifully for other stuffed dishes too, like these Crispy Zucchini Rings with Creamy Dip.

    Temperature Control for Perfect Doneness

    The secret to juicy Gouda & Mushroom Stuffed Chicken is proper temperature management. Start by searing the chicken in a hot pan to create a golden crust that seals in the juices. Then transfer to a 375°F oven to finish cooking gently. I highly recommend using a meat thermometer—insert it into the thickest part of the chicken (not the filling) and cook until it reaches 165°F. Let the chicken rest for 5 minutes after removing from the oven. This resting period allows the juices to redistribute throughout the meat and the cheese to set slightly, making for a perfect presentation when sliced.

    Serving Ideas & Creative Variations

    Complementary Side Dishes

    Gouda & Mushroom Stuffed Chicken pairs beautifully with both simple and sophisticated sides. For a complete meal, I love serving it with roasted asparagus or a bright arugula salad dressed with lemon vinaigrette. The freshness cuts through the richness of the cheese. For heartier appetites, creamy mashed potatoes or buttery rice pilaf make excellent companions to soak up any escaping cheese and juices. On busy weeknights, I often serve it alongside my One-Pan Garlic Potatoes and Asparagus for minimal cleanup. A slice of crusty bread on the side is perfect for capturing any delicious sauce that might escape.

    Exciting Flavor Variations

    While the classic Gouda & Mushroom Stuffed Chicken is divine, don’t be afraid to experiment with variations. Try substituting cheeses like fontina, gruyère, or even blue cheese for different flavor profiles. The mushroom mixture can be enhanced with fresh herbs like thyme or rosemary, or add some heat with a pinch of red pepper flakes. For a Mediterranean twist, incorporate sun-dried tomatoes and basil into your stuffing. My family loves when I add crispy bacon bits to the mushroom mixture for an extra layer of smoky flavor. These simple swaps can transform this one recipe into countless delicious dinner options.

    Storage & Troubleshooting Guide

    Proper Storage and Reheating

    Leftover Gouda & Mushroom Stuffed Chicken can be stored in an airtight container in the refrigerator for up to 3 days. To reheat, avoid the microwave which can make the chicken rubbery. Instead, place in a 300°F oven, covered with foil, for about 15 minutes or until warmed through. This gentle reheating helps preserve the moisture and texture. If you’re meal prepping, you can assemble the stuffed chicken breasts ahead of time and refrigerate them uncooked for up to 24 hours. Just bring them to room temperature for 20 minutes before cooking for the best results.

    Common Issues and Solutions

    The most common challenge with Gouda & Mushroom Stuffed Chicken is cheese leakage during cooking. To prevent this, make sure your pocket is deep enough but has a small opening. Secure with toothpicks if necessary and consider chilling the stuffed breasts for 15 minutes before cooking to firm up the cheese. If your chicken is browning too quickly but isn’t cooked through, lower the oven temperature and cover loosely with foil. For chicken that seems dry, try brining it beforehand in a simple salt solution for 30 minutes, or consider using chicken thighs instead of breasts for naturally juicier meat.

    Frequently Asked Questions

    Can I make Gouda & Mushroom Stuffed Chicken ahead of time?

    Yes! You can prepare and stuff the chicken up to 24 hours in advance. Keep refrigerated in an airtight container and bring to room temperature for 20 minutes before cooking for best results.

    What can I substitute for Gouda cheese?

    Fontina, mozzarella, or Havarti make excellent substitutes as they melt beautifully. For stronger flavors, try smoked cheddar or Gruyère.

    How do I know when my stuffed chicken is fully cooked?

    Use a meat thermometer inserted into the thickest part of the chicken (not the filling). It should read 165°F for safe consumption.

    Can I freeze Gouda & Mushroom Stuffed Chicken?

    Yes, freeze uncooked stuffed chicken breasts individually wrapped for up to 3 months. Thaw overnight in the refrigerator before cooking according to the original instructions.

    What mushrooms work best for stuffed chicken?

    Button or cremini mushrooms are ideal for their flavor and texture. Shiitake or oyster mushrooms can add more depth, but avoid portobello as they release too much moisture.

    Final Thoughts

    This Gouda & Mushroom Stuffed Chicken has become a staple in my kitchen for good reason—it delivers restaurant-quality results with minimal effort. The combination of tender chicken, creamy Gouda, and savory mushrooms creates a dish that feels special enough for company but simple enough for weeknights. I hope you’ll give this recipe a try and experience the joy of cutting into that perfectly cooked chicken to reveal the melty, flavorful center. Don’t forget to share your creations on Pinterest and let me know your favorite variations!

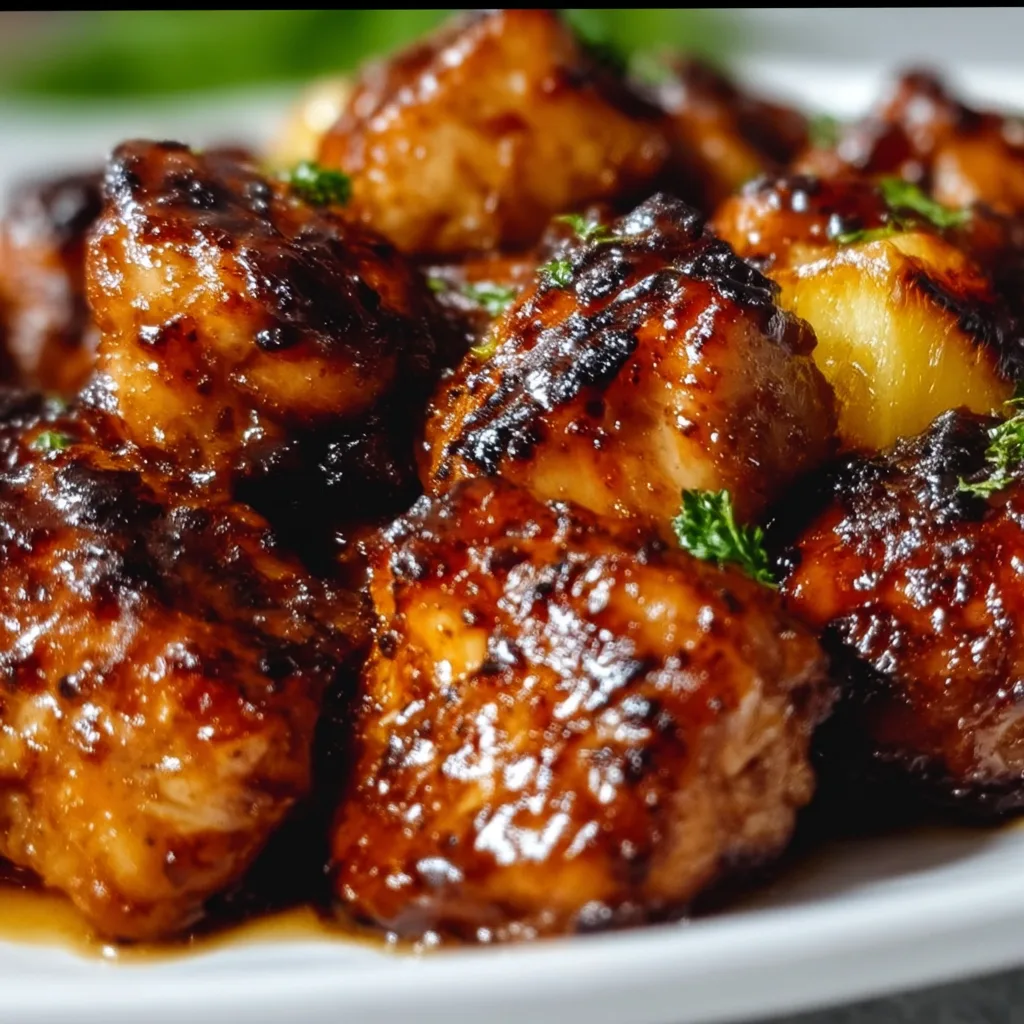
  • Hawaiian Huli Huli Chicken Recipe That Will Blow Your Mind!

    Hawaiian Huli Huli Chicken Recipe That Will Blow Your Mind!

    Hawaiian Huli Huli Chicken Recipe That Will Blow Your Mind!

    Hawaiian Huli Huli Chicken brings a taste of paradise straight to your dinner table with its irresistible sweet-tangy glaze and smoky char. The first time I made this island favorite, the aroma of ginger, soy, and pineapple transported me straight to a beachside luau! This Hawaiian classic literally means “turn-turn” chicken, referring to how it’s traditionally rotated over kiawe wood fires. My version simplifies the technique while keeping all those bold tropical flavors intact. Whether you’re grilling for a backyard gathering or looking to brighten a weeknight dinner, this recipe delivers that perfect balance of caramelized sweetness and savory depth.

    Recipe

    Why You’ll Love This Hawaiian Huli Huli Chicken

    Perfect Balance of Flavors

    The magic of Hawaiian Huli Huli Chicken lies in its perfectly balanced marinade that combines sweet, savory, and tangy elements. Fresh pineapple juice provides natural sweetness while ketchup adds depth and body. The umami from soy sauce melds with zesty ginger and garlic to create a complex flavor profile that caramelizes beautifully when cooked. I love how the brown sugar creates those irresistible sticky edges! What makes this recipe truly special is how the marinade transforms into a glossy glaze that coats each piece of chicken with island-inspired goodness. It’s tropical comfort food at its finest.

    Simple Yet Impressive

    Don’t let the exotic name fool you – this Hawaiian Huli Huli Chicken is surprisingly easy to prepare. The marinade comes together in minutes with pantry staples and a quick blitz in the blender. Unlike complicated recipes that demand constant attention, this one does most of the work for you while the chicken marinates. I’ve served this at everything from casual weeknight dinners to backyard gatherings, and it never fails to impress. The vibrant flavors and gorgeous caramelization make it look like you spent hours in the kitchen, when really, it’s mostly hands-off time. Perfect for busy home cooks who still want something special!

    Essential Tips & Tricks

    Marinating Magic

    For truly exceptional Hawaiian Huli Huli Chicken, the marinating time makes all the difference. While you can get away with a quick 30-minute soak, I’ve found overnight marinating creates the most flavorful results. The acids from the pineapple juice and vinegar tenderize the meat while the flavors penetrate deeply. A little tip I discovered: reserve about ¼ cup of the marinade before adding the chicken to use as a finishing glaze later. This prevents cross-contamination and gives you that perfect sticky finish. For maximum flavor infusion, I like to massage the marinade into the meat and flip the bag halfway through marinating time.

    Perfect Cooking Technique

    The traditional method for Hawaiian Huli Huli Chicken involves constant turning over an open flame, which develops those gorgeous caramelized edges. On a grill, maintain a medium heat (around 350-375°F) to prevent burning the sugars in the marinade. If using bone-in chicken, start with the skin side up, then flip every 5-7 minutes. For a similar effect in the oven, broil on high for the final 2-3 minutes to achieve that signature char. Like with my Creamy Garlic Shrimp Over Mashed Potatoes, using an instant-read thermometer ensures perfect doneness – look for 165°F for breasts and 175°F for thighs.

    Serving Ideas & Creative Variations

    Traditional Hawaiian Sides

    Complete your island feast by pairing Hawaiian Huli Huli Chicken with authentic sides that complement its sweet-savory profile. Traditional Hawaiian macaroni salad with its creamy, slightly sweet dressing makes a perfect counterpoint to the chicken’s bold flavors. Sticky white rice is essential for soaking up every drop of that delicious sauce! For a fresh element, I love adding grilled pineapple slices that get beautifully caramelized on the edges. When I’m feeling ambitious, I’ll make quick pickled vegetables with rice vinegar and a touch of sugar to cut through the richness of the chicken.

    Modern Twists

    While traditional preparations are wonderful, Hawaiian Huli Huli Chicken lends itself beautifully to creative adaptations. Try using the marinade with pork tenderloin or firm tofu for equally delicious results. For a fun handheld option, shred the cooked chicken and serve in lettuce cups topped with pineapple salsa. I’ve even turned leftovers into amazing tacos with cabbage slaw and avocado! For a fusion approach similar to my Pollo Asado Mexican Grilled Chicken, try adding a touch of chipotle to the marinade for smoky heat that complements the sweetness perfectly.

    Storage & Troubleshooting Guide

    Proper Storage Methods

    To maintain the delicious flavor of your Hawaiian Huli Huli Chicken, proper storage is essential. Refrigerate leftovers within two hours of cooking in shallow airtight containers or tightly wrapped in heavy-duty aluminum foil. When stored correctly, the chicken stays delicious for 3-4 days in the refrigerator. For longer storage, freeze in freezer-safe containers for up to 3 months. I like to portion leftovers into individual servings for easy reheating. When reheating, add a splash of pineapple juice or chicken broth to maintain moisture, and consider a quick broil to revive the caramelized exterior.

    Common Issues Solved

    Even experienced cooks occasionally encounter challenges with Hawaiian Huli Huli Chicken. If you find your chicken burning too quickly, the high sugar content in the marinade is likely the culprit. Lower your heat and move chicken to indirect heat. For chicken that’s not developing enough color, try patting the meat dry before grilling and brushing with reserved marinade during the final minutes. If your sauce seems too thin, reduce some reserved marinade in a small saucepan until syrupy before brushing on the chicken. And remember, dark meat (thighs and legs) is more forgiving than breasts if you’re worried about drying out.

    Frequently Asked Questions

    What cuts of chicken work best for Hawaiian Huli Huli Chicken?

    Bone-in, skin-on thighs and drumsticks are traditional and stay juiciest. However, boneless skinless thighs or breasts work well too—just reduce cooking time for breasts to prevent drying out.

    Can I make Hawaiian Huli Huli Chicken without a grill?

    Absolutely! Broil in the oven on a rack over a foil-lined baking sheet, turning regularly. You can also use a grill pan on the stovetop with excellent results.

    How can I make this recipe less sweet?

    Reduce the brown sugar by half and increase the vinegar or add a tablespoon of lime juice. You can also add a teaspoon of sriracha for heat that balances the sweetness.

    Can I use canned pineapple instead of fresh juice?

    Yes! Canned pineapple juice works perfectly. If using canned pineapple chunks, blend them with their juice for a thicker, more flavorful marinade.

    What’s the best way to reheat leftovers?

    Gently reheat covered in a 325°F oven with a splash of chicken broth. For a quick option, microwave at 70% power with a damp paper towel covering the chicken.

    Final Thoughts

    Hawaiian Huli Huli Chicken brings a taste of the islands to your table with minimal effort and maximum flavor. The combination of sweet, tangy, and savory elements creates something truly special that will have everyone asking for seconds. I love how this recipe transforms simple chicken into something extraordinary through the magic of that incredible marinade. Whether you’re serving it at a summer barbecue or brightening a weeknight dinner, this Hawaiian classic delivers tropical vibes and delicious satisfaction. Find more inspiring recipes on Pinterest!