Author: Darleen Vance

  • Crispy Hot Honey Feta Chicken That Will Blow Your Mind!

    Crispy Hot Honey Feta Chicken That Will Blow Your Mind!

    Crispy Hot Honey Feta Chicken That Will Blow Your Mind!

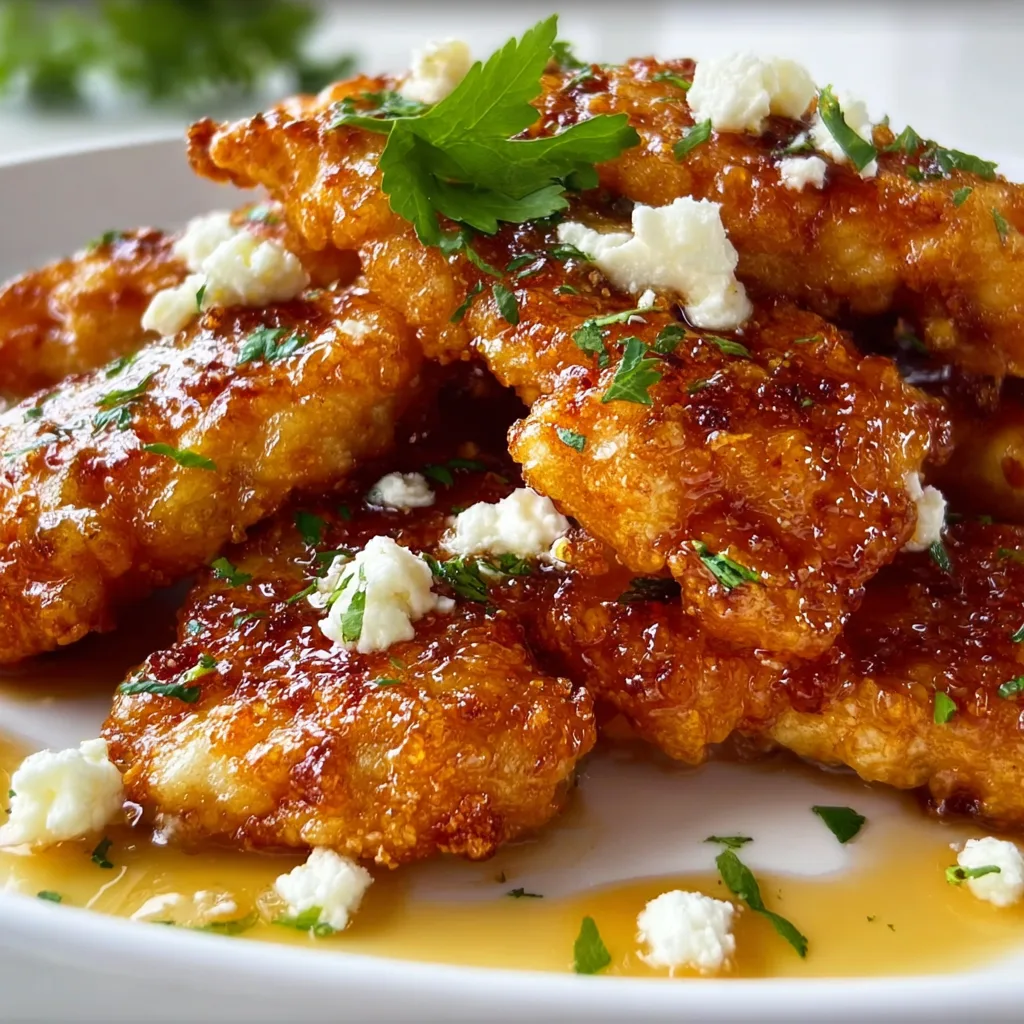
    Crispy Hot Honey Feta Chicken combines everything I love about comfort food – golden, crunchy chicken cutlets drizzled with spicy-sweet honey and topped with crumbled feta that gets slightly melty against the hot surface. The first time I made this for my family, my kitchen filled with that irresistible aroma of seasoned breadcrumbs hitting hot oil. My husband walked in, took one deep breath, and said, “Whatever that is, I want it now!” The perfect balance of heat, sweetness, and tangy cheese makes this dish an absolute showstopper that’s surprisingly simple to prepare. If you love the combination of sweet and spicy, check out my Sausage Ricotta Honey Hot Pizza too!

    Recipe

    Why You’ll Love This Crispy Hot Honey Feta Chicken

    A Symphony of Textures and Flavors

    The magic of this Crispy Hot Honey Feta Chicken lies in its contrasting elements that somehow work in perfect harmony. The exterior crunch gives way to juicy, tender chicken inside, while the hot honey creates a glossy, sticky coating that clings to every bite. I love watching the feta slowly soften against the warm chicken without fully melting. The tangy, salty cheese cuts through the sweetness of the honey, creating that perfect bite that makes you close your eyes and savor the moment. It’s comfort food elevated to something special enough for guests.

    Quick Enough for Weeknights, Impressive Enough for Company

    What I adore about this Crispy Hot Honey Feta Chicken is how it transforms a basic chicken dinner into something that feels restaurant-worthy in under 30 minutes. The ingredients are pantry staples, but the combination feels fresh and exciting. The visual appeal alone – that golden crust, the amber honey drizzle, and the snow-white feta crumbles – makes this dish Instagram-worthy without any fussy techniques. I’ve served this on busy Tuesdays and for Saturday dinner parties with equal success.

    Essential Tips & Tricks

    Perfecting the Crispy Coating

    For truly Crispy Hot Honey Feta Chicken, don’t skip pounding the chicken to even thickness – this ensures perfect cooking and maximum crunch. My secret weapon is a double dredge – flour, then egg, then a mixture of panko and regular breadcrumbs for varied texture. Make sure your oil is hot enough before adding chicken (test with a breadcrumb – it should sizzle immediately). Don’t crowd the pan! Work in batches to maintain that golden crust. The sound of the sizzle as the chicken hits the oil is your reassurance that crispiness is on its way.

    Balancing the Hot Honey Drizzle

    The hot honey component of Crispy Hot Honey Feta Chicken requires a delicate balance. I recommend starting with good-quality honey and infusing it with your preferred heat source – crushed red pepper flakes, cayenne, or even a dash of hot sauce. Warm it gently; don’t boil it. The honey should be loose enough to drizzle but not so hot that it loses its viscosity. For a milder version that’s still flavorful, try my Sticky Honey Garlic Steak and Rotini approach to sweet heat balance.

    Serving Ideas & Creative Variations

    Perfect Pairings for a Complete Meal

    Crispy Hot Honey Feta Chicken pairs beautifully with sides that complement its flavor profile. I love serving it with a crisp arugula salad dressed simply with lemon and olive oil – the peppery greens cut through the richness perfectly. For heartier appetites, roasted lemon potatoes or a simple orzo with herbs make excellent accompaniments. The chicken also works wonderfully sliced over pasta tossed with a light garlic oil. For an impressive spread, add my Crispy Garlic Air Fryer Broccoli on the side.

    Exciting Twists on the Classic

    While the traditional Crispy Hot Honey Feta Chicken is divine, don’t be afraid to experiment! Try using different cheeses – goat cheese adds tangy creaminess, while blue cheese brings bold flavor. The hot honey can be customized with garlic, herbs, or even a splash of bourbon for depth. For a fun presentation, slice the chicken and serve it in warm pitas with cucumber, tomatoes, and a drizzle of tzatziki. You can also transform this into sliders by serving on mini buns with a slice of pickle for a crowd-pleasing appetizer.

    Storage & Troubleshooting Guide

    Keeping It Crispy for Leftovers

    Storing Crispy Hot Honey Feta Chicken properly ensures you can enjoy that delicious crunch even the next day. Allow the chicken to cool completely before refrigerating in an airtight container, separating layers with parchment paper. For reheating, skip the microwave – it’ll make your beautiful crust soggy! Instead, place in a 350°F oven for 10-15 minutes until heated through. I recommend adding the feta and hot honey fresh after reheating for the best texture and flavor profile. Properly stored, the chicken will maintain quality for up to 3 days.

    Solving Common Cooking Challenges

    If your Crispy Hot Honey Feta Chicken coating is falling off, your pan likely wasn’t hot enough when you added the chicken. The immediate sear is crucial for adhering the breading. Another tip: let the breaded chicken rest for 5-10 minutes before frying to help the coating set. If your honey sauce is too spicy, temper it with a touch more honey or a small pat of butter. For chicken that’s browning too quickly on the outside but remains undercooked inside, lower the heat and finish cooking with a lid to trap heat.

    Frequently Asked Questions

    Can I make Crispy Hot Honey Feta Chicken in an air fryer?

    Absolutely! Spray the breaded chicken with cooking oil and air fry at 380°F for about 12 minutes, flipping halfway. You’ll get a similar crunch with less oil.

    What’s the best chicken cut to use?

    Boneless, skinless chicken breasts work best when pounded thin. Thighs are a juicier alternative but may need slightly longer cooking time.

    How spicy is the hot honey?

    The heat level is customizable. Start with 1 teaspoon of red pepper flakes per ½ cup honey and adjust to your preference.

    Can I prepare components ahead of time?

    You can bread the chicken up to 4 hours ahead and refrigerate. The hot honey can be made 2 weeks in advance and stored in a jar.

    What can I substitute for feta in Crispy Hot Honey Feta Chicken?

    Goat cheese, ricotta salata, or even crumbled queso fresco work well. For a dairy-free version, try a sprinkle of nutritional yeast.

    Final Thoughts

    Crispy Hot Honey Feta Chicken represents what I love most about cooking – simple ingredients transformed into something memorable through technique and creativity. The combination of textures and flavors creates a dish that feels special without being complicated. Every time I serve it, I’m reminded that good food doesn’t need to be fussy to be impressive. I hope this recipe brings the same joy to your table that it has to mine! For more delicious inspiration, follow me on Pinterest where I share all my favorite comfort food creations.
  • Garlic Butter Steak Bites & Shell Pasta | Irresistibly Delicious!

    Garlic Butter Steak Bites & Shell Pasta | Irresistibly Delicious!

    Garlic Butter Steak Bites & Shell Pasta | Irresistibly Delicious!

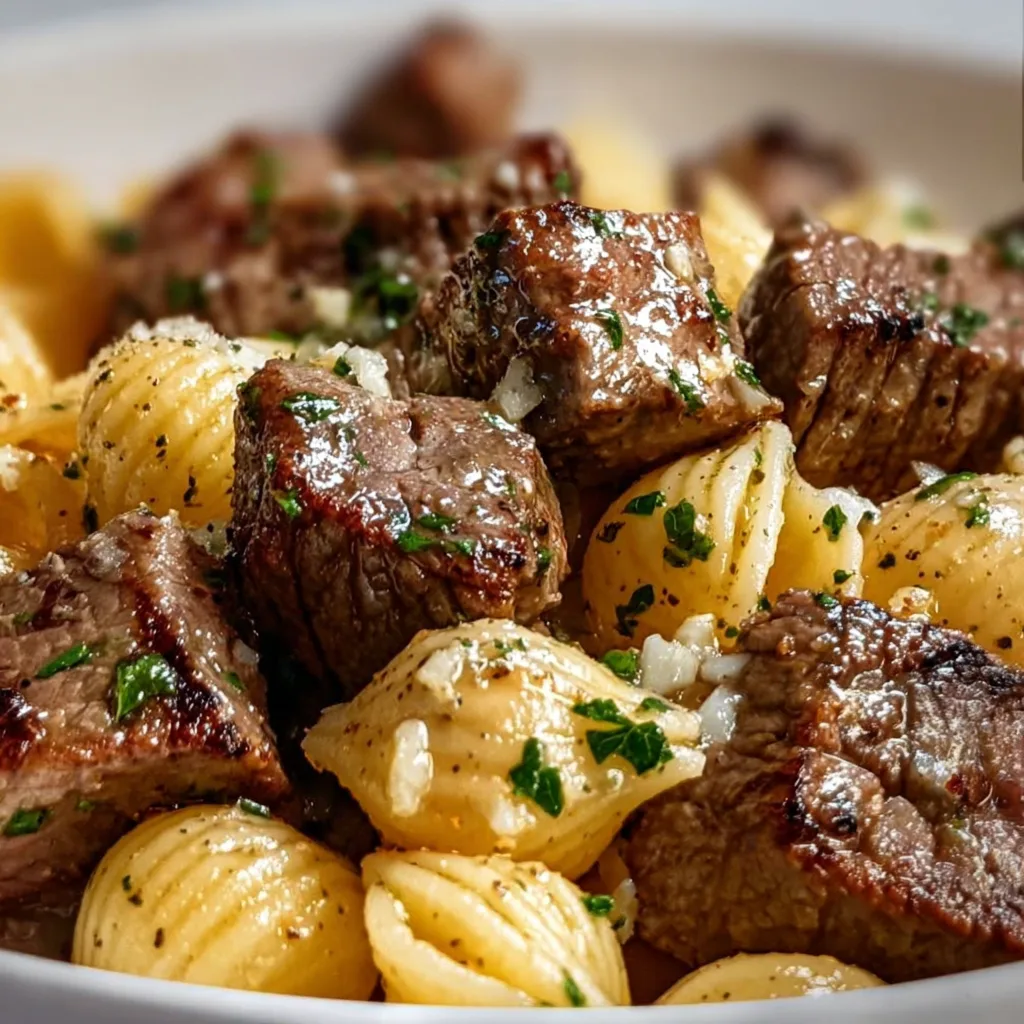
    Garlic Butter Steak Bites & Shell Pasta is the ultimate comfort food that combines tender, juicy steak with al dente pasta shells, all coated in a rich, garlicky butter sauce that will make your taste buds dance with joy. I discovered this recipe on a rainy Sunday when I needed something quick yet indulgent to lift my spirits. The way the shell pasta cradles little pools of that velvety sauce while the steak adds a satisfying chew makes this dish absolutely irresistible. It’s become my go-to for both weeknight dinners and casual entertaining because it feels special without requiring hours in the kitchen.

    Recipe

    Why You’ll Love This Garlic Butter Steak Bites & Shell Pasta

    Perfect Balance of Flavors and Textures

    This dish delivers an incredible harmony of flavors that will satisfy even the pickiest eaters. The tender steak bites develop a beautiful caramelized crust when seared at high heat, while remaining juicy inside. The shell pasta isn’t just a carb filler—it’s specifically chosen because those little pockets capture the garlic butter sauce perfectly. I love how each bite offers multiple textures: the slight chew of perfectly cooked pasta, the tenderness of the steak, and occasionally that delightful crunch when you hit a bit of caramelized garlic. It’s a textural symphony that keeps you coming back for more.

    Quick and Impressive Meal Solution

    When life gets hectic but you still want something that feels special, Garlic Butter Steak Bites & Shell Pasta is your answer. The entire dish comes together in under 30 minutes, making it perfect for busy weeknights. Yet it’s impressive enough for guests, who will think you spent hours in the kitchen! I’ve served this at last-minute dinner gatherings and received more compliments than dishes that took triple the effort. The rich aroma of garlic butter sizzling in the pan creates an inviting atmosphere that makes everyone feel instantly at home and eager to dig in.

    Essential Tips & Tricks

    Selecting and Preparing the Perfect Ingredients

    Start with the right cut of beef—sirloin or ribeye works beautifully for this dish. Look for well-marbled pieces that will remain juicy when quickly cooked. Room temperature steak sears more evenly, so take it out of the refrigerator 20-30 minutes before cooking. For the pasta, slightly undercook it by 1 minute less than package directions since it will continue cooking when tossed with the hot sauce. Fresh garlic makes a world of difference compared to pre-minced varieties, and European-style butter creates a richer sauce that clings beautifully to both the steak and pasta shells.

    Mastering the Cooking Technique

    The secret to perfect Garlic Butter Steak Bites & Shell Pasta lies in the cooking sequence. Always cook in batches to avoid overcrowding, which steams rather than sears the meat. Use a screaming hot pan to get that gorgeous caramelization on the steak bites—I’m talking about a pan so hot that the butter sizzles instantly. For the garlic, add it only after reducing the heat to prevent burning, which creates bitterness. When combining everything, toss gently to coat the pasta shells without breaking them, allowing those little pockets to fill with the luscious sauce. For more protein-packed comfort food ideas, check out these Power-Packed High Protein Cheesy Chicken Potatoes.

    Serving Ideas & Creative Variations

    Complementary Side Dishes

    This hearty main dish pairs beautifully with lighter sides that balance its richness. A simple arugula salad dressed with lemon juice and olive oil provides a peppery contrast that cuts through the buttery sauce. Roasted asparagus or broccolini adds color and nutrition while soaking up any extra sauce on your plate—no wasting that liquid gold! For a complete meal that still feels light, I often serve a side of garlic bread for sauce-mopping purposes. When entertaining, I arrange everything on a large wooden board for a casual, interactive dining experience that always impresses guests.

    Exciting Flavor Variations

    While the classic garlic butter version is divine, don’t be afraid to experiment with flavor profiles. Add a Mediterranean twist by incorporating sun-dried tomatoes, crumbled feta, and fresh basil at the end. For heat lovers, red pepper flakes or a dash of cajun seasoning transforms the dish entirely. You could also try a mushroom variation with sautéed cremini mushrooms and a splash of white wine in the sauce. For seafood enthusiasts, try the Garlic Butter Steak Bites and Shrimp version that combines the best of land and sea in one incredible dish.

    Storage & Troubleshooting Guide

    Proper Storage and Reheating Methods

    This dish is best enjoyed fresh, but leftovers can still be delicious when stored properly. Place cooled leftovers in an airtight container and refrigerate for up to 3 days. When reheating, add a splash of beef broth or water to revitalize the sauce that may have been absorbed by the pasta. Gentle reheating is key—use a covered skillet over medium-low heat rather than the microwave, which can toughen the steak. For meal prep, consider keeping the steak bites separate from the dressed pasta, combining them only upon reheating for the best texture preservation.

    Common Issues and Easy Fixes

    If your steak bites turn out tough, you’ve likely overcooked them or cut them too small. Aim for 1-inch chunks and cook them quickly over high heat for just 1-2 minutes per side. Sauce breaking or appearing greasy usually means the heat was too high when adding the butter—next time, remove the pan from heat briefly before adding butter. If your pasta shells stick together, you probably didn’t use enough cooking water or oil after draining. A quick fix is tossing the pasta with a little olive oil immediately after draining and separating any clumps before adding to the sauce.

    Frequently Asked Questions

    What cut of beef works best for Garlic Butter Steak Bites & Shell Pasta?

    Sirloin, ribeye, or New York strip work best due to their tenderness and marbling. Cut into 1-inch cubes for the perfect bite-sized pieces that cook quickly while remaining juicy inside.

    Can I substitute the shell pasta with another type?

    Yes! While shells capture the sauce beautifully, you can use penne, farfalle, or orecchiette. Avoid long pasta like spaghetti, as it doesn’t hold the chunky sauce components as effectively.

    How do I prevent the garlic from burning?

    Add garlic only after reducing the heat and cooking the steak. Alternatively, add it just 30 seconds before removing the pan from heat to preserve its flavor without burning.

    Is there a dairy-free version of this recipe?

    Substitute butter with olive oil and a dairy-free butter alternative. The flavor profile will change slightly, but you’ll still get a delicious meal with similar richness.

    Can I make Garlic Butter Steak Bites & Shell Pasta ahead for a party?

    Prepare components separately—cook pasta al dente and toss with olive oil, and prepare the steak separately. Combine with freshly made sauce just before serving for best results.

    Final Thoughts

    Garlic Butter Steak Bites & Shell Pasta represents comfort food at its finest—simple ingredients transformed into something truly special through thoughtful preparation. I love how this dish brings together the luxury of steak with the homey comfort of pasta in a way that feels both indulgent and approachable. Whether you’re cooking for one or hosting friends, this recipe delivers maximum flavor with minimal fuss. Share your creations with us on Pinterest and let me know what variations you’ve tried!

  • Steak Cheese Quesadillas Blackstone: Irresistibly Crispy & Juicy!

    Steak Cheese Quesadillas Blackstone: Irresistibly Crispy & Juicy!

    Steak Cheese Quesadillas Blackstone: Irresistibly Crispy & Juicy!

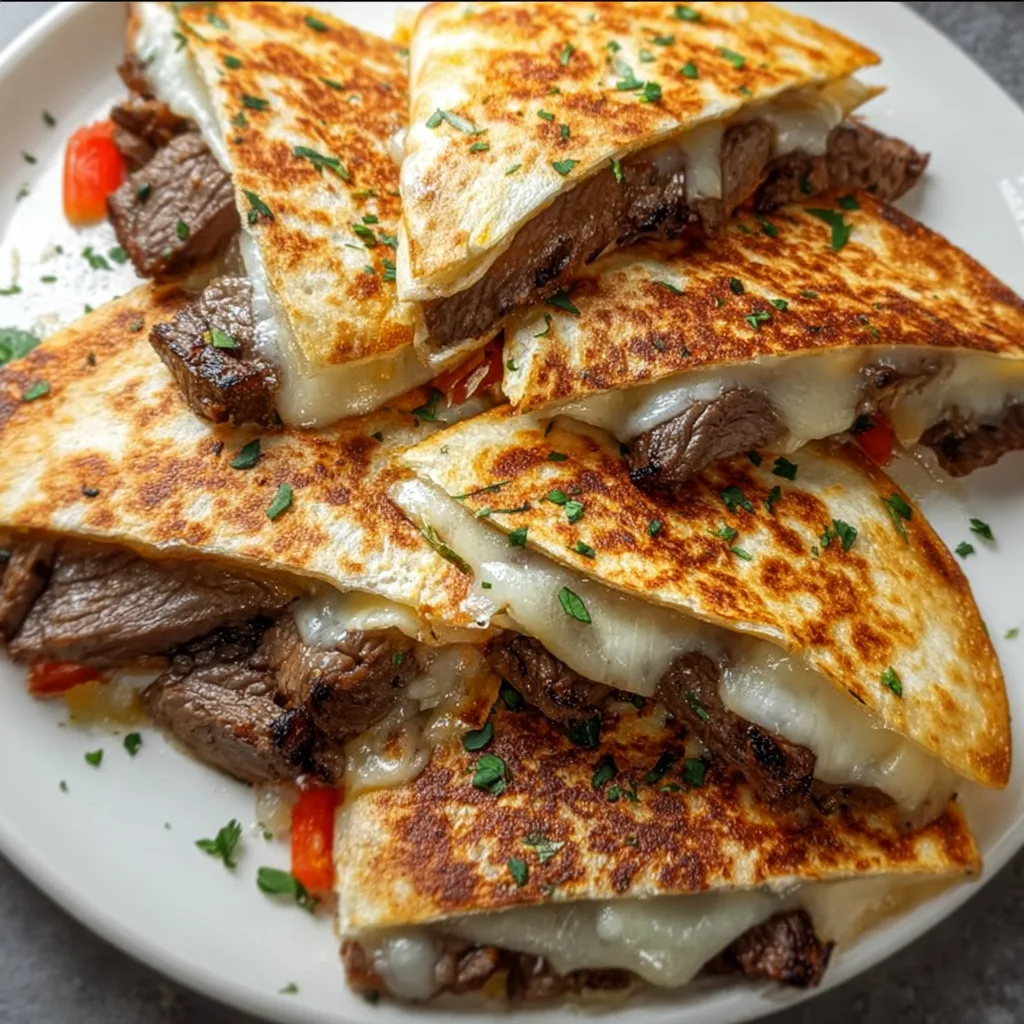
    Steak Cheese Quesadillas Blackstone have completely transformed my outdoor cooking game! There’s something magical about that sizzle when tender strips of seasoned steak and gooey cheese hit that hot griddle surface. I discovered this recipe last summer when hosting an impromptu backyard gathering, and it’s been my go-to ever since. The Blackstone griddle creates the perfect crispy exterior while keeping everything inside melty and delicious. If you’re looking for a crowd-pleaser that brings restaurant-quality results right to your patio, these quesadillas are about to become your new obsession.

    Recipe

    Why You’ll Love This Steak Cheese Quesadillas Blackstone

    Perfect Texture Combination

    The Blackstone griddle creates a texture paradise that’s impossible to achieve with other cooking methods. The flat, evenly-heated surface delivers that restaurant-quality crisp on your tortillas while maintaining that perfect golden color. I still remember the first time I made these—the satisfying crunch as I cut through the tortilla giving way to that molten cheese pull that had my guests reaching for seconds before they’d finished firsts! The steak stays juicy and tender inside while the exterior gets those beautiful caramelized edges. It’s a textural symphony that makes these steak cheese quesadillas absolutely irresistible.

    Quick & Impressive Results

    One of the greatest joys of making steak cheese quesadillas on a Blackstone is how quickly impressive results come together. From prep to plate, you’re looking at under 30 minutes, even when cooking for a crowd. The spacious cooking surface means you can make multiple quesadillas simultaneously—a game-changer when entertaining! I’ve converted even my most kitchen-shy friends into Blackstone believers after showing them how easy it is to flip a perfectly golden quesadilla with confidence. The speed-to-impressiveness ratio here is off the charts, making this recipe perfect for both weeknight dinners and weekend gatherings.

    Essential Tips & Tricks

    Mastering the Steak

    The foundation of exceptional steak cheese quesadillas Blackstone starts with properly prepared beef. I recommend using flank or skirt steak sliced against the grain into thin strips—this ensures maximum tenderness. Season generously with salt, pepper, garlic powder, and a hint of cumin at least 15 minutes before cooking to allow flavors to penetrate. The Blackstone’s high, even heat creates beautiful caramelization on the steak in just 2-3 minutes per side. Don’t overcrowd the griddle! Work in batches if needed, allowing each piece of steak to make full contact with the cooking surface for that perfect sear before assembling your quesadillas.

    Temperature Control Secrets

    Mastering temperature zones on your Blackstone is the secret to quesadilla perfection. I’ve learned through many (delicious) trials that medium-high heat (around 375°F) works best for the initial steak sear, while medium heat (325-350°F) is ideal for quesadilla assembly and cooking. This prevents burning while still achieving that golden exterior. If you’re making grilled cheese with sun-dried tomatoes or quesadillas, temperature control is everything! Use a digital thermometer to monitor surface temperature until you develop an intuitive feel. Remember to let your Blackstone preheat for 10-15 minutes before cooking for the most consistent results.

    Serving Ideas & Creative Variations

    Topping Bar Extravaganza

    Transform your steak cheese quesadillas Blackstone experience with a build-your-own topping bar that elevates every bite. I arrange small bowls of fresh pico de gallo, creamy avocado slices, tangy sour cream, zesty lime wedges, and chopped cilantro. The cool, fresh toppings create a beautiful contrast against the hot, crispy quesadillas. My personal favorite combination includes a dollop of roasted jalapeño crema that adds just enough heat without overwhelming the flavors. For an extra special touch, offer a sticky honey garlic sauce that guests can drizzle over their quesadillas for a sweet-savory finish.

    Global Flavor Inspirations

    Take your Blackstone quesadillas on a worldwide flavor journey by experimenting with different cheese and seasoning combinations. For Mediterranean-inspired quesadillas, try feta cheese, oregano-seasoned steak, and a sprinkle of sun-dried tomatoes. Asian-fusion versions work beautifully with thinly sliced steak marinated in soy, ginger, and a touch of honey, paired with pepper jack cheese. My guests went wild for Korean-inspired quesadillas featuring bulgogi-style steak with mozzarella and a quick kimchi slaw on the side. The Blackstone’s even heating ensures these creative variations cook perfectly every time.

    Storage & Troubleshooting Guide

    Proper Leftovers Management

    Properly storing leftover steak cheese quesadillas maintains their delicious flavor while ensuring food safety. Allow quesadillas to cool completely before wrapping each one individually in aluminum foil or plastic wrap, then place in an airtight container. Refrigerate for up to 3 days. For best reheating results, avoid the microwave which makes them soggy! Instead, place them on a baking sheet in a 350°F oven for 7-10 minutes, or back on the Blackstone griddle at medium-low heat for 2-3 minutes per side. The tortilla will re-crisp beautifully while the cheese melts to perfection.

    Common Issues Solved

    Even experienced cooks encounter challenges with steak cheese quesadillas Blackstone preparation. If your tortillas are burning before the cheese melts, your heat is too high—dial it back and move to a cooler zone on the griddle. Soggy quesadillas usually result from overfilling; stick to a thin, even layer of ingredients and avoid watery components. If your quesadillas are difficult to flip without spilling, try using slightly smaller tortillas or less filling until you master the technique. Remember that the first quesadilla is often a learning experience, just like the first pancake! Adjust your technique as you go.

    Frequently Asked Questions

    What cut of steak works best for Steak Cheese Quesadillas Blackstone?

    Flank, skirt, or ribeye steak work beautifully. Slice thinly against the grain after cooking for maximum tenderness. For budget options, sirloin tips can work well when marinated for 30 minutes before cooking.

    Can I prep ingredients ahead of time?

    Absolutely! Slice and season your steak up to 24 hours ahead and store refrigerated. Shred cheese and prepare toppings up to 2 days in advance. This makes assembly lightning-fast when you’re ready to cook.

    What’s the best cheese for quesadillas?

    A combination of cheeses works best—I recommend equal parts monterey jack for meltability and sharp cheddar for flavor. Pepper jack adds nice heat, while queso quesadilla or Oaxaca cheese provides authentic stretch.

    How do I clean my Blackstone after making quesadillas?

    While still warm (not hot), scrape surface with a metal spatula, then wipe with paper towels. For stuck-on cheese, pour water and scrub with a grill stone, then dry thoroughly and apply a thin oil layer.

    Can I make steak cheese quesadillas Blackstone for a large group?

    Definitely! The Blackstone excels at batch cooking. Cook all steak first, set aside covered with foil, then assemble 3-4 quesadillas simultaneously. Keep finished ones warm in a 200°F oven until serving.

    Final Thoughts

    Steak cheese quesadillas Blackstone have earned a permanent spot in my outdoor cooking repertoire. There’s something deeply satisfying about the sizzle of perfectly seasoned steak hitting that hot griddle surface, followed by the golden crispness of the tortilla and the stretchy cheese pull with every bite. Whether you’re hosting friends or simply treating yourself to an elevated dinner, this recipe delivers restaurant-quality results with backyard convenience. I encourage you to make this recipe your own—experiment with different cheeses, seasonings, and toppings to create your signature version. Happy griddling! Find more inspiration at Pinterest.

  • Meatball and Mashed Potato Bake That Will Melt Your Heart

    Meatball and Mashed Potato Bake That Will Melt Your Heart

    Meatball and Mashed Potato Bake That Will Melt Your Heart

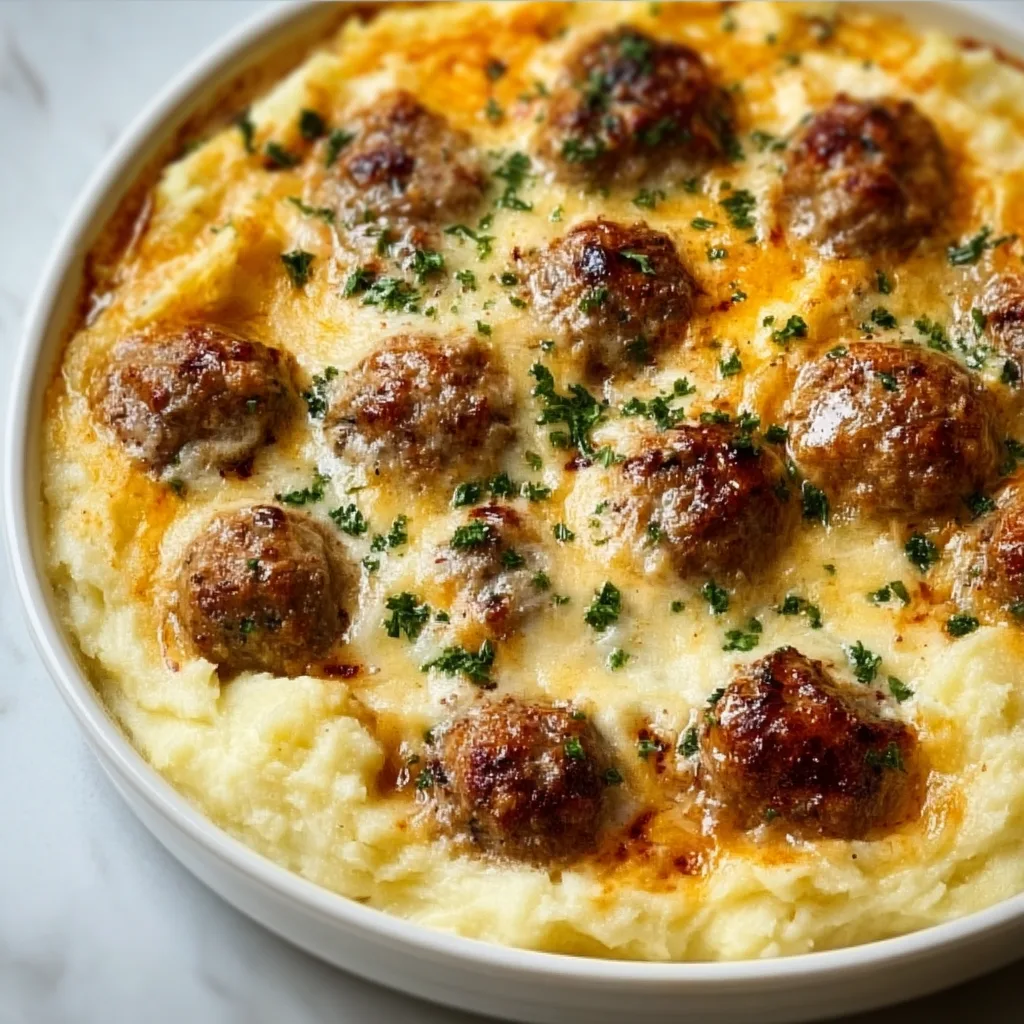
    This Meatball and Mashed Potato Bake transforms everyday ingredients into a heartwarming casserole that feels like a warm hug on a plate. The first time I made this comforting dish, my kitchen filled with the rich aroma of savory meatballs nestled in creamy mashed potatoes, all topped with a golden cheese crust that made my mouth water before I even took it out of the oven. There’s something magical about the way the flavors meld together, creating that perfect bite that has everyone at the table asking for seconds. If you love hearty, satisfying meals that bring the family together, this cozy casserole is about to become your new favorite.

    Recipe

    Why You’ll Love This Meatball and Mashed Potato Bake

    Perfect Comfort Food for Any Season

    There’s something undeniably satisfying about a bubbling Meatball and Mashed Potato Bake fresh from the oven. On cold winter evenings, it wraps you in warmth from the inside out, but I’ve found it’s just as welcome during summer gatherings when comfort food cravings strike. The combination of juicy meatballs with their savory depth and fluffy mashed potatoes creates a textural symphony that satisfies in a way few other dishes can. What I love most is how the edges of the potatoes get slightly crispy while the interior stays creamy—creating that perfect contrast in every bite.

    Make-Ahead Friendly for Busy Weeknights

    As someone who values both homemade meals and sanity on hectic days, I cherish recipes with make-ahead potential. This meatball bake has saved me countless times when afternoon activities run long. You can prepare the components separately—roll the meatballs and refrigerate them uncooked, make the mashed potatoes ahead, then assemble and bake when needed. I’ve even frozen the entire assembled (but unbaked) casserole for up to a month with excellent results. Just thaw overnight in the refrigerator and add an extra 15 minutes to the baking time. Weeknight dinner crisis averted!

    Essential Tips & Tricks

    Perfecting Your Meatball Mixture

    The secret to irresistible meatballs lies in both ingredients and technique. I recommend using a mixture of ground beef and pork (70/30 ratio) for the perfect balance of flavor and juiciness. Adding a splash of milk-soaked bread creates tenderness while minced garlic and finely chopped onions infuse every bite with aromatic goodness. The game-changer? Don’t overmix. Gentle handling keeps meatballs tender rather than tough. I like to mix just until ingredients are combined, then let the mixture rest for 10 minutes before rolling. This rest period allows the flavors to meld and the proteins to relax for a more tender result.

    Elevating Your Mashed Potatoes

    The foundation of any great Meatball and Mashed Potato Bake is, unsurprisingly, exceptional mashed potatoes. Start with starchy varieties like Russets or Yukon Golds—they create the creamiest texture. After boiling until fork-tender, drain thoroughly and return to the hot pot for a minute to evaporate excess moisture. This seemingly small step makes a huge difference! For next-level creaminess, warm your butter and milk/cream before adding them to the potatoes. I like to infuse this liquid with a bay leaf and garlic clove for subtle depth of flavor. Remember to season generously—potatoes absorb salt like nothing else.

    Serving Ideas & Creative Variations

    Perfect Pairings for a Complete Meal

    A beautiful Meatball and Mashed Potato Bake deserves thoughtful accompaniments to round out the meal. I love serving it with a crisp side salad dressed simply with lemon vinaigrette—the brightness cuts through the richness perfectly. Roasted vegetables like asparagus, Brussels sprouts, or balsamic-glazed carrots add color and nutritional balance. For a truly special touch, consider homemade garlic bread or buttery dinner rolls to soak up every last bit of sauce. When entertaining, I sometimes add a starter of stuffed mushrooms or a light soup to create a memorable multi-course experience.

    Global Flavor Inspirations

    While the classic version is unbeatable, this dish welcomes creative variations inspired by global cuisines. For an Italian twist, incorporate basil and sun-dried tomatoes into the mashed potatoes and use Italian-seasoned meatballs with mozzarella topping. Feeling Scandinavian? Add lingonberry jam on the side and season the meatballs with allspice and nutmeg. My family’s favorite is the Mediterranean version with lamb meatballs seasoned with mint and oregano, topped with feta cheese and olives. The beauty of this dish is its flexibility—you can adapt it to use ingredients you already love or introduce new flavor profiles.

    Storage & Troubleshooting Guide

    Proper Storage for Maximum Freshness

    To maintain the quality of your Meatball and Mashed Potato Bake, proper storage is essential. Refrigerate leftovers within two hours of cooking, transferring them to shallow airtight containers to speed cooling. The bake will keep beautifully for 3-4 days in the refrigerator. For freezing, I recommend portioning into individual servings for easier reheating. Wrap each portion in plastic wrap, then aluminum foil, and freeze for up to 3 months. When reheating, sprinkle a few drops of water over the top before covering with foil—this prevents the potatoes from drying out and restores that fresh-baked texture.

    Solving Common Preparation Challenges

    Even experienced cooks encounter occasional challenges with this dish. If your meatballs are coming out too dense, you’re likely overmixing or compacting them too firmly when rolling. Use a light touch and remember that irregular-shaped meatballs have character! For watery mashed potatoes, the culprit is usually insufficient draining after boiling. Let potatoes sit in a colander for a few minutes, then return to the hot pot to evaporate excess moisture. If your cheese topping isn’t browning properly, switch to the broiler for the final 2-3 minutes—just watch carefully to prevent burning.

    Frequently Asked Questions

    Can I use frozen meatballs for this Meatball and Mashed Potato Bake?

    Absolutely! Thaw them first or extend the baking time by 15-20 minutes if using them frozen. Quality matters here, so choose a brand you already enjoy for the best results.

    What cheeses work best for the topping?

    Sharp cheddar provides excellent flavor and meltability. For variety, try Gruyère, fontina, or a combination of mozzarella with Parmesan for stretch and flavor depth.

    Can I make this dish vegetarian?

    Yes! Substitute plant-based meatballs or lentil balls. For extra flavor, add roasted mushrooms and caramelized onions to the vegetarian version.

    How do I prevent the mashed potatoes from drying out?

    Add extra butter and a splash of cream to your mashed potatoes, and ensure the bake is covered with foil for the first half of baking time.

    What’s the best way to reheat leftovers?

    Microwave individual portions covered with a damp paper towel, or reheat larger amounts in a 325°F oven covered with foil until heated through (about 20 minutes).

    Final Thoughts

    This Meatball and Mashed Potato Bake has become more than just a recipe in my household—it’s a tradition that signals comfort, care, and connection. The beauty lies in its simplicity and how it brings people together around the table, creating moments that linger long after the plates are cleared. Whether you’re making it for a quiet family dinner or a gathering of friends, this dish has that rare quality of feeling both special and familiar at the same time. I hope it brings as much joy to your table as it has to mine! Find more comfort food inspiration on Pinterest.

  • Roasted Red Pepper Hummus That Will Blow Your Taste Buds Away!

    Roasted Red Pepper Hummus That Will Blow Your Taste Buds Away!

    Roasted Red Pepper Hummus That Will Blow Your Taste Buds Away!

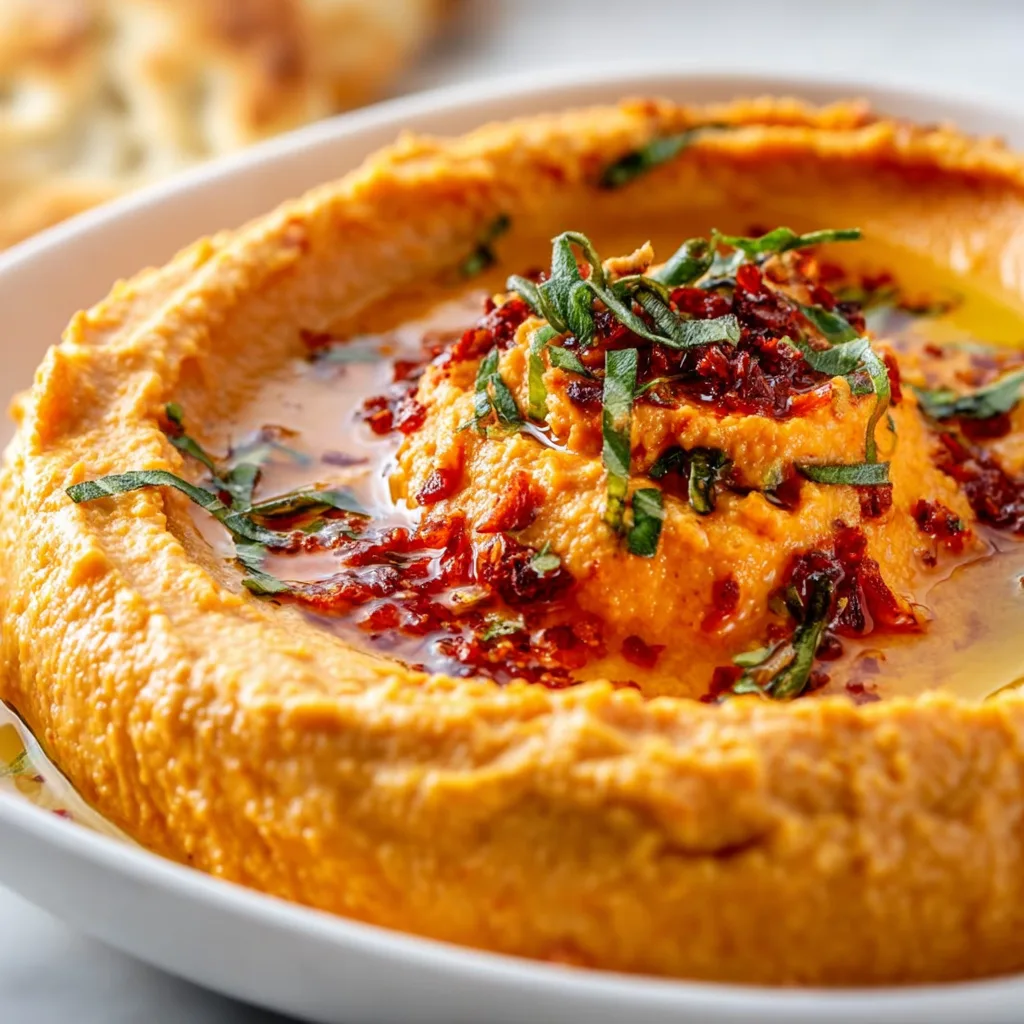
    Roasted Red Pepper Hummus is my absolute go-to when I need something that impresses without breaking a sweat. The first time I made this vibrant dip, my kitchen filled with the aromatic blend of toasted garlic and sweet peppers that transported me straight to a Mediterranean coastline. There’s something magical about the way the smoky roasted peppers blend with creamy chickpeas, creating that perfect balance of flavors. Whether you’re hosting friends or just treating yourself to an elevated snack, this recipe delivers restaurant-quality hummus right in your home. Trust me, once you try making this version, store-bought will never taste the same again.

    Recipe

    Why You’ll Love This Roasted Red Pepper Hummus

    Perfect Balance of Flavors

    The beauty of roasted red pepper hummus lies in its harmonious flavor profile. The natural sweetness of the roasted peppers perfectly balances the earthy chickpeas and nutty tahini. I love how the lemon juice adds just enough brightness to lift everything up, while a hint of cumin brings that subtle warmth that makes you go back for another scoop. The garlic provides a gentle kick without overwhelming your palate. What makes this recipe special is how each ingredient gets to shine while creating a cohesive, crave-worthy dip that’s both sophisticated and comforting at the same time.

    Quick and Versatile

    One of my favorite things about making roasted red pepper hummus is how effortlessly it comes together. In just about 15 minutes, you can have a gourmet-quality dip ready to serve. The food processor does all the heavy lifting, transforming simple ingredients into silky perfection. This recipe is incredibly forgiving and adaptable – whether you’re using jarred roasted peppers or roasting your own, the results are consistently delicious. Plus, it works as an appetizer, sandwich spread, salad topper, or even as a sauce for grilled chicken or crispy falafel.

    Essential Tips & Tricks

    Achieving the Perfect Texture

    The secret to ultra-smooth roasted red pepper hummus is all about technique. Always remove the chickpea skins for the silkiest texture – it takes a few extra minutes but makes a world of difference. I learned this trick from my Mediterranean neighbor who insisted this step separates good hummus from great hummus. Another game-changer is adding the tahini and lemon juice first, blending them together before adding other ingredients. This creates an emulsion that helps achieve that luxurious, whipped consistency. Finally, drizzle in ice-cold water while blending to create a light, airy texture that’s absolutely dreamy.

    Flavor Enhancement Secrets

    To elevate your roasted red pepper hummus to restaurant quality, focus on these flavor boosters. First, toast your garlic in olive oil until just golden – this mellows the harshness while intensifying the aromatic qualities. For the peppers, charring them yourself adds incredible depth, but in a pinch, jarred peppers work beautifully too (just pat them dry first). Don’t skimp on good quality tahini; its nutty richness is essential. A pinch of smoked paprika adds complexity, while a drizzle of high-quality olive oil before serving creates that professional finish that makes everyone ask for your recipe.

    Serving Ideas & Creative Variations

    Beautiful Presentation Techniques

    Elevating your roasted red pepper hummus from delicious to Instagram-worthy is all about the presentation. Create a shallow well in the center with the back of a spoon, then fill it with extra virgin olive oil for that classic restaurant look. I love sprinkling contrasting toppings like toasted pine nuts, finely chopped fresh herbs (parsley or cilantro work beautifully), or a dusting of sumac for color and flavor. For special occasions, try serving individual portions in small dishes with a swirl of harissa and microgreens. Don’t forget warm pita triangles arranged artfully around the edge of your serving platter.

    Exciting Flavor Variations

    While classic roasted red pepper hummus is divine, experimenting with variations keeps things exciting. Try adding a roasted jalapeño alongside the red peppers for a spicy kick that’s perfect with crispy chicken sandwiches. For a Mediterranean twist, blend in some sun-dried tomatoes and fresh basil. Caramelized onions add incredible sweetness and depth, while a spoonful of harissa creates a North African-inspired version. My personal favorite is adding a handful of feta cheese for a tangy, creamy variation that disappears in minutes at gatherings. Each variation maintains the essence of roasted red pepper hummus while offering a new flavor experience.

    Storage & Troubleshooting Guide

    Proper Storage Methods

    Keeping your roasted red pepper hummus fresh is simple with the right approach. Store it in an airtight container in the refrigerator for up to 5 days, though the flavors are most vibrant in the first 3 days. A helpful trick I’ve discovered is placing a thin layer of olive oil on top before sealing – this creates a barrier against air and prevents the surface from drying out. For longer storage, hummus freezes surprisingly well for up to 3 months. Portion it into small containers or ice cube trays for convenient thawing. Just give it a good stir and a drizzle of fresh olive oil after thawing to revive its texture.

    Fixing Common Problems

    Even experienced cooks occasionally encounter hummus issues, but they’re easy to fix. If your roasted red pepper hummus is too thick or stiff, simply add more liquid – a tablespoon at a time of either ice water, olive oil, or lemon juice until you reach your desired consistency. For hummus that’s too thin, blend in more chickpeas. Flavor too bland? Try adding more salt, lemon juice, or a pinch of cumin. If the garlic taste is overwhelming, balance it with additional tahini and lemon juice. For grainy texture, the solution is almost always more processing time – sometimes it takes a full 3-4 minutes of blending to achieve that silky-smooth restaurant quality.

    Frequently Asked Questions

    Can I make roasted red pepper hummus without tahini?

    Yes! While traditional hummus uses tahini, you can substitute with Greek yogurt for creaminess or nut butters like cashew or almond butter. The flavor profile will change slightly, but it’s still delicious.

    How do I roast peppers for homemade roasted red pepper hummus?

    Place whole bell peppers on a baking sheet at 450°F for 25-30 minutes, turning occasionally, until charred all over. Transfer to a bowl, cover with plastic wrap for 15 minutes, then peel away the skin.

    Is roasted red pepper hummus healthy?

    Absolutely! It’s packed with plant protein, fiber, and healthy fats. The roasted red peppers add vitamin C and antioxidants, making this a nutritious choice for snacking or meals.

    Can I make this recipe spicy?

    Definitely! Add a pinch of cayenne pepper, a dash of hot sauce, or include a roasted jalapeño with your red peppers for a spicy kick that complements the sweet peppers beautifully.

    Why is my hummus bitter?

    Bitterness usually comes from too much tahini or olive oil that’s past its prime. Balance it with more lemon juice, a pinch of sugar, or additional roasted red peppers to enhance sweetness.

    Final Thoughts

    Creating the perfect roasted red pepper hummus is both an art and a delightful sensory experience. The vibrant color alone makes it a standout on any table, but it’s the complex flavors and silky texture that will keep everyone coming back for more. Whether you’re serving it as a simple snack or as part of an elaborate mezze spread, this recipe delivers consistent, crave-worthy results. I hope you’ll experiment with the variations and make this roasted red pepper hummus your own signature dish. Don’t forget to check out more Mediterranean-inspired recipes on Pinterest for complementary dishes!

  • Churro Cruffins: Irresistible Cinnamon Sugar Treats Bursting with Flavor

    Churro Cruffins: Irresistible Cinnamon Sugar Treats Bursting with Flavor

    Churro Cruffins: Irresistible Cinnamon Sugar Treats Bursting with Flavor

    Churro Cruffins Cinnamon Sugar Treats are what happens when the buttery layers of a croissant meet the sugary, spiced charm of a churro! I first stumbled upon this magical hybrid at a tiny bakery tucked away in my neighborhood, and I’ve been obsessed ever since. There’s something irresistibly comforting about biting through that crispy, sugar-coated exterior into the soft, flaky interior. The warm aroma of cinnamon that fills your kitchen is worth the effort alone. Whether you’re hosting brunch or simply craving something sweet, these delicious cruffins with cinnamon will quickly become your new favorite indulgence.

    Recipe

    Why You’ll Love These Churro Cruffins Cinnamon Sugar Treats

    Perfect Balance of Textures

    What makes these churro cruffins truly special is the incredible contrast between textures. The outside develops this gorgeous caramelized crunch from the cinnamon sugar coating, while the inside stays airy and tender with distinct buttery layers. I remember watching my niece take her first bite – her eyes widened with pure delight as the crispy exterior gave way to that pillowy center. The beauty of these treats is how they manage to capture both worlds: the satisfying crackle of a churro’s exterior and the delicate, pull-apart layers of a perfect croissant. It’s truly the best of both pastry worlds!

    Make-Ahead Friendly

    One of my favorite things about these churro cruffins cinnamon sugar treats is how flexible they are for busy schedules. The dough can be prepared the night before and left to rise slowly in the refrigerator, developing even more flavor overnight. I often prep everything before bed when hosting weekend guests, which means I can simply roll, shape, and bake in the morning. Nothing beats greeting sleepy-eyed visitors with the intoxicating scent of cinnamon and butter! The prep-ahead capability makes these impressive pastries surprisingly stress-free for special breakfasts or brunches when you’d rather be socializing than stuck in the kitchen.

    Essential Tips & Tricks

    Mastering the Lamination Process

    The key to perfect churro cruffins lies in the lamination technique – those beautiful, distinct layers that make each bite so special. Keep your butter cold but pliable; too hard and it will break through the dough, too soft and it will melt into it. I learned this lesson the hard way during a summer baking session when my kitchen was uncomfortably warm! Work quickly and return the dough to the refrigerator whenever it starts feeling too soft. Each fold creates more layers, so be patient with this process. Remember that properly laminated dough should show distinct streaks of butter – this is what creates those gorgeous heavenly chocolate banana split cupcakes-worthy layers that make cruffins so special.

    The Perfect Cinnamon Sugar Coating

    The signature element of churro cruffins cinnamon sugar treats is that irresistible spiced coating. For the best flavor balance, I recommend using a mixture of granulated and brown sugars with a generous amount of cinnamon. The brown sugar adds depth and a subtle molasses note that perfectly complements the buttery pastry. Apply the coating while the cruffins are still slightly warm – not hot enough to melt the sugar completely, but warm enough for it to adhere properly. I like to gently toss them in the mixture rather than just sprinkling it on top, ensuring every nook and cranny gets that delightful churro-inspired coating that makes these treats so craveable.

    Serving Ideas & Creative Variations

    Perfect Pairings

    These churro cruffins cinnamon sugar treats shine brightest when paired with the right accompaniments. Serve them alongside a rich chocolate dipping sauce for an elevated churro experience that will transport you straight to a Spanish café. For breakfast, I love them with a strong cup of coffee or chai tea to balance the sweetness. When hosting, I create a little brunch station with fresh fruit, whipped cream, and these cruffins as the star. The contrast of tart berries against the sweet, spiced pastry is absolutely divine! For an extra special touch, warm them slightly before serving – about 10 seconds in the microwave or a few minutes in a low oven brings back that fresh-baked easy wisconsin apple kringle pastry magic.

    Flavor Twists and Add-Ins

    While classic churro cruffins cinnamon sugar treats are perfect on their own, there are endless ways to make them your own. Try adding orange zest to the sugar coating for a bright, citrusy note that cuts through the richness. My personal favorite variation includes a touch of cardamom along with the cinnamon – it adds an unexpected aromatic dimension that guests always ask about. For a decadent twist, fill the center with dulce de leche or chocolate ganache before baking. You can also experiment with different spices like nutmeg, ginger, or even a pinch of cayenne for a subtle heat that plays beautifully against the sweet coating. These variations keep the basic recipe exciting all year round.

    Storage & Troubleshooting Guide

    Keeping Them Fresh

    Churro cruffins cinnamon sugar treats are at their absolute best when freshly baked, but proper storage can help maintain their quality. If you plan to enjoy them within 24 hours, store at room temperature in an airtight container lined with paper towels to absorb excess moisture. For longer storage, freeze them without the cinnamon sugar coating – simply reheat in a 300°F oven for 5-7 minutes, then apply fresh coating. I’ve found that microwaving frozen cruffins for just 15-20 seconds followed by a few minutes in a toaster oven gives them that nearly-fresh-baked texture we all crave. The sugar coating may lose some crispness over time, but the flavor remains delightful.

    Troubleshooting Common Issues

    If your churro cruffins aren’t turning out perfectly, don’t worry – a few adjustments can help. When cruffins don’t rise properly, the most common culprit is temperature issues – either the butter melted into the dough or the environment was too cold for proper proofing. Give them ample time to rise in a slightly warm spot before baking. If the centers are doughy, they likely need a few more minutes in the oven. For cruffins that brown too quickly on the outside while staying raw inside, lower your oven temperature by 25°F and extend baking time. I once salvaged an underproofed batch by letting them rest longer before the final rise – patience truly is key when working with laminated dough!

    Frequently Asked Questions

    Can I make churro cruffins cinnamon sugar treats without a stand mixer?

    Absolutely! While a mixer makes the process easier, you can knead the dough by hand. The texture might be slightly different, but the buttery, cinnamon-sugar goodness will still shine through.

    How far in advance can I prepare the dough?

    The dough can be refrigerated for up to 24 hours before shaping and baking. This cold fermentation actually improves flavor development, making it perfect for planning ahead.

    Can I use pre-made puff pastry instead?

    Yes! While not traditional, store-bought puff pastry makes a quick shortcut. The texture will be different but still delicious – just roll, shape, bake, and coat with the cinnamon sugar mixture.

    My kitchen is very warm. Any tips for keeping the dough cold?

    Work in short intervals, returning the dough to the refrigerator for 15-20 minutes whenever it feels soft. Chilled tools (rolling pin, bowl, surface) also help maintain proper temperature.

    Can these be made gluten-free?

    With some adjustments, yes. Use a cup-for-cup gluten-free flour blend with xanthan gum, but expect a slightly different texture. The lamination process may be trickier with gluten-free dough.

    Final Thoughts

    These churro cruffins cinnamon sugar treats represent everything I love about baking – the way simple ingredients transform into something magical, the joy of sharing something homemade, and the smiles they inevitably bring to the table. There’s something deeply satisfying about creating these buttery, spiced treasures in your own kitchen. Whether you’re an experienced baker or trying laminated dough for the first time, the process is rewarding and the results are absolutely worth it. Don’t forget to share your creations on Pinterest – I’d love to see your take on these irresistible treats!

  • Bojangles Fried Chicken: Crispy, Juicy, Irresistible Flavor Blast!

    Bojangles Fried Chicken: Crispy, Juicy, Irresistible Flavor Blast!

    Bojangles Fried Chicken: Crispy, Juicy, Irresistible Flavor Blast!

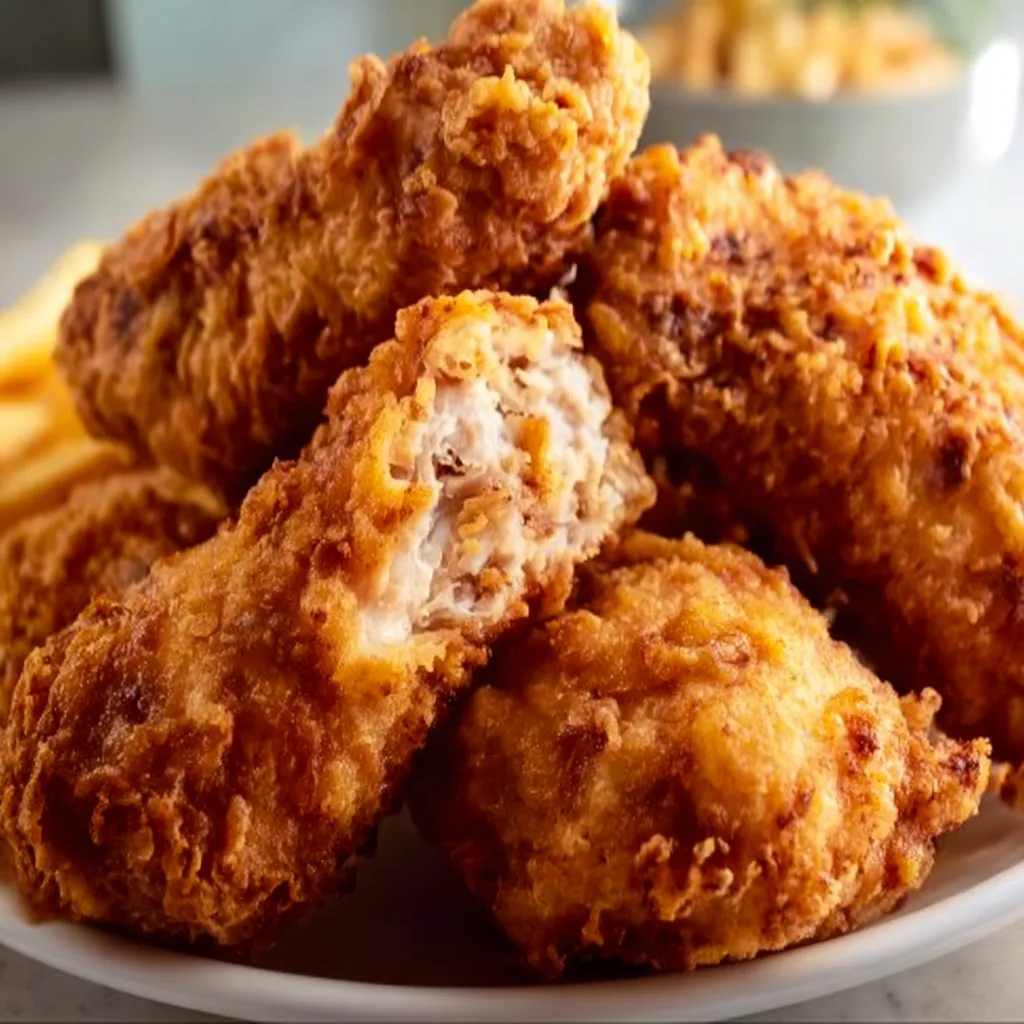
    Bojangles Fried Chicken has been my obsession since I first tasted that perfect blend of spices that dance across perfectly crispy skin. There’s something magical about recreating this Southern classic at home – the way the kitchen fills with that unmistakable aroma that takes me back to road trips through the Carolinas. I’ve spent years perfecting this copycat recipe, tweaking spice levels and frying techniques until it’s just right. Today, I’m sharing all my secrets so you can experience that same crispy, flavorful joy without leaving your kitchen.

    Recipe

    Why You’ll Love This Bojangles Fried Chicken

    The Perfect Spice Blend

    The heart and soul of Bojangles Fried Chicken lies in its distinctive seasoning. I’ve cracked the code with a blend of paprika, cayenne, and a hint of dried herbs that creates that signature flavor profile. The secret is letting your chicken marinate in buttermilk overnight, which not only tenderizes the meat but also helps the spices penetrate deeply. I remember serving this at my sister’s birthday gathering – everyone kept asking if I’d secretly ordered takeout! The spice level gives you that gentle heat without overwhelming your taste buds.

    Crispy Exterior, Juicy Interior

    The texture contrast is what makes Bojangles Fried Chicken truly special. The double-dredging technique is non-negotiable here – it creates those gorgeous craggy edges that crisp up beautifully. I use a mixture of flour and cornstarch (about 3:1 ratio) for extra crunch that stays crispy even hours later. The temperature control is crucial: starting at 350°F and maintaining it throughout the cooking process ensures your chicken cooks evenly without burning the coating. When done right, that first bite gives you a satisfying crunch followed by incredibly tender, juicy meat.

    Essential Tips & Tricks

    Brining Makes All the Difference

    Never skip the brine when making Bojangles Fried Chicken! A proper buttermilk brine with salt and spices creates chicken that’s seasoned all the way through, not just on the surface. Let your chicken soak for at least 4 hours, though overnight is ideal. The lactic acid in buttermilk works magic, breaking down proteins to create that melt-in-your-mouth tenderness. I learned this the hard way after making a batch without brining – the difference was night and day! For extra flavor, add a splash of hot sauce to your brine.

    Oil Temperature Management

    Maintaining the right oil temperature is the difference between perfect Bojangles Fried Chicken and disappointment. Invest in a good thermometer and keep your oil between 325-350°F throughout the cooking process. When you add chicken, the temperature drops, so adjust your heat accordingly. I use a cast iron Dutch oven which holds heat beautifully and prevents temperature fluctuations. Don’t crowd the pan – fry in batches, allowing plenty of space between pieces. Rest your fried chicken on a wire rack, not paper towels, to maintain that perfect crispy exterior.

    Serving Ideas & Creative Variations

    Classic Southern Sides

    Bojangles Fried Chicken deserves proper accompaniments. Serve with homemade biscuits and honey butter for that authentic experience. Creamy coleslaw provides the perfect cool, crunchy contrast to the warm, spicy chicken. My personal favorite pairing is mac and cheese with a crispy breadcrumb topping – the combination of textures is simply divine! For a complete Southern feast, add collard greens cooked with a ham hock and some crispy potato side dishes to round out the meal. Don’t forget sweet tea – it’s practically mandatory!

    Global Fusion Twists

    While traditional Bojangles Fried Chicken is perfect as-is, experimenting with flavor profiles can be incredibly rewarding. Try adding Korean gochujang to your spice mix for a sweet-spicy fusion version. For an Italian twist, mix grated Parmesan and dried Italian herbs into your flour dredge. I once made a Mexican-inspired version with cumin, oregano, and chili powder that was absolutely incredible served with lime crema. You could also go Nashville-hot style by brushing the finished chicken with a spiced oil mixture. These variations maintain the soul of Bojangles while introducing exciting new flavors.

    Storage & Troubleshooting Guide

    Keeping It Crispy

    Maintaining that signature Bojangles Fried Chicken crispiness is possible with proper storage techniques. For short-term storage, let chicken cool completely on a wire rack before refrigerating. Avoid covering hot chicken, which creates condensation and soggy coating. When reheating, use an oven or air fryer at 350°F for 10-15 minutes – never microwave! For meal prep, you can store the breaded, uncooked chicken in the refrigerator for up to 24 hours before frying. The coating actually benefits from this rest, adhering better to the chicken.

    Fixing Common Problems

    Even experienced cooks encounter challenges with Bojangles Fried Chicken. If your coating falls off, your chicken likely wasn’t dry enough before dredging – pat it thoroughly after brining. For undercooked chicken, use a meat thermometer to ensure it reaches 165°F internally. Dark meat near bones takes longer, so adjust cooking time accordingly. If your chicken burns on the outside before cooking through, your oil is too hot. For pale, soggy chicken, your oil wasn’t hot enough. Remember that perfect Bojangles Fried Chicken comes from practice – each batch teaches you something new!

    Frequently Asked Questions

    What makes Bojangles Fried Chicken different from other fried chicken?

    Bojangles Fried Chicken features a distinctive Cajun-inspired seasoning blend and a uniquely crispy coating. The combination of spices and double-dredging technique creates that signature flavor and texture that fans love.

    Can I make Bojangles Fried Chicken in an air fryer?

    Yes! Spray your breaded chicken with oil and cook at 380°F for about 20 minutes, flipping halfway. While not identical to deep-fried, it still delivers great flavor with less oil.

    How do I know when my chicken is fully cooked?

    Use a meat thermometer inserted into the thickest part (avoiding bones) to reach 165°F. Juices should run clear, not pink, when pierced.

    What’s the best oil for frying chicken?

    Vegetable, peanut, or canola oil works best due to their high smoke points. Peanut oil adds a subtle nutty flavor that complements the spices beautifully.

    Can I prepare parts of this Bojangles Fried Chicken recipe ahead of time?

    Absolutely! Brine your chicken overnight and prepare your flour mixture in advance. You can even bread the chicken a few hours before frying and keep it refrigerated.

    Final Thoughts

    Mastering Bojangles Fried Chicken at home is truly a culinary achievement worth celebrating. The combination of perfectly seasoned, juicy meat and that signature crackling crust creates an experience that brings people together around the table. I’ve watched this recipe create memories at family gatherings, weekend dinners, and impromptu get-togethers. While it takes some practice to perfect, the results are absolutely worth the effort. Don’t forget to check out more of my comfort food recipes on Pinterest for more inspiration!

  • Old Chicago’s Italian Nachos Copycat Recipe That Will Blow Minds!

    Old Chicago’s Italian Nachos Copycat Recipe That Will Blow Minds!

    Old Chicago’s Italian Nachos Copycat Recipe That Will Blow Minds!

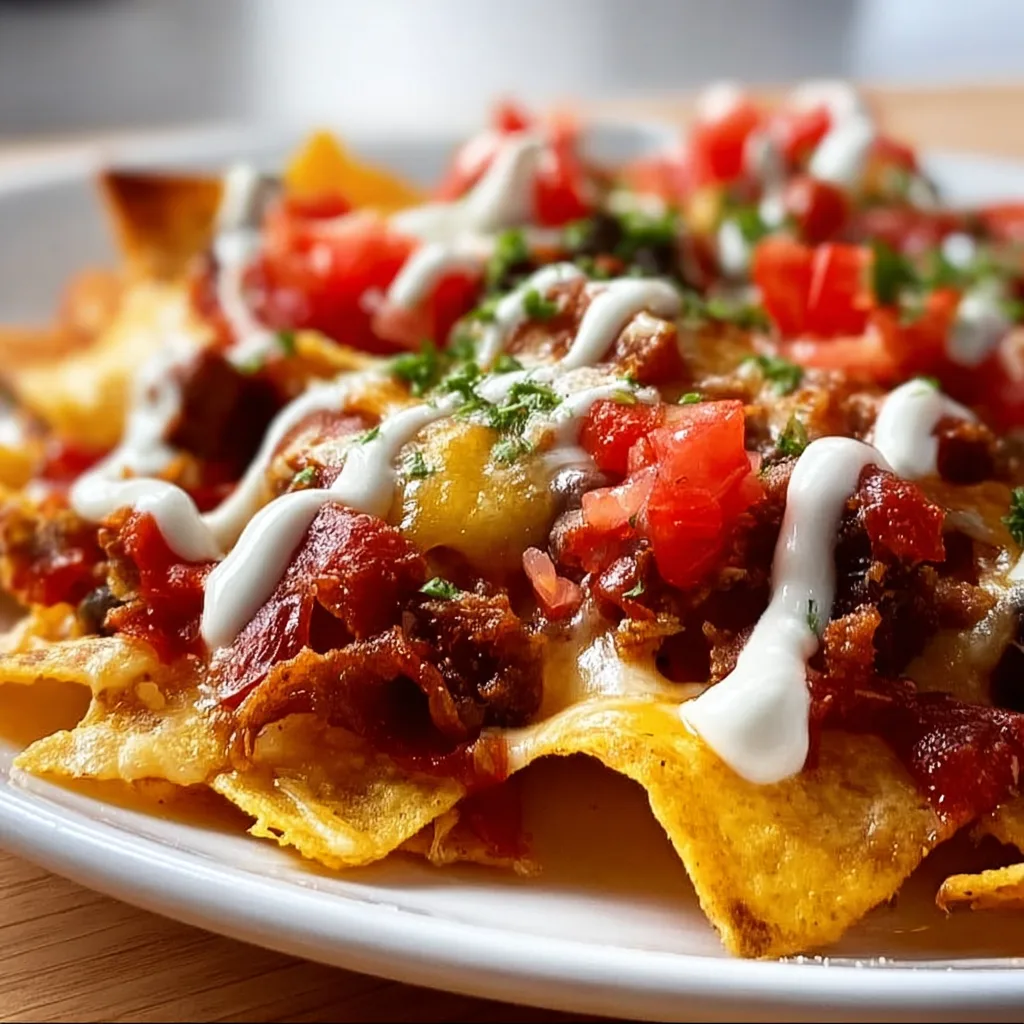
    Old Chicago’s Italian Nachos Copycat recipe brings the beloved restaurant appetizer right to your kitchen with crispy wonton chips layered with zesty Italian sausage, melty cheese, and all the fixings that make this dish irresistible. I stumbled upon this recipe years ago during a desperate craving when my favorite location closed down. The first time I recreated these nachos at home, my friends literally fought over the last bite! There’s something magical about that perfect combination of crispy, savory, and cheesy elements that makes this Old Chicago’s inspired dish absolutely addictive.

    Recipe

    Why You’ll Love This Old Chicago’s Italian Nachos Copycat

    Perfect Party Pleaser

    These Italian nachos are guaranteed to disappear within minutes at any gathering. The combination of crispy wonton chips, savory Italian sausage, and melty cheese creates an irresistible appetizer that’s both familiar and unique. I served these at my sister’s housewarming party, and three people asked for the recipe before the night was over! The beauty lies in how they perfectly balance textures—crispy chips, tender sausage, and gooey cheese—while delivering bold Italian flavors that everyone recognizes and loves.

    Restaurant Quality at Home

    Making this Old Chicago’s Italian Nachos Copycat at home gives you the freedom to customize while saving money. The restaurant version costs around $14, but the homemade version comes in under $10 and feeds more people! Plus, you control the quality of ingredients—I use local Italian sausage from my favorite butcher and freshly grated cheese instead of pre-packaged. The difference in flavor is remarkable, and there’s something deeply satisfying about recreating restaurant favorites in your own kitchen, especially when friends can’t tell the difference!

    Essential Tips & Tricks

    Perfecting Your Wonton Chips

    The foundation of great Italian nachos is perfectly crispy wonton chips. I learned the hard way that oil temperature is crucial—too cool and they’re greasy, too hot and they burn instantly. Maintain your oil at 350°F and work in small batches, frying for just 15-20 seconds per side. Pat them dry immediately after frying to maintain that satisfying crunch. For a healthier alternative, brush with olive oil and bake at 375°F for 7-9 minutes, watching carefully as they can go from golden to burnt in seconds. These chips also pair beautifully with creamy dips.

    Cheese Selection Matters

    The cheese blend makes or breaks these nachos. While Old Chicago uses a combination of mozzarella and pepper jack, I’ve found that adding a touch of provolone deepens the flavor profile. Grate your cheese fresh rather than using pre-shredded—the anti-caking agents in packaged cheese prevent that luscious melt we’re after. Layer half your cheese directly on the chips before adding toppings, then finish with the remaining cheese on top. This creates that perfect cheese pull moment when you grab a loaded chip!

    Serving Ideas & Creative Variations

    Impressive Presentation Styles

    Serve your Old Chicago’s Italian Nachos Copycat on a large platter for family-style dining or create individual portions in cast iron skillets for a restaurant-worthy presentation. I love arranging the nachos in a circular pattern, creating a “flower” of chips with toppings concentrated in the center—this ensures every chip gets some goodness! For special occasions, serve on a heated pizza stone to keep everything warm longer. Add a dramatic touch by finishing with a drizzle of balsamic glaze in a zigzag pattern across the top, just before serving with your favorite pizza.

    Exciting Flavor Variations

    Transform these nachos into different culinary experiences by switching up key ingredients. Try a Mediterranean version with lamb sausage, feta cheese, olives, and tzatziki drizzle. For spice lovers, incorporate pepperoncini, calabrian chilies, and spicy capicola alongside the Italian sausage. My vegetarian friends rave about my mushroom version—I sauté portobello and cremini mushrooms with Italian herbs until deeply caramelized for that meaty umami flavor without the meat. The wonton chips provide the perfect neutral base for endless creative possibilities!

    Storage & Troubleshooting Guide

    Proper Storage Solutions

    While fresh nachos are always best, you can store components separately to enjoy later. Keep fried wonton chips in an airtight container at room temperature for up to 3 days—add a paper towel to absorb excess moisture. The cooked Italian sausage mixture stays good refrigerated for up to 4 days. For quick assembly later, store prepared toppings in separate containers. If you must store assembled nachos, keep them uncovered in the refrigerator and reheat in a 350°F oven for 5-7 minutes until the cheese is bubbly again—though the chips won’t regain their original crispness.

    Fixing Common Problems

    If your wonton chips turn out too greasy, your oil likely wasn’t hot enough. Next time, use a thermometer to maintain 350°F. Soggy nachos? Layer chips more carefully, keeping wet ingredients (like tomatoes and peppers) toward the top rather than directly on chips. If cheese isn’t melting properly, it’s likely too thick or the wrong type—shred it finer and consider adding a more meltable cheese like fontina. For chips that brown too quickly when frying, your oil is too hot—reduce heat and test with a small piece before frying the batch.

    Frequently Asked Questions

    Can I make Old Chicago’s Italian Nachos Copycat ahead of time?

    Prepare components separately up to 2 days ahead—fry chips, cook sausage, and prep toppings. Store separately, then assemble and bake just before serving for the best texture and flavor experience.

    What’s the best cheese substitute for a dairy-free version?

    Use dairy-free mozzarella and pepper jack alternatives that specifically mention “good melting” on the package. Violife and Miyoko’s brands work particularly well for achieving that stretchy cheese pull.

    How can I make these nachos spicier?

    Add crushed red pepper flakes to the sausage while cooking, use hot Italian sausage instead of mild, incorporate diced jalapeños with the peppers, or drizzle with spicy pepper oil before serving.

    What’s the best dipping sauce for Old Chicago’s Italian Nachos Copycat?

    Serve with warm marinara, garlic aioli, pesto cream sauce, or my personal favorite—a blend of sour cream with Italian herbs and a dash of hot sauce.

    Can I use tortilla chips instead of wonton wrappers?

    Yes, though the texture and flavor will differ from the authentic Old Chicago’s version. If using tortilla chips, choose thicker restaurant-style chips that can support the hearty toppings without breaking.

    Final Thoughts

    This Old Chicago’s Italian Nachos Copycat recipe has become my go-to crowd-pleaser for everything from game days to casual dinner parties. There’s something magical about watching friends dive in, eyes widening at that first perfect bite of crispy wonton, savory sausage, and melty cheese. Don’t be surprised when this becomes your most requested recipe! The beauty lies in its versatility—make it exactly like the restaurant version or put your own creative spin on it. Either way, these Italian nachos bring that special restaurant experience right to your table. Find more of my recipes on Pinterest!