Author: Lily Bennett

  • Dutch Oven No Knead Crusty Bread – Irresistibly Easy & Crispy!

    Dutch Oven No Knead Crusty Bread – Irresistibly Easy & Crispy!

    Dutch Oven No Knead Crusty Bread – Irresistibly Easy & Crispy!

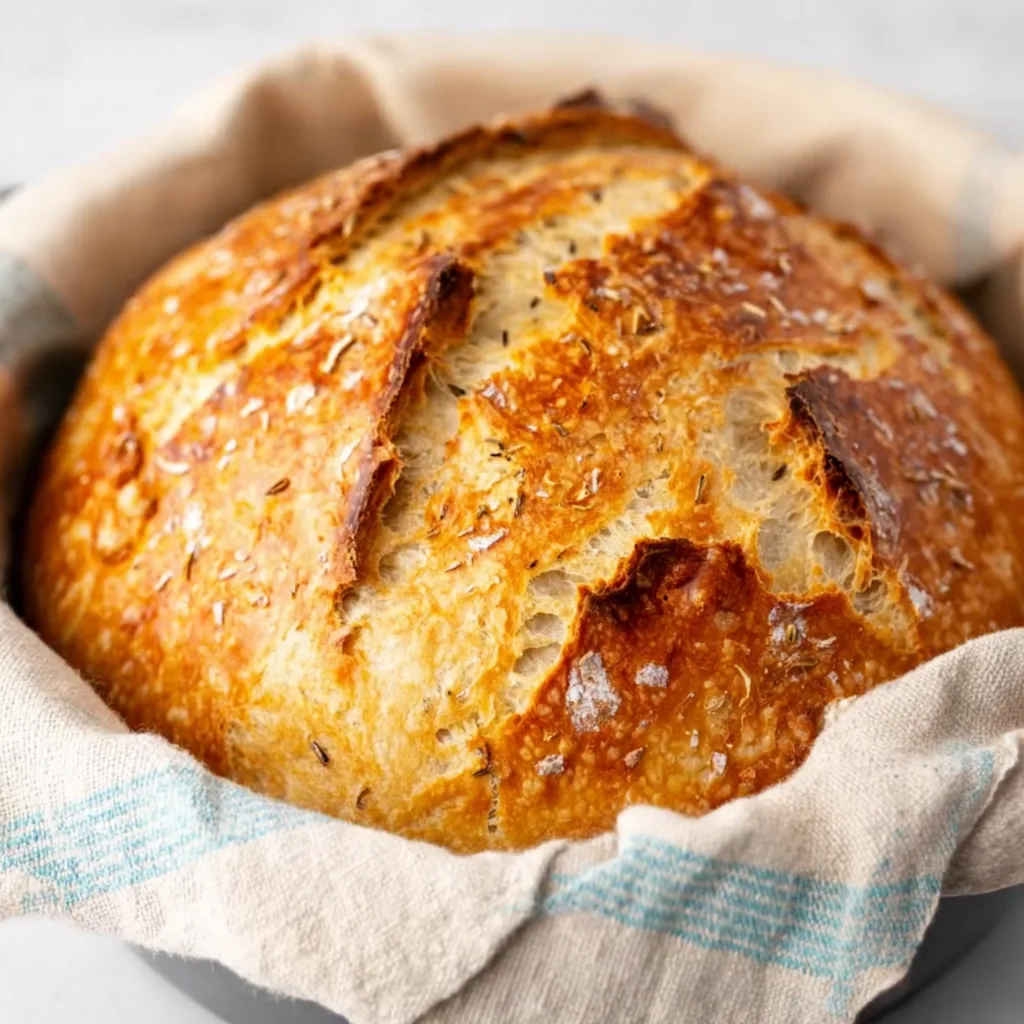
    Dutch Oven No Knead Crusty Bread has completely transformed my home baking game. There’s something almost magical about the way such simple ingredients—flour, water, salt, and a tiny bit of yeast—can create a loaf with a crackly crust and tender, airy interior that rivals any artisanal bakery. The first time I pulled one of these golden loaves from my oven, the satisfying tap-tap-tap of my knuckles against that crisp exterior nearly brought tears to my eyes. If you’ve been intimidated by bread baking, this foolproof method is your gateway to fresh-baked bliss. Trust me, your kitchen will never smell more inviting.

    Recipe

    Why You’ll Love This Dutch Oven No Knead Crusty Bread

    Effortless Technique for Bakery-Quality Results

    The beauty of this Dutch oven no knead bread lies in its hands-off approach. Unlike traditional bread recipes that demand vigorous kneading and precise timing, this method lets time do the hard work. Just mix the ingredients until shaggy, let the dough rest overnight (or up to 18 hours!), and the slow fermentation develops complex flavors and that perfect texture. I still remember my skepticism the first time I tried it—how could something so simple taste so good? But that initial bite of warm, chewy bread with a swipe of butter convinced me this would become a weekend ritual in my home.

    Perfect for Beginners and Busy Bakers

    If you’ve ever felt intimidated by bread baking, this recipe will change everything. With minimal ingredients and equipment, it’s practically foolproof. The long rise forgives minor measuring mistakes, and the Dutch oven creates the perfect environment for that professional crust. I often mix the dough before bed on Friday night, then shape and bake it Saturday afternoon while tackling weekend chores. The hands-on time is less than 15 minutes total, making it ideal for busy schedules. Even my friend who claims to “kill everything in the kitchen” mastered this on her first try!

    Essential Tips & Tricks

    Mastering the Dutch Oven Method

    Using a Dutch oven is the secret weapon for achieving that bakery-worthy crust. The heavy, covered pot traps steam during the initial baking phase, creating the perfect environment for crust development. Preheat your Dutch oven for at least 30 minutes at 450°F before adding the dough—this intense heat immediately sets the exterior. I learned the hard way that skipping the preheat results in a pale, chewy crust! Remove the lid for the final 15-20 minutes of baking to allow the crust to develop that gorgeous golden color and crackly texture that makes homemade bread so satisfying.

    Perfecting Your Dough Consistency

    Getting the right dough consistency is crucial for that perfect crumb structure. Aim for a wet, shaggy dough that looks almost too sticky—this high hydration creates those beautiful air pockets inside. If your dough seems dry, add water a tablespoon at a time until it’s properly sticky. Remember that humidity affects flour absorption, so adjustments are normal. During winter, my kitchen is drier, and I often need an extra 2-3 tablespoons of water. Use a rubber spatula for mixing to keep your hands clean, and dust your work surface generously with flour when shaping to prevent sticking.

    Serving Ideas & Creative Variations

    Elevate Your Meals with Freshly Baked Bread

    There’s nothing quite like tearing into warm, crusty bread as the centerpiece of a meal. Serve thick slices alongside creamy tomato cannellini bean soup for a comforting dinner, or create an impressive bread board for gatherings with quality olive oil, flaky salt, and fresh herbs. On lazy weekend mornings, I love toasting slices until golden, then topping with smashed avocado, a squeeze of lemon, and red pepper flakes. For an elevated sandwich experience, layer thinly sliced bread with prosciutto, arugula, and fig jam—the contrast between the crusty exterior and soft interior creates the perfect bite.

    Flavor Variations to Keep Things Interesting

    Once you’ve mastered the basic recipe, the flavor possibilities are endless. Add 2-3 tablespoons of fresh herbs like rosemary, thyme, or dill to the initial dough for an aromatic loaf. For a Mediterranean twist, fold in ½ cup of chopped olives and 2 tablespoons of lemon zest during the shaping stage. My personal favorite variation includes 1 cup of shredded sharp cheddar and 2 tablespoons of cracked black pepper—it makes the most incredible grilled cheese you’ve ever tasted! Sweet variations work beautifully too; try adding dried cranberries and chopped walnuts for a breakfast loaf that’s perfect with a smear of honey butter.

    Storage & Troubleshooting Guide

    Keeping Your Bread Fresh

    Store your Dutch oven no knead bread properly to maintain that perfect texture as long as possible. For short-term storage (1-2 days), simply place the cut side down on a cutting board or wrap loosely in a clean kitchen towel. Avoid plastic bags, which trap moisture and soften that beautiful crust! For longer storage, slice the entire loaf once completely cooled, then freeze in a zip-top bag with as much air removed as possible. Frozen slices can go directly into the toaster for an almost-fresh experience. I keep a loaf in the freezer at all times for those evenings when I need something special to elevate a simple dinner.

    Solving Common Baking Issues

    If your bread isn’t turning out perfectly, a few simple adjustments can make all the difference. For a denser-than-desired loaf, your dough might be too dry or your fermentation time too short—try adding a bit more water next time and extending the rise. If your crust isn’t crackling crisp, make sure your Dutch oven is thoroughly preheated and check your oven temperature with an independent thermometer. Pale crust usually means your oven temperature is too low or you didn’t bake long enough. Remember that seasonal changes affect flour absorption—I find I need slightly less water in humid summer months and more in dry winter air.

    Frequently Asked Questions

    Can I use all-purpose flour instead of bread flour for Dutch oven no knead crusty bread?

    Yes! All-purpose flour works beautifully, though bread flour gives a slightly chewier texture. The long fermentation helps develop gluten even with all-purpose flour, creating excellent structure and flavor.

    How do I know when my bread is fully baked?

    The bread should be deeply golden brown and sound hollow when tapped on the bottom. For extra certainty, an internal temperature of 205-210°F indicates it’s perfectly done.

    Can I make this bread without a Dutch oven?

    While a Dutch oven creates the best crust, alternatives include a heavy covered pot, a pizza stone with a metal bowl as a dome, or even a preheated cast iron skillet with a metal bowl cover.

    Why did my dough spread out instead of rising up?

    This typically happens when the dough is too wet or wasn’t properly shaped to create tension. Try using slightly less water next time and practice creating a tighter surface during shaping.

    How long should I let the bread cool before slicing?

    Allow your bread to cool at least 30 minutes before slicing. This resting period completes the baking process internally and prevents a gummy texture.

    Final Thoughts

    Creating Dutch oven no knead crusty bread has become more than just a recipe in my kitchen—it’s a ritual that grounds me and fills my home with comfort. The minimal effort for such spectacular results makes this technique something I return to again and again. There’s profound satisfaction in transforming basic ingredients into something so nourishing and beautiful. Whether you’re a baking novice or experienced bread maker, this method deserves a permanent place in your culinary repertoire. I hope your kitchen soon fills with the intoxicating aroma of freshly baked bread and the joy of that first perfect bite. Happy baking! Find more inspiration on Pinterest.

  • Easy Monkey Bread with Canned Biscuits – Irresistibly Soft & Quick!

    Easy Monkey Bread with Canned Biscuits – Irresistibly Soft & Quick!

    Easy Monkey Bread with Canned Biscuits - Irresistibly Soft & Quick!

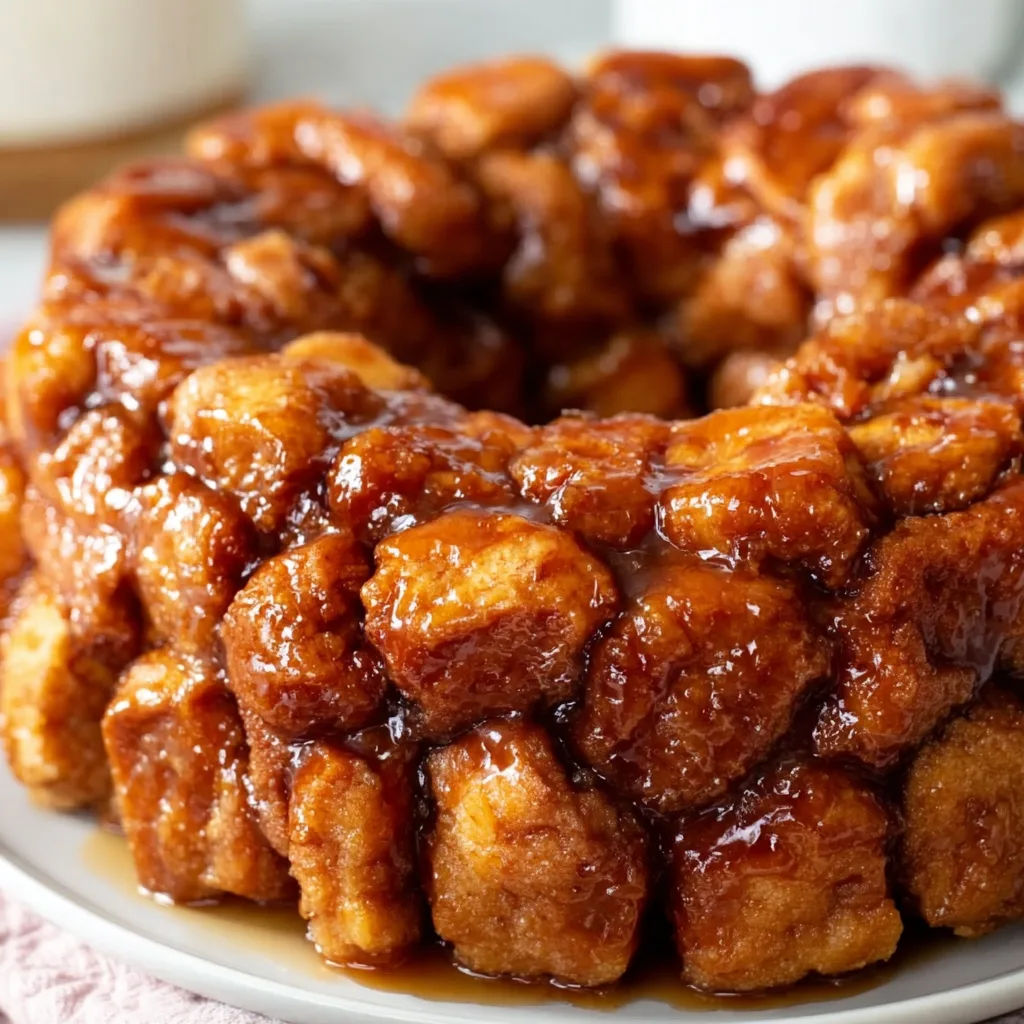
    Easy Monkey Bread with Canned Biscuits has been my Sunday morning salvation more times than I can count. There’s something magical about the way those cinnamon-sugar coated biscuit pieces transform into a gooey, pull-apart masterpiece that fills the house with the most intoxicating aroma. I still remember the first time I made this for my nieces—their little fingers couldn’t wait to pull apart the warm, sticky pieces. This recipe is my go-to when I need comfort food that doesn’t demand hours in the kitchen. The best part? You probably have everything you need already!

    Recipe

    Why You’ll Love This Easy Monkey Bread with Canned Biscuits

    Simple Ingredients, Maximum Impact

    This recipe requires just six basic ingredients that transform into something extraordinary. The humble canned biscuits become the foundation for this gooey masterpiece, while brown sugar and cinnamon create that irresistible caramel coating. I love how accessible this recipe is—no special trips to the store required! The butter melts into every nook and cranny, creating pockets of molten goodness that make each bite pure bliss. Even on my most exhausted mornings, I can manage to toss these ingredients together and create something that makes everyone think I spent hours in the kitchen.

    Foolproof for Beginners

    I’ve yet to meet someone who couldn’t master this Easy Monkey Bread with Canned Biscuits. The beauty lies in its forgiving nature—even if you’re not precise with your measurements or your biscuit cutting isn’t perfect, it still turns out amazing. My friend Sarah, who claims she can burn water, made this as her first-ever baking project and it was a stunning success! The recipe follows a simple pattern: cut, coat, arrange, pour, bake. That’s it! The oven does all the heavy lifting while you take all the credit. It’s the perfect confidence-builder for kitchen newbies.

    Essential Tips & Tricks

    Perfecting the Caramel Sauce

    The secret to truly exceptional monkey bread lies in the caramel sauce that forms as it bakes. For the richest flavor, use dark brown sugar instead of light—those extra molasses notes make all the difference. Make sure your butter is completely melted and well-mixed with the sugar before pouring over the biscuits. I learned the hard way that rushing this step leads to uneven sweetness! Let the mixture come to a gentle bubble on the stove before removing it. This activates the caramelization process that will continue in the oven, creating that sticky-sweet coating that makes banana bread cinnamon rolls seem almost plain by comparison.

    Bundt Pan Secrets

    A properly prepared pan is non-negotiable for monkey bread success. I once skipped the thorough greasing step and spent 20 minutes chiseling my creation out in pieces—learn from my mistake! Spray every crevice of your Bundt pan with cooking spray or butter it generously. For easy release, wait 10 minutes after baking before inverting onto a plate. The slight cooling allows the caramel to set just enough to stay with the bread instead of pooling on your serving plate. If you don’t have a Bundt pan, a 9×13 baking dish works too, though you’ll lose the classic ring shape that makes presentation so impressive.

    Serving Ideas & Creative Variations

    Beyond Breakfast

    While Easy Monkey Bread with Canned Biscuits shines as a breakfast treat, it’s versatile enough for any occasion. Serve it as a showstopping dessert at dinner parties with a scoop of vanilla ice cream melting into the warm crevices. For brunch gatherings, pair it with a savory egg casserole to balance the sweetness. I’ve even served it at baby showers alongside fresh fruit and coffee—the pull-apart nature makes it perfect for grazing events. For an extra-special touch, drizzle with cream cheese glaze while still warm, creating something that rivals those cheesecake brownie bites everyone loves so much.

    Flavor Twists to Try

    The classic cinnamon-sugar version is just the beginning of your monkey bread journey. Add chopped nuts (pecans or walnuts) between layers for delightful crunch and nutty flavor. Chocolate lovers can tuck mini chocolate chips into the biscuit pieces before arranging them. For a fruity version, add diced apples tossed in lemon juice between layers—they soften perfectly while baking. My personal favorite variation includes orange zest in the sugar mixture and a splash of bourbon in the caramel sauce for a sophisticated twist. You can even go savory with herbs, cheese, and garlic butter instead of the sweet coating!

    Storage & Troubleshooting Guide

    Keeping It Fresh

    Monkey bread is at its absolute best when fresh from the oven, but leftovers (if you’re lucky enough to have any!) can be stored effectively. Cover tightly with plastic wrap or transfer to an airtight container and keep at room temperature for up to 2 days. For longer storage, refrigerate for up to 5 days. To reheat, microwave individual portions for 15-20 seconds—it revives that fresh-baked texture surprisingly well! If you want to prepare ahead, you can assemble everything the night before, refrigerate unbaked, and simply add 5-10 minutes to the baking time in the morning.

    Fixing Common Problems

    Even the most experienced bakers encounter hiccups! If your monkey bread seems doughy in the center, it likely needs more time—cover with foil to prevent over-browning and continue baking. For bread that’s stuck to the pan, run a butter knife gently around the edges and bottom, then place a warm, damp towel over the pan for a few minutes to help loosen the caramel. If your caramel sauce separates or crystallizes, it was likely heated too quickly or at too high a temperature. Next time, melt the butter and sugar together slowly over medium-low heat, stirring constantly until smooth.

    Frequently Asked Questions

    Can I make Easy Monkey Bread with Canned Biscuits without a Bundt pan?

    Absolutely! A 9×13 baking dish works well, though the baking time may decrease slightly. You can even use a loaf pan for a smaller batch—just reduce the ingredients proportionally.

    How do I know when my monkey bread is fully baked?

    The top should be golden brown, and a skewer inserted into the thickest part should come out clean with no raw dough. The internal temperature should reach about 190°F.

    Can I freeze monkey bread?

    Yes! Cool completely, wrap tightly in plastic wrap and foil, and freeze for up to 3 months. Thaw overnight in the refrigerator and reheat in a 300°F oven until warm.

    What’s the best way to cut the biscuits?

    Kitchen scissors work wonderfully! Simply snip each biscuit into quarters. A bench scraper or sharp knife works well too—just don’t use a serrated knife, which can compress the dough.

    Can I make this Easy Monkey Bread with homemade biscuit dough instead of canned?

    Certainly! Prepare your favorite biscuit recipe, but skip the final shaping and baking. Instead, pinch off small portions to use exactly as you would the canned biscuit pieces.

    Final Thoughts

    This Easy Monkey Bread with Canned Biscuits has saved countless weekend mornings in my home, bringing smiles and creating memories around my table. There’s something deeply satisfying about watching someone’s face light up as they pull apart their first warm, gooey piece. It’s become more than just a recipe in my household—it’s a tradition, a comfort, and sometimes, a peace offering. I hope it brings the same joy to your kitchen! For more delicious breakfast ideas, check out my Pinterest collection where I’m always adding new favorites.

  • Easy Fajita Chicken Pasta Recipe: Flavor Explosion You’ll Crave!

    Easy Fajita Chicken Pasta Recipe: Flavor Explosion You’ll Crave!

    Easy Fajita Chicken Pasta Recipe: Flavor Explosion You’ll Crave!

    This Easy Fajita Chicken Pasta combines zesty Tex-Mex flavors with creamy, comforting pasta for a dinner that’s ready in under 30 minutes. The first time I made this dish, my kitchen filled with the mouthwatering aroma of sizzling peppers and spices that transported me straight to my favorite Mexican restaurant. The colorful bell peppers, tender chicken strips, and al dente pasta come together in a silky sauce that hits all the right notes – spicy, creamy, and utterly satisfying. If you’re looking for a quick weeknight dinner that feels like a special treat, this fajita pasta is about to become your new favorite.

    Recipe

    Why You’ll Love This Easy Fajita Chicken Pasta

    Perfect Balance of Flavors and Textures

    There’s something magical about the way the smoky fajita seasonings meld with the creamy sauce in this dish. Each bite delivers that distinctive fajita flavor you crave, but in a comforting pasta format that feels like a warm hug at the end of a long day. The bell peppers maintain just the right amount of crispness, creating a beautiful contrast against the tender chicken and silky pasta. I love how the sauce clings to every piece of penne, ensuring flavor in every forkful. It’s the kind of dish that makes everyone at the table fall silent for a moment as they savor that first perfect bite.

    Quick and Adaptable for Busy Weeknights

    This 30-minute wonder has saved me countless times when I needed dinner on the table fast but didn’t want to compromise on flavor. The beauty of this recipe is how easily it adapts to what you have on hand. No red peppers? Green works fine. Prefer a protein swap? Shrimp or steak are fantastic alternatives. You can dial the spice level up or down depending on your family’s preferences. I’ve made this on hectic Wednesdays when my day ran long and on relaxed weekends when I wanted something satisfying without spending hours in the kitchen. It never disappoints.

    Essential Tips & Tricks

    Mastering the Perfect Chicken Texture

    The secret to juicy, tender chicken in this pasta is to cook it quickly over high heat. I slice my chicken breasts into thin strips against the grain, which helps them cook evenly and stay tender. Season the chicken generously before it hits the pan, and don’t overcrowd – work in batches if necessary. You want a nice sear on the outside while keeping the inside moist. Remove the chicken from the pan once it’s just cooked through (about 3-4 minutes) and set it aside while you prepare the vegetables and sauce. This prevents the chicken from becoming tough and dry when you combine everything at the end.

    Creating the Perfect Creamy Fajita Sauce

    The velvety sauce is what transforms this from ordinary to extraordinary. Start with a roux (equal parts butter and flour) to create a stable base, then slowly whisk in your liquid ingredients. For extra flavor, deglaze the pan with a splash of chicken broth after cooking the vegetables, scraping up all those delicious browned bits. When adding cream, lower the heat to prevent curdling. For the perfect consistency, let the sauce simmer until it coats the back of a spoon. Remember that it will thicken slightly as it cools, so if it seems too thick, add a little pasta water to loosen it up.

    Serving Ideas & Creative Variations

    Complementary Side Dishes

    This Easy Fajita Chicken Pasta shines as a complete meal, but I love serving it with a few simple sides to round out the experience. A crisp green salad with a light vinaigrette provides a refreshing contrast to the rich pasta. Garlic bread or warm tortillas are perfect for sopping up every last drop of that delicious sauce. For a more authentic Mexican-inspired meal, add a side of black beans or a simple corn salad with lime and cilantro. When I’m entertaining, I’ll serve this pasta alongside a pitcher of homemade sangria or margaritas for a festive touch that always impresses my guests.

    Creative Recipe Variations

    The basic recipe is delicious, but don’t be afraid to make it your own! For a vegetarian version, substitute the chicken with portobello mushrooms or plant-based chicken alternatives. Add a southwestern twist by incorporating black beans, corn, and diced tomatoes. Spice lovers can kick up the heat with jalapeños or a dash of cayenne pepper. For a lighter option, use half-and-half instead of heavy cream and whole wheat pasta for added fiber. My personal favorite variation includes a handful of chopped fresh cilantro and a squeeze of lime juice just before serving – it brightens the entire dish with a fresh, zesty finish.

    Storage & Troubleshooting Guide

    Proper Storage and Reheating Methods

    This pasta keeps beautifully, making it perfect for meal prep and leftovers. Store in an airtight container in the refrigerator for up to 3 days. When reheating, add a splash of milk or chicken broth to revive the sauce, as it tends to thicken when chilled. Microwave on medium power in short intervals, stirring between each to ensure even heating. For best results, reheat on the stovetop over medium-low heat. If you want to freeze portions, do so before adding the cream sauce – cream-based sauces can separate when frozen and reheated. The pasta and chicken-vegetable mixture freeze well for up to 2 months.

    Fixing Common Recipe Issues

    Even experienced cooks encounter challenges sometimes. If your sauce breaks or curdles, lower the heat immediately and whisk in a tablespoon of cold cream. Too thick? Add pasta water a tablespoon at a time until you reach your desired consistency. Too thin? Mix a teaspoon of cornstarch with cold water and stir it in. If your pasta turned out too spicy, add more cream or a dollop of sour cream to mellow it out. Underseasoned? A pinch of salt, a squeeze of lime, or a dash of hot sauce can bring the flavors into balance. Remember that pasta continues absorbing sauce as it sits, so serve promptly for the best texture.

    Frequently Asked Questions

    Can I make Easy Fajita Chicken Pasta ahead of time?

    Yes! Prepare the components separately – cook the pasta al dente, prepare the chicken and vegetables, and make the sauce. Store separately in the refrigerator for up to 24 hours, then combine and reheat gently when ready to serve.

    What’s the best pasta shape for this recipe?

    Penne, rotini, or farfalle work best as they catch and hold the creamy fajita sauce in their ridges and crevices. Avoid long pasta like spaghetti, which doesn’t capture the sauce as effectively.

    Can I make this recipe dairy-free?

    Absolutely! Substitute the heavy cream with full-fat coconut milk and use olive oil instead of butter. The coconut adds a subtle sweetness that complements the fajita spices beautifully.

    How spicy is this dish?

    The heat level is moderate but customizable. Use mild fajita seasoning for a family-friendly version, or add diced jalapeños and cayenne pepper for extra heat if you prefer a spicier kick.

    What can I use if I don’t have fajita seasoning?

    Make your own by combining 1 tablespoon chili powder, 1 teaspoon each of paprika, cumin, and garlic powder, ½ teaspoon each of oregano and salt, and ¼ teaspoon cayenne pepper.

    Final Thoughts

    This Easy Fajita Chicken Pasta has become a staple in my recipe rotation for good reason. It delivers restaurant-quality flavor with minimal effort, making it perfect for both busy weeknights and casual entertaining. The way it combines familiar Tex-Mex flavors with the comfort of a creamy pasta dish creates something truly special that appeals to both adventurous eaters and picky palates alike. I hope this recipe brings as much joy to your table as it has to mine! For more delicious recipe inspiration, be sure to follow me on Pinterest.

  • Chocolate Cherry Dump Cake: Irresistibly Easy & Delicious!

    Chocolate Cherry Dump Cake: Irresistibly Easy & Delicious!

    Chocolate Cherry Dump Cake: Irresistibly Easy & Delicious!

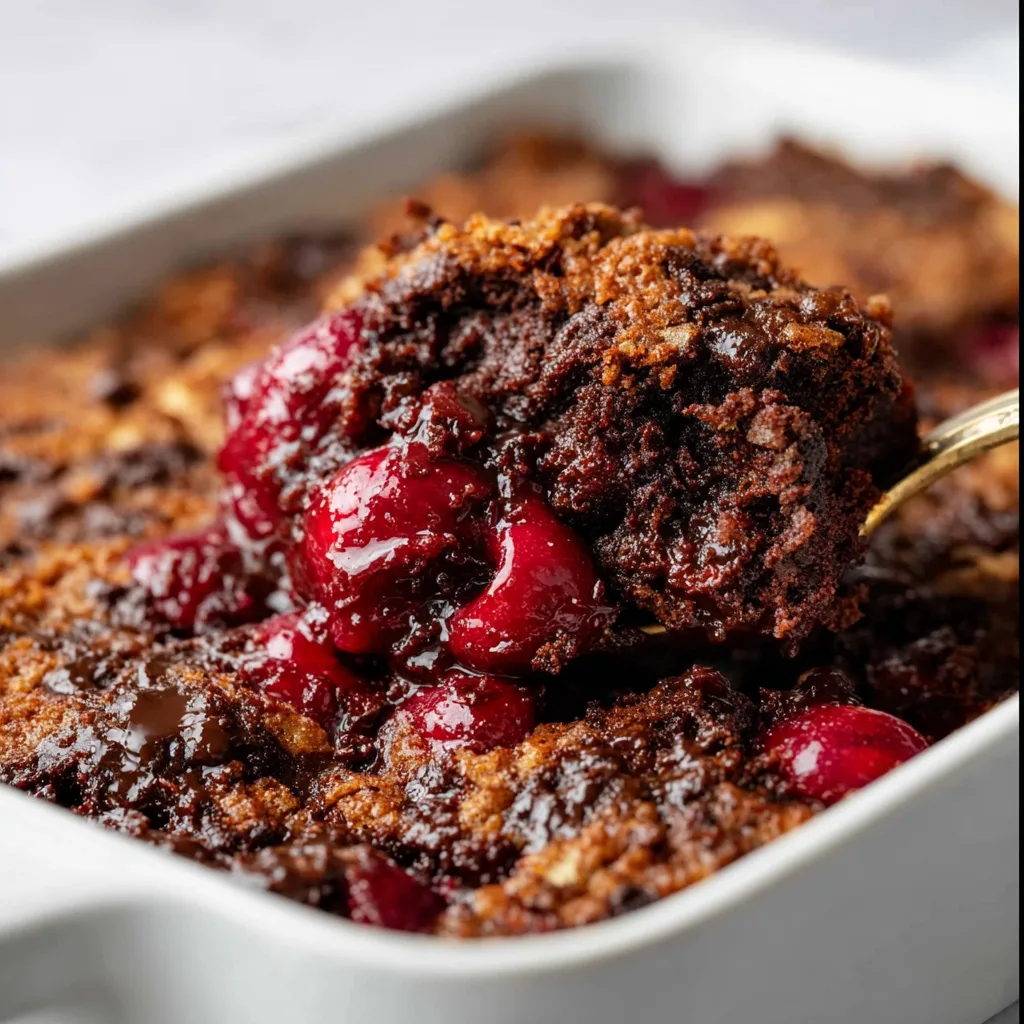
    Chocolate Cherry Dump Cake brings together the irresistible combination of fudgy chocolate cake mix and juicy cherries in what might be the easiest dessert you’ll ever make. I discovered this magical concoction during a snowy weekend when my sister dropped by unexpectedly. With minimal pantry ingredients and about five minutes of prep time, we created a warm, bubbling masterpiece that filled my kitchen with the most heavenly aroma. The contrast between the tart cherries and rich chocolate creates a flavor symphony that’s impossible to resist. If you love effortless desserts with maximum impact like my Cheesecake Brownie Bites, this dump cake deserves a permanent spot in your recipe collection.

    Recipe#

    Why You’ll Love This Chocolate Cherry Dump Cake

    Perfect for Beginners and Busy Bakers

    If you’ve ever felt intimidated by baking, this Chocolate Cherry Dump Cake will restore your confidence instantly. There’s no mixing, beating, or complicated techniques—just strategic layering of ingredients that transform in the oven. I’m not exaggerating when I say my 8-year-old nephew makes this independently! The “dump” in dump cake means exactly what it sounds like: dump the ingredients in a pan, bake, and voilà! The minimal hands-on time (literally 5 minutes) makes this perfect for busy weeknights when you crave something sweet but lack the energy for elaborate baking projects.

    Crowd-Pleasing Comfort in Every Bite

    There’s something about the combination of warm chocolate and cherries that speaks directly to the soul. The cake develops a slightly crisp top while maintaining a gooey, pudding-like interior that’s utterly comforting. I’ve brought this to potlucks, family gatherings, and office parties, and it disappears faster than anything else on the dessert table. The nostalgic flavors remind many people of Black Forest cake but without all the work. Plus, watching people’s faces light up when they take their first bite brings me genuine joy every single time—there’s always that moment of surprise when they learn how simple it was to make.

    Essential Tips & Tricks

    Ingredient Selection Matters

    While dump cakes are forgiving by nature, choosing quality ingredients elevates this simple dessert to something truly special. For the cherries, I recommend using tart cherry pie filling rather than sweet—it creates the perfect balance with the chocolate cake. If you’re feeling adventurous, mix in a handful of fresh or frozen cherries for varied texture. For the cake mix, any chocolate variety works, but dark chocolate or devil’s food creates the richest flavor. The butter should be cold and sliced thinly—this ensures it melts evenly throughout the cake, creating pockets of buttery goodness that make each bite memorable.

    Perfect Baking Technique

    The magic of Chocolate Cherry Dump Cake happens in the oven, where simple layers transform into a cohesive, delicious dessert. Always use a 9×13 baking dish for even cooking—ceramic or glass works best as they distribute heat gently. Resist the urge to mix the ingredients! Proper layering is crucial: pie filling on bottom, dry cake mix sprinkled evenly over top, and butter arranged to cover as much surface as possible. If you notice dry spots halfway through baking, a light spray of cooking oil helps. Like my Dark Chocolate Bread Pudding, this dessert continues developing flavor as it cools, so allow at least 15 minutes before serving.

    Serving Ideas & Creative Variations

    Elevate with Perfect Pairings

    Transform your Chocolate Cherry Dump Cake from casual to company-worthy with thoughtful serving choices. A scoop of vanilla bean ice cream melting into the warm cake creates a temperature and texture contrast that’s absolutely divine. For an adult twist, try a splash of kirsch or amaretto drizzled over the top before adding whipped cream. I love serving individual portions in pretty dessert bowls with a sprinkle of shaved chocolate and a fresh cherry on top when entertaining. For everyday indulgence, a simple dusting of powdered sugar and a fork is all you need—sometimes I eat it straight from the pan while watching my favorite show!

    Seasonal and Dietary Adaptations

    One of the reasons I return to this recipe repeatedly is its incredible versatility. In summer, try substituting fresh berries mixed with a little sugar and cornstarch instead of cherry pie filling. For fall, apple pie filling with a sprinkle of cinnamon creates a cozy variation. To make this gluten-free, simply use a gluten-free chocolate cake mix—no other adjustments needed! For a lighter version, try using a sugar-free cake mix and light butter. When cherries aren’t in season, frozen cherries cooked down with a little sugar make an excellent substitute for pie filling. My Strawberry White Chocolate Bars fans particularly love the white chocolate chip variation of this dump cake.

    Storage & Troubleshooting Guide

    Keeping Your Dump Cake Fresh

    Chocolate Cherry Dump Cake stays delicious for several days when stored properly. For maximum freshness, allow the cake to cool completely before covering with plastic wrap or transferring to an airtight container. At room temperature, it maintains its quality for about 2 days. For longer storage, refrigerate for up to 5 days—the flavors actually deepen and meld together beautifully overnight! To reheat, microwave individual portions for 20-30 seconds or place the entire dish (if oven-safe) in a 300°F oven for 10 minutes. The cake also freezes surprisingly well; portion into individual servings, wrap tightly, and freeze for up to 3 months.

    Solving Common Dump Cake Dilemmas

    Even with a recipe this simple, occasional challenges can arise. If your cake turns out too dry, the most common culprit is uneven butter distribution. Next time, try using more butter or melting it first and drizzling evenly. For a cake that’s too soggy in the middle, your oven temperature might be running low—try increasing by 25°F or extending the baking time by 5-10 minutes. If the top browns too quickly while the center remains underdone, loosely cover with foil halfway through baking. For a dump cake that lacks flavor intensity, try adding a teaspoon of almond extract to the cherry filling or mixing mini chocolate chips into the cake mix layer.

    Frequently Asked Questions

    Can I make Chocolate Cherry Dump Cake ahead of time?

    Absolutely! Prepare it up to 24 hours ahead, refrigerate unbaked, and add 5-10 minutes to the baking time. It actually tastes even better the next day as the flavors meld together beautifully.

    What can I substitute for cherry pie filling?

    Any fruit pie filling works wonderfully—try blueberry, strawberry, or peach. You can also use 4 cups of fresh fruit mixed with ¼ cup sugar and 2 tablespoons cornstarch.

    Can I use a different cake mix flavor?

    Yes! While chocolate complements cherries perfectly, vanilla, white, or even spice cake mix creates delicious variations with different flavor profiles.

    Is it possible to make this dump cake in a slow cooker?

    Definitely! Layer ingredients in your slow cooker, cook on low for 3-4 hours or high for 2 hours until the top is set and edges are bubbly.

    Why is my Chocolate Cherry Dump Cake still powdery on top?

    This happens when the butter doesn’t cover all the cake mix. Next time, use more butter slices or try melting the butter and drizzling it evenly over the cake mix.

    Final Thoughts

    This Chocolate Cherry Dump Cake has saved countless dinner parties and satisfied innumerable midnight cravings in my home. Its beauty lies in the perfect balance between effort and reward—minimal work yielding maximum delight. I love how it brings people together around the table, sparking conversations and creating memories. The versatility means you’ll never tire of it, while the simplicity ensures you’ll turn to it again and again. Whether you’re a novice baker or seasoned pro, this recipe deserves a permanent place in your dessert rotation. Find more inspiration and variations on my Pinterest boards!

  • Breakfast Egg Muffins: Easy, Delicious Bites That Boost Your Morning!

    Breakfast Egg Muffins: Easy, Delicious Bites That Boost Your Morning!

    Breakfast Egg Muffins: Easy, Delicious Bites That Boost Your Morning!

    Breakfast egg muffins have completely transformed my morning routine. These protein-packed, customizable little bites of heaven are the answer to those hectic weekday mornings when you’re rushing out the door but still want something nutritious and delicious. I discovered these gems last winter when my alarm failed me, and I’ve been obsessed ever since. The beauty lies in their simplicity – just whisk eggs, add your favorite mix-ins, bake in a muffin tin, and voilà! You’ve got breakfast ready to grab-and-go for the entire week.

    Recipe

    Why You’ll Love These Breakfast Egg Muffins

    Perfect Portable Protein Power

    These egg muffins are like little protein powerhouses that fit perfectly in your hand. Each muffin packs approximately 6-8 grams of protein, depending on your add-ins, making them ideal for fueling busy mornings. I love that they’re naturally low-carb while still being incredibly satisfying. The texture is what really wins me over – fluffy in the center with slightly crisp edges. When I’m running late for work (which happens more than I’d like to admit), I can grab two of these from the fridge, reheat them in 30 seconds, and feel good knowing I’m starting my day right.

    Endlessly Customizable For Every Taste

    What makes breakfast egg muffins truly special is how infinitely adaptable they are. Think of them as blank canvases for your culinary creativity! My family members each have their favorites – my husband loves bacon and cheddar, my daughter insists on spinach and feta, and I’m partial to bell peppers with pepper jack cheese. You can go Mediterranean with olives and tomatoes, Southwestern with jalapeños and Mexican cheese, or keep it classic with ham and Swiss. I’ve even created themed batches for brunch gatherings where guests can sample different flavor combinations.

    Essential Tips & Tricks

    Perfecting Your Egg Base

    The secret to truly exceptional breakfast egg muffins starts with the egg mixture. For the fluffiest texture, whisk your eggs vigorously for at least 30 seconds to incorporate air – this makes all the difference! I add a splash of heavy cream or milk (about 1 tablespoon per 6 eggs) for richness, plus a pinch of salt and fresh cracked pepper. My game-changing tip: add 1/4 teaspoon of baking powder to the mixture. This creates an even lighter, soufflé-like texture that prevents the dreaded rubbery egg syndrome that can happen with reheating. Trust me, this small addition makes a world of difference.

    Preventing Sticking Disasters

    Nothing is more frustrating than having your beautiful breakfast egg muffins stick to the pan! After much trial and error, I’ve found the foolproof method for easy removal. First, use a good quality non-stick muffin tin. Then, either spray generously with cooking spray or use silicone muffin liners (my personal preference). If using metal tins without liners, let the muffins cool for 5 minutes before attempting to remove them – they’ll shrink slightly and release more easily. For stubborn muffins, run a butter knife gently around the edges. These steps ensure your muffins come out intact every time.

    Serving Ideas & Creative Variations

    Breakfast Egg Muffin Meal Pairings

    These versatile egg muffins can stand alone as a quick breakfast, but they truly shine when paired with complementary sides. I love serving them with fresh fruit for a complete morning meal – berries or sliced melon provide the perfect sweet contrast. For weekend brunches, I place them on a platter alongside crispy breakfast potatoes and avocado slices. They also make fantastic sandwich fillers – try placing one between a toasted English muffin with a slice of cheese for an elevated breakfast sandwich. For a lighter option, serve with a simple green salad dressed with lemon vinaigrette.

    Seasonal Inspiration for Your Muffins

    Changing up your breakfast egg muffins with seasonal ingredients keeps this staple feeling fresh year-round. In spring, I incorporate tender asparagus tips and fresh herbs like chives and dill. Summer calls for garden-fresh tomatoes, zucchini, and basil. Fall inspires combinations with roasted butternut squash, sage, and gruyere cheese. Winter is perfect for heartier additions like roasted brussels sprouts with bacon and parmesan. I recently made a batch with leftover roasted vegetables from dinner the night before – the caramelized flavors were incredible! Rotating ingredients seasonally ensures you’ll never get bored.

    Storage & Troubleshooting Guide

    Maximizing Freshness and Flavor

    The make-ahead nature of breakfast egg muffins is what makes them truly life-changing for busy mornings. After baking, let them cool completely before storing to prevent condensation (which leads to sogginess). Store in an airtight container with paper towels between layers to absorb excess moisture. They’ll keep in the refrigerator for 4-5 days. For longer storage, freeze them individually wrapped in plastic, then placed in a freezer bag – they’ll last up to 2 months this way. To reheat refrigerated muffins, microwave for 20-30 seconds. For frozen ones, either thaw overnight or microwave for 60-90 seconds.

    Troubleshooting Common Challenges

    Even with the best recipes, breakfast egg muffins can sometimes present challenges. If your muffins are deflating after baking, you’re likely overfilling the cups – fill only 3/4 full to allow for expansion. Rubbery texture usually means they’re overcooked; reduce baking time by 2-3 minutes next batch. Watery muffins typically result from high-moisture vegetables like mushrooms or tomatoes – either pre-cook these ingredients to remove moisture or pat them dry before adding. If your muffins taste bland, remember that eggs need proper seasoning – don’t be shy with salt, pepper, and herbs. A sprinkle of hot sauce in the egg mixture can also enhance flavors without adding noticeable heat.

    Frequently Asked Questions

    Can I make breakfast egg muffins without dairy?

    Absolutely! Skip the cheese and use unsweetened almond or coconut milk instead of dairy milk. Add extra vegetables or herbs to boost flavor, and consider adding nutritional yeast for a cheesy taste without dairy.

    How do I know when my egg muffins are done baking?

    They should be puffed up, set in the center, and lightly golden around the edges. Insert a toothpick – it should come out clean. They typically take 18-22 minutes at 350°F.

    Can I use egg whites only for breakfast egg muffins?

    Yes! Replace whole eggs with twice the amount of egg whites. Add an extra pinch of salt and consider including some healthy fats like avocado to compensate for the missing yolks.

    What’s the best way to prevent vegetables from sinking?

    Pre-cook vegetables to remove excess moisture, chop them into small pieces, and lightly toss them in a sprinkle of flour before adding to the egg mixture. Distribute them evenly before pouring the egg mixture.

    Why did my egg muffins stick despite using non-stick spray?

    Non-stick spray can sometimes be insufficient. Try parchment paper liners, silicone muffin cups, or thoroughly greasing with butter. Let muffins cool for 5 minutes before attempting to remove.

    Final Thoughts

    Breakfast egg muffins have become my secret weapon for starting the day right without sacrificing precious morning time. Their versatility means they never get boring, while their nutritional profile keeps me energized until lunch. I love seeing friends’ faces light up when I share this simple yet game-changing breakfast hack. Whether you’re meal prepping for a busy week, feeding a family with different tastes, or looking for a protein-rich breakfast option, these customizable egg cups deserve a permanent spot in your cooking rotation. Find more breakfast inspiration on Pinterest!

  • Banana Oatmeal Muffins: Irresistibly Moist & Easy Breakfast Treat!

    Banana Oatmeal Muffins: Irresistibly Moist & Easy Breakfast Treat!

    Banana Oatmeal Muffins: Irresistibly Moist & Easy Breakfast Treat!

    Banana Oatmeal Muffins have become my morning salvation on those days when the alarm feels particularly cruel. The first time I pulled a batch from my oven, the kitchen filled with that irresistible aroma of sweet bananas and warm cinnamon that practically whispered, “Good morning, beautiful.” These hearty, wholesome muffins strike that perfect balance between healthy and indulgent – packed with fiber-rich oats and naturally sweetened with ripe bananas, yet still delivering that coffee-shop-worthy texture that makes mornings something to look forward to. Trust me, these will become your new breakfast bestie at first bite.

    Recipe

    Why You’ll Love These Banana Oatmeal Muffins

    Perfect Balance of Healthy & Delicious

    These muffins aren’t just another breakfast option—they’re a nutritional powerhouse disguised as a treat. The oats deliver slow-release energy that keeps you satisfied until lunch, while bananas provide natural sweetness and potassium. I love that I can indulge guilt-free knowing they contain whole grains and fruit. The texture hits that sweet spot too—tender and moist with just enough structure from the oats. When my daughter declared them “actually good for something healthy,” I knew we had a winner that would become part of our regular rotation.

    Quick & Customizable for Any Occasion

    From sleepy Monday mornings to weekend brunches, these muffins fit seamlessly into any scenario. The batter comes together in under 10 minutes with just one bowl—perfect for those mornings when every minute counts. I’ve made these during chaotic weekday mornings while simultaneously packing lunches and signing permission slips. They’re endlessly adaptable too—toss in chocolate chips for a treat, walnuts for extra protein, or blueberries for a fruity twist. They’ve saved countless mornings when cereal just wouldn’t cut it but a full breakfast spread wasn’t happening.

    Essential Tips & Tricks

    Banana Selection & Preparation

    The secret to exceptional banana oatmeal muffins lies in using perfectly overripe bananas with plenty of brown spots—the uglier, the better! These bananas deliver maximum sweetness and that intense banana flavor that makes these muffins irresistible. I keep a stash in my freezer (peel and all) for muffin emergencies. Just thaw them in the microwave for about 30 seconds, then squeeze the soft banana right into your mixing bowl. For the best texture, mash them thoroughly but leave tiny chunks for bursts of banana goodness throughout. This technique elevates these muffins from good to absolutely crave-worthy.

    Oat Varieties & Mixing Method

    The type of oats you choose dramatically impacts the final texture. I prefer old-fashioned rolled oats for hearty texture, but quick oats work in a pinch for a more uniform crumb similar to my Blueberry Cheesecake Cookies. The mixing method matters too—gently fold the wet and dry ingredients together just until combined. Overmixing activates the gluten, resulting in tough, dense muffins. I learned this the hard way after enthusiastically beating a batch into submission! For extra flavor dimension, try toasting the oats in a dry skillet for 2-3 minutes before adding them to your dry ingredients—this simple step adds a wonderful nutty undertone.

    Serving Ideas & Creative Variations

    Breakfast Pairings & Toppings

    Transform these humble muffins into a complete breakfast with thoughtful pairings. I love serving them slightly warm with a smear of almond butter and a drizzle of honey—the protein-fat combo makes them more satisfying. For brunch gatherings, I arrange them on a wooden board surrounded by Greek yogurt, fresh berries, and a small pitcher of maple syrup. The contrast of temperatures and textures creates a memorable experience. A sprinkle of turbinado sugar before baking gives them a delightful crackly top, while a post-bake brush of melted butter and cinnamon-sugar creates a donut-like finish similar to my Cinnamon Bread Pudding.

    Seasonal & Dietary Adaptations

    These versatile muffins welcome seasonal ingredients throughout the year. In fall, add a handful of diced apples and extra cinnamon; summer calls for fresh berries or diced peaches. For holiday mornings, I fold in cranberries and orange zest—the bright pops of color and flavor are festive and unexpected. They’re easily adapted for dietary needs too. Swap regular flour for a gluten-free blend, use coconut oil instead of butter, or replace eggs with flax eggs for vegan friends. The recipe remains foolproof, producing moist, flavorful muffins that never betray their modified status—even the pickiest eaters won’t notice the difference!

    Storage & Troubleshooting Guide

    Optimal Storage Methods

    Keep your banana oatmeal muffins fresh and delicious with proper storage techniques. For short-term storage (2-3 days), place completely cooled muffins in an airtight container lined with paper towels to absorb excess moisture. I add a slice of bread on top—it works like magic to keep them moist! For longer storage, individually wrap muffins in plastic wrap, place in a freezer bag, and freeze for up to 3 months. When the craving hits, microwave a frozen muffin for 30 seconds or thaw overnight in the refrigerator. I often make double batches specifically for freezing—future me is always grateful for the foresight.

    Common Issues & Solutions

    Even experienced bakers encounter muffin mishaps! If your muffins turn out dense, you’ve likely overmixed the batter or used too much flour. Remember to measure flour correctly by spooning it into your measuring cup and leveling off—never scoop directly from the bag. Flat-topped muffins indicate your oven temperature might be too low; invest in an oven thermometer for accuracy. If muffins stick to the liners, try lightly spraying them with cooking oil before filling, or use parchment liners which naturally release better. For pale muffins lacking that golden dome, position your rack in the upper third of the oven where heat concentration creates that bakery-style finish.

    Frequently Asked Questions

    Can I make these banana oatmeal muffins gluten-free?

    Absolutely! Substitute regular flour with a 1:1 gluten-free baking blend and ensure your oats are certified gluten-free. The texture remains moist and tender with this simple swap.

    How ripe should bananas be for the best flavor?

    Use very ripe bananas with numerous brown spots or even mostly black peels. These contain more sugar and stronger banana flavor, creating more flavorful, naturally sweet muffins.

    Can I substitute honey for sugar in this recipe?

    Yes! Replace white sugar with ¾ cup honey, but reduce other liquids by 2-3 tablespoons to compensate for honey’s moisture. The flavor will have lovely floral notes.

    Why did my muffins turn out dense instead of fluffy?

    Overmixing the batter develops gluten, creating density. Mix just until ingredients are combined, leaving some small lumps for lighter, fluffier muffins.

    How can I boost the protein content in these muffins?

    Add 2-3 tablespoons of Greek yogurt, swap ¼ cup flour for protein powder, or incorporate chopped nuts and seeds for a satisfying protein boost without sacrificing taste.

    Final Thoughts

    These banana oatmeal muffins have become more than just a recipe in my household—they’re a solution to hectic mornings, a wholesome treat that satisfies sweet cravings, and a blank canvas for creative flavor experiments. There’s something deeply satisfying about transforming spotty bananas into something so delicious and nourishing. Whether you’re a seasoned baker or kitchen novice, these forgiving, adaptable muffins deliver consistent results that’ll have everyone reaching for seconds. I’d love to see your creations on Pinterest!

  • Mint Oreo Truffles Recipe: Irresistibly Creamy & Easy to Make!

    Mint Oreo Truffles Recipe: Irresistibly Creamy & Easy to Make!

    Mint Oreo Truffles Recipe: Irresistibly Creamy & Easy to Make!

    Mint Oreo Truffles are what happen when cookie magic meets creamy decadence in bite-sized form. I discovered these little treasures during a holiday party mishap when my planned dessert literally fell flat (soufflé disasters, we’ve all been there!). With just three core ingredients and about 30 minutes of hands-on time, these truffles saved the evening and have become my go-to impressive-yet-simple treat. The contrast between the rich chocolate coating and cool mint interior creates a flavor explosion that’s reminiscent of those fancy chocolates from specialty shops—but so much more satisfying because you made them! Perfect for gifting, parties, or midnight snacking sessions when nobody’s watching.

    Recipe

    Why You’ll Love These Mint Oreo Truffles

    No-Bake Simplicity

    Let’s be honest—sometimes we want impressive desserts without turning our kitchen into a disaster zone. These Mint Oreo Truffles require zero baking and minimal equipment (just a food processor and microwave!). On busy weeknights when my sweet tooth is screaming but my energy is whispering, I can whip these up while catching up on my favorite show. The hands-on time is brief, yet the results look like you spent hours crafting each truffle. Plus, they’re surprisingly forgiving for beginners—even if your chocolate dipping technique isn’t perfect, they’ll still taste amazing!

    Crowd-Pleasing Flavor Profile

    The combination of mint and chocolate creates an irresistible flavor duo that appeals to practically everyone. I’ve served these at family gatherings where my picky nephew and gourmet-loving aunt both reached for seconds! The cooling mint perfectly balances the rich chocolate, creating that classic flavor combination we all crave. What makes these extra special is the texture contrast—the soft, almost fudgy interior against the snap of the chocolate coating. It’s that perfect bite that makes people close their eyes and say “mmm” without even realizing they’re doing it.

    Essential Tips & Tricks

    Perfecting the Truffle Texture

    The secret to perfect Mint Oreo Truffles lies in the cream cheese temperature. Cold cream cheese creates lumps, while overly soft cream cheese makes the mixture too sticky to roll. Let it sit at room temperature for exactly 20 minutes before mixing. When processing the cookies, pulse until you achieve fine crumbs but stop before it becomes powder—those tiny cookie bits provide delightful texture. I learned this the hard way after over-processing my first batch into dust! The mixture should hold together when pressed but not stick excessively to your hands—similar to the consistency of play-dough.

    Mastering the Chocolate Coating

    Achieving that glossy finish on your Mint Oreo Truffles requires proper chocolate melting technique. Chop your chocolate finely for even melting and use 30-second microwave intervals, stirring between each. The biggest game-changer? Adding a teaspoon of coconut oil to the melted chocolate creates the perfect consistency for dipping. For that professional look, I use a fork to dip each truffle, gently tapping to remove excess chocolate. If your kitchen is warm, place the rolled truffle centers in the freezer for 10 minutes before dipping—they’ll hold their shape better and the chocolate will set more quickly.

    Serving Ideas & Creative Variations

    Presentation Perfection

    Transform these simple Mint Oreo Truffles into showstopping desserts with thoughtful presentation. Arrange them in mini cupcake liners on a tiered stand for elegant events, or stack them in a clear gift box tied with ribbon for heartfelt homemade gifts. For holiday gatherings, I love creating a dessert board with these truffles as the centerpiece, surrounded by fresh berries, cookies, and caramel swirl cheesecake bites. The contrast of the dark chocolate against white serving dishes creates a striking visual. For an extra touch of elegance, dust some with a hint of gold luster dust or drizzle with contrasting white chocolate.

    Flavor Customization Options

    While classic Mint Oreo Truffles are divine, don’t be afraid to experiment with creative variations. Substitute mint Oreos with seasonal flavors like pumpkin spice in fall or lemon in summer. Add a teaspoon of orange zest to the filling for chocolate-orange truffles that taste like those fancy Christmas chocolates. For adults-only gatherings, I’ve added a tablespoon of Baileys or Kahlúa to the mixture—just reduce the cream cheese slightly to maintain the proper consistency. My personal favorite twist is adding a tiny pinch of sea salt to the chocolate coating, creating that irresistible sweet-salty balance that makes these even more addictive.

    Storage & Troubleshooting Guide

    Proper Storage Methods

    Keeping your Mint Oreo Truffles fresh requires proper storage techniques. Store them in an airtight container with parchment paper between layers to prevent sticking. In the refrigerator, they’ll maintain peak freshness for up to two weeks—if they last that long! For longer storage, these truffles freeze beautifully for up to three months. Just place them on a baking sheet until frozen solid, then transfer to a freezer bag. When ready to enjoy, thaw in the refrigerator overnight rather than at room temperature to prevent condensation from forming on the chocolate coating, which can cause discoloration and texture changes.

    Common Issues & Solutions

    Even experienced bakers encounter challenges with Mint Oreo Truffles. If your mixture is too sticky to roll, refrigerate it for 30 minutes or add more crushed cookies a tablespoon at a time. For truffles that fall apart in the chocolate, they likely need more cream cheese to bind properly. If your chocolate coating develops white streaks (called blooming), it was likely overheated—next time, melt more slowly and add a teaspoon of coconut oil to stabilize it. For chocolate that’s too thick for dipping, thin it with additional coconut oil, half a teaspoon at a time. Remember that imperfect-looking truffles can always be saved with decorative toppings like sprinkles or drizzled chocolate!

    Frequently Asked Questions

    Can I make Mint Oreo Truffles without a food processor?

    Absolutely! Place Oreos in a sealed plastic bag and crush them with a rolling pin until finely ground. Mix with cream cheese by hand, though it will require more effort to achieve the same smooth consistency.

    How far in advance can I make Mint Oreo Truffles for an event?

    You can prepare these truffles up to 5 days before your event. Store them in the refrigerator in an airtight container with parchment paper between layers to maintain freshness and prevent sticking.

    Can I use different flavored Oreos for these truffles?

    Yes! While mint Oreos create the classic Mint Oreo Truffles, you can substitute any flavor—golden, birthday cake, or seasonal varieties all work beautifully with the same technique.

    Why did my chocolate coating crack after setting?

    Chocolate cracks when truffles are too cold during dipping. Allow frozen centers to sit at room temperature for 5-10 minutes before dipping to prevent thermal shock to the chocolate.

    What’s the best chocolate to use for coating Mint Oreo Truffles?

    High-quality baking chocolate or chocolate chips with at least 60% cocoa content melt smoothly. Avoid chocolate candy melts as they contain stabilizers that affect the authentic taste.

    Final Thoughts

    Mint Oreo Truffles represent everything I love about homemade treats—simple ingredients transformed into something truly special. They’ve become my signature dessert for good reason: they’re adaptable, impressive, and bring genuine joy to anyone who tries them. The combination of crunchy chocolate coating with that creamy, minty center creates a perfect bite every time. Whether you’re making them for a holiday gathering, a thoughtful gift, or simply because it’s Wednesday, these truffles have a way of making ordinary moments feel special. Find more delicious inspiration on my Pinterest page and discover your next favorite treat!

  • Creamy Tuscan Marry Me Butter Beans – Irresistibly Delicious & Easy!

    Creamy Tuscan Marry Me Butter Beans – Irresistibly Delicious & Easy!

    Creamy Tuscan Marry Me Butter Beans – Irresistibly Delicious & Easy!

    Creamy Tuscan Marry Me Butter Beans are the ultimate comfort dish that combines velvety white beans with a rich, sun-dried tomato cream sauce that’ll make anyone fall in love at first bite. I discovered this recipe during a rainy weekend when I craved something hearty yet elegant. The moment the aroma of garlic and herbs filled my kitchen, I knew this would become a staple in my home. There’s something magical about how these humble beans transform into a restaurant-worthy dish that’s both indulgent and nourishing. Perfect for date nights or cozy gatherings, these beans might just prompt a proposal! Check out my garlic herb chicken recipe for a perfect pairing.

    Recipe

    Why You’ll Love This Creamy Tuscan Marry Me Butter Beans

    A Flavor Symphony in Every Bite

    The magic of these Creamy Tuscan Marry Me Butter Beans lies in their perfect balance of flavors. The creamy sauce coats each tender bean with a luxurious blend of garlic, Italian herbs, and sun-dried tomato tanginess. What makes this dish truly special is how the beans absorb all those beautiful flavors while maintaining their buttery texture. I love how the slight sweetness of the sun-dried tomatoes plays against the savory notes of the garlic and the subtle heat from red pepper flakes. It’s like a culinary hug that warms you from the inside out!

    Budget-Friendly Elegance That Impresses

    Don’t let the “Marry Me” title fool you—these beans are surprisingly economical! Using pantry staples like canned butter beans means you can create this impressive dish without breaking the bank. I’ve served this at dinner parties where guests assumed I’d spent hours in the kitchen, when really, it comes together in about 30 minutes. The rich, restaurant-quality result belies its simple preparation and affordable ingredients. It’s proof that humble ingredients can transform into something truly special with just a few thoughtful additions and techniques.

    Essential Tips & Tricks

    Perfecting Your Bean Selection & Preparation

    For the creamiest result, butter beans (also called lima beans) are the star, but cannellini or great northern beans work beautifully too. Always rinse canned beans thoroughly to remove excess sodium and starch that can make your dish taste tinny. If using dried beans, soak them overnight and cook until just tender—slightly undercooked is better than mushy since they’ll continue cooking in the sauce. I once rushed this step and ended with bean mush instead of distinct, cream-coated beauties. Take your time draining them well to prevent a watery sauce that dilutes all those gorgeous flavors.

    Creating the Ultimate Creamy Tuscan Sauce

    The secret to this dish’s “marry me” status lies in building flavor layers methodically. Start by sautéing finely minced garlic in good olive oil until fragrant but not browned—burnt garlic will ruin everything! Add sun-dried tomatoes early so they release their oils into the base. When adding cream, lower the heat to prevent curdling and simmer gently to reduce and thicken. For extra richness, stir in a tablespoon of cream cheese or mascarpone. This technique creates a sauce that’s velvety and clings perfectly to each bean, similar to my popular creamy mushroom chicken pasta that uses the same principle.

    Serving Ideas & Creative Variations

    Perfect Pairings to Complete Your Meal

    These Creamy Tuscan Marry Me Butter Beans shine as both a main dish and a spectacular side. For a complete vegetarian meal, serve over creamy polenta or alongside crusty artisan bread for sauce-sopping. As a side, they complement grilled chicken, roasted salmon, or a juicy steak beautifully. I love serving them in shallow bowls to contain all that luscious sauce, with a sprinkle of fresh herbs and a drizzle of your best olive oil. For an elegant touch, add a side of roasted asparagus or a simple arugula salad with lemon vinaigrette to cut through the richness.

    Exciting Twists on the Classic Recipe

    Don’t be afraid to make this recipe your own! Add crispy pancetta or bacon bits for a smoky flavor dimension. For a seafood twist, fold in sautéed shrimp or scallops during the final minutes of cooking. Vegetable lovers can enhance the dish with sautéed mushrooms, wilted spinach, or roasted red peppers. I once added artichoke hearts and a splash of white wine, which transported the dish to a new level of Mediterranean flair. For a spicier version that pairs wonderfully with my blackened steak and shrimp alfredo, increase the red pepper flakes or add a dash of cajun seasoning.

    Storage & Troubleshooting Guide

    Keeping Your Beans Perfectly Creamy

    These Creamy Tuscan Marry Me Butter Beans store beautifully, often tasting even better the next day as the flavors meld. Cool completely before transferring to airtight containers and refrigerate for up to 3 days. When reheating, do so gently over low heat, adding a splash of cream or broth if the sauce has thickened too much. Avoid microwave reheating if possible, as it can make the sauce separate and the beans become tough. For meal prep, prepare the sauce ahead of time and store separately from the beans, combining them just before serving for the freshest texture.

    Fixing Common Sauce Mishaps

    If your sauce breaks or curdles, don’t panic! Lower the heat immediately and whisk in a tablespoon of cold cream. For sauce that’s too thin, create a slurry with a teaspoon of cornstarch dissolved in cold water and whisk it in while the sauce simmers. Too thick? Simply thin with a splash of broth or cream. If your beans seem bland, brighten with a squeeze of lemon juice and an extra pinch of salt. Remember that cream-based sauces need proper seasoning—taste as you go and adjust accordingly. I once saved a broken sauce by blending a small portion and whisking it back in—it worked like magic!

    Frequently Asked Questions

    Can I make Creamy Tuscan Marry Me Butter Beans vegan?

    Absolutely! Substitute the heavy cream with full-fat coconut milk or cashew cream, and use nutritional yeast instead of parmesan. The result is still wonderfully creamy with all the Tuscan flavors intact.

    What makes these butter beans earn the “Marry Me” title?

    The irresistible combination of creamy sauce, tender beans, and Tuscan flavors creates such an impressive dish that it’s rumored to have prompted marriage proposals! It’s comfort food elevated to romance-worthy status.

    Can I use fresh tomatoes instead of sun-dried?

    You can, but the flavor profile will change. If using fresh, choose Roma tomatoes, remove seeds, and roast them first to concentrate their flavor. Sun-dried tomatoes provide a unique sweetness and intensity that’s hard to replicate.

    How can I add protein to this dish?

    Grilled chicken, Italian sausage, or sautéed shrimp make excellent protein additions. For vegetarian options, try adding crispy tofu cubes or a sprinkle of toasted pine nuts.

    Are butter beans and lima beans the same thing?

    Yes! Butter beans are mature lima beans. They’re larger, creamier, and have a buttery texture that works perfectly in this dish. Either labeled variety will work beautifully.

    Final Thoughts

    These Creamy Tuscan Marry Me Butter Beans represent what I love most about cooking—transforming simple ingredients into something extraordinary. The rich, velvety sauce coating each tender bean creates a dish that feels both comforting and special. Whether you’re cooking for yourself, family, or someone you’re hoping to impress, this recipe delivers on both flavor and presentation. I hope you’ll share your creations with me on Pinterest and let me know if they inspire any big questions in your household!