Blog

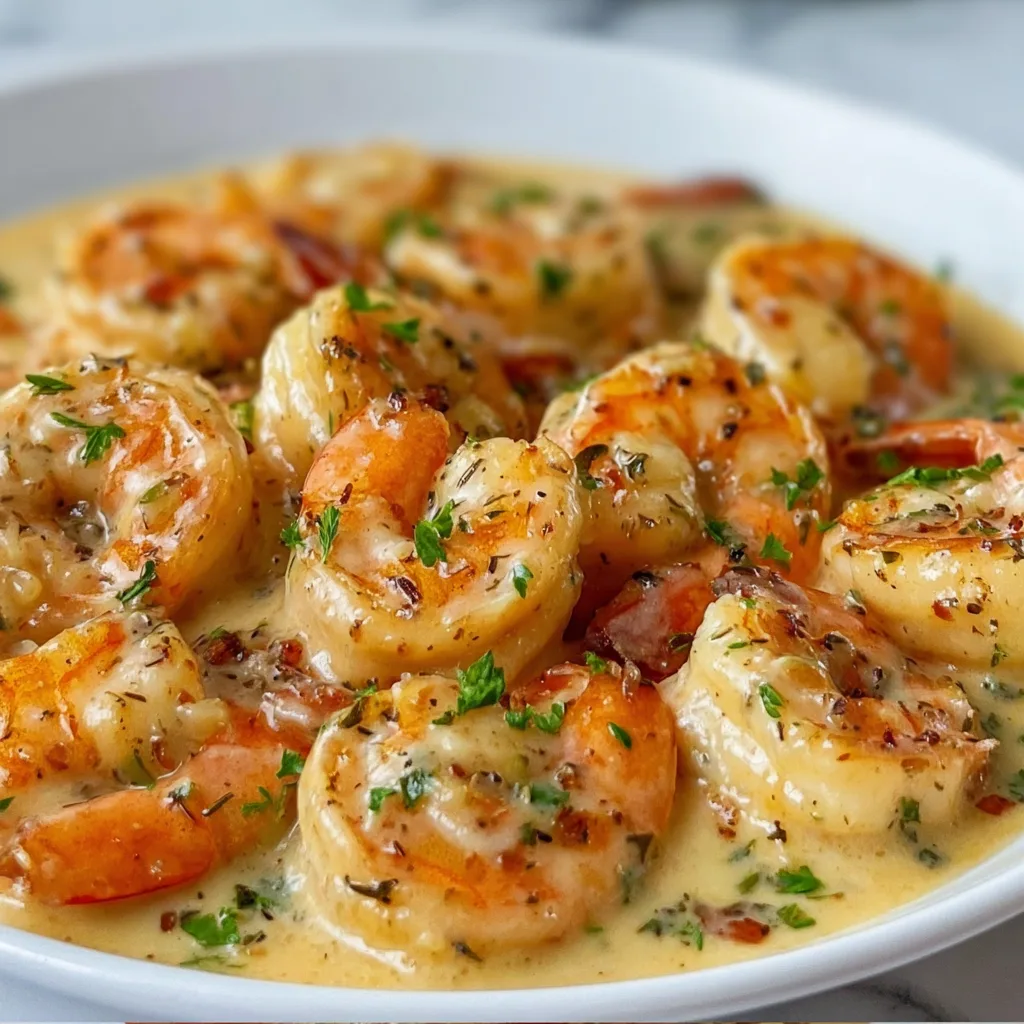
  • Shrimp Newburg Recipe: Creamy, Decadent, and Irresistibly Easy!

    Shrimp Newburg Recipe: Creamy, Decadent, and Irresistibly Easy!

    Shrimp Newburg Recipe: Creamy, Decadent, and Irresistibly Easy!

    Shrimp Newburg is one of those classic dishes that manages to be both elegantly sophisticated and comforting at the same time. The first time I made this rich, creamy creation, I was transported back to my grandmother’s dining room where special occasions always meant something decadent on the table. The tender shrimp bathed in a velvety cognac-kissed sauce creates a luxurious meal that feels like a warm hug on a plate. Whether you’re planning a romantic dinner or simply want to elevate your weeknight cooking, this Shrimp Newburg recipe promises restaurant-quality results with surprisingly little effort.

    Recipe

    Why You’ll Love This Shrimp Newburg Recipe

    Perfect Balance of Flavors and Textures

    There’s something magical about the way the sweet, tender shrimp mingles with the rich, buttery sauce in this recipe. The delicate seafood flavor shines through while being complemented by the warm notes of cognac or sherry. I love how the sauce coats each shrimp perfectly, creating little pockets of flavor with every bite. The slight tanginess from the lemon juice brightens everything up, preventing the dish from becoming too heavy. It’s this perfect balance that makes Shrimp Newburg so addictive – sophisticated enough for special occasions but comforting enough to make you close your eyes with each delicious forkful.

    Quick Yet Impressive Results

    Despite its fancy reputation, Shrimp Newburg comes together in about 30 minutes from start to finish. This makes it my go-to when I need something impressive but don’t have hours to spend in the kitchen. The sauce thickens beautifully as it simmers, transforming before your eyes into that signature velvety consistency. I still remember the first time I served this to guests – they couldn’t believe I’d whipped it up so quickly! The combination of minimal prep work and maximum flavor impact makes this recipe a true kitchen hero when you want to impress without stress. Your dinner guests will think you spent hours crafting this luxurious dish.

    Essential Tips & Tricks

    Selecting and Preparing the Shrimp

    The foundation of an exceptional Shrimp Newburg starts with high-quality shrimp. I recommend using large or jumbo shrimp (16-20 count per pound) for the best texture and presentation. Fresh is wonderful if you have access, but don’t hesitate to use frozen shrimp that’s been properly thawed. The key is ensuring they’re deveined and peeled, leaving just the tails on for a prettier presentation if desired. When cooking the shrimp, remember that they’ll continue cooking in the sauce, so it’s better to slightly undercook them in the initial sauté. Pink with just a hint of translucence is perfect – they should have just curled into a loose C-shape.

    Creating the Perfect Sauce Consistency

    The signature velvety texture of Shrimp Newburg sauce requires a bit of attention but is simple to master. Start with a proper roux by cooking the flour and butter until it smells slightly nutty but hasn’t browned. When adding your liquid ingredients, pour slowly while whisking constantly to prevent lumps from forming. If your sauce seems too thick, add a tablespoon of cream or stock at a time until you reach the desired consistency. For a silkier finish, temper your egg yolks by adding a small amount of the hot sauce to them before incorporating them back into the pan. This prevents curdling and creates that luxurious mouthfeel that makes Shrimp Newburg so special.

    Serving Ideas & Creative Variations

    Classic and Modern Serving Suggestions

    Traditionally, Shrimp Newburg is served over buttery toast points or puff pastry shells for an elegant presentation. For a more substantial meal, spoon it over perfectly cooked rice or angel hair pasta that will catch all that luscious sauce. One of my favorite ways to serve it is nestled in a bed of creamy mashed potatoes with a sprinkle of fresh chives – the contrast between the silky sauce and fluffy potatoes is divine! For a low-carb option, consider serving over cauliflower rice or alongside roasted asparagus. Whatever base you choose, a simple green salad with a light vinaigrette makes the perfect accompaniment to balance the richness of this spectacular dish.

    Exciting Flavor Twists and Additions

    While the classic recipe is perfection, I love experimenting with flavor variations that put a personal spin on this timeless dish. Adding a pinch of smoked paprika or cayenne pepper brings a subtle heat that complements the sweetness of the shrimp beautifully. For a Mediterranean twist, stir in some sun-dried tomatoes and a handful of baby spinach just before serving. Seafood lovers might appreciate a mixed version with lobster or scallops alongside the shrimp – I tried this for a holiday dinner and it was a showstopper! You can also incorporate crispy bacon bits for a smoky contrast or add sautéed mushrooms for an earthy dimension that pairs wonderfully with the rich sauce.

    Storage & Troubleshooting Guide

    Proper Storage and Reheating Methods

    Shrimp Newburg is best enjoyed fresh, but leftovers can be stored in an airtight container in the refrigerator for up to 2 days. When reheating, do so gently over low heat to prevent the sauce from breaking and the shrimp from becoming tough. I recommend adding a splash of cream or milk when reheating to revitalize the sauce’s silky texture. For the best results, warm the sauce separately until it’s just heated through, then add the shrimp for the final minute to avoid overcooking. Unfortunately, Shrimp Newburg doesn’t freeze well due to the cream-based sauce, which can separate upon thawing, and the texture of the shrimp may become compromised.

    Common Issues and How to Fix Them

    Even experienced cooks occasionally encounter challenges with Shrimp Newburg. If your sauce breaks or curdles, don’t panic! Try removing it from heat and whisking in a tablespoon of cold cream or a small pat of softened butter. For a sauce that’s too thin, create a slurry with a teaspoon of cornstarch and cold water, then whisk it in while the sauce simmers. Conversely, if your sauce is too thick, gradually add warm stock or cream until you reach the desired consistency. Overcooked shrimp can become rubbery – if this happens, consider chopping them and incorporating them into a creamy pasta dish where the sauce will help mask the texture.

    Remember that patience is key – gentle heat and constant attention yield the best results.

    Frequently Asked Questions

    What exactly is Shrimp Newburg?

    Shrimp Newburg is a rich American seafood dish consisting of shrimp in a creamy sauce made with butter, egg yolks, cream, and sherry or cognac. It originated in the late 1800s and is traditionally served over toast points, puff pastry, or rice.

    Can I make Shrimp Newburg ahead of time?

    You can prepare the sauce up to 24 hours ahead, but I recommend cooking the shrimp just before serving. Reheat the sauce gently, then add freshly cooked shrimp to maintain their tender texture and prevent overcooking.

    What can I substitute for the alcohol in Shrimp Newburg recipe?

    For a non-alcoholic version, substitute the sherry or cognac with seafood stock mixed with a tablespoon of lemon juice and a teaspoon of vanilla extract. This maintains the depth of flavor without using alcohol.

    How can I tell when the shrimp are perfectly cooked?

    Perfectly cooked shrimp turn pink, opaque, and curl into a loose C-shape. If they curl into a tight O-shape, they’re overcooked. They should feel firm but still have a slight bounce when pressed.

    What sides pair well with this dish?

    Light, fresh sides balance Shrimp Newburg’s richness best. Consider steamed asparagus, a simple green salad, roasted Brussels sprouts, or garlic green beans. For starches, rice, crusty bread, or pasta work beautifully.

    Final Thoughts

    This Shrimp Newburg recipe transforms simple ingredients into something truly special – a dish that feels like celebration on a plate. I hope you’ll embrace both the classic preparation and the creative variations to make this recipe your own. There’s something deeply satisfying about mastering a timeless dish like this, watching as humble shrimp transform into an elegant meal worthy of your most cherished gatherings. Whether for a romantic dinner, holiday feast, or simply because you deserve something extraordinary, Shrimp Newburg delivers comfort and luxury in equal measure. Find more seafood inspirations on our Pinterest board and keep creating beautiful meals!
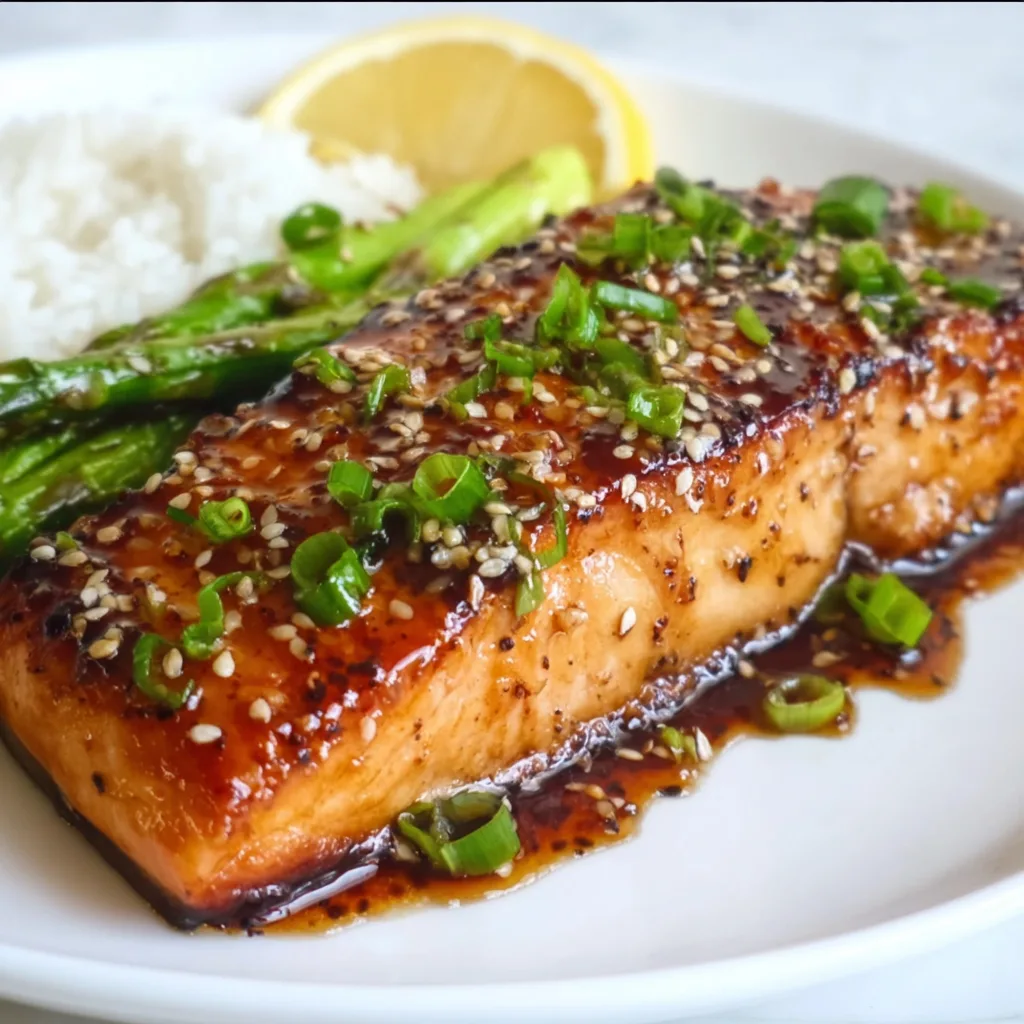

  • Ginger Soy Glazed Salmon That’ll WOW Your Taste Buds!

    Ginger Soy Glazed Salmon That’ll WOW Your Taste Buds!

    Ginger Soy Glazed Salmon That’ll WOW Your Taste Buds!

    Ginger Soy Glazed Salmon is one of those dishes that makes weeknight cooking feel like a special occasion. The first time I made this recipe, the aroma of ginger and garlic filled my kitchen, instantly transporting me to my favorite Asian restaurant. There’s something magical about how the sweet-savory glaze caramelizes on the salmon, creating a dish that’s both impressive and incredibly simple. If you’re looking for a dinner that delivers restaurant-quality flavor with minimal effort, this recipe is about to become your new favorite.

    Recipe

    Why You’ll Love This Ginger Soy Glazed Salmon

    Perfect Balance of Flavors

    The magic of this Ginger Soy Glazed Salmon lies in its perfect harmony of flavors. The salty umami from the soy sauce balances beautifully with honey’s natural sweetness, while fresh ginger adds that distinctive zingy warmth that makes your taste buds dance. I love how the garlic deepens everything, creating layers of flavor that seem far more complex than the simple ingredients list suggests. The first time my husband tasted this, he actually closed his eyes and said, “This is better than any restaurant salmon.” That moment of pure satisfaction is exactly why I keep coming back to this recipe.

    Quick and Foolproof Preparation

    Even on my busiest days, I can have this Ginger Soy Glazed Salmon on the table in under 30 minutes. The beauty is in its simplicity – just whisk the glaze ingredients, pour over the salmon, and let the oven do the work. What I appreciate most is how forgiving this recipe is for beginners. The glaze creates a protective coating that helps prevent the salmon from drying out, making it nearly impossible to overcook. Last Tuesday, I got distracted by a phone call and left it in a few minutes longer than planned, yet it still emerged perfectly tender and flavorful.

    Essential Tips & Tricks

    Selecting the Perfect Salmon

    Choosing the right salmon makes all the difference in this recipe. Look for center-cut fillets with vibrant color and firm texture. I prefer wild-caught salmon for its richer flavor, but farm-raised works beautifully too. The thickness matters – aim for pieces that are about 1-1.5 inches thick at their deepest point for even cooking. I learned this lesson the hard way when I used thin tail pieces that overcooked while the thicker portions were perfect. For the freshest flavor, give your salmon a gentle sniff – it should smell clean and oceanic, never fishy or ammonia-like.

    Mastering the Glaze Consistency

    The secret to an exceptional Ginger Soy Glazed Salmon is getting that glaze consistency just right. You want it thick enough to cling to the salmon but not so thick that it won’t penetrate the fish. I find that simmering the glaze for 3-4 minutes creates the perfect sticky-sweet coating that caramelizes beautifully. For an extra layer of flavor, reserve some of the glaze before marinating and brush it on during the last few minutes of cooking. This technique creates that gorgeous lacquered finish that makes this dish look like it came from a high-end restaurant.

    Serving Ideas & Creative Variations

    Perfect Pairings for a Complete Meal

    This Ginger Soy Glazed Salmon deserves accompaniments that complement its bold flavors without overwhelming them. My go-to side is fluffy jasmine rice that soaks up every drop of that precious glaze. For vegetables, steamed bok choy or sesame-roasted broccoli provide the perfect contrast in both texture and flavor. When entertaining, I love serving this with a quick cucumber salad dressed with rice vinegar and sesame oil – the cool crispness balances the rich salmon beautifully. For a special touch, sprinkle everything with toasted sesame seeds and thinly sliced green onions just before serving.

    Exciting Flavor Variations

    While the classic ginger-soy combination is perfection, this recipe welcomes creative twists. For a spicy kick, add a tablespoon of sriracha or a teaspoon of gochujang to the glaze. When I’m craving something citrusy, I’ll add orange zest and a splash of fresh juice to brighten everything up. For a tropical variation that my family adores, try incorporating a tablespoon of pineapple juice and a sprinkle of toasted coconut flakes on top. For an elegant dinner party version, finish with a drizzle of wasabi cream – it adds a sophisticated heat that guests always rave about.

    Storage & Troubleshooting Guide

    Proper Storage for Leftovers

    Leftover Ginger Soy Glazed Salmon can be just as delicious the next day if stored properly. Allow the salmon to cool completely before refrigerating in an airtight container for up to 2 days. I prefer reheating gently in a 275°F oven just until warmed through – about 10 minutes – to preserve the moisture. Microwaving works in a pinch, but use 50% power in short bursts to prevent that dreaded rubbery texture. For a completely different experience, try enjoying leftover salmon chilled on a salad with some of the reserved glaze thinned with a bit of rice vinegar as dressing.

    Solving Common Cooking Challenges

    If your salmon isn’t caramelizing properly, your oven temperature might be too low or the glaze might need more sugar content. Ensure your oven is fully preheated and consider positioning the salmon on the upper third rack for better browning. If the glaze is burning before the salmon is cooked through, cover loosely with foil for part of the cooking time. For those times when your salmon releases too much liquid during cooking (diluting that beautiful glaze), try patting the fillets extra dry before glazing and letting them sit at room temperature for 10-15 minutes before baking.

    Frequently Asked Questions

    Can I make Ginger Soy Glazed Salmon ahead of time?

    You can prepare the glaze up to 3 days ahead and store it refrigerated. For best results, glaze the salmon just before cooking, though you can prep the salmon and glaze it up to 2 hours before baking.

    Is this recipe gluten-free?

    Not as written, but it’s easily adaptable by substituting tamari or coconut aminos for the soy sauce. Double-check that your honey is pure and not blended with other ingredients.

    Can I grill this salmon instead of baking it?

    Absolutely! Grill over medium-high heat for 4-5 minutes per side, basting with additional glaze. Use a fish basket or foil packet if you’re concerned about sticking.

    What’s the best way to tell when the salmon is perfectly cooked?

    The salmon is done when it flakes easily with a fork but still maintains some translucency in the center. For medium-rare, aim for an internal temperature of 125°F.

    Can I use frozen salmon for Ginger Soy Glazed Salmon?

    Yes, but thaw it completely in the refrigerator overnight and pat it very dry before applying the glaze. Frozen-then-thawed salmon may release more moisture during cooking.

    Final Thoughts

    This Ginger Soy Glazed Salmon has become my reliable hero for everything from quick weeknight dinners to impressive entertaining. There’s something magical about how such a simple preparation can transform ordinary salmon into something truly extraordinary. The combination of sweet, salty, and zingy flavors creates a dish that feels both comforting and special. Whether you’re cooking for yourself or hosting friends, this recipe delivers that perfect balance of effort to reward. I hope this becomes a beloved staple in your kitchen too! Find more delicious inspiration on Pinterest.

  • Buffalo Chicken Quesadilla: Irresistibly Spicy, Crunchy & Cheesy!

    Buffalo Chicken Quesadilla: Irresistibly Spicy, Crunchy & Cheesy!

    Buffalo Chicken Quesadilla: Irresistibly Spicy, Crunchy & Cheesy!

    Buffalo Chicken Quesadilla is the ultimate comfort food mashup that brings together crispy tortillas, gooey cheese, and that unmistakable buffalo kick we all crave. I discovered this recipe during a game night with friends when we wanted something quick but impressive. The first bite had everyone silent – that perfect moment when food is so good nobody wants to talk! The zesty buffalo sauce mingles with melty cheese while the tender chicken adds satisfying substance. It’s become my go-to when I need to transform basic ingredients into something extraordinary. Whether you’re hosting friends or just treating yourself, these quesadillas deliver restaurant-quality flavor with minimal effort. Check out my Italian Chopped Salad for the perfect side pairing!

    Recipe

    Why You’ll Love This Buffalo Chicken Quesadilla

    Perfect Balance of Flavors and Textures

    There’s something magical about the way the spicy buffalo sauce dances with creamy cheese in these quesadillas. Each bite delivers a perfect harmony – the kick of hot sauce mellowed by rich cheese, with chunks of chicken adding substance. I love how the tortilla crisps up golden-brown, creating that satisfying crunch that gives way to the gooey interior. The contrast between the crispy exterior and the melty filling is what makes these irresistible. My husband, who claims he’s “not a buffalo chicken guy,” somehow manages to eat three of these whenever I make them. That’s the true test of a winning recipe!

    Quick and Convenient Preparation

    These quesadillas are my secret weapon for those evenings when cooking feels like a chore. With pre-cooked chicken (rotisserie chicken works beautifully), the active prep time is under 15 minutes. I’ve made these after long workdays, during halftime of football games, and for impromptu get-togethers. The ingredient list is refreshingly short, with most items being pantry and fridge staples. I love recipes that deliver massive flavor without requiring a special shopping trip. These quesadillas are also wonderfully adaptable to what you have on hand – different cheese varieties or hot sauce brands each bring their unique twist to the basic formula.

    Essential Tips & Tricks

    Perfecting Your Buffalo Sauce Balance

    Finding your ideal heat level is crucial for buffalo chicken quesadilla success. I recommend starting with a 2:1 ratio of buffalo sauce to butter for a balanced flavor that won’t overwhelm. For extra creaminess that tames the heat, mix in a tablespoon of ranch or blue cheese dressing directly into your chicken mixture. Another game-changer: let your sauce-coated chicken rest for 5-10 minutes before assembling your quesadillas. This allows the flavors to meld and prevents excessive moisture that could make your tortillas soggy. Remember, you can always serve extra sauce on the side for dipping, allowing everyone to adjust to their preference.

    Achieving the Perfect Crispy Exterior

    The secret to a restaurant-quality quesadilla is getting that perfectly crispy exterior while ensuring the cheese melts completely. I swear by using a cast-iron skillet with just a light brush of butter or oil. Medium heat is your friend – too hot and your tortilla burns before the cheese melts; too low and you’ll never get that crisp texture. Press down gently with a spatula during the first 30 seconds of cooking to ensure good contact with the pan. For the ultimate crispy finish, try my Quick Jumbo Dinner Rolls technique – a light sprinkle of grated Parmesan on the outside of the tortilla creates an incredible crispy, cheesy crust that’s absolutely addictive.

    Serving Ideas & Creative Variations

    Perfect Pairings and Dipping Options

    Elevate your buffalo chicken quesadilla experience with thoughtfully chosen sides and dips. I always serve mine with a trio of cooling dips – ranch, blue cheese, and a simple crema made with lime juice and cilantro. The tanginess cuts through the richness perfectly. For sides, crisp celery and carrot sticks aren’t just traditional buffalo wing companions – they provide a fresh, crunchy contrast to the rich quesadillas. On game days, I’ll create a build-your-own dipping station with additional options like avocado crema, jalapeño honey, and pico de gallo. The variety lets everyone customize their experience while the cool dips balance the heat from the buffalo sauce.

    Exciting Flavor Variations to Try

    While the classic buffalo chicken quesadilla is perfect, experimenting with variations keeps this recipe exciting. Try a BBQ twist by replacing half the buffalo sauce with your favorite barbecue sauce and adding caramelized onions. For a Mexican-inspired version, mix in some taco seasoning with your chicken and add black beans and corn. My personal favorite variation includes crumbled blue cheese inside the quesadilla alongside the shredded cheese blend for pockets of tangy goodness. For an extra special touch, check out my Crispy Homemade Chicken Spring Rolls for inspiration on adding creative garnishes like pickled vegetables or specialized slaws as accompaniments.

    Storage & Troubleshooting Guide

    Proper Storage and Reheating Methods

    Leftover buffalo chicken quesadillas can maintain their deliciousness with proper storage. I recommend cooling completely before wrapping each quesadilla individually in aluminum foil or parchment paper, then placing in an airtight container. They’ll keep in the refrigerator for up to 3 days. For reheating, avoid the microwave which makes them soggy. Instead, use a dry skillet over medium-low heat for 2-3 minutes per side to restore the crispy exterior. For meal prep, you can freeze the assembled but uncooked quesadillas with parchment paper between each one. When ready to eat, cook from frozen, adding just a minute or two to the cooking time.

    Solving Common Quesadilla Problems

    Even experienced cooks encounter quesadilla challenges occasionally. If your quesadilla is leaking filling, you’re likely overstuffing – stick to about ⅓ cup of filling per 8-inch tortilla and leave a ½-inch border around the edge. Soggy quesadillas usually mean your filling contained too much moisture. Pat chicken dry before mixing with sauce, and if using vegetables, pre-cook them to release their water. If cheese isn’t melting before the tortilla browns, your heat is too high. Try covering the pan for 30 seconds to trap heat and melt the cheese without burning the tortilla. For torn tortillas, make sure they’re fresh and pliable – warming them for 10 seconds in the microwave helps.

    Frequently Asked Questions

    What’s the best cheese for Buffalo Chicken Quesadillas?

    A combination of mozzarella and sharp cheddar provides the perfect balance of meltability and flavor. Monterey Jack or pepper jack can be substituted for added creaminess or spice. Avoid pre-shredded cheese as it contains anti-caking agents that prevent proper melting.

    Can I make Buffalo Chicken Quesadillas ahead of time?

    Yes! Prepare the buffalo chicken mixture up to 2 days ahead and refrigerate. You can also assemble the quesadillas and refrigerate for up to 4 hours before cooking. For best results, bring them to room temperature for 15 minutes before cooking.

    How do I prevent my quesadillas from getting soggy?

    Ensure your chicken isn’t too wet by patting it dry before mixing with sauce. Cook quesadillas on medium-high heat to quickly crisp the tortilla, and serve immediately. If making multiple quesadillas, keep finished ones warm in a 200°F oven on a wire rack.

    What can I substitute for buffalo sauce?

    If you don’t have buffalo sauce, mix hot sauce with melted butter (2:1 ratio). For less heat, try barbecue sauce, sweet chili sauce, or even a mixture of honey and sriracha for a different but equally delicious flavor profile.

    Are Buffalo Chicken Quesadillas spicy?

    The spice level of Buffalo Chicken Quesadillas depends entirely on your choice of sauce. Mild buffalo sauce creates a tangy quesadilla suitable for most palates, while medium or hot varieties will deliver more kick. Adjust to your preference!

    Final Thoughts

    Buffalo Chicken Quesadillas have earned their place in my regular rotation because they deliver maximum satisfaction with minimal effort. There’s something undeniably comforting about that perfect bite – crispy tortilla giving way to spicy-tangy chicken and gooey cheese. I love how versatile they are, working equally well as a quick weeknight dinner, game day snack, or even cut into smaller pieces as party appetizers. The beauty lies in their simplicity and how they transform basic ingredients into something truly craveable. Make these once, and I guarantee they’ll become a requested favorite in your household too! Find more inspiration on my Pinterest for creative serving ideas.

  • Baked Sausage & Cream Cheese Crescents: Irresistibly Delicious!

    Baked Sausage & Cream Cheese Crescents: Irresistibly Delicious!

    Baked Sausage & Cream Cheese Crescents: Irresistibly Delicious!

    Baked Sausage & Cream Cheese Crescents are the appetizer that consistently disappears first at every gathering I host. There’s something magical about that golden, flaky crescent dough wrapped around savory sausage and creamy cheese that makes people hover near the serving platter. I discovered this recipe years ago when I needed something quick for an impromptu game night, and it’s become my go-to ever since. The combination of warm, melty cream cheese and perfectly seasoned sausage creates a flavor explosion that’s simply irresistible. Plus, they’re incredibly easy to make when you’re short on time but want to impress!

    Recipe

    Why You’ll Love This Baked Sausage & Cream Cheese Crescents

    Perfect Party Food That Disappears Fast

    These little bundles of joy are the ultimate crowd-pleaser that vanish within minutes of hitting the table. The flaky exterior gives way to a creamy, savory filling that keeps everyone coming back for more. I love watching guests’ eyes light up when they take their first bite! They’re substantial enough to satisfy hunger but small enough that people don’t feel guilty grabbing seconds (or thirds). Plus, they’re versatile enough for casual game days or more upscale gatherings. I’ve even served them at holiday cocktail parties where they outshined much fancier appetizers!

    Quick Prep With Maximum Impact

    When I’m racing against the clock but need something homemade, these crescents are my secret weapon. With just 15 minutes of active prep time, they deliver an impressive result that looks like you spent hours in the kitchen. The beauty lies in their simplicity—brown some sausage, mix in cream cheese, roll in crescents, and bake! I’ve made these while simultaneously helping my daughter with homework and taking phone calls. They’re that manageable! The aroma that fills your kitchen while they bake is an added bonus, creating an inviting atmosphere before your guests even arrive.

    Essential Tips & Tricks

    Getting The Filling Just Right

    The key to exceptional Baked Sausage & Cream Cheese Crescents lies in the filling-to-dough ratio. I’ve learned through many batches that about 1½ tablespoons of filling per crescent triangle hits the sweet spot. Too much and they’ll burst during baking; too little and you’ll miss that luscious creaminess. Let your cream cheese come to room temperature before mixing with the cooked sausage—this creates a smoother blend that’s easier to work with. For an extra flavor dimension, I add a dash of garlic powder and a sprinkle of green onions. The subtle heat from these additions elevates the entire experience.

    Perfecting The Crescent Technique

    After years of making these, I’ve perfected the wrapping technique that prevents filling leakage. Start by placing the filling at the wider end of the triangle, then roll toward the pointed tip, gently tucking in the sides as you go. For a professional-looking finish, slightly curve the ends inward to create that classic crescent shape, similar to the beautiful Garlic Butter Parmesan Knots you might also enjoy. Don’t skip brushing the tops with beaten egg—this creates that gorgeous golden shine that makes them irresistible. For extra insurance against leaks, pinch the seams firmly and arrange them seam-side down on your baking sheet.

    Serving Ideas & Creative Variations

    Perfect Pairings For Any Occasion

    These versatile crescents complement nearly any meal or stand proudly on their own. For brunch gatherings, I serve them alongside a fresh Italian Chopped Salad for a delightful contrast of warm, rich flavors against cool, crisp vegetables. For game day spreads, pair them with tangy dipping sauces like ranch, honey mustard, or even a spicy sriracha mayo. The temperature contrast between the hot crescents and cool dips creates a memorable taste experience. When serving as an appetizer before dinner, I arrange them on a wooden board with clusters of grapes and sliced apples for a visually appealing presentation.

    Exciting Flavor Variations To Try

    While the classic recipe is divine, experimenting with different flavor profiles keeps things interesting! My family goes wild for the Mexican-inspired version with chorizo, cream cheese, and a sprinkle of taco seasoning. For an Italian twist, try Italian sausage with basil, sun-dried tomatoes, and a bit of mozzarella mixed into the cream cheese. Breakfast crescents with maple breakfast sausage and a touch of maple syrup in the cream cheese mixture are perfect for morning gatherings. Vegetarian guests appreciate a version with sautéed mushrooms, spinach, and caramelized onions replacing the sausage—the umami flavor is absolutely incredible!

    Storage & Troubleshooting Guide

    Make-Ahead And Storage Solutions

    These crescents are perfect for busy hosts who need time-saving strategies. You can prepare the filling up to two days ahead and store it in an airtight container in the refrigerator. For partially made crescents, assemble them completely, place on a baking sheet, cover with plastic wrap, and refrigerate for up to 12 hours before baking. If you have leftovers (which rarely happens in my house!), store them in an airtight container in the refrigerator for up to three days. To reheat, place in a 350°F oven for 5-7 minutes—the microwave works in a pinch but sacrifices that wonderful flaky texture.

    Solving Common Baking Challenges

    If you find your crescents leaking filling during baking, you’re likely overfilling or not sealing properly. Try reducing the filling to 1 tablespoon per triangle and really focus on pinching those seams closed. Pale crescents usually indicate your oven temperature is too low—invest in an oven thermometer for accuracy. If the bottoms are burning while the tops remain undercooked, try placing the baking sheet on a higher rack and using a quality, light-colored baking sheet. For crescents that unravel during baking, try chilling them for 10 minutes before baking to help the dough set its shape.

    Frequently Asked Questions

    Can I make Baked Sausage & Cream Cheese Crescents ahead of time?

    Yes! Prepare the filling up to 2 days ahead and refrigerate. You can also assemble the crescents and refrigerate them (unbaked) for up to 12 hours before baking. Just add 2-3 minutes to the baking time if cooking from cold.

    What’s the best type of sausage to use?

    Regular breakfast sausage works beautifully, but Italian sausage (mild or hot) adds wonderful flavor. Turkey or chicken sausage creates a lighter version, while vegetarian sausage alternatives work well for meat-free options.

    Can I freeze these crescents?

    Absolutely! Freeze unbaked crescents on a baking sheet until solid, then transfer to a freezer bag for up to 3 months. Bake directly from frozen, adding about 5-7 minutes to the baking time.

    How do I prevent the filling from leaking out?

    Use about 1-1½ tablespoons of filling per crescent, place it on the wide end, and be sure to pinch all seams tightly. Arranging them seam-side down on the baking sheet also helps prevent leakage.

    What can I add to the Baked Sausage & Cream Cheese Crescents for extra flavor?

    Try adding diced jalapeños, green onions, fresh herbs, different cheese varieties, or a dash of hot sauce to the filling. A sprinkle of everything bagel seasoning on top before baking adds amazing texture and flavor!

    Final Thoughts

    Baked Sausage & Cream Cheese Crescents have earned their place as a staple in my entertaining repertoire for good reason. They strike that perfect balance between impressive and achievable that we all search for in recipes. Every time I make them, I’m reminded of the simple joy that comes from creating something delicious that brings people together. The way conversations flow more easily when hands reach for these warm, flaky bites makes all the difference at gatherings. I hope these crescents become a beloved tradition in your home too! For more delicious inspiration, check out my Pinterest collection.

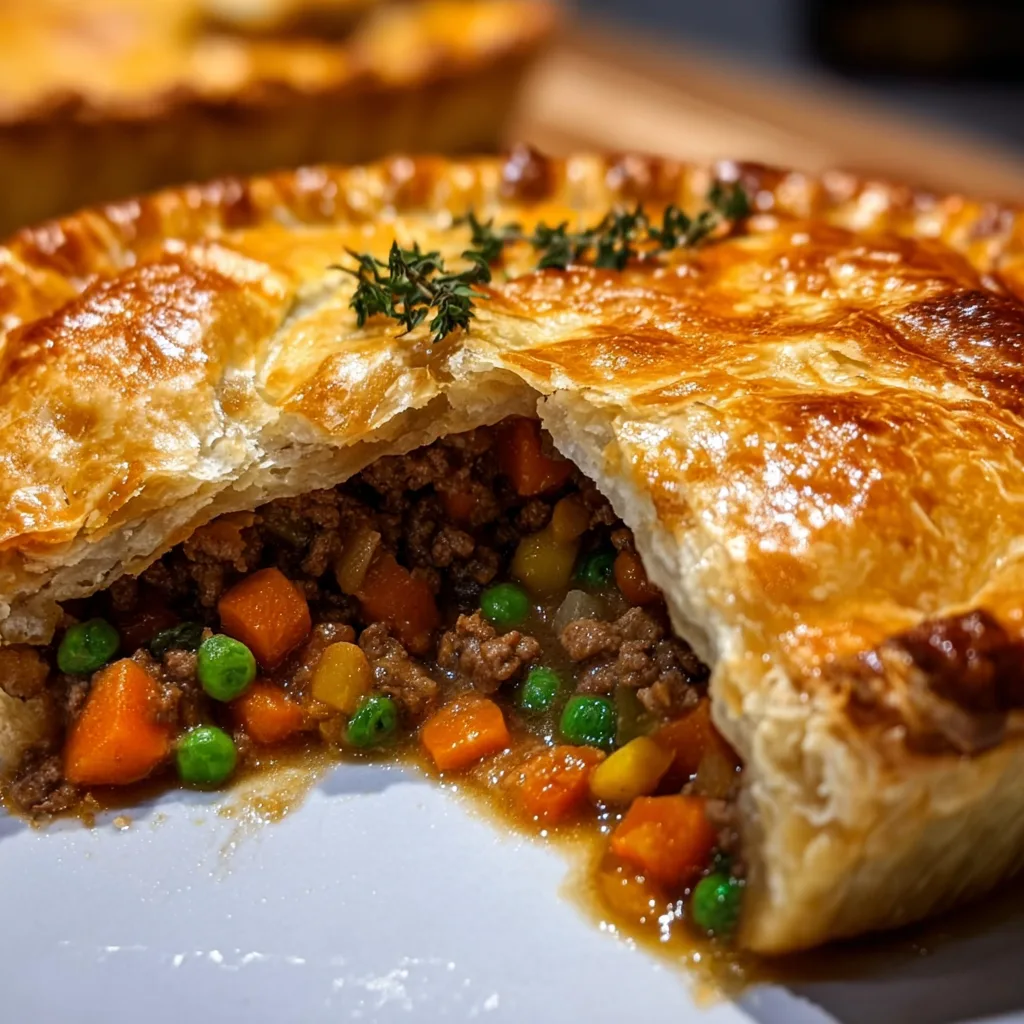
  • Hearty Beef & Veggie Meat Pie: Irresistibly Flaky & Comforting!

    Hearty Beef & Veggie Meat Pie: Irresistibly Flaky & Comforting!

    Hearty Beef & Veggie Meat Pie: Irresistibly Flaky & Comforting!

    There’s something magical about a Hearty Beef & Veggie Meat Pie with Flaky Crust that transports me back to my grandmother’s kitchen. That moment when your fork breaks through the golden, buttery pastry to reveal steaming, savory filling underneath—pure comfort in every bite. I’ve spent years perfecting this recipe, balancing tender beef chunks with colorful vegetables and rich gravy. The best part? While it looks impressive enough for Sunday dinner, it’s actually straightforward enough for weeknight cooking. Let me show you how to create this cozy classic that my family requests constantly, especially when the weather turns chilly.

    Recipe

    Why You’ll Love This Hearty Beef & Veggie Meat Pie with Flaky Crust

    Perfect Balance of Flavors and Textures

    This meat pie hits all the right notes with its perfect balance of savory and subtle sweetness. The beef becomes fork-tender after simmering in a rich gravy infused with herbs and a splash of Worcestershire sauce. I love how the vegetables maintain just enough bite—carrots, peas, and potatoes create a medley of textures that complement the meat beautifully. The real magic happens when everything bakes together under that gloriously flaky crust, allowing the flavors to meld and intensify. It’s comfort food that doesn’t feel heavy but still satisfies that deep craving for something substantial and homemade.

    Make-Ahead Convenience

    One reason I make this Hearty Beef & Veggie Meat Pie so often is its incredible flexibility. The filling can be prepared up to three days ahead and kept refrigerated, making assembly quick when you’re ready to bake. I often double the recipe and freeze individual portions for busy weeknights—just thaw overnight and bake! You can even prepare the entire pie, freeze it unbaked, then cook directly from frozen by adding 20-25 minutes to the bake time. This has saved dinner countless times when life gets hectic, and nobody can tell it wasn’t made completely from scratch that day.

    Essential Tips & Tricks

    Perfecting Your Pastry

    The secret to a truly exceptional crust lies in keeping everything cold. I chill my butter, flour, and even the bowl before mixing. Work quickly with your fingertips rather than your whole hands to prevent warming the dough. Another game-changer? Adding a tablespoon of ice-cold vinegar to your dough—it inhibits gluten formation for maximum flakiness. Let your dough rest in the refrigerator for at least 30 minutes before rolling. This relaxes the gluten and prevents shrinkage during baking. For that professional-looking golden finish, brush with egg wash and sprinkle with flaky sea salt before baking.

    Mastering the Filling

    The key to a deeply flavored filling starts with properly browning your beef in batches—don’t overcrowd the pan! This caramelization creates rich flavor compounds that form the foundation of your pie. Deglaze the pan with a splash of red wine or beef broth to capture all those delicious browned bits. For vegetables that maintain their integrity, add them in stages according to cooking time—root vegetables first, peas last. Thicken your gravy with a roux or cornstarch slurry, but allow it to cool completely before filling your pie to prevent a soggy bottom. Try my Italian Chopped Salad alongside for a complete meal.

    Serving Ideas & Creative Variations

    Perfect Pairings

    Serve this Hearty Beef & Veggie Meat Pie with simple sides that complement without competing. A crisp green salad with vinaigrette cuts through the richness perfectly. For something heartier, try roasted Brussels sprouts with bacon or buttered green beans with almonds. On chilly evenings, nothing beats pairing it with a robust red wine like Malbec or Syrah. For family gatherings, I love setting out small ramekins of cranberry sauce or caramelized onion chutney as unexpected but delicious accompaniments. The pie is substantial enough to stand alone, but these thoughtful additions elevate the entire experience.

    Regional Twists

    Every region has its own take on meat pies, offering endless inspiration for variations. Try an English-inspired version with Stilton cheese crumbled into the filling, or go Scottish with a splash of whisky and some rutabaga. Australian meat pies traditionally include a dash of Vegemite or Marmite for umami depth. For something completely different, try a Moroccan-spiced version with cinnamon, cumin, and dried fruit. My personal favorite is adding mushrooms and a splash of cream for a stroganoff-inspired twist. These variations pair beautifully with Quick Jumbo Dinner Rolls for sopping up extra gravy.

    Storage & Troubleshooting Guide

    Proper Storage Methods

    Store your leftover meat pie properly to maintain both flavor and food safety. Refrigerate any cooled leftovers within two hours of baking, tightly covered with foil or in an airtight container. The pie will keep beautifully for up to four days. For freezing, wrap individual slices in plastic wrap, then foil, labeling with the date. These will last up to three months in the freezer. To reheat refrigerated pie, use a 350°F oven for 15-20 minutes rather than the microwave to preserve the crust’s texture. For frozen slices, reheat covered with foil for 30 minutes, then uncover for 5-10 minutes to crisp up.

    Fixing Common Issues

    Even experienced bakers encounter pie problems occasionally. If your bottom crust turns soggy, try blind-baking it for 10 minutes before adding the cooled filling. For filling that’s too runny, mix 1 tablespoon cornstarch with 2 tablespoons cold water and stir into your simmering filling next time. If your crust browns too quickly, simply tent it with foil halfway through baking. Cracks in your top crust? No problem—brush with a little egg wash to “glue” them together. Remember that a less-than-perfect looking pie often tastes just as delicious, so don’t stress over aesthetics. The rustic, homemade appearance is part of its charm!

    Frequently Asked Questions

    Can I make this Hearty Beef & Veggie Meat Pie with store-bought pastry?

    Absolutely! While homemade pastry offers superior flavor and texture, good-quality store-bought puff pastry or pie crust works perfectly when you’re short on time. Just make sure it’s thawed properly before using.

    What’s the best cut of beef for meat pies?

    Chuck roast or stewing beef work best as they become tender and flavorful during slow cooking. Avoid lean cuts like sirloin which can become tough and dry in the long cooking process.

    Can I make this pie vegetarian?

    Yes! Substitute the beef with a mix of mushrooms, lentils, and additional root vegetables. Use vegetable broth and add a tablespoon of soy sauce or miso paste for umami depth.

    How do I prevent a soggy bottom crust?

    Ensure your filling is completely cooled before adding it to the pastry. You can also blind-bake the bottom crust for 10 minutes or brush it with beaten egg white before adding filling.

    Can I prepare this in advance for a dinner party?

    Definitely! Assemble the entire pie up to 24 hours ahead and refrigerate unbaked. Remove from the refrigerator 30 minutes before baking to prevent thermal shock to your baking dish.

    Final Thoughts

    This Hearty Beef & Veggie Meat Pie with Flaky Crust has become more than just a recipe in my household—it’s a tradition that brings everyone to the table with anticipation. There’s something deeply satisfying about creating a dish that nourishes both body and soul, especially when shared with loved ones. I hope you’ll try this recipe and perhaps start your own meat pie tradition. The beauty of cooking lies in these moments: the anticipation as the golden crust emerges from the oven, the appreciative murmurs around the table, and the connection that comes from sharing something made with care. Find more cozy recipes at Pinterest.

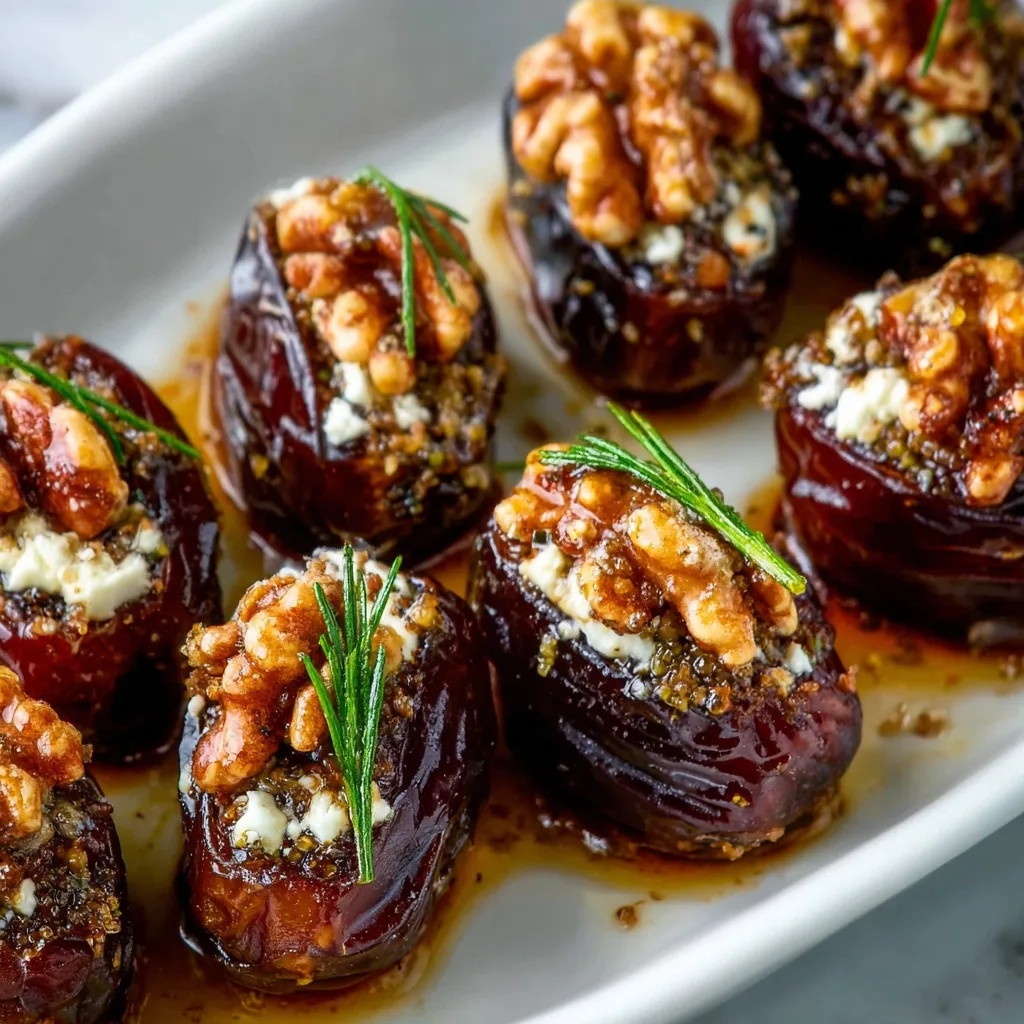
  • Gourmet Roasted Stuffed Dates with Goat Cheese: Irresistibly Delicious!

    Gourmet Roasted Stuffed Dates with Goat Cheese: Irresistibly Delicious!

    Gourmet Roasted Stuffed Dates with Goat Cheese: Irresistibly Delicious!

    Gourmet Roasted Stuffed Dates with Goat Cheese are the perfect blend of sweet and savory that elevate any gathering from ordinary to extraordinary. The first time I made these for a dinner party, my guests literally gasped when they bit into the warm, creamy centers contrasted with the caramelized exterior. There’s something magical about the way the tangy goat cheese melts against the natural sweetness of dates. These little jewels have become my go-to appetizer when I want to impress without spending hours in the kitchen. Like my Crispy Shrimp Toast, they strike that perfect balance between elegant and approachable.

    Recipe

    Recipe

    Why You’ll Love This Gourmet Roasted Stuffed Dates with Goat Cheese

    A Perfect Balance of Flavors and Textures

    These stuffed dates are a sensory delight that hits all the right notes. The natural caramelization that happens when dates roast creates an almost candy-like exterior that gives way to creamy, tangy goat cheese. Add a drizzle of honey and a sprinkle of sea salt, and you’ve got a perfect bite that dances between sweet and savory. I love how the slight crunch of the date skin yields to that warm, molten center. The best part? You’ll only need a handful of quality ingredients to create something that tastes genuinely gourmet. The contrast between the chewy dates and creamy filling creates a textural experience that keeps everyone reaching for more.

    Quick Preparation with Impressive Results

    One thing I adore about these gourmet roasted stuffed dates with goat cheese is how they deliver maximum impact with minimal effort. You can prep them in under 15 minutes, yet they look like something from an upscale restaurant. The visual appeal alone—golden brown dates with their creamy centers peeking out—signals to guests that something special awaits. I’ve served these at everything from casual wine nights to holiday gatherings, and they always disappear within minutes. There’s something deeply satisfying about creating something so elegant with such simple ingredients. Plus, they can be partially prepped ahead, making them perfect for entertaining when you don’t want to be stuck in the kitchen.

    Essential Tips & Tricks

    Selecting and Preparing the Perfect Dates

    The foundation of truly exceptional stuffed dates begins with choosing the right variety. Medjool dates are my absolute favorite for this recipe—they’re larger, softer, and have a caramel-like sweetness that works beautifully with tangy goat cheese. When preparing them, make a lengthwise slit that’s deep enough to hold a generous amount of filling but not so deep that the date splits completely. I’ve found that removing the pit with a gentle twist preserves the date’s shape better than cutting it out. For an extra touch of luxury, let your dates come to room temperature before stuffing—they’re more pliable and the flavors bloom more intensely when they’re not cold from the refrigerator.

    Cheese Selection and Flavor Enhancements

    While plain goat cheese creates a wonderful stuffed date, taking it up a notch with flavored varieties can transform this appetizer. I love using honey-infused goat cheese for an extra layer of sweetness or herb-coated varieties for a more savory profile. For the creamiest texture, let your goat cheese soften at room temperature for 15-20 minutes before stuffing. This makes it easier to work with and helps it melt more evenly during roasting. For an unexpected twist, try mixing your goat cheese with a touch of Italian Chopped Salad inspired herbs like basil and oregano. The bright herbaceous notes cut through the richness beautifully, creating a more complex flavor profile that will have everyone asking for your secret.

    Serving Ideas & Creative Variations

    Elegant Presentation Techniques

    Elevate your gourmet roasted stuffed dates with goat cheese through thoughtful presentation that makes them look as special as they taste. Arrange them on a wooden board with fresh herbs scattered between for a rustic-elegant look that photographs beautifully. For cocktail parties, secure each date with a decorative toothpick for easy grabbing. I love serving them on a bed of arugula drizzled with balsamic glaze—the peppery greens and tangy reduction complement the sweet-savory profile perfectly. For holiday gatherings, try arranging them in a wreath pattern with pomegranate arils and rosemary sprigs. The jewel-toned garnishes against the amber dates create a festive display that’s almost too pretty to eat.

    Sweet and Savory Variations to Try

    The classic goat cheese filling is just the beginning—these dates are incredibly versatile. For a sweet-meets-heat version, add a tiny drizzle of hot honey or a pinch of chili flakes to the goat cheese. The subtle spice cuts through the sweetness beautifully. For a more substantial bite, wrap each stuffed date in prosciutto before roasting—the salty meat crisps up and adds another dimension of flavor. My personal favorite variation includes a small piece of Crispy Bacon and a walnut half pressed into the cheese. The combination of creamy, crunchy, sweet, and smoky creates an irresistible bite that disappears in seconds at parties. Don’t be afraid to experiment with blue cheese or mascarpone for completely different flavor profiles.

    Storage & Troubleshooting Guide

    Make-Ahead Options and Reheating

    These gourmet roasted stuffed dates with goat cheese are perfect for planning ahead when entertaining. You can stuff the dates up to 24 hours in advance and store them covered in the refrigerator until you’re ready to roast. If you want to prepare them even further ahead, freeze the stuffed (but not yet roasted) dates on a parchment-lined tray, then transfer to a freezer bag once solid. They’ll keep for up to a month! When reheating already roasted dates, avoid the microwave which can make them tough. Instead, warm them in a 300°F oven for 5-7 minutes until just heated through. The texture won’t be quite as perfect as freshly roasted, but they’ll still be delicious.

    Solving Common Problems

    If your dates are splitting open too much during roasting, try reducing the oven temperature by 25 degrees and watching them more closely. The perfect balance is achieving a warm, melty center without the dates completely falling apart. If your goat cheese is oozing out too much, try chilling the stuffed dates for 15 minutes before roasting to firm up the cheese. For dates that seem too dry after roasting, a light drizzle of honey or aged balsamic right before serving adds moisture and flavor. If you find the flavor too one-dimensional, a pinch of flaky sea salt or a few drops of lemon juice just before serving will brighten everything up and make the flavors pop.

    Frequently Asked Questions

    Can I make gourmet roasted stuffed dates with goat cheese ahead of time?

    Yes! You can stuff the dates up to 24 hours ahead and refrigerate. For best results, bring to room temperature for 15 minutes before roasting. They’re actually better when the flavors have time to meld together.

    What can I substitute for goat cheese?

    Cream cheese, mascarpone, or ricotta work beautifully. For dairy-free options, try cashew cheese or firm tofu blended with nutritional yeast and lemon juice for tanginess.

    How long do these stuffed dates stay fresh?

    Roasted stuffed dates will keep for up to 3 days refrigerated in an airtight container. The texture is best on the first day, but they’re still delicious cold from the fridge.

    Can I freeze these before or after roasting?

    Freeze them before roasting for best results. Arrange stuffed dates on a baking sheet until solid, then transfer to a freezer bag. Roast directly from frozen, adding 2-3 minutes to cooking time.

    What wines pair well with stuffed dates?

    Sweet dates with tangy goat cheese pair beautifully with sparkling wines like Prosecco or a light rosé. For contrast, try an off-dry Riesling or a nutty Sherry.

    Final Thoughts

    These gourmet roasted stuffed dates with goat cheese have become my signature appetizer for good reason—they strike that perfect balance between sophisticated and approachable, impressive and easy. What I love most is how versatile they are, fitting in at both casual gatherings and elegant dinner parties. The way they hit those sweet-savory notes makes them universally appealing, and I’ve yet to meet someone who can stop at just one. I hope you’ll make these little jewels your own, perhaps adding your personal twist to the filling or presentation. They’re proof that sometimes the simplest combinations create the most memorable experiences. Find more inspiration on my Pinterest page!

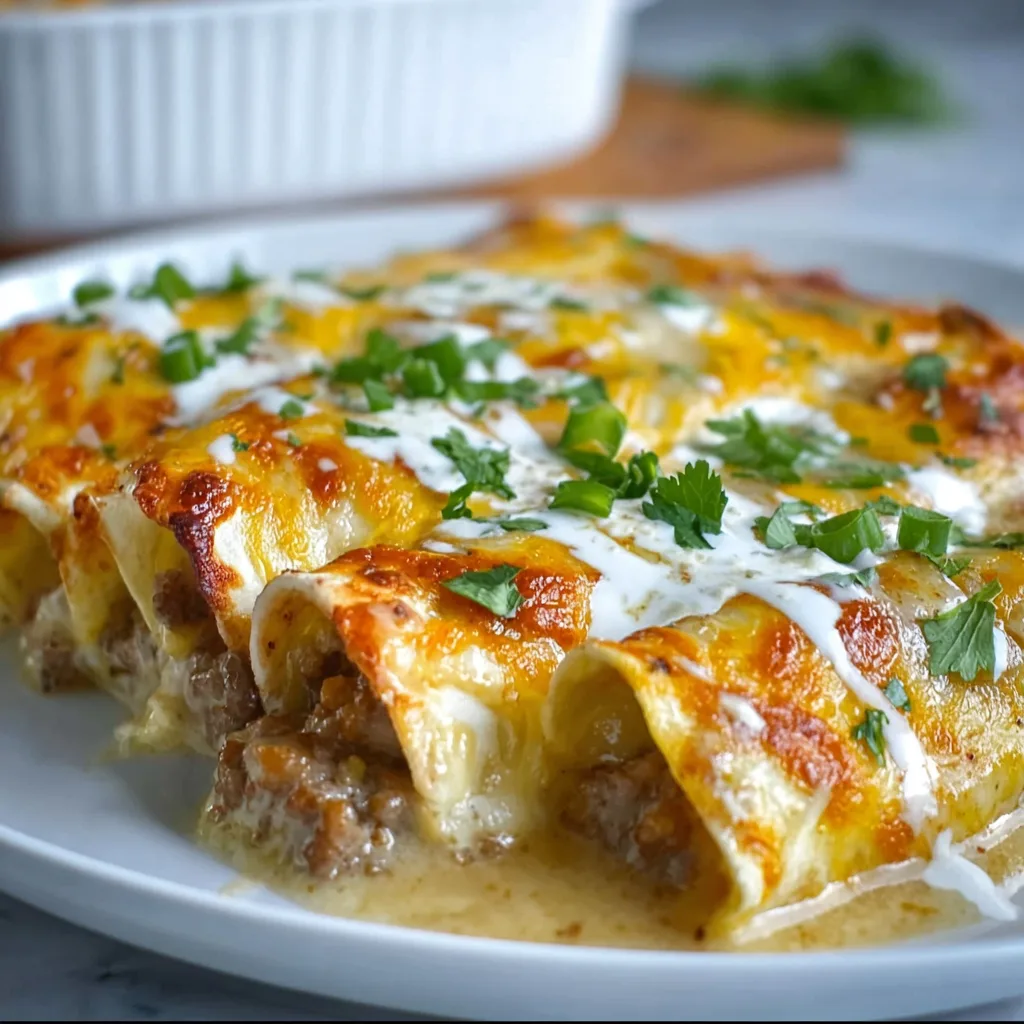
  • Breakfast Sausage Gravy Enchiladas: Irresistible Comfort in Every Bite!

    Breakfast Sausage Gravy Enchiladas: Irresistible Comfort in Every Bite!

    Breakfast Sausage Gravy Enchiladas: Irresistible Comfort in Every Bite!

    Breakfast Sausage Gravy Enchiladas combine two comfort food favorites into one irresistible dish that’ll have your family running to the table. The first time I made these for my Sunday brunch gathering, my brother-in-law asked for the recipe before he’d even finished his first bite! There’s something magical about the way the creamy, peppery sausage gravy wraps around tender tortillas, creating layers of flavor that feel like a warm hug on a plate. If you love hearty breakfast options that work just as beautifully for dinner, this recipe from RecipesDarleen deserves a spot in your regular rotation.

    Recipe

    Recipe

    Why You’ll Love This Breakfast Sausage Gravy Enchiladas

    A Perfect Fusion of Comfort Foods

    These enchiladas hit all the right notes by combining two beloved comfort classics. The savory sausage gravy – thick, creamy, and studded with bits of perfectly seasoned pork – transforms ordinary enchiladas into something extraordinary. I’ve always believed that breakfast foods shouldn’t be limited to mornings, and these enchiladas prove my point beautifully. The contrast between the soft tortillas and the rich gravy creates a textural experience that’s deeply satisfying. Plus, they’re surprisingly versatile – make them spicier with hot sausage or milder for sensitive palates.

    Make-Ahead Friendly for Busy Days

    One thing I absolutely adore about this recipe is how perfectly it fits into a busy lifestyle. You can prep these enchiladas entirely the night before, cover the baking dish, and refrigerate until morning. The make-ahead convenience means you can enjoy a spectacular breakfast without the early morning hustle. I’ve made these for holiday mornings when family is visiting, and being able to simply slide the dish into the oven while I enjoy coffee with my guests feels like a small miracle. The flavors actually develop beautifully overnight, making the dish even more delicious.

    Essential Tips & Tricks

    Getting the Perfect Gravy Consistency

    The heart of this recipe is undoubtedly the sausage gravy, and getting its consistency right makes all the difference. Start with quality breakfast sausage – I prefer something with sage and a hint of maple. When making the gravy, cook the flour with the sausage drippings for at least 2 minutes to eliminate any raw flour taste. Add milk gradually while whisking constantly to prevent lumps. For the perfect thickness, remember that the gravy will thicken slightly as it cools, so aim for a consistency just a touch thinner than you want in the final dish.

    Tortilla Selection and Preparation

    Don’t underestimate the importance of your tortilla choice and preparation method! I’ve learned through many (delicious) experiments that flour tortillas work best for this recipe, as corn tortillas can break down too much in the creamy sauce. For the best texture, lightly toast your tortillas in a dry skillet before assembling – this creates a barrier that helps them maintain integrity while baking. If you’re looking for a twist on this recipe, try my Italian Sausage Pasta Bake for another comforting meal option.

    Serving Ideas & Creative Variations

    Complementary Side Dishes

    These enchiladas shine brightest when paired with fresh, bright accompaniments that balance their richness. I love serving them with a simple avocado salad – just diced avocado, cherry tomatoes, a squeeze of lime, and cilantro. A side of fresh fruit also provides a welcome contrast to the savory enchiladas. For a more substantial brunch spread, add crispy breakfast potatoes or a light green salad. The enchiladas themselves are quite filling, so sides can be simple. For another hearty breakfast option that pairs well, check out these Spinach Feta Egg Muffins.

    Exciting Flavor Variations

    While the classic recipe is divine, don’t be afraid to put your personal spin on these enchiladas. Try adding caramelized onions to your gravy for sweetness, or mix in roasted green chiles for a Southwestern twist. For a meat-lover’s version, add crumbled bacon or diced ham alongside the sausage. Vegetarian guests? Substitute the pork sausage with a plant-based alternative and mushrooms for a similar umami experience. I’ve even made a fusion version with a sprinkle of curry powder in the gravy that received rave reviews at my last brunch gathering.

    Storage & Troubleshooting Guide

    Proper Storage and Reheating

    These enchiladas store beautifully, making them perfect for meal prep or leftovers. After cooling completely, cover tightly with foil or transfer portions to airtight containers and refrigerate for up to 3 days. For reheating, the microwave works in a pinch, but for best results, place in a 325°F oven, covered with foil, for about 15-20 minutes until heated through. If the gravy seems too thick after refrigeration, drizzle a little milk over the enchiladas before reheating to restore that creamy consistency.

    Fixing Common Issues

    Even experienced cooks encounter challenges, but most issues with this recipe have simple fixes. If your gravy turns out too thick, gradually whisk in additional warm milk until you reach the desired consistency. Too thin? Make a slurry with equal parts flour and cold water, then whisk into the simmering gravy. Dealing with soggy enchiladas? Next time, toast your tortillas more thoroughly before assembly and ensure your gravy has cooled slightly before pouring. For gravy that lacks flavor, don’t be shy with black pepper and consider adding a dash of garlic powder.

    Frequently Asked Questions

    Can I make Breakfast Sausage Gravy Enchiladas vegetarian?

    Absolutely! Substitute the pork sausage with a plant-based alternative and use mushrooms for umami. The gravy works beautifully with vegetable broth instead of milk for a dairy-free version.

    How spicy are these enchiladas?

    They’re mild by default, getting most flavor from the breakfast sausage. Adjust the heat by choosing spicy sausage or adding red pepper flakes to the gravy.

    Can I freeze these enchiladas?

    Yes! Assemble but don’t bake, then freeze for up to 3 months. Thaw overnight in the refrigerator before baking, adding 10-15 minutes to the cooking time.

    What cheese works best for this recipe?

    Sharp cheddar provides the best flavor contrast with the creamy gravy, but Monterey Jack or a Mexican blend also works beautifully.

    Can I use corn tortillas instead of flour?

    While flour tortillas hold up better in the creamy sauce, corn tortillas can work if you fry them briefly in oil before filling to create a moisture barrier.

    Final Thoughts

    Breakfast Sausage Gravy Enchiladas represent comfort food at its finest – familiar yet exciting, simple yet impressive. There’s something deeply satisfying about creating a dish that bridges culinary traditions and works for any meal of the day. The way the spiced sausage gravy envelops each bite makes this more than just a recipe – it’s an experience worth sharing. For more delicious inspiration, follow me on Pinterest where I’m always posting new comfort food creations!

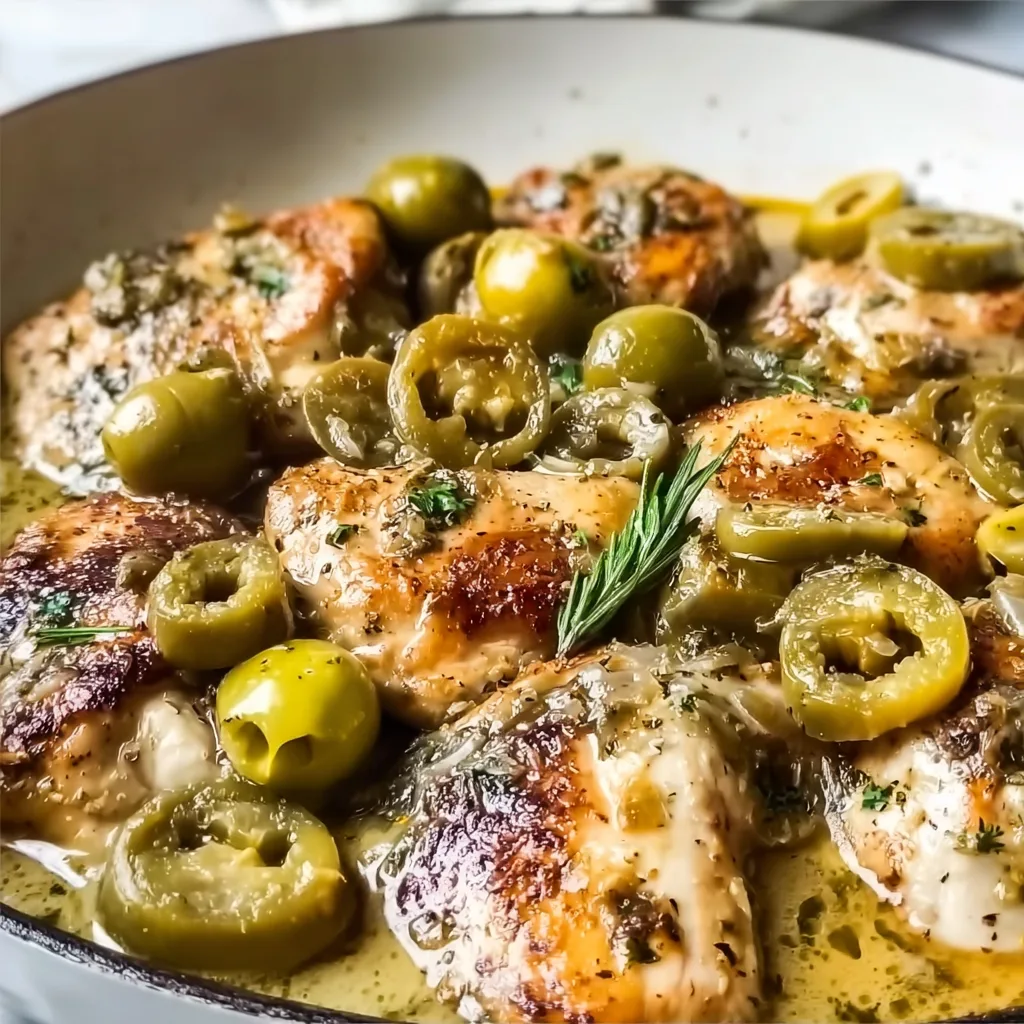
  • One-Skillet Pepperoncini Chicken – Easy, Juicy & Flavor-Packed!

    One-Skillet Pepperoncini Chicken – Easy, Juicy & Flavor-Packed!

    One-Skillet Pepperoncini Chicken – Easy, Juicy & Flavor-Packed!

    One-Skillet Pepperoncini Chicken has become my weeknight dinner hero, and I’m betting it’ll soon be yours too. There’s something magical about the tangy, slightly spicy pepperoncini peppers mingling with tender chicken as everything cooks together in a single pan. The first time I made this dish, my kitchen filled with an aroma that had my partner wandering in from the living room asking, “What smells so incredible?” That’s the beauty of this recipe—it’s effortlessly impressive while being remarkably simple. The pepperoncini brine creates a self-making sauce that transforms ordinary chicken into something crave-worthy. Ready to discover your new favorite weeknight meal?

    Recipe

    Why You’ll Love This One-Skillet Pepperoncini Chicken

    Perfect Balance of Flavors

    The genius of One-Skillet Pepperoncini Chicken lies in its perfect flavor harmony. The mild heat from the pepperoncini peppers balances beautifully with the savory chicken, creating a dish that’s tangy without overwhelming your palate. I love how the peppers mellow as they cook, releasing their bright, briny essence into the sauce. The chicken absorbs all these flavors as it simmers, becoming incredibly tender and juicy. What makes this dish special is how the pepperoncini brine transforms into a velvety sauce that’s just begging to be spooned over rice or sopped up with crusty bread.

    Minimal Cleanup, Maximum Impact

    As someone who values both delicious food and minimal dishwashing, this One-Skillet Pepperoncini Chicken recipe is a dream come true. Everything comes together in one single pan, meaning you’ll spend more time enjoying dinner and less time scrubbing pots and pans afterward. I still remember the first time I made this on a hectic Wednesday when deadlines were looming—the relief of creating something so flavorful with such little effort felt like a small miracle. The presentation is naturally beautiful too, with the golden chicken nestled among the bright pepperoncini peppers, making it perfect for both casual family dinners and entertaining guests.

    Essential Tips & Tricks

    Choosing the Right Ingredients

    The secret to exceptional One-Skillet Pepperoncini Chicken starts with quality ingredients. Opt for bone-in, skin-on chicken thighs for the juiciest results—they’re more forgiving and won’t dry out during cooking. When selecting pepperoncini, look for jars labeled “mild” if you prefer less heat or “hot” if you enjoy a spicier kick. I’ve learned through trial and error that including some of the pepperoncini brine (about ¼ cup) creates a more flavorful sauce. For an extra dimension of flavor, add a splash of white wine or chicken broth to deglaze the pan after browning the chicken, scraping up all those delicious brown bits from the bottom of the skillet.

    Mastering the Cooking Technique

    The key to perfect One-Skillet Pepperoncini Chicken lies in the searing technique. Start with a hot skillet—I prefer cast iron for its heat retention—and don’t rush the browning process. Let the chicken skin develop a golden crust before flipping, usually 5-7 minutes per side. This step creates incredible flavor and texture. Once you’ve added your pepperoncini and liquid, resist the urge to stir too frequently. Instead, let everything simmer gently, occasionally spooning the sauce over the chicken. This basting technique ensures the meat stays moist while absorbing all those tangy flavors. For an extra touch of richness, consider adding a pat of butter to the sauce just before serving, like in these Garlic Butter Chicken Broccoli recipes.

    Serving Ideas & Creative Variations

    Perfect Pairings

    One-Skillet Pepperoncini Chicken pairs beautifully with so many sides, making it incredibly versatile for any occasion. My personal favorite is serving it over creamy polenta or mashed potatoes, which provide the perfect canvas for soaking up that incredible sauce. For a lighter option, try it with a simple arugula salad dressed with lemon and olive oil—the peppery greens complement the tangy chicken wonderfully. Crusty bread is non-negotiable in my home; there’s nothing better than using it to capture every last drop of the pepperoncini sauce. For a complete meal that will impress guests, pair it with Italian Chopped Salad and some roasted vegetables for a colorful, satisfying dinner.

    Creative Twists on the Classic

    While the classic One-Skillet Pepperoncini Chicken is perfect as is, I love experimenting with variations that keep this dish exciting. Try adding Mediterranean flair by incorporating olives, capers, and a sprinkle of feta cheese in the last few minutes of cooking. For a creamier version, stir in a splash of heavy cream or cream cheese just before serving. When I’m in the mood for something heartier, I add cannellini beans or chickpeas to the skillet, allowing them to warm through and absorb the flavors.

    You can also transform this into a pasta dish by shredding the cooked chicken and tossing everything with your favorite pasta shape—penne and orecchiette work particularly well, catching all that delicious sauce in their nooks and crannies.

    Storage & Troubleshooting Guide

    Proper Storage Methods

    One-Skillet Pepperoncini Chicken makes exceptional leftovers, often tasting even better the next day as the flavors continue to develop. Store any remaining chicken and sauce in an airtight container in the refrigerator for up to 3 days. For best results, let the dish cool completely before refrigerating. When reheating, add a splash of chicken broth to maintain moisture and prevent the sauce from reducing too much. If you want to freeze portions for later, remove the chicken from the bones first, then store the meat and sauce together in freezer-safe containers for up to 2 months. Thaw overnight in the refrigerator before gently reheating on the stovetop.

    Troubleshooting Common Issues

    If your One-Skillet Pepperoncini Chicken sauce is too thin, there’s a simple fix: remove the chicken temporarily and simmer the sauce over medium heat until it reduces to your desired consistency. Conversely, if the sauce becomes too thick or intense, add a splash of chicken broth or water to thin it out. For chicken that isn’t browning properly, ensure your skillet is hot enough before adding the meat and that the chicken skin is thoroughly patted dry.

    If you find the dish too tangy from the pepperoncini, balance it with a teaspoon of honey or a knob of butter to round out the flavors. Remember that different brands of pepperoncini vary in acidity, so adjusting to taste is perfectly normal.

    Frequently Asked Questions

    Can I use boneless chicken for One-Skillet Pepperoncini Chicken?

    Yes! Boneless chicken thighs or breasts work well but cook faster than bone-in pieces. Reduce cooking time by about 10 minutes and check for doneness with a meat thermometer (165°F internal temperature).

    Are pepperoncini peppers very spicy?

    Pepperoncini peppers are mild on the heat scale, offering more tanginess than spice. They’re perfect for those who enjoy flavor without intense heat, making this dish family-friendly.

    Can I make this dish ahead for a dinner party?

    Absolutely! One-Skillet Pepperoncini Chicken actually improves with time as flavors meld. Prepare it a day ahead, refrigerate, then gently reheat before serving for maximum flavor.

    What’s the best skillet to use?

    A cast iron skillet works best because it retains heat evenly and creates beautiful browning. However, any oven-safe skillet with a heavy bottom will work well.

    How can I make the sauce creamier?

    For a creamier One-Skillet Pepperoncini Chicken sauce, stir in 2-3 tablespoons of cream cheese or heavy cream during the last 5 minutes of cooking, allowing it to melt into the sauce.

    Final Thoughts

    One-Skillet Pepperoncini Chicken has earned its place in my regular meal rotation because it delivers so much flavor with so little effort. There’s something deeply satisfying about creating a dish where simple ingredients transform into something greater than the sum of their parts. I find myself craving the bright, tangy flavors and tender chicken even as I write this. Whether you’re cooking for a busy weeknight or a special gathering, this versatile recipe adapts to any occasion. Don’t forget to check out more delicious recipes on Pinterest for inspiration. I hope this One-Skillet Pepperoncini Chicken brings as much joy to your table as it has to mine!