Blog

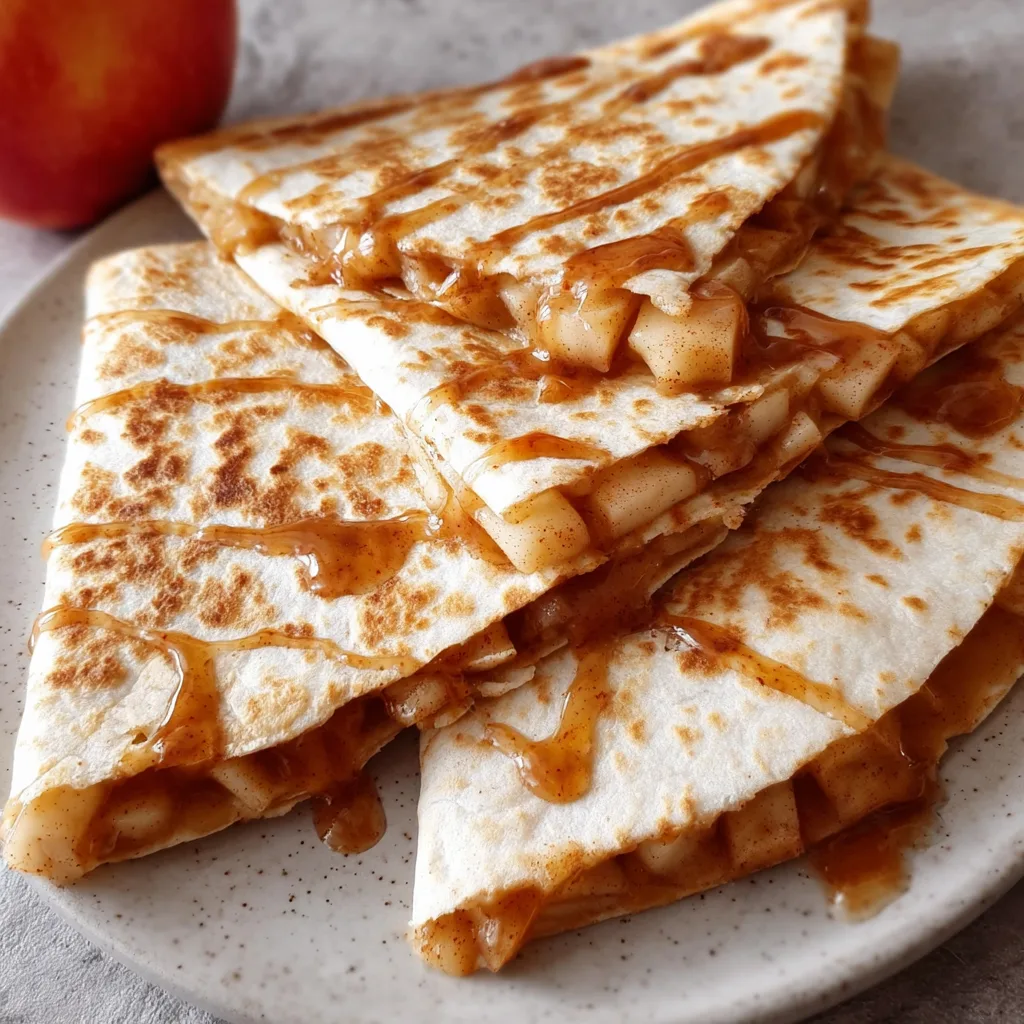
  • Apple Cinnamon Breakfast Quesadillas: Irresistible Morning Treat!

    Apple Cinnamon Breakfast Quesadillas: Irresistible Morning Treat!

    Apple Cinnamon Breakfast Quesadillas: Irresistible Morning Treat!

    Apple Cinnamon Breakfast Quesadillas have transformed my morning routine into something I genuinely look forward to. There’s something magical about the way warm cinnamon-spiced apples melt into gooey cheese between crispy tortillas that makes even the earliest wake-up calls worthwhile. I discovered this recipe on a chilly autumn morning when I craved something comforting yet quick. Now it’s become my go-to when I need a breakfast that feels special but doesn’t demand much time in the kitchen. If you love the classic pairing of apples and cinnamon but want something more substantial than traditional pancakes, these quesadillas are about to become your new favorite.

    Recipe

    Why You’ll Love These Apple Cinnamon Breakfast Quesadillas

    Perfect Balance of Sweet and Savory

    These Apple Cinnamon Breakfast Quesadillas deliver that irresistible sweet-savory combination that makes breakfast truly special. The caramelized apples develop a deep, honeyed flavor as they soften in butter and cinnamon, while the cheese adds a savory richness that prevents the dish from becoming too dessert-like. What I love most is how the tortilla crisps up, creating textural contrast against the tender apple filling. The aroma alone is worth making these – nothing gets my family out of bed faster than the scent of cinnamon and apples wafting through the house on a lazy weekend morning.

    Quick and Customizable Morning Option

    One of the best things about these Apple Cinnamon Breakfast Quesadillas is how quickly they come together. From start to finish, you’re looking at just 15 minutes, which makes them perfect for both rushed weekday mornings and leisurely weekend brunches. They’re incredibly versatile too – you can use whatever apples you have on hand, switch up the cheese based on your preferences, or add extras like chopped nuts for crunch. I’ve made these with everything from Honeycrisp to Granny Smith apples, each bringing its own character to the dish. The recipe is forgiving enough for beginners but interesting enough for experienced cooks.

    Essential Tips & Tricks

    Perfecting Your Apple Filling

    The secret to exceptional Apple Cinnamon Breakfast Quesadillas lies in how you prepare the apples. I recommend dicing them small (about ¼-inch cubes) so they cook quickly and distribute evenly throughout the quesadilla. Cook them just until tender but not mushy – you want them to hold their shape while still being soft enough to bite through easily. A splash of vanilla extract makes a world of difference, adding depth that complements the cinnamon beautifully. Don’t rush the caramelization process; those few extra minutes allow the natural sugars in the apples to develop, creating rich flavor that makes these quesadillas truly special, similar to my Easy Wisconsin Apple Kringle Pastry.

    Achieving the Perfect Crispy Exterior

    The difference between a good quesadilla and a great one often comes down to the tortilla. For Apple Cinnamon Breakfast Quesadillas, I find that medium-sized flour tortillas work best – they’re sturdy enough to hold the filling without tearing but thin enough to crisp up nicely. The key is moderate heat and patience. Too hot, and your tortilla burns before the cheese melts; too cool, and you’ll end up with a soggy result. I like to brush the outside lightly with butter for that golden-brown finish. Once assembled, press down gently with a spatula to ensure good contact between the filling and tortilla, helping the cheese melt evenly and bind everything together.

    Serving Ideas & Creative Variations

    Complementary Toppings and Sides

    Apple Cinnamon Breakfast Quesadillas shine when paired with the right accompaniments. A dollop of Greek yogurt adds a tangy freshness that balances the sweetness perfectly – I prefer it to sour cream for its protein boost and subtle flavor. A drizzle of pure maple syrup takes these into indulgent territory, while a dusting of powdered sugar makes them feel festive. For a complete breakfast, I serve these alongside crispy bacon or breakfast sausage for protein contrast. Fresh berries on the side add bright color and flavor that complements the warm spices. These quesadillas also pair beautifully with a cup of coffee or breakfast tea for a complete morning experience.

    Seasonal and Dietary Adaptations

    These Apple Cinnamon Breakfast Quesadillas can easily adapt to different dietary needs and seasonal availability. For a dairy-free version, use plant-based cheese alternatives and coconut oil instead of butter – the flavor profile changes slightly but remains delicious. In summer, try adding fresh berries alongside the apples for brightness. Fall calls for pear-apple combinations with a touch of nutmeg. Winter variations might include dried cranberries and a hint of orange zest. For those watching carbs, low-carb tortillas work surprisingly well. You can even make these gluten-free by using appropriate tortillas – the filling itself is naturally gluten-free. The versatility makes these quesadillas perfect for serving to guests with varying dietary preferences.

    Storage & Troubleshooting Guide

    Make-Ahead and Reheating Methods

    Apple Cinnamon Breakfast Quesadillas can be prepped ahead for busy mornings. The apple filling can be made up to three days in advance and stored in an airtight container in the refrigerator. When you’re ready to use it, simply warm it slightly before assembling your quesadillas. Fully assembled and cooked quesadillas can be refrigerated for up to two days – though the texture is best when fresh. To reheat, avoid the microwave which will make them soggy. Instead, warm them in a dry skillet over medium-low heat for 2-3 minutes per side, or use a toaster oven at 350°F for about 5 minutes until heated through and crisp again.

    Common Issues and Solutions

    The most frequent challenge with Apple Cinnamon Breakfast Quesadillas is preventing soggy tortillas. The key is ensuring your apple filling isn’t too wet – if needed, let it cool slightly before assembling so excess moisture evaporates. If your cheese isn’t melting properly, try grating it finely rather than using pre-shredded varieties which often contain anti-caking agents. For quesadillas that fall apart during flipping, make sure you’re not overfilling them and give them enough time to seal on the first side before attempting to turn them. Using a wide spatula helps maintain structural integrity. If your apples are too firm after cooking, simply cover the pan for a minute or two to steam them slightly without adding extra liquid.

    Frequently Asked Questions

    What type of apples work best for Apple Cinnamon Breakfast Quesadillas?

    Firm, sweet-tart varieties like Honeycrisp, Gala, or Pink Lady maintain their structure while cooking. Granny Smith provides more tartness if you prefer less sweetness. Avoid softer varieties like McIntosh that break down too quickly.

    Can I make Apple Cinnamon Breakfast Quesadillas without cheese?

    Absolutely! The cheese helps bind ingredients together, but you can substitute nut butter or cream cheese. For dairy-free options, plant-based cream cheese works well, or simply omit and enjoy the apple-cinnamon filling on its own.

    How do I prevent my quesadillas from becoming soggy?

    Cook apples until excess moisture evaporates before assembling. Use moderate heat when cooking the quesadillas, and don’t stack them while hot. Serve immediately for best texture or reheat in a dry skillet.

    Can I freeze these quesadillas for later?

    Yes! Assemble them but don’t cook. Freeze with parchment between each quesadilla, then store in freezer bags for up to 2 months. Cook from frozen in a skillet, adding 1-2 minutes per side.

    What’s the best way to cut Apple Cinnamon Breakfast Quesadillas?

    Let them rest 1-2 minutes after cooking, then use a pizza cutter for clean slices. A sharp knife works too. Cut into triangles or strips depending on whether you’re serving as a meal or finger food.

    Final Thoughts

    Apple Cinnamon Breakfast Quesadillas have earned their place in my regular breakfast rotation because they strike that perfect balance between special and simple. There’s something deeply satisfying about the warm, spiced apple filling against the crisp tortilla exterior that makes ordinary mornings feel like occasions. I love how they bridge the gap between sweet and savory, making them versatile enough to please everyone at the table. Whether you’re cooking for yourself or a crowd, these quesadillas deliver comfort food vibes without complicated techniques or hard-to-find ingredients. Give them a try and discover your own favorite way to enjoy this breakfast twist! Don’t forget to check out more breakfast inspiration on Pinterest.
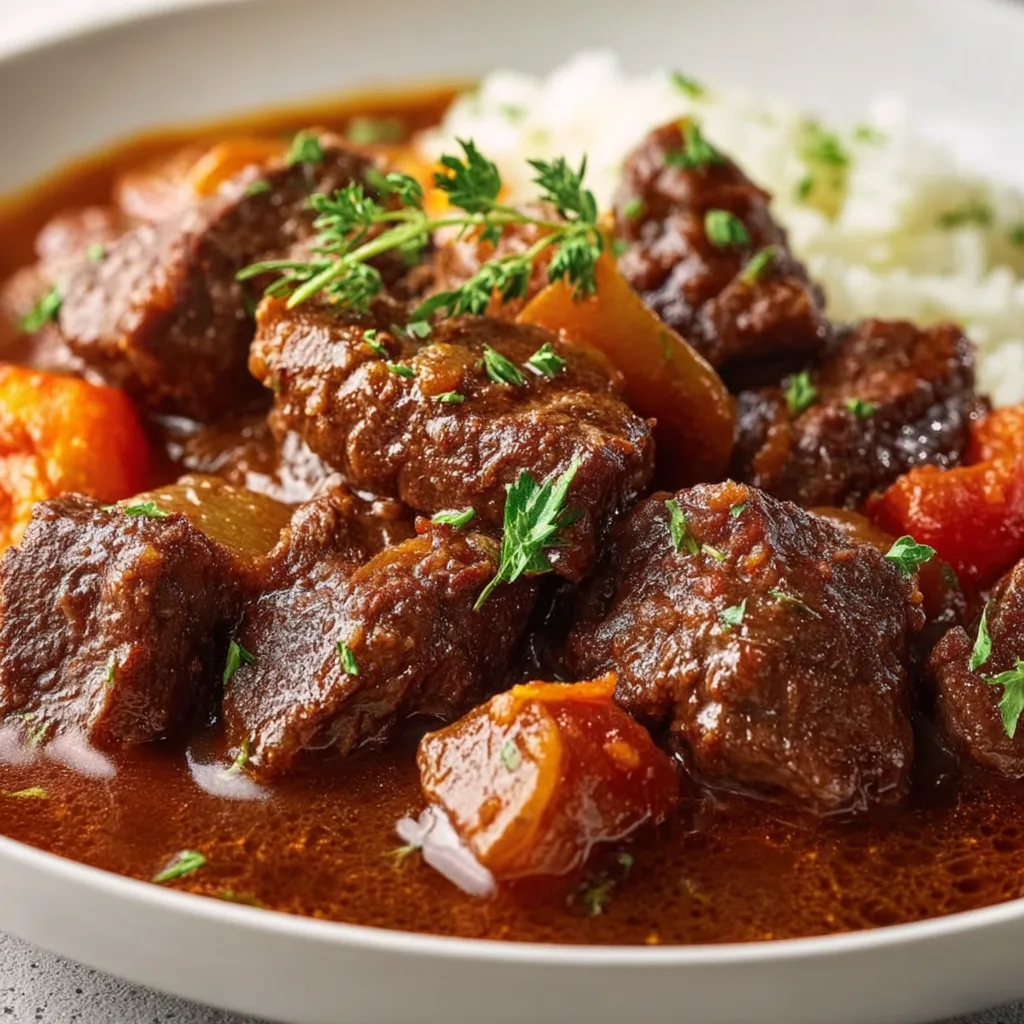
  • Slow Cooker Pepper Steak Recipe That Will Blow Your Mind!

    Slow Cooker Pepper Steak Recipe That Will Blow Your Mind!

    Slow Cooker Pepper Steak Recipe That Will Blow Your Mind!

    Slow Cooker Pepper Steak is one of those magical comfort meals that practically makes itself. The tender strips of beef, vibrant bell peppers, and rich savory sauce come together in a symphony of flavors while your trusty slow cooker does all the work. I first discovered this recipe during a particularly hectic week when my kitchen renovation left me with just a slow cooker and a dream. The aroma that filled my home as this dish simmered all day was nothing short of heavenly. If you’re craving something that delivers maximum flavor with minimum effort, this hearty dish from my collection is exactly what you need.

    Recipe

    Why You’ll Love This Slow Cooker Pepper Steak

    Perfect for Busy Days

    This slow cooker pepper steak is a lifesaver on those days when you’re juggling a million things. Just 15 minutes of morning prep, and you’ll return home to a restaurant-quality meal. The beef becomes incredibly tender as it cooks low and slow, absorbing all those savory flavors from the soy sauce, ginger, and garlic. I love how the bell peppers maintain just enough texture to provide a satisfying contrast to the melt-in-your-mouth beef. My neighbor actually knocked on my door last time I made this, drawn in by the irresistible aroma wafting from my kitchen!

    Budget-Friendly Gourmet

    One of the greatest advantages of slow cooker recipes like this pepper steak is their ability to transform economical cuts of beef into something extraordinary. Chuck roast or flank steak work beautifully here, sliced against the grain for maximum tenderness. The slow cooking process breaks down the tougher fibers, resulting in meat that rivals expensive steakhouse offerings. Plus, bell peppers are often on sale, making this an affordable way to feed a family. I’ve calculated this meal at less than $3 per serving when made with sale ingredients – a fraction of takeout prices!

    Essential Tips & Tricks

    Perfecting the Meat Texture

    For the most tender pepper steak results, slice your beef thinly against the grain before adding it to the slow cooker. This cuts through the muscle fibers and results in meat that practically melts in your mouth. I also recommend browning the meat first in a hot skillet with a touch of oil – this extra step takes just 5 minutes but creates those delicious caramelized flavors that make the dish extraordinary. For maximum convenience, you can even prep and slice everything the night before, storing the components separately in the refrigerator until morning.

    Managing Moisture and Flavor

    The secret to a perfectly balanced slow cooker pepper steak lies in managing the moisture. Too much liquid creates a soupy mess, while too little risks burning. I’ve found that 3/4 cup of beef broth provides the ideal base. Add your bell peppers during the last hour of cooking to keep them vibrant and prevent them from turning to mush. For an extra flavor boost, try adding a tablespoon of oyster sauce alongside the soy sauce – it adds an incredible umami depth that takes this dish to new heights!

    Serving Ideas & Creative Variations

    Perfect Pairings

    This pepper steak creates a beautiful pool of savory sauce that begs to be spooned over something absorbent. Fluffy white rice is the classic choice, but don’t stop there! Try serving it over cauliflower rice for a lower-carb option, or spoon it onto wide egg noodles for a fusion twist. I particularly love it with a side of steamed broccoli that catches all those delicious juices. For a complete meal that will impress dinner guests, pair it with a simple cucumber salad dressed with rice vinegar and sesame oil – the cool crunch perfectly complements the rich, tender beef.

    Exciting Flavor Twists

    While traditional pepper steak is magnificent on its own, don’t be afraid to make it your own! Add a handful of snow peas or sliced mushrooms during the final hour for extra texture and nutrition. For a spicier version, include a teaspoon of sriracha or a sprinkle of red pepper flakes. My personal favorite variation includes a tablespoon of hoisin sauce and a splash of orange juice for a sweet-savory twist that reminds me of my favorite Chinese restaurant. You can even swap the beef for chicken thighs or pork shoulder with delicious results!

    Storage & Troubleshooting Guide

    Storing and Reheating

    This slow cooker pepper steak actually improves overnight as the flavors continue to meld, making it perfect for meal prep. Store leftovers in airtight containers in the refrigerator for up to 4 days, or freeze portions for up to 3 months. When reheating, add a splash of beef broth to restore moisture, and warm gently on the stovetop or microwave until just heated through. I like to prepare a double batch specifically to freeze individual portions for those nights when cooking feels impossible – future you will be incredibly grateful for this delicious homemade freezer meal!

    Common Problems and Solutions

    If your pepper steak sauce is too thin, try this simple fix: mix 1 tablespoon of cornstarch with 2 tablespoons of cold water, then stir this slurry into the slow cooker during the last 30 minutes of cooking with the lid off. For beef that isn’t as tender as you’d like, your cooking time might need extending – tough cuts sometimes need an extra hour or two to reach that perfect texture. If your dish tastes bland, brighten it with a splash of rice vinegar or a squeeze of fresh lime juice just before serving. These acidic notes will wake up all the flavors!

    Frequently Asked Questions

    Can I make Slow Cooker Pepper Steak with frozen meat?

    For safety reasons, I don’t recommend using frozen meat directly in the slow cooker. Always thaw your beef completely in the refrigerator before slicing and cooking to ensure even cooking and proper food safety.

    What’s the best cut of beef for Slow Cooker Pepper Steak?

    Flank steak, chuck roast, or round steak work beautifully. These economical cuts become incredibly tender during the slow cooking process, absorbing all the delicious flavors of the sauce.

    Can I add vegetables other than bell peppers?

    Absolutely! Snow peas, mushrooms, onions, and water chestnuts are excellent additions. Add firmer vegetables earlier in the cooking process and more delicate ones in the last hour.

    How do I prevent my bell peppers from getting mushy?

    Add your bell peppers during the final hour of cooking time. This allows them to soften while still maintaining some texture and their vibrant color.

    Can I make this recipe in an Instant Pot instead?

    Yes! Use the sauté function to brown the meat, then pressure cook on high for 20 minutes with a natural release. Add peppers, then pressure cook for an additional 2 minutes.

    Final Thoughts

    This Slow Cooker Pepper Steak has become one of my most requested recipes for good reason. It transforms simple ingredients into a crave-worthy meal with minimal effort, making it perfect for both weeknight dinners and special occasions. The combination of tender beef, colorful peppers, and that rich, savory sauce creates pure comfort in a bowl. I hope this recipe brings as much joy to your table as it has to mine! For more delicious slow cooker inspiration, be sure to check out my Pinterest collection of comfort food favorites.

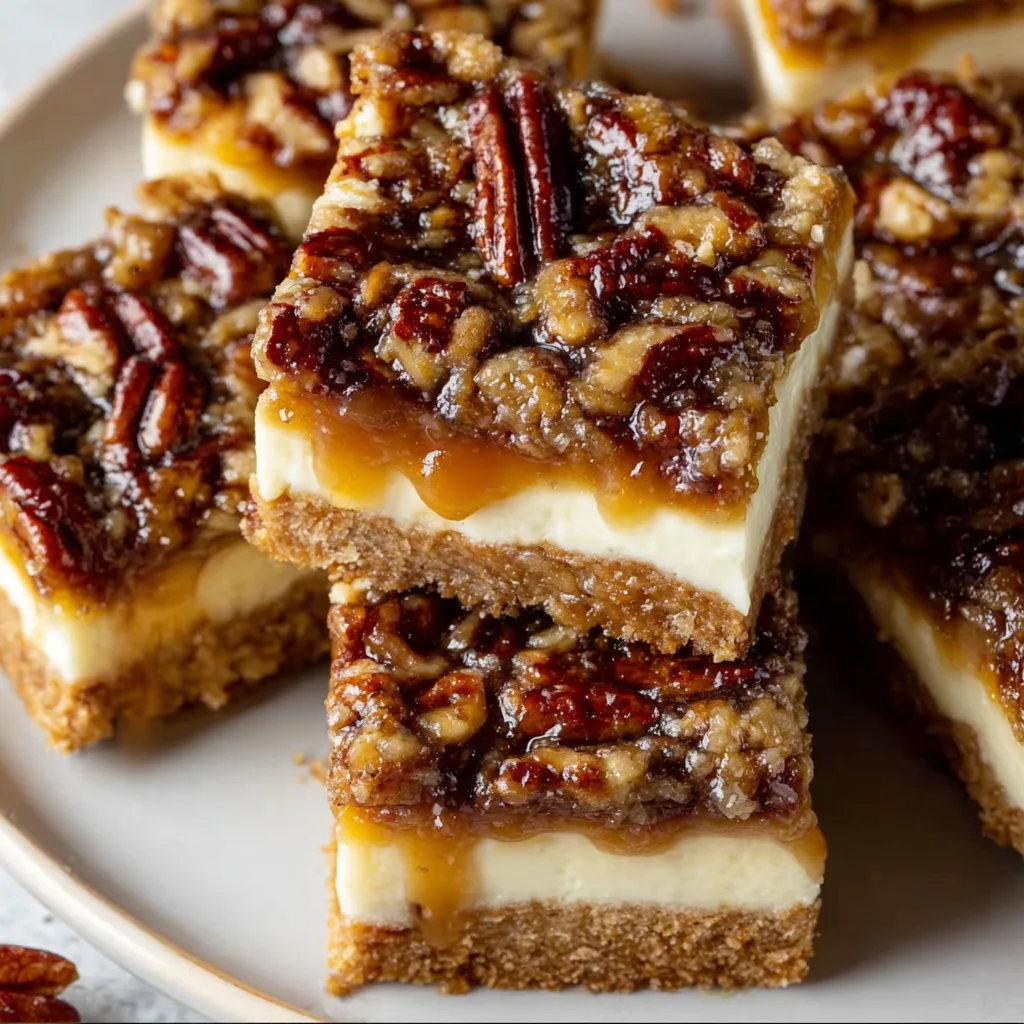
  • Pecan Pie Cheesecake Bars: Irresistibly Creamy & Nutty Delight!

    Pecan Pie Cheesecake Bars: Irresistibly Creamy & Nutty Delight!

    Pecan Pie Cheesecake Bars: Irresistibly Creamy & Nutty Delight!

    Pecan Pie Cheesecake Bars bring together two of my absolute favorite desserts in one irresistible treat. The buttery graham cracker crust, velvety cream cheese layer, and that gooey pecan pie topping create a dessert trifecta that’s simply magical. Every time I make these bars, they disappear faster than I can say “seconds, please!” There’s something about that perfect balance of creamy and crunchy textures that makes these bars impossible to resist. Trust me, once you try these Pecan Pie Cheesecake Bars, they’ll become your new go-to dessert for holidays and gatherings.

    Recipe

    Why You’ll Love These Pecan Pie Cheesecake Bars

    Perfect Flavor Harmony

    The magic of these Pecan Pie Cheesecake Bars lies in their perfect layering. The tangy cream cheese filling provides a beautiful contrast to the sweet, caramel-like pecan topping. I still remember the first time I made these for my sister’s birthday – the look on her face when that first bite combined the silky cheesecake with the crunchy, caramelized pecans was priceless! The graham cracker crust adds that essential buttery foundation that ties everything together. Each bite delivers a symphony of textures and flavors that dance on your tongue.

    Make-Ahead Convenience

    One of the greatest perks of these Pecan Pie Cheesecake Bars is their impressive shelf life. You can prepare them up to three days before your event, making them perfect for busy holiday planning. The flavors actually develop and meld together beautifully as they chill in the refrigerator. Last Thanksgiving, I made them two days ahead, and they were the star dessert – even better than when freshly made! This make-ahead quality means less stress on party day and more time to enjoy with your guests while still serving a showstopping dessert.

    Essential Tips & Tricks

    Perfecting Your Layers

    The key to success with these Pecan Pie Cheesecake Bars is properly setting each layer before adding the next. Make sure your crust is firmly packed and pre-baked until just golden. Cool the cheesecake layer completely before adding the pecan topping – I learned this the hard way when I rushed once and ended up with a swirled mess (delicious, but not what I was going for!). For the pecan layer, cook it until it reaches that perfect thick, syrupy consistency that coats the back of a spoon. This patience ensures distinct, beautiful layers that will impress everyone who takes a slice.

    Temperature Matters

    Room temperature ingredients are absolutely non-negotiable for the cheesecake layer. Cold cream cheese will leave you with lumps that no amount of mixing can salvage. I set out my ingredients at least an hour before baking, sometimes even longer on cold winter days. When baking, resist the urge to open the oven door, as temperature fluctuations can cause cracks. For cooling, a gradual approach works best – let the bars cool in the turned-off oven with the door cracked for about 30 minutes before moving to room temperature. For more temperature-sensitive desserts, check out these Heavenly Chocolate Banana Split Cupcakes.

    Serving Ideas & Creative Variations

    Elegant Presentation Options

    Transform these Pecan Pie Cheesecake Bars from casual to elegant affair-worthy with thoughtful presentation. For dinner parties, I like to cut them into small squares, place each on a doily-lined dessert plate, and add a light dusting of powdered sugar with a fresh mint leaf. For a more dramatic presentation, try warming individual servings for 15 seconds and drizzling with additional caramel sauce. The warm-cool contrast is divine! Serve alongside coffee or a small glass of bourbon for adults – the pairing enhances the caramel notes in the pecan topping beautifully.

    Seasonal Adaptations

    These versatile bars welcome creative twists throughout the year. In fall, I add a teaspoon of pumpkin pie spice to the cheesecake layer for a seasonal touch. For winter holidays, a splash of bourbon in the pecan mixture adds sophisticated warmth. Summer gatherings call for a lighter version – try adding lemon zest to the cheesecake layer and serving with fresh berries. For chocolate lovers, incorporate mini chocolate chips into the cheesecake layer or drizzle with chocolate ganache. For another delicious seasonal treat, these pair wonderfully with Orleans Bread Pudding with Bourbon Sauce.

    Storage & Troubleshooting Guide

    Proper Storage Techniques

    To maintain the perfect texture of your Pecan Pie Cheesecake Bars, proper storage is crucial. Once completely cooled, cover them tightly with plastic wrap or store in an airtight container in the refrigerator for up to 5 days. The plastic wrap should touch the surface of the bars to prevent condensation from forming. For longer storage, these bars freeze beautifully for up to 3 months. I like to cut them into individual portions, wrap each in plastic, then foil, and place in a freezer bag – this way I can thaw just what I need for impromptu dessert cravings!

    Fixing Common Issues

    Even experienced bakers encounter challenges! If your cheesecake layer cracks, don’t panic – the pecan topping will hide imperfections beautifully. For a too-soft pecan layer, refrigerate longer or next time, cook the pecan mixture until slightly thicker. If your crust crumbles when cutting, try chilling the bars longer before slicing, and always use a sharp knife wiped clean between cuts. If the bars seem too sweet, balance with a touch of sea salt sprinkled on top or serve with unsweetened whipped cream. Remember that even “imperfect” bars will taste amazing!

    Frequently Asked Questions

    Can I make Pecan Pie Cheesecake Bars without corn syrup?

    Absolutely! Substitute maple syrup or honey for corn syrup in the pecan layer. The flavor will be slightly different but equally delicious, and many people prefer these natural sweeteners.

    How do I know when the cheesecake layer is properly baked?

    The edges should be set but the center should still have a slight jiggle when gently shaken. It will continue to set as it cools. Overbaking results in a dry, cracked cheesecake.

    Can I use a different crust for these bars?

    Yes! Try a shortbread crust, chocolate graham cracker crust, or even crushed vanilla wafers. Each variation brings a different flavor dimension to the Pecan Pie Cheesecake Bars.

    Are these bars gluten-free?

    Not with traditional graham crackers, but you can easily substitute gluten-free graham crackers for the crust to make a gluten-free version everyone can enjoy.

    How far in advance can I make these for a party?

    These bars taste best when made 1-2 days ahead, allowing flavors to meld. They’ll keep well refrigerated for up to 5 days, making them perfect for advance preparation.

    Final Thoughts

    These Pecan Pie Cheesecake Bars represent the perfect marriage of two beloved desserts, creating something even more extraordinary than its individual components. The combination of textures and flavors makes them irresistible to everyone from casual dessert fans to serious sweet connoisseurs. I’ve watched people who claim they “don’t like cheesecake” or “aren’t pecan pie fans” fall completely in love with these bars. They’ve become my signature dessert for a reason! For more delicious recipes, follow me on Pinterest where I share new creations regularly.

  • Potato Breakfast Casserole: Irresistible Morning Comfort Recipe!

    Potato Breakfast Casserole: Irresistible Morning Comfort Recipe!

    Potato Breakfast Casserole: Irresistible Morning Comfort Recipe!

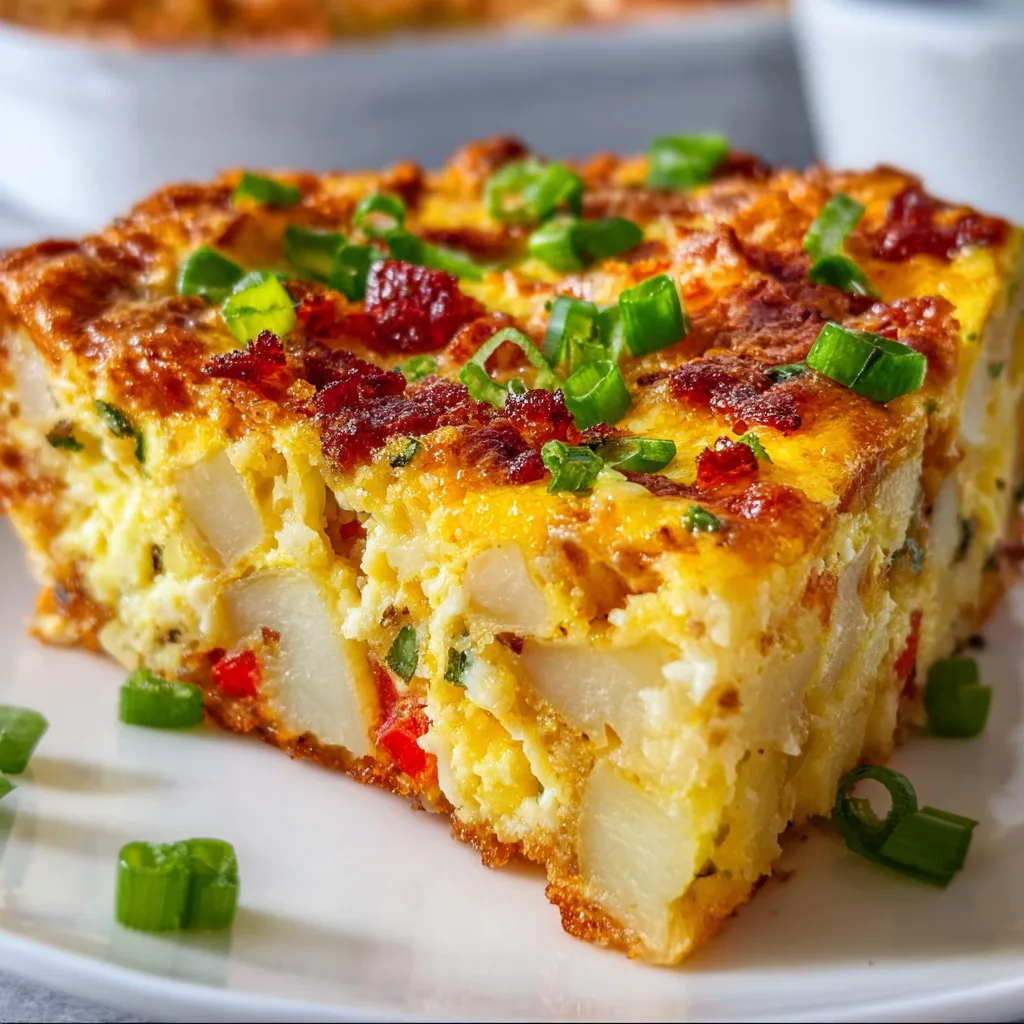
    This Potato Breakfast Casserole is my ultimate weekend comfort food – a golden, bubbling dish that fills my kitchen with the most incredible aroma. I first created this recipe during a snowy cabin getaway when I needed to feed a hungry crowd with minimal fuss. The crispy potato base, fluffy eggs, and melty cheese combination had everyone asking for seconds! It’s become my go-to for lazy Sunday mornings when I want something hearty that doesn’t keep me trapped in the kitchen. The best part? You can prep it the night before and simply pop it in the oven while you enjoy your coffee.

    Recipe

    Why You’ll Love This Potato Breakfast Casserole

    Perfect Make-Ahead Solution

    If you’re like me and morning coordination isn’t your strong suit, you’ll appreciate how this potato breakfast casserole shines as a make-ahead marvel. I often assemble everything the night before, cover it tightly, and refrigerate. The flavors actually develop beautifully overnight as the potatoes absorb all those savory seasonings. When morning comes, all that’s left is to bake until golden and bubbly. This has saved countless family brunches when I’d rather be enjoying conversation than frantically cooking while guests arrive.

    Customizable for Every Taste

    What makes this potato casserole truly special is how easily it adapts to whatever ingredients you have on hand. The base recipe calls for crispy hash browns, eggs, cheese, and breakfast meat, but I’ve made countless variations. Sometimes I go vegetarian with bell peppers, spinach, and mushrooms. Other times, I spice things up with jalapeños and pepper jack. My husband loves when I add crumbled sausage and cream cheese for extra richness. The potato base provides the perfect canvas for your creativity.

    Essential Tips & Tricks

    Getting the Perfect Texture

    The secret to an exceptional potato breakfast casserole lies in the texture contrast. For crispy edges and a tender center, I pre-cook the hash browns in a bit of butter until golden before adding them to the baking dish. Another game-changer? Squeezing excess moisture from your potatoes using a clean kitchen towel. This simple step prevents that dreaded soggy bottom! I also recommend letting the casserole rest for 10-15 minutes after baking – this helps everything set properly so you get perfect, clean slices.

    Flavor-Boosting Techniques

    Elevating your breakfast casserole is all about building layers of flavor. I always sauté onions until translucent before adding them – the caramelization adds incredible depth. My other non-negotiable? Seasoning each component separately rather than just sprinkling everything on top. The potatoes need their own salt and pepper, as does the egg mixture. For an umami boost, add a dash of Worcestershire sauce to your eggs or sprinkle some garlic powder over your potatoes. These small touches make a remarkable difference.

    Serving Ideas & Creative Variations

    Complementary Side Dishes

    A potato breakfast casserole pairs beautifully with lighter sides that balance its heartiness. I love serving it alongside a simple arugula salad dressed with lemon and olive oil – the peppery greens and bright acidity cut through the richness perfectly. Fresh fruit is another must-have; berries or citrus segments add a sweet-tart contrast. For special occasions, I’ll include warm buttered toast and a pitcher of mimosas. The combination makes for a gorgeous brunch spread that feels both indulgent and balanced.

    Seasonal Adaptations

    One of my favorite things about this casserole is how easily it transitions through the seasons. In spring, I fold in fresh asparagus tips and goat cheese. Summer calls for garden-fresh tomatoes, basil, and mozzarella for a caprese-inspired version. Fall brings sweet potato substitutions with sage and gruyère, while winter means heartier additions like roasted brussels sprouts and smoky bacon. The potato base remains constant, but these seasonal swaps keep the recipe exciting all year round.

    Storage & Troubleshooting Guide

    Proper Storage Methods

    Your potato breakfast casserole will stay fresh in the refrigerator for up to 4 days when stored properly. I recommend cutting it into individual portions before refrigerating – this makes reheating much easier. Always allow the casserole to cool completely before covering with plastic wrap or transferring to airtight containers. For longer storage, you can freeze portions for up to 3 months. I wrap individual slices in plastic, then foil, labeling each with the date for easy tracking.

    Reheating Without Drying Out

    The key challenge when reheating any potato casserole is maintaining moisture while restoring that lovely texture. For refrigerated portions, I microwave at 70% power with a damp paper towel over the top to create steam. For frozen pieces, thaw overnight in the refrigerator first. My preferred method for larger portions is oven reheating at 325°F, covered with foil for the first 15 minutes, then uncovered for 5-10 minutes to crisp up the top. A sprinkle of fresh cheese before the final minutes works wonders!

    Frequently Asked Questions

    Can I use fresh potatoes instead of frozen hash browns?

    Yes! Grate fresh potatoes, rinse under cold water, then thoroughly pat dry. Pre-cook them in a skillet until barely golden to remove excess moisture before assembling your casserole.

    How do I know when my potato breakfast casserole is done?

    The casserole is done when the edges are golden brown, the center is set (not jiggly), and a knife inserted in the middle comes out clean. Internal temperature should reach 160°F.

    Can I assemble this the night before?

    Absolutely! Prepare everything, cover tightly, and refrigerate overnight. Add an extra 10-15 minutes to the baking time since it’ll be cold from the refrigerator.

    What’s the best cheese to use?

    Sharp cheddar provides the best flavor, but a mixture of cheeses like monterey jack, gruyère, or colby creates wonderful complexity. Avoid pre-shredded cheese as it contains anti-caking agents.

    Why is my potato breakfast casserole watery?

    This typically happens when potatoes aren’t properly dried or vegetables release too much moisture. Pre-cook watery vegetables like mushrooms and spinach, and always squeeze excess moisture from potatoes.

    Final Thoughts

    This potato breakfast casserole has become more than just a recipe in my household – it’s a tradition that brings everyone to the table with smiles. The versatility means it never gets boring, while the make-ahead convenience makes it practical for both lazy weekends and special celebrations. I’ve shared this recipe countless times on Pinterest where it’s become a favorite. Whether you’re feeding a crowd or planning breakfast meal-prep for busy mornings, this casserole delivers comfort in every bite.

  • Pink Coconut Cake Bars That Will Melt Your Heart!

    Pink Coconut Cake Bars That Will Melt Your Heart!

    Pink Coconut Snowball Cake Bars That Will Melt Your Heart!

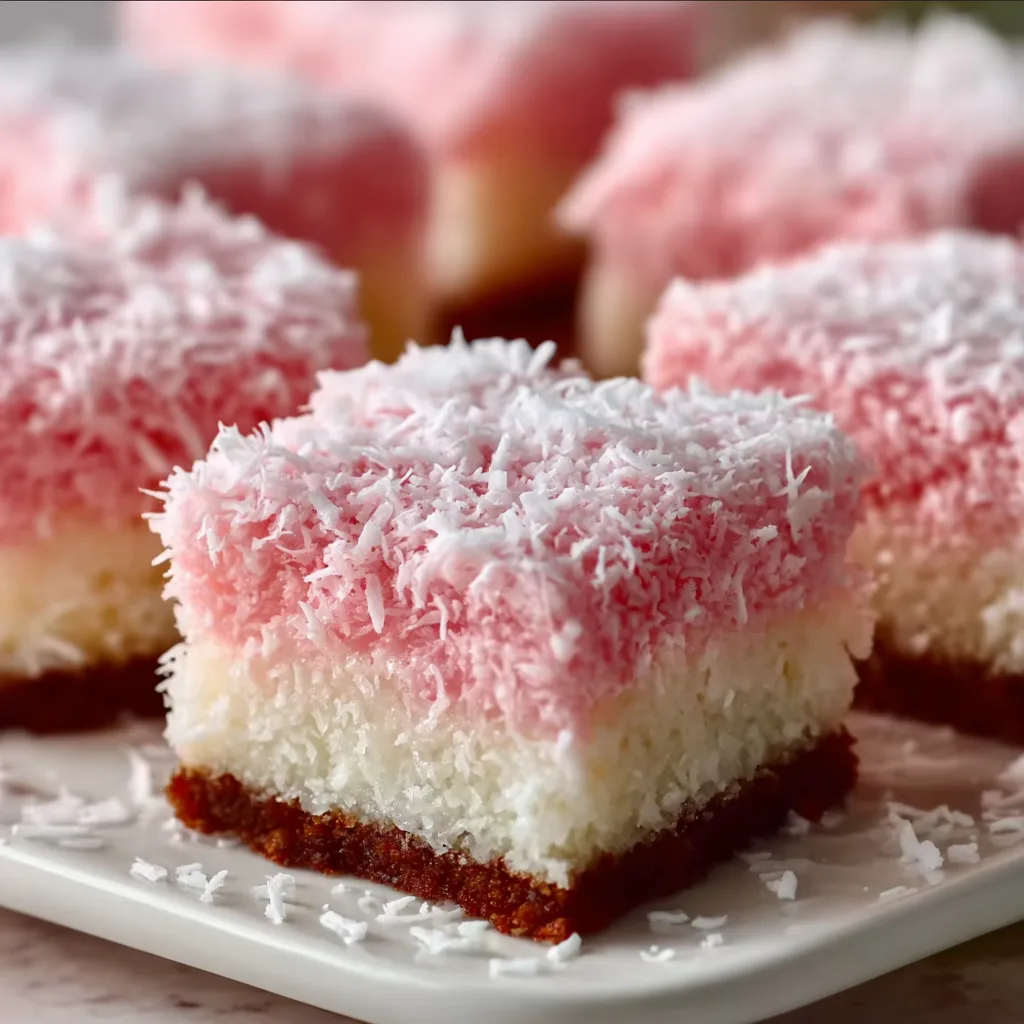
    Pink Coconut Snowball Cake Bars have become my absolute obsession this winter season! These delightful treats combine the nostalgic charm of those classic pink snowball cakes with the convenience of easy-to-serve bars. The moment I bit into one, I was transported back to childhood birthday parties, but with a grown-up twist that had me reaching for seconds. The pillowy soft cake base, creamy filling, and that signature pink coconut coating create a dessert that’s both visually stunning and irresistibly tasty. If you’re looking for something that will make everyone at your gathering smile, these heavenly bars are guaranteed to steal the show!

    Recipe

    Why You’ll Love These Pink Coconut Snowball Cake Bars

    Perfect Balance of Flavors and Textures

    There’s something magical about the way these Pink Coconut Snowball Cake Bars come together. The tender vanilla cake provides the perfect foundation, while the marshmallow cream filling adds a sweet, cloud-like layer that melts in your mouth. What I adore most is the contrast between the soft interior and the slightly chewy coconut exterior. The pink-tinted coconut isn’t just for looks—it adds a subtle tropical flavor that complements the vanilla beautifully. I’ve watched friends close their eyes in pure bliss with that first bite, savoring the perfect balance of sweetness without being overwhelmingly sugary.

    Stunning Visual Appeal Without Complicated Techniques

    Let’s be honest—we eat with our eyes first, and these Pink Coconut Snowball Cake Bars deliver major wow factor with minimal effort. The vibrant pink coating makes them perfect for everything from baby showers to Valentine’s Day to everyday pick-me-ups. What I love most is how impressed everyone thinks I am when I serve these, even though the process is surprisingly straightforward! The natural white of the coconut takes food coloring beautifully, creating that signature pink hue that’s both nostalgic and Instagram-worthy. These bars bring pure joy before anyone even takes a bite—though the flavor absolutely lives up to the visual promise.

    Essential Tips & Tricks

    Perfecting the Coconut Coating

    Getting that perfect Pink Coconut Snowball Cake Bars coating is all about technique. I’ve found that lightly toasting half the coconut before coloring gives the bars more depth of flavor and a wonderful textural contrast. When adding food coloring, place the coconut in a zip-top bag with a few drops of gel coloring (it’s more concentrated than liquid) and massage it through—this ensures even distribution without making the coconut soggy. For the best adhesion, make sure your frosting layer is slightly tacky but not completely set when you press the coconut on. I learned this the hard way after my first batch had patchy coverage that left me disappointed!

    Achieving the Perfect Cake Texture

    The foundation of extraordinary Pink Coconut Snowball Cake Bars is a cake that’s moist but sturdy enough to hold up to handling. The secret ingredient is sour cream, which creates an incredibly tender crumb while providing enough structure. Room temperature ingredients are non-negotiable here—cold eggs or butter will create a dense, uneven texture. I recommend sifting the dry ingredients to avoid lumps and incorporate air. For the ultimate texture, don’t overmix once the dry ingredients meet the wet ones. I’ve found that using a light hand like you would with brownies results in bars that stay moist for days without becoming gummy or dry.

    Serving Ideas & Creative Variations

    Seasonal Adaptations

    Pink Coconut Snowball Cake Bars are wonderfully versatile for any occasion. For holiday celebrations, try changing the coconut color—red and green for Christmas, pastels for Easter, or orange for Halloween. The cake base itself can be flavored with different extracts like almond or lemon to match seasonal themes. My family went wild for the peppermint version I made last December, with crushed candy canes sprinkled over the pink coconut. Summer gatherings call for a tropical twist—try adding a thin layer of pineapple preserves between the cake and frosting. These adaptations keep the classic appeal while making the bars feel special for any time of year.

    Elegant Presentation Techniques

    Elevate your Pink Coconut Snowball Cake Bars from casual treat to elegant dessert with thoughtful presentation. Individual servings on small dessert plates with a light dusting of powdered sugar and fresh berries make them dinner-party worthy. For a beautiful display, try arranging them on a tiered stand with fresh flowers between the levels. I once served these at my sister’s bridal shower on vintage china with edible rose petals scattered around—the combination of the pink bars with the delicate flowers had everyone reaching for their cameras before diving in! For an extra touch of luxury, serve with a side of whipped cream or vanilla bean ice cream.

    Storage & Troubleshooting Guide

    Keeping Your Bars Fresh

    Maintaining the perfect texture of Pink Coconut Snowball Cake Bars requires proper storage. At room temperature, they’ll stay perfectly moist for up to 3 days when stored in an airtight container with parchment paper between layers to prevent sticking. For longer storage, refrigeration works beautifully—just bring them to room temperature before serving to allow the flavors to fully bloom. If you notice the coconut starting to dry out slightly, lightly mist the bars with water using a clean spray bottle before returning them to their container. I’ve found that freezing works surprisingly well too—individually wrap bars in plastic, then foil, and they’ll keep their texture for up to 2 months.

    Solving Common Problems

    Even experienced bakers encounter challenges with Pink Coconut Snowball Cake Bars. If your coconut won’t stick properly, the likely culprit is frosting that’s too firm—try warming your offset spatula in hot water before spreading the frosting to create a tackier surface. For bars that seem dry, brush a simple syrup (equal parts sugar and water, heated until dissolved) over the cake before frosting. Coconut turning soggy usually means moisture is getting trapped—make sure bars are completely cool before coating and storing. If the pink color bleeds into the cake, you’re probably using liquid food coloring that’s too concentrated—switch to gel and use it sparingly, or dry the tinted coconut on paper towels before applying.

    Frequently Asked Questions

    Can I make Pink Coconut Snowball Cake Bars ahead of time?

    Absolutely! These bars actually improve with a day of rest as flavors meld. Make them up to 3 days ahead and store in an airtight container at room temperature or refrigerate for up to a week.

    What’s the best food coloring to use for the pink coconut?

    Gel food coloring works best as it provides vibrant color without adding excess moisture that can make the coconut soggy. Start with just a tiny amount—you can always add more!

    Can I freeze Pink Coconut Snowball Cake Bars?

    Yes! Wrap individual bars in plastic wrap, then foil, and freeze for up to 2 months. Thaw at room temperature for about an hour before serving.

    How do I prevent the coconut from falling off?

    Make sure your frosting is slightly tacky when you apply the coconut. Press it gently but firmly into the frosting, and refrigerate briefly afterward to help it set.

    Are there dairy-free alternatives for making these bars?

    Definitely! Use plant-based butter, coconut cream instead of sour cream, and dairy-free cream cheese for the frosting. The results are just as delicious with these substitutions.

    Final Thoughts

    These Pink Coconut Snowball Cake Bars have become my go-to when I want to bring something that combines nostalgia with a touch of elegance. There’s something special about watching people’s faces light up when they spot that distinctive pink coconut coating, knowing the delightful taste experience that awaits them. I encourage you to make these your own—play with colors, flavors, and presentations while keeping the core charm that makes these bars so beloved. Share your creations on Pinterest and spread the joy these delightful treats bring!

  • Crispy Hot Honey Feta Chicken That Will Blow Your Mind!

    Crispy Hot Honey Feta Chicken That Will Blow Your Mind!

    Crispy Hot Honey Feta Chicken That Will Blow Your Mind!

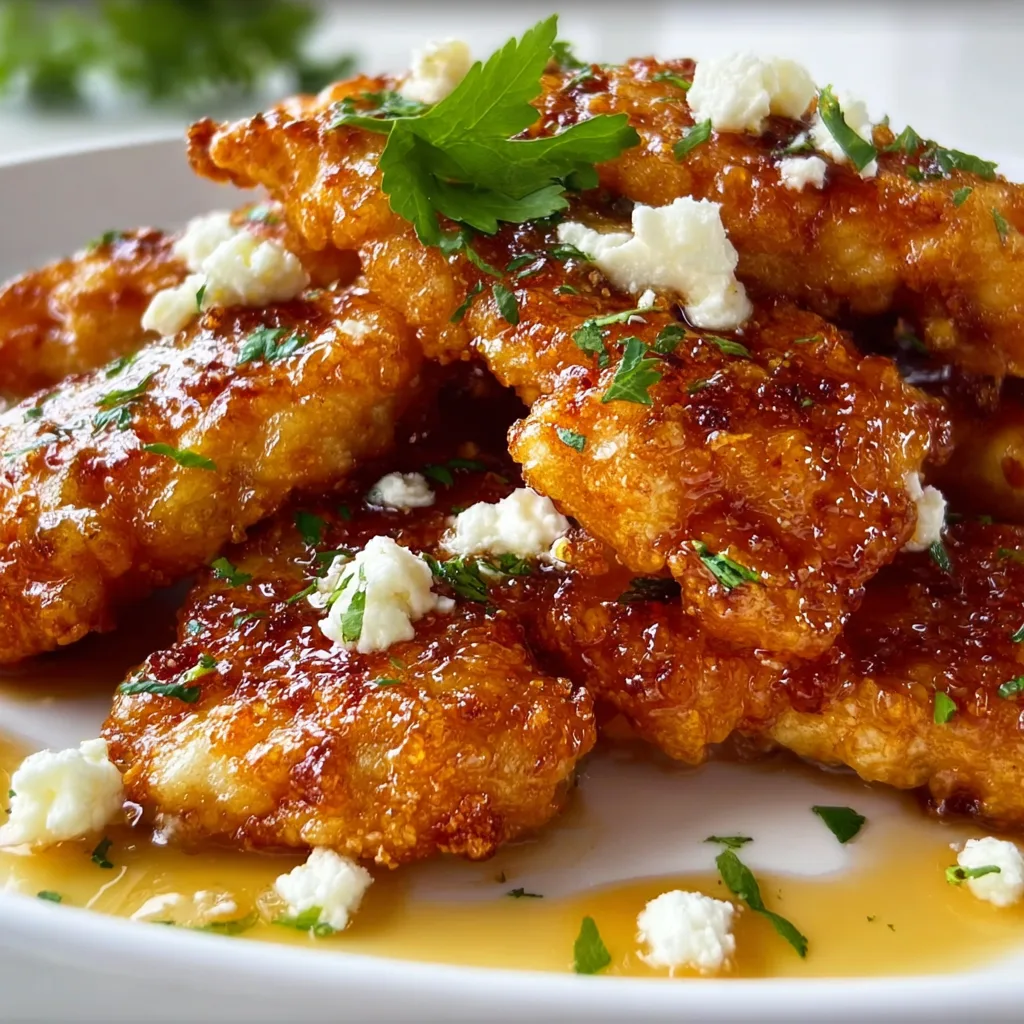
    Crispy Hot Honey Feta Chicken combines everything I love about comfort food – golden, crunchy chicken cutlets drizzled with spicy-sweet honey and topped with crumbled feta that gets slightly melty against the hot surface. The first time I made this for my family, my kitchen filled with that irresistible aroma of seasoned breadcrumbs hitting hot oil. My husband walked in, took one deep breath, and said, “Whatever that is, I want it now!” The perfect balance of heat, sweetness, and tangy cheese makes this dish an absolute showstopper that’s surprisingly simple to prepare. If you love the combination of sweet and spicy, check out my Sausage Ricotta Honey Hot Pizza too!

    Recipe

    Why You’ll Love This Crispy Hot Honey Feta Chicken

    A Symphony of Textures and Flavors

    The magic of this Crispy Hot Honey Feta Chicken lies in its contrasting elements that somehow work in perfect harmony. The exterior crunch gives way to juicy, tender chicken inside, while the hot honey creates a glossy, sticky coating that clings to every bite. I love watching the feta slowly soften against the warm chicken without fully melting. The tangy, salty cheese cuts through the sweetness of the honey, creating that perfect bite that makes you close your eyes and savor the moment. It’s comfort food elevated to something special enough for guests.

    Quick Enough for Weeknights, Impressive Enough for Company

    What I adore about this Crispy Hot Honey Feta Chicken is how it transforms a basic chicken dinner into something that feels restaurant-worthy in under 30 minutes. The ingredients are pantry staples, but the combination feels fresh and exciting. The visual appeal alone – that golden crust, the amber honey drizzle, and the snow-white feta crumbles – makes this dish Instagram-worthy without any fussy techniques. I’ve served this on busy Tuesdays and for Saturday dinner parties with equal success.

    Essential Tips & Tricks

    Perfecting the Crispy Coating

    For truly Crispy Hot Honey Feta Chicken, don’t skip pounding the chicken to even thickness – this ensures perfect cooking and maximum crunch. My secret weapon is a double dredge – flour, then egg, then a mixture of panko and regular breadcrumbs for varied texture. Make sure your oil is hot enough before adding chicken (test with a breadcrumb – it should sizzle immediately). Don’t crowd the pan! Work in batches to maintain that golden crust. The sound of the sizzle as the chicken hits the oil is your reassurance that crispiness is on its way.

    Balancing the Hot Honey Drizzle

    The hot honey component of Crispy Hot Honey Feta Chicken requires a delicate balance. I recommend starting with good-quality honey and infusing it with your preferred heat source – crushed red pepper flakes, cayenne, or even a dash of hot sauce. Warm it gently; don’t boil it. The honey should be loose enough to drizzle but not so hot that it loses its viscosity. For a milder version that’s still flavorful, try my Sticky Honey Garlic Steak and Rotini approach to sweet heat balance.

    Serving Ideas & Creative Variations

    Perfect Pairings for a Complete Meal

    Crispy Hot Honey Feta Chicken pairs beautifully with sides that complement its flavor profile. I love serving it with a crisp arugula salad dressed simply with lemon and olive oil – the peppery greens cut through the richness perfectly. For heartier appetites, roasted lemon potatoes or a simple orzo with herbs make excellent accompaniments. The chicken also works wonderfully sliced over pasta tossed with a light garlic oil. For an impressive spread, add my Crispy Garlic Air Fryer Broccoli on the side.

    Exciting Twists on the Classic

    While the traditional Crispy Hot Honey Feta Chicken is divine, don’t be afraid to experiment! Try using different cheeses – goat cheese adds tangy creaminess, while blue cheese brings bold flavor. The hot honey can be customized with garlic, herbs, or even a splash of bourbon for depth. For a fun presentation, slice the chicken and serve it in warm pitas with cucumber, tomatoes, and a drizzle of tzatziki. You can also transform this into sliders by serving on mini buns with a slice of pickle for a crowd-pleasing appetizer.

    Storage & Troubleshooting Guide

    Keeping It Crispy for Leftovers

    Storing Crispy Hot Honey Feta Chicken properly ensures you can enjoy that delicious crunch even the next day. Allow the chicken to cool completely before refrigerating in an airtight container, separating layers with parchment paper. For reheating, skip the microwave – it’ll make your beautiful crust soggy! Instead, place in a 350°F oven for 10-15 minutes until heated through. I recommend adding the feta and hot honey fresh after reheating for the best texture and flavor profile. Properly stored, the chicken will maintain quality for up to 3 days.

    Solving Common Cooking Challenges

    If your Crispy Hot Honey Feta Chicken coating is falling off, your pan likely wasn’t hot enough when you added the chicken. The immediate sear is crucial for adhering the breading. Another tip: let the breaded chicken rest for 5-10 minutes before frying to help the coating set. If your honey sauce is too spicy, temper it with a touch more honey or a small pat of butter. For chicken that’s browning too quickly on the outside but remains undercooked inside, lower the heat and finish cooking with a lid to trap heat.

    Frequently Asked Questions

    Can I make Crispy Hot Honey Feta Chicken in an air fryer?

    Absolutely! Spray the breaded chicken with cooking oil and air fry at 380°F for about 12 minutes, flipping halfway. You’ll get a similar crunch with less oil.

    What’s the best chicken cut to use?

    Boneless, skinless chicken breasts work best when pounded thin. Thighs are a juicier alternative but may need slightly longer cooking time.

    How spicy is the hot honey?

    The heat level is customizable. Start with 1 teaspoon of red pepper flakes per ½ cup honey and adjust to your preference.

    Can I prepare components ahead of time?

    You can bread the chicken up to 4 hours ahead and refrigerate. The hot honey can be made 2 weeks in advance and stored in a jar.

    What can I substitute for feta in Crispy Hot Honey Feta Chicken?

    Goat cheese, ricotta salata, or even crumbled queso fresco work well. For a dairy-free version, try a sprinkle of nutritional yeast.

    Final Thoughts

    Crispy Hot Honey Feta Chicken represents what I love most about cooking – simple ingredients transformed into something memorable through technique and creativity. The combination of textures and flavors creates a dish that feels special without being complicated. Every time I serve it, I’m reminded that good food doesn’t need to be fussy to be impressive. I hope this recipe brings the same joy to your table that it has to mine! For more delicious inspiration, follow me on Pinterest where I share all my favorite comfort food creations.

  • Garlic Butter Steak Bites & Shell Pasta | Irresistibly Delicious!

    Garlic Butter Steak Bites & Shell Pasta | Irresistibly Delicious!

    Garlic Butter Steak Bites & Shell Pasta | Irresistibly Delicious!

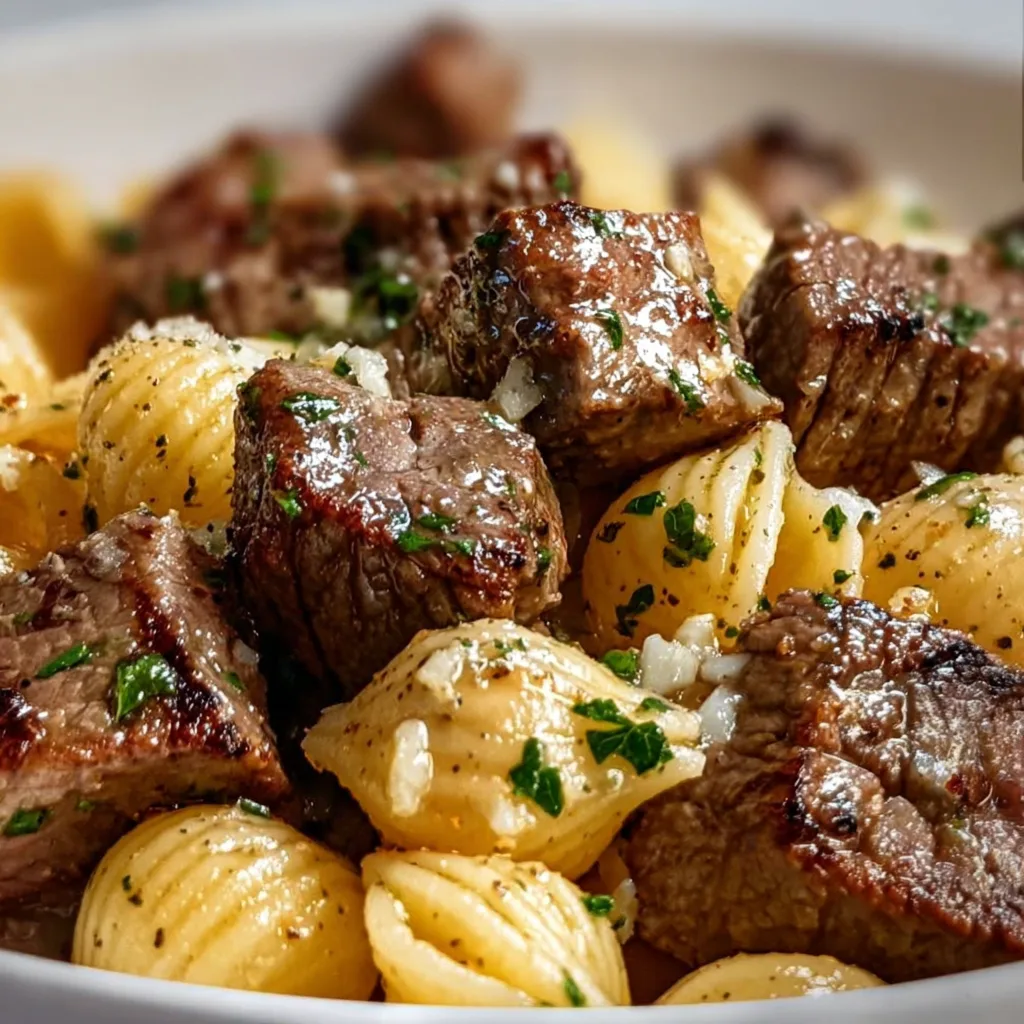
    Garlic Butter Steak Bites & Shell Pasta is the ultimate comfort food that combines tender, juicy steak with al dente pasta shells, all coated in a rich, garlicky butter sauce that will make your taste buds dance with joy. I discovered this recipe on a rainy Sunday when I needed something quick yet indulgent to lift my spirits. The way the shell pasta cradles little pools of that velvety sauce while the steak adds a satisfying chew makes this dish absolutely irresistible. It’s become my go-to for both weeknight dinners and casual entertaining because it feels special without requiring hours in the kitchen.

    Recipe

    Why You’ll Love This Garlic Butter Steak Bites & Shell Pasta

    Perfect Balance of Flavors and Textures

    This dish delivers an incredible harmony of flavors that will satisfy even the pickiest eaters. The tender steak bites develop a beautiful caramelized crust when seared at high heat, while remaining juicy inside. The shell pasta isn’t just a carb filler—it’s specifically chosen because those little pockets capture the garlic butter sauce perfectly. I love how each bite offers multiple textures: the slight chew of perfectly cooked pasta, the tenderness of the steak, and occasionally that delightful crunch when you hit a bit of caramelized garlic. It’s a textural symphony that keeps you coming back for more.

    Quick and Impressive Meal Solution

    When life gets hectic but you still want something that feels special, Garlic Butter Steak Bites & Shell Pasta is your answer. The entire dish comes together in under 30 minutes, making it perfect for busy weeknights. Yet it’s impressive enough for guests, who will think you spent hours in the kitchen! I’ve served this at last-minute dinner gatherings and received more compliments than dishes that took triple the effort. The rich aroma of garlic butter sizzling in the pan creates an inviting atmosphere that makes everyone feel instantly at home and eager to dig in.

    Essential Tips & Tricks

    Selecting and Preparing the Perfect Ingredients

    Start with the right cut of beef—sirloin or ribeye works beautifully for this dish. Look for well-marbled pieces that will remain juicy when quickly cooked. Room temperature steak sears more evenly, so take it out of the refrigerator 20-30 minutes before cooking. For the pasta, slightly undercook it by 1 minute less than package directions since it will continue cooking when tossed with the hot sauce. Fresh garlic makes a world of difference compared to pre-minced varieties, and European-style butter creates a richer sauce that clings beautifully to both the steak and pasta shells.

    Mastering the Cooking Technique

    The secret to perfect Garlic Butter Steak Bites & Shell Pasta lies in the cooking sequence. Always cook in batches to avoid overcrowding, which steams rather than sears the meat. Use a screaming hot pan to get that gorgeous caramelization on the steak bites—I’m talking about a pan so hot that the butter sizzles instantly. For the garlic, add it only after reducing the heat to prevent burning, which creates bitterness. When combining everything, toss gently to coat the pasta shells without breaking them, allowing those little pockets to fill with the luscious sauce. For more protein-packed comfort food ideas, check out these Power-Packed High Protein Cheesy Chicken Potatoes.

    Serving Ideas & Creative Variations

    Complementary Side Dishes

    This hearty main dish pairs beautifully with lighter sides that balance its richness. A simple arugula salad dressed with lemon juice and olive oil provides a peppery contrast that cuts through the buttery sauce. Roasted asparagus or broccolini adds color and nutrition while soaking up any extra sauce on your plate—no wasting that liquid gold! For a complete meal that still feels light, I often serve a side of garlic bread for sauce-mopping purposes. When entertaining, I arrange everything on a large wooden board for a casual, interactive dining experience that always impresses guests.

    Exciting Flavor Variations

    While the classic garlic butter version is divine, don’t be afraid to experiment with flavor profiles. Add a Mediterranean twist by incorporating sun-dried tomatoes, crumbled feta, and fresh basil at the end. For heat lovers, red pepper flakes or a dash of cajun seasoning transforms the dish entirely. You could also try a mushroom variation with sautéed cremini mushrooms and a splash of white wine in the sauce. For seafood enthusiasts, try the Garlic Butter Steak Bites and Shrimp version that combines the best of land and sea in one incredible dish.

    Storage & Troubleshooting Guide

    Proper Storage and Reheating Methods

    This dish is best enjoyed fresh, but leftovers can still be delicious when stored properly. Place cooled leftovers in an airtight container and refrigerate for up to 3 days. When reheating, add a splash of beef broth or water to revitalize the sauce that may have been absorbed by the pasta. Gentle reheating is key—use a covered skillet over medium-low heat rather than the microwave, which can toughen the steak. For meal prep, consider keeping the steak bites separate from the dressed pasta, combining them only upon reheating for the best texture preservation.

    Common Issues and Easy Fixes

    If your steak bites turn out tough, you’ve likely overcooked them or cut them too small. Aim for 1-inch chunks and cook them quickly over high heat for just 1-2 minutes per side. Sauce breaking or appearing greasy usually means the heat was too high when adding the butter—next time, remove the pan from heat briefly before adding butter. If your pasta shells stick together, you probably didn’t use enough cooking water or oil after draining. A quick fix is tossing the pasta with a little olive oil immediately after draining and separating any clumps before adding to the sauce.

    Frequently Asked Questions

    What cut of beef works best for Garlic Butter Steak Bites & Shell Pasta?

    Sirloin, ribeye, or New York strip work best due to their tenderness and marbling. Cut into 1-inch cubes for the perfect bite-sized pieces that cook quickly while remaining juicy inside.

    Can I substitute the shell pasta with another type?

    Yes! While shells capture the sauce beautifully, you can use penne, farfalle, or orecchiette. Avoid long pasta like spaghetti, as it doesn’t hold the chunky sauce components as effectively.

    How do I prevent the garlic from burning?

    Add garlic only after reducing the heat and cooking the steak. Alternatively, add it just 30 seconds before removing the pan from heat to preserve its flavor without burning.

    Is there a dairy-free version of this recipe?

    Substitute butter with olive oil and a dairy-free butter alternative. The flavor profile will change slightly, but you’ll still get a delicious meal with similar richness.

    Can I make Garlic Butter Steak Bites & Shell Pasta ahead for a party?

    Prepare components separately—cook pasta al dente and toss with olive oil, and prepare the steak separately. Combine with freshly made sauce just before serving for best results.

    Final Thoughts

    Garlic Butter Steak Bites & Shell Pasta represents comfort food at its finest—simple ingredients transformed into something truly special through thoughtful preparation. I love how this dish brings together the luxury of steak with the homey comfort of pasta in a way that feels both indulgent and approachable. Whether you’re cooking for one or hosting friends, this recipe delivers maximum flavor with minimal fuss. Share your creations with us on Pinterest and let me know what variations you’ve tried!

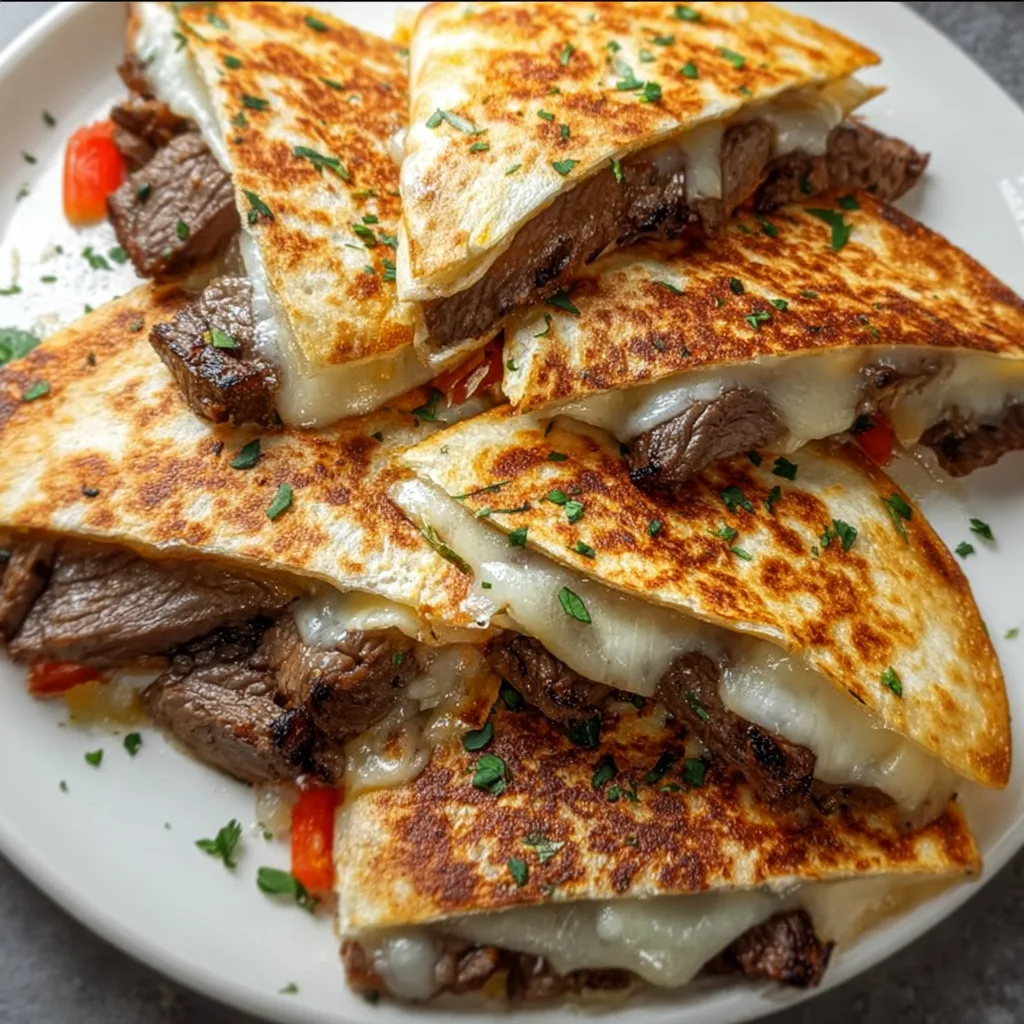
  • Steak Cheese Quesadillas Blackstone: Irresistibly Crispy & Juicy!

    Steak Cheese Quesadillas Blackstone: Irresistibly Crispy & Juicy!

    Steak Cheese Quesadillas Blackstone: Irresistibly Crispy & Juicy!

    Steak Cheese Quesadillas Blackstone have completely transformed my outdoor cooking game! There’s something magical about that sizzle when tender strips of seasoned steak and gooey cheese hit that hot griddle surface. I discovered this recipe last summer when hosting an impromptu backyard gathering, and it’s been my go-to ever since. The Blackstone griddle creates the perfect crispy exterior while keeping everything inside melty and delicious. If you’re looking for a crowd-pleaser that brings restaurant-quality results right to your patio, these quesadillas are about to become your new obsession.

    Recipe

    Why You’ll Love This Steak Cheese Quesadillas Blackstone

    Perfect Texture Combination

    The Blackstone griddle creates a texture paradise that’s impossible to achieve with other cooking methods. The flat, evenly-heated surface delivers that restaurant-quality crisp on your tortillas while maintaining that perfect golden color. I still remember the first time I made these—the satisfying crunch as I cut through the tortilla giving way to that molten cheese pull that had my guests reaching for seconds before they’d finished firsts! The steak stays juicy and tender inside while the exterior gets those beautiful caramelized edges. It’s a textural symphony that makes these steak cheese quesadillas absolutely irresistible.

    Quick & Impressive Results

    One of the greatest joys of making steak cheese quesadillas on a Blackstone is how quickly impressive results come together. From prep to plate, you’re looking at under 30 minutes, even when cooking for a crowd. The spacious cooking surface means you can make multiple quesadillas simultaneously—a game-changer when entertaining! I’ve converted even my most kitchen-shy friends into Blackstone believers after showing them how easy it is to flip a perfectly golden quesadilla with confidence. The speed-to-impressiveness ratio here is off the charts, making this recipe perfect for both weeknight dinners and weekend gatherings.

    Essential Tips & Tricks

    Mastering the Steak

    The foundation of exceptional steak cheese quesadillas Blackstone starts with properly prepared beef. I recommend using flank or skirt steak sliced against the grain into thin strips—this ensures maximum tenderness. Season generously with salt, pepper, garlic powder, and a hint of cumin at least 15 minutes before cooking to allow flavors to penetrate. The Blackstone’s high, even heat creates beautiful caramelization on the steak in just 2-3 minutes per side. Don’t overcrowd the griddle! Work in batches if needed, allowing each piece of steak to make full contact with the cooking surface for that perfect sear before assembling your quesadillas.

    Temperature Control Secrets

    Mastering temperature zones on your Blackstone is the secret to quesadilla perfection. I’ve learned through many (delicious) trials that medium-high heat (around 375°F) works best for the initial steak sear, while medium heat (325-350°F) is ideal for quesadilla assembly and cooking. This prevents burning while still achieving that golden exterior. If you’re making grilled cheese with sun-dried tomatoes or quesadillas, temperature control is everything! Use a digital thermometer to monitor surface temperature until you develop an intuitive feel. Remember to let your Blackstone preheat for 10-15 minutes before cooking for the most consistent results.

    Serving Ideas & Creative Variations

    Topping Bar Extravaganza

    Transform your steak cheese quesadillas Blackstone experience with a build-your-own topping bar that elevates every bite. I arrange small bowls of fresh pico de gallo, creamy avocado slices, tangy sour cream, zesty lime wedges, and chopped cilantro. The cool, fresh toppings create a beautiful contrast against the hot, crispy quesadillas. My personal favorite combination includes a dollop of roasted jalapeño crema that adds just enough heat without overwhelming the flavors. For an extra special touch, offer a sticky honey garlic sauce that guests can drizzle over their quesadillas for a sweet-savory finish.

    Global Flavor Inspirations

    Take your Blackstone quesadillas on a worldwide flavor journey by experimenting with different cheese and seasoning combinations. For Mediterranean-inspired quesadillas, try feta cheese, oregano-seasoned steak, and a sprinkle of sun-dried tomatoes. Asian-fusion versions work beautifully with thinly sliced steak marinated in soy, ginger, and a touch of honey, paired with pepper jack cheese. My guests went wild for Korean-inspired quesadillas featuring bulgogi-style steak with mozzarella and a quick kimchi slaw on the side. The Blackstone’s even heating ensures these creative variations cook perfectly every time.

    Storage & Troubleshooting Guide

    Proper Leftovers Management

    Properly storing leftover steak cheese quesadillas maintains their delicious flavor while ensuring food safety. Allow quesadillas to cool completely before wrapping each one individually in aluminum foil or plastic wrap, then place in an airtight container. Refrigerate for up to 3 days. For best reheating results, avoid the microwave which makes them soggy! Instead, place them on a baking sheet in a 350°F oven for 7-10 minutes, or back on the Blackstone griddle at medium-low heat for 2-3 minutes per side. The tortilla will re-crisp beautifully while the cheese melts to perfection.

    Common Issues Solved

    Even experienced cooks encounter challenges with steak cheese quesadillas Blackstone preparation. If your tortillas are burning before the cheese melts, your heat is too high—dial it back and move to a cooler zone on the griddle. Soggy quesadillas usually result from overfilling; stick to a thin, even layer of ingredients and avoid watery components. If your quesadillas are difficult to flip without spilling, try using slightly smaller tortillas or less filling until you master the technique. Remember that the first quesadilla is often a learning experience, just like the first pancake! Adjust your technique as you go.

    Frequently Asked Questions

    What cut of steak works best for Steak Cheese Quesadillas Blackstone?

    Flank, skirt, or ribeye steak work beautifully. Slice thinly against the grain after cooking for maximum tenderness. For budget options, sirloin tips can work well when marinated for 30 minutes before cooking.

    Can I prep ingredients ahead of time?

    Absolutely! Slice and season your steak up to 24 hours ahead and store refrigerated. Shred cheese and prepare toppings up to 2 days in advance. This makes assembly lightning-fast when you’re ready to cook.

    What’s the best cheese for quesadillas?

    A combination of cheeses works best—I recommend equal parts monterey jack for meltability and sharp cheddar for flavor. Pepper jack adds nice heat, while queso quesadilla or Oaxaca cheese provides authentic stretch.

    How do I clean my Blackstone after making quesadillas?

    While still warm (not hot), scrape surface with a metal spatula, then wipe with paper towels. For stuck-on cheese, pour water and scrub with a grill stone, then dry thoroughly and apply a thin oil layer.

    Can I make steak cheese quesadillas Blackstone for a large group?

    Definitely! The Blackstone excels at batch cooking. Cook all steak first, set aside covered with foil, then assemble 3-4 quesadillas simultaneously. Keep finished ones warm in a 200°F oven until serving.

    Final Thoughts

    Steak cheese quesadillas Blackstone have earned a permanent spot in my outdoor cooking repertoire. There’s something deeply satisfying about the sizzle of perfectly seasoned steak hitting that hot griddle surface, followed by the golden crispness of the tortilla and the stretchy cheese pull with every bite. Whether you’re hosting friends or simply treating yourself to an elevated dinner, this recipe delivers restaurant-quality results with backyard convenience. I encourage you to make this recipe your own—experiment with different cheeses, seasonings, and toppings to create your signature version. Happy griddling! Find more inspiration at Pinterest.