Blog

  • Hot Honey Chicken Cutlets That Will Blow Your Mind!

    Hot Honey Chicken Cutlets That Will Blow Your Mind!

    Hot Honey Chicken Cutlets That Will Blow Your Mind!

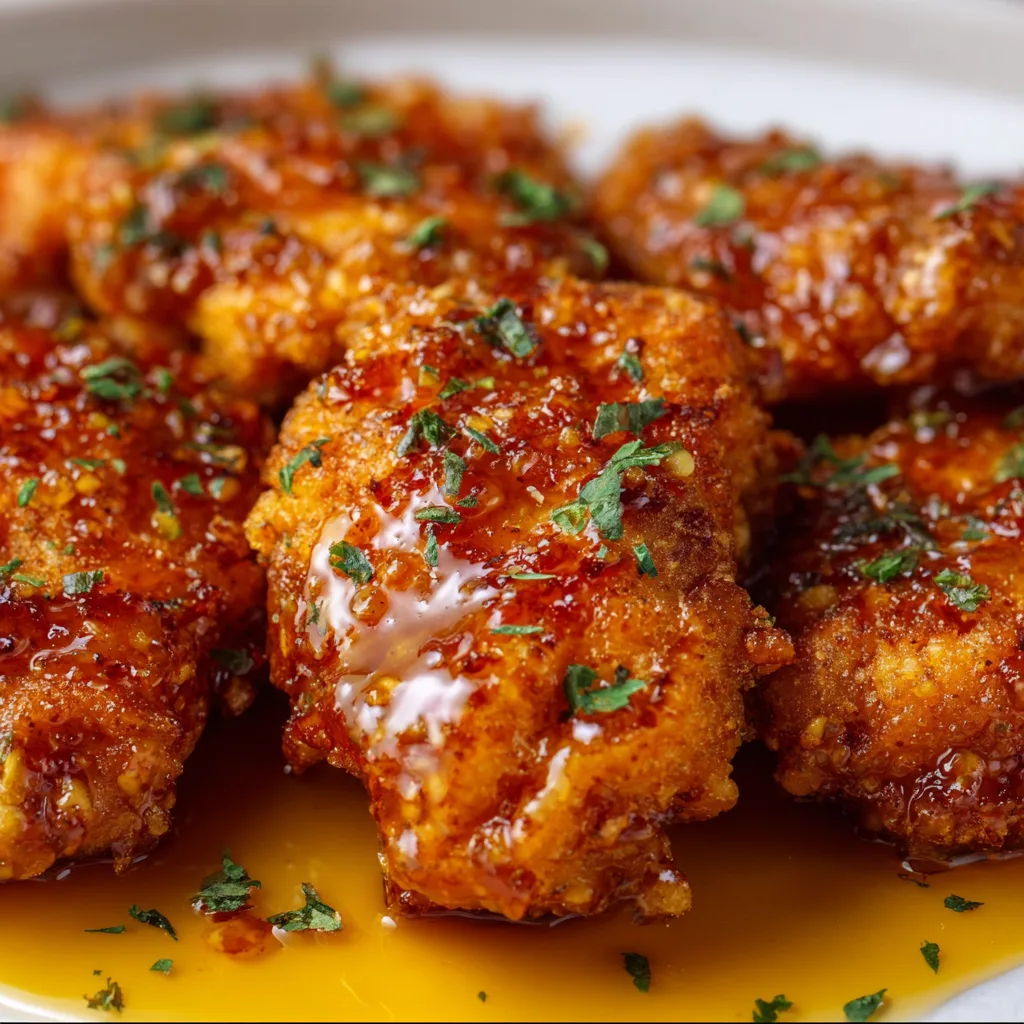
    Hot honey chicken cutlets have become my absolute obsession lately. That perfect balance of crispy exterior giving way to juicy, tender meat, all glazed with sweet-spicy honey that creates the most addictive sticky finish. I’ve been perfecting this recipe for months, and I’m thrilled to finally share it with you! The combination of golden, crunchy coating and that rich honey drizzle creates a flavor explosion that’s both comforting and exciting. Trust me, once you try these crispy hot honey feta chicken cutlets, you’ll be making them on repeat.

    Recipe

    Why You’ll Love These Hot Honey Chicken Cutlets

    Perfect Balance of Sweet & Heat

    There’s something magical about the sweet-heat combination that makes these cutlets irresistible. The honey creates this gorgeous glossy coating that caramelizes slightly when it hits the hot chicken. I love watching my family’s faces light up with that first bite—the initial sweetness followed by a gentle kick of heat that builds perfectly. The beauty is you can adjust the spice level to your preference. Last weekend, I made these for my sister who can’t handle much heat, and even she was reaching for seconds!

    Weeknight-Friendly Preparation

    These hot honey chicken cutlets have become my go-to when I need a quick impressive dinner. The entire process takes under 30 minutes, making it perfect for busy evenings when you still want something special. I’ve streamlined the breading process to minimize mess (a three-bowl setup is your friend here!). The cutlets cook quickly since they’re thin, and the honey sauce comes together in seconds. I’ve lost count of how many Monday night dinners these cutlets have rescued when I’m tired but still craving something delicious.

    Essential Tips & Tricks

    Perfecting the Crispy Coating

    The secret to perfectly crispy hot honey chicken cutlets lies in the double-dredge technique. Start with thin, evenly pounded cutlets—this ensures even cooking and maximum crispiness. Pat them completely dry before dredging to help the coating stick. For extra crunch, I mix panko with regular breadcrumbs and add a touch of cornstarch to my flour mixture. Another game-changer? Let the breaded cutlets rest for 5 minutes before frying. This gives the coating time to adhere properly and results in that satisfying crunch that pairs so beautifully with the sticky honey sauce.

    Mastering the Hot Honey Drizzle

    The honey-to-heat ratio is crucial for balancing these cutlets perfectly. I prefer using good-quality local honey for its complex flavor notes. For the heat element, I’ve found that a combination of red pepper flakes and a touch of cayenne gives the most balanced result. The secret is infusing the honey—warm it gently with your spices and a splash of apple cider vinegar for brightness. Let it steep while you cook the chicken. This method creates a more complex flavor than simply mixing cold honey with hot sauce. For a delicious variation, check out my air fryer parmesan crusted chicken wings for another crispy chicken option.

    Serving Ideas & Creative Variations

    Perfect Pairings for a Complete Meal

    These hot honey chicken cutlets shine when paired with bright, fresh sides that complement their sweet-spicy profile. My family’s favorite combination is serving them over a crisp arugula salad dressed with lemon vinaigrette—the peppery greens and acidic dressing cut through the richness perfectly. For a heartier option, they’re amazing with creamy mashed potatoes or buttery rice that soaks up the extra honey drizzle. On summer evenings, I love serving them alongside charred corn on the cob and a simple cucumber salad. The contrasting temperatures and textures create a truly satisfying meal experience.

    Exciting Flavor Twists

    Don’t be afraid to play with the flavor profile of your hot honey chicken cutlets! My latest obsession is adding a tablespoon of bourbon to the honey mixture for a subtle smoky sweetness. For an Asian-inspired version, incorporate ginger, garlic, and a splash of soy sauce into your honey drizzle. Herb lovers should try adding fresh thyme or rosemary to the breadcrumb mixture. For a Mediterranean twist, top the finished cutlets with crumbled feta, fresh mint, and a squeeze of lemon. Looking for more creative chicken ideas? Try my Mediterranean chicken orzo for another flavorful option.

    Storage & Troubleshooting Guide

    Keeping Leftovers Fresh & Crispy

    While these hot honey chicken cutlets are best enjoyed fresh, proper storage can help maintain their delicious texture. If you have leftovers, let them cool completely before refrigerating. Store them in a single layer in an airtight container with paper towels between layers to absorb moisture. When reheating, avoid the microwave which will make them soggy. Instead, place them on a wire rack over a baking sheet and warm in a 350°F oven for 7-10 minutes. For maximum crispiness, give them a quick spritz of oil before reheating. I often make extra cutlets specifically for lunch the next day!

    Solving Common Cooking Challenges

    The most common issue with hot honey chicken cutlets is coating that falls off during cooking. To prevent this, ensure your oil is hot enough before adding the chicken (around 350°F is perfect). Another trick is to avoid overcrowding the pan, which lowers the oil temperature and creates steam. If your honey sauce is too thick, add a teaspoon of warm water to thin it. Too thin? Simmer it for an extra minute to reduce. For cutlets that brown too quickly on the outside before cooking through, lower your heat slightly and finish them in a 350°F oven for 5 minutes.

    Frequently Asked Questions

    Can I make hot honey chicken cutlets in an air fryer?

    Absolutely! Spray the breaded cutlets with cooking oil and air fry at 375°F for 7-8 minutes per side. The coating won’t be quite as golden, but they’ll still be delicious with the honey drizzle.

    How spicy are these chicken cutlets?

    The heat level is customizable. As written, they have a medium kick that builds gradually. Reduce the red pepper flakes by half for milder cutlets, or double them for a fiery version.

    Can I use chicken thighs instead of breasts?

    Yes! Pound boneless, skinless thighs to an even thickness. They’ll be even juicier than breasts but may need an extra minute or two of cooking time.

    What’s the best oil for frying these cutlets?

    Vegetable, canola, or peanut oil work best due to their high smoke points. Avoid olive oil, which can impart a strong flavor and smokes at lower temperatures.

    Can I make the hot honey sauce ahead of time?

    Definitely! The hot honey sauce keeps well in the refrigerator for up to two weeks. Just warm it gently before drizzling over your freshly cooked chicken cutlets.

    Final Thoughts

    These hot honey chicken cutlets have earned their place as a staple in my recipe collection. They strike that perfect balance between everyday accessible and special enough for company. The contrast of crispy exterior, juicy chicken, and that sweet-spicy honey glaze creates a memorable dish that’s both comforting and exciting. I hope you’ll give them a try and experience the magic for yourself! Don’t forget to check out more delicious recipes on Pinterest for endless culinary inspiration.
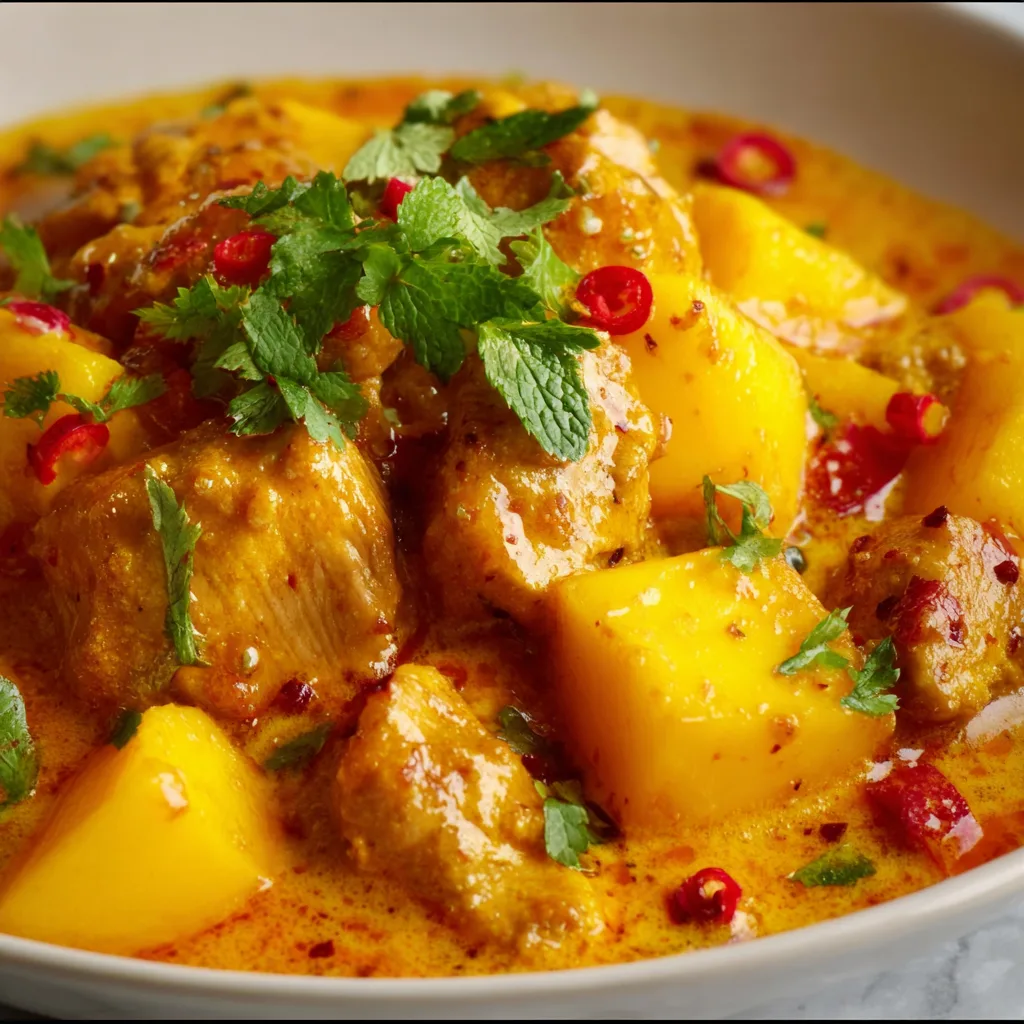

  • Mango Chicken Curry Recipe: Irresistibly Sweet & Spicy Delight!

    Mango Chicken Curry Recipe: Irresistibly Sweet & Spicy Delight!

    Mango Chicken Curry Recipe: Irresistibly Sweet & Spicy Delight!

    Mango Chicken Curry combines the sweet tanginess of ripe mangoes with aromatic spices and tender chicken for a dish that’s both comforting and exotic. The first time I made this curry, my kitchen filled with the most intoxicating scent—cardamom, ginger, and sweet mango melding together in perfect harmony. I’ve been tweaking this recipe for years, and I’m thrilled to finally share my perfected version with you! This vibrant curry strikes the perfect balance between creamy, spicy, and sweet, making it an absolute showstopper for both weeknight dinners and special occasions.

    Recipe

    Why You’ll Love This Mango Chicken Curry

    A Symphony of Flavors and Textures

    The magic of this Mango Chicken Curry lies in its incredible depth of flavor. The natural sweetness from ripe mangoes perfectly balances the warming spices, while the coconut milk adds a velvety richness that makes each bite utterly satisfying. I love how the chicken becomes incredibly tender as it simmers in the sauce, absorbing all those gorgeous flavors. The contrast between the soft chicken, juicy mango chunks, and the silky curry sauce creates a textural experience that keeps you coming back for more. It’s comfort food with a tropical twist!

    Quick and Impressive Dinner Solution

    Despite its complex flavors, this curry comes together in under 40 minutes, making it perfect for busy weeknights when you want something special without spending hours in the kitchen. I’ve served this to dinner guests who assumed I’d been cooking all day! The vibrant golden-orange color makes for a stunning presentation that looks as good as it tastes. Plus, it’s naturally gluten-free and can be easily adapted for various dietary needs. This has become my go-to recipe when I need to impress without stress.

    Essential Tips & Tricks

    Selecting and Preparing the Perfect Mangoes

    For the best Mango Chicken Curry, choosing the right mangoes is crucial. Look for mangoes that yield slightly to gentle pressure—they should feel soft but not mushy. I prefer using Alphonso or Ataulfo varieties for their sweet flavor and minimal fiber, but any ripe mango will work. When prepping, slice along both sides of the flat pit, score the flesh in a grid pattern, then invert and cut the cubes away from the skin. For a smoother curry, puree half the mango and leave the rest in chunks for delightful texture contrast, similar to how I prepare fruit for my Cheesecake Fruit Salad with Caramel.

    Balancing Spices for Perfect Heat

    The spice balance makes or breaks a curry. I recommend starting with a base blend of ground cumin, coriander, turmeric, and garam masala. Add these to the oil after sautéing your onions for maximum flavor release. For heat, adjust the cayenne pepper or fresh chilies to your preference—remember you can always add more, but you can’t take it away! A pinch of cinnamon adds wonderful depth that complements the mango beautifully. Taste as you go and remember that the flavors will develop further as the curry simmers, becoming more harmonious and complex.

    Serving Ideas & Creative Variations

    Perfect Pairings for a Complete Meal

    Mango Chicken Curry deserves worthy companions! I love serving it over fluffy basmati rice that soaks up all that glorious sauce. For a lighter option, cauliflower rice works beautifully too. On the side, warm naan bread is perfect for scooping up every last drop. For a complete spread, add a simple cucumber raita to cool the palate, or try my Roasted Red Pepper Hummus with pita for an unexpected but delicious fusion approach. Fresh herbs like cilantro or mint scattered on top add brightness and color that elevates the entire presentation.

    Exciting Twists on the Classic Recipe

    Don’t be afraid to make this Mango Chicken Curry your own! For a seafood variation, substitute the chicken with shrimp or firm white fish for a quicker cooking time and lighter finish. Vegetarians can use chickpeas and roasted cauliflower instead of chicken—the sauce is so flavorful, you won’t miss the meat. For a creamier curry, add a dollop of Greek yogurt just before serving. If you love extra texture, sprinkle toasted cashews or coconut flakes on top. My personal favorite twist is adding a splash of lime juice and zest at the end for a citrusy brightness.

    Storage & Troubleshooting Guide

    Keeping It Fresh and Flavorful

    This Mango Chicken Curry actually tastes even better the next day as the flavors have time to meld together! Store leftovers in an airtight container in the refrigerator for up to 3 days. When reheating, add a splash of water or coconut milk if the curry has thickened too much. For longer storage, this curry freezes beautifully for up to 3 months—just leave out any fresh herbs until serving time. I like to portion it into individual containers for quick grab-and-heat lunches that brighten up my workday with tropical flavors.

    Solving Common Curry Challenges

    If your curry sauce is too thin, simmer it uncovered for a few extra minutes to reduce and concentrate the flavors. Conversely, if it’s too thick, add coconut milk or chicken broth a tablespoon at a time until you reach your desired consistency. If the mango flavor isn’t pronounced enough, try adding a tablespoon of mango chutney. For a curry that’s too spicy, additional coconut milk or a dollop of yogurt will help tame the heat. Remember that curry is forgiving—taste as you go and adjust the seasonings until it’s perfectly balanced to your preference.

    Frequently Asked Questions

    Can I use canned mango instead of fresh?

    Yes! While fresh mango provides the best flavor, canned mango chunks (drained) work well in a pinch. Choose varieties packed in juice rather than syrup for a more authentic taste.

    Is Mango Chicken Curry spicy?

    The spice level is entirely customizable. As written, this recipe has a medium heat that balances the sweet mango. Adjust the chili powder or fresh chilies to make it milder or spicier to suit your preference.

    Can I make this curry in advance for a party?

    Absolutely! Mango Chicken Curry actually improves with time as the flavors develop. Make it up to 2 days ahead, refrigerate, and gently reheat before serving.

    What protein substitutes work well in this recipe?

    Try firm tofu, chickpeas, or paneer for vegetarian options. For seafood lovers, shrimp or firm white fish make excellent substitutes that cook even faster than chicken.

    How can I thicken my Mango Chicken Curry if it’s too watery?

    For a thicker Mango Chicken Curry, simmer uncovered for 5-10 minutes longer or add 1-2 teaspoons of cornstarch mixed with water. Both methods will help concentrate flavors while thickening.

    Final Thoughts

    This Mango Chicken Curry has become one of my signature dishes for good reason. It transforms simple ingredients into something truly magical—a testament to how food can transport us to faraway places through flavor. The balance of sweet mango, aromatic spices, and tender chicken creates a meal that nourishes both body and soul. I hope this curry brings as much joy to your table as it has to mine! For more delicious recipes like this one, follow me on Pinterest where I’m always sharing new culinary inspirations.

  • Spinach Feta Puff Pastry Recipe That Will Wow Your Taste Buds!

    Spinach Feta Puff Pastry Recipe That Will Wow Your Taste Buds!

    Spinach Feta Puff Pastry Recipe That Will Wow Your Taste Buds!

    Spinach Feta Puff Pastry is my absolute favorite way to transform simple ingredients into something that looks and tastes gourmet with minimal effort. There’s something magical about the way flaky, buttery pastry embraces the savory combination of wilted spinach and tangy feta cheese. I discovered this recipe during a rainy Sunday afternoon when I needed comfort food but didn’t want to spend hours in the kitchen. The first bite—with that perfect crunch followed by the creamy interior—made me wonder why I hadn’t been making these all along. If you love the Mediterranean flavor profile in my roasted red pepper hummus, you’ll adore these elegant pastries.

    Recipe

    Why You’ll Love This Spinach Feta Puff Pastry

    Perfect Balance of Flavors and Textures

    There’s nothing quite like the textural contrast between the shatteringly crisp exterior and the warm, creamy filling of these pastries. The earthy spinach perfectly balances the salty punch of feta, while a hint of nutmeg brings everything together with surprising depth. I love watching my guests’ faces light up with that first bite—their expressions shifting from polite interest to wide-eyed delight. The beauty is in the simplicity: just a few quality ingredients that complement each other perfectly. And despite their impressive appearance, they’re remarkably forgiving for beginners.

    Quick Prep for Maximum Impact

    What truly makes this Spinach Feta Puff Pastry a staple in my entertaining arsenal is the incredible effort-to-reward ratio. With just 15 minutes of active prep time, you’ll create something that looks like it came from a fancy bakery. I’ve made these on harried weeknights and for last-minute gatherings when I needed something special but lacked time. The versatility is unmatched—serve them as elegant appetizers, pair with soup for a light dinner, or include them in brunch spreads. They’re equally at home at casual gatherings and sophisticated dinner parties.

    Essential Tips & Tricks

    Working With Puff Pastry Like a Pro

    The secret to perfect Spinach Feta Puff Pastry starts with properly handling the puff pastry itself. Always thaw it in the refrigerator overnight rather than on the counter—this prevents the butter layers from melting prematurely. When rolling, work quickly with a lightly floured surface, and keep the pastry cold until the last possible moment. One trick I learned from a pastry chef friend: chill your filled and shaped pastries for 15 minutes before baking. This extra step allows the butter in the pastry to firm up again, creating those gorgeous flaky layers that make puff pastry so irresistible.

    Perfecting the Spinach Filling

    The difference between good and exceptional Spinach Feta Puff Pastry lies in how you handle the spinach. Always thoroughly drain your spinach—I wrap mine in a clean kitchen towel and squeeze until not a drop of moisture remains. Excess water is the enemy of crisp pastry! Season aggressively; the pastry itself is bland, so your filling needs to carry the flavor weight. I like adding a pinch of red pepper flakes for subtle heat, minced garlic for depth, and a whisper of lemon zest to brighten everything. Let the filling cool completely before assembling to prevent the pastry from becoming soggy.

    Serving Ideas & Creative Variations

    Elegant Presentation Techniques

    Transform your Spinach Feta Puff Pastry from delicious to showstopping with simple presentation tricks. For dinner parties, I arrange individual triangles on a wooden board with fresh herbs scattered between them and lemon wedges for squeezing. For brunch gatherings, try cutting the pastry into long strips, twisting them with filling, and forming spirals—they bake into beautiful pinwheels. A light egg wash with a sprinkle of everything bagel seasoning or black sesame seeds adds visual interest and flavor. Serve alongside a creamy yogurt dip for an extra touch of luxury.

    Creative Flavor Variations

    While the classic spinach and feta combination is timeless, don’t be afraid to experiment with your puff pastry creations. My Mediterranean-inspired variation adds chopped sun-dried tomatoes, pine nuts, and fresh basil to the filling. For something more decadent, try incorporating caramelized onions, goat cheese, and a drizzle of honey. A handful of chopped Kalamata olives brings a briny punch that complements the feta beautifully. For meat lovers, add crispy prosciutto bits or cooked, crumbled sausage. Each variation maintains the spirit of the original while offering a new flavor adventure.

    Storage & Troubleshooting Guide

    Make-Ahead and Storage Solutions

    The versatility of Spinach Feta Puff Pastry extends to its make-ahead potential. You can prepare the filling up to three days in advance and store it in an airtight container in the refrigerator. For partially assembled pastries, freeze them unbaked on a baking sheet, then transfer to freezer bags once solid—they’ll keep for up to three months. Bake directly from frozen, adding just 5-7 minutes to the baking time. Fully baked pastries can be refrigerated for 2-3 days and reheated in a 350°F oven for 5-10 minutes to restore crispness. Never microwave them unless you enjoy soggy pastry!

    Fixing Common Pastry Problems

    Even experienced bakers encounter challenges with puff pastry. If your pastry isn’t rising properly, the most common culprit is temperature. Either the pastry got too warm before baking (chill it!) or your oven isn’t hot enough (preheat thoroughly). Leaking filling usually means you’ve overfilled or haven’t sealed the edges properly—a fork pressed firmly around the edges creates both a decorative finish and a good seal. If your pastry browns too quickly before cooking through, loosely tent with foil after the first 15 minutes of baking. Remember that puff pastry should be deeply golden, not pale, for the best texture.

    Frequently Asked Questions

    Can I use frozen spinach for Spinach Feta Puff Pastry?

    Absolutely! Thaw it completely and squeeze out all moisture—I recommend using a clean kitchen towel for this. One 10-ounce package of frozen spinach equals about 1½ pounds of fresh spinach after cooking.

    What can I substitute for feta cheese?

    Goat cheese provides similar tanginess with a creamier texture. Ricotta mixed with Parmesan works well too, though you’ll need to add more salt. For a non-dairy option, try firm tofu crumbled with nutritional yeast and lemon juice.

    How do I prevent my puff pastry from getting soggy?

    Ensure all filling ingredients are cool and as dry as possible before assembly. For extra protection, you can brush the inside of the pastry with beaten egg or sprinkle with a thin layer of breadcrumbs before adding filling.

    Can I prepare these in advance for a party?

    Yes! Assemble them completely, then refrigerate unbaked for up to 24 hours or freeze for longer storage. Brush with egg wash just before baking, not in advance.

    Why did my Spinach Feta Puff Pastry not puff up properly?

    Your pastry was likely too warm when it went into the oven. Always chill assembled pastries for 15-20 minutes before baking, and ensure your oven is fully preheated to the correct temperature.

    Final Thoughts

    Spinach Feta Puff Pastry represents that perfect intersection of simplicity and sophistication that makes cooking so rewarding. I find myself returning to this recipe whenever I want to create something special without spending hours in the kitchen. The combination of buttery layers, savory spinach, and tangy feta creates a memorable bite that friends request again and again. Whether you’re serving these as elegant appetizers or casual weeknight fare, they bring a touch of effortless elegance to any table. Find more inspiration for your next gathering on Pinterest.

  • Gluten-Free Healthy Chocolate Cookies That Will WOW Your Tastebuds!

    Gluten-Free Healthy Chocolate Cookies That Will WOW Your Tastebuds!

    Gluten-Free Healthy Chocolate Cookies That Will WOW Your Tastebuds!

    Gluten-Free Healthy Chocolate Cookies have been my absolute salvation during those moments when the chocolate cravings hit but I don’t want to derail my wellness journey. There’s something magical about that first bite – the rich cocoa melting on your tongue, the perfect chewiness giving way to a tender center. I’ll never forget the look on my sister’s face when she tried these and couldn’t believe they were actually good for you. Made with nutrient-dense ingredients like almond flour, natural sweeteners, and antioxidant-rich cocoa, these cookies prove that healthy indulgence isn’t an oxymoron. Ready to transform your snack game with cookies you can feel good about enjoying? Let’s bake some joy!

    Recipe

    Why You’ll Love These Gluten-Free Healthy Chocolate Cookies

    Perfect Texture & Taste Without The Guilt

    The first thing that’ll strike you about these cookies is their incredible fudgy texture – they have that perfect balance between chewy edges and slightly soft centers that makes traditional cookies so irresistible. But unlike their conventional counterparts, these won’t send your blood sugar soaring only to crash later. The natural sweeteners release energy slowly, while the healthy fats from nut butter create that satisfying mouthfeel we all crave. I’ve served these at countless gatherings, and the look of surprise when I reveal they’re actually nutritious is priceless. Even my picky nephew who scrutinizes “healthy food” like a detective devours these without hesitation!

    Nutrient-Dense Ingredients That Nourish

    Every bite of these gluten-free healthy chocolate cookies delivers genuine nutritional benefits beyond just satisfying your sweet tooth. The almond flour provides protein and vitamin E, while the raw cacao powder is packed with antioxidants and magnesium – nature’s stress-reliever! I’ve carefully selected ingredients that work together to create a treat that actually supports your wellbeing. The healthy fats help keep you satisfied longer, while the fiber content means these cookies won’t spike your blood sugar like conventional desserts. It’s the difference between a treat that leaves you feeling sluggish and one that can actually energize you for the afternoon ahead.

    Essential Tips & Tricks

    The secret to achieving that ideal cookie texture lies in understanding how gluten-free ingredients behave differently. Don’t be alarmed if your dough seems wetter than traditional cookie dough – this is completely normal! Allow the mixture to rest for 10-15 minutes before scooping, which gives the almond flour time to absorb moisture. For chewier cookies, slightly underbake them by about 1-2 minutes. The cookies will continue cooking on the hot baking sheet after removal from the oven. I learned this the hard way after overbaking my first batch and ending up with cookies that could double as hockey pucks! For more baking inspiration, check out my butter pecan cookies for another delicious treat.

    Temperature & Timing Mastery

    Nothing ruins a healthy cookie faster than improper baking temperature. These cookies thrive at a slightly lower temperature than traditional cookies – 325°F is the sweet spot that allows them to cook through without burning the delicate natural sweeteners. Set your timer for 8 minutes initially, then check every minute thereafter. The cookies should look slightly underdone in the center when you pull them out – they’ll firm up as they cool. I always rotate my baking sheet halfway through cooking time to ensure even browning. Remember that darker baking sheets conduct heat differently than light ones, potentially requiring 1-2 minutes less baking time.

    Serving Ideas & Creative Variations

    Elevated Pairings For Any Occasion

    These gluten-free healthy chocolate cookies shine brightest when paired with complementary flavor companions. Try serving them alongside a frothy almond milk latte or a cup of peppermint tea that brings out the chocolate notes. For dessert platters, I arrange them with fresh berries and a small dish of almond butter for dipping – an unexpected touch that guests always rave about. When I’m feeling extra fancy, I’ll sandwich two cookies with a thin layer of coconut yogurt and freeze for 20 minutes for a guilt-free ice cream sandwich. These cookies also make the perfect accompaniment to my roasted red pepper hummus for a sweet and savory snack board.

    Seasonal & Dietary Adaptations

    The versatility of this recipe makes it perfect for creative customization throughout the year. In fall, I fold in a teaspoon of pumpkin spice and some chopped pecans. Summer calls for lemon zest and dried blueberries for a refreshing twist. For those avoiding nuts, sunflower seed flour and sunflower seed butter work beautifully as substitutes. To make these vegan, simply swap the egg for a flax egg (1 tablespoon ground flaxseed mixed with 3 tablespoons water, left to gel for 15 minutes). For an extra protein boost, add a scoop of your favorite plant-based chocolate protein powder and adjust the liquid accordingly.

    Storage & Troubleshooting Guide

    Keeping Your Cookies Fresh & Delicious

    The moisture retention in these gluten-free healthy chocolate cookies differs from traditional recipes, requiring specific storage strategies. Store them in an airtight container with a slice of bread to maintain perfect chewiness for up to 5 days at room temperature. For longer storage, these cookies freeze beautifully – just place them in a single layer on a baking sheet until frozen solid, then transfer to a freezer bag. They’ll keep for up to 3 months! When ready to enjoy, let them thaw at room temperature for about 30 minutes, or microwave for 10-15 seconds for that fresh-baked warmth. I always make a double batch specifically to freeze for those emergency chocolate cravings.

    Solving Common Baking Challenges

    Even experienced bakers encounter texture issues with gluten-free recipes sometimes. If your cookies spread too much, your oven may be running hot – try reducing the temperature by 25°F. Cookies too dry? You likely overbaked them or used too much flour – remember that measuring gluten-free flours by weight rather than volume yields more consistent results. If your cookies aren’t sweet enough, try adding a few drops of liquid stevia rather than more granulated sweetener, which could throw off the texture. For cookies that fall apart easily, add a teaspoon of xanthan gum to help bind the ingredients. I once saved a crumbly batch by pressing the dough into a pan for cookie bars instead!

    Frequently Asked Questions

    Are these cookies truly healthy?

    Yes! These gluten-free healthy chocolate cookies contain nutrient-dense ingredients like almond flour, antioxidant-rich cocoa, and natural sweeteners. They provide protein, healthy fats, and fiber while avoiding refined sugars and processed flours that cause inflammation.

    Can I substitute the almond flour?

    Absolutely! Oat flour works well as a 1:1 replacement, while coconut flour is more absorbent (use 1/3 cup coconut flour to replace 1 cup almond flour and add an extra egg for moisture).

    How can I make these cookies extra chocolatey?

    Fold in 1/4 cup of sugar-free or dark chocolate chips and use Dutch-processed cocoa powder for a deeper chocolate flavor. A teaspoon of espresso powder also intensifies the chocolate notes without adding coffee flavor.

    Why did my cookies turn out dry?

    Gluten-free cookies can dry out if overbaked even by a minute or two. Always err on the side of underbaking and remember they continue cooking on the hot baking sheet after removal from the oven.

    Can I make the dough ahead of time?

    Yes! The cookie dough can be refrigerated for up to 3 days in an airtight container. Let it come to room temperature for about 15 minutes before scooping and baking for best results.

    Final Thoughts

    These gluten-free healthy chocolate cookies have transformed how I think about treats that nourish both body and soul. The beauty lies in their versatility – they’re equally at home in a lunchbox, as an afternoon pick-me-up with tea, or dressed up for dessert. What I love most is how they’ve changed conversations around healthy eating in my household, proving that wellness doesn’t mean deprivation. Share your baking adventures with these cookies on Pinterest – I’d love to see your variations and hear how they’ve satisfied your chocolate cravings while keeping you on track with your health goals!

  • Coconut Curry Salmon That’ll Blow Your Taste Buds Away!

    Coconut Curry Salmon That’ll Blow Your Taste Buds Away!

    Coconut Curry Salmon That’ll Blow Your Taste Buds Away!

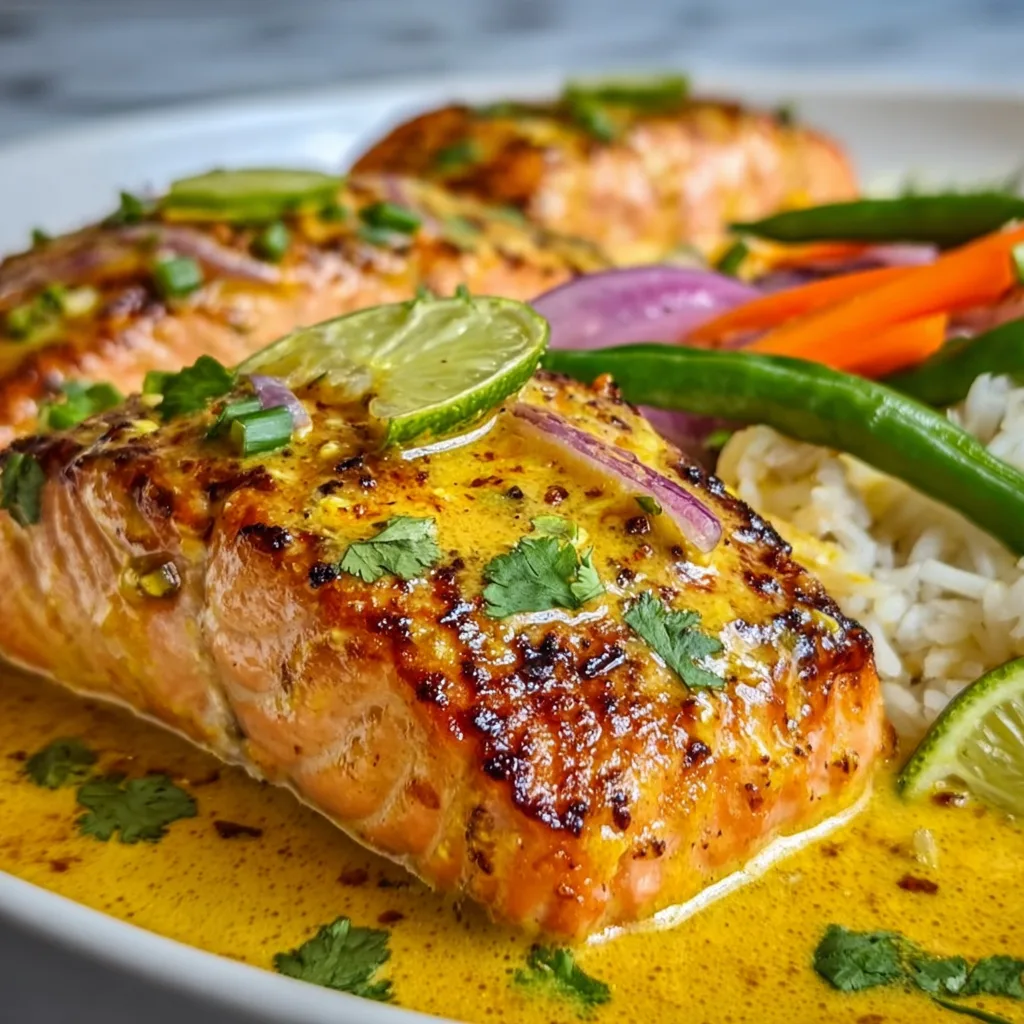
    Coconut Curry Salmon has become my absolute go-to for those evenings when I want something that feels fancy but doesn’t require hours in the kitchen. The first time I made this dish, the aroma of simmering coconut milk and curry spices filled my apartment, and my neighbor actually knocked on my door to ask what that heavenly smell was! The rich, velvety sauce paired with tender salmon creates a meal that’s both comforting and elegant. I love how the natural sweetness of the coconut balances perfectly with the gentle heat of curry, creating a dish that’s sophisticated yet incredibly simple to prepare. If you’re looking for more seafood inspiration, my Crispy Parmesan Crusted Air Fryer Tilapia is another quick favorite.

    Recipe

    Why You’ll Love This Coconut Curry Salmon

    Perfect Balance of Flavors

    The magic of this Coconut Curry Salmon lies in its perfect flavor harmony. The natural richness of salmon creates an ideal canvas for the creamy coconut and aromatic curry. I’ve found that using full-fat coconut milk makes all the difference—it creates that silky texture that coats each bite of fish beautifully. The first time I served this to my sister (who claims to dislike curry), she was shocked by how the flavors melded together without any single note overpowering the others. The subtle sweetness from the coconut balances the warming spices, making this dish approachable even for those who typically shy away from curry.

    Quick Yet Impressive

    What I adore most about this Coconut Curry Salmon is how it transforms a weeknight dinner into something that feels restaurant-worthy in under 30 minutes. Last month when my in-laws dropped by unexpectedly, I whipped this up while we chatted, and they were genuinely impressed. The vibrant yellow sauce creates a stunning presentation against the pink salmon, especially when garnished with fresh herbs and a squeeze of lime. It’s become my secret weapon for those nights when I want something that feels special without the fuss. The hands-on time is minimal, yet the results are consistently spectacular—exactly what I need after a long day.

    Essential Tips & Tricks

    Selecting and Preparing Your Salmon

    Choosing the right salmon is your first step toward curry perfection. I prefer wild-caught salmon fillets with the skin on—they tend to stay moister during cooking. Look for pieces that are uniform in thickness (about 1-1.5 inches) to ensure even cooking. Before cooking, I always pat my salmon dry with paper towels, which helps the seasoning stick and creates better browning. Season the flesh side with salt and pepper right before cooking, not too far in advance. I learned this the hard way after once salting too early and ending up with salmon that had released too much moisture before hitting the pan.

    Creating the Perfect Curry Base

    The curry foundation is where all the magic happens! Start by sautéing finely diced onions until translucent before adding minced garlic and ginger. This aromatic base is crucial—don’t rush this step! When adding curry powder or paste, I briefly toast it in the pan for 30-45 seconds until fragrant, which blooms the spices and deepens their flavor. For the coconut milk, I recommend using full-fat varieties for the richest texture. If you’re looking for other ways to use these ingredients, my Creamy Coconut Curry Prawn Spaghetti uses a similar technique with equally delicious results. Remember to simmer the sauce briefly before adding the salmon—this develops flavor without reducing it too much.

    Serving Ideas & Creative Variations

    Perfect Pairings

    Coconut Curry Salmon shines brightest when served with the right accompaniments. My go-to is fluffy jasmine rice which soaks up that glorious sauce—I always make extra sauce just for this reason! For a lighter option, cauliflower rice works beautifully. I love adding a side of quick-pickled cucumbers for brightness and crunch; just thinly slice cucumbers and marinate them in rice vinegar, a pinch of sugar, and salt for 15 minutes while preparing the main dish. Fresh herbs like cilantro, Thai basil, or mint scattered over the top add a pop of color and freshness that elevates the entire presentation.

    Exciting Flavor Twists

    Don’t be afraid to make this Coconut Curry Salmon recipe your own with some creative variations! Adding a tablespoon of Thai red curry paste instead of powder creates a different flavor profile with more depth and heat. For a sweeter version, try stirring in a teaspoon of mango chutney or a handful of diced pineapple to the sauce. When I’m craving extra vegetables, I toss in handfuls of baby spinach or snow peas during the last few minutes of cooking. For special occasions, I’ve even added a few Crispy Shrimp Toast pieces on the side for an impressive Asian-inspired feast that always gets rave reviews from my dinner guests.

    Storage & Troubleshooting Guide

    Proper Storage Solutions

    Leftover Coconut Curry Salmon can be just as delicious the next day if stored properly. Allow the dish to cool completely before transferring to an airtight container. It will keep in the refrigerator for up to 2 days—though in my house, it rarely lasts that long! When reheating, do so gently over low heat to prevent the salmon from becoming tough. I’ve found that adding a splash of coconut milk during reheating helps restore the creamy texture of the sauce. For meal prep, you can actually prepare the curry sauce up to 3 days ahead and store it separately, then simply cook fresh salmon when you’re ready to serve.

    Common Issues & Solutions

    If your Coconut Curry Salmon sauce has split or curdled, don’t panic! This usually happens when the sauce is heated too quickly or at too high a temperature. To fix it, remove from heat immediately and whisk in 1-2 tablespoons of room temperature coconut milk. Another common issue is overcooked salmon—it should be just opaque in the center. I use the rule of 10 minutes cooking time per inch of thickness as my guide. If your sauce is too thin, simmer it for a few minutes before adding the salmon. Too thick? Add a splash of coconut milk or chicken broth to reach your desired consistency.

    Frequently Asked Questions

    Can I use frozen salmon for Coconut Curry Salmon?

    Yes! Thaw completely in the refrigerator overnight, then pat very dry with paper towels before cooking to remove excess moisture. This prevents the sauce from becoming watery.

    What can I substitute for coconut milk?

    Heavy cream works as a non-coconut alternative, though the flavor will be different. For a lighter option, try cashew cream or a blend of yogurt and milk for tanginess.

    How spicy is this curry dish?

    The recipe as written is mild to medium. Adjust the heat by varying the amount of curry powder or adding red pepper flakes to taste.

    Can I make this dish ahead for a dinner party?

    Prepare the curry sauce up to 24 hours ahead and refrigerate. Cook the salmon fresh just before serving for the best texture and flavor.

    Is Coconut Curry Salmon healthy?

    Absolutely! It’s rich in omega-3 fatty acids from the salmon and contains anti-inflammatory properties from the curry spices. Use light coconut milk to reduce calories if desired.

    Final Thoughts

    This Coconut Curry Salmon has become more than just a recipe in my kitchen—it’s my reliable companion for both quiet weeknights and special gatherings. The way the creamy coconut sauce envelops each tender piece of salmon creates something truly magical that belies how simple it is to prepare. I hope this dish brings the same comfort and joy to your table as it has to mine. Don’t forget to check out more inspiration on Pinterest where I’m always sharing my latest creations and variations on classics like this coconut curry salmon.

  • Creamy Tuscan Marry Me Butter Beans – Irresistibly Delicious & Easy!

    Creamy Tuscan Marry Me Butter Beans – Irresistibly Delicious & Easy!

    Creamy Tuscan Marry Me Butter Beans – Irresistibly Delicious & Easy!

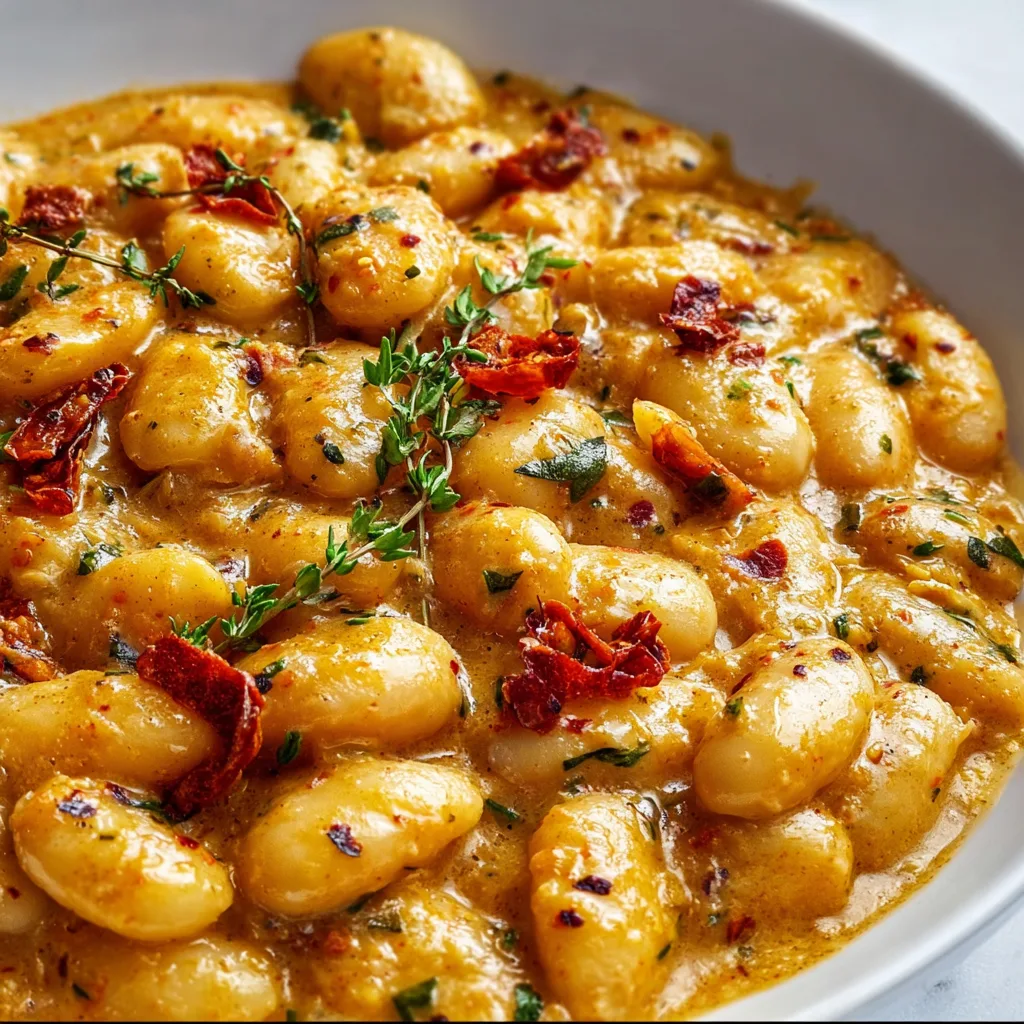
    Creamy Tuscan Marry Me Butter Beans are the ultimate comfort dish that combines velvety white beans with a rich, sun-dried tomato cream sauce that’ll make anyone fall in love at first bite. I discovered this recipe during a rainy weekend when I craved something hearty yet elegant. The moment the aroma of garlic and herbs filled my kitchen, I knew this would become a staple in my home. There’s something magical about how these humble beans transform into a restaurant-worthy dish that’s both indulgent and nourishing. Perfect for date nights or cozy gatherings, these beans might just prompt a proposal! Check out my garlic herb chicken recipe for a perfect pairing.

    Recipe

    Why You’ll Love This Creamy Tuscan Marry Me Butter Beans

    A Flavor Symphony in Every Bite

    The magic of these Creamy Tuscan Marry Me Butter Beans lies in their perfect balance of flavors. The creamy sauce coats each tender bean with a luxurious blend of garlic, Italian herbs, and sun-dried tomato tanginess. What makes this dish truly special is how the beans absorb all those beautiful flavors while maintaining their buttery texture. I love how the slight sweetness of the sun-dried tomatoes plays against the savory notes of the garlic and the subtle heat from red pepper flakes. It’s like a culinary hug that warms you from the inside out!

    Budget-Friendly Elegance That Impresses

    Don’t let the “Marry Me” title fool you—these beans are surprisingly economical! Using pantry staples like canned butter beans means you can create this impressive dish without breaking the bank. I’ve served this at dinner parties where guests assumed I’d spent hours in the kitchen, when really, it comes together in about 30 minutes. The rich, restaurant-quality result belies its simple preparation and affordable ingredients. It’s proof that humble ingredients can transform into something truly special with just a few thoughtful additions and techniques.

    Essential Tips & Tricks

    Perfecting Your Bean Selection & Preparation

    For the creamiest result, butter beans (also called lima beans) are the star, but cannellini or great northern beans work beautifully too. Always rinse canned beans thoroughly to remove excess sodium and starch that can make your dish taste tinny. If using dried beans, soak them overnight and cook until just tender—slightly undercooked is better than mushy since they’ll continue cooking in the sauce. I once rushed this step and ended with bean mush instead of distinct, cream-coated beauties. Take your time draining them well to prevent a watery sauce that dilutes all those gorgeous flavors.

    Creating the Ultimate Creamy Tuscan Sauce

    The secret to this dish’s “marry me” status lies in building flavor layers methodically. Start by sautéing finely minced garlic in good olive oil until fragrant but not browned—burnt garlic will ruin everything! Add sun-dried tomatoes early so they release their oils into the base. When adding cream, lower the heat to prevent curdling and simmer gently to reduce and thicken. For extra richness, stir in a tablespoon of cream cheese or mascarpone. This technique creates a sauce that’s velvety and clings perfectly to each bean, similar to my popular creamy mushroom chicken pasta that uses the same principle.

    Serving Ideas & Creative Variations

    Perfect Pairings to Complete Your Meal

    These Creamy Tuscan Marry Me Butter Beans shine as both a main dish and a spectacular side. For a complete vegetarian meal, serve over creamy polenta or alongside crusty artisan bread for sauce-sopping. As a side, they complement grilled chicken, roasted salmon, or a juicy steak beautifully. I love serving them in shallow bowls to contain all that luscious sauce, with a sprinkle of fresh herbs and a drizzle of your best olive oil. For an elegant touch, add a side of roasted asparagus or a simple arugula salad with lemon vinaigrette to cut through the richness.

    Exciting Twists on the Classic Recipe

    Don’t be afraid to make this recipe your own! Add crispy pancetta or bacon bits for a smoky flavor dimension. For a seafood twist, fold in sautéed shrimp or scallops during the final minutes of cooking. Vegetable lovers can enhance the dish with sautéed mushrooms, wilted spinach, or roasted red peppers. I once added artichoke hearts and a splash of white wine, which transported the dish to a new level of Mediterranean flair. For a spicier version that pairs wonderfully with my blackened steak and shrimp alfredo, increase the red pepper flakes or add a dash of cajun seasoning.

    Storage & Troubleshooting Guide

    Keeping Your Beans Perfectly Creamy

    These Creamy Tuscan Marry Me Butter Beans store beautifully, often tasting even better the next day as the flavors meld. Cool completely before transferring to airtight containers and refrigerate for up to 3 days. When reheating, do so gently over low heat, adding a splash of cream or broth if the sauce has thickened too much. Avoid microwave reheating if possible, as it can make the sauce separate and the beans become tough. For meal prep, prepare the sauce ahead of time and store separately from the beans, combining them just before serving for the freshest texture.

    Fixing Common Sauce Mishaps

    If your sauce breaks or curdles, don’t panic! Lower the heat immediately and whisk in a tablespoon of cold cream. For sauce that’s too thin, create a slurry with a teaspoon of cornstarch dissolved in cold water and whisk it in while the sauce simmers. Too thick? Simply thin with a splash of broth or cream. If your beans seem bland, brighten with a squeeze of lemon juice and an extra pinch of salt. Remember that cream-based sauces need proper seasoning—taste as you go and adjust accordingly. I once saved a broken sauce by blending a small portion and whisking it back in—it worked like magic!

    Frequently Asked Questions

    Can I make Creamy Tuscan Marry Me Butter Beans vegan?

    Absolutely! Substitute the heavy cream with full-fat coconut milk or cashew cream, and use nutritional yeast instead of parmesan. The result is still wonderfully creamy with all the Tuscan flavors intact.

    What makes these butter beans earn the “Marry Me” title?

    The irresistible combination of creamy sauce, tender beans, and Tuscan flavors creates such an impressive dish that it’s rumored to have prompted marriage proposals! It’s comfort food elevated to romance-worthy status.

    Can I use fresh tomatoes instead of sun-dried?

    You can, but the flavor profile will change. If using fresh, choose Roma tomatoes, remove seeds, and roast them first to concentrate their flavor. Sun-dried tomatoes provide a unique sweetness and intensity that’s hard to replicate.

    How can I add protein to this dish?

    Grilled chicken, Italian sausage, or sautéed shrimp make excellent protein additions. For vegetarian options, try adding crispy tofu cubes or a sprinkle of toasted pine nuts.

    Are butter beans and lima beans the same thing?

    Yes! Butter beans are mature lima beans. They’re larger, creamier, and have a buttery texture that works perfectly in this dish. Either labeled variety will work beautifully.

    Final Thoughts

    These Creamy Tuscan Marry Me Butter Beans represent what I love most about cooking—transforming simple ingredients into something extraordinary. The rich, velvety sauce coating each tender bean creates a dish that feels both comforting and special. Whether you’re cooking for yourself, family, or someone you’re hoping to impress, this recipe delivers on both flavor and presentation. I hope you’ll share your creations with me on Pinterest and let me know if they inspire any big questions in your household!

  • Air Fryer Parmesan Wings: Crispy, Cheesy & Addictive Snack!

    Air Fryer Parmesan Wings: Crispy, Cheesy & Addictive Snack!

    Air Fryer Parmesan Wings: Crispy, Cheesy & Addictive Snack!

    Air Fryer Parmesan Crusted Chicken Wings have become my absolute obsession lately! There’s something magical about that perfect crunch when you bite into a wing that’s coated in savory parmesan and herbs, all while being healthier than deep-fried versions. I discovered this recipe during a game night at home when I wanted something impressive without spending hours in the kitchen. The air fryer transformed these ordinary wings into crispy, golden perfection that had everyone asking for the recipe. Trust me, once you try these wings with their crispy exterior and juicy interior, your snack game will never be the same again. Check out my other favorite recipes here.

    Recipe

    Why You’ll Love This Air Fryer Parmesan Crusted Chicken Wings

    Perfect Texture Every Time

    The air fryer magic truly shines with these parmesan crusted wings. Unlike oven-baked versions that can sometimes turn out soggy, or deep-fried ones that leave you feeling heavy, these strike the perfect balance. The circulating hot air creates that coveted crispy exterior while keeping the inside tender and juicy. I still remember the first time I made these – the satisfying crunch as I bit into that perfectly golden crust nearly made me dance around my kitchen! Plus, the parmesan forms this incredible savory shell that locks in all the chicken’s natural moisture, making these wings practically foolproof.

    Healthier Without Sacrificing Flavor

    Let’s be honest – we all want delicious food that doesn’t leave us feeling guilty afterward. These parmesan wings deliver exactly that! With minimal oil (just a light spray), you get all the indulgence without the extra calories. The rich flavor comes from the quality ingredients – freshly grated parmesan, aromatic herbs, and perfectly seasoned chicken – rather than excessive fats. I’ve served these to friends who swear they’re deep-fried because they simply can’t believe something this crispy and flavorful could be made with so little oil. It’s the perfect way to satisfy cravings while sticking to healthier eating habits.

    Essential Tips & Tricks

    Preparation Secrets

    The key to exceptional Air Fryer Parmesan Crusted Chicken Wings starts before they even hit the air fryer. Always pat your wings completely dry with paper towels – this simple step eliminates excess moisture that would otherwise prevent that perfect crust from forming. For maximum flavor penetration, I recommend seasoning the wings at least 30 minutes before cooking (overnight in the fridge is even better!). When creating your parmesan coating, opt for freshly grated parmesan rather than pre-packaged – the difference in melt and flavor is remarkable. And don’t skip that final spritz of oil spray on the coated wings – it helps the cheese crisp up beautifully.

    Perfecting the Cooking Process

    Temperature control is crucial for achieving that golden-brown parmesan crust without drying out the chicken. I’ve found that preheating your air fryer for 3-5 minutes creates the perfect environment for immediate crisping. Arrange your wings in a single layer with small spaces between each piece – overcrowding is the enemy of crispiness! Halfway through cooking, give them a gentle flip for even browning. For extra crispiness, try increasing the temperature by 25°F during the final 2-3 minutes. This technique creates that restaurant-quality finish that will have everyone thinking you ordered takeout from your favorite wing spot.

    Serving Ideas & Creative Variations

    Perfect Pairings

    These parmesan wings deserve companions that complement their crispy, savory goodness! I love serving them with a cooling blue cheese or ranch dip that balances the richness perfectly. For a complete meal, pair with fresh celery and carrot sticks for that classic wing experience with a satisfying crunch. When hosting, I arrange them on a wooden board surrounded by colorful dips and vegetable sticks – the presentation always impresses! For a heartier spread, these wings pair beautifully with sweet potato fries or a light arugula salad dressed with lemon vinaigrette. The contrast between the crispy wings and fresh sides creates a perfectly balanced meal.

    Flavor Twists

    While the classic parmesan crust is magnificent, experimenting with flavors takes these wings to new heights! Try adding Italian seasoning and a touch of lemon zest to the parmesan mixture for Mediterranean-inspired wings. For heat lovers, incorporate cayenne pepper or red pepper flakes into your coating. My personal favorite variation includes a drizzle of hot honey over the finished wings – the sweet-spicy-savory combination is absolutely divine! For an Asian-inspired twist, mix in some sesame seeds and serve with a side of sweet chili sauce. Don’t be afraid to get creative – these wings provide the perfect canvas for your flavor imagination!

    Storage & Troubleshooting Guide

    Keeping Wings Fresh

    Properly storing your Air Fryer Parmesan Crusted Chicken Wings ensures they remain delicious for days. Allow leftover wings to cool completely before refrigerating in an airtight container – they’ll stay good for up to 3 days. To maintain that crispy texture when reheating, avoid the microwave which will make them soggy. Instead, place them in the air fryer at 350°F for 3-4 minutes until heated through. For make-ahead preparation, you can season the wings and create the parmesan coating separately, storing them in the refrigerator until ready to cook. This prep-ahead method saves time while ensuring your wings are just as flavorful.

    Common Challenges Solved

    If your wings aren’t crisping properly, a few simple adjustments can help. The most common culprit is excess moisture – make sure your wings are thoroughly patted dry before coating. If your parmesan coating isn’t sticking well, try lightly spraying the wings with oil before applying the mixture. For wings that cook unevenly, remember that size matters – try to select wings of similar size or adjust cooking times for larger pieces. If you notice the parmesan burning before the wings are cooked through, lower your temperature by 25°F and extend the cooking time slightly. These simple fixes ensure perfect wings every time.

    Frequently Asked Questions

    Can I use frozen chicken wings for this recipe?

    Yes, but thaw them completely first and pat them very dry. Frozen wings contain excess moisture that prevents proper crisping. Add 2-3 minutes to your cooking time if starting with previously frozen wings.

    How do I know when my Air Fryer Parmesan Crusted Chicken Wings are done?

    Wings are done when they reach an internal temperature of 165°F and the parmesan coating is golden brown and crispy. If you don’t have a thermometer, cut into the thickest part – the meat should be white with no pink.

    Can I make these wings ahead of time for a party?

    Absolutely! Cook them 80% of the way through, then refrigerate. Before serving, air fry for 3-4 minutes at 375°F to reheat and finish crisping the parmesan coating.

    What’s the best parmesan cheese to use?

    Freshly grated Parmigiano-Reggiano gives the best flavor and melt. Pre-shredded cheese contains anti-caking agents that can prevent proper melting and crisping.

    Can I make this recipe in a conventional oven instead?

    Yes, bake at 425°F on a wire rack over a baking sheet for 35-40 minutes, flipping halfway. The texture won’t be quite as crispy as air-fried, but still delicious.

    Final Thoughts

    These Air Fryer Parmesan Crusted Chicken Wings have revolutionized my entertaining menu and weeknight dinners alike. The combination of convenience, healthier cooking, and that irresistible crispy texture makes them a standout recipe worth mastering. I find myself making these whenever I need a reliable crowd-pleaser or just a satisfying meal for myself. Don’t forget to check out more delicious recipes on my Pinterest page for endless inspiration. Your air fryer is about to become your new best friend in the kitchen!

  • Sautéed Bok Choy Recipe That Will WOW Your Taste Buds!

    Sautéed Bok Choy Recipe That Will WOW Your Taste Buds!

    Sautéed Bok Choy Recipe That Will WOW Your Taste Buds!

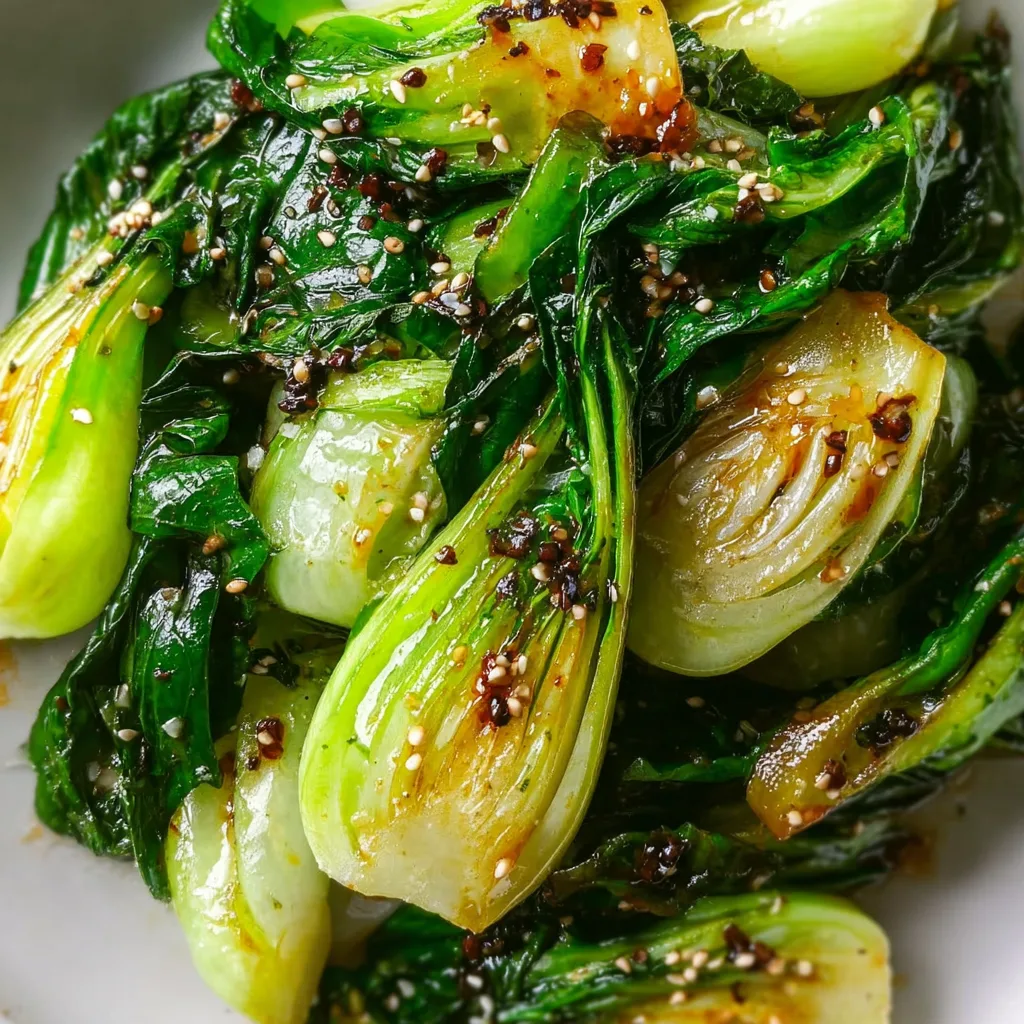
    Sautéed Bok Choy is one of those side dishes that transforms an ordinary meal into something special. The first time I made it, I was amazed at how just a few minutes in a hot pan could turn these humble greens into something so flavorful and elegant. There’s something magical about the way bok choy’s crisp stems and tender leaves create the perfect texture contrast. Whether you’re pairing it with garlic herb chicken or serving it alongside your favorite Asian-inspired main, this quick veggie side brings brightness and nutrition to your table in minutes.

    Recipe

    Why You’ll Love This Sautéed Bok Choy

    Simple Ingredients, Maximum Flavor

    This sautéed bok choy recipe proves that sometimes the simplest dishes are the most impressive. With just five ingredients – fresh bok choy, garlic, ginger, soy sauce, and a touch of sesame oil – you’ll create a side dish that’s bursting with umami goodness. I love how the garlic becomes golden and fragrant while the ginger adds that perfect zing. The beauty lies in letting these quality ingredients shine without overwhelming them. The natural sweetness of the bok choy stems paired with the savory sauce creates a perfect balance that makes your taste buds dance.

    Quick Cooking Time

    On those hectic weeknights when I’m scrambling to get dinner on the table, this sautéed bok choy is my secret weapon. It takes just 5 minutes to prep and another 5 to cook – that’s faster than boiling pasta! The quick cooking method preserves the vibrant green color and nutrients while developing those complex flavors we crave. I’ve lost count of how many times this recipe has saved dinner when I needed something nutritious but didn’t have much time. The rapid cooking also means you can prepare it at the last minute while your main dish rests.

    Essential Tips & Tricks

    Proper Preparation Techniques

    The key to perfect sautéed bok choy starts before it even hits the pan. Always separate the leaves from stems and wash thoroughly to remove any hidden grit. I learned this the hard way after serving sandy bok choy to dinner guests (mortifying!). Pat everything dry before cooking – excess water creates steam instead of that beautiful caramelization we’re after. For baby bok choy, I recommend halving or quartering lengthwise to create more surface area for browning while keeping the elegant shape. For larger varieties, slice the stems into uniform pieces so they cook evenly.

    Mastering the Cooking Process

    The secret to restaurant-quality sautéed bok choy is high heat and not overcrowding your pan. When I tried making this at my slow cooker chicken stew dinner party, I discovered that working in batches produces much better results than cramming everything in at once. Start by sautéing the stems for 1-2 minutes before adding the leaves – this ensures perfect texture throughout. Keep everything moving in the pan, especially the garlic and ginger, which can burn quickly. The final splash of soy sauce should sizzle dramatically, creating an instant glaze that coats every piece.

    Serving Ideas & Creative Variations

    Perfect Pairings

    Sautéed bok choy shines as a versatile side that complements nearly any protein. I particularly love serving it alongside crispy hot honey feta chicken for a meal that balances rich and light elements. The clean, bright flavors of bok choy also pair beautifully with grilled fish, especially salmon or sea bass. For a complete Asian-inspired meal, serve it with steamed rice and teriyaki chicken. When hosting dinner parties, I arrange the glossy green bok choy on a long platter, creating a dramatic presentation that always impresses guests while keeping the focus on simple, quality ingredients.

    Exciting Flavor Twists

    While the classic garlic-ginger combination is unbeatable, don’t be afraid to experiment with your sautéed bok choy. Adding a sprinkle of red pepper flakes creates a pleasant heat that wakes up your taste buds. For a nutty dimension, finish with toasted sesame seeds or chopped cashews. My personal favorite variation includes a splash of rice vinegar and a drizzle of honey for a sweet-tangy profile that’s absolutely addictive. For special occasions, try deglazing the pan with a tablespoon of sake or mirin – the resulting sauce elevates this humble vegetable to gourmet status.

    Storage & Troubleshooting Guide

    Proper Storage Methods

    While sautéed bok choy is best enjoyed fresh from the wok, sometimes leftovers are inevitable. Store any extras in an airtight container in the refrigerator for up to 3 days. I’ve found that the flavor actually deepens overnight, making next-day bok choy perfect for adding to grain bowls or quick lunches. To reheat, a quick 30-second zap in the microwave works, but for best results, give it a brief stir-fry to revive the texture. Freezing isn’t ideal as the texture becomes mushy, but in a pinch, frozen leftovers can be incorporated into soups or dumplings where the textural change won’t be as noticeable.

    Common Challenges Solved

    The most frequent issue with sautéed bok choy is excess moisture making it soggy instead of crisp-tender. The solution is simple: ensure your bok choy is thoroughly dried before cooking and your pan is hot enough to sear rather than steam. If your garlic turns bitter, you’re likely cooking it too long or at too high a temperature – add it after the stems have started to soften. For bok choy that’s too tough, you probably didn’t cook the stems long enough before adding the leaves. Remember that cooking times vary depending on size – baby bok choy cooks much faster than the larger varieties.

    Frequently Asked Questions

    What’s the difference between baby bok choy and regular bok choy?

    Baby bok choy has a milder flavor and more tender texture than regular bok choy. It’s smaller, with pale green stems and is often used whole in stir-fries, while regular bok choy is larger with white stems and is typically chopped before cooking.

    Can I make sautéed bok choy ahead of time?

    Yes, you can prepare sautéed bok choy up to a day ahead. Store it refrigerated and reheat quickly in a hot pan to maintain the crisp-tender texture. It’s best served fresh, but reheating works well for meal prep.

    What’s the best oil to use for sautéed bok choy?

    Oils with high smoke points like avocado, grapeseed, or peanut oil work best for the initial sauté. Finish with a drizzle of sesame oil at the end for authentic flavor without burning this delicate oil.

    How do I prevent my sautéed bok choy from becoming bitter?

    To avoid bitterness in sautéed bok choy, don’t overcook it. Keep the cooking time brief (3-5 minutes total) and use fresh, quality ingredients. Adding a touch of sweetness like honey can also balance any natural bitterness.

    Is sautéed bok choy keto-friendly?

    Absolutely! Sautéed bok choy is perfect for keto diets with approximately 1.5g of net carbs per cup. It provides excellent nutrition while keeping carbs low, making it an ideal vegetable side dish for keto meal plans.

    Final Thoughts

    Sautéed bok choy might seem simple, but it’s this simplicity that makes it truly special. The way it transforms from raw to vibrant green perfection in just minutes never fails to delight me. I hope you’ll make this recipe part of your regular rotation – it’s proof that healthy eating doesn’t require complexity or hours in the kitchen. Whether you’re just beginning your culinary journey or you’re a seasoned cook, this dish delivers restaurant-quality results with minimal effort. For more vegetable inspiration, check out my recipes on Pinterest where I’m always sharing new ideas for making veggies the star of your plate.