Blog

  • Dal Makhani Recipe: Irresistibly Creamy & Bursting with Flavor!

    Dal Makhani Recipe: Irresistibly Creamy & Bursting with Flavor!

    Dal Makhani Recipe: Irresistibly Creamy & Bursting with Flavor!

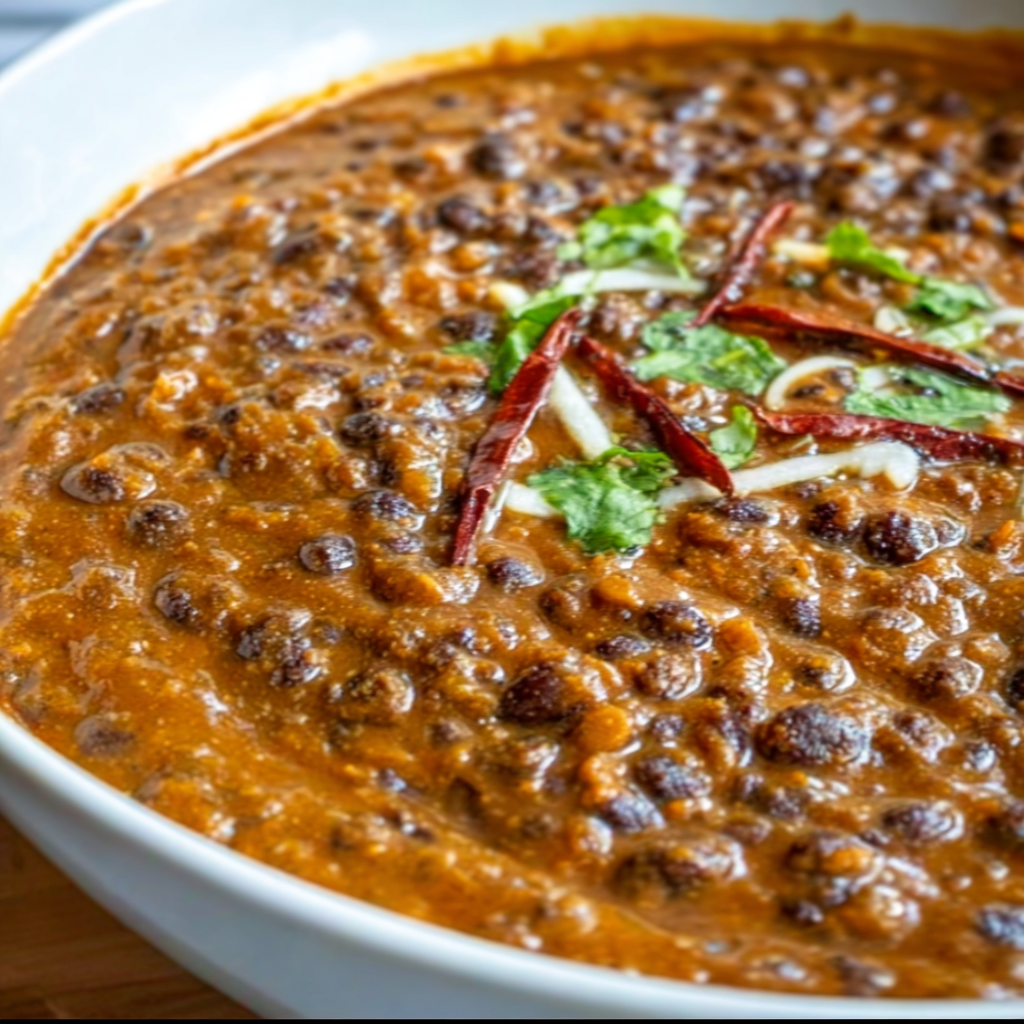
    Dal Makhani has completely transformed my weeknight dinner game, bringing the rich, creamy flavors of North Indian cuisine right into my humble kitchen. The first time I simmered these black lentils with butter and cream, my entire apartment filled with an aroma so intoxicating that my neighbor actually knocked on my door asking what I was cooking! This velvety dal creates pure magic in your mouth—each spoonful delivers a perfect balance of smokiness, creaminess, and subtle spice that will transport you straight to the streets of Delhi. If you’ve been searching for an authentic Dal Makhani recipe, your journey ends here.

    Recipe

    Why You’ll Love This Dal Makhani

    A Perfect Balance of Flavors

    This Dal Makhani delivers complex layers of flavor that develop beautifully over time. The earthy black lentils provide a hearty base while the aromatic spices—cumin, coriander, and garam masala—create depth without overwhelming heat. I love how the slow cooking process transforms simple ingredients into something truly extraordinary. The butter and cream melt into the lentils, creating that signature silky texture that coats your spoon and warms your soul. Trust me, even my spice-cautious friends request this dish repeatedly!

    Versatile and Nutritious Comfort Food

    Beyond its incredible taste, Dal Makhani offers remarkable nutritional benefits. These black lentils pack a serious protein punch while providing fiber that keeps you satisfied for hours. I often make a large batch on Sunday for easy weekday lunches that actually keep me energized through afternoon meetings. It’s equally perfect for casual family dinners or impressive enough for guests. The best part? It actually tastes even better the next day, making it ideal for meal prep and busy households who need delicious food without daily cooking.

    Essential Tips & Tricks

    Perfecting the Texture

    The secret to restaurant-quality Dal Makhani lies in achieving that perfect creamy consistency. Start by soaking your black lentils (urad dal) and kidney beans (rajma) overnight—this isn’t optional! This crucial step ensures they cook evenly and develop that luxurious texture. When simmering, maintain a gentle bubble rather than a rolling boil, and stir occasionally to prevent sticking. The traditional method calls for slow cooking for hours, but I’ve found that 45 minutes in a pressure cooker followed by 20 minutes of simmering with cream creates nearly identical results for those busy weeknights.

    Building Flavor Foundations

    The tempering process (tadka) transforms this dish from good to extraordinary. Heat ghee or butter until shimmering, then add whole spices like cumin seeds and bay leaves, allowing them to release their essential oils before adding onions. Let those onions caramelize to a deep golden brown—don’t rush this step! The natural sweetness balances the earthiness of the lentils. For authentic flavor, finish with a splash of cream and a dollop of butter just before serving. This final touch creates that signature velvety mouthfeel that makes restaurant-style Dal Makhani so irresistible.

    Serving Ideas & Creative Variations

    Perfect Pairings

    Dal Makhani deserves worthy companions on your table. Serve with fluffy basmati rice or freshly made naan bread for soaking up every last drop of that luxurious sauce. I love adding a side of quick-pickled onions for brightness and textural contrast. For a complete Indian feast, pair with Cauliflower Chickpea Curry and a simple cucumber raita. The cooling yogurt balances the richness perfectly. For special occasions, try serving in individual copper bowls with a swirl of cream and fresh cilantro—the presentation elevates the experience and always impresses guests!

    Modern Twists on Tradition

    While I respect tradition, I’ve discovered some delightful creative variations that breathe new life into this classic dish. For a lighter version, substitute half the cream with coconut milk for subtle sweetness. Vegetable additions like wilted spinach or roasted butternut squash fold in beautifully during the final cooking stage. My personal favorite twist is adding a tablespoon of smoked paprika for enhanced smokiness—it mimics the traditional clay pot cooking method. For heat lovers, stir in a spoonful of chili garlic paste just before serving for a fiery kick that complements the creamy base.

    Storage & Troubleshooting Guide

    Keeping It Fresh

    Dal Makhani actually improves with time as flavors meld together, making it perfect for batch cooking. Store in airtight containers in the refrigerator for up to 5 days—the flavors will continue developing beautifully. For longer storage, freeze portions in freezer-safe containers for up to 3 months. When reheating, add a splash of water or cream as the dal tends to thicken considerably. I often make double batches specifically to freeze; nothing beats having homemade Dal Makhani ready within minutes on hectic days when cooking feels impossible.

    Fixing Common Issues

    Even experienced cooks occasionally encounter challenges with Dal Makhani. If your dal is too thick or grainy, the lentils likely needed more soaking time or longer cooking. Simply add warm water or stock (¼ cup at a time) and simmer until the desired consistency is reached. For dal that’s too thin, continue simmering uncovered to reduce, or add a teaspoon of cornstarch slurried with cold water. If your dal lacks depth, try adding a touch more garam masala and a squeeze of lemon juice—acid brightens all the flavors. Remember that patience is key—this dish rewards those who give it time to develop.

    Frequently Asked Questions

    Can I make Dal Makhani without cream for a dairy-free version?

    Absolutely! Substitute full-fat coconut milk or cashew cream for traditional dairy. The coconut adds subtle sweetness while cashew cream maintains the neutral creamy profile closer to the original.

    How can I make authentic Dal Makhani if I don’t have time for overnight soaking?

    Use the quick-soak method: boil lentils and beans for 2 minutes, then let sit covered for 1 hour. While not ideal, it’s a workable solution when time is limited.

    My Dal Makhani never tastes as rich as restaurant versions. What’s the secret?

    Restaurants often use significantly more butter and cream than home recipes suggest. Don’t skimp on these ingredients if you want true restaurant flavor in your Dal Makhani.

    Can I make this in a slow cooker instead?

    Yes! Cook on low for 8 hours after sautéing the aromatics. Add cream and butter during the final 30 minutes of cooking time.

    What’s the difference between Dal Makhani and regular dal?

    Dal Makhani specifically uses whole black lentils and kidney beans simmered with butter and cream, while regular dal can be made with various split lentils and typically has a thinner consistency.

    Final Thoughts

    Dal Makhani represents everything I love about cooking—simple ingredients transformed through time and technique into something truly extraordinary. There’s something deeply satisfying about watching these humble lentils slowly absorb the flavors and become this luxurious, velvety dish that brings people together. Whether you’re new to Indian cooking or a seasoned pro, this recipe deserves a permanent spot in your repertoire. For more delicious recipes like this one, follow me on Pinterest where I share my latest culinary adventures!
  • Bacon Cheeseburger Tortellini: Irresistibly Delicious Comfort Food!

    Bacon Cheeseburger Tortellini: Irresistibly Delicious Comfort Food!

    Bacon Cheeseburger Tortellini: Irresistibly Delicious Comfort Food!

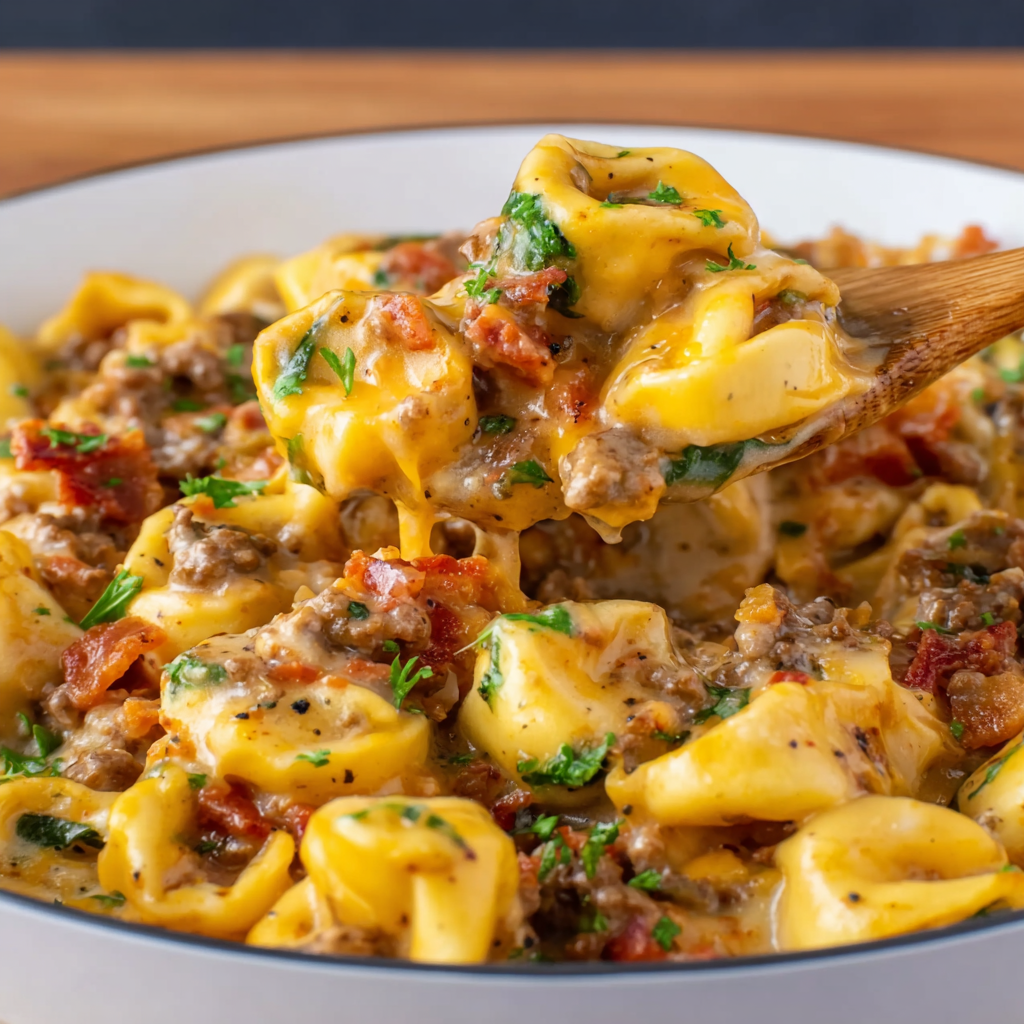
    Bacon Cheeseburger Tortellini has completely transformed my weeknight dinner game, and I’m absolutely thrilled to share this cozy comfort dish with you! The first time I made this, my kitchen filled with the irresistible aroma of sizzling bacon and seasoned ground beef that had my family hovering around the stove asking “how much longer?” This delicious pasta creation combines all the flavors of your favorite burger – savory beef, crispy bacon, melty cheese – with pillowy cheese-filled tortellini for a meal that feels like a warm hug. It’s become my go-to when I need something hearty that makes everyone at my table smile. Check out more family favorites at Recipes Darleen.

    Recipe

    Why You’ll Love This Bacon Cheeseburger Tortellini

    Perfect Comfort Food Combination

    There’s something magical about combining two beloved classics into one extraordinary dish. The rich, savory ground beef perfectly complements the cheese-filled tortellini, creating layers of flavor in every bite. I still remember the first time I served this to my sister – her eyes widened with that first forkful! The bacon adds a smoky crunch that elevates the entire dish, while the cheese sauce brings everything together in creamy perfection. This dish strikes that perfect balance between familiar comfort and exciting flavor that makes dinnertime something to look forward to.

    Quick and Straightforward Preparation

    On busy weeknights when I’m juggling work emails and helping with homework, this recipe is my saving grace. You’ll have this on the table in under 30 minutes, making it perfect for those evenings when you want something delicious without spending hours in the kitchen. The ingredients are straightforward pantry staples, and the cooking process flows naturally – brown the meat, cook the pasta, combine with the sauce. No complicated techniques or specialized equipment needed! Even when I’m exhausted, I can make this dish on autopilot and still have everyone asking for seconds.

    Essential Tips & Tricks

    Perfecting the Flavor Base

    The secret to making this dish absolutely irresistible lies in building those foundational flavors. Start by cooking your bacon until it’s perfectly crispy, then use that flavorful bacon fat to brown your ground beef – this simple step infuses everything with that smoky, savory essence. Don’t rush the onion and garlic sautéing process; letting them become translucent and aromatic creates depth in your sauce. I always add a splash of Worcestershire sauce for that authentic burger flavor that makes everyone ask, “What’s in this?” Remember to season each layer as you go, rather than just at the end.

    Pasta and Sauce Techniques

    Achieving that perfect creamy texture makes all the difference between a good dish and a great one. Cook your tortellini just until al dente – they’ll continue cooking slightly in the sauce. For the creamiest result, I’ve found that gradually adding cheese to the sauce while it’s off the heat prevents graininess. If your sauce seems too thick, add a splash of pasta water – the starch helps everything come together beautifully. For a variation with an Italian twist, check out my Italian Chicken Gnocchi Soup which uses similar techniques for creating a velvety base.

    Serving Ideas & Creative Variations

    Perfect Pairings and Sides

    Serve this hearty dish with something fresh and crisp to balance the richness. A simple green salad with a tangy vinaigrette cuts through the creaminess beautifully – I like arugula with lemon dressing for the perfect contrast. Garlic bread makes an excellent companion for soaking up every last bit of that delicious sauce. For a complete meal that will impress dinner guests, consider adding my Mediterranean Chicken Quinoa Bowl as a lighter side option. For casual family dinners, I serve this in wide, shallow bowls to keep everything at the perfect temperature.

    Exciting Flavor Twists

    Don’t be afraid to make this recipe your own with creative flavor variations! For a spicy kick, add diced jalapeños or a dash of hot sauce to the sauce. My husband loves when I add mushrooms for an earthy element, while my kids go crazy for the version with diced pickles mixed in at the end for that authentic burger experience. Try using half ground beef and half Italian sausage for extra depth, or swap the cheddar for pepper jack if you enjoy heat. For a lighter option, ground turkey works beautifully – just add a bit more seasoning since it’s naturally less flavorful than beef.

    Storage & Troubleshooting Guide

    Proper Storage and Reheating

    This dish makes fantastic leftovers that might taste even better the next day! Store any remaining pasta in an airtight container in the refrigerator for up to 3 days. When reheating, add a splash of milk or cream to revive the sauce, as it tends to thicken when chilled. Warm it gently on the stovetop over medium-low heat, stirring occasionally to prevent sticking. I don’t recommend freezing this dish, as the cream sauce can separate and the tortellini texture suffers. For meal prep, you can prepare the meat sauce ahead of time and refrigerate, then cook the pasta fresh when you’re ready to serve.

    Common Issues and Solutions

    If your sauce breaks or looks curdled, don’t panic! Lower the heat immediately and whisk in a tablespoon of cold cream. The most common mistake is overheating the cheese sauce – always add cheese off the heat. If your dish seems bland, brighten it with a squeeze of fresh lemon juice or a dash of hot sauce. Too thick? Add pasta water a tablespoon at a time. Too thin? Let it simmer uncovered for a few minutes. Remember that tortellini absorbs sauce quickly, so if you’re not serving immediately, make your sauce slightly thinner than you think you need.

    Frequently Asked Questions

    Can I use frozen tortellini for Bacon Cheeseburger Tortellini?

    Absolutely! No need to thaw – just add 1-2 minutes to the cooking time. Check for doneness by tasting a piece; it should be tender but still have a slight bite.

    What cheese works best in this recipe?

    Sharp cheddar provides classic burger flavor, but a mix of cheddar and mozzarella creates the best melt. Experiment with American cheese for an authentic fast-food burger taste.

    Can I make this dish ahead of time?

    Prepare the meat sauce up to 2 days ahead, but cook the tortellini fresh when ready to serve. Combine everything just before serving for best texture.

    Is there a way to make this lighter?

    Use lean ground beef or turkey, reduced-fat cheese, and light cream instead of heavy cream. Add extra vegetables like bell peppers or spinach for nutrition.

    What’s the best way to reheat leftovers?

    Gently warm on the stovetop with a splash of milk to revive the sauce. Microwave on 70% power, stirring halfway through, to prevent the pasta from becoming tough.

    Final Thoughts

    This Bacon Cheeseburger Tortellini has become more than just a recipe in my household – it’s a guaranteed mood-lifter after long days and the dish most requested for special family dinners. The way it combines familiar comfort with surprising depth keeps everyone coming back for more. I’d love to see your versions of this dish – share them with me on Pinterest! Remember that cooking is about making memories as much as meals, and this Bacon Cheeseburger Tortellini creates plenty of both around my table.

  • Honey Lime Chicken with Fresh Mango Salsa: Irresistibly Zesty & Sweet!

    Honey Lime Chicken with Fresh Mango Salsa: Irresistibly Zesty & Sweet!

    Honey Lime Chicken with Fresh Mango Salsa: Irresistibly Zesty & Sweet!

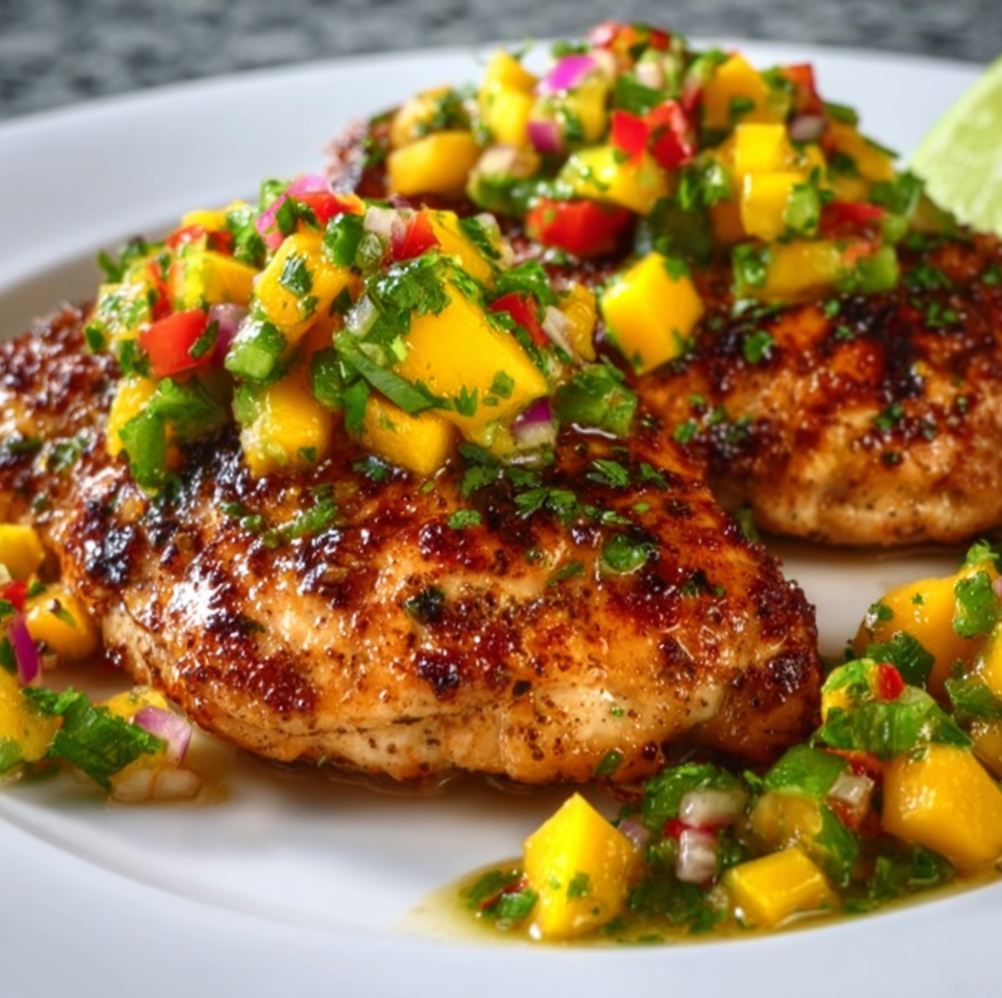
    There’s something magical about the way honey lime chicken with fresh mango salsa dances across your taste buds on a warm evening. The tangy lime juice mingling with sweet honey creates this irresistible glaze that caramelizes perfectly on the grill. I discovered this recipe during a beach vacation when a local chef shared his secret for the most flavorful chicken I’d ever tasted. The tropical brightness of the mango salsa paired with the sticky-sweet chicken instantly transports me back to that oceanside dinner. This dish has become my go-to when I want to impress guests or simply treat myself to something special from Recipes Darleen.

    Recipe

    Why You’ll Love This Honey Lime Chicken with Fresh Mango Salsa

    Perfect Balance of Flavors

    The magic of this dish lies in its perfect harmony of flavors. The honey provides a natural sweetness that caramelizes beautifully when grilled, while the lime juice cuts through with bright acidity that keeps everything balanced. I love how the chicken soaks up all these flavors, becoming incredibly juicy and tender. The marinade requires just a handful of ingredients you probably already have in your pantry: honey, lime juice, garlic, and a touch of chili powder for subtle heat. When these ingredients come together, they create a mouthwatering aroma that will have your family gathering in the kitchen before dinner is even ready!

    Quick and Versatile Preparation

    One thing I absolutely adore about this honey lime chicken is how versatile the preparation can be. You can marinate the chicken for as little as 30 minutes when you’re short on time, or let it soak overnight for maximum flavor penetration. The cooking method is flexible too! Grill it for those beautiful char marks and smoky flavor, bake it for hands-off convenience, or even pan-sear it when the weather doesn’t cooperate. I’ve made this recipe on busy weeknights and for special weekend gatherings. The fresh mango salsa comes together in minutes while the chicken cooks, making this an efficient yet impressive meal that never feels rushed.

    Essential Tips & Tricks

    Perfecting the Marinade

    The key to exceptional honey lime chicken starts with the marinade. I’ve found that using fresh lime juice (never bottled) makes a remarkable difference in brightness. For the best flavor infusion, score your chicken breasts with shallow cuts before marinating—this allows the sweet-tangy mixture to penetrate deeper. Another game-changer is adding a tablespoon of olive oil to your marinade, which helps the chicken retain moisture during cooking. Don’t skip the 10 minutes of resting time after cooking! This allows the juices to redistribute throughout the meat, resulting in chicken that’s moist and tender rather than dry. Your patience will be rewarded with perfectly juicy results.

    Creating Perfect Mango Salsa

    The fresh mango salsa deserves as much attention as the chicken itself. Select mangoes that yield slightly to pressure—they should feel soft but not mushy. I’ve learned that the best texture comes from dicing all ingredients to a similar size, about ¼-inch pieces. For a balanced flavor profile, don’t skip the red onion and jalapeño; they provide essential contrast to the sweet mango. A pro tip I discovered after many attempts: make the salsa at least 30 minutes before serving and store it in the refrigerator. This allows the flavors to meld together beautifully, similar to how I prepare the Mexican Street Corn Pasta Salad that pairs wonderfully with this dish.

    Serving Ideas & Creative Variations

    Complementary Side Dishes

    This honey lime chicken with fresh mango salsa shines as the star of various meal presentations. For a complete dinner, I love serving it over coconut rice, which soaks up all those delicious juices. A simple side of black beans seasoned with cumin and lime provides protein and complements the tropical flavors perfectly. For a lighter option, pair with a crisp jicama slaw dressed with lime and cilantro. When entertaining, I arrange the sliced chicken over a bed of mixed greens with avocado slices and drizzle with extra lime juice. The vibrant colors make for a stunning presentation that’s as beautiful as it is delicious!

    Exciting Flavor Variations

    While the classic recipe is divine, I’ve enjoyed experimenting with variations that maintain the essence of the dish while introducing new flavor dimensions. Try adding a tablespoon of tequila to the marinade for a subtle complexity that evokes margarita vibes. For a Thai-inspired twist, incorporate lemongrass and a splash of coconut milk into the marinade. The mango salsa is equally adaptable—add diced pineapple or peach for additional sweetness, or substitute watermelon for a refreshing summer variation. For heat lovers, incorporate habanero instead of jalapeño in the salsa, similar to my approach with Grilled Shrimp Bowl with Avocado Corn Salsa.

    Storage & Troubleshooting Guide

    Proper Storage Solutions

    Storing leftover honey lime chicken properly ensures you can enjoy this delicious meal for days to come. Allow the chicken to cool completely before refrigerating in an airtight container—it will maintain its quality for up to 3 days. Store the mango salsa separately in its own container to preserve its fresh texture and prevent it from becoming soggy. When reheating the chicken, add a splash of water or chicken broth to maintain moisture, then cover and warm gently in the microwave or in a skillet over medium-low heat. For meal prep, you can freeze the marinated raw chicken for up to 2 months—just thaw overnight in the refrigerator when ready to cook.

    Common Issues and Solutions

    Even experienced cooks encounter challenges with this recipe. If your chicken is turning out dry, you’re likely overcooking it—invest in a meat thermometer and remove the chicken from heat when it reaches 165°F (74°C). For chicken that’s not absorbing enough flavor, try pounding it to an even thickness before marinating to help it cook evenly and absorb more marinade. If your mango salsa is too watery, make sure to remove excess juice from the mango before mixing, and add a touch more lime juice and salt to brighten the flavors. When the salsa lacks punch, a pinch of cayenne pepper or a drizzle of honey can quickly remedy the situation.

    Frequently Asked Questions

    Can I make honey lime chicken with fresh mango salsa ahead of time?

    Yes! Marinate the chicken up to 24 hours in advance and prepare the mango salsa up to 4 hours before serving. Store separately in the refrigerator and combine just before serving for the freshest flavor and texture.

    What’s the best type of mango to use for the salsa?

    Ataulfo (also called champagne or honey) mangoes work beautifully with their sweet, creamy flesh and minimal fibers. Tommy Atkins mangoes are more widely available and also work well when fully ripe.

    Can I use frozen mango for the salsa?

    While fresh is preferred for optimal texture, thawed frozen mango will work in a pinch. Drain excess liquid after thawing and pat dry with paper towels before dicing and mixing with other ingredients.

    How can I make this recipe spicier?

    Add cayenne pepper or red pepper flakes to the chicken marinade, and increase the amount of jalapeño (keeping the seeds) in the mango salsa. A dash of hot sauce just before serving also works wonderfully.

    Is this recipe gluten-free?

    Yes, this honey lime chicken with fresh mango salsa is naturally gluten-free. Just ensure any pre-packaged spices you use don’t contain anti-caking agents with gluten.

    Final Thoughts

    This honey lime chicken with fresh mango salsa has become more than just a recipe in my kitchen—it’s a reminder that simple ingredients can create extraordinary meals. The bright, tropical flavors bring sunshine to the table regardless of season, while the balance of sweet, tangy, and spicy elements makes every bite interesting. I hope this dish brings as much joy to your table as it has to mine! For more delicious inspiration, check out my other recipes on Pinterest where I’m always sharing new flavor adventures.

  • Strawberry Shortcake Cheesecake Rolls: Irresistibly Sweet Sushi Delight!

    Strawberry Shortcake Cheesecake Rolls: Irresistibly Sweet Sushi Delight!

    Strawberry Shortcake Cheesecake Rolls: Irresistibly Sweet Sushi Delight!

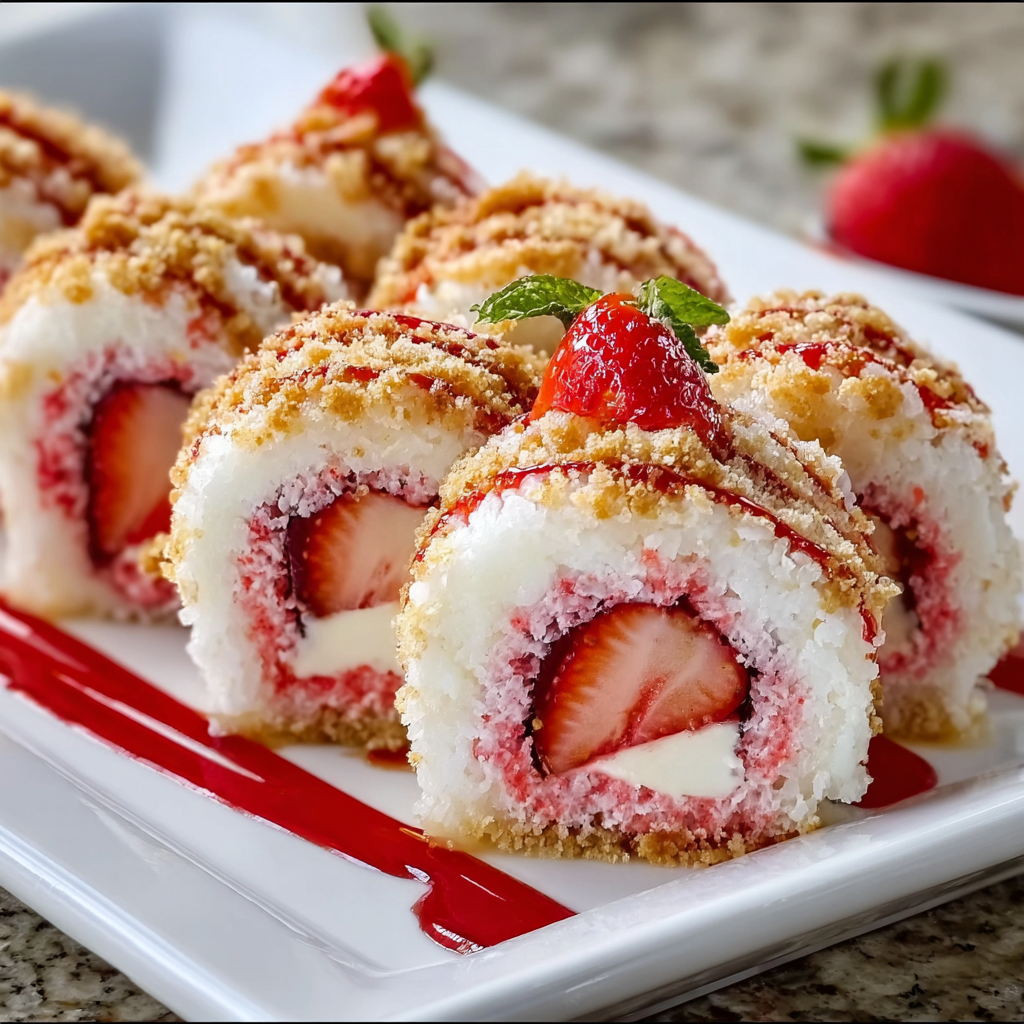
    These strawberry shortcake cheesecake dessert sushi rolls have completely transformed my dessert game! Imagine the creamy richness of cheesecake, the sweet-tart pop of fresh strawberries, and the nostalgic comfort of shortcake—all rolled into an adorable, bite-sized treat that looks as impressive as it tastes. I first created these for my niece’s birthday party, and the way everyone’s eyes lit up when they spotted these pretty pink rolls made my heart sing. If you’re looking for a show-stopping dessert that combines classic flavors in an unexpected way, this recipe is about to become your new favorite!

    Recipe

    Why You’ll Love This Strawberry Shortcake Cheesecake Dessert Sushi Rolls

    Perfect Balance of Flavors and Textures

    There’s something magical about the way these elements come together. The cream cheese filling delivers that tangy richness we all crave, while crumbled shortcake adds a delicate sweetness and subtle texture. Fresh strawberries bring their juicy brightness, creating that perfect sweet-tart balance that makes your taste buds dance. I love how each bite delivers a complete flavor experience—creamy, sweet, tangy, and fresh all at once. The soft, pillowy wrap hugs everything together, making these rolls incredibly satisfying to bite into. Trust me, the flavor combination is absolutely dreamy!

    Impressive Yet Surprisingly Simple

    Don’t let their elegant appearance fool you—these dessert sushi rolls are much easier to make than they look! The rolling technique is forgiving and doesn’t require any special equipment beyond plastic wrap and a bamboo sushi mat (though a clean kitchen towel works in a pinch). I was honestly nervous the first time I attempted these, but after rolling just one, I felt like a pro! The prep time is minimal, and most components can be made ahead. Plus, they’re endlessly customizable with whatever berries or cookies you have on hand. These rolls deliver maximum “wow factor” with minimum stress.

    Essential Tips & Tricks

    Mastering the Perfect Roll

    The key to beautiful rolls is working with chilled ingredients but not ice-cold ones. Let your cream cheese soften slightly—about 20 minutes at room temperature is perfect. When spreading your filling, leave a small border at the edges to prevent overflow. Use plastic wrap directly against the surface as you roll to create tension without sticking. Roll firmly but gently—too loose and they’ll fall apart, too tight and fillings squish out. I learned this the hard way after my first attempt left me with a delicious but messy creation! Practice makes perfect, and even “ugly” rolls taste amazing. For more dessert inspiration, check out my other no-bake treats.

    Ingredient Selection Matters

    Always opt for full-fat cream cheese for the richest, most stable filling. Low-fat versions contain more water and can make your rolls soggy. For strawberries, choose firm, ripe berries with vibrant color—they’ll provide the best flavor and won’t release too much juice into your rolls. Pat them dry after washing to remove excess moisture. The shortcake element is flexible—store-bought shortcake, vanilla cookies, or even angel food cake all work beautifully. I sometimes add a tiny splash of almond extract to the filling for an elevated flavor that guests can’t quite put their finger on but always love!

    Serving Ideas & Creative Variations

    Presentation That Wows

    Serve these rolls slightly chilled for the best texture and flavor—about 15-20 minutes out of the refrigerator is perfect. Arrange them on a white platter for dramatic contrast, or go full sushi-style with chopsticks and a small dish of strawberry coulis “soy sauce” for dipping. A light dusting of powdered sugar or a drizzle of white chocolate adds an elegant finishing touch. For special occasions, I place each roll in a decorative cupcake liner and arrange them in a circle around a bowl of extra strawberries. The presentation always earns gasps of delight before anyone even takes a bite!

    Exciting Flavor Twists

    While the classic strawberry version is divine, don’t be afraid to experiment! Try blueberry-lemon by adding lemon zest to the filling and substituting fresh blueberries. Chocolate lovers will adore a version with chocolate graham crackers and chocolate-dipped strawberries. For a tropical twist, use pineapple and coconut with macadamia nut cookies. During fall, pumpkin cheesecake filling with gingersnap crumbles creates a seasonal sensation. My personal favorite variation includes a thin layer of Nutella spread beneath the cream cheese layer—it’s absolutely indulgent and perfect for special occasions when calories don’t count!

    Storage & Troubleshooting Guide

    Proper Storage Techniques

    These rolls are best enjoyed within 24 hours of making them, but proper storage can extend their life. Keep them in an airtight container with parchment paper between layers to prevent sticking. Refrigerate immediately after serving—cream cheese shouldn’t sit at room temperature for more than two hours. While freezing isn’t ideal due to texture changes in the strawberries, you can freeze the rolls without fruit for up to one month. I like to make a double batch, freezing half with just the cream cheese filling, then adding fresh strawberries after thawing for a quick dessert option on busy days!

    Fixing Common Issues

    If your filling seems too soft to work with, chill it for 15-20 minutes before spreading. For rolls that fall apart, the likely culprit is overfilling—less is more for structural integrity! If your strawberries are releasing too much juice, try macerating them with a tiny bit of sugar and draining the excess liquid before using. Rolls looking messy? A dusting of powdered sugar hides a multitude of sins! And if disaster truly strikes, simply turn everything into a trifle by layering the components in a pretty glass dish. I once salvaged a failed batch this way for unexpected guests, and they thought I’d planned it all along!

    Frequently Asked Questions

    Can I make strawberry shortcake cheesecake dessert sushi rolls ahead of time?

    Yes! Prepare them up to 24 hours in advance, but add any powdered sugar or delicate garnishes just before serving. Store in the refrigerator in an airtight container with parchment between layers.

    What can I substitute for the cream cheese filling?

    Mascarpone makes a luxurious alternative. For a lighter option, try Greek yogurt mixed with a bit of honey and whipped until firm. Each creates a different flavor profile while maintaining the creamy texture.

    Are these suitable for a gluten-free diet?

    Absolutely! Simply use gluten-free cookies or shortcake as your crumble element. The rest of the ingredients are naturally gluten-free, making this an easily adaptable dessert.

    How do I prevent my rolls from getting soggy?

    Pat strawberries completely dry after washing, don’t prepare more than 24 hours ahead, and keep refrigerated until about 15-20 minutes before serving.

    Can I use frozen strawberries instead of fresh?

    Fresh is best for texture and appearance. If using frozen, thaw completely, drain thoroughly, and pat dry to remove excess moisture. The rolls may be slightly softer but will still taste delicious.

    Final Thoughts

    These strawberry shortcake cheesecake dessert sushi rolls have become my signature party treat for good reason—they’re unexpected, delightful, and always disappear quickly! The combination of creamy cheesecake, sweet-tart strawberries, and nostalgic shortcake flavors creates something truly special. I love watching guests’ faces light up when they take their first bite. Don’t be intimidated by their fancy appearance—with the tips I’ve shared, you’ll be rolling like a pro in no time. For more inspiration, follow my Pinterest board where I share new dessert ideas weekly!

  • Homemade Rose Pistachio Ice Cream Recipe That Will Melt Your Heart

    Homemade Rose Pistachio Ice Cream Recipe That Will Melt Your Heart

    Homemade Rose Pistachio Ice Cream Recipe That Will Melt Your Heart

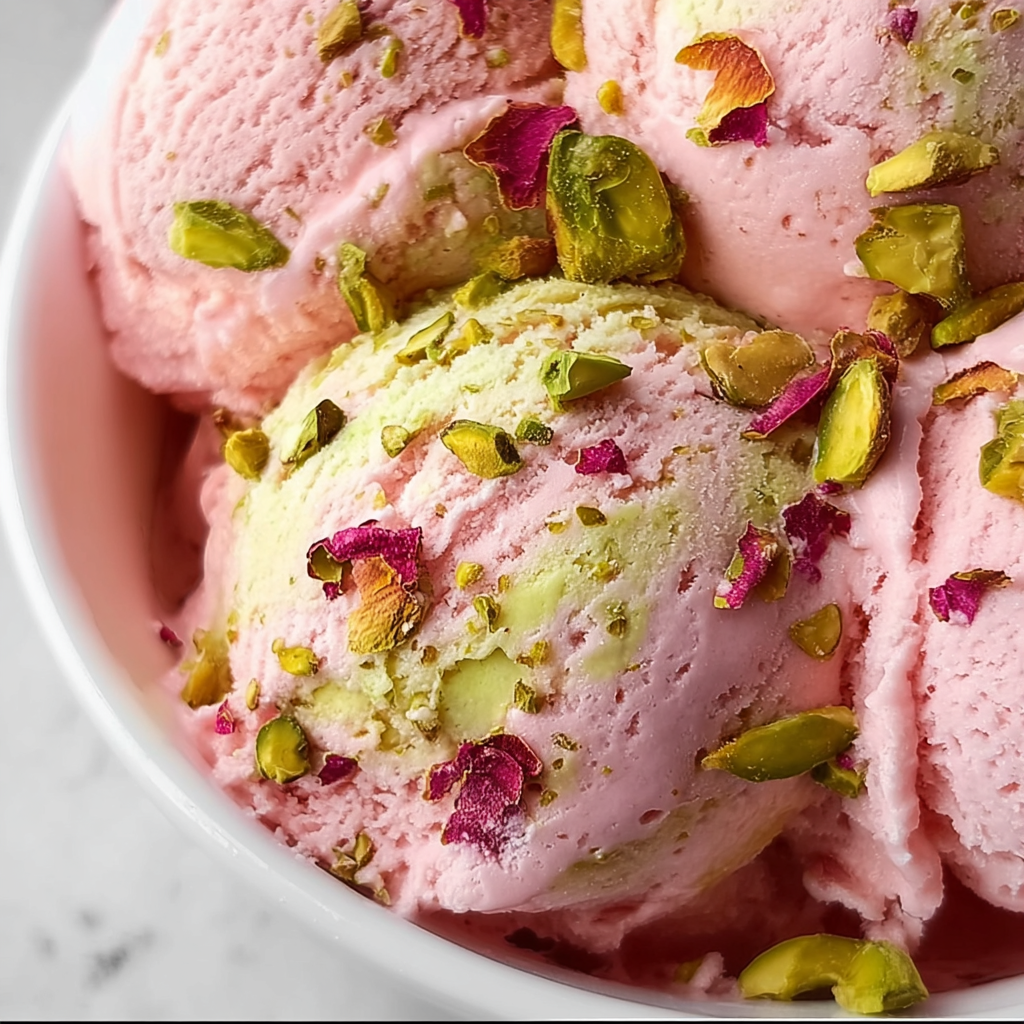
    There’s something magical about homemade rose pistachio ice cream that transports me to warm summer evenings spent on my grandmother’s porch. The delicate floral notes of rose water dancing with the nutty crunch of pistachios creates a dessert that feels both indulgent and refreshing. I’ve spent years perfecting this recipe, and I’m thrilled to finally share my secret technique for achieving that perfect creamy texture without an ice cream maker. This Middle Eastern-inspired treat has become my go-to for impressing dinner guests or simply treating myself after a long day. Ready to create something extraordinary in your own kitchen? Let’s dive in!

    Recipe

    Why You’ll Love This Homemade Rose Pistachio Ice Cream

    A Symphony of Unique Flavors

    The combination of fragrant rose water and toasted pistachios creates a flavor profile that’s both exotic and comforting. Unlike store-bought versions that often taste artificial, this homemade recipe captures the essence of real roses with just the right amount of sweetness. The pistachios add a wonderful textural element and nutty depth that balances the floral notes perfectly. I love how the subtle pink hue makes this dessert as beautiful to look at as it is delicious to eat. Trust me, once you taste this velvety creation, you’ll never go back to plain vanilla!

    Surprisingly Simple Preparation

    Don’t let the elegant result fool you—this recipe is remarkably straightforward to make. The no-churn method eliminates the need for specialized equipment while still producing a luxuriously smooth texture. I was shocked the first time I made it at how the heavy cream transformed into this pillowy, cloud-like base with just a few minutes of whipping. The active prep time is under 15 minutes, making this a perfect dessert for busy weeknights or last-minute gatherings. The hardest part is simply waiting for it to freeze!

    Essential Tips & Tricks

    Selecting Quality Ingredients

    The quality of your rose water makes all the difference in this recipe. Look for culinary-grade rose water (not the cosmetic kind!) from Middle Eastern markets or specialty food stores for the most authentic flavor. When it comes to pistachios, splurge on the freshly shelled variety if possible—their vibrant green color and robust flavor will elevate your ice cream significantly. I once made the mistake of using old pistachios from the back of my pantry, and the difference was noticeable! For a delicious contrast similar to this recipe’s sweet-savory balance, check out my Honey Butter Skillet Corn Recipe.

    Perfecting the Texture

    Achieving that silky-smooth consistency depends on properly whipping your cream. Beat until firm peaks form, but be careful not to over-whip—you’ll end up with butter! Another game-changing tip is adding a tablespoon of vodka or bourbon (which won’t freeze solid) to prevent ice crystals from forming. For the ultimate creamy result, place plastic wrap directly on the surface of your ice cream mixture before freezing. This prevents that dreaded freezer burn that can ruin even the most perfectly prepared dessert.

    Serving Ideas & Creative Variations

    Elegant Presentation Options

    Transform this homemade rose pistachio ice cream into a showstopping dessert by serving it in chilled glass bowls with a light dusting of crushed pistachios and dried rose petals. For dinner parties, I love scooping it into delicate tuile cookies or alongside warm baklava for a Middle Eastern-inspired finale. The subtle pink color looks stunning against dark chocolate desserts too! Create an impressive dessert board by pairing this ice cream with my 3-Ingredient Biscoff Cookies for a combination that will have everyone reaching for seconds.

    Exciting Flavor Twists

    While the classic rose pistachio combination is divine, don’t be afraid to experiment with creative variations. Add a teaspoon of cardamom or a pinch of saffron for an even more exotic flavor profile. White chocolate chunks melt beautifully into the base, creating pockets of sweet creaminess. For a refreshing summer twist, fold in some finely diced cucumber (yes, really!) for a subtle coolness that complements the rose perfectly. My personal favorite variation includes a ribbon of homemade raspberry coulis swirled throughout for a tangy contrast.

    Storage & Troubleshooting Guide

    Maximizing Freshness

    For the best texture and flavor, store your homemade rose pistachio ice cream in a shallow, airtight container rather than a deep dish. This allows for more even freezing and easier scooping. I recommend placing parchment paper directly on the surface before sealing to prevent ice crystals. While technically safe to eat for up to two months, the premium quality begins to decline after about two weeks. For the ultimate scoop-ability, transfer your ice cream from the freezer to the refrigerator for 15 minutes before serving.

    Solving Common Issues

    If your ice cream develops ice crystals despite your best efforts, don’t despair! Let it soften slightly, then re-blend in a food processor and refreeze for a second chance at creamy perfection. Too strong a rose flavor? Balance it with an extra splash of vanilla extract or a squeeze of lemon juice to brighten the profile. If your mixture seems too loose before freezing, whip the cream a bit longer or add an extra tablespoon of sweetened condensed milk to help it set properly.

    Frequently Asked Questions

    Can I make rose pistachio ice cream without an ice cream maker?

    Absolutely! This no-churn recipe uses whipped cream and sweetened condensed milk as the base, eliminating the need for specialized equipment while still achieving that perfect creamy texture.

    Where can I find food-grade rose water?

    Look for culinary rose water in Middle Eastern markets, specialty food stores, or online retailers. Avoid products labeled for cosmetic use—they aren’t food-safe.

    How long does homemade rose pistachio ice cream last in the freezer?

    When stored in an airtight container with parchment paper pressed against the surface, it maintains premium quality for about two weeks, though it remains safe to eat for up to two months.

    Can I substitute the pistachios with other nuts?

    Yes! Almonds work beautifully with rose flavors, while cashews offer a creamier texture. Just make sure to toast them first for maximum flavor.

    Why did my ice cream become icy instead of creamy?

    Ice crystals typically form when there’s too much moisture or when the ice cream experiences temperature fluctuations. Adding a tablespoon of alcohol and placing plastic wrap directly on the surface before freezing helps prevent this.

    Final Thoughts

    This homemade rose pistachio ice cream has become my signature dessert for good reason—it strikes that perfect balance between sophisticated and comforting. The fragrant rose paired with buttery pistachios creates something truly magical that store-bought varieties simply can’t match. I hope you’ll give this recipe a try and experience the joy of creating this extraordinary treat in your own kitchen. Don’t forget to share your creations on Pinterest and tag me—I’d love to see how you make this recipe your own!

  • Raspberry Pistachio Cupcakes That Will Wow Your Tastebuds!

    Raspberry Pistachio Cupcakes That Will Wow Your Tastebuds!

    Raspberry Pistachio Cupcakes That Will Wow Your Tastebuds!

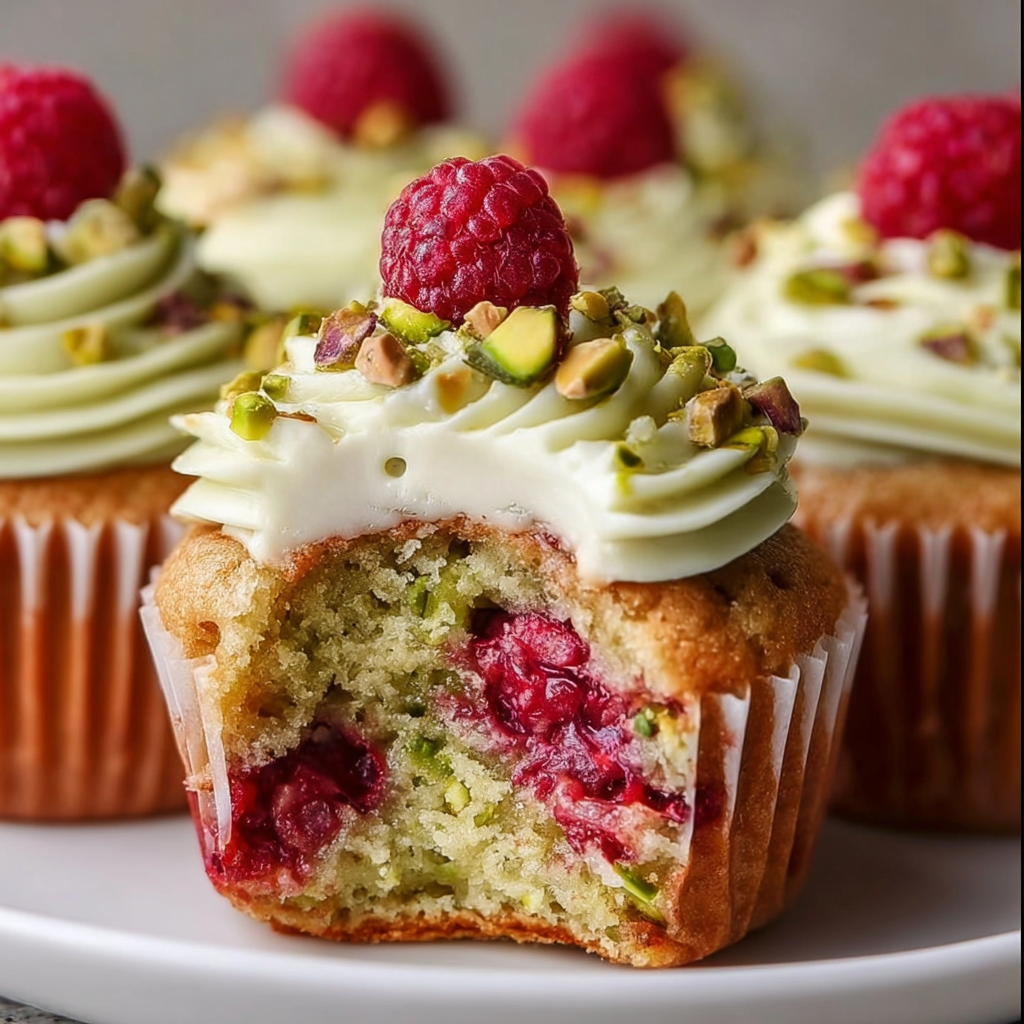
    These Raspberry Pistachio Cupcakes are what dessert dreams are made of—moist vanilla cupcakes studded with fresh raspberries, topped with a cloud of pistachio buttercream that’s just the right balance of nutty and sweet. I discovered this flavor combination at a tiny bakery while traveling through Seattle last summer, and I’ve been obsessed with perfecting my own version ever since. The vibrant pink of the berries against that pale green frosting creates a treat that’s as gorgeous as it is delicious. Trust me, these cupcakes will have everyone at your table reaching for seconds before they’ve even finished their first! Check out my other sweet treats for more inspiration.

    Recipe

    Why You’ll Love These Raspberry Pistachio Cupcakes

    Perfect Balance of Flavors

    The magic of these cupcakes lies in the contrast between tart and sweet. Fresh raspberries burst with bright acidity against the buttery cake backdrop, while the pistachio frosting adds a nutty complexity that elevates everything. I love how the slight saltiness of the pistachios cuts through the sweetness, creating that perfect bite that makes your taste buds dance. The first time I served these at my sister’s baby shower, my brother-in-law (who claims to “not like dessert”) ate three! That’s when I knew this recipe was something special.

    Stunning Visual Appeal

    These cupcakes are truly Instagram-worthy without requiring professional decorating skills. The natural colors—ruby-red raspberry against that subtle pistachio green—create a striking visual that looks far more complicated than it actually is. I’m always charmed by how the little flecks of crushed pistachios add texture and dimension to the frosting. When I bring these to gatherings, people always pull out their phones for a photo before taking their first bite! The natural beauty of these ingredients does all the heavy lifting.

    Essential Tips & Tricks

    Mastering the Raspberry Incorporation

    The key to perfect raspberry distribution is to dust your berries with flour before folding them into the batter. This prevents them from sinking to the bottom during baking. I learned this trick after a disastrous first attempt where all my beautiful berries created soggy bottoms! For the most vibrant flavor, use fresh raspberries when in season, but frozen work wonderfully too—just don’t thaw them first. Fold them in gently with just 3-4 strokes to maintain those gorgeous berry swirls without turning your batter pink.

    Perfecting the Pistachio Frosting

    Creating silky pistachio frosting requires properly prepared nuts as your foundation. I recommend roasting raw, unsalted pistachios for 8 minutes at 350°F to intensify their flavor before grinding them into a fine meal. The secret to that heavenly texture is sifting the ground pistachios to remove any larger pieces that would make piping difficult. For an extra flavor boost that pairs beautifully with these cupcakes, try my lemon curd cookies recipe for another dessert that balances tart and sweet perfectly.

    Serving Ideas & Creative Variations

    Elegant Presentation Options

    Transform these cupcakes into a showstopping centerpiece by arranging them on a tiered stand with fresh raspberries and pistachio clusters scattered between layers. For special occasions, I love to add a light dusting of edible gold powder to the frosting peaks—it catches the light beautifully and elevates the whole presentation. Individual cupcake boxes tied with ribbon make these perfect favors for bridal showers or birthday celebrations. I once served these on vintage teacups for my mom’s 60th birthday tea party, and everyone was charmed!

    Seasonal and Dietary Adaptations

    These cupcakes adapt beautifully to different dietary needs without sacrificing flavor. For gluten-free guests, simply substitute a high-quality cup-for-cup gluten-free flour blend—I’ve tested this multiple times with excellent results. During winter months when fresh raspberries are expensive, try my raspberry-pistachio variation using good-quality raspberry jam swirled into the batter. For a delightful summer twist, check out my lemon raspberry cake that uses similar flavor profiles in a larger format perfect for summer gatherings.

    Storage & Troubleshooting Guide

    Keeping Cupcakes Fresh

    To maintain the perfect texture of your Raspberry Pistachio Cupcakes, store unfrosted cupcakes at room temperature in an airtight container for up to 2 days. Once frosted, refrigeration is best, but always bring them to room temperature before serving—cold cupcakes lose their flavor complexity. I’ve found that placing a slice of sandwich bread in the storage container helps keep the cupcakes moist without making them soggy. For longer storage, unfrosted cupcakes freeze beautifully for up to 3 months when wrapped individually in plastic and placed in a freezer bag.

    Solving Common Baking Issues

    If your cupcakes sink in the middle, your oven is likely running too hot—invest in an oven thermometer for consistent results. Overmixing the batter can also cause this problem by incorporating too much air. For frosting that separates or appears grainy, the butter was probably too warm; chill it for 10 minutes, then rewhip. When your raspberries bleed too much color into the batter, try using frozen berries without thawing them first. I once saved slightly overbaked cupcakes by brushing the tops with a simple syrup—no one ever knew they were rescued from disaster!

    Frequently Asked Questions

    Can I make these Raspberry Pistachio Cupcakes ahead of time?

    Yes! Bake cupcakes up to 2 days ahead and store unfrosted in an airtight container. The frosting can be made 1 day ahead and refrigerated. Bring frosting to room temperature and rewhip before using.

    How do I prevent my raspberries from sinking to the bottom?

    Toss fresh raspberries in 1 tablespoon of flour before folding them into the batter. This creates a light coating that helps them stay suspended during baking.

    Can I use pistachios with shells for the frosting?

    No, start with shelled pistachios. The extra work of removing shells yourself often results in bits of shell remaining, which creates an unpleasant texture in your frosting.

    What’s the best way to store leftover frosting?

    Store leftover pistachio frosting in an airtight container in the refrigerator for up to 5 days. Bring to room temperature and rewhip before using.

    Are Raspberry Pistachio Cupcakes suitable for freezing?

    Absolutely! Freeze unfrosted cupcakes for up to 3 months. Thaw overnight in the refrigerator, then bring to room temperature before frosting.

    Final Thoughts

    These Raspberry Pistachio Cupcakes have become my signature dessert—the one friends request for birthdays and the first to disappear at potlucks. There’s something magical about how these two flavors complement each other, creating something greater than the sum of their parts. I hope you’ll give them a try and experience the joy of watching someone’s face light up with that first perfect bite. Don’t forget to share your creations on Pinterest and tag me so I can see your beautiful Raspberry Pistachio Cupcakes come to life in your kitchen!

  • Buffalo Chicken Pasta Salad That’s Irresistibly Creamy & Spicy!

    Buffalo Chicken Pasta Salad That’s Irresistibly Creamy & Spicy!

    Buffalo Chicken Pasta Salad That’s Irresistibly Creamy & Spicy!

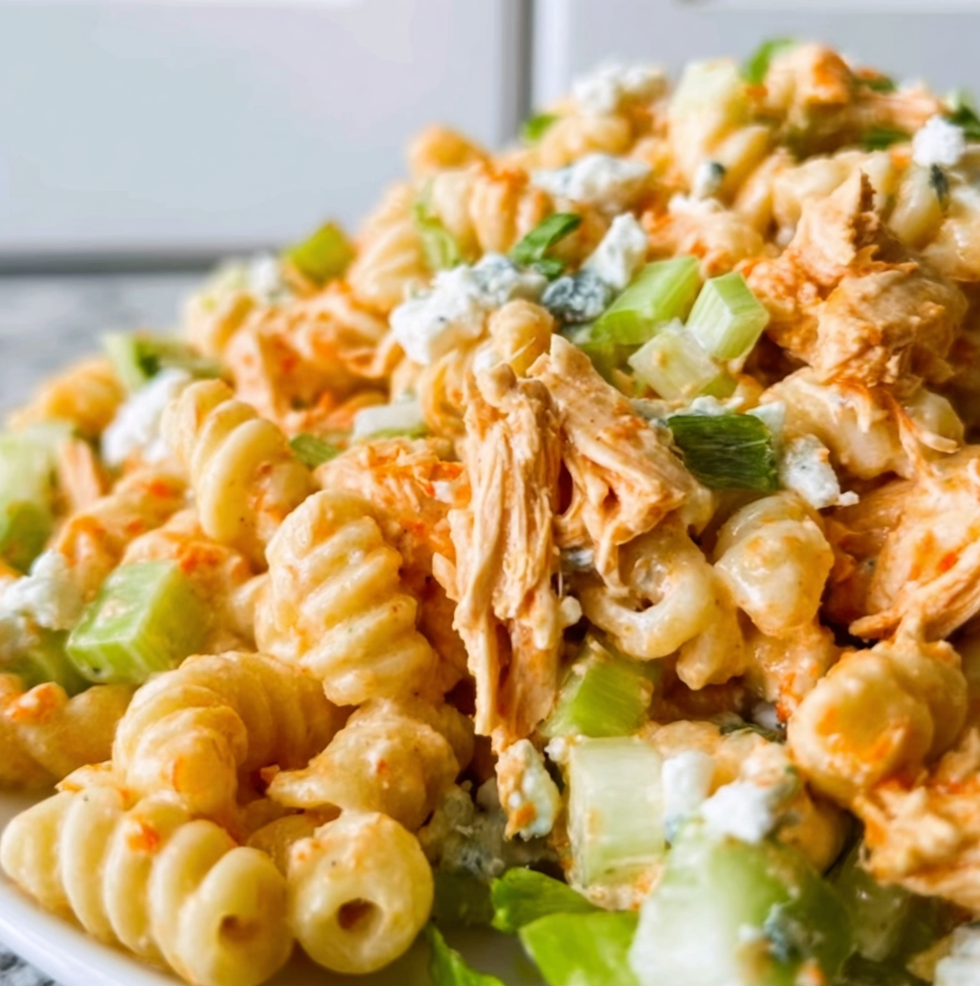
    Buffalo Chicken Pasta Salad combines two comfort food favorites into one irresistible dish that’s perfect for summer gatherings, meal prep, or a satisfying weeknight dinner. The spicy kick of buffalo sauce mingles with creamy dressing and tender pasta, creating a flavor explosion in every bite. I first made this for my sister’s backyard barbecue, and it disappeared faster than any other dish! The tangy heat balanced with cool, creamy elements makes this pasta salad absolutely crave-worthy and something you’ll want to make again and again. Let me show you how to create this perfect balance of flavors at Recipes Darleen.

    Recipe

    Why You’ll Love This Buffalo Chicken Pasta Salad

    Perfect Balance of Flavors and Textures

    The magic of this Buffalo Chicken Pasta Salad lies in its contrasting elements working in perfect harmony. The spicy buffalo sauce coats tender chunks of chicken, while the cool, creamy dressing soothes the heat just enough. I love how the al dente pasta provides the perfect backdrop for these bold flavors. The crunch from diced celery and red onion adds textural contrast that keeps each bite interesting. When I serve this at gatherings, even my heat-averse friends can’t resist coming back for seconds—it’s that perfect balance of spicy and creamy that makes everyone’s taste buds dance!

    Make-Ahead Convenience

    One thing I absolutely adore about this recipe is its meal prep potential. I often make a big batch on Sunday, and the flavors actually improve overnight as they mingle in the refrigerator. The pasta absorbs more of the buffalo essence, and everything melds into creamy, spicy perfection. It’s saved me on countless busy weeknights when I need something substantial but don’t have time to cook. Plus, it travels beautifully for potlucks and picnics. I’ve brought this to office lunches and beach days alike, and it holds up wonderfully, making it truly versatile for any occasion.

    Essential Tips & Tricks

    Choosing and Cooking Your Pasta

    The foundation of any great pasta salad is properly cooked pasta, and this Buffalo Chicken Pasta Salad is no exception. I recommend using medium-sized pasta shapes with ridges or cavities that trap the delicious sauce—rotini, farfalle, or penne work beautifully. The key is cooking the pasta just until al dente, then immediately rinsing under cold water to stop the cooking process. This prevents the pasta from becoming mushy as it sits in the dressing. For an extra flavor boost, try cooking your pasta in chicken broth instead of water! This simple swap adds a subtle depth that elevates the entire dish, similar to how I enhance my Grilled Chicken Orzo Salad with Avocado.

    Perfecting the Buffalo Sauce Balance

    Finding the right spice level is crucial for this salad. I recommend starting with less buffalo sauce than you think you’ll need—you can always add more, but you can’t take it away! My perfect ratio is about 1/3 cup buffalo sauce to 3/4 cup creamy dressing for a family-friendly heat level. For extra creaminess that helps tame the heat, I sometimes add a dollop of blue cheese or ranch dressing. If you’re serving guests with varying spice preferences, consider keeping extra buffalo sauce on the side so everyone can customize their heat level. The goal is that perfect balance where the buffalo flavor shines without overwhelming the other ingredients.

    Serving Ideas & Creative Variations

    Complementary Side Dishes

    This Buffalo Chicken Pasta Salad shines as a main dish, but pairing it with the right sides creates a complete meal experience. I love serving it with cooling elements like sliced cucumbers or a simple green salad with a light vinaigrette to balance the richness. For a heartier spread, add some crusty garlic bread or homemade cornbread to soak up any extra dressing. When I’m entertaining, I sometimes create a pasta salad bar with this buffalo version as the star, alongside my Mexican Street Corn Pasta Salad for variety. The contrast between the spicy buffalo and sweet corn flavors gives guests delightful options that complement each other beautifully.

    Creative Twist Options

    Don’t be afraid to put your own spin on this versatile recipe! One of my favorite variations is adding avocado chunks just before serving for creamy, cooling bites that balance the heat. For a Mediterranean twist, try incorporating crumbled feta instead of blue cheese and adding chopped Kalamata olives. Vegetarian guests? Substitute the chicken with roasted cauliflower tossed in buffalo sauce—the florets catch the sauce beautifully. For a lower-carb option, use zucchini noodles for half the pasta. When I’m feeling extra indulgent, I sometimes add crispy bacon bits or even crushed ranch-flavored chips on top for unexpected texture and flavor that makes everyone ask for my secret ingredient!

    Storage & Troubleshooting Guide

    Proper Storage Techniques

    To maintain the best quality of your Buffalo Chicken Pasta Salad, proper storage is essential. Store it in an airtight container in the refrigerator for up to 4 days. I find that glass containers work best as they don’t absorb the buffalo flavor like plastic sometimes can. If you’re making this ahead for a party, consider keeping the dressing separate until about an hour before serving. This prevents the pasta from absorbing all the moisture and becoming soggy. For meal prep, I portion individual servings into separate containers for grab-and-go lunches. If the salad seems dry after refrigeration, simply drizzle a little extra dressing or a splash of buttermilk to refresh it before serving.

    Quick Fixes for Common Issues

    Even the most experienced cooks encounter challenges, but I’ve got solutions! If your pasta salad becomes too spicy, add more of the creamy element—try folding in additional ranch dressing, sour cream, or even cream cheese to tame the heat. Too dry after sitting overnight? A splash of milk or a dollop of mayo works wonders to bring back the creaminess. If the pasta has absorbed too much liquid and become mushy, add fresh, crisp elements like diced bell peppers or celery to reintroduce texture. And if the buffalo flavor isn’t pronounced enough, don’t just add more sauce—a sprinkle of cayenne or a dash of hot sauce will amp up the heat without making the salad too wet.

    Frequently Asked Questions

    Can I use leftover rotisserie chicken for Buffalo Chicken Pasta Salad?

    Absolutely! Rotisserie chicken is perfect for this recipe—it saves time and adds flavor. Simply shred or dice the meat and toss with buffalo sauce before adding to your pasta salad.

    How can I make this pasta salad healthier?

    Use whole wheat pasta, Greek yogurt instead of mayo in the dressing, and increase the vegetables. Try adding shredded carrots, diced bell peppers, or broccoli florets for extra nutrition.

    Is this recipe gluten-free?

    Not as written, but you can easily substitute gluten-free pasta. Just ensure your buffalo sauce is gluten-free as well, as some brands contain wheat-based ingredients.

    Can I freeze Buffalo Chicken Pasta Salad?

    I don’t recommend freezing this salad as the creamy dressing will separate and the pasta texture will change significantly upon thawing.

    How spicy is this Buffalo Chicken Pasta Salad?

    The spice level is customizable! Start with less buffalo sauce if you prefer mild heat, or add cayenne pepper or hot sauce for extra kick if you love spicy foods.

    Final Thoughts

    This Buffalo Chicken Pasta Salad has become my go-to recipe when I want to impress without spending hours in the kitchen. The bold flavors, make-ahead convenience, and endless adaptability make it perfect for everything from quiet family dinners to lively potlucks. I love seeing people’s surprised expressions when they taste how the creamy, spicy elements come together so perfectly. For more delicious recipes like this one, follow me on Pinterest where I share new inspiration daily!

  • Grilled BBQ Chicken Foil Dinner That Will Wow Your Taste Buds!

    Grilled BBQ Chicken Foil Dinner That Will Wow Your Taste Buds!

    Grilled BBQ Chicken Foil Dinner That Will Wow Your Taste Buds!

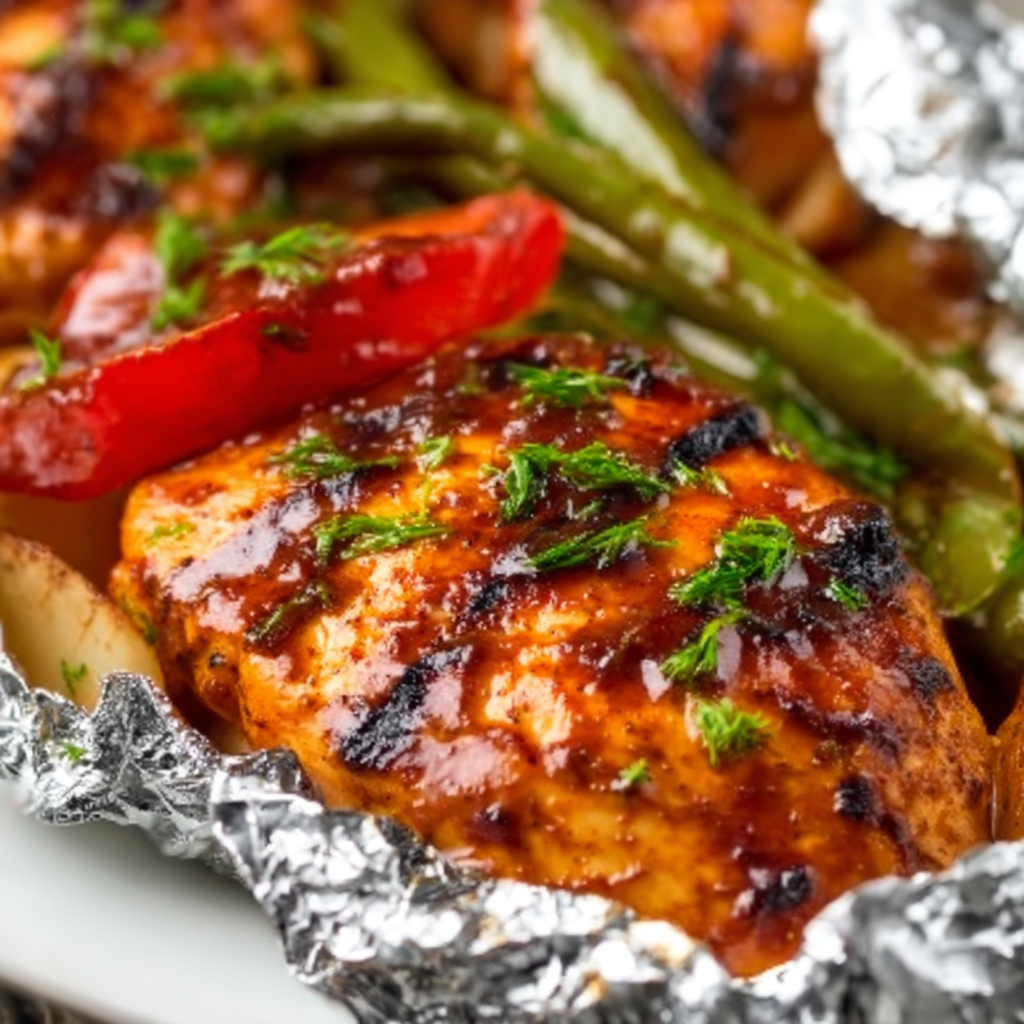
    There’s something magical about the way a Grilled BBQ Chicken Foil Dinner transforms an ordinary weeknight into a special occasion. The tantalizing aroma of smoky barbecue sauce mingling with tender chicken and colorful vegetables never fails to bring my family running to the table. I discovered this foolproof method during a chaotic summer when I needed dinner solutions that wouldn’t heat up my kitchen. Now it’s become our go-to meal for both busy weeknights and casual entertaining. The beauty lies in its simplicity—everything cooks together in a tidy foil packet, infusing the ingredients with incredible flavor while keeping cleanup to an absolute minimum.

    Recipe

    Why You’ll Love This Grilled BBQ Chicken Foil Dinner

    Perfect for Busy Families

    As a mom who juggles work deadlines and family commitments, I’m always looking for time-saving meals that don’t sacrifice flavor. These foil packets are my secret weapon! Simply toss your chicken, veggies, and seasonings together, wrap them up, and let the grill work its magic. The entire meal cooks in about 20 minutes, giving you precious time to help with homework or simply catch your breath. I love that I can prep these packets in the morning, refrigerate them, and then quickly grill them when evening chaos hits. The best part? Everyone gets their own personalized dinner packet, eliminating those “I don’t like peppers” complaints!

    Flavor That Can’t Be Beat

    The enclosed cooking environment of foil packets creates a flavor intensity that’s hard to achieve with other methods. As the chicken cooks, it releases its juices, which mingle with the barbecue sauce and seasonings to create an incredible natural sauce. The vegetables steam in this flavorful mixture, absorbing all those delicious flavors while maintaining their nutritional value. I’ve found that adding a small pat of butter to each packet creates an irresistible richness that takes this dish to restaurant-quality levels. My husband always comments that the chicken stays remarkably juicy and tender—a welcome change from dried-out grilled chicken breasts!

    Essential Tips & Tricks

    Foil Packet Perfection

    Creating the perfect foil packet requires a bit of technique, but it’s easy once you know the tricks. Start with heavy-duty aluminum foil or double up regular foil to prevent tearing. Cut pieces approximately 12×18 inches to give yourself plenty of working room. Place ingredients in the center, then bring the long sides together above the food. Fold the edges down in several small, tight folds until the foil is snug against the food. Crimp the short ends similarly, but leave a small pocket of air inside to allow for steam circulation. This proper sealing technique prevents juices from escaping while allowing enough space for everything to cook evenly.

    Temperature Management

    The secret to perfectly cooked chicken packets lies in temperature control. I’ve learned through plenty of trial and error that medium heat (around 375°F) works best for foil packets. Too hot, and you’ll burn the outside while leaving the inside raw; too cool, and everything will steam rather than develop those desirable caramelized flavors. I recommend using a two-zone fire on your grill—hot on one side, cooler on the other. Start packets on the cooler side for about 15 minutes, then move to the hot side for 5 minutes to develop some char. Always check that your chicken reaches 165°F before serving. Visit Recipes Darleen for more grilled chicken inspiration!

    Serving Ideas & Creative Variations

    Perfect Pairings

    While these foil packets contain a complete meal, I sometimes add a few complementary sides to round things out. A simple green salad with a light vinaigrette provides a fresh contrast to the rich, smoky flavors of the packets. For heartier appetites, I’ll serve warm crusty bread for sopping up the incredible sauce that develops inside each packet—trust me, you won’t want to waste a drop! On special occasions, I’ll add a sweet ending like lemon curd cookies that cleanse the palate after the savory barbecue flavors. For outdoor gatherings, consider setting up a “topping station” with fresh herbs, crumbled cheese, and additional barbecue sauce.

    Mix It Up

    The beauty of this cooking method is its versatility—once you master the basic technique, the variations are endless! Swap chicken thighs for breasts for even juicier results. Try different vegetable combinations based on what’s in season: summer squash and cherry tomatoes in summer, sweet potatoes and Brussels sprouts in fall. For a tropical twist, add pineapple chunks and switch to a teriyaki-based sauce. Feeling adventurous? Create a Mexican-inspired version with lime juice, chili powder, and corn. For a Mediterranean flair, use olive oil, lemon, oregano, and olives instead of barbecue sauce. My family has fun voting on their favorite variations, making dinner both delicious and interactive!

    Storage & Troubleshooting Guide

    Leftovers & Make-Ahead Tips

    These foil packet meals are perfect for meal prepping! You can assemble them up to 24 hours in advance—just keep them refrigerated until you’re ready to grill. If you have leftovers, transfer the contents to an airtight container (discard the used foil) and refrigerate for up to 3 days. While reheating in the microwave works in a pinch, I prefer reheating in a 350°F oven for about 15 minutes to maintain some of the original texture. For a time-saving hack, prepare a double batch and freeze the uncooked packets for up to 1 month. Thaw completely in the refrigerator before grilling. The flavors actually intensify as they marinate, making next-day leftovers particularly delicious!

    Troubleshooting Common Issues

    Even the most foolproof recipes can encounter hiccups! If your packets are leaking precious juices, you likely need to improve your sealing technique. Make sure your foil pieces are large enough and that you’re creating tight, multiple folds. If vegetables are coming out undercooked while the chicken is done, try cutting them into smaller, more uniform pieces. For those finding the chicken too dry, add a tablespoon of chicken broth or extra barbecue sauce to each packet before sealing. If you’re struggling with sticking, lightly spray the foil with cooking spray before adding ingredients. Remember that cooking times may vary based on your grill’s temperature and the size of your chicken pieces—always use a meat thermometer for perfect results.

    Frequently Asked Questions

    Can I make Grilled BBQ Chicken Foil Dinners in the oven instead?

    Absolutely! Bake at 425°F for 25-30 minutes until chicken reaches 165°F. You’ll miss some smoky flavor but still get delicious results. Open carefully as steam will escape when unwrapping.

    What vegetables work best in these foil packets?

    Choose vegetables with similar cooking times like bell peppers, zucchini, corn, and onions. For harder vegetables like carrots or potatoes, slice them thinner so they cook at the same rate as the chicken.

    How do I prevent my foil packets from sticking?

    Spray the foil lightly with cooking spray before adding ingredients, or place a piece of parchment paper between the food and foil for easy release and serving.

    Can I make these packets vegetarian?

    Definitely! Substitute the chicken with firm tofu, portobello mushrooms, or chickpeas. Add extra seasonings and a splash more sauce since these alternatives won’t release as much natural flavor as chicken.

    How do I know when my Grilled BBQ Chicken Foil Dinner is done?

    Carefully open one packet and check that chicken has reached 165°F with a meat thermometer. The chicken should be opaque throughout with no pink remaining, and vegetables should be tender.

    Final Thoughts

    The Grilled BBQ Chicken Foil Dinner has become a cornerstone in my recipe collection because it delivers on so many levels—flavor, convenience, and versatility. There’s something deeply satisfying about unwrapping these little foil presents at the dinner table, releasing a cloud of fragrant steam that promises deliciousness inside. Whether you’re cooking for picky eaters, entertaining guests, or simply trying to get a nutritious dinner on the table with minimal fuss, these customizable packets rise to every occasion. Don’t forget to check out more delicious ideas on our Pinterest board for inspiration!