Blog

  • Slow Cooker Beef Ramen Noodles – Cozy, Bold, Irresistible

    Slow Cooker Beef Ramen Noodles – Cozy, Bold, Irresistible

    Slow Cooker Beef Ramen Noodles saved my Tuesday. I tossed everything into the crockpot right after finding my whisk in the kids’ Lego bin (true story). By dinner, Slow Cooker Beef Ramen Noodles transformed into a cozy, slurp-worthy bowl that tasted like takeout meets homemade comfort. I’m Darleen Vance, and if your kitchen chaos looks like mine, this recipe will be your weeknight wingman.
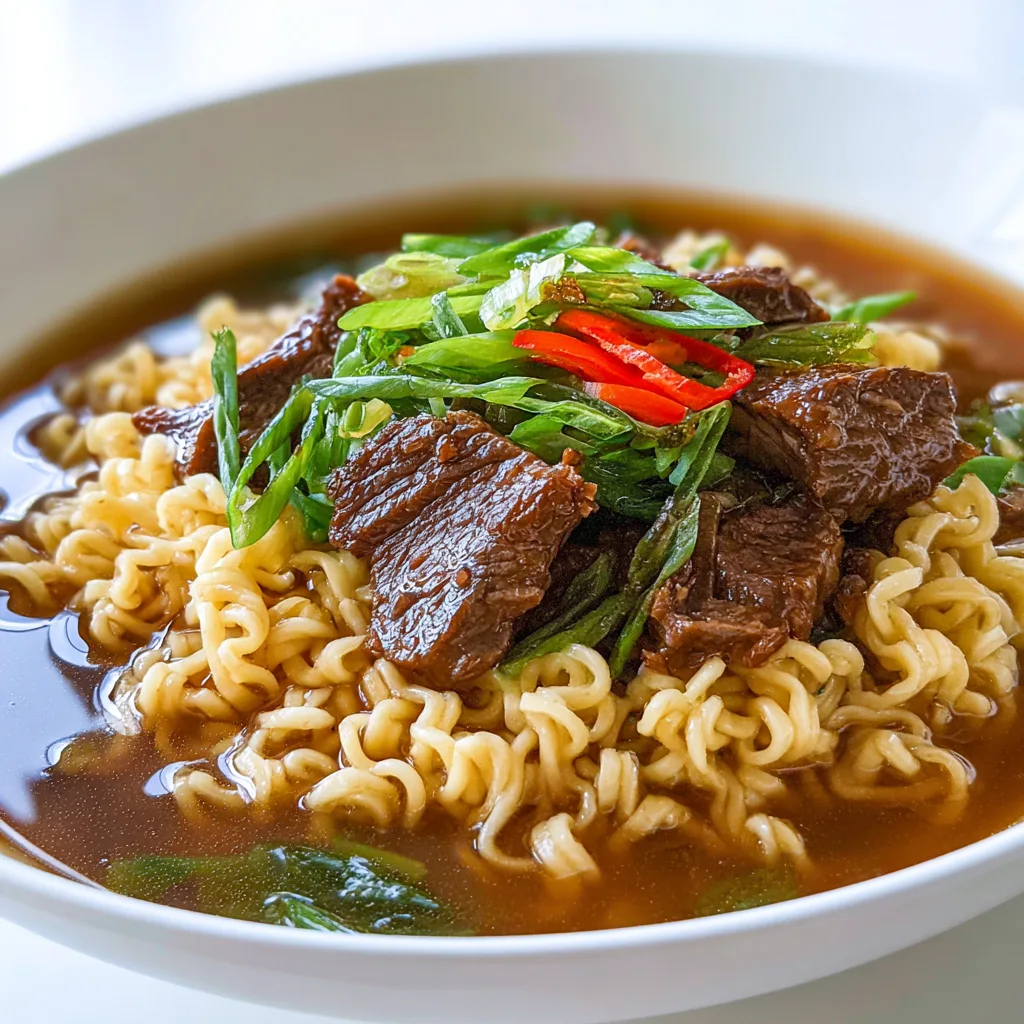
    Slow Cooker Beef Ramen Noodles

    Recipe

    Why You’ll Love These Slow Cooker Beef Ramen Noodles

    What Makes This Slow Cooker Beef Ramen Noodles So Irresistible

    I made Slow Cooker Beef Ramen Noodles after a long day of carpool and emails, and the scent alone had my family hovering like hungry hummingbirds. Slow Cooker Beef Ramen Noodles simmer low and slow, so every noodle soaks up a homemade, cozy broth that tastes like your favorite takeout bowl. When a one-pot meal practically cooks itself, I call that a weeknight miracle and real-deal comfort food.

    • Set-it-and-forget-it ease: minimal prep, the slow cooker does the work for this easy dinner.
    • Comfort-first flavor: tender beef, bold umami, and springy ramen in a rich, homemade broth.
    • Family-friendly: mild heat by default; spice lovers can add more chili-garlic sauce.
    • One-pot cleanup: the noodles cook right in the crockpot for a true one-pan meal.
    • Flexible and forgiving: swap veggies, choose your greens, and make it your own.

    If you’re craving slurpable comfort food, this homemade version brings cozy joy to the table. Ready to cook? Let’s slide right into the recipe card and make it happen.

    Between quick prep and restaurant-style payoff, Slow Cooker Beef Ramen Noodles are a social media darling. The crockpot ramen trend celebrates flavor with simplicity—no fussy steps, just everyday ingredients that deliver deep, satisfying taste. It’s the ultimate easy dinner that feels special enough for guests but simple enough for Tuesday.

    Craving more cozy bowls? Don’t miss my Kielbasa Potato Soup or my wildly comforting Creamy Tuscan Chicken Pasta. And for another slow cooker favorite, try Slow Cooker Mongolian Beef.

    Tips, Tricks & Expert Secrets for Slow Cooker Beef Ramen Noodles

    Chef Tips for Perfect Slow Cooker Beef Ramen Noodles Every Time

    During a cooking class I taught last fall, I learned that the biggest “aha!” for students was when to add the noodles. With Slow Cooker Beef Ramen Noodles, timing is everything—especially for that bouncy, restaurant-style texture. Here’s how I turn a humble crockpot into a ramen shop in my kitchen.

    • Brown for depth: Sear the beef first for richer, layered flavor. It’s optional, but Slow Cooker Beef Ramen Noodles benefit from those caramelized edges.
    • Season in stages: Salt lightly up front (broth, soy, sauces add sodium) and finish with a splash of soy to balance the homemade broth.
    • Add noodles last: Stir ramen in during the final 5–8 minutes to keep them springy, not mushy—this cooking tip is a quick fix that changes everything.
    • Veg timing matters: Sturdier veggies early, delicate greens at the end for color and freshness.

    Smart Ingredient Swaps & Practical Cooking Advice

    • Gluten-free: Use gluten-free tamari and certified gluten-free ramen or rice noodles for a homemade version that’s friendly to your needs.
    • Lighter broth: Use lean sirloin and skip hoisin for a lower-fat bowl; add extra mushrooms for savory body.
    • Heat control: Keep chili-garlic sauce on the side for a family-friendly, easy recipe that pleases everyone.
    • What not to do: Don’t leave noodles in the slow cooker on Warm—they’ll overcook and lose that slurpable bite.

    Follow these tips for Slow Cooker Beef Ramen Noodles and you’ll nail cozy, takeout-style comfort right at home—no line, no fuss.

    Serving Ideas & Creative Variations for Slow Cooker Beef Ramen Noodles

    How to Serve Slow Cooker Beef Ramen Noodles for Maximum Enjoyment

    When I served this to friends on a rainy Saturday, I set out little bowls of toppings and watched everyone play. Slow Cooker Beef Ramen Noodles shine with simple plating suggestions: big bowls, generous ladles of broth, and a sprinkle of greens. For serving ideas, keep it colorful and cozy.

    • Garnish bar: green onions, sesame seeds, chili oil, lime wedges, and a soft-boiled egg for a ramen-house finish.
    • Pairings: crisp cucumber salad or quick pickled veggies; sip with iced green tea or a light lager.
    • Saucy lift: a drizzle of toasted sesame oil or extra soy right before serving elevates the flavor.

    Flavor Twists and Seasonal Variations

    • Spicy miso twist: whisk in 1–2 tbsp white miso and a spoon of chili crisp for a deeper, savory kick.
    • Fall harvest: add cubed butternut squash in the first hour; finish with kale for a seasonal twist.
    • Pinterest-popular veggie ramen: swap beef for baby bella mushrooms and add edamame for a hearty vegetarian variation.

    Food bloggers and creators: shoot overhead with chopsticks crossed over the bowl and a napkin pop of color. Bright garnishes and steam-kissed noodles make Slow Cooker Beef Ramen Noodles camera-ready in seconds.

    Storage & Troubleshooting Guide for Slow Cooker Beef Ramen Noodles

    How to Store and Reheat Slow Cooker Beef Ramen Noodles

    Leftovers of Slow Cooker Beef Ramen Noodles are gold—especially when my teen raids the fridge after practice. Here’s how I store and reheat to keep every bite cozy and delicious.

    • Room temp: Keep out no longer than 2 hours.
    • Fridge: 3–4 days in airtight containers; store noodles and broth separately if possible.
    • Freezer: Freeze beef and broth up to 3 months; add fresh noodles after reheating for best texture.
    • Reheat: Simmer gently on the stovetop or in the microwave at 50–70% power; add a splash of broth or water to loosen.

    Troubleshooting Common Slow Cooker Beef Ramen Noodles Issues

    • Too salty: Add unsalted broth or water and a pinch of brown sugar to rebalance.
    • Too watery: Stir in a cornstarch slurry and cook on High 15–20 minutes to thicken.
    • Mushy noodles: Cook noodles separately and add right before serving—or reduce cook time to 5 minutes in the crockpot.
    • Bland broth: Finish with soy, lime juice, or a dab of chili-garlic sauce to brighten.

    With these storage tips and quick fixes, Slow Cooker Beef Ramen Noodles stay fresh, flavorful, and ready to rescue dinner—again and again.

    FAQs

    Can I make Slow Cooker Beef Ramen Noodles without searing the beef?

    Yes. Searing adds depth, but skipping it still yields tender, flavorful results thanks to the long simmer and umami-rich sauces.

    When do I add the ramen noodles?

    Add ramen during the last 5–8 minutes on High and stir once or twice. Pull as soon as they’re just tender for the best texture.

    How can I make this less salty?

    Use low-sodium broth and soy, skip hoisin, and season at the end. If it tastes too salty, dilute with unsalted broth or water.

    Can I use a different cut of beef?

    Yes. Chuck is ideal for slow cooking, but sirloin or stew meat also works. Cook until tender, then slice or shred.

    Conclusion

    Slow Cooker Beef Ramen Noodles bring restaurant-worthy comfort to your table with almost zero effort. The slow cooker coaxes tenderness from the beef while the ramen bathes in a savory, homemade broth—an easy dinner that hits every cozy note. This one-pot meal is family-friendly, flexible, and perfect for weeknights when you need a hands-off, comforting win. If you loved this, explore more warm bowls on my site like Bacon Cheddar Gnocchi Soup or my quick Potsticker Soup. Ready to slurp? Try Slow Cooker Beef Ramen Noodles at home and tag me so I can see your steaming bowls!


  • Cranberry Turkey Stuffing Balls – Cozy and Irresistible

    Cranberry Turkey Stuffing Balls – Cozy and Irresistible

    Cranberry Turkey Stuffing Balls are my favorite way to turn holiday chaos into dinner magic. Once, my mixer walked itself off the counter while I was juggling gravy, and Cranberry Turkey Stuffing Balls saved the night—one bowl, quick roll, and into the oven. The tart cranberries and savory turkey make these little bites taste like a cozy hug, and they come together faster than you can say “who used all the foil?” If you’re craving the comfort of Thanksgiving without the marathon, you’re in the right place.

    Cranberry Turkey Stuffing Balls

    Recipe


    WHY YOU’LL LOVE THIS RECIPE

    What Makes This Cranberry Turkey Stuffing Balls So Irresistible

    I first made Cranberry Turkey Stuffing Balls on a night when the dishwasher decided to protest and my kids were “taste-testing” the cranberries like it was their job. Cranberry Turkey Stuffing Balls gave me a fast, homemade plan: one bowl, quick roll, and a tray of golden comfort food in under an hour. Each bite balances savory turkey, cozy stuffing, and tart cranberry pops—like Thanksgiving, but simplified for an easy dinner. They’re the kind of homemade version you can pull off on a weeknight or serve when company drops in, without turning your kitchen upside down.

    • Comfort food, simplified: all the flavors you love in a tidy, hand-held bite.
    • Quick prep: one bowl, one pan, minimal cleanup—perfect for busy nights.
    • Flexible and forgiving: use leftover turkey, boxed stuffing, or your family’s recipe.
    • Family-friendly: mildly seasoned yet flavorful—kids and grown-ups devour them.
    • Make-ahead and freezer-friendly: prep now, bake later when life gets loud.

    For more cozy inspo, pair tonight’s plan with a pot of creamy mushroom soup or browse my cold-weather favorites on the home recipe hub. Ready to bake? Let’s get to the recipe card below.

    It’s the leftovers glow-up. Instead of another plain sandwich, these Cranberry Turkey Stuffing Balls deliver a quick fix that looks party-ready and tastes like a homemade, one-pan meal. They crisp at the edges, stay tender inside, and work for game day, casual dinners, or holiday brunch spreads. That perfect tart-sweet cranberry pop has social media swooning, and the easy recipe keeps it weeknight-friendly. Once you try the baked version with creamy gravy on the side, you might never look at leftover turkey the same way again.

    TIPS, TRICKS & EXPERT SECRETS

    Chef Tips for Perfect Cranberry Turkey Stuffing Balls Every Time

    During a cooking demo, I learned a humbling truth: I can whisk gravy while answering the door, but I cannot eyeball broth with confidence. Lesson learned—measure for texture. These cooking tips keep your Cranberry Turkey Stuffing Balls juicy, flavorful, and delightfully golden, with that homemade finish you love in an easy recipe.

    • Hydration check: The mixture should hold when pressed but not feel wet. Start with 1/3 cup broth and add by the tablespoon.
    • Soft aromatics: Sauté onion and celery first; raw veg can steam and make the centers dense.
    • Gentle mix: Fold, don’t mash. Overmixing compacts stuffing and dries out the balls.
    • Crispy edges: A light oil mist before baking encourages bronzing without frying.
    • Thermometer win: Pull at 165°F internal for tender, not overbaked, centers.

    What not to do: Don’t drown the mix in broth. Too much liquid leads to soggy bottoms and uneven texture. This quick fix is all about balance.

    Smart Ingredient Swaps & Practical Cooking Advice

    • Gluten-free: Use gluten-free stuffing mix or cornbread stuffing and ensure broth is GF.
    • Dairy-free: Swap butter for olive oil and skip the cheese center—still rich and cozy.
    • Low-fat: Use egg whites (2–3) and lightly spray the pan instead of brushing with oil.
    • Herb twist: Fresh rosemary or sage can replace thyme—go slow; they’re potent.
    • Air fryer option: 375°F, 10–12 minutes, shaking halfway; finish when golden and 165°F inside.

    If you love this homemade version of holiday comfort, you might also enjoy my sweet potato recipes for a seasonal side that plays perfectly with these savory bites.

    SERVING IDEAS & CREATIVE VARIATIONS

    How to Serve Cranberry Turkey Stuffing Balls for Maximum Enjoyment

    The first time I plated these for friends, I set them on a wooden board with a tiny gravy boat and a dish of cranberry sauce—instant applause. Presentation counts, but flavor is still the star. Here’s how to turn Cranberry Turkey Stuffing Balls into a cozy, company-ready spread with easy serving ideas and plating suggestions.

    • Gravy duo: Offer classic turkey gravy and a lighter pan gravy flavored with thyme.
    • Fresh crunch: Add a quick arugula salad with lemon vinaigrette to cut richness.
    • Soup-and-bites dinner: Pair with chicken pot pie soup for a comforting, complete meal.
    • Beverage: A crisp cider or light Pinot Noir complements the tart cranberry notes.

    Plating suggestion: Serve on a parchment-lined board, scatter fresh parsley, and keep sauces in small ramekins. If you share on social, shoot near a window, use neutral plates, and add a linen napkin to warm up the scene.

    Flavor Twists and Seasonal Variations

    • Harvest maple glaze: Brush balls with 1 tablespoon maple syrup whisked with 1 teaspoon Dijon and a pinch of black pepper for the last 5 minutes of baking.
    • Cheesy center: Hide a small cube of fontina or mozzarella inside each ball for a melty surprise.
    • Herby cornbread: Swap stuffing for cornbread dressing, add minced sage, and increase black pepper.
    • Pinterest-favorite mini skewers: Serve each ball on a toothpick with a cranberry on top and a drizzle of gravy for cocktail hour.

    These flavor variations make Cranberry Turkey Stuffing Balls endlessly adaptable—from weeknight easy dinner to holiday party hero.

    STORAGE & TROUBLESHOOTING GUIDE

    How to Store and Reheat Cranberry Turkey Stuffing Balls

    Leftovers are a gift—especially when they reheat like a dream. I’ve tucked a container of Cranberry Turkey Stuffing Balls behind the yogurt more than once to “save” them for lunch. Here’s how to store, keep fresh, and reheat for the best texture.

    • Room temperature: Keep up to 2 hours max on the counter for serving.
    • Refrigerator: Store in an airtight container 3–4 days. Layer with parchment to prevent sticking.
    • Freezer: Freeze on a tray until solid, then bag up to 2 months. Press out air to prevent freezer burn.
    • Reheat—oven: 350°F for 10–12 minutes (frozen: 18–20), covered loosely with foil, then uncover 2–3 minutes for crisping.
    • Reheat—air fryer: 325°F for 6–8 minutes (frozen: 10–12), shaking once.
    • Reheat—skillet: Add a teaspoon of oil and a splash of broth, cover 3–4 minutes, then uncover to crisp.

    Troubleshooting Common Cranberry Turkey Stuffing Balls Issues

    • Too dry: Add 1–2 tablespoons warm broth and gently toss before reheating; serve with extra gravy.
    • Soggy/watery: Bake on a wire rack set over the sheet pan to promote airflow. Next time, add broth more gradually.
    • Uneven texture: Finely chop turkey and celery; large chunks prevent the mixture from binding evenly.
    • Falling apart: Increase egg by 1 and chill the mixture 20 minutes before rolling.
    • Underbrowned: Use convection if available or brush lightly with oil for better browning.

    With these storage and reheat tips, your Cranberry Turkey Stuffing Balls stay tender, flavorful, and ready when you are. You’ve got this—and dinner, too.

    FAQs

    Can I make Cranberry Turkey Stuffing Balls ahead?

    Yes. Roll and refrigerate up to 24 hours, or freeze unbaked on a tray, then bag. Bake from chilled or frozen, adding a few minutes as needed.

    What stuffing works best?

    Any style works—boxed, sourdough, or cornbread. If very dry, loosen with a bit of warm broth before mixing so the balls hold together.

    How do I keep them from drying out?

    Don’t overbake, and add broth gradually until the mixture holds when pressed. Serve with gravy for extra moisture and flavor.

    Can I use chicken instead of turkey?

    Absolutely. Shredded rotisserie chicken makes a tasty, easy swap with the same bake time and texture.

    Conclusion

    Cranberry Turkey Stuffing Balls are your cozy, homemade solution to leftover turkey and busy-night dinners. With savory stuffing, juicy turkey, and bright cranberry in every bite, these comforting, one-pan wonders deliver easy flavor without fuss. Whether you serve them with gravy for a family meal or pass them as a holiday appetizer, they’re a crowd-pleasing, easy dinner that stays true to home. Try Cranberry Turkey Stuffing Balls this week, share your plate, and tag me—I can’t wait to see your spin.

  • Christmas Cranberry Orange Cookies Recipe – Zesty & Cozy

    Christmas Cranberry Orange Cookies Recipe – Zesty & Cozy

    Christmas Cranberry Orange Cookies Recipe magic started in my kitchen when the mixer was going, the dog was howling at the mailman, and my orange zest flew like confetti. This Christmas Cranberry Orange Cookies Recipe came together between a spilled bag of cranberries and a timer I forgot to set—classic Darleen Vance chaos with a sweet ending. The dough is simple, the flavor is bold, and the aroma will have your holiday spirits rising faster than my kids when they smell cookies.

    Christmas Cranberry Orange Cookies Recipe – Zesty & Cozy

    Recipe

    Why You’ll Love This Christmas Cranberry Orange Cookies Recipe

    What Makes This Christmas Cranberry Orange Cookies Recipe So Irresistible

    I first baked this Christmas Cranberry Orange Cookies Recipe for a neighborhood swap after my mixer flung flour like light snow. Worth it. The citrus perfumes the whole kitchen, the cranberries are delightfully chewy, and the glaze is the sparkly bow on top. This Christmas Cranberry Orange Cookies Recipe balances sweet and tart for a homemade holiday cookie that tastes like a bakery classic—without bakery stress.

    • Bright, zesty orange flavor meets sweet, chewy cranberries—true comfort baking.
    • Quick prep and simple ingredients—an easy recipe you can make last-minute.
    • No-fuss dough with a short chill for perfectly soft, tender centers.
    • Festive look for cookie trays, swaps, and homemade gift boxes.
    • Optional white chocolate and pistachios add a cozy, bakery-style finish.

    Cozy baking is back, and this Christmas Cranberry Orange Cookies Recipe checks every holiday box: nostalgic, homemade, and beautifully photogenic. The citrus aroma, the ruby cranberries, and that glossy orange glaze are social-media ready and perfect for sharing. Whether you love easy cookies, soft and chewy texture, or a comfort food treat with real orange zest, this homemade version delivers a quick fix for your sweet tooth. Ready to bake? Let’s get you to the recipe card below.

    Tips, Tricks & Expert Secrets for the Christmas Cranberry Orange Cookies Recipe

    Chef Tips for Perfect Christmas Cranberry Orange Cookies Recipe Every Time

    In my first test batch of this Christmas Cranberry Orange Cookies Recipe, I skipped chilling and ended up with tasty, but a touch too flat cookies. One quick cooking tip later—chill for even 20 minutes—and the texture turned into that soft, pillowy perfection.

    • Cream the butter and sugars until light and fluffy; this traps air for lift and a tender crumb.
    • Use freshly grated orange zest; it’s the secret to a bold, fragrant, homemade flavor.
    • Chill the dough 20–30 minutes for thicker cookies with soft centers and lightly crisp edges.
    • Pull cookies when the edges set but the centers look slightly underdone; they finish on the sheet.

    Smart Ingredient Swaps & Practical Cooking Advice

    • Gluten-free: Swap in a 1:1 gluten-free baking flour with xanthan gum and bake as directed.
    • Dairy-free: Use vegan butter sticks and dairy-free white chips; the Christmas Cranberry Orange Cookies Recipe stays wonderfully soft.
    • Low-sugar tweak: Reduce granulated sugar by 2–3 tablespoons; keep the brown sugar for moisture.

    What not to do: Don’t overmix once the flour goes in. Overmixing toughens the dough and mutes the soft, chewy texture this easy recipe is loved for. With these quick fixes and a homemade approach, you’ll nail the Christmas Cranberry Orange Cookies Recipe like a pro.

    Serving Ideas & Creative Variations for the Christmas Cranberry Orange Cookies Recipe

    How to Serve Christmas Cranberry Orange Cookies Recipe for Maximum Enjoyment

    When I set out trays of this Christmas Cranberry Orange Cookies Recipe for guests, I nestle them beside a little bowl of extra zest and a carafe of hot cocoa. The color pops, the glaze sparkles, and everyone reaches for seconds.

    • Pair with hot cocoa, spiced tea, or a latte to highlight the bright citrus notes.
    • Arrange on a festive platter with fresh orange slices and a sprinkle of powdered sugar for an elegant plating suggestion.
    • Pack into cookie tins with parchment layers for an easy, homemade gift.

    Flavor Twists and Seasonal Variations

    • Almond Kiss: Add 1/2 tsp almond extract and top warm cookies with a white chocolate drizzle.
    • Ginger Spark: Add 1 tsp ground ginger to the dry mix for a warming seasonal twist.
    • Pistachio Crunch: Fold in chopped pistachios for a color-contrast crunch and bakery look.

    Sharing on social? Photograph in natural window light, stack three cookies, and show the cranberry-studded interior with a clean break. For more festive bakes, try my One-Bowl Peppermint Brownies next, or cozy up with a slice of Gluten-Free Cinnamon Coffee Cake. If you’re assembling a dessert tray, the Salted Caramel Apple Bars are a stunning pairing.

    Storage & Troubleshooting Guide for the Christmas Cranberry Orange Cookies Recipe

    How to Store and Reheat Christmas Cranberry Orange Cookies Recipe

    Left with a mountain of cookies after my last holiday party, I tested every storage method so you don’t have to. The result: this Christmas Cranberry Orange Cookies Recipe keeps beautifully with minimal fuss.

    • Room temperature: Store in an airtight container up to 3–4 days. Place a slice of bread in the container to keep cookies soft.
    • Refrigerator: Not necessary for baked cookies, but the dough can chill up to 48 hours for make-ahead convenience.
    • Freezer: Freeze baked cookies up to 2 months in a zip-top bag with air pressed out. Thaw at room temp.
    • Reheating: Warm in a 300°F (150°C) oven for 3–4 minutes or a few seconds in the microwave for that fresh-baked feel.

    Troubleshooting Common Christmas Cranberry Orange Cookies Recipe Issues

    • Too flat: Dough too warm. Chill 20–30 minutes before baking and ensure butter isn’t overly soft.
    • Dry or crumbly: Overbaked or flour-heavy. Weigh flour or spoon-and-level; bake until edges just set.
    • Not enough orange flavor: Increase zest by 1–2 teaspoons or finish with extra zest in the glaze.
    • Uneven texture: Overmixing after adding flour. Mix just until combined for a tender, homemade crumb.

    With these storage tips, reheat notes, and texture fixes, your Christmas Cranberry Orange Cookies Recipe will stay bakery-fresh. You’ve got this—holiday cookie success is right out of your oven.

    FAQs

    Can I make the Christmas Cranberry Orange Cookies Recipe ahead of time?

    Yes. Chill the dough up to 48 hours or freeze portioned dough balls up to 2 months. Bake from frozen, adding 1–2 minutes.

    Do I need to soak the dried cranberries?

    Not required. If your cranberries are very dry, soak in warm orange juice for 5 minutes, pat dry, and fold in.

    How do I keep the Christmas Cranberry Orange Cookies Recipe soft?

    Pull when edges set but centers look slightly underdone. Cool on the sheet 5 minutes, then store airtight with a slice of bread.

    Can I skip the glaze?

    Absolutely. The cookies are delicious plain; the glaze adds shine and extra orange flavor but isn’t essential.

    Conclusion

    The Christmas Cranberry Orange Cookies Recipe brings bright citrus, chewy cranberries, and soft, bakery-style texture to your holiday table. This easy, homemade bake proves that simple ingredients and a few smart steps create reliable, comfort food magic. From cookie swaps to cozy evenings, the Christmas Cranberry Orange Cookies Recipe delivers festive color, big flavor, and that nostalgic orange zest aroma everyone loves. Bake a batch, drizzle the glaze, and enjoy the soft-and-chewy perfection. Try it at home, share your tray, and tag me—let’s make your holiday cookie plate the star of the season.

  • Glazed Carrots – Irresistibly Easy and Comforting

    Glazed Carrots – Irresistibly Easy and Comforting

    Glazed Carrots are my weeknight peace treaty. The first time I made Glazed Carrots, I was juggling a wobbly cutting board, a timer that wouldn’t stop beeping, and my son asking if butter counts as a vegetable. I tossed carrots in a pan with brown sugar and honey, and the glossy, sweet glaze saved dinner and my mood. Now I keep this easy side in rotation because it’s fast, family-approved, and tastes like a warm hug on a plate.

    Glazed Carrots

    Recipe

    WHY YOU’LL LOVE THIS RECIPE

    What Makes This Glazed Carrots So Irresistible

    I learned the magic of Glazed Carrots on a Tuesday when the roast was a little dry and the clock was not my friend. A quick swirl of butter, brown sugar, and honey turned a simple pan of carrots into a glossy, sweet-salty side that the whole table grabbed first. Glazed Carrots instantly elevate even a basic dinner, and they come together with pantry staples. This easy dinner side is comfort food without fuss—polished enough for holidays, but perfect for any night you need a homemade win.

    • Quick prep: From stove to table in about 20–25 minutes—ideal for busy nights.
    • Simple ingredients: Carrots, butter, brown sugar, and honey you probably already have.
    • One-pan ease: Minimal cleanup and maximum flavor—an easy, homemade favorite.
    • Family-friendly: Naturally sweet, tender, and glossy, loved by kids and adults.
    • Flexible flavor: Add orange zest, cinnamon, or thyme for a cozy seasonal twist.

    Glazed Carrots bring big flavor with little effort, a true one-pan meal helper that pairs with everything from roasted chicken to weeknight pasta. If you’re craving more cozy sides and soups, you’ll love my best creamy mushroom soup and these hearty sweet potato recipes. Ready to cook? Let’s get to the recipe card.

    They’re the ultimate easy recipe upgrade: a homemade version of your favorite steakhouse side that tastes luxurious but requires zero chef training. With glossy edges and buttery sweetness, Glazed Carrots are photogenic for social sharing, comforting for weeknights, and impressive for guests. That balance of speed, flavor, and comfort keeps this side trending—especially around holidays when simple, make-ahead-friendly sides are gold.

    TIPS, TRICKS & EXPERT SECRETS

    Chef Tips for Perfect Glazed Carrots Every Time

    I once taught a quick cooking class where my burner ran hotter than the sun. The carrots still came out dreamy because the method is forgiving—if you know a few smart cooking tips. Here’s how to nail Glazed Carrots like a pro.

    • Cut evenly: Slice carrots on a bias about 1/2 inch thick so they cook at the same rate and glaze beautifully.
    • Par-simmer first: Briefly simmer in a splash of water with a pinch of salt until tender-crisp before adding sugar and butter. This keeps them vibrant and not mushy.
    • Reduce to gloss: Let the brown sugar, honey, and butter bubble until syrupy; the glaze should coat the back of a spoon.
    • Finish with acid: A teaspoon of apple cider vinegar or lemon juice brightens the sweetness for a balanced, restaurant-style finish.

    Smart Ingredient Swaps & Practical Cooking Advice

    • Vegan swap: Use vegan butter and maple syrup instead of honey for a fully plant-based, homemade version.
    • Lower sugar option: Reduce brown sugar to 2 tablespoons and add orange zest for a fragrant, easy fix.
    • Spice it right: A pinch of cinnamon or ginger adds cozy depth; fresh thyme brings a savory edge.
    • What not to do: Don’t walk away once the glaze starts reducing. Over-reduction turns sticky fast; if that happens, add a tablespoon of water and swirl to loosen.

    This easy recipe loves a medium skillet, steady heat, and a little patience during the glaze phase. If the texture seems off, remember: you can always add a splash of water to fix it, or cook 1–2 minutes more to thicken. Glazed Carrots reward attention with that perfect glossy finish.

    SERVING IDEAS & CREATIVE VARIATIONS

    How to Serve Glazed Carrots for Maximum Enjoyment

    I once arranged Glazed Carrots in a shallow bowl with extra glaze and a shine of orange zest, and my friend thought I secretly hired a caterer. Presentation matters! For a pretty plating suggestion, spoon the carrots onto a warm platter, drizzle with pan glaze, and finish with flaky salt and fresh herbs. Pair Glazed Carrots with cozy mains like lemon herb chicken and rice or weeknight favorites such as slow cooker Mongolian beef. For a comforting soup-and-side moment, serve alongside my creamy mushroom soup.

    • Holiday sideboard: Pile Glazed Carrots into a wide, shallow dish so the glaze shows; sprinkle with chopped parsley or thyme.
    • Weeknight bowl: Add to grain bowls with quinoa, rotisserie chicken, and a squeeze of lemon for a quick, homemade dinner.
    • Elegant plate: Fan the carrots next to roasted salmon; finish with a touch of orange zest and toasted almonds.

    Flavor Twists and Seasonal Variations

    • Orange-Maple Glazed Carrots: Swap honey for maple syrup and add 1 teaspoon orange zest plus 1 tablespoon orange juice for a bright, seasonal twist.
    • Brown Butter Sage: Brown the butter first and toss in a few sage leaves; this adds nutty depth and autumn comfort-food vibes.
    • Spicy Honey: Add a pinch of red pepper flakes or a drizzle of hot honey for a sweet-heat flavor variation that’s amazing with pork chops.

    For photos, keep a little extra glaze in the pan and spoon it over right before shooting; that mirror-shine reads beautifully on camera and social feeds. Glazed Carrots are naturally vibrant, so choose a neutral plate and let the color pop.

    STORAGE & TROUBLESHOOTING GUIDE

    How to Store and Reheat Glazed Carrots

    I’m a leftovers loyalist. When I batch-cook Glazed Carrots, I stash them in shallow containers so they cool quickly and keep that silky texture. Here’s how to store, keep fresh, and reheat without losing the glaze.

    • Room temperature: Keep Glazed Carrots out no longer than 2 hours.
    • Fridge: Store in an airtight container up to 4 days. Press parchment onto the surface to minimize moisture loss.
    • Freezer: Freeze up to 2 months. For best texture, undercook carrots by 1–2 minutes before freezing.
    • Reheat: Warm gently in a skillet over medium-low with a splash of water to loosen the glaze. You can also reheat covered in a 325°F oven for 10–12 minutes, or in an air fryer at 300°F for 5–6 minutes, shaking once.

    Troubleshooting Common Glazed Carrots Issues

    • Too watery: Simmer uncovered for 1–3 minutes to reduce, or add 1 teaspoon butter to help emulsify.
    • Too thick/sticky: Stir in 1–2 tablespoons water and gently reheat to loosen the glaze.
    • Overcooked/mushy: Next time, cut carrots thicker and reduce simmer time; for now, fold gently and serve warm—they’ll still taste great.
    • Not sweet enough: Add 1–2 teaspoons honey or a pinch more brown sugar and simmer briefly to incorporate.
    • Flat flavor: Brighten with 1 teaspoon apple cider vinegar or lemon juice and a pinch of salt.

    You’ve got this! With a few quick fixes, your Glazed Carrots will keep their glossy finish and comforting flavor—ready to rescue any dinner plate.

    FAQs

    Can I use baby carrots for Glazed Carrots?

    Yes. Baby carrots work well—just simmer a bit longer until tender-crisp before glazing, since they’re thicker and often colder from the fridge.

    How do I make Glazed Carrots without honey?

    Use maple syrup or add an extra tablespoon of brown sugar plus 1 teaspoon water. The glaze will still be shiny and delicious.

    Can I prep Glazed Carrots ahead?

    Par-cook the carrots up to 24 hours ahead. Reheat in the glaze, reducing to a glossy finish right before serving for best texture.

    Are Glazed Carrots gluten-free?

    Yes, this recipe is naturally gluten-free. Always check labels on butter substitutes and spices if you’re cooking for strict diets.

    Conclusion

    Glazed Carrots are the cozy, homemade side that turns any plate into comfort food. With a buttery-sweet glaze and simple pantry ingredients, Glazed Carrots deliver big flavor fast—perfect for holiday tables and weeknight cravings. Use the tips above to customize your easy recipe with orange zest, maple syrup, brown butter, or thyme, and serve alongside family favorites for a well-rounded meal. I hope you love this glossy, crowd-pleasing classic as much as we do in my kitchen. Try it at home and tag me so I can see your Glazed Carrots shine!

  • Kielbasa Potato Soup – Cozy and Irresistibly Creamy

    Kielbasa Potato Soup – Cozy and Irresistibly Creamy

    Kielbasa Potato Soup had a starring role the day my spatula slipped into the sink and my toddler announced he was “helping” by salting the floor. I laughed, stirred, and kept going. Kielbasa Potato Soup is my kind of cozy—hearty, creamy, and quick enough for real-life weeknights. The sizzle of sausage, the melt-in-your-mouth potatoes, and that velvety finish make everything feel right again, even when the kitchen looks like a whirlwind. Darleen Vance here—welcome to my chaos-tested, family-approved bowl of comfort.

    Kielbasa Potato Soup

    Recipe

    WHY YOU’LL LOVE THIS RECIPE

    What Makes This Kielbasa Potato Soup So Irresistible

    I learned fast that weeknight magic happens when dinner doesn’t boss you around. Kielbasa Potato Soup does that beautifully. The first time I made it, I burned the toast, the dog stole a carrot, and yet the soup came out creamy, savory, and exactly what our cold evening needed. Kielbasa Potato Soup is a one-pot comfort food hero, and the leftovers might be even better. That smoky sausage, golden potatoes, and velvety broth? Yes please.

    • Quick prep, big reward: a true easy dinner that tastes slow-simmered.
    • One-pot meal for minimal dishes and maximum flavor.
    • Simple, affordable, homemade ingredients you already love.
    • Family-friendly comfort food; everyone asks for seconds.
    • Customizable creaminess and spice level for your perfect bowl.

    When you crave something cozy, creamy, and satisfying, Kielbasa Potato Soup checks every box. Grab your spoon—we’re diving in next with the full recipe card.

    Right now, home cooks want dependable, crave-worthy meals with pantry staples—exactly why Kielbasa Potato Soup is everywhere. It’s the kind of homemade favorite that photographs beautifully, reheats like a dream, and tastes like the weekend even on a Tuesday. If you love simple comfort food, try my Easy Potsticker Soup for another one-pot win, or cozy up with Gluten-Free Lasagna Soup on pasta night.

    TIPS, TRICKS & EXPERT SECRETS

    Chef Tips for Perfect Kielbasa Potato Soup Every Time

    During a cooking class, I once got so chatty I forgot to brown the kielbasa—never again. Browning matters. Here are my favorite cooking tips to make your Kielbasa Potato Soup restaurant-cozy at home:

    • Brown the sausage well: those caramelized bits are flavor gold for this easy recipe.
    • Use Yukon golds: they hold their shape yet mash into a creamy, homemade version without flour.
    • Season in layers: salt with the veggies, season again after simmering, and finish with a bright splash of vinegar or lemon.
    • Control thickness: lightly mash potatoes to thicken, or add a cornstarch slurry for a quick fix.

    Smart Ingredient Swaps & Practical Cooking Advice

    • Dairy-light option: replace heavy cream with half-and-half and skip cheese for a lighter but still silky bowl.
    • Gluten-free swap: thicken with cornstarch or simply mash more potatoes—no flour needed.
    • Smoky twist: choose smoked paprika and a hardwood-smoked kielbasa for deeper, bolder flavor.
    • What not to do: don’t let the soup boil after adding cream. High heat can cause dairy to split and the texture to turn grainy.

    These cooking tips make Kielbasa Potato Soup an easy recipe you’ll rely on, whether you’re new to the kitchen or a seasoned home cook who loves a quick fix on busy nights.

    SERVING IDEAS & CREATIVE VARIATIONS

    How to Serve Kielbasa Potato Soup for Maximum Enjoyment

    I love bringing a steaming pot to the table—everyone ladles their own, and suddenly it feels like Sunday supper. For a simple plating suggestion, finish each bowl with a drizzle of cream, a shower of parsley, and a few warm slices of seared kielbasa. Pair your Kielbasa Potato Soup with warm crusty bread, a crisp green salad, or roasted broccoli. For a heartier spread, add a slow-cooker main like my Slow Cooker Mongolian Beef and let the aromas fill your kitchen.

    • Serving ideas: buttered rye toast, garlic bread, or cheddar biscuits.
    • Beverage pairings: crisp lager, dry cider, or an herb-forward iced tea.

    Flavor Twists and Seasonal Variations

    • Autumn Harvest: stir in sautéed mushrooms and a pinch of nutmeg for a woodsy vibe.
    • Spicy Polish-Inspired: add a teaspoon of hot paprika and a dash of horseradish to the bowl.
    • Veggie-Forward: toss in chopped kale or cabbage in the last 5 minutes for color and texture.

    Food bloggers and content creators: for social photos, plate in matte bowls, garnish with cracked pepper and parsley, and capture steam. Your Kielbasa Potato Soup will gleam, and those golden kielbasa edges will pop on camera.

    STORAGE & TROUBLESHOOTING GUIDE

    How to Store and Reheat Kielbasa Potato Soup

    I once made a double batch of Kielbasa Potato Soup for a snow day and lived on the leftovers happily all week. Here’s how to keep it fresh:

    • Room temperature: keep out no longer than 2 hours.
    • Fridge: store in airtight containers for 3–4 days to keep flavors bright.
    • Freezer: cool completely, portion into freezer-safe containers, and freeze up to 3 months.
    • Reheat: warm gently on the stovetop over medium-low, stirring often. Add a splash of broth or milk to loosen. Microwave in short bursts, stirring between, to avoid hot spots.

    Troubleshooting Common Kielbasa Potato Soup Issues

    • Too thick: whisk in warm broth or milk, a little at a time, until velvety.
    • Too thin: mash more potatoes or simmer uncovered to reduce; use a cornstarch slurry for a fast fix.
    • Dairy split: remove from heat, whisk in a splash of cream, and reheat gently—avoid boiling after adding dairy.
    • Bland flavor: add salt in small pinches, a squeeze of lemon or vinegar, and a bit more pepper; a touch more smoked paprika can revive it.

    With these storage tips and quick solutions, your Kielbasa Potato Soup will stay dreamy and delicious from first bowl to last.

    FAQs

    Can I make Kielbasa Potato Soup ahead?

    Yes. Cook, cool, and refrigerate up to 4 days. Reheat gently and add a splash of broth or milk to restore creaminess.

    What potatoes work best for Kielbasa Potato Soup?

    Yukon golds hold their shape and mash smoothly, giving a naturally creamy texture without extra thickeners.

    How can I lighten this soup?

    Use half-and-half instead of heavy cream, skip the cheese, and add extra veggies like kale or cabbage.

    Is Kielbasa Potato Soup gluten-free?

    It can be. Use cornstarch to thicken (or simply mash potatoes) and check that your kielbasa is labeled gluten-free.

    Conclusion

    Kielbasa Potato Soup is the kind of comfort food that turns a busy night into a warm, homemade moment. With smoky sausage, tender potatoes, and a creamy broth, this easy dinner delivers big flavor in one pot. Whether you choose a lighter, dairy-friendly version or go all-in with cheddar richness, it’s a flexible, crowd-pleasing bowl you’ll return to again and again. Save this Kielbasa Potato Soup for your next weeknight or weekend gathering, and if you’re craving more cozy bowls, bookmark my White Lasagna Soup (Crockpot). Try it at home and tag me—I can’t wait to see your simmering, creamy masterpiece!

  • Best Creamy Mushroom Soup – Irresistibly Cozy and Creamy

    Best Creamy Mushroom Soup – Irresistibly Cozy and Creamy

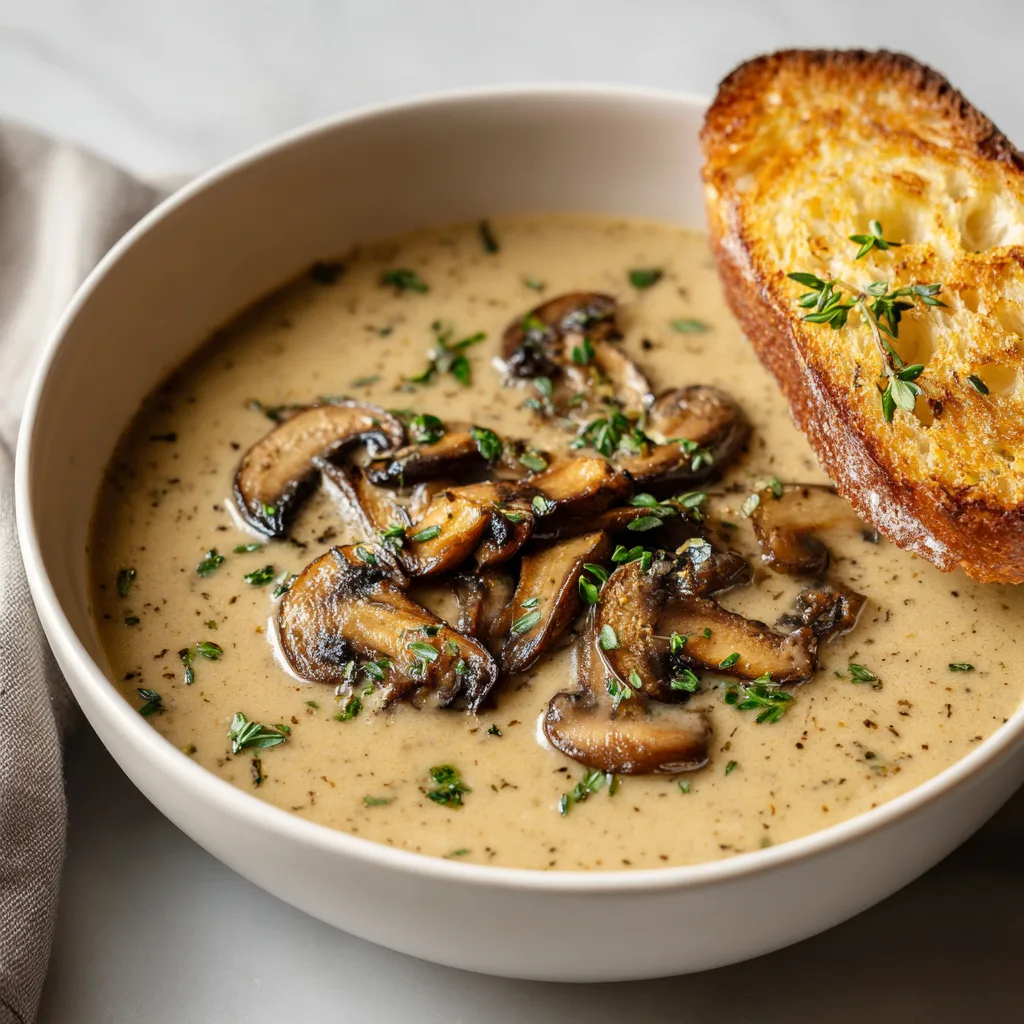
    Best Creamy Mushroom Soup is my weeknight hero and my rainy-day hug in a bowl. Last Tuesday, I was juggling a zoom call, a baseball uniform that wasn’t dry, and a cat determined to nap on my cutting board. Somehow, Best Creamy Mushroom Soup still came out gloriously silky. I’m Darleen Vance, and this is the recipe I count on when dinner needs to be fast, comforting, and homemade—no fuss, just rich, earthy flavor and a dreamy, creamy finish.

    Best Creamy Mushroom Soup

    Recipe

    WHY YOU’LL LOVE THIS RECIPE

    What Makes This Best Creamy Mushroom Soup So Irresistible

    Confession time: I once tried to “speed chop” mushrooms while my teenager asked where the car keys were and my dog practiced parkour off the pantry door. Best Creamy Mushroom Soup still tasted like a cozy bistro classic. The reason Best Creamy Mushroom Soup wins on busy nights is simple—it delivers deep, homemade flavor with hardly any fuss. The earthy cremini and shiitake mix, the thyme, and a splash of sherry create that restaurant-level savor that turns an easy dinner into something memorable. And since this is a one-pot comfort food dream, cleanup is blissfully quick.

    • Comforting flavor: layers of savory, creamy goodness that define the Best Creamy Mushroom Soup experience.
    • Easy, one-pot method: a true homemade, weeknight-friendly recipe.
    • Simple ingredients: pantry staples with a few fresh upgrades for bold depth.
    • Family-friendly: rich but balanced; even mushroom skeptics often ask for seconds.
    • Flexible: make it vegetarian, gluten-free, or extra decadent with simple tweaks.

    From first simmer to final spoonful, Best Creamy Mushroom Soup gives you an easy dinner that feels like a love letter to comfort food. Ready to cook? Let’s head into the recipe card below.

    All over my inbox and social feeds, the chatter is the same: Best Creamy Mushroom Soup hits that sweet spot between creamy nostalgia and modern, homemade flair. It’s the kind of creamy soup that looks great in a bowl, tastes like you fussed all day, and still fits into a weeknight. Whether you’re batch-cooking for meal prep or ladling out steaming bowls for company, this homemade version proves simplicity and flavor can happily coexist.

    TIPS, TRICKS & EXPERT SECRETS

    Chef Tips for Perfect Best Creamy Mushroom Soup Every Time

    During a class I once taught, I learned the hard way that mushrooms need room. We crowded the pot, they steamed, and the Best Creamy Mushroom Soup lost its depth. My quick fix? Work in batches and treat mushrooms like steak—color equals flavor. Here’s how to nail this easy recipe every time.

    • Brown, don’t steam: Spread mushrooms out so they caramelize. It’s the secret to the Best Creamy Mushroom Soup depth.
    • Season in layers: Salt the onions lightly, add soy or tamari to boost umami, and finish with lemon for brightness.
    • Whisk gradually: Sprinkle flour, then whisk in broth slowly to ensure a silky, homemade texture with no lumps.
    • Low simmer after cream: Once dairy goes in, keep heat low to prevent curdling and preserve that creamy soup body.

    Smart Ingredient Swaps & Practical Cooking Advice

    • Vegan version: Replace butter with olive oil, use coconut cream or cashew cream, and swap broth for veggie stock. You’ll still get Best Creamy Mushroom Soup richness with a plant-based twist.
    • Gluten-free: Use a 1:1 gluten-free flour blend or thicken with a cornstarch slurry. Keep the homemade version fully accessible.
    • Lighter option: Sub half-and-half for some or all of the heavy cream; it keeps the easy recipe cozy without going too heavy.
    • What not to do: Don’t over-blend. Best Creamy Mushroom Soup should retain some texture. Overmixing turns it pasty instead of lush.

    These cooking tips keep your Best Creamy Mushroom Soup consistent and deeply flavorful. Consider this your friendly roadmap to soup bliss.

    SERVING IDEAS & CREATIVE VARIATIONS

    How to Serve Best Creamy Mushroom Soup for Maximum Enjoyment

    When I serve Best Creamy Mushroom Soup to guests, I break out shallow bowls, extra herbs, and a drizzle of something glossy—it instantly looks restaurant-ready. For plating suggestions and cozy serving ideas, think rustic and warm.

    • Pair with a crusty baguette or garlic toast and a simple arugula salad with lemon vinaigrette.
    • Serve alongside roasted chicken or try my weeknight-favorite Lemon Herb Chicken and Rice for a complete comfort spread.
    • Soup night duo: balance creaminess with a lighter bowl like my Easy Potsticker Soup—a cozy contrast that guests love.
    How to Serve Best Creamy Mushroom Soup for Maximum Enjoyment

    Flavor Twists and Seasonal Variations

    • Autumn thyme + sage: Boost herbs and finish with a pat of butter and a pinch of nutmeg for a seasonal twist on Best Creamy Mushroom Soup.
    • Roasted garlic upgrade: Blend in a head of roasted garlic for deeper sweetness and amplified comfort food vibes.
    • Truffle touch: A light drizzle of truffle oil and chives creates a fancy, homemade version you’ll want to photograph.

    For content creators, style Best Creamy Mushroom Soup with a swirl of cream and stacked mushroom slices, then shoot overhead in soft light. If you love creamy soups, bookmark a reader favorite like Gluten-Free Lasagna Soup for your next soup night. However you serve it, these flavor variations keep your bowl exciting and camera-ready.

    STORAGE & TROUBLESHOOTING GUIDE

    How to Store and Reheat Best Creamy Mushroom Soup

    Leftovers of Best Creamy Mushroom Soup might be the best part—tomorrow’s lunch is already winning. Here’s how to store, keep fresh, and reheat while preserving that silky texture.

    • Room temperature: Don’t leave Best Creamy Mushroom Soup out longer than 2 hours.
    • Refrigerator: Store in airtight containers for up to 4 days. Glass jars or snap-lid containers help maintain flavor and texture.
    • Freezer: Freeze for up to 3 months. For best results, freeze before adding dairy; stir in cream after reheating for a smoother finish.
    • Reheating: Warm gently on the stovetop over low heat, stirring often. You can microwave in 60-second bursts at 50–70% power, stirring between intervals. Avoid boiling to keep the creamy soup from separating.

    Troubleshooting Common Best Creamy Mushroom Soup Issues

    • Too thin/watery: Simmer uncovered to reduce, or whisk 1 tsp cornstarch with 1 tbsp cold broth and stir in slowly.
    • Too thick: Add warm broth or a splash of cream until you reach your preferred texture.
    • Curdled dairy: Keep the heat low after adding cream. If separation happens, whisk in a bit more cream off heat to bring it together.
    • Flat flavor: Add a pinch of salt, a few drops of lemon juice, or another splash of soy/tamari to boost umami.
    • Lacking depth: Make sure mushrooms got good color. Next time, don’t overcrowd the pan—browning is key in Best Creamy Mushroom Soup.

    Take a breath—you’ve got this. With these storage tips and quick fixes, your Best Creamy Mushroom Soup will stay cozy, creamy, and company-ready.

    FAQs

    Can I make Best Creamy Mushroom Soup ahead of time?

    Yes. Make it up to 2 days ahead, refrigerate, and reheat gently over low heat. Add a splash of broth or cream if it thickens.

    What mushrooms are best for Best Creamy Mushroom Soup?

    A mix of cremini and shiitake gives a balanced, earthy flavor. Add a few porcini or oyster mushrooms for extra depth.

    Can I make Best Creamy Mushroom Soup without flour?

    Yes. Thicken with a cornstarch slurry or blend a portion of the soup to create body without flour.

    Is Best Creamy Mushroom Soup freezer-friendly?

    It freezes best before adding dairy. Freeze, then reheat and stir in cream right before serving for a silky finish.

    Conclusion

    Best Creamy Mushroom Soup is the cozy, homemade comfort food you’ll crave on busy weeknights and slow Sundays alike. With simple ingredients, one-pot ease, and restaurant-level flavor, this creamy soup proves that the best dinners are often the simplest. Whether you pair it with toast and a salad or serve it alongside a hearty main, Best Creamy Mushroom Soup turns any table into a warm welcome. If you’re building a soup lineup, you’ll also love the variety on my home site. Try it at home and tag me—I can’t wait to see your bowls.

  • Creamy Tuscan Chicken Pasta – Cozy, Irresistible Flavor

    Creamy Tuscan Chicken Pasta – Cozy, Irresistible Flavor

    Creamy Tuscan Chicken Pasta is the dish my family calls the “apology pasta” because it fixes any weeknight meltdown. Once, I tried to film this Creamy Tuscan Chicken Pasta while the smoke alarm insisted on a cameo—turns out, toasting bread on broil is not a multitasker’s friend. The sauce waited patiently, the kids didn’t, and we all ended up laughing over bowls of silky, garlicky comfort. Let’s just say the pasta saved dinner—and my pride.

    Creamy Tuscan Chicken Pasta

    Recipe

    Why You’ll Love This Creamy Tuscan Chicken Pasta

    What Makes This Creamy Tuscan Chicken Pasta So Irresistible

    I first made Creamy Tuscan Chicken Pasta on a night when my timer, my toddler, and my laundry buzzer all went off at once. I tossed everything into one big skillet and hoped for the best. Turns out, Creamy Tuscan Chicken Pasta is practically foolproof: silky sauce, juicy chicken, and that sun-dried tomato pop. It’s the kind of easy dinner that tastes like you’ve been simmering all day—without the stress. If you love a fast, homemade comfort food that feels like a restaurant treat, this is the pasta that delivers.

    • Fast and weeknight-friendly: simple steps, ready in about 40 minutes.
    • Comforting and creamy: Parmesan cream sauce clings to every noodle.
    • Balanced flavors: garlicky, tangy sun-dried tomatoes, bright spinach, and a squeeze of lemon.
    • Family-approved and company-ready: looks fancy, tastes cozy.
    • Flexible: choose your pasta shape, adjust spice, add veggies.

    Whether you’re craving an easy dinner or a homemade date-night classic, Creamy Tuscan Chicken Pasta brings the cozy factor to your table every single time. Ready to cook?

    On social feeds and at potlucks, Creamy Tuscan Chicken Pasta is trending because it’s that rare one-pan meal that nails both flavor and convenience. It suits busy cooks who want a homemade vibe without fuss. The glossy sauce, the color from spinach and tomatoes, and the quick fix nature make it super shareable. Save this for weeknights or Sunday meal prep—either way, your skillet becomes your best friend.

    Tuscan Chicken Pasta Tips, Tricks & Expert Secrets

    Chef Tips for Perfect Creamy Tuscan Chicken Pasta Every Time

    The first time I taught a friend this dish, she asked, “Is it really this easy?” Yes—but a few smart moves make Creamy Tuscan Chicken Pasta shine. Here are the cooking tips I swear by:

    • Brown for flavor: Sear chicken in batches so it caramelizes instead of steaming. Golden bits are liquid flavor gold.
    • Reserve pasta water: The starchy water helps emulsify and thicken the Parmesan cream sauce for that restaurant-style sheen.
    • Grate your cheese fresh: Pre-grated Parmesan contains anti-caking agents that can make sauces grainy. Freshly grated melts smoothly.
    • Low and gentle simmer: Keep the cream just below a boil to avoid curdling and to maintain a silky texture.

    Smart Ingredient Swaps & Practical Cooking Advice

    • Lighter version: Swap half the cream for half-and-half; add an extra splash of pasta water to keep it glossy.
    • Gluten-free: Use your favorite GF pasta and confirm your sun-dried tomatoes and broth are gluten-free. For more cozy GF inspiration, try my Gluten-Free Lasagna Soup.
    • Protein swap: Replace chicken with shrimp (add near the end) or try sliced Italian chicken sausage.
    • Veg boost: Add mushrooms or roasted red peppers with the tomatoes; toss in peas with the spinach.
    • What not to do: Don’t boil the sauce hard after adding cream and Parmesan—vigorous boiling can split the sauce and turn it grainy.

    Lean into these easy recipe techniques and your Creamy Tuscan Chicken Pasta will taste like a polished, homemade version you’ll make on repeat.

    Serving Ideas & Creative Variations for Creamy Tuscan Chicken Pasta

    How to Serve Creamy Tuscan Chicken Pasta for Maximum Enjoyment

    When friends drop by, I pile Creamy Tuscan Chicken Pasta into a warm, shallow bowl and let the glossy sauce steal the show. A sprinkle of basil and a heavy snow of Parmesan always earns a chorus of “oohs.” For simple serving ideas and pairings:

    • Side salad: Peppery arugula with lemon vinaigrette cuts through the richness.
    • Bread: Warm ciabatta or garlic bread to swipe up every last ribbon of sauce.
    • Beverage: A crisp Pinot Grigio or sparkling water with lemon keeps the flavors bright.
    How to Serve Creamy Tuscan Chicken Pasta for Maximum Enjoyment

    Flavor Twists and Seasonal Variations

    • Roasted garlic twist: Roast a head of garlic and mash into the sauce for sweeter depth.
    • Autumn harvest: Swap spinach for kale, add roasted butternut cubes, and finish with a pinch of nutmeg.
    • Spicy Calabrian: Stir in Calabrian chili paste for a Pinterest-loved kick.

    For a full chicken dinner rotation, try my bright, one-pan Lemon Herb Chicken and Rice next. And if you like to share on socials, style your Creamy Tuscan Chicken Pasta in a wide bowl, twirl a forkful for height, and let those sun-dried tomato flecks pop. Finish with cracked black pepper for a simple plating suggestion that photographs beautifully.

    Storage & Troubleshooting Guide for Creamy Tuscan Chicken Pasta

    How to Store and Reheat Creamy Tuscan Chicken Pasta

    I stash leftover Creamy Tuscan Chicken Pasta for next-day lunches—future-me always sends thanks. Here’s how to keep it fresh:

    • Room temperature: Keep no longer than 2 hours.
    • Fridge: Store in airtight containers 3–4 days. A drizzle of milk or broth loosens the sauce on reheat.
    • Freezer: Cream sauces can separate, but it’s doable. Freeze up to 2 months in freezer-safe bags, pressing out air. Thaw overnight in the fridge and rewarm gently.
    • Reheat: Warm in a covered skillet over low heat with a splash of milk/broth, stirring to re-emulsify. Microwave in short bursts, stirring between. Avoid boiling.

    Troubleshooting Common Creamy Tuscan Chicken Pasta Issues

    • Sauce too thick: Add warm pasta water or broth, a splash at a time, until silky.
    • Sauce too thin: Simmer gently to reduce, or whisk in a bit more freshly grated Parmesan off heat.
    • Grainy sauce: The heat was too high or cheese pre-grated. Lower heat and use freshly grated Parmesan next time.
    • Bland flavor: Add 1/2 teaspoon more salt, a squeeze of lemon, or an extra pinch of red pepper flakes. Don’t forget to finish with basil.
    • Overcooked chicken: Slice chicken thin and sear just until done; add it back to the sauce at the end to rewarm only.

    With a little storage advice and a few quick fixes, your Creamy Tuscan Chicken Pasta will keep its lush texture and craveable flavor day two and beyond.

    FAQs

    Can I use half-and-half instead of heavy cream?

    Yes. Replace up to half the cream with half-and-half. Simmer gently and use a splash of pasta water to keep the sauce velvety.

    How can I make Creamy Tuscan Chicken Pasta gluten-free?

    Use gluten-free pasta and confirm your broth and sun-dried tomatoes are GF. Cook pasta slightly under al dente to prevent mushiness.

    Can I use rotisserie chicken?

    Absolutely. Stir in shredded rotisserie chicken near the end to warm through. Reduce initial searing time since the chicken is already cooked.

    How do I thicken the sauce without flour?

    Simmer to reduce, stir in more freshly grated Parmesan off heat, and add a splash of starchy pasta water for a glossy, emulsified finish.

    Conclusion

    Creamy Tuscan Chicken Pasta is the kind of easy recipe that turns a busy night into cozy comfort—silky sauce, juicy chicken, and that sun-dried tomato sparkle. It’s a homemade classic that feels special yet fits your weeknight rhythm. If you’re building a comfort-food menu, add my crowd-pleasing Slow Cooker Mongolian Beef and finish with Salted Caramel Apple Bars for dessert. Make this Creamy Tuscan Chicken Pasta tonight, share your bowl, and tag me so I can cheer you on. Your skillet is about to become the hardest-working tool in your kitchen.

  • Classic Christmas Toffee – Irresistible and Cozy

    Classic Christmas Toffee – Irresistible and Cozy

    Classic Christmas Toffee is the recipe I pull out when the house is buzzing, the dog is underfoot, and the timer is set but I swear it never beeps loud enough. One year, I stirred the pot with a wooden spoon in one hand and answered the door with the other—still, Classic Christmas Toffee came out glossy, crisp, and perfect. The magic is in the simple stir, the patient simmer, and the chocolate layer that makes everyone lean over the counter. I’m Darleen Vance, and I promise this is the easiest holiday candy you’ll love to gift, share, and sneak when the kitchen is quiet again.

    Classic Christmas Toffee is the recipe I pull out when the house is buzzing, the dog is underfoot,

    Recipe

    WHY YOU’LL LOVE THIS RECIPE

    What Makes This Classic Christmas Toffee So Irresistible

    I learned quickly that Classic Christmas Toffee waits for no one. The first December I tested this version, I took one call, looked back, and boom—perfect amber. Classic Christmas Toffee is as classic as it gets: buttery, crisp, and capped with melty chocolate. It’s homemade, one-pan candy comfort food you can master on a regular Tuesday and gift all weekend long. I keep it simple, reassuring, and fun—because holiday cooking should feel like a warm hug and smell like butter and sugar behaving beautifully.

    • Buttery snap and glossy chocolate finish—every bite delivers rich, balanced flavor.
    • Simple, pantry-friendly ingredients—no fussy tools beyond a sturdy saucepan and a candy thermometer.
    • Quick prep—stir, simmer, and set; most of the time is hands-off cooling.
    • Perfect for gifting—break into shards and tuck into tins or jars with a ribbon.
    • Foolproof texture—light corn syrup is optional but helps ensure a silky, non-grainy homemade version.

    This easy recipe checks every holiday box: it’s affordable, fast, and wildly shareable. TikTok and Pinterest love clean break shots, and a batch of Classic Christmas Toffee gives you that polished sheen with minimal effort. The buzz is real because it feels like a shortcut to nostalgia—an easy, homemade, one-pan success that tastes like a family tradition. If you’re new to candy-making, this is your gentle nudge to try. Grab a saucepan and let’s make the batch that has everyone asking for “just one more piece.”

    TIPS, TRICKS & EXPERT SECRETS

    Chef Tips for Perfect Classic Christmas Toffee Every Time

    During a holiday bake sale, I brought a test batch and watched the butter separate right before pouring. Lesson learned: toffee loves steady heat and calm stirring. To lock in success with Classic Christmas Toffee, here’s what I do every time.

    • Use a heavy-bottomed saucepan: even heat equals even caramelization and fewer hot spots.
    • Attach a candy thermometer and trust it: cook to 295–300°F for that ideal, crisp snap.
    • Stir gently: once it boils, stir occasionally with a heatproof spatula to keep the mixture smooth without introducing crystals.
    • Prep your pan first: parchment-lined and half the nuts scattered so you can pour immediately when it’s ready.

    Smart Ingredient Swaps & Practical Cooking Advice

    • No corn syrup? Skip it—still delicious. For a quick fix to prevent crystallization, add a teaspoon of lemon juice or a pinch of cream of tartar to the sugar mixture.
    • Dairy-free/vegan: swap in plant-based butter with at least 80% fat and use dairy-free chocolate chips. Texture stays crisp, and the flavor shines.
    • Gluten-free friendly: this homemade version is naturally gluten-free—just confirm your chocolate is certified GF.
    • What not to do: don’t crank the heat or walk away. Overheating burns the sugar at the edges, turns it bitter, and can cause butter to separate.

    With these cooking tips in mind, Classic Christmas Toffee becomes the easy recipe you’ll count on for gifts, dessert platters, and sweet moments between the hustle and the tree lights.

    SERVING IDEAS & CREATIVE VARIATIONS

    How to Serve Classic Christmas Toffee for Maximum Enjoyment

    When I serve Classic Christmas Toffee at parties, I pile it high on a wood board with glints of sea salt catching the light. The trick is simple styling and smart pairings. Classic Christmas Toffee shines when it’s the star, but it also loves company.

    • Pair with hot drinks: hot cocoa, strong coffee, or spiced chai cut through the buttery sweetness.
    • Dessert boards: add clementines, dried cranberries, cheddar slices, and roasted nuts for sweet-salty balance.
    • Ice cream topper: crumble over vanilla bean or coffee ice cream for a crunchy, chocolatey crown.

    For more cozy holiday sweets, try my One-Bowl Peppermint Brownies or bake a tin of Traditional German Butter Cookies to round out your dessert spread.

    Flavor Twists and Seasonal Variations

    • Pistachio-Cranberry Toffee: swap nuts for chopped pistachios and sprinkle dried cranberries on the chocolate for festive color.
    • Espresso Toffee: whisk 1 teaspoon instant espresso into the hot toffee off heat before pouring; top with dark chocolate.
    • Peppermint Bark Toffee: use white and dark chocolate swirled on top and finish with crushed peppermint candies.

    Plating suggestion: stack shards in a clear jar with parchment layers and a ribbon. Content creators—shoot at a 45-degree angle so the glossy chocolate and nut flecks catch the light. However you riff, the homemade flavor of Classic Christmas Toffee always delivers.

    STORAGE & TROUBLESHOOTING GUIDE

    How to Store and Reheat Classic Christmas Toffee

    I once hid a tin of Classic Christmas Toffee from myself, only to find it a week later—still perfectly crisp. That’s the beauty of this candy when you store it right.

    • Room temperature: keep in an airtight container with parchment between layers for up to 2 weeks in a cool, dry spot.
    • Refrigerator: extends freshness to about 3 weeks; seal well to prevent moisture from softening the snap.
    • Freezer: up to 2 months; double-wrap in plastic and a zip-top bag or airtight tin. Thaw unopened at room temperature to avoid condensation.

    Reheating: toffee doesn’t need reheating. If chocolate looks dull from temperature swings, a brief chill restores the sheen. If pieces soften slightly, refrigerate 15–20 minutes to firm.

    Troubleshooting Common Classic Christmas Toffee Issues

    • Grainy texture: sugar crystallized. Fix by adding 1–2 tablespoons water to the next batch and a teaspoon corn syrup or a pinch of cream of tartar; avoid scraping the pan sides.
    • Butter separated: heat was too high or stirring was too vigorous. Maintain medium heat and stir gently; a pat of butter can sometimes bring it back together if it splits early.
    • Too soft or sticky: didn’t reach hard crack (295–300°F) or humidity got involved. Cook to temperature, and cool in a dry room.
    • Bitter flavor: the mixture scorched. Use a heavy pan, moderate heat, and watch for the 295–300°F window. Pull from heat promptly.

    Follow this storage advice and quick fixes, and your Classic Christmas Toffee will stay crisp, glossy, and gift-ready. You’ve got this—and I’m cheering you on from my butter-splattered counter.

    FAQs

    Do I need a candy thermometer for Classic Christmas Toffee?

    It’s the most reliable way to hit hard crack (295–300°F). Without one, use the cold water test and look for a deep amber color and nutty aroma.

    Why did my toffee turn grainy?

    Crystallization likely occurred. Avoid stirring once sugar fully dissolves, don’t scrape the pan sides, and add a little corn syrup or lemon juice to inhibit crystals.

    Can I use different nuts or skip them?

    Absolutely. Almonds, pecans, walnuts, pistachios—or skip nuts entirely and sprinkle flaky salt or holiday sprinkles.

    How far ahead can I make Classic Christmas Toffee for gifts?

    Make it up to 2 weeks ahead. Store airtight at room temp with parchment layers. For extra insurance, refrigerate or freeze and thaw sealed.

    Conclusion

    Classic Christmas Toffee is the buttery, chocolate-crowned candy that turns simple pantry staples into pure holiday magic. This homemade version uses one pan, steady heat, and a few smart tricks so you can nail that crisp snap every time. Whether you pack tins for neighbors, crumble shards on ice cream, or line a dessert board beside Pecan Pie Cookies, you’ll taste cozy nostalgia in every bite. Make Classic Christmas Toffee once, and it becomes part of your season. Try it at home and tag me—I can’t wait to see your glossy slabs and sparkling salt flakes.