Blog

  • White Chicken Enchiladas with Creamy Sauce & Zesty Green Chiles

    White Chicken Enchiladas with Creamy Sauce & Zesty Green Chiles

    White Chicken Enchiladas with Creamy Sauce & Zesty Green Chiles

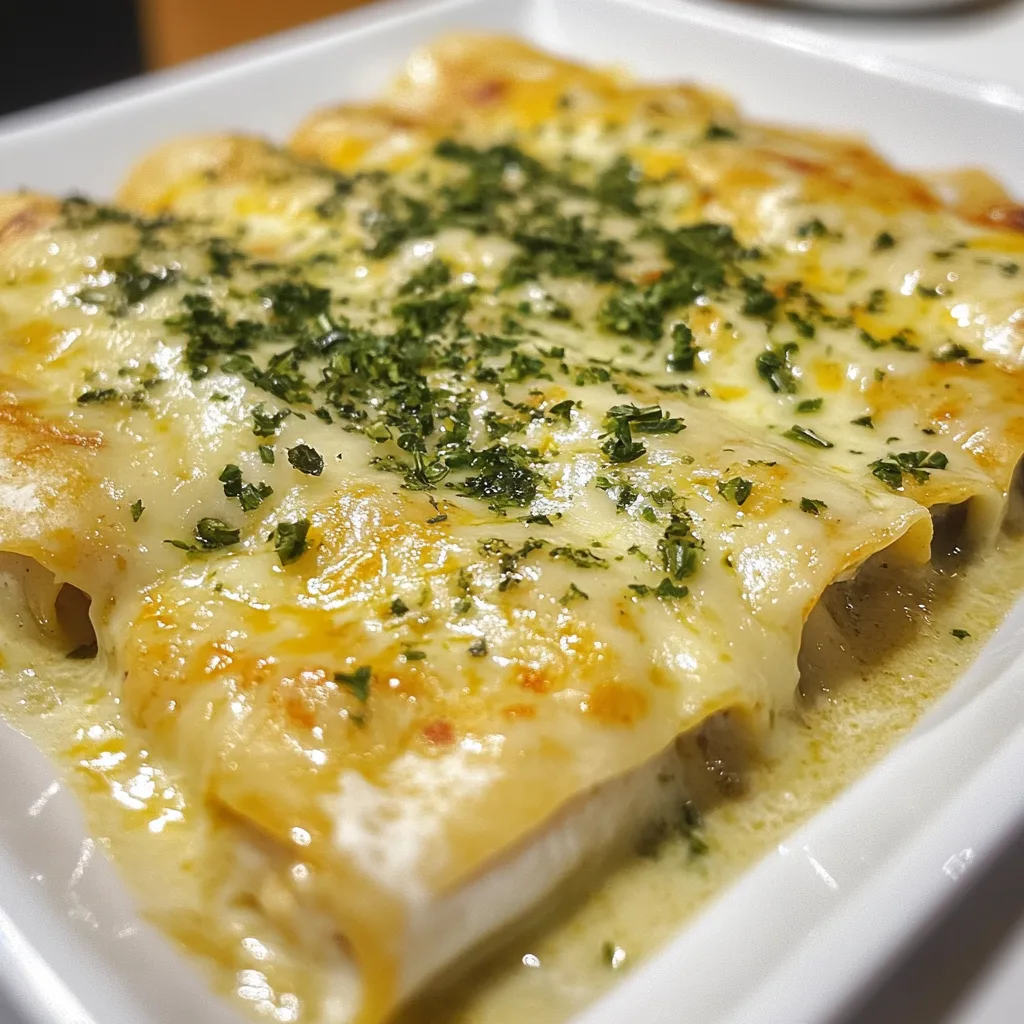
    White Chicken Enchiladas with Sour Cream Sauce and Green Chiles are my absolute comfort food obsession. There’s something magical about that first bite – tender shredded chicken wrapped in soft tortillas, all bathed in a velvety, tangy sour cream sauce with just enough kick from the green chiles. I discovered this recipe during a rainy weekend when I needed something warm and cheesy to lift my spirits. The aroma of these enchiladas baking fills my kitchen with promises of creamy, cheesy goodness that makes everyone drift toward the oven asking, “How much longer?” Let me show you how to create this crowd-pleasing dish that’s become my family’s most requested dinner.

    Recipe

    Why You’ll Love This White Chicken Enchiladas with Sour Cream Sauce and Green Chiles

    Perfect Balance of Flavors and Textures

    The magic of these enchiladas lies in their perfect balance – creamy, tangy, and just a touch spicy. The sour cream sauce creates a velvety blanket over everything, while the green chiles add a gentle warmth without overwhelming heat. I love how the tortillas soak up just enough sauce to become tender but still hold their shape. The contrast between the melty cheese topping and the soft, flavorful filling creates a texture experience that’s utterly satisfying. Every bite delivers that comfort food feeling that makes your shoulders relax and your worries melt away.

    Quick and Adaptable for Busy Weeknights

    These enchiladas are my secret weapon for busy weeks. You can use rotisserie chicken to slash prep time, and the sauce comes together in minutes. I’ve made these on hectic weeknights when I thought takeout was our only option, and they’re always faster than delivery! The recipe is wonderfully adaptable – use what you have on hand. No Monterey Jack? Cheddar works beautifully. No green chiles? Try a spoonful of salsa verde instead. The flexibility makes this dish a reliable standby when you need something delicious without a special shopping trip.

    Essential Tips & Tricks

    Perfecting Your Sour Cream Sauce

    The heart of these enchiladas is the dreamy sour cream sauce. For the smoothest results, let your sour cream come to room temperature before mixing. This prevents those little clumps that can form when cold dairy hits hot liquid. I learned this trick after one too many lumpy sauces! Whisking the flour into the melted butter before adding other ingredients creates a silky base that thickens perfectly. Don’t rush this step – let it bubble gently for about a minute to cook out the raw flour taste. For extra flavor, try adding a pinch of cumin or a squeeze of lime juice to brighten everything up.

    Assembly Secrets for Perfect Results

    The way you assemble these enchiladas makes all the difference in the final dish. First, warm your tortillas before rolling – 15 seconds in the microwave wrapped in a damp paper towel works perfectly. This prevents cracking and makes them pliable. When filling, place the chicken mixture slightly off-center and don’t overstuff (about 3 tablespoons is perfect). For the prettiest presentation, place them seam-side down in your baking dish. I like to reserve about ¼ cup of cheese to sprinkle on top during the last 5 minutes of baking for that perfect golden brown finish.

    Serving Ideas & Creative Variations

    Complementary Side Dishes

    These enchiladas pair beautifully with bright, fresh sides that balance their richness. My go-to combination includes a zesty cilantro lime rice and a simple black bean salad with corn, bell peppers, and a squeeze of lime. For something lighter, try a crisp green salad with avocado and a tangy vinaigrette. When I’m feeling extra, I serve these with homemade pico de gallo and a dollop of guacamole. The cool, fresh toppings create a wonderful contrast with the warm, creamy enchiladas. For a complete fiesta, add some slow cooker beef stroganoff for guests who prefer beef over chicken.

    Exciting Flavor Variations

    Don’t be afraid to put your own spin on these enchiladas! One of my favorite variations is adding roasted poblano peppers for a smoky depth that complements the creamy sauce perfectly. For a tex-mex twist, mix some black beans and corn into your chicken filling. Seafood lovers can substitute shrimp for chicken – just sauté them until just pink before filling the tortillas. For a vegetarian version, replace the chicken with a mixture of sautéed mushrooms, spinach, and bell peppers. The sour cream sauce works beautifully with all these variations, making this recipe incredibly versatile.

    Storage & Troubleshooting Guide

    Make-Ahead and Freezer Tips

    These enchiladas are perfect for meal prepping and freezing. To make ahead, assemble everything but don’t bake – cover tightly and refrigerate for up to 24 hours. When ready to bake, let the dish sit at room temperature for 30 minutes first. For freezing, assemble in a freezer-safe container, but keep the sauce separate in a freezer bag. Freeze for up to 3 months. When ready to enjoy, thaw both overnight in the refrigerator, pour the sauce over the enchiladas, and bake as directed, adding about 15 minutes to the baking time. The sauce may look slightly separated after freezing but will come back together when heated.

    Fixing Common Problems

    If your sauce seems too thin, don’t panic! Simply whisk in additional flour, one teaspoon at a time, until it reaches your desired thickness. For sauce that’s too thick, gradually add chicken broth until you reach the perfect consistency. If your tortillas crack during rolling, they weren’t warmed enough – quickly microwave them again. For enchiladas that seem dry after baking, serve with extra warm sauce on the side. If your cheese isn’t browning on top, switch your oven to broil for the final 1-2 minutes, watching carefully to prevent burning. Remember, perfect enchiladas come with practice!

    Frequently Asked Questions

    Can I make White Chicken Enchiladas with Sour Cream Sauce and Green Chiles ahead of time?

    Absolutely! Assemble up to 24 hours ahead and refrigerate unbaked. Add 10-15 minutes to the baking time if cooking straight from the refrigerator. The flavors actually develop nicely with a little rest time.

    What’s the best cheese to use for this recipe?

    Monterey Jack melts beautifully and has a mild flavor that complements the green chiles. For more flavor, try a mixture of Monterey Jack and sharp white cheddar, or add some crumbled queso fresco on top after baking.

    Can I use corn tortillas instead of flour?

    Yes! Corn tortillas work well but require different handling. Dip each briefly in warm chicken broth before filling to prevent cracking. They’ll give your enchiladas a more authentic Mexican flavor and texture.

    How spicy are these enchiladas?

    With standard canned green chiles, they’re mild to medium – just enough warmth without overwhelming heat. For spicier enchiladas, add diced jalapeños to the filling or choose “hot” green chiles instead of mild.

    What can I substitute for sour cream?

    Greek yogurt makes an excellent healthier substitute with a similar tangy flavor. For a dairy-free version, try coconut cream with a squeeze of lime juice to add tanginess.

    Final Thoughts

    These White Chicken Enchiladas with Sour Cream Sauce and Green Chiles have become my ultimate comfort food for good reason – they’re creamy, satisfying, and adaptable to whatever life throws your way. I love how they bring everyone to the table with smiles, whether it’s a casual family dinner or a gathering with friends. The way the sauce bubbles around the edges of the baking dish, creating those perfectly crispy bits, is pure magic. I hope these enchiladas bring as much joy to your table as they have to mine! For more delicious recipe ideas, check out my Pinterest board where I’m always adding new inspiration.
  • Classic Shepherd’s Pie: Rich Beef Gravy & Cheesy Mash Bliss

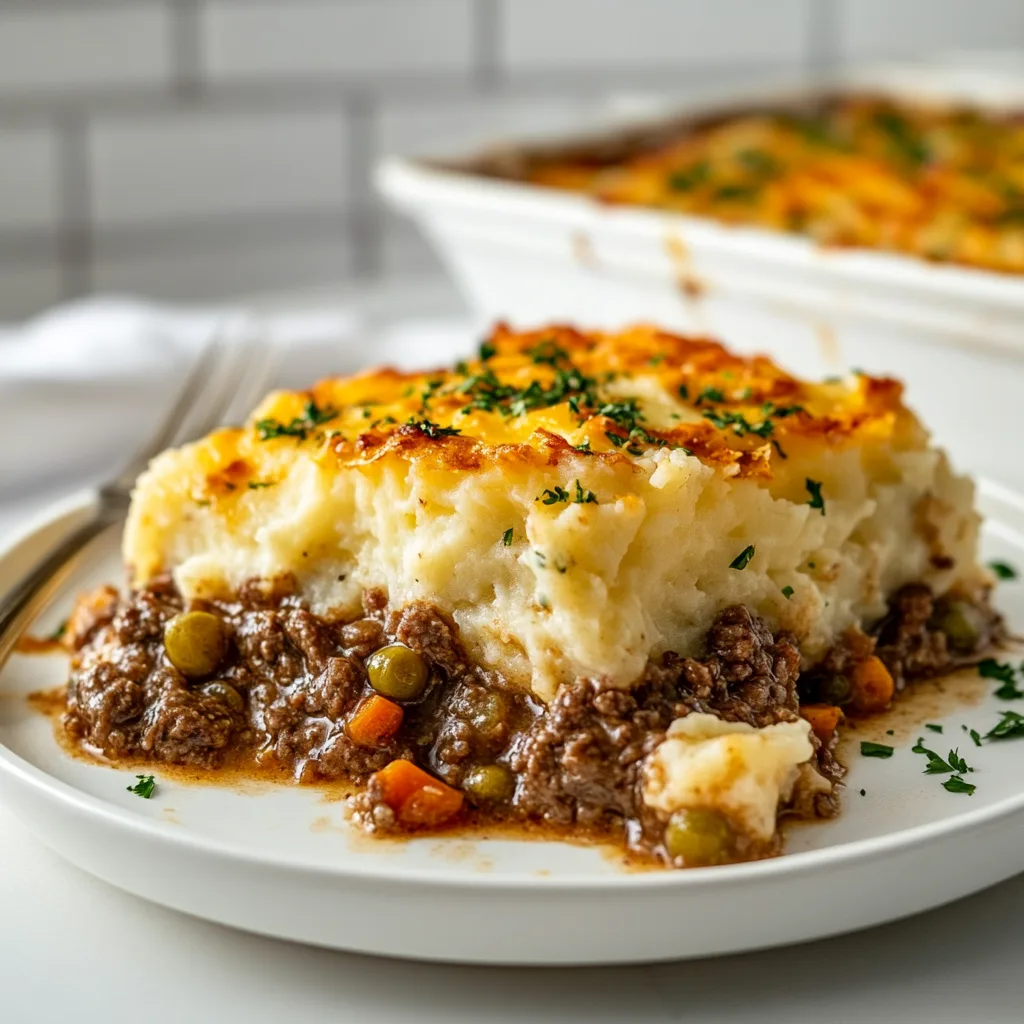
    Classic Shepherd’s Pie: Rich Beef Gravy & Cheesy Mash Bliss

    Classic Shepherd’s Pie: Rich Beef Gravy & Cheesy Mash Bliss

    There’s something deeply comforting about a Classic Shepherd’s Pie with Rich Beef Gravy and Cheesy Mash that speaks to my soul on chilly evenings. The way the savory beef filling mingles with that golden potato topping creates pure magic on your plate. I remember making this for my family during our first snowfall last year—the windows frosted over while inside, the aroma of herbs and beef filled our kitchen. This hearty dish isn’t just dinner; it’s a warm hug in food form, perfect for gathering loved ones around your table. Let me show you how to create this ultimate comfort classic that never fails to impress.

    Recipe

    Why You’ll Love This Classic Shepherd’s Pie with Rich Beef Gravy and Cheesy Mash

    Perfect Comfort Food For Any Season

    There’s something magical about breaking through that crispy cheese crust to find perfectly seasoned beef below. This shepherd’s pie recipe strikes the perfect balance between hearty and refined. The rich gravy develops incredible depth as it simmers, while the vegetables add both nutrition and texture. I love how the kitchen fills with the most incredible savory aroma while it bakes—it’s like an invitation for everyone to gather. Plus, it’s wonderfully adaptable to whatever vegetables you have on hand, making it perfect for using up those odds and ends in your crisper drawer.

    Make-Ahead Friendly For Busy Weeknights

    As a busy home cook, I appreciate recipes that work with my schedule, not against it. This shepherd’s pie shines in that department! You can prepare the entire dish up to two days ahead and refrigerate it unbaked. When you’re ready, simply pop it in the oven and dinner is served. The flavors actually develop beautifully during their rest in the refrigerator, making this possibly even better the next day. I often make a double batch on Sunday afternoons, baking one for dinner and freezing the other for those inevitable hectic weeknights when cooking from scratch feels impossible.

    Essential Tips & Tricks

    Creating The Perfect Beef Filling

    The heart of any great shepherd’s pie lies in its deeply flavored filling. Start with good quality ground beef (80/20 is ideal for flavor) and take time to properly brown it—this develops those rich, caramelized notes that elevate the entire dish. Deglaze your pan with a splash of red wine or beef broth, scraping up those flavorful browned bits. For an extra-rich gravy, add a tablespoon of tomato paste and let it cook until it darkens slightly before adding your liquids. This simple step creates incredible depth that makes your shepherd’s pie stand out from basic versions. Just like in my Hearty Beef and Vegetable Soup, these flavor-building techniques make all the difference.

    Mastering The Cheesy Potato Topping

    The crowning glory of shepherd’s pie is undoubtedly that golden potato layer. For the creamiest, most luxurious mash, use starchy potatoes like Russets or Yukon Golds. After draining, return them to the hot pot for a minute to evaporate excess moisture before mashing—this prevents waterlogged potatoes. Warm your butter and milk before adding them in, which helps maintain the potatoes’ temperature and prevents gumminess. For that irresistible cheesy crust, mix sharp cheddar directly into your mash, then sprinkle more on top before baking. Create texture by using a fork to make peaks and valleys that will crisp beautifully in the oven.

    Serving Ideas & Creative Variations

    Perfect Pairings For A Complete Meal

    While this hearty shepherd’s pie is practically a complete meal on its own, a few simple sides can round out your dinner beautifully. I love serving it with a crisp green salad dressed with a tangy vinaigrette to cut through the richness. For special occasions, add some Roasted Brussels Sprouts for a touch of caramelized sweetness that complements the savory pie perfectly. A simple steamed green vegetable like peas or broccoli adds color and freshness. For bread lovers, warm crusty sourdough is ideal for sopping up every last bit of that incredible gravy—because trust me, you won’t want to leave a drop behind!

    Creative Twists On The Classic Recipe

    While traditional shepherd’s pie is perfect as is, don’t be afraid to make it your own! For a Mediterranean twist, add olives, feta, and oregano to the filling. Craving something spicy? Incorporate chipotle peppers, corn, and black beans for a Southwestern version. I recently made a fall-inspired variation with sweet potatoes instead of regular potatoes, adding a touch of cinnamon and nutmeg to the mash—my guests couldn’t stop raving about it! For a lighter option, try cauliflower mash on top, or go luxurious with a blend of potatoes and parsnips for sweet, earthy notes that elevate the entire dish.

    Storage & Troubleshooting Guide

    Proper Storage For Leftovers

    Shepherd’s pie makes fantastic leftovers that sometimes taste even better the next day! Once cooled, cover your leftover shepherd’s pie tightly with foil or transfer portions to airtight containers. It will keep beautifully in the refrigerator for up to 4 days. For longer storage, freeze individual portions wrapped well in foil and placed in freezer bags—they’ll keep for up to 3 months. When reheating, thaw overnight in the refrigerator if frozen, then warm in a 350°F oven until heated through. For quickest results, microwave individual portions, though you’ll lose some of that delightful crusty top texture that makes this dish so special.

    Solving Common Shepherd’s Pie Problems

    Even experienced cooks sometimes encounter issues with shepherd’s pie. If your gravy filling seems too watery, simmer it longer before assembling, or add a cornstarch slurry (1 teaspoon cornstarch mixed with 1 tablespoon cold water) to thicken it. For potatoes that won’t hold their shape, make sure you’re using starchy varieties and avoid overmixing. If your topping browns too quickly before the filling heats through, cover with foil for part of the baking time. And if you’re concerned about the filling bubbling over, place your baking dish on a sheet pan before putting it in the oven—this saves potential cleanup and prevents that dreaded burning smell!

    Frequently Asked Questions

    What’s the difference between Shepherd’s Pie and Cottage Pie?

    Traditional Shepherd’s Pie uses ground lamb, while Cottage Pie uses beef. In America, both names are often used interchangeably, but purists maintain this distinction. Either meat creates a delicious dish when properly seasoned and prepared.

    Can I make Classic Shepherd’s Pie with Rich Beef Gravy and Cheesy Mash ahead of time?

    Absolutely! Assemble completely, cover, and refrigerate for up to 2 days before baking. Add 10-15 minutes to the baking time if cooking directly from the refrigerator. The flavors actually improve with time.

    What’s the best cheese for the potato topping?

    Sharp cheddar provides the best flavor balance and melting properties. For variations, try mixing in Gruyère for nuttiness or Parmesan for a salty kick. Avoid pre-shredded cheeses as they contain anti-caking agents.

    Can I make this recipe gluten-free?

    Yes! Replace flour with cornstarch for thickening (use half the amount) or a 1:1 gluten-free flour blend. Ensure your beef broth is also gluten-free, as many commercial brands contain wheat derivatives.

    How do I know when my shepherd’s pie is done baking?

    The pie is done when the potato topping is golden brown with crispy edges and the filling is bubbling around the sides. Internal temperature should reach 165°F for food safety.

    Final Thoughts

    There’s something truly special about serving a Classic Shepherd’s Pie with Rich Beef Gravy and Cheesy Mash to people you love. The way faces light up at that first bite, the comfortable silence as everyone enjoys those savory flavors—these are the moments that make cooking worthwhile. This dish represents what I love most about home cooking: simple ingredients transformed into something extraordinary through a little time and care. Whether you’re making it for a weeknight family dinner or a gathering with friends, this shepherd’s pie recipe promises to deliver both comfort and joy to your table. Happy cooking! For more comforting recipes, visit our Pinterest page.

  • Baked Macaroni and Cheese with Crispy Panko Topping – Irresistibly Cheesy!

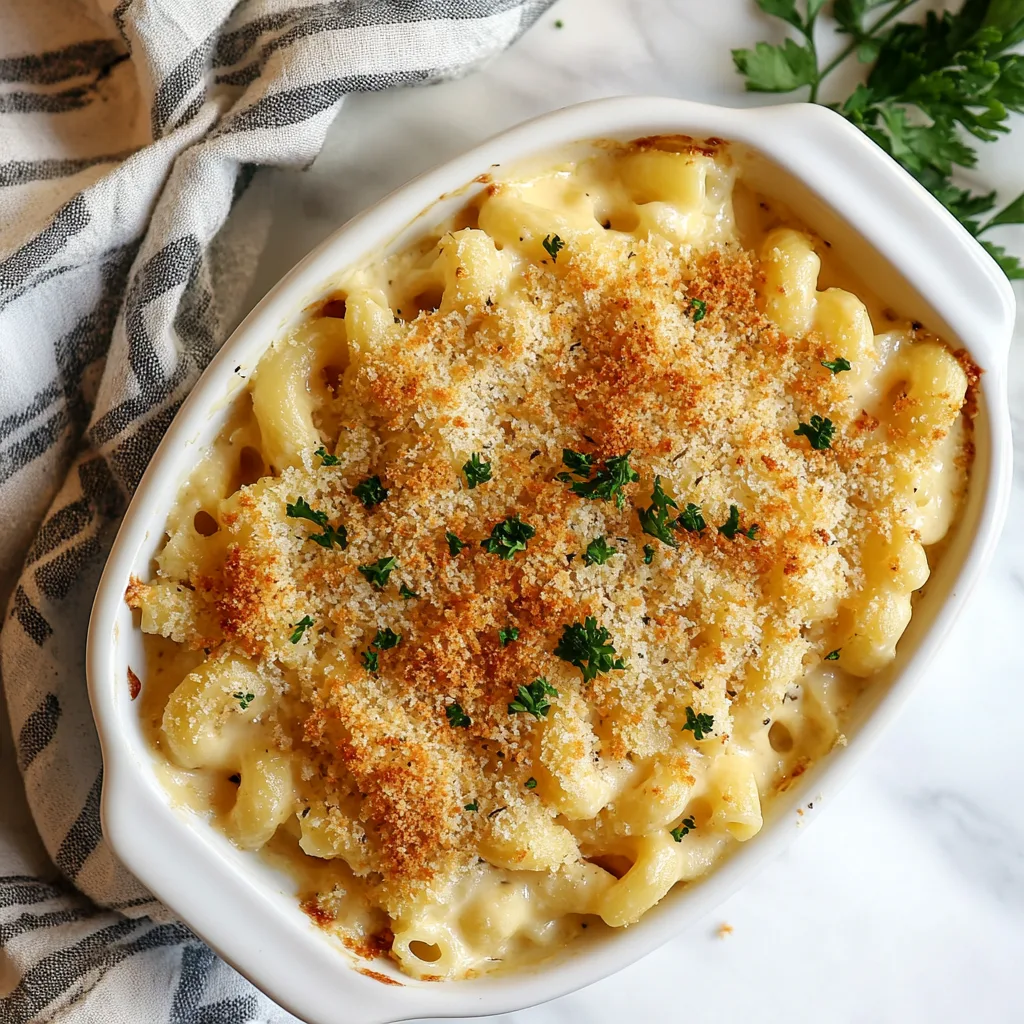
    Baked Macaroni and Cheese with Crispy Panko Topping – Irresistibly Cheesy!

    Baked Macaroni and Cheese with Crispy Panko Topping – Irresistibly Cheesy!

    The moment I pull a bubbling dish of Baked Macaroni and Cheese with Crispy Panko Topping from the oven, my kitchen transforms into a sanctuary of comfort. That golden, crunchy top giving way to creamy, cheesy pasta underneath is pure magic. I’ve spent years perfecting this recipe, testing different cheese combinations and topping techniques until I found the perfect balance. This isn’t just mac and cheese—it’s a hug in a casserole dish, the kind of meal that makes everyone at the table fall silent for those first few blissful bites. Let me show you how to create this crowd-pleasing comfort food masterpiece.

    Recipe

    Why You’ll Love This Baked Macaroni and Cheese with Crispy Panko Topping

    The Perfect Texture Contrast

    There’s something incredibly satisfying about the textural contrast in this dish. The crispy, golden panko topping shatters slightly under your fork, giving way to the creamy, velvety cheese sauce coating each pasta piece. I’ve found that toasting the panko in butter before topping the mac and cheese makes all the difference—it ensures that perfect crunch even after baking. The pasta itself stays tender but with a slight bite (never mushy!), creating that perfect mouthfeel that makes you close your eyes with each forkful.

    A Foolproof Cheese Sauce

    The heart of any great mac and cheese is the sauce, and this one is incredibly reliable. The combination of sharp cheddar for flavor and monterey jack for meltability creates the perfect cheese blend that’s both flavorful and smooth. The sauce starts with a simple roux (butter and flour) that guarantees a silky texture without graininess or separation. I’ve made this for countless dinner parties, and the sauce has never let me down—even when I’ve had to reheat it the next day. It’s rich without being heavy, coating each pasta piece perfectly.

    Essential Tips & Tricks

    Choosing the Right Pasta Shape

    Not all pasta shapes are created equal when it comes to mac and cheese. You want shapes with nooks and crannies to trap that luscious cheese sauce. Elbow macaroni is classic, but cavatappi, shells, or fusilli work beautifully too. Always cook the pasta 1-2 minutes shy of the package directions—it’ll continue cooking in the oven. I once made the mistake of fully cooking the pasta before baking, and the result was sadly mushy. The pasta should offer just a bit of resistance when you bite into it after baking, creating that perfect al dente texture.

    The Secret to Ultra-Creamy Results

    The key to achieving that restaurant-quality creaminess lies in how you prepare your cheese. Always grate it yourself rather than using pre-shredded varieties, which contain anti-caking agents that can make your sauce grainy. Another game-changing tip is adding the cheese to your béchamel off the heat, which prevents the proteins from seizing up. For extra richness, a splash of heavy cream never hurts! This approach reminds me of my Creamy Tuscan Tortellini Soup where the same principles create that velvety mouthfeel everyone loves.

    Serving Ideas & Creative Variations

    Elevate It to a Complete Meal

    Transform this side dish into a satisfying main course by adding protein and vegetables. Fold in crispy bacon bits, shredded rotisserie chicken, or sautéed mushrooms before baking. For a healthier twist, mix in steamed broccoli florets or roasted butternut squash cubes. My family particularly loves when I add caramelized onions and peas—the sweetness balances the rich cheese beautifully. Serve alongside a simple green salad with a bright vinaigrette to cut through the richness, similar to how I balance flavors in my Hearty Beef and Vegetable Soup.

    Global Flavor Inspirations

    Take your mac and cheese on a culinary world tour by incorporating international flavors. For a Mexican-inspired version, mix in chorizo, jalapeños, and top with crushed tortilla chips. Create a Mediterranean twist with sun-dried tomatoes, olives, and crumbled feta. For an Italian variation, stir in pesto and top with extra parmesan. My personal favorite is adding buffalo sauce, blue cheese crumbles, and shredded chicken for a buffalo chicken mac and cheese that disappears in minutes at potlucks. These variations keep this classic dish exciting and new every time.

    Storage & Troubleshooting Guide

    Make-Ahead and Freezing Instructions

    This Baked Macaroni and Cheese with Crispy Panko Topping is perfect for meal prepping. You can assemble it up to two days ahead, keeping the topping separate until just before baking. For freezing, prepare everything except the panko topping, cool completely, then wrap tightly in foil and freeze for up to three months. Thaw overnight in the refrigerator before baking. I often make two smaller dishes instead of one large one—we enjoy one for dinner and freeze the other for those hectic weeknights when cooking from scratch feels impossible.

    Rescuing Common Mac and Cheese Problems

    Even experienced cooks occasionally encounter issues with mac and cheese. If your sauce looks grainy, whisk in a splash of warm milk over low heat until smooth. For mac and cheese that’s too dry after baking, drizzle in warm milk or cream and gently stir before serving. If your topping isn’t browning properly, a quick blast under the broiler works wonders—just watch it closely to prevent burning. I learned this the hard way once when I got distracted by a phone call and returned to a very “well-done” topping that my family still teases me about!

    Frequently Asked Questions

    Can I use gluten-free pasta for this Baked Macaroni and Cheese with Crispy Panko Topping?

    Absolutely! Use your favorite gluten-free pasta and gluten-free panko. Reduce the initial baking time by about 5 minutes as gluten-free pasta tends to cook faster in the oven.

    What’s the best cheese combination for mac and cheese?

    A mix of sharp cheddar for flavor and a good melting cheese like monterey jack, gruyère, or fontina creates the perfect balance of taste and texture.

    Can I make this in advance?

    Yes! Prepare everything except the panko topping, refrigerate for up to 2 days, then add the topping and bake when ready to serve. Add 10-15 minutes to the baking time if coming from the refrigerator.

    My sauce is lumpy. How can I fix it?

    Remove from heat and vigorously whisk in 1-2 tablespoons of warm milk until smooth. Always add cheese gradually and stir constantly to prevent lumps.

    How do I reheat leftovers without drying them out?

    Add a splash of milk, cover with foil, and reheat at 325°F until warmed through. The extra moisture prevents the pasta from drying out.

    Final Thoughts

    This Baked Macaroni and Cheese with Crispy Panko Topping has become my signature dish for good reason. It strikes that perfect balance between sophisticated flavor and nostalgic comfort that appeals to everyone from picky kids to discerning foodies. The contrast between the crispy topping and the creamy interior creates a sensory experience that elevates it beyond ordinary mac and cheese. Whether you’re serving it as a side dish at holiday gatherings or as the star of a cozy weeknight dinner, this recipe delivers that warm, satisfied feeling that only the best comfort food can provide. Find more comfort food inspiration on our Pinterest page.

  • Slow Cooker Beef Stroganoff: Creamy Comfort with Tender Noodles!

    Slow Cooker Beef Stroganoff: Creamy Comfort with Tender Noodles!

    Slow Cooker Beef Stroganoff: Creamy Comfort with Tender Noodles!

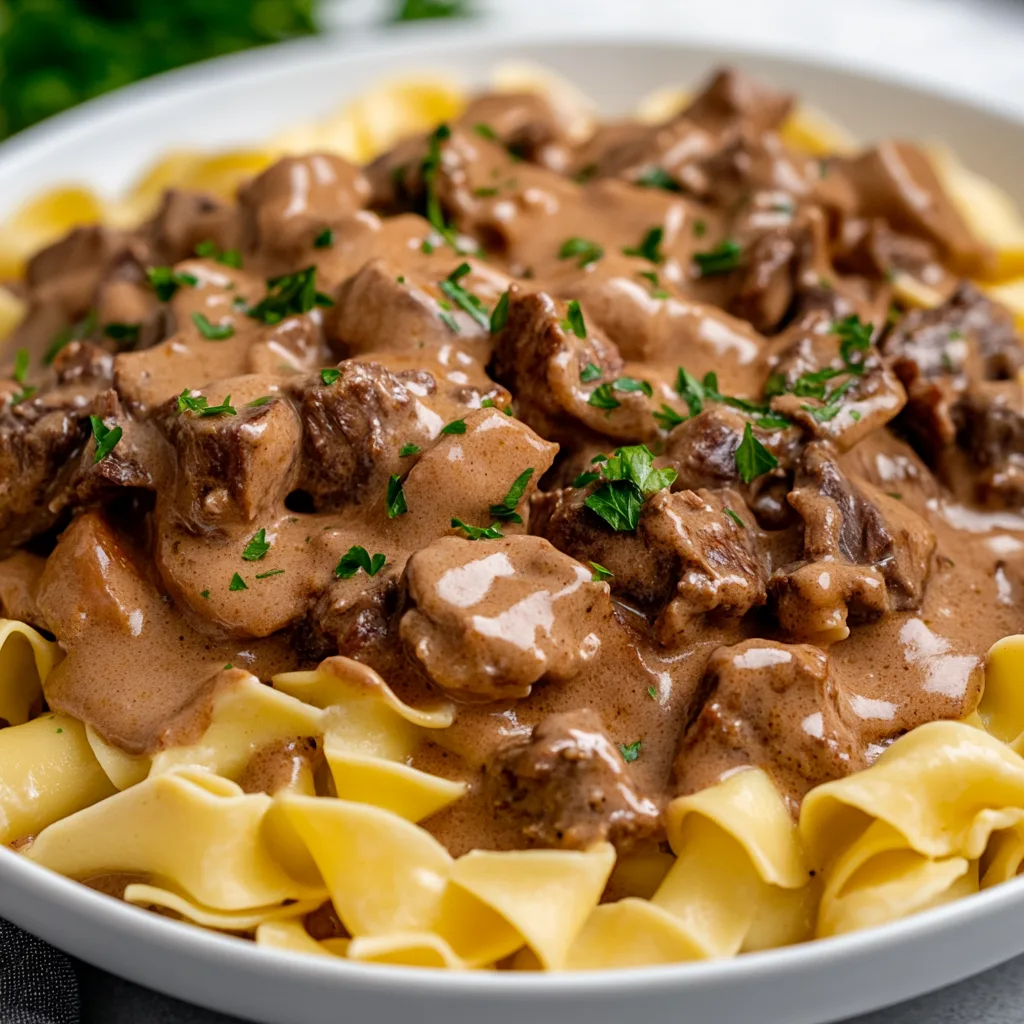
    Slow Cooker Beef Stroganoff with Tender Egg Noodles is one of those magical comfort foods that wraps you in a warm hug on chilly evenings. I discovered this recipe during my first winter in Minnesota, when the snow piled up outside my windows and I craved something deeply satisfying. The rich, velvety sauce coating perfectly tender beef and those delightful egg noodles creates a symphony of flavors that’s both nostalgic and elegant. Trust me, this dish has become my go-to when I need something that feels like home in a bowl—simple to prepare but impressive enough for company.

    Recipe

    Why You’ll Love This Slow Cooker Beef Stroganoff with Tender Egg Noodles

    Perfect for Busy Weeknights

    There’s something incredibly satisfying about walking through your door after a long day to the aroma of slow-cooked beef filling your home. I love how this recipe practically cooks itself while I’m busy with life’s demands. Just 15 minutes of morning prep rewards you with a restaurant-quality dinner by evening. The slow cooker transforms inexpensive cuts of beef into melt-in-your-mouth tender morsels that would make any chef proud. And those moments when dinner is already handled? That’s pure kitchen magic that gives you back precious time with your family.

    Rich, Creamy Texture Without the Fuss

    The velvety sauce in this stroganoff develops incredible depth during its slow simmer. Unlike stovetop versions that need constant babysitting, this recipe builds flavor effortlessly. The marriage of savory beef broth, tangy sour cream, and earthy mushrooms creates layers of complexity that taste like you spent hours at the stove. I adore how the sauce clings perfectly to each tender egg noodle, ensuring every bite delivers that perfect balance of creaminess and comfort. It’s the kind of dish that makes everyone at the table fall silent for a moment—the ultimate compliment to any cook.

    Essential Tips & Tricks

    Choosing and Preparing the Beef

    Selecting the right cut of beef makes all the difference in this stroganoff. I prefer chuck roast or sirloin tip, cut against the grain into 1-inch pieces for the most tender results. Before adding to your slow cooker, take the extra five minutes to brown the meat in batches. This step creates that gorgeous caramelization that adds incredible depth to your final dish. Pat the beef dry with paper towels first—this helps achieve that perfect sear rather than steaming the meat. Trust me, this small effort elevates your stroganoff from good to absolutely unforgettable.

    The Secret to Perfect Egg Noodles

    The tender egg noodles are truly the unsung heroes of this dish. Cook them separately, about 1-2 minutes shy of the package directions—they’ll continue softening when mixed with the hot stroganoff sauce. I learned the hard way that adding noodles directly to the slow cooker creates a gummy mess! Instead, toss them with a tiny bit of olive oil after draining to prevent sticking while you finish the sauce. For an extra touch of luxury, try these homemade egg noodles if you’re feeling ambitious on a weekend.

    Serving Ideas & Creative Variations

    Elevate Your Presentation

    Transform this humble comfort food into a dinner party worthy dish with thoughtful presentation. I love serving stroganoff in shallow, wide bowls that showcase the sauce and noodles beautifully. Garnish with a small dollop of sour cream, a sprinkle of fresh chopped parsley, and a light dusting of paprika for color contrast. For special occasions, I place the stroganoff alongside a simple green salad with vinaigrette dressing and crusty artisan bread. These little touches elevate the entire dining experience without requiring much extra effort.

    Exciting Flavor Twists

    Don’t be afraid to make this classic recipe your own! For a Swedish-inspired version, add a tablespoon of Dijon mustard and a sprinkle of dill to the sauce. Craving something with a kick? Stir in a teaspoon of smoked paprika and a dash of cayenne. For a lighter spring variation, add fresh peas and asparagus tips during the last 15 minutes of cooking. My family’s favorite twist includes caramelized onions and a splash of cognac for special occasions. These simple variations keep this comfort food staple exciting throughout the changing seasons.

    Storage & Troubleshooting Guide

    Proper Storage for Leftovers

    Leftover stroganoff can be even better the next day as the flavors continue to meld. Store the sauce and noodles separately in airtight containers in the refrigerator for up to 3 days. When reheating, add a splash of beef broth to the sauce to restore its silky consistency, then warm gently on the stovetop over medium-low heat. For freezing, I recommend only freezing the sauce (without noodles) in portion-sized containers for up to 3 months. Thaw overnight in the refrigerator before reheating and pairing with freshly cooked egg noodles.

    Fixing Common Issues

    If your sauce seems too thin after cooking, there’s an easy fix! Remove the lid during the last 30 minutes of cooking to allow natural reduction. Alternatively, create a slurry with 1 tablespoon cornstarch mixed with 2 tablespoons cold water and stir it into the hot sauce. For sauce that’s too thick, simply thin with additional beef broth until you reach your desired consistency. If your beef isn’t tender enough, it likely needs more time—return to the slow cooker for additional 30-minute increments until it reaches that perfect fork-tender texture.

    Frequently Asked Questions

    Can I use Greek yogurt instead of sour cream in Slow Cooker Beef Stroganoff?

    Yes! Greek yogurt makes a great substitute. Use full-fat for best results and stir it in at the very end of cooking, off the heat, to prevent curdling. The flavor will be slightly tangier but still delicious.

    What’s the best cut of beef for stroganoff?

    Chuck roast or sirloin tip work beautifully. They have enough marbling to become tender during slow cooking while maintaining their texture and flavor without drying out.

    Can I add the noodles directly to the slow cooker?

    I don’t recommend it. Cook noodles separately to prevent them from becoming mushy. Add them just before serving for the perfect texture every time.

    How do I prevent the sauce from curdling?

    Temper your sour cream by mixing it with a few tablespoons of the warm (not hot) sauce first, then stir this mixture back into the slow cooker with the heat turned off.

    Can I make Slow Cooker Beef Stroganoff ahead for a dinner party?

    Absolutely! Prepare the beef mixture a day ahead and refrigerate. Reheat gently, prepare fresh noodles, and combine just before serving for best results.

    Final Thoughts

    This Slow Cooker Beef Stroganoff with Tender Egg Noodles has become my ultimate comfort food victory—sophisticated enough for company yet simple enough for weeknights. I love how it transforms humble ingredients into something truly special through the gentle magic of slow cooking. The rich sauce, tender beef, and perfectly cooked egg noodles create a harmony of flavors that feels like culinary poetry. Whether you’re cooking for a family dinner or looking to impress guests, this stroganoff delivers that perfect blend of convenience and comfort that keeps us coming back to the table. Find more of my favorite recipes on Pinterest.

  • One-Pan Creamy Garlic Butter Chicken & Rice – Irresistibly Easy!

    One-Pan Creamy Garlic Butter Chicken & Rice – Irresistibly Easy!

    One-Pan Creamy Garlic Butter Chicken & Rice – Irresistibly Easy!

    One-Pan Creamy Garlic Butter Chicken and Rice has become my absolute go-to recipe for those evenings when I want something utterly comforting but don’t have the energy for a kitchen full of dirty pots and pans. The first time I made this dish, the aroma of garlic and butter wafting through my kitchen instantly transported me back to my grandmother’s cozy dining room. There’s something magical about how the chicken becomes tender while the rice soaks up all those incredible flavors. If you’re looking for a simple yet impressive dinner that delivers big on flavor, this one-pan wonder is exactly what you need.

    Recipe

    Why You’ll Love This One-Pan Creamy Garlic Butter Chicken and Rice

    Perfect Balance of Flavors and Textures

    The magic of this dish lies in its perfect harmony of creamy richness and savory depth. The garlic butter creates this velvety base that coats each grain of rice, while the chicken adds a satisfying heartiness. I love how the edges of the rice get slightly crispy while the center remains tender and creamy. The first time my husband tried this, he closed his eyes and just savored the moment—that’s when I knew this recipe was a keeper! The combination of herbs and that touch of lemon zest brightens everything up, creating a dish that feels both indulgent and somehow light at the same time.

    Ultimate Convenience Factor

    Let’s be honest—after a long day, the last thing any of us wants is to juggle multiple pots and pans. This recipe is a true kitchen savior because everything cooks together in perfect harmony. I’ve lost count of how many times I’ve made this on hectic weeknights when I’m helping with homework while trying to get dinner on the table. The prep is straightforward: just season the chicken, sauté it with garlic and butter, add rice and broth, and let it all simmer together. The cleanup is minimal (just one pan!), but the results are anything but basic. It’s the kind of efficiency that makes weeknight cooking feel manageable again.

    Essential Tips & Tricks

    Getting the Rice Perfectly Cooked

    The secret to perfectly tender rice that’s neither mushy nor undercooked is all about timing and liquid ratio. I’ve found that medium-grain rice works beautifully here—it absorbs the flavors while maintaining its structure. Start by toasting the rice in the butter for about 2 minutes before adding your liquid; this simple step creates a protective coating that prevents the rice from becoming gummy. Another game-changer is using warm broth instead of cold, which helps maintain an even cooking temperature. If you notice the liquid absorbing too quickly, don’t hesitate to add an extra splash of broth. Trust your instincts—the rice should be tender but still have a slight bite to it.

    Achieving Perfectly Juicy Chicken

    Nothing ruins this dish faster than dry, overcooked chicken. The trick I’ve learned is to use boneless, skin-on chicken thighs for the best flavor and moisture retention. Season them generously with salt and pepper at least 15 minutes before cooking to enhance their natural flavor.

    When searing, give them space in the pan and resist the urge to move them around—that golden crust is flavor gold! I always check for doneness with a meat thermometer (165°F is perfect) rather than cutting into the meat and losing those precious juices. If you’re using chicken breasts instead, consider cutting them into even-sized pieces to ensure they cook at the same rate as your rice—similar to how I prepare my Slow Cooker Chicken Cacciatore.

    Serving Ideas & Creative Variations

    Perfect Pairings for a Complete Meal

    This one-pan wonder stands beautifully on its own, but I love adding a few thoughtful sides to round out the meal. A simple arugula salad with lemon vinaigrette provides a peppery freshness that cuts through the richness. For a more substantial dinner, roasted asparagus or broccolini takes just minutes in a hot oven and adds vibrant color and nutrition. When I’m hosting friends, I serve this with warm crusty bread for soaking up every last bit of that creamy sauce—no one can resist! For wine lovers, a crisp Pinot Grigio or unoaked Chardonnay complements the buttery notes perfectly. The beauty is that the main dish requires so little effort that you can focus on these simple extras.

    Exciting Flavor Twists to Try

    The beauty of this recipe is how easily it adapts to different flavor profiles. For a Mediterranean twist, add sun-dried tomatoes, olives, and crumbled feta in the last few minutes of cooking. My family loves when I do a mushroom variation with wild mushrooms and a splash of white wine for depth. For heat lovers, incorporate diced jalapeños and smoked paprika for a Spanish-inspired kick.

    You can even swap the chicken for shrimp (add them in the last 5 minutes to avoid overcooking) or go vegetarian with hearty mushrooms and extra vegetables. For a cozy fall version, try adding butternut squash cubes and sage—it’s similar to my Slow Cooker Tuscan Fish Stew in terms of seasonal comfort but with a completely different flavor profile.

    Storage & Troubleshooting Guide

    Proper Storage for Leftovers

    This dish makes fantastic leftovers that actually improve overnight as the flavors meld together. Store any remaining portions in airtight containers in the refrigerator for up to 3 days. When reheating, add a splash of chicken broth or even a little cream to revitalize the sauce, as the rice tends to absorb liquid as it sits. I like to microwave it at 70% power, stirring halfway through, to prevent the chicken from becoming tough. For meal prep, portion individual servings into microwave-safe containers for grab-and-go lunches. If you want to freeze portions, do so before adding any fresh herbs or garnishes, and use within 2 months for the best quality.

    Fixing Common Issues

    Even experienced cooks occasionally run into challenges with one-pan dishes. If your rice is still firm but the liquid has evaporated, simply add ¼ cup more warm broth or water, cover tightly, and cook on low heat for an additional 5 minutes. For sauce that’s too thin, a quick fix is removing the chicken temporarily and simmering the sauce uncovered for a few minutes until it reduces to your desired consistency. If the bottom is browning too quickly, lower the heat immediately and place a diffuser beneath your pan if you have one. And for those times when the garlic threatens to burn, adding a splash of white wine or broth will instantly cool the pan while adding flavor depth.

    Frequently Asked Questions

    Can I use brown rice instead of white rice?

    Yes, but brown rice requires more liquid (about ½ cup extra) and longer cooking time (approximately 15-20 minutes more). Start the chicken later in the process to prevent overcooking it while the brown rice finishes.

    What’s the best chicken cut for One-Pan Creamy Garlic Butter Chicken and Rice?

    Boneless, skin-on chicken thighs offer the best flavor and moisture. They’re more forgiving than breasts if slightly overcooked and contribute richer flavor to the finished dish.

    Can I make this dairy-free?

    Absolutely! Substitute the butter with olive oil and replace cream with full-fat coconut milk or your favorite plant-based cooking cream. The flavor profile will change slightly but remain delicious.

    How can I add more vegetables to this dish?

    Stir in quick-cooking vegetables like spinach, peas, or cherry tomatoes during the final 5 minutes. For harder vegetables like broccoli, briefly steam them separately before adding to preserve their texture.

    What if I don’t have a large enough pan?

    If your largest pan isn’t sufficient, you can transfer everything to a casserole dish after the initial sautéing steps, cover with foil, and finish cooking in a 375°F oven for about 25 minutes.

    Final Thoughts

    This One-Pan Creamy Garlic Butter Chicken and Rice has become more than just a recipe in my household—it’s a reliable solution for those nights when I want to put something special on the table without spending hours in the kitchen. The combination of tender chicken, creamy rice, and that irresistible garlic butter sauce creates a meal that feels like a warm hug at the end of a long day. I’d love to see how you make this recipe your own! Share your creations with me on Pinterest and let me know what creative twists you’ve added to make it uniquely yours.

  • Cheesy Hamburger Tater Tot Casserole: Irresistibly Easy Comfort Food

    Cheesy Hamburger Tater Tot Casserole: Irresistibly Easy Comfort Food

    Cheesy Hamburger Tater Tot Casserole: Irresistibly Easy Comfort Food

    Cheesy Hamburger Tater Tot Casserole is the ultimate comfort food that wraps you in a warm hug on chilly evenings. As someone who grew up in a household where casseroles were the centerpiece of family dinners, this dish holds a special place in my heart. The first time I made this for my own family, the kitchen filled with that irresistible aroma of seasoned beef and melting cheese that instantly brought everyone to the table. There’s something magical about the way the crispy tater tots create the perfect golden crown for the savory, bubbling mixture beneath. It’s simple, satisfying, and guaranteed to become a regular in your dinner rotation.

    Recipe

    Why You’ll Love This Cheesy Hamburger Tater Tot Casserole

    Perfect Family-Friendly Comfort Food

    This casserole is the definition of crowd-pleasing comfort. On busy weeknights when I’m juggling work deadlines and my daughter’s soccer practice, I can brown the beef, stir in a few ingredients, top with tater tots, and pop it in the oven. The kitchen fills with that mouthwatering savory aroma that signals home and comfort. What I adore most is watching my picky eater clean her plate without complaint! The familiar flavors of seasoned ground beef, melted cheese, and crispy potatoes create that perfect balance that satisfies both kids and adults alike.

    Make-Ahead and Budget-Friendly

    As a busy mom, I’m always looking for time-saving meals that don’t break the bank. This casserole checks both boxes beautifully! Ground beef stretches your dollar further than most proteins, and tater tots are an affordable freezer staple. I often prep this on Sunday afternoon, refrigerate it, and bake it on Monday evening when we’re rushing in from activities. You can even freeze the assembled casserole (minus the tater tots) for up to 3 months, making this a perfect emergency meal for hectic seasons. Just thaw, top with tots, and bake!

    Essential Tips & Tricks

    Getting the Perfect Texture

    The secret to an exceptional tater tot casserole lies in the texture contrast. Nobody wants soggy tots! I always thoroughly drain the beef after browning to prevent excess grease from making the casserole watery. Another game-changer is arranging your tater tots in a single layer rather than randomly piling them on. This ensures each tot gets delightfully crispy on top while soaking up just enough savory goodness underneath. For extra insurance against sogginess, I sometimes pre-bake the tots for 5 minutes before adding them to the casserole.

    Flavor Boosting Techniques

    Don’t settle for bland casserole when a few simple additions can create flavor explosions! I always sauté diced onions and fresh garlic with the ground beef rather than using powders. My secret weapon is a splash of Worcestershire sauce and a tablespoon of Dijon mustard stirred into the beef mixture – these umami boosters add incredible depth. For cheese, combine sharp cheddar with a melty cheese like Monterey Jack. The sharp contrast is reminiscent of my Crockpot Taco Tater Tot Casserole but with a classic hamburger twist.

    Serving Ideas & Creative Variations

    Perfect Pairings

    This hearty casserole deserves thoughtful sides that balance its richness. My family loves the fresh contrast of a simple green salad with vinaigrette dressing alongside this indulgent main dish. On particularly cold evenings, I serve steamed broccoli or green beans that catch any extra cheese sauce – delicious! For appetizers, keep it light with vegetable crudités and hummus. If you’re hosting a casual gathering, this casserole pairs wonderfully with my Spinach Artichoke Dip as a starter, creating a cozy comfort food theme throughout the meal.

    Exciting Flavor Twists

    The beauty of this casserole lies in its versatility as a blank canvas for creativity! My taco-inspired version substitutes taco seasoning for the regular seasonings and adds black beans and corn to the beef mixture. For an Italian twist, mix in Italian seasoning, diced bell peppers, and top with mozzarella instead of cheddar. My breakfast variation uses breakfast sausage instead of beef, adds scrambled eggs to the mixture, and uses hash browns instead of tater tots. The possibilities are endless – I’ve even made a buffalo chicken version that disappeared in minutes!

    Storage & Troubleshooting Guide

    Proper Storage Methods

    Leftovers (if you’re lucky enough to have any!) need proper storage to maintain their deliciousness. Allow the casserole to cool completely before transferring portions to airtight containers. Refrigerate for up to 3 days – I find the flavor actually improves overnight as everything melds together! For freezing, portion cooled leftovers into freezer-safe containers and store for up to 2 months. The texture of the tater tots will change slightly upon reheating, but the flavor remains fantastic. I always reheat in the oven rather than microwave to help restore some crispness.

    Fixing Common Issues

    Even experienced cooks encounter casserole challenges! If your casserole seems too watery, there are several solutions. First, ensure you’ve thoroughly drained the beef after browning. Second, if using frozen vegetables, thaw and drain them first. For already watery casserole, sprinkle 2 tablespoons of grated Parmesan on top during the last 10 minutes of baking – it helps absorb moisture while adding flavor. If your tots aren’t crisping, finish with 2-3 minutes under the broiler, watching carefully to prevent burning. Remember, every oven is different, so adjust temperatures as needed!

    Frequently Asked Questions

    Can I make Cheesy Hamburger Tater Tot Casserole in a slow cooker?

    Yes! Brown the beef mixture first, then layer in a greased slow cooker. Cook on low for 4-5 hours, adding the tots and cheese during the final 30 minutes. The tots won’t be as crispy as oven-baked, but still delicious.

    What can I substitute for cream of mushroom soup?

    Cream of chicken or celery soup works perfectly. For homemade, make a simple roux with 2 tablespoons each of butter and flour, then whisk in 1½ cups milk and season to taste.

    Can I use ground turkey instead of beef?

    Absolutely! Ground turkey is a lighter option but can be drier. Add a tablespoon of olive oil when browning and perhaps a bit more seasoning to enhance flavor.

    How do I make this casserole gluten-free?

    Check that your cream soup and tater tots are gluten-free (most tots are, but verify). Use gluten-free Worcestershire sauce and ensure all seasonings are free from gluten-containing additives.

    Why are my tater tots soggy in the casserole?

    This typically happens if there’s excess moisture in the beef mixture. Thoroughly drain the beef, consider pre-baking the tots for 5 minutes, and don’t cover the casserole while baking.

    Final Thoughts

    This Cheesy Hamburger Tater Tot Casserole has saved countless hectic weeknights in my household, bringing smiles to tired faces and filling hungry bellies with minimal effort. The beauty of this dish lies in its simplicity, adaptability, and that undeniable comfort factor that makes everyone feel at home. Whether you stick to the classic version or venture into creative variations, this casserole promises satisfaction in every bite. Don’t forget to check out more comforting recipes on our Pinterest page for your next family dinner inspiration!

  • Creamy Chicken and Gnocchi Soup That Warms Your Soul Instantly

    Creamy Chicken and Gnocchi Soup That Warms Your Soul Instantly

    Creamy Chicken and Gnocchi Soup That Warms Your Soul Instantly

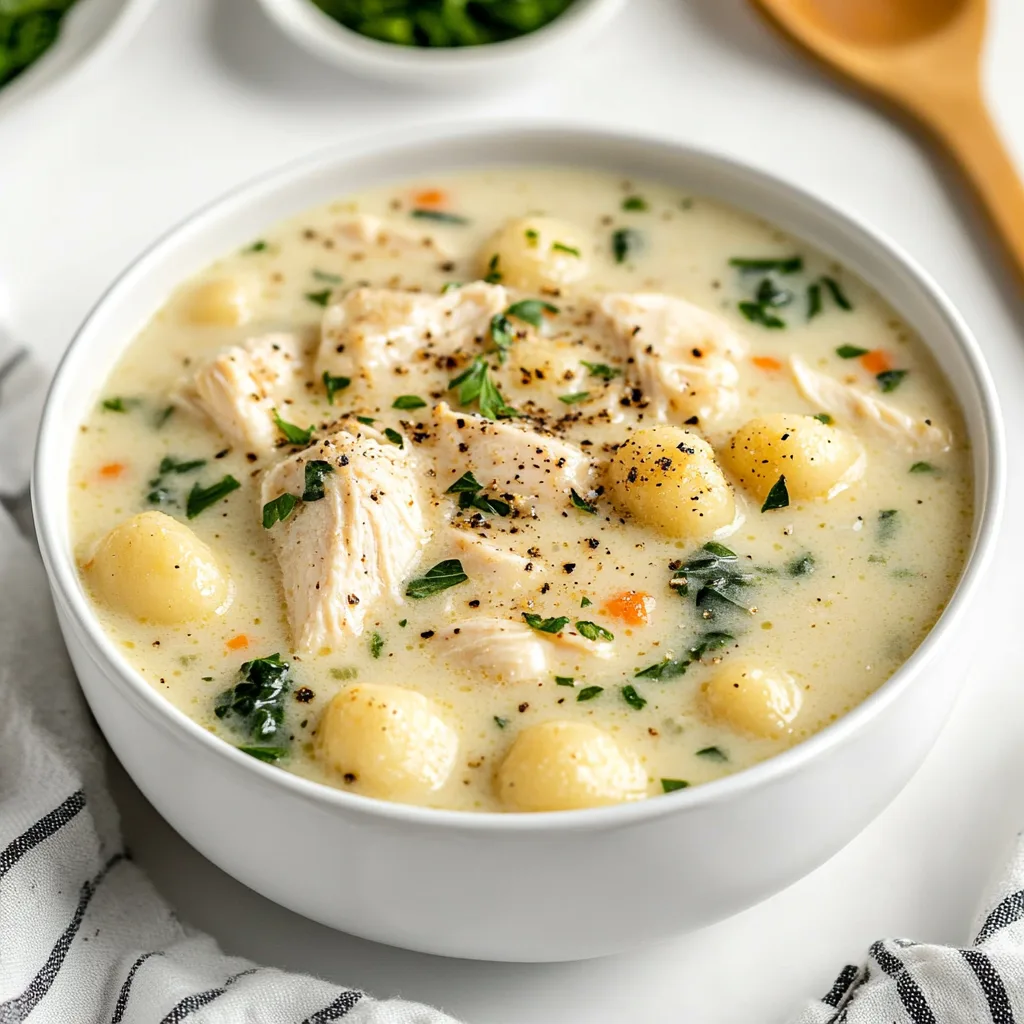
    Creamy Chicken and Gnocchi Soup is the ultimate comfort in a bowl—a velvety blend of tender chicken, pillowy gnocchi, and fresh vegetables that warms you from the inside out. On chilly evenings when the wind howls outside my kitchen window, I find myself reaching for this recipe time and again. The rich, herb-infused broth cradles each bite with a gentle hug of flavor that reminds me of my grandmother’s kitchen. If you’re searching for that perfect balance of hearty and creamy, this soup delivers in every spoonful. It’s like chicken noodle soup‘s sophisticated cousin that somehow feels both luxurious and comforting at once.

    Recipe

    Why You’ll Love This Creamy Chicken and Gnocchi Soup

    Restaurant-Quality Flavor at Home

    This soup captures that beloved Olive Garden magic but in your own kitchen and at a fraction of the cost. The velvety broth creates the perfect backdrop for tender chicken and pillow-soft gnocchi to shine. I still remember the first time I made this—my husband took one taste and declared it better than any restaurant version! The secret lies in building layers of flavor gradually, allowing the aromatics to release their essence before adding the cream. Each spoonful delivers a harmonious blend of herbs, savory chicken, and that signature richness that makes you close your eyes with each bite.

    Simple Ingredients, Extraordinary Results

    Don’t let the luxurious taste fool you—this soup relies on accessible ingredients you likely already have. Rotisserie chicken saves precious time without sacrificing flavor, while store-bought gnocchi eliminates any dough-making stress. The first time I made this was during a snowstorm when I couldn’t get to the store, and I was amazed at how I created something so special from my pantry basics. Fresh carrots, celery, and spinach add vibrant color and nutrition, while Italian seasoning and garlic infuse everything with aromatic depth. The beauty lies in how these simple elements transform into something greater than their parts.

    Essential Tips & Tricks

    Perfecting the Base

    Creating a flavorful foundation is crucial for this soup’s success. Begin by sautéing onions, carrots, and celery until they’re just tender but still have some bite—about 5-7 minutes. This creates a sweet, aromatic base that elevates everything else. I learned this technique from my Italian neighbor who insists that rushing this step is a culinary sin! Add garlic only in the final minute to prevent bitterness. When adding flour, cook it for at least 2 minutes to eliminate any raw taste before slowly incorporating the broth. This patience pays off with a silky-smooth texture and deeper flavor that makes the soup truly crave-worthy.

    Gnocchi Wisdom

    The pillowy gnocchi are the stars of this soup, so treat them with care. I prefer shelf-stable gnocchi for this recipe as they hold their shape better in the simmering broth. Add them just 5 minutes before serving to prevent them from becoming gummy or falling apart. My first attempt taught me this lesson the hard way when I added them too early and ended up with gnocchi mush! If you’re making this soup ahead of time, consider cooking and storing the gnocchi separately, then adding them to individual bowls when reheating. This simple step ensures perfect texture every time.

    Serving Ideas & Creative Variations

    Perfect Pairings

    Elevate your soup experience with thoughtful accompaniments that complement its creamy richness. A crusty baguette or garlic bread provides the perfect vehicle for sopping up every last drop of that velvety broth. For a lighter touch, try a simple side salad with a bright vinaigrette to cut through the richness. My family’s favorite pairing is actually homemade breadsticks dusted with parmesan and herbs. I love setting the table with small bowls of extra toppings like crispy bacon bits, fresh herbs, or grated parmesan, allowing everyone to customize their bowl to perfection.

    Delicious Twists

    Don’t be afraid to make this recipe your own with creative variations that keep it exciting. Swap the chicken for leftover turkey after holidays, or try Italian sausage for a spicier profile. For a seafood version, replace chicken with shrimp added in the final minutes of cooking. Vegetable options are endless—try adding mushrooms for earthiness, bell peppers for sweetness, or zucchini for summer freshness. My neighbor adds a splash of white wine before the broth for an elegant twist. For dairy-free guests, coconut cream creates a surprisingly delicious alternative that maintains that luxurious mouthfeel everyone loves.

    Storage & Troubleshooting Guide

    Make-Ahead & Freezing Tips

    This soup is perfect for meal prepping, actually improving in flavor overnight as the ingredients meld together. Store in airtight containers in the refrigerator for up to 4 days. When freezing, I recommend omitting the cream and gnocchi, adding them fresh during reheating for best results. The first time I froze the complete soup, the texture changed dramatically—lesson learned! Portion into individual containers for quick lunches, and when reheating, do so gently on the stovetop rather than microwaving to preserve the creamy texture. Add a splash of fresh cream when serving to revive that silky richness.

    Fixing Common Issues

    Even experienced cooks encounter soup challenges occasionally. If your soup is too thin, create a slurry with 1 tablespoon cornstarch and 2 tablespoons cold water, then whisk into the simmering soup until it reaches your desired thickness. For soup that’s too thick, gradually add more broth until you achieve the perfect consistency. If the cream appears to separate (which happened during my first attempt), lower the heat immediately and whisk vigorously—never boil cream-based soups. For bland flavor, brighten with a squeeze of lemon juice and adjust seasoning with additional herbs, salt, and pepper.

    Frequently Asked Questions

    Can I make Creamy Chicken and Gnocchi Soup in a slow cooker?

    Absolutely! Cook vegetables, chicken, and broth on low for 5-6 hours. Add the gnocchi during the final 30 minutes and stir in cream just before serving for perfect texture.

    What can I substitute for heavy cream?

    Half-and-half or evaporated milk work well for a lighter version. For dairy-free options, full-fat coconut milk or cashew cream provide similar richness without compromising flavor.

    Can I use frozen gnocchi instead of shelf-stable?

    Yes! No need to thaw—add frozen gnocchi directly to the simmering soup but allow 1-2 extra minutes of cooking time until they float to the surface.

    How do I prevent the gnocchi from becoming mushy?

    Add gnocchi just 5 minutes before serving. If making ahead, store gnocchi separately from the soup and combine only when reheating individual portions.

    What herbs work best in this soup?

    Italian seasoning provides excellent flavor, but fresh thyme, rosemary, and bay leaves create wonderful depth. Remove woody stems before serving for the best experience.

    Final Thoughts

    This Creamy Chicken and Gnocchi Soup has become my reliable comfort food champion—equally perfect for casual family dinners and impressive enough for guests. The way the cream wraps around each pillowy gnocchi dumpling creates a moment of pure culinary joy that’s hard to beat. I hope this recipe brings the same warmth and satisfaction to your table that it has to mine. Remember that cooking is about making something that speaks to your soul, so adjust the seasonings and ingredients to make this soup uniquely yours. For more cozy recipes, visit our Pinterest board where comfort food reigns supreme!

  • Slow Cooker Chicken Cacciatore: Bold Flavors with Peppers & Mushrooms

    Slow Cooker Chicken Cacciatore: Bold Flavors with Peppers & Mushrooms

    Slow Cooker Chicken Cacciatore: Bold Flavors with Peppers & Mushrooms

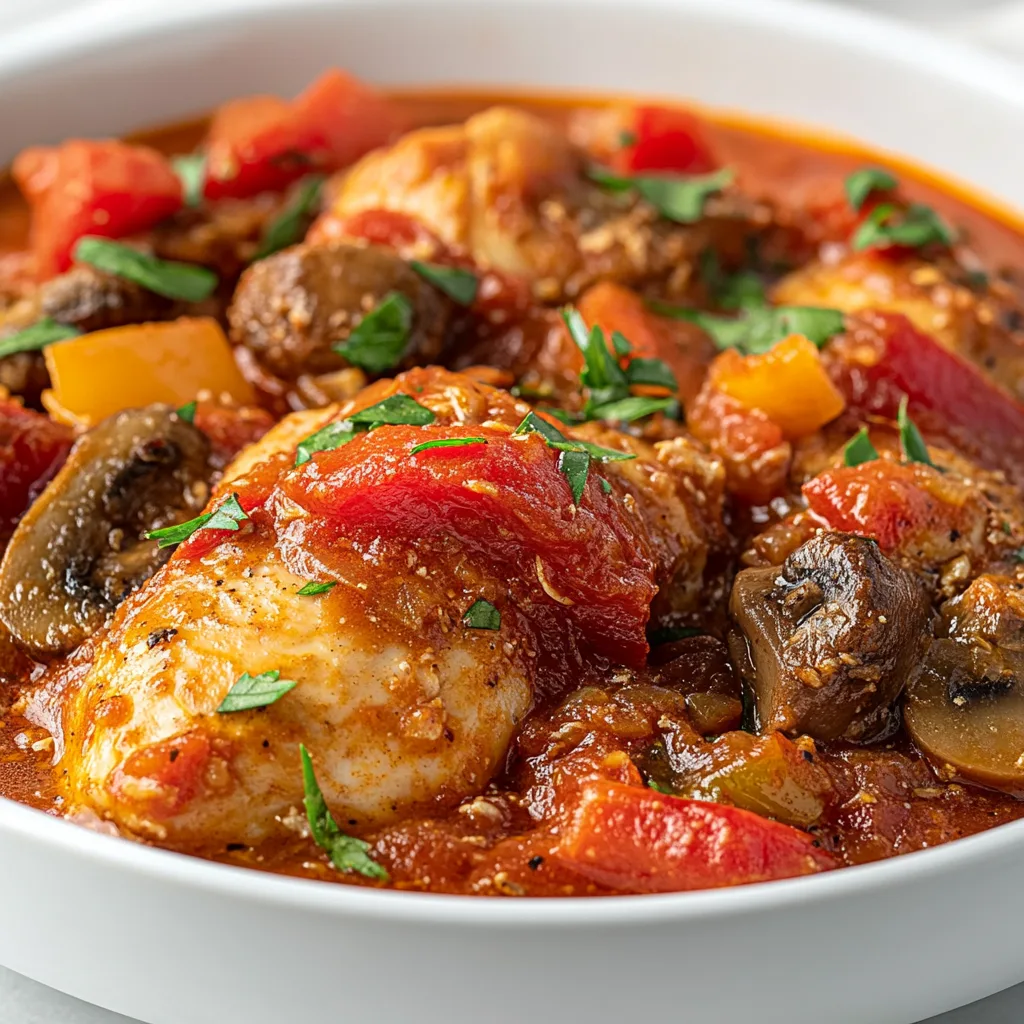
    The slow cooker chicken cacciatore with bell peppers, mushrooms and tomatoes is a dish that speaks to my soul on chilly evenings. There’s something magical about walking through the door after a long day to be greeted by those rich Italian aromas wafting through the house. I discovered this recipe during my first winter in our little farmhouse, when I needed something that could cook while I was painting the dining room. Now, it’s become our family’s comfort food tradition when the temperatures drop. The tender chicken, sweet bell peppers, earthy mushrooms, and tangy tomatoes create a symphony of flavors that’s both rustic and elegant.

    Recipe

    Why You’ll Love This Slow Cooker Chicken Cacciatore with Bell Peppers, Mushrooms and Tomatoes

    Effortless Gourmet Experience

    This slow cooker chicken cacciatore transforms simple ingredients into a restaurant-worthy meal with minimal effort. The low, slow cooking allows all those beautiful flavors to meld together, creating layers of depth you’d think took hours of active cooking. I love that I can spend just 15 minutes in the morning browning the chicken (don’t skip this step!) and slicing veggies, then let the slow cooker work its magic. By dinnertime, the chicken is fall-off-the-bone tender, and the sauce has developed a rich complexity that tastes like it’s been simmering on a Tuscan stovetop all day.

    Nutritious One-Pot Wonder

    Beyond being delicious, this cacciatore is packed with nutrition that makes me feel good about serving it to my family. The colorful bell peppers provide vitamins A and C, while the mushrooms add immune-boosting properties and a meaty texture that makes this dish so satisfying. The tomatoes release lycopene as they cook down into that gorgeous sauce. I appreciate that everything cooks together in one pot, infusing the chicken with flavor while creating a complete meal. It’s a balanced dinner with protein, vegetables, and incredible taste that satisfies everyone at my table.

    Essential Tips & Tricks

    Perfect Prep Methods

    The secret to exceptional chicken cacciatore starts with properly preparing your ingredients. Browning the chicken before adding it to the slow cooker creates a flavor foundation that makes all the difference. I spend just 3-4 minutes per side until it’s golden (not cooked through). For vegetables, cut bell peppers and mushrooms in larger chunks than you might think—they’ll soften considerably during cooking. I also recommend using whole canned tomatoes and crushing them by hand for a rustic texture that’s far superior to pre-crushed varieties. These small steps take minimal extra time but dramatically elevate the final dish.

    Flavor-Boosting Techniques

    To take your cacciatore from good to memorable, incorporate these flavor-enhancing methods. Add a splash of red wine vinegar during the last 30 minutes of cooking—the acidity brightens all the flavors and cuts through the richness. Don’t skip the fresh herbs at the end; they provide a vibrant contrast to the long-cooked sauce. I learned from my Italian neighbor to stir in a tablespoon of butter just before serving for silky richness. For a deeper flavor profile, try this technique I use in my Slow Cooker Tuscan Fish Stew: add a parmesan rind to the pot while cooking, then remove before serving.

    Serving Ideas & Creative Variations

    Perfect Pairings

    Chicken cacciatore begs for something to catch all that incredible sauce. My family’s favorite is serving it over creamy polenta, which creates the most comforting combination imaginable. The soft polenta soaks up the rich tomato sauce perfectly. For a lighter option, try zucchini noodles or cauliflower rice. Crusty Italian bread is non-negotiable at our table—there’s nothing like tearing off a piece to swipe through the remaining sauce. A simple arugula salad with lemon vinaigrette provides a perfect peppery contrast that cleanses the palate between bites of the rich cacciatore.

    Exciting Flavor Twists

    While traditional cacciatore is perfect as is, I love experimenting with variations that keep this recipe in our regular rotation. Try adding fennel bulb along with the other vegetables for a subtle anise flavor that pairs beautifully with the tomatoes. For a Spanish twist, incorporate smoked paprika and olives. When I want extra protein, I follow a similar technique to my Comforting Crockpot Fish Chowder and add white beans during the last hour of cooking. For special occasions, stir in a splash of cream at the end for a more luxurious sauce.

    Storage & Troubleshooting Guide

    Proper Storage Solutions

    One of the best things about this chicken cacciatore is how the flavors continue to develop overnight. Store leftovers in airtight containers in the refrigerator for up to 4 days—I actually think it tastes even better on day two! For freezing, let the cacciatore cool completely, then portion into freezer-safe containers, leaving a half-inch of space at the top. It freezes beautifully for up to 3 months. When reheating, I recommend thawing overnight in the refrigerator, then warming gently on the stovetop with a splash of chicken broth to refresh the sauce.

    Common Issues Solved

    If your cacciatore sauce is too thin, there’s an easy fix. Remove the chicken and set the slow cooker to high with the lid off for 20-30 minutes to reduce the sauce. Alternatively, create a cornstarch slurry (1 tablespoon cornstarch mixed with 2 tablespoons cold water) and stir it in during the last 30 minutes of cooking. If your vegetables are too soft, next time add firmer vegetables like bell peppers halfway through cooking instead of at the beginning. For chicken that seems dry, it may have been overcooked—try reducing the cooking time by 30-60 minutes in your next batch.

    Frequently Asked Questions

    Can I use boneless chicken instead of bone-in?

    Yes, you can use boneless chicken thighs or breasts, but reduce cooking time by 1-2 hours. Bone-in chicken provides more flavor and moisture, but boneless works well for a quicker-cooking version.

    How can I make this Slow Cooker Chicken Cacciatore with Bell Peppers, Mushrooms and Tomatoes spicier?

    Add 1/2 teaspoon red pepper flakes at the beginning or a diced jalapeño with the other vegetables. You can also serve with hot pepper oil for people to add to their individual portions.

    Can I cook this on high instead of low?

    Yes, you can cook on high for 3-4 hours instead of low for 6-8 hours. However, the chicken may not be quite as tender, and the flavors won’t develop as deeply.

    Is this recipe gluten-free?

    Yes, this recipe is naturally gluten-free as written. Just double-check your chicken broth and tomato paste labels to ensure they don’t contain hidden gluten ingredients.

    Can I add wine to the recipe?

    Absolutely! Replace 1/2 cup of the chicken broth with dry red wine for added depth. Add it after browning the chicken and let it reduce slightly before transferring to the slow cooker.

    Final Thoughts

    This slow cooker chicken cacciatore with bell peppers, mushrooms and tomatoes has become more than just a recipe in my home—it’s a tradition that signals comfort and care. There’s something deeply satisfying about creating such a flavorful, nurturing meal with minimal hands-on time. I hope this cacciatore brings the same warmth to your kitchen that it has to mine. Don’t forget to check out more of my favorite slow cooker recipes on Pinterest for inspiration that makes everyday cooking special.