Category: Pumpkin Recipes

Pumpkin recipes made easy! Discover cozy, slow cooker-friendly fall dishes like pumpkin soup, pumpkin chili, and spiced lattes. Pure autumn comfort!

  • 5 Moist Pumpkin Chocolate Chip Bread Hacks You’ll Love

    5 Moist Pumpkin Chocolate Chip Bread Hacks You’ll Love

    Pumpkin chocolate chip bread wasn’t always a staple in my kitchen—until one chaotic October morning changed everything.

    Hey! I’m Darleen Vance—34, Salt Lake City native, and a woman who used to think slow cookers were just for potlucks and pumpkin bread was something you grabbed at a coffee shop, not something you baked. I was wrong. Very wrong.

    It all started during “The Great Mealtime Struggle”: three hungry kids, a work-from-home day job, and a kitchen that felt like a personal battleground. One fall morning, with a clingy toddler on my hip and zero time to fuss, I tossed together pumpkin purée, chocolate chips, and a few pantry staples into a loaf pan. I didn’t expect magic—but I got it.

    What came out of that oven? The most moist, tender, chocolate-studded pumpkin bread my family had ever tasted. Now? It’s a non-negotiable in our home every fall. And along the way, I’ve picked up some game-changing hacks to make it even better.

    Ready to discover them? Let’s dive into 5 little secrets that’ll make your pumpkin chocolate chip bread the most-requested treat on your block.
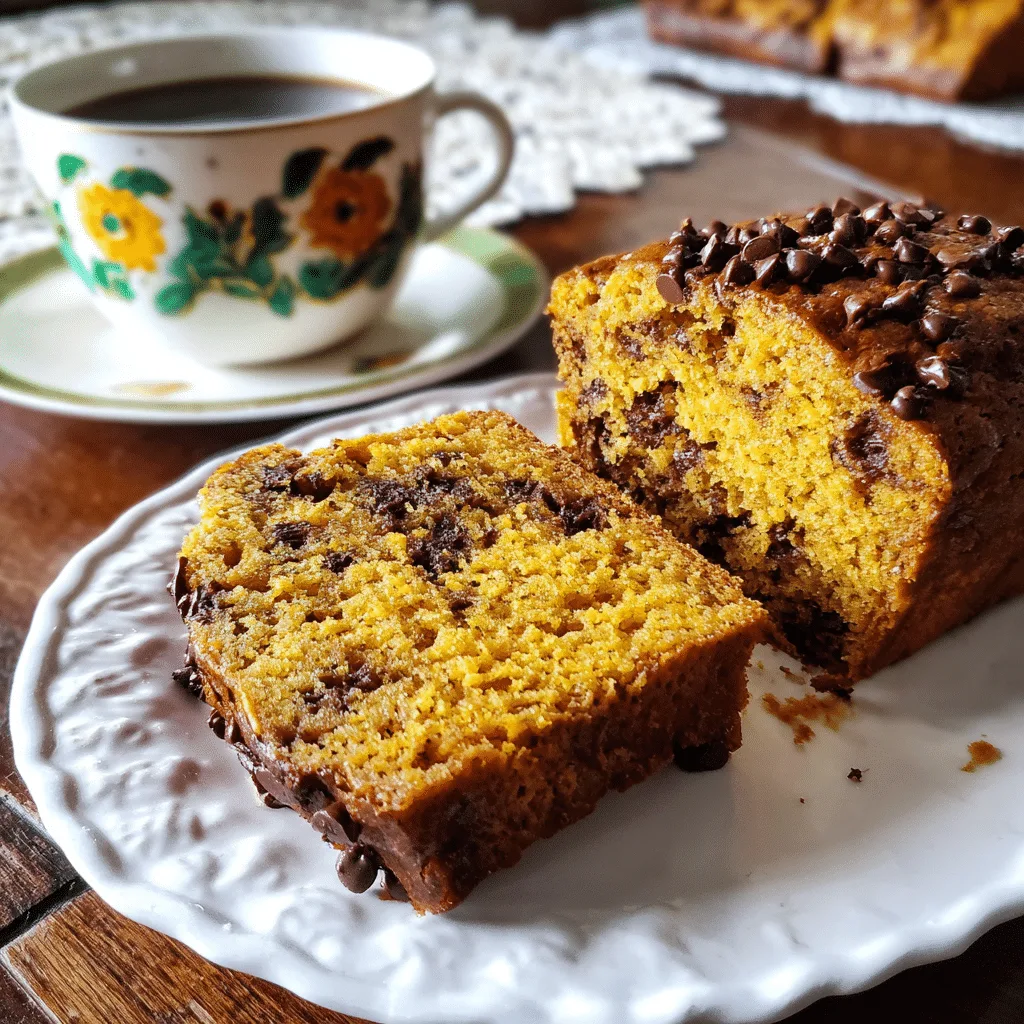
    Pumpkin chocolate chip bread loaf with a golden crust on rustic table

    Recipe

    The Foundation of Moist Pumpkin Chocolate Chip Bread

    Why Moisture Is the Heart of a Great Pumpkin Loaf

    When it comes to pumpkin chocolate chip bread, texture is everything. You want a slice that’s rich, dense, and so moist it nearly melts in your mouth. Achieving that perfect balance isn’t just about using pumpkin purée—it’s about how you build your batter, from fat content to baking temperature.

    Moisture is what separates a bland quick bread from an unforgettable one. It helps bind flavors, enhances the chocolate chips, and brings out the natural sweetness of the pumpkin. Whether you’re baking for your kids or prepping for a cozy fall brunch, moisture is your number one priority.

    This isn’t just about taste—moist pumpkin loaf with chocolate chips keeps longer on the counter, stays soft for days, and slices clean every time. That’s why every trick you’ll learn here builds off that one core goal: better texture without sacrificing structure.

    Hack 1: Use a Blend of Oils, Not Just Butter

    Butter gives flavor, yes—but it’s oil that locks in the moisture. For the ultimate chocolate chip pumpkin loaf, use a mix of melted butter and neutral oil (like canola or vegetable oil). Oil is 100% fat and doesn’t evaporate during baking the way butter can.

    This blend results in a tender crumb while still keeping that classic bakery-style flavor. It’s the best of both worlds.

    Want to know what type of oil works best? Stick to neutral oils. Olive oil can overpower the warm spices in this spiced pumpkin bread with chips. Aim for 1/2 cup oil to 1/4 cup melted butter per loaf for balance.

    Pumpkin chocolate chip bread ingredients laid out on a marble counter

    Texture and Flavor Boosters for Perfect Pumpkin Bread

    Hack 2: Add Greek Yogurt or Sour Cream for a Tender Crumb

    For next-level pumpkin chocolate chip bread, moisture alone isn’t enough. You also want a tender, almost velvety texture—and that’s where dairy makes the difference. Add a few spoonfuls of full-fat Greek yogurt or sour cream to your batter.

    These ingredients introduce both fat and acidity, which interact with the baking soda to help your loaf rise just enough without drying out. The result? A moist pumpkin loaf with chocolate chips that’s lighter, yet still rich and satisfying. If you love baking with yogurt, you’ll also enjoy these 10-minute Greek yogurt pumpkin muffins—they’re quick, tender, and full of flavor.

    Use about 1/3 cup of yogurt or sour cream in place of some of the pumpkin purée if your batter feels too wet. This small adjustment can transform a dense loaf into a soft, bakery-style slice.

    Prefer bite-sized treats? Try these pumpkin donut holes—a great way to use up leftover pumpkin purée.

    Hack 3: Don’t Skip the Spices—They Matter More Than You Think

    While pumpkin gets top billing in pumpkin chocolate chip bread, the real flavor depth comes from the spice blend. Without it, the bread can fall flat.

    A well-balanced chocolate chip pumpkin loaf should include cinnamon, nutmeg, ginger, and just a touch of cloves or allspice. These spices warm up the sweetness of the chocolate and bring out the earthy richness of the pumpkin.

    Measure carefully. Too much clove can overwhelm, while not enough cinnamon leaves the loaf tasting bland. For one loaf, start with 1 ½ teaspoons of cinnamon, ¼ teaspoon each of nutmeg and ginger, and a pinch of clove.

    This spice profile doesn’t just make your bread more flavorful—it enhances the aroma and creates that classic fall baking recipe vibe we all crave.

    Baking Smarter for Better Results

    Hack 4: Always Use Room-Temperature Ingredients

    This step may seem small, but it’s one of the most important when baking pumpkin chocolate chip bread. Cold eggs, milk, or yogurt can cause your batter to seize or clump, leading to uneven texture and underbaked spots.

    Room-temperature ingredients combine more smoothly, which means better structure and a more even bake. When your batter is properly emulsified, your loaf rises evenly, sets beautifully, and locks in moisture.

    Pumpkin chocolate chip bread rising in the oven
    Baking pumpkin chocolate chip bread low and slow for moist texture

    Set your eggs and dairy on the counter at least 30 minutes before mixing. If you forget, place eggs in warm water for 10 minutes—an easy trick every home baker should know.

    For an easy fall baking recipe, this one tweak makes a major difference in the final outcome.

    Hack 5: Fold in Chocolate Chips the Right Way

    When adding chocolate chips to pumpkin chocolate chip bread, placement matters. If you just stir them in, they’ll often sink to the bottom or clump unevenly.

    Instead, coat your chocolate chips lightly in flour before folding them gently into the batter. This helps suspend them evenly throughout the loaf, giving you rich, gooey chocolate in every bite.

    Use high-quality semi-sweet or dark chips for contrast against the sweet and spiced pumpkin base. If you’re going for a pumpkin dessert with chocolate chips, mini chips also distribute flavor more evenly and melt beautifully into the crumb.

    Every slice should showcase that perfect pairing of moist pumpkin loaf with chocolate chips—not just the bottom layer.

    Little Details That Make a Big Difference

    Don’t Overmix—The #1 Mistake to Avoid

    Once you’ve added your dry ingredients to the wet, stop and take a breath. The quickest way to ruin your pumpkin chocolate chip bread is by overmixing the batter. Overmixing develops the gluten in the flour too much, which leads to a tough, rubbery loaf instead of that soft, cakey texture we’re after.

    Stir the batter just until you no longer see streaks of flour. Gently fold in your chocolate chips last. The batter should look slightly lumpy and thick. That’s the sweet spot for a truly moist pumpkin loaf with chocolate chips.

    Use a spatula instead of a mixer at this stage to stay in control. The gentler your mixing, the softer your bread.

    Bake Low and Slow for Even Moisture

    The final trick to bakery-worthy pumpkin chocolate chip bread is temperature. Many home ovens run hotter than expected. If your loaf bakes too fast on the outside, it can stay underdone in the center—especially with a thick, rich batter like this one.

    Set your oven to 325°F, not 350°F, and bake the loaf in the center rack for 55 to 65 minutes. This slightly lower temperature allows the loaf to cook through slowly and retain more moisture.

    Use the toothpick test—look for moist crumbs, not raw batter. Let it rest in the pan for 10 minutes, then finish cooling on a rack. This patience pays off with a loaf that slices clean and stays soft for days.

    These details—how you mix and how you bake—make all the difference between an average result and a chocolate chip pumpkin loaf everyone raves about.

    Conclusion

    You now have all five proven hacks to bake the most irresistible pumpkin chocolate chip bread—moist, tender, and bursting with chocolate in every bite. These aren’t complicated techniques, but they make a world of difference in texture, flavor, and shelf life.

    So go ahead—bake a loaf this week and watch it disappear slice by slice.

    Tried it? I’d love to see your results! Share your loaf on Facebook and tag me @DarleenVance. Let’s swap tips, tricks, and maybe a few crumbs. You never know—your version might just inspire someone else’s next cozy bake.
    FAQ: Pumpkin Chocolate Chip Bread

    How do I keep pumpkin chocolate chip bread moist?

    To keep pumpkin chocolate chip bread moist, use oil or a blend of oil and butter in your batter. Avoid overbaking by using a lower temperature, and store the loaf wrapped tightly at room temperature for up to three days.

    Can I freeze pumpkin chocolate chip bread?

    Yes, pumpkin chocolate chip bread freezes well. Wrap the cooled loaf tightly in plastic wrap and then foil. Store in the freezer for up to three months. Thaw at room temperature for best results.

    Why did my pumpkin chocolate chip bread sink in the middle?

    If your pumpkin chocolate chip bread sinks, it may be underbaked or overmixed. Use room-temperature ingredients, avoid over-stirring, and test for doneness with a toothpick to ensure the center is fully set.

    What kind of chocolate chips are best for pumpkin chocolate chip bread?

    Semi-sweet or dark chocolate chips work best in pumpkin chocolate chip bread because they balance the natural sweetness of the pumpkin and spices. Mini chips distribute more evenly throughout the loaf.

  • Pumpkin Butternut Squash Soup: 5 Stunning Secrets

    Pumpkin Butternut Squash Soup: 5 Stunning Secrets

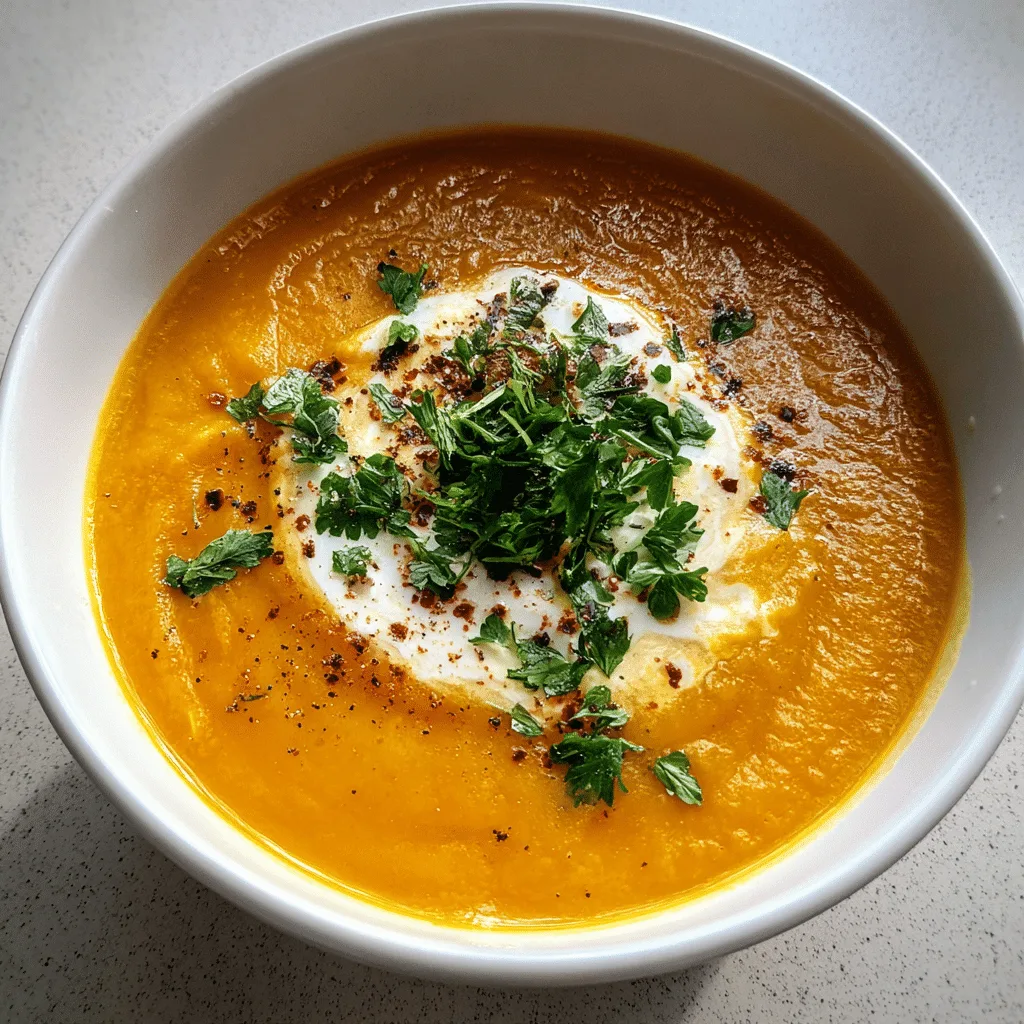
    Pumpkin butternut squash soup used to sound like a fancy fall dish that belonged in a restaurant, not my chaotic weekday kitchen. But now? It’s one of those “how-did-I-ever-live-without-this” slow cooker miracles that makes autumn feel like magic—every spoonful creamy, cozy, and loaded with flavor.

    Hey! I’m Darleen Vamce—34, Salt Lake City native, and a woman who used to think slow cookers were just for potlucks and overly mushy stews. I was wrong. Very wrong. Now, this humble little machine is basically my co-chef, my weekday dinner savior, and the secret weapon behind most of the meals that make my family think I have superpowers.

    It all started during The Great Mealtime Struggle: three hungry kids, a day job that didn’t quit at 5, and a mocking kitchen. Out of desperation, I pulled down a dusty slow cooker, tossed in pumpkin, butternut squash, garlic, broth, and a whisper of nutmeg—baby in one arm, ladle in the other. The result? Magic. Pure, creamy, life-altering magic.

    So today, I’m sharing the 5 stunning secrets that turn a simple slow-cooked soup into the coziest comfort meal you’ll crave all season.

    Ingredients for pumpkin butternut squash soup on wooden table
    Table of Contents

    Recipe

    Unlocking the Fall Flavor Foundation

    Why Pumpkin Butternut Squash Soup Deserves a Spot in Your Meal Plan

    Pumpkin butternut squash soup isn’t just another seasonal trend. It’s a nourishing, naturally creamy soup that brings warmth to your table with minimal effort and maximum flavor. It’s the kind of recipe that fits any mood—weeknight dinner, cozy Sunday lunch, or a holiday starter that impresses without stress.

    The blend of pumpkin and butternut squash creates a sweet-savory balance that feels rich but still light. When slow-cooked, their textures break down into something silky and smooth, making this dish ideal for those who love comforting meals with a healthy twist. Plus, it’s packed with nutrients like vitamin A, fiber, and antioxidants—all in one pot.

    What I love most? You don’t need fancy ingredients or endless prep. With a few pantry staples and a little patience, your slow cooker does the work while you get on with life. This recipe is also flexible—whether you’re after a vegan squash soup or want to swirl in cream for a luxurious touch, it adapts beautifully.

    The Secret Behind the Texture: Butternut Squash’s Magic

    Butternut squash is the unsung hero of creamy fall soup recipes. Its flesh softens into a velvety base that gives pumpkin butternut squash soup its signature texture. When slow-cooked with aromatics like onion, garlic, and a pinch of cinnamon, it delivers a depth of flavor you simply can’t get from canned soup.

    Pairing pumpkin with butternut squash also boosts the natural sweetness, so you can keep the sodium and added fats low without sacrificing taste. Want to enhance the flavor even more? Roast your squash before adding it to the slow cooker. That little bit of caramelization goes a long way in layering flavor.

    By using fresh or frozen squash and 100% pure pumpkin purée, this autumn soup idea becomes an affordable, nourishing staple you’ll return to all season. It’s more than just a recipe—it’s your go-to strategy for cold-weather comfort.

    Ingredients for pumpkin butternut squash soup on wooden table

    The 5 Stunning Secrets Begin Here

    Secret #1: Use Coconut Milk for a Luscious Finish

    One of the stunning secrets to elevating pumpkin butternut squash soup is adding coconut milk instead of heavy cream. Not only does it keep the recipe dairy-free, but it also brings a subtle sweetness that pairs beautifully with the roasted flavors of pumpkin and squash.

    Coconut milk makes your soup extra creamy without overpowering the natural ingredients. It blends smoothly into the slow cooker, turning this already comforting dish into a velvety, cozy soup recipe that tastes like something from a high-end fall café.

    Whether you’re aiming for a vegan squash soup or just trying to lighten things up, this swap changes everything. And don’t worry—if you’re not a coconut fan, unsweetened almond or oat milk works well too.

    Secret #2: Add a Touch of Apple for Natural Sweetness

    This might sound unusual, but adding a peeled, diced apple to the mix enhances the soup’s natural sweetness and complexity. This is one of those tricks that transforms a simple autumn soup idea into something unexpectedly special.

    The apple cooks down with the pumpkin and butternut squash, melting into the background but adding brightness that balances the earthy depth of the vegetables. It’s subtle, but you’ll notice it in every bite.

    If you’re making a savory pumpkin soup and worried it might be too sweet, opt for a tart apple like Granny Smith. It offers acidity instead of sugary flavor, adding another layer of interest to your soup without overpowering it.

    If you’re a fan of set-it-and-forget-it meals, this slow-cooked pumpkin butternut squash soup is going to be your new favorite. It delivers the same comfort and warmth as our Slow Cooker Pumpkin Pie Oatmeal, making it perfect for those chilly autumn days when you want something cozy simmering in the kitchen. And if soups are your go-to during the colder months, you’ll love exploring more ideas in our Dump and Go Crockpot Soups collection—quick, comforting, and packed with flavor.

    Together, these first two secrets are already reshaping how pumpkin butternut squash soup shows up in your kitchen. And we’re just getting started.

    Flavor Layers That Transform Every Spoonful

    Secret #3: Toasted Spices Make All the Difference

    You might be surprised at how much flavor lives in your spice cabinet—but only if you wake it up. The third stunning secret? Toast your spices before tossing them into the slow cooker.

    Warming ground cumin, cinnamon, and a pinch of smoked paprika in a dry skillet for just 30 seconds releases their oils and unlocks deeper, richer aromas. This simple move gives pumpkin butternut squash soup that warm, roasted depth that usually takes hours to develop.

    Think of it as building flavor from the bottom up. Instead of just tasting “spiced,” you’ll experience layers—sweet squash, cozy warmth, and a whisper of smokiness all playing together in every bite.

    This trick is especially powerful in slow cooker recipes where flavors have time to meld. If you’ve ever made a creamy fall soup recipe and thought it tasted flat, this might be the missing step.

    Secret #4: Don’t Skip the Acid

    The fourth stunning secret is one most people never think about: acid. A splash of apple cider vinegar or lemon juice at the end brightens the entire pot.

    Pumpkin and butternut squash are sweet, earthy ingredients. Without a balancing note, they can feel heavy. That’s where a little acid swoops in and lifts the flavor, making your soup feel lighter, fresher, and more dynamic.

    You don’t need much—just a teaspoon or two stirred in right before serving. You’ll notice the difference immediately. It sharpens the spices, balances the sweetness, and makes your soup taste like it came from a professional kitchen.

    This step is especially effective if you’re serving this as a starter for guests. It wakes up the palate and makes every bite feel fresh.

    Slow cooker filled with pumpkin and squash soup in progress

    The Final Secret + Serving Like a Pro

    Secret #5: Blend Smart and Garnish Bold

    The last of our 5 stunning secrets is simple but powerful: how you blend matters just as much as what you put in. To get that ultra-smooth texture that defines great pumpkin butternut squash soup, use an immersion blender directly in the slow cooker. It’s mess-free, safe, and gives you full control over consistency.

    Want it extra silky? Go the extra mile and run the soup through a high-speed blender in batches. The result is next-level creamy—perfect for impressing guests or just treating yourself to a little luxury.

    But don’t stop there. Garnish matters. A swirl of coconut cream, a sprinkle of roasted pumpkin seeds, or a handful of microgreens adds contrast, crunch, and color. Suddenly your pumpkin butternut squash soup isn’t just a meal—it’s an experience.

    Serving Ideas That Elevate Every Bowl

    Served pumpkin butternut squash soup with garnish and bread

    Once your soup is ready, serve it hot in wide, shallow bowls so the aroma fills the air. Pair it with crusty bread, a grilled cheese on sourdough, or even a seasonal salad with cranberries and pecans.

    This creamy fall soup recipe isn’t just warm and filling—it’s incredibly versatile. Make it the centerpiece of a cozy dinner, pack it in a thermos for a chilly afternoon, or freeze extra for a future busy night. The slow cooker does the work, but these little finishing touches make it unforgettable.

    Pumpkin butternut squash soup is more than just a fall staple—it’s a go-to comfort food, and now, with these 5 stunning secrets, you’ve got the tools to make it exceptional every single time.

    Conclusion: Make This Your Go-To Fall Comfort Soup

    Now that you know the 5 stunning secrets behind truly exceptional pumpkin butternut squash soup, it’s time to bring them into your kitchen. This isn’t just another recipe—it’s a cozy ritual, a family favorite, and a cold-weather essential that you can prep in the morning and savor by night.

    From the creamy texture to the subtle spice and sweet undertones, pumpkin butternut squash soup delivers comfort and flavor in every bowl. Whether you’re serving guests or feeding your family, it’s the kind of dish that feels homemade and heartwarming—even on your busiest days.

    Try it at home, snap a photo, and tag me on Facebook—I’d love to see how your slow cooker magic turns out.

    Frequently Asked Questions About Pumpkin Butternut Squash Soup

    What’s the best way to thicken pumpkin butternut squash soup?

    The best way to thicken pumpkin butternut squash soup is to let it simmer uncovered for the last 30 minutes or blend it thoroughly using an immersion blender. If needed, you can stir in a small amount of coconut cream or mashed white beans for a richer, thicker texture without losing the healthy balance.

    Can I freeze pumpkin butternut squash soup?

    Absolutely. Pumpkin butternut squash soup freezes beautifully. Let the soup cool completely, then pour it into freezer-safe containers, leaving room at the top for expansion. It will keep for up to three months. Reheat gently on the stovetop and stir well to restore its creamy consistency.

    Is pumpkin butternut squash soup healthy?

    Yes, pumpkin butternut squash soup is naturally nutritious. It’s high in fiber, vitamins A and C, and antioxidants. When made with coconut milk or vegetable broth, it’s also vegan and low in saturated fat. It’s a great option for a wholesome, comforting meal during the colder months.

    Can I make pumpkin butternut squash soup without a slow cooker?

    Definitely. While a slow cooker helps build flavor over time, pumpkin butternut squash soup can also be made on the stovetop. Simply sauté your aromatics, add the vegetables and broth, then simmer for 30–40 minutes before blending. The taste is still cozy, creamy, and deeply satisfying.
  • How To Make Fluffy Sourdough Pumpkin Cinnamon Rolls (Yields 12)

    How To Make Fluffy Sourdough Pumpkin Cinnamon Rolls (Yields 12)

    Sourdough pumpkin cinnamon rolls changed the way I think about baking—especially during busy, chaotic seasons of life.

    I used to believe homemade cinnamon rolls were for people with time, patience, and countertops free of crayon marks and cracker crumbs. Definitely not me. But one chilly fall morning, with sourdough discard staring at me from the back of the fridge and a baby on my hip, I took a chance. I mixed it with pumpkin purée, warm spices, and crossed my fingers.

    The result? Soft, tangy, pumpkin-kissed spirals so fluffy and fragrant, my kids thought I’d bought them from a bakery.

    That was the day I realized my slow cooker and sourdough starter could be partners in crime. These rolls don’t just smell like fall—they feel like victory. And best of all, they let me prep in the morning and enjoy in the evening, with zero stress.

    Now they’re my go-to for brunches, lazy weekends, and cozy mornings. Ready to make them part of your rotation too? Let’s do it.

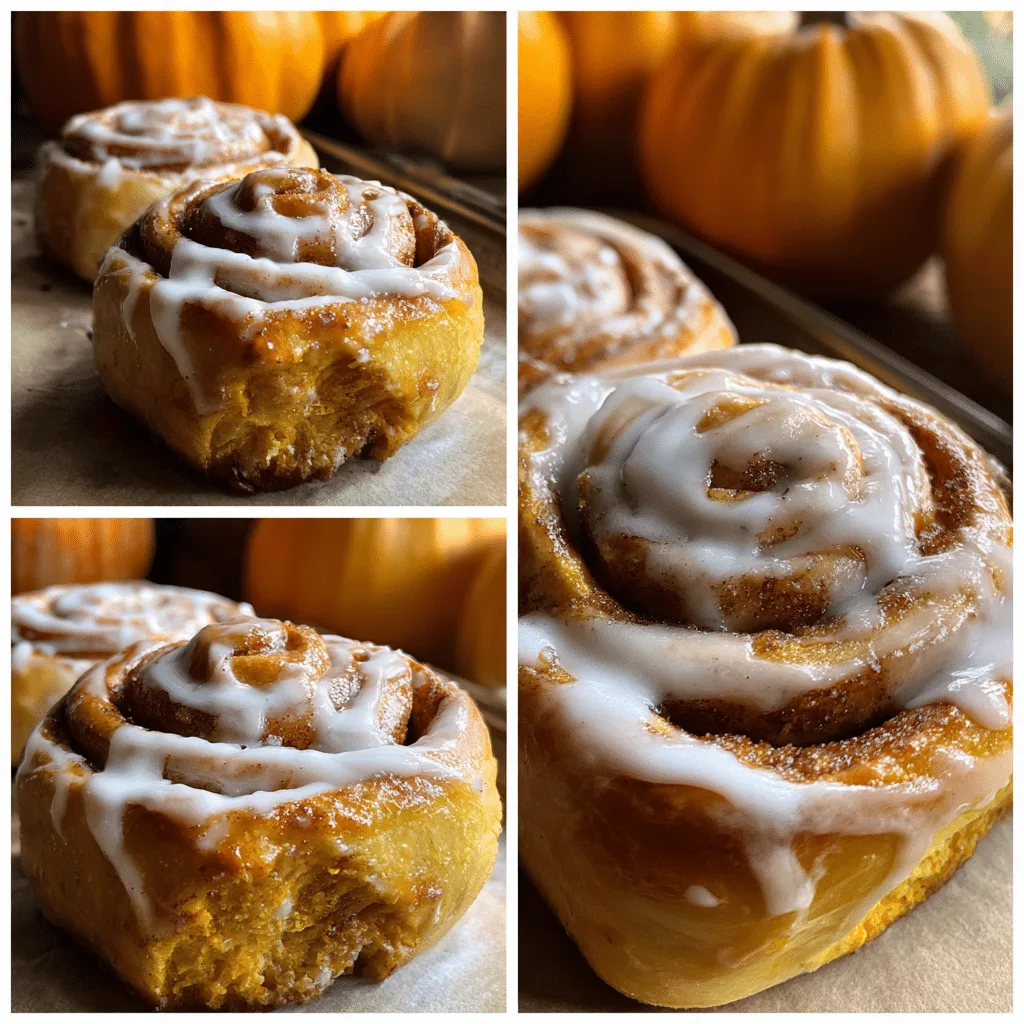
    Sourdough pumpkin cinnamon rolls freshly baked on a wooden table
    Table of Contents

    Recipe

    Why Sourdough + Pumpkin Is a Fall Baking Win

    Sourdough pumpkin cinnamon rolls bring together everything we love about fall baking—warmth, spice, and deep, developed flavor.

    Sourdough starter (or discard) adds tang and tenderness to the dough, while pumpkin purée lends softness, moisture, and a golden hue. Together, they make cinnamon rolls that are anything but basic. The result? Soft, fluffy layers with a subtle earthy flavor that balances perfectly with cinnamon sugar.

    And the best part? No waste. This is one of those sourdough discard recipes that feels like a reward, not a chore.

    You don’t need a fancy mixer or bakery skills—just a bowl, a little patience, and the right ingredients.

    Cold Fermentation for Better Texture and Taste

    Let’s talk timing. You’ll mix the dough in the morning or evening and let it rest slowly in the fridge. This slow rise cinnamon roll method develops flavor while freeing up your day. No constant checking. No rushing. Just magic happening while you work, sleep, or binge your favorite show.

    The dough stays soft and easy to work with—even for beginners. You’ll notice a smoother texture, stronger rise, and deeper taste. That’s the magic of sourdough.

    So if you’ve been craving homemade pumpkin cinnamon buns with that perfect soft pull and golden color, this is your base.

    Next up? We roll and fill.

    The Perfect Filling for Sourdough Pumpkin Cinnamon Rolls

    The filling in sourdough pumpkin cinnamon rolls is what makes them unforgettable. You’ll need a mix of brown sugar, cinnamon, nutmeg, and softened butter. This blend melts into the dough during baking and forms that signature sticky swirl in the center.

    You can also add a pinch of clove or ginger for an extra hit of fall warmth. These spices turn simple dough into rich, spiced pumpkin cinnamon buns that taste like they came from a bakery.

    Spread the filling evenly over the rolled-out dough. Use a gentle hand but cover the surface completely. The better the coverage, the more defined the swirl.

    Roll and Slice Like a Pro

    Start rolling from the long side of the dough, working slowly to keep it tight. This helps maintain the structure and prevents the filling from spilling out. Once rolled, use unflavored dental floss or a sharp knife to cut the log into equal pieces.

    For best results, slice the dough into 12 even rounds. Each one will bake into a tall, fluffy spiral with soft edges and a gooey center.

    Sourdough pumpkin cinnamon rolls should be placed into a buttered baking dish with a little room to rise. Let them proof until puffy and slightly expanded. This step sets the stage for that final soft rise in the oven or slow cooker.

    Whether you call them sourdough cinnamon rolls or pumpkin spice rolls, this method guarantees clean swirls and consistent shape. From prep to pan, every step counts.

    Oven-Baked Sourdough Pumpkin Cinnamon Rolls

    When you’re ready to bake, preheat your oven to 350°F. Place the rolls in a greased baking dish and bake uncovered for 25 to 30 minutes. The tops should turn golden brown, and the centers should be soft but cooked through.

    Baking gives sourdough pumpkin cinnamon rolls a light crust on the outside while keeping the centers pillowy. If you prefer a classic texture with a slight chew, the oven is your best method. Just make sure the rolls have fully proofed before they hit the heat. You’ll know they’re ready when they look puffy and feel airy to the touch.

    Oven baking works well if you like structured, tall pumpkin sourdough rolls that hold their swirl perfectly. The result is rich in color, flavor, and aroma.

    Slow Cooker for Ultra-Soft Rolls

    For a hands-off approach, try the slow cooker. Line the base with parchment paper or use a silicone insert. Arrange the rolls with a little space between each, cover, and cook on high for 2 hours or low for 3 to 4 hours.

    The slow cooker creates a moist environment that keeps the rolls extra soft. This method is great for slow rise cinnamon rolls that you want to be gooey in the center with tender edges.

    The rolls won’t brown like they do in the oven, but they will stay incredibly moist. For added color, you can pop them under the broiler for 2 to 3 minutes after cooking.

    Whether baked or slow-cooked, sourdough pumpkin cinnamon rolls deliver on flavor and texture. It all comes down to how soft or structured you want the final result.

    The Cream Cheese Glaze That Brings It All Together

    The perfect finish for sourdough pumpkin cinnamon rolls is a thick, creamy glaze. Classic cream cheese frosting adds tang and richness that complements the spiced pumpkin filling. To make it, combine:

    • 4 oz softened cream cheese
    • 1 cup powdered sugar
    • 1 tsp vanilla extract
    • 2–3 tbsp milk (for texture)

    Mix until smooth. Spread generously over the warm sourdough pumpkin cinnamon rolls for a glossy finish, or let the rolls cool for a thick, creamy layer that stays in place.

    This glaze takes your pumpkin spice cinnamon rolls from great to unforgettable. The balance of sweet, tangy, and warm spice is what makes this recipe such a hit during fall baking season.

    Glazed sourdough pumpkin cinnamon rolls ready to serve

    How to Store and Customize for Any Occasion

    After baking, store your sourdough pumpkin cinnamon rolls in an airtight container. They’ll stay fresh at room temperature for up to 2 days or in the refrigerator for 4–5 days. To freeze, wrap unfrosted rolls tightly and store for up to 2 months.

    Reheat them gently to restore the softness. Add glaze after reheating for the best texture.

    Want to customize? Try adding chopped nuts or raisins to the filling. Use maple extract in the glaze or fold in a bit of orange zest for a citrusy twist. The core of sourdough pumpkin cinnamon rolls is flexible enough to handle your favorite mix-ins.

    This base recipe also works well for sourdough discard cinnamon rolls or those looking to use up leftover starter. Whether you call them pumpkin cinnamon buns, homemade cinnamon rolls, or pumpkin sourdough buns, they deliver bakery-style flavor at home.

    If you love fall flavors, don’t miss these cozy treats: Pumpkin Donut Holes with 5 Sweet Ideas and 3-Ingredient Pumpkin Cookies—both easy, quick, and full of spice.

    Conclusion: Make These Rolls Part of Your Fall Tradition

    Whether you’re baking for a cozy weekend, a special brunch, or just because your sourdough discard is calling your name, these sourdough pumpkin cinnamon rolls deliver every time. The soft dough, rich cinnamon swirl, and creamy glaze come together in a recipe that’s as satisfying to make as it is to eat.

    Once you’ve made your first batch, you’ll see why these are more than just another fall treat—they’re a homemade ritual worth repeating. They’re warm, fluffy, and perfectly spiced with pumpkin in every bite.

    Have you tried this recipe? I’d love to see how your sourdough pumpkin cinnamon rolls turned out.
    Snap a photo and tag me on Facebook @RecipesDarleen — or drop a comment to share your favorite twist on the classic.

    Now go bake something amazing. You’ve got this.

    Frequently Asked Questions

    Can I use sourdough discard in this recipe?

    Yes, sourdough pumpkin cinnamon rolls are perfect for using sourdough discard. The discard adds a mild tang and keeps the dough soft. Just make sure your discard is unfed and at room temperature for best results.

    Can I make these rolls ahead of time?

    Absolutely. You can assemble sourdough pumpkin cinnamon rolls the night before, cover them tightly, and refrigerate. Let them come to room temperature and rise before baking the next day. It’s a great way to prep ahead for brunch or holidays.

    Why didn’t my rolls rise enough?

    This often happens if the dough didn’t proof long enough or if your starter wasn’t active. For pumpkin cinnamon buns that are light and fluffy, make sure your sourdough is mature and your kitchen is warm enough for a proper rise. Cold dough takes longer to proof.

    Can I freeze these before baking?

    Yes. Shape your sourdough pumpkin cinnamon rolls, place them on a tray, and freeze before the final rise. Once frozen, transfer them to a sealed container. When ready to bake, thaw overnight in the fridge and let them rise before cooking. It’s an easy way to enjoy homemade pumpkin rolls on demand.
  • Pumpkin Donut Holes Recipe: 5 Sweet Ideas You’ll Love

    Pumpkin Donut Holes Recipe: 5 Sweet Ideas You’ll Love

    Pumpkin donut holes recipe — this little phrase takes me straight back to the day I discovered how magical a slow morning could smell.

    Hey, I’m Darleen Vamce, 34, born and raised in Salt Lake City. For the longest time, I thought donut holes were something you grabbed from a bakery box on your way to work.

    Then came “The Great Mealtime Struggle” — three hungry kids, a day job that didn’t quit at 5, and a kitchen that felt more like a battlefield than a sanctuary.

    One chilly October morning, I decided to fight back with pumpkin, cinnamon, and a dash of rebellion. I mixed, rolled, and baked while the baby gurgled in his high chair.

    By the time the first batch came out, the whole house smelled like fall wrapped in sugar. Now, these pumpkin donut holes aren’t just a treat — they’re my little edible proof that joy can fit in the palm of your hand.

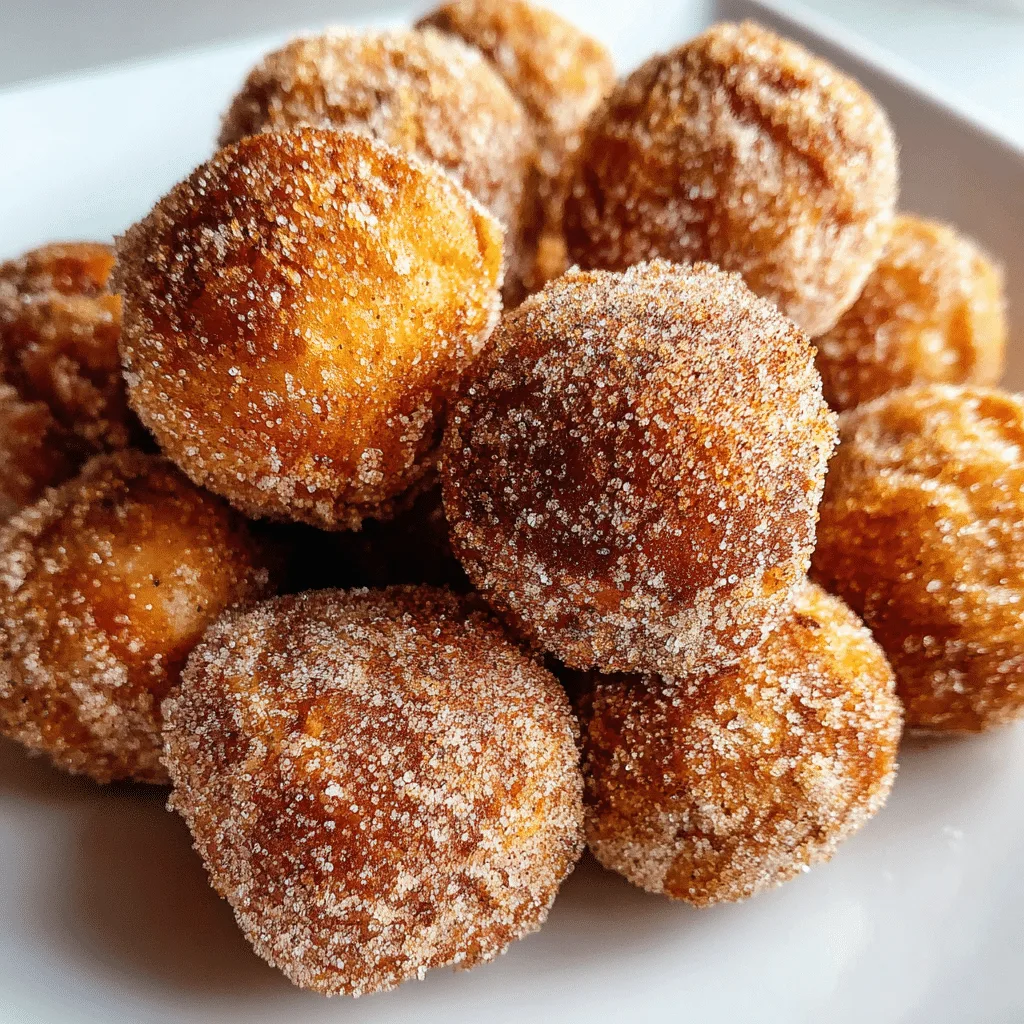
    Pumpkin donut holes recipe served on a rustic plate with cinnamon sugar.
    Table of Contents

    Recipe

    Cozy Beginnings with Pumpkin Donut Holes Recipe

    Fall mornings have a certain magic, and nothing captures it better than a pumpkin donut holes recipe that fills your kitchen with cinnamon, nutmeg, and warm sugar. These little bites are soft, sweet, and just the right size for savoring with coffee or sharing with family. They remind me of autumn weekends when the air turns crisp, leaves start to fall, and everyone craves comforting, homemade treats.

    Why Pumpkin Donut Holes Are a Must-Make

    Bite-sized and bursting with flavor, these treats are perfect whether you’re making easy pumpkin donut holes for a quick breakfast or baked pumpkin donut holes for a healthier twist. The pumpkin puree keeps them soft and moist, while pumpkin spice adds that unmistakable fall aroma. Even better, they’re simple enough for a weekday treat but special enough to serve at a holiday brunch.

    The Appeal of Mini Pumpkin Desserts

    There’s something about mini pumpkin desserts that feels indulgent yet guilt-free. They disappear fast at parties, especially when rolled in cinnamon sugar for that bakery-style finish. Plus, this homemade pumpkin donuts approach means you can skip the deep fryer and still get that tender crumb and cozy spice flavor.

    Ingredients That Make Pumpkin Donut Holes Shine

    Every great pumpkin donut holes recipe starts with the right ingredients. These aren’t just pantry staples — they’re the building blocks of a cozy, cinnamon-kissed morning.

    Essential Ingredients for Perfect Pumpkin Donut Holes

    To get that soft, melt-in-your-mouth texture, you’ll need a few essentials. Pumpkin puree is the heart of any good pumpkin donut holes recipe, adding rich flavor and moisture. It’s the same secret that keeps our 3-Ingredient Pumpkin Cookies irresistibly tender.

    Then there’s the pumpkin spice blend — a cozy mix of cinnamon, nutmeg, and ginger — that fills your kitchen with that unmistakable autumn aroma, much like the scent you’ll get from baking 10-Minute Greek Yogurt Pumpkin Muffins.

    You’ll also need all-purpose flour for structure, baking powder for that perfect rise, brown sugar for deeper sweetness, eggs for richness, milk for smooth batter, and melted butter for extra flavor and softness.

     Ingredients for pumpkin donut holes recipe arranged on a wooden table.

    Why These Ingredients Work Together

    The pumpkin puree isn’t just for color — it adds moisture, so you don’t have to rely on heavy oils like you would with fried donuts. The pumpkin spice blend infuses the batter, making every bite feel like a little taste of fall. Rolling them in cinnamon sugar after baking transforms them into cinnamon sugar pumpkin donuts that feel bakery-fresh but are completely homemade.

    Step-by-Step Guide to Baking Pumpkin Donut Holes

    Making a pumpkin donut holes recipe at home is easier than you might think. You don’t need a fryer, fancy equipment, or hours of prep — just a mixing bowl, a donut hole pan (or mini muffin tin), and a little autumn spirit.

    Preparing the Batter

    1. Preheat your oven to 350°F (175°C).
    2. In one bowl, whisk together flour, baking powder, salt, and pumpkin spice.
    3. In another, combine pumpkin puree, brown sugar, eggs, milk, and melted butter until smooth.
    4. Gradually mix the dry ingredients into the wet until a thick, slightly sticky batter forms.

    This simple process creates homemade pumpkin donuts that are tender and flavorful. The pumpkin spice fills the air, making it one of my favorite fall breakfast ideas.

    Baking and Finishing Touches

    Spoon the batter into the prepared pan, filling each cavity about three-quarters full. Bake for 10–12 minutes, or until a toothpick inserted into the center comes out clean. While still warm, roll each piece in cinnamon sugar to transform them into soft pumpkin donut holes with a bakery-style finish.

    Serve immediately for a cozy treat or store in an airtight container for up to two days. These also make perfect pumpkin breakfast treats when paired with coffee or cider.

    Serving and Storing Your Pumpkin Donut Holes Recipe

    A pumpkin donut holes recipe isn’t just about baking — it’s about creating moments worth remembering. Whether you serve them fresh from the oven or save them for the next day, these little bites bring fall flavor into every moment.

    Best Ways to Serve

    These baked pumpkin donut holes shine brightest when served warm. Arrange them on a platter alongside hot coffee, chai, or apple cider for a comforting fall breakfast spread. They also make charming additions to brunch buffets, especially if you pair them with other mini pumpkin desserts like pumpkin bread or mousse cups.

    For special mornings, dust them with powdered sugar for a festive look, or drizzle lightly with maple glaze. This extra touch turns your homemade pumpkin donuts into a bakery-worthy treat without the bakery price tag.

    Storage Tips for Freshness

    If you somehow have leftovers (which is rare in my house), store these soft pumpkin donut holes in an airtight container at room temperature for up to two days. For longer storage, freeze them in a single layer, then reheat gently in the oven. This way, your pumpkin breakfast treats will taste just as fresh as the day you baked them.

    No matter how you enjoy them, this pumpkin donut holes recipe will always be more than just a list of ingredients — it’s a warm slice of autumn, a sweet little ritual, and a reminder that the best treats are the ones we share.

    Conclusion – The Magic of a Pumpkin Donut Holes Recipe

    There’s something about a pumpkin donut holes recipe that feels like a little gift from fall itself. From the moment you mix the batter to the first warm bite, these soft pumpkin donut holes fill your home with cinnamon spice and sweet pumpkin aroma. They’re the perfect blend of comfort and simplicity — easy enough for a weekday treat, yet special enough for holiday mornings.

    This isn’t just baking. It’s slowing down long enough to roll dough, dust with sugar, and savor the joy in something homemade. With this pumpkin donut holes recipe, you’re not just making dessert — you’re creating memories that will stick around long after the last crumb is gone.

    So preheat that oven, grab your pumpkin puree, and let this cozy little tradition take root in your kitchen. Then share a batch with someone you love, because the best pumpkin donut holes recipe is the one you make and enjoy together.

    Try it this week and tag me in your photos on facebook — I can’t wait to see your sweet little bites of fall!

    FAQ – Pumpkin Donut Holes Recipe

    What makes this pumpkin donut holes recipe so good?

    This pumpkin donut holes recipe combines pumpkin puree, warm spices, and a light, baked texture for a treat that’s both cozy and easy to make. The cinnamon sugar coating gives these soft pumpkin donut holes that irresistible bakery-style finish.

    Can I bake pumpkin donut holes instead of frying?

    Yes! This pumpkin donut holes recipe is designed for baking, which means less oil but all the same delicious flavor. These baked pumpkin donut holes are perfect for anyone looking for a lighter take on homemade pumpkin donuts.

    Can I use fresh pumpkin in a pumpkin donut holes recipe?

    Absolutely. If you prefer fresh pumpkin, cook and puree it until smooth before using. Fresh pumpkin adds a rich flavor that works beautifully in mini pumpkin desserts like these pumpkin breakfast treats.

    How do I store pumpkin donut holes for maximum freshness?

    Keep your pumpkin donut holes recipe results in an airtight container at room temperature for up to two days. For longer storage, freeze your soft pumpkin donut holes and reheat gently before serving to bring back that just-baked taste.

    Can I make pumpkin donut holes ahead of time?

    Yes, you can prepare the batter for your pumpkin donut holes recipe the night before and refrigerate it. This makes it easy to bake fresh pumpkin breakfast treats in the morning without extra prep time.

  • Amazing 3-Ingredient Pumpkin Cookies To Try Now

    Amazing 3-Ingredient Pumpkin Cookies To Try Now

    Amazing 3-ingredient pumpkin cookies changed the way I bake forever. Hey there—I’m Darleen Vamce, a 34-year-old mom from Salt Lake City who once believed slow cookers and shortcuts were just for potlucks or last-minute meals. That myth shattered one chaotic autumn afternoon during what my family now calls “The Great Mealtime Struggle.”

    Three hungry kids. One crying baby. Zero time. I grabbed a box of spice cake mix, a can of pumpkin, and chocolate chips—tossed it all together, crossed my fingers, and hoped for something edible.

    What came out of the oven? Soft, gooey magic. And just like that, these cookies earned a permanent spot in our fall baking lineup.

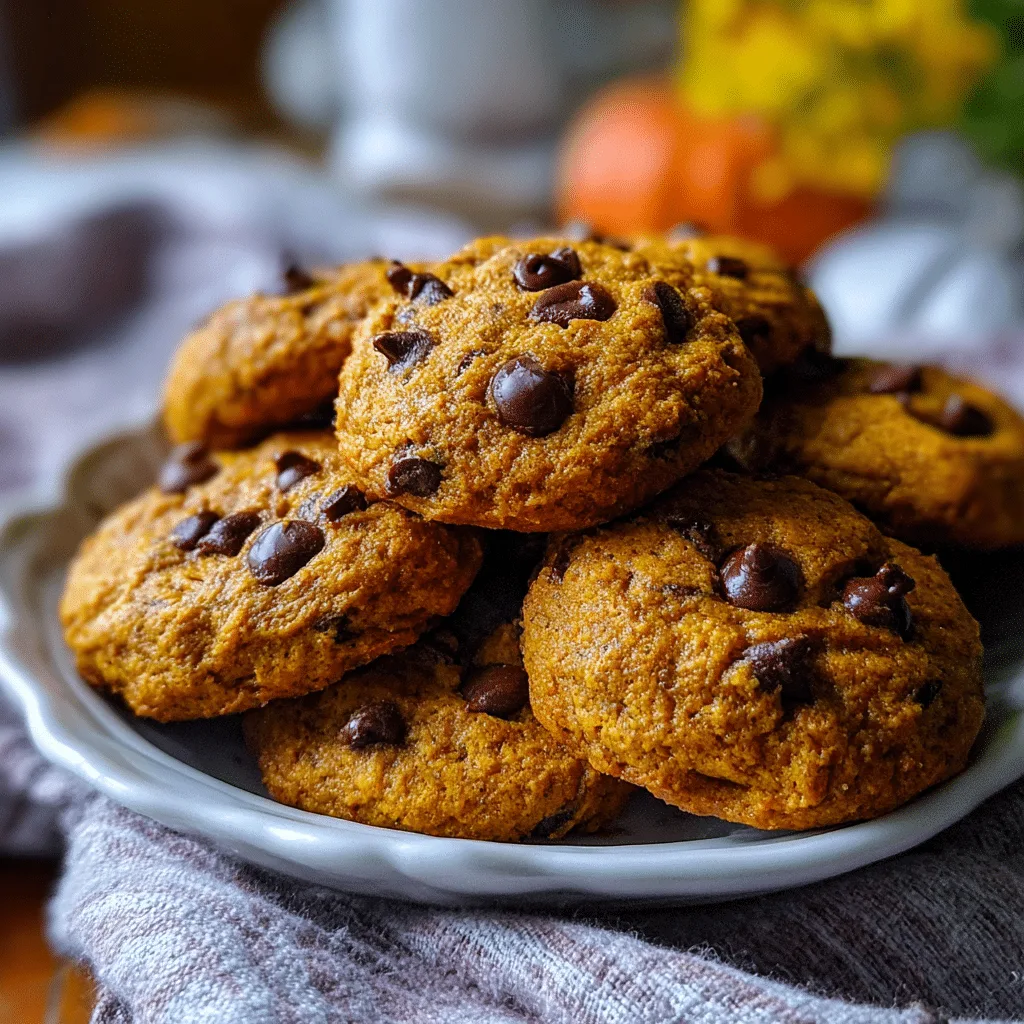
    Amazing 3-ingredient pumpkin cookies with chocolate chips
    Table of Contents

    Recipe

    Why These Amazing 3-Ingredient Pumpkin Cookies Are a Must-Try

    There’s something special about fall baking—the cozy smells, the golden spices, the warmth of the oven. But what if you could capture all that comfort without the fuss? That’s where these amazing 3-ingredient pumpkin cookies come in. Whether you’re juggling a busy weekday or hosting a last-minute gathering, this recipe delivers every single time.

    The beauty is in the simplicity: pumpkin puree, spice cake mix, and chocolate chips. That’s it. No eggs. No oil. Just three pantry-friendly ingredients that combine into soft, chewy, flavor-packed cookies in under 20 minutes.

    And don’t let the ease fool you. These aren’t “good for being easy” cookies. They’re just plain good. The kind that disappear before they’ve even cooled.

    If you’ve ever searched for easy pumpkin cookie recipes and ended up with dry, crumbly disappointments, you’re not alone. These are different. The pumpkin puree keeps the texture soft and moist, while the cake mix adds just enough spice and structure.

    The best part? You can toss in your favorite extras—white chocolate chips, chopped nuts, or even a swirl of cream cheese frosting if you’re feeling fancy. But honestly, they’re perfect as-is. Sweet, simple, and the definition of quick pumpkin desserts.

    Whether you’re new to baking or just need something beginner-friendly that still feels homemade, this is the kind of treat that makes you look like you planned it—even when you didn’t.

    What Makes These Pumpkin Cookies Perfect for Fall

    Fall is when our kitchen turns into a scent-sational wonderland. Cinnamon, nutmeg, and warm vanilla fill the air, and these amazing 3-ingredient pumpkin cookies slide right into that autumn vibe. They’re basically the cookie version of your coziest sweater and a warm mug of cider.

    These cookies are more than just quick—they’re seasonal stars. With just a can of pumpkin and a box of spice cake mix, you’re already halfway to making the best fall cookie recipe you’ll come across. No mixer, no chill time, no stress. Just mix, scoop, and bake.

    Even better? They’re naturally egg-free and oil-free. If you’ve been searching for no egg pumpkin cookies that actually taste amazing, this is it.

    The Texture: Soft, Chewy, and Just the Right Amount of Melt

    The texture is what really sets these cookies apart. They’re soft pumpkin cookies with a cakey bite—almost like a muffin top, but with melty chocolate chips woven in. They stay moist for days (if they last that long).

    Even picky eaters—yes, including toddlers—can’t get enough. And if you want to impress someone with minimal effort, this is your go-to.

    Bake them for school events, Halloween parties, or just a Tuesday when you’re craving something sweet but don’t want to wreck the kitchen.

    How to Make Amazing 3-Ingredient Pumpkin Cookies in Minutes

    Let’s talk prep. These amazing 3-ingredient pumpkin cookies are so simple, you can mix them with one hand while holding a toddler in the other—ask me how I know.

    All you need is one bowl, one spoon, and three simple ingredients:

    • 1 box of spice cake mix
    • 1 can of pumpkin puree
    • 1 cup of chocolate chips

    That’s it. No melting butter, no separating eggs, no need for fancy mixers. Just scoop out heaping spoonfuls onto a baking sheet, pop them in the oven, and in about 12–14 minutes you’ll have warm, canned pumpkin cookies that taste like you’ve been working all day.

    Want even more effortless ideas? I often prep these alongside my 10-minute Greek yogurt pumpkin muffins for a double batch of fall goodness.

    Freshly baked 3-ingredient pumpkin cookies
    Soft pumpkin cookies ready in just 14 minutes

    This base dough is a blank canvas. Try white chocolate chips, chopped walnuts, or even swirl in some peanut butter. It’s also a great way to use up that extra can of pumpkin left over from making slow cooker pumpkin pie oatmeal.

    That’s the joy of 3 ingredient cookie ideas—you get to be creative without complicating the recipe. Whether you’re prepping a treat for guests or just looking for fast quick pumpkin desserts, these cookies always deliver.

    Tips to Make the Best 3-Ingredient Pumpkin Cookies Ever

    The beauty of these amazing 3-ingredient pumpkin cookies is that they’re nearly impossible to mess up—but I’ve learned a few tricks to make them even better. After making dozens of batches (and eating most of them), I’ve fine-tuned the little details that take these cookies from great to unforgettable.

    First, don’t overbake. These cookies don’t brown much, so watch the clock instead of the color. Pull them out when they look just barely set. Let them rest on the baking sheet for a few minutes before moving to a rack—they’ll finish cooking without drying out.

    Want extra flavor? Add a pinch of pumpkin pie spice or cinnamon. Even though the spice cake mix already brings warmth, a little extra spice makes a big difference.

    Who These Cookies Are Perfect For

    These amazing 3-ingredient pumpkin cookies are a total gift for new bakers. They fall firmly under the category of beginner cookie recipes—meaning you don’t need skills, fancy tools, or even a lot of confidence. Just stir, scoop, and smile.

    They’re also perfect if you’re short on time but still want to serve something seasonal and sweet. Whether you’re prepping the best cookies for fall, or you need something fast for an office party, this recipe saves the day.

    No matter who you’re baking for—your family, your coworkers, or just your future snack-craving self—these cookies check every box: fast, soft, delicious, and satisfying. Definitely one of the easiest and most loved quick pumpkin desserts I’ve ever made.

    Final Thoughts on These Amazing 3-Ingredient Pumpkin Cookies

    By now, you’ve seen just how simple—and how magical—these amazing 3-ingredient pumpkin cookies really are. They’re the kind of recipe that rescues busy weekdays, satisfies last-minute cravings, and fills your kitchen with the scent of fall.

    Whether you’re brand new to baking or just love a good shortcut, these cookies prove you don’t need a long ingredient list to make something memorable. They’re soft, sweet, filled with melty chocolate, and endlessly versatile. It’s no wonder they’ve become one of my go-to quick pumpkin desserts every year.

    ????‍???? Your Turn!

    Try these cookies at home and tag me @recipesdarleen on Instagram—I’d love to see your batch! Share them with friends, neighbors, or just keep them all to yourself (I won’t tell).

    Frequently Asked Questions About Amazing 3-Ingredient Pumpkin Cookies

    Are these really just three ingredients?

    Yes! These amazing 3-ingredient pumpkin cookies only need canned pumpkin, spice cake mix, and chocolate chips. That’s it. No oil, no eggs, no butter—just mix and bake. It’s one of the simplest beginner cookie recipes you’ll ever try.

    Can I use yellow or vanilla cake mix instead?

    You can, but the flavor won’t be quite the same. Spice cake mix brings that signature cozy fall flavor. If you only have yellow cake mix, add a teaspoon of pumpkin pie spice to mimic the flavor in these quick pumpkin desserts.

    How should I store these cookies?

    Store these amazing 3-ingredient pumpkin cookies in an airtight container at room temperature for up to 3 days. They stay soft thanks to the pumpkin! For longer storage, pop them in the freezer for up to 2 months.

    Can I make them gluten-free?

    Absolutely! Just use a gluten-free spice cake mix. Everything else is naturally gluten-free. You’ll still get the soft, chewy magic that makes these some of the best cookies for fall—no one will notice the difference.
  • 6 Amazing Ways To Make Slow Cooker Pumpkin Pie Oatmeal Better

    6 Amazing Ways To Make Slow Cooker Pumpkin Pie Oatmeal Better

    Pumpkin Pie Oatmeal isn’t just breakfast in my house—it’s a hug in a bowl, the kind that makes chilly mornings feel a little less rushed and a lot more comforting.

    Hey! I’m Darleen Vamce—34, Salt Lake City native, and a woman who used to think slow cookers were just for potlucks and overly mushy stews. I was wrong. Very wrong. Now, this humble little machine is basically my co-chef, my weekday dinner savior, and, as I learned one autumn morning, the secret to turning simple oats into a dessert-like breakfast that still feels wholesome.

    It all started during what I call “The Great Mealtime Struggle”: three hungry kids, a job that didn’t quit at 5, and a kitchen that seemed to mock me every evening. One October morning, with the leaves blazing gold outside, I tossed oats, pumpkin puree, spices, and a splash of maple syrup into the slow cooker—baby balanced on my hip, coffee cooling on the counter. Hours later, the smell hit me first: warm cinnamon, nutmeg, and that creamy pumpkin goodness. My kids swore I’d made pie for breakfast. That’s the moment I realized this wasn’t just oatmeal—it was magic.

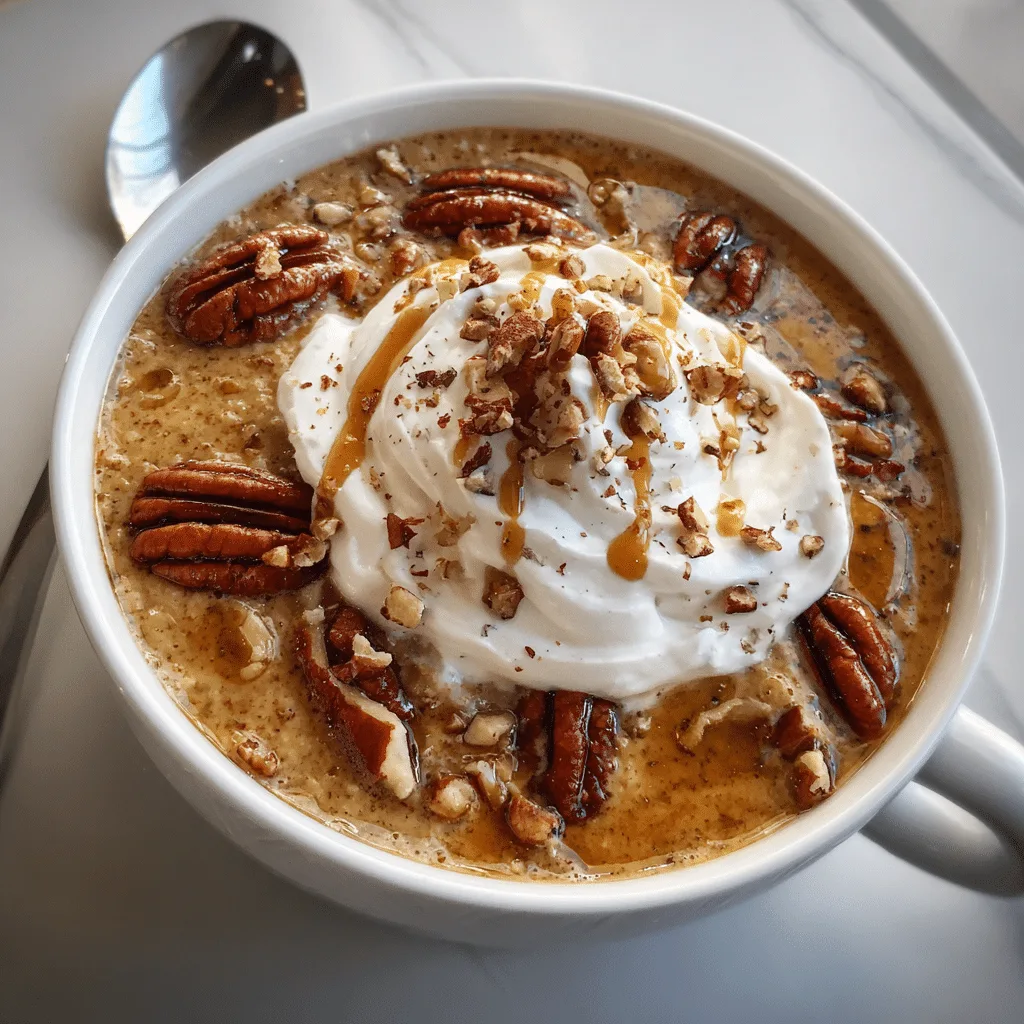
    Slow cooker pumpkin pie oatmeal in a rustic bowl topped with pecans
    Table of Contents

    Recipe

    Unlocking the Flavor Potential of Pumpkin Pie Oatmeal

    When it comes to comfort breakfasts, Pumpkin Pie Oatmeal has an edge—it blends the warmth of autumn spices with the creamy texture of slow-cooked oats. But even the coziest recipe can be elevated. With a few intentional tweaks, you can turn this already delightful dish into a breakfast that makes you linger at the table just a little longer.

    The key is thinking beyond “just follow the recipe.” Instead, imagine layering flavors, textures, and aromas so that every spoonful feels like the best bite. Here’s how to start.

    Choose the Right Oats for a Creamier Texture

    For a truly indulgent creamy pumpkin spice oatmeal, start with steel-cut oats. They hold their shape during the long cooking process in a slow cooker and absorb the pumpkin puree and maple syrup slowly, creating a rich, velvety consistency. If you prefer something softer, rolled oats will deliver a comforting, porridge-like texture that still feels satisfying.

    Elevate Your Spice Game

    While cinnamon and nutmeg are classic for spiced pumpkin breakfast porridge, adding a pinch of ground ginger or cardamom can bring out deeper, more complex flavors. Toast your spices for a minute before adding them to the pot—this simple step unlocks their natural oils and intensifies their aroma.

    Adding Layers of Flavor and Texture

    The beauty of Pumpkin Pie Oatmeal is that it’s a canvas for creativity. Once you’ve got your base simmering away in the slow cooker, you can start thinking about flavor pairings and textures that turn each bowl into something special. These little enhancements can transform your breakfast from a comforting classic into something guests will talk about long after the morning meal.

    Sweeteners That Make a Difference

    Maple syrup brings a warm richness, while brown sugar adds molasses depth. For a lighter healthy pumpkin oatmeal breakfast, try honey or coconut sugar. For a full pumpkin spread, pair your oatmeal with 10-Minute Greek Yogurt Pumpkin Muffins.

    Toppings That Add Crunch

    Toasted pecans, walnuts, or pumpkin seeds add the perfect contrast to creamy pumpkin spice oatmeal. A sprinkle of granola or crushed ginger snaps turns it into a treat. And for more pumpkin dessert ideas, check out 5 Pumpkin Pie Crisp Recipes.

    Boosting Aroma and Presentation

    A bowl of Pumpkin Pie Oatmeal should delight your senses before the first bite. The slow cooker does much of the work, but a few thoughtful touches can make the experience unforgettable.

    Infuse with Irresistible Aromas

    While the slow cooker works its magic, add a cinnamon stick, a splash of vanilla extract, or even a bit of orange zest to the pot. These small additions transform a simple spiced pumpkin breakfast porridge into something that feels bakery-fresh. The aroma will fill your kitchen and create that cozy fall atmosphere before the oatmeal is even served.

    Make It Beautiful in the Bowl

    Pumpkin pie oatmeal topped with whipped cream and pecans
    Add your favorite toppings to pumpkin pie oatmeal for extra flavor.

    We eat with our eyes first, so take a moment to garnish your crockpot pumpkin pie oatmeal. A dollop of whipped cream or Greek yogurt, a light dusting of cinnamon, and a drizzle of maple syrup make it look—and feel—like a treat. For a healthier option, top with sliced bananas or fresh berries for color and freshness.

    Make-Ahead Magic and Easy Morning Wins

    One of the best things about Pumpkin Pie Oatmeal is how it fits into busy mornings without sacrificing flavor. By prepping ahead, you can enjoy a steaming, fragrant bowl any day of the week.

    Make-Ahead Pumpkin Oatmeal for Stress-Free Breakfasts

    Prepare your Pumpkin Pie Oatmeal the night before by adding oats, pumpkin puree, milk, spices, and your favorite sweetener to the slow cooker. Set it to low, and by morning, you’ll wake up to the rich scent of creamy pumpkin spice oatmeal filling your home. This method not only saves time but also allows the flavors to meld, creating an even more indulgent bowl.

    Cooked pumpkin pie oatmeal in slow cooker with cinnamon stick

    Double the Batch for Easy Reheats

    Cooking a larger amount of Pumpkin Pie Oatmeal means you can portion it into containers for the week. Simply reheat with a splash of milk, and it’s as cozy and satisfying as the first day. This works beautifully for healthy pumpkin oatmeal breakfast meal-prepping, especially when topped with nuts, fruit, or a swirl of maple syrup.

    With a little planning, your Pumpkin Pie Oatmeal becomes more than a recipe—it’s a fall morning tradition that’s ready whenever you are.

    Conclusion: Your New Favorite Cozy Breakfast

    With a slow cooker, a few pantry staples, and a touch of creativity, Pumpkin Pie Oatmeal becomes more than just a seasonal recipe—it turns into a morning ritual that brings comfort and joy. From enhancing flavors with warm spices to adding crunch with nuts and seeds, each of these six ideas makes your oatmeal richer, creamier, and more satisfying.

    So, the next time you crave something warm and spiced, let Pumpkin Pie Oatmeal be your go-to. Prep it the night before, wake up to its irresistible aroma, and savor every spoonful. If you try these tips, share your delicious bowl on Pinterest and tag me—I’d love to see how you make your Pumpkin Pie Oatmeal better than ever.

    FAQ: Pumpkin Pie Oatmeal

    How do I make Pumpkin Pie Oatmeal in a slow cooker?

    To make Pumpkin Pie Oatmeal in a slow cooker, combine oats, pumpkin puree, milk, water, spices like cinnamon and nutmeg, and your preferred sweetener. Cook on low for 6–8 hours, or until the oats are tender and creamy. This method creates a crockpot pumpkin pie oatmeal that’s rich in flavor and perfect for cozy mornings.

    Can I make Pumpkin Pie Oatmeal ahead of time?

    Yes! Pumpkin Pie Oatmeal is ideal for make-ahead breakfasts. Store cooled portions in airtight containers in the fridge for up to five days. Reheat with a splash of milk for a creamy pumpkin spice oatmeal texture.

    What toppings go well with Pumpkin Pie Oatmeal?

    Great toppings for Pumpkin Pie Oatmeal include toasted pecans, walnuts, pumpkin seeds, granola, fresh fruit, or a drizzle of maple syrup. For a more indulgent treat, add whipped cream or a spoonful of Greek yogurt.

    Is Pumpkin Pie Oatmeal healthy?

    Pumpkin Pie Oatmeal can be a healthy breakfast, especially when made with whole oats, pure pumpkin puree, and natural sweeteners. It’s full of fiber, vitamin A, and warming spices, making it a nutritious choice for a healthy pumpkin oatmeal breakfast.
  • 7 Amazing Ways To Make Baked Pumpkin Gnocchi

    7 Amazing Ways To Make Baked Pumpkin Gnocchi

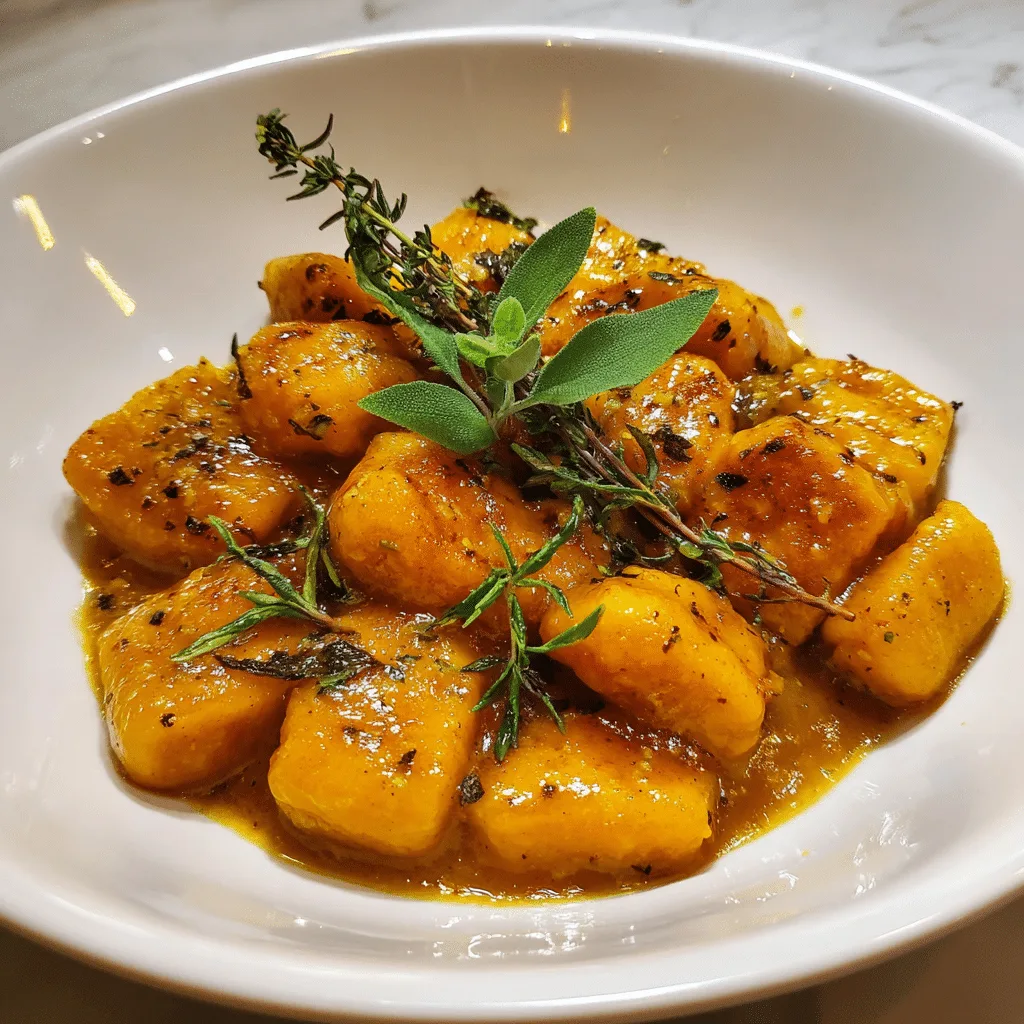
    Baked pumpkin gnocchi wasn’t always on my weeknight dinner radar. In fact, a few years back, I thought gnocchi belonged only in fancy restaurants and that pumpkin was strictly for pies. Then came “The Great Mealtime Struggle”—three hungry kids, a day job that didn’t end at five, and a kitchen that mocked me with its emptiness. One chilly October morning, I spotted a can of pumpkin, a bag of potato gnocchi, and my trusty slow cooker’s cousin—the oven. A little cheese, a sprinkle of sage, and one bubbly, golden bake later… my family was hooked. Now it’s my go-to fall comfort food magic.

    Baked pumpkin gnocchi recipe with golden cheese and sage.
    Table of Contents

    Recipe

    The Magic of Baked Pumpkin Gnocchi

    Why Baked Pumpkin Gnocchi is a Fall Favorite

    Why Baked Pumpkin Gnocchi is a Fall Favorite

    There’s something special about the way baked pumpkin gnocchi transforms an ordinary dinner into cozy comfort on a plate. The soft potato dumplings soak up the creamy pumpkin sauce, turning every bite into a warm hug. Unlike plain pasta, baked gnocchi holds up beautifully in the oven, creating that irresistible blend of tender centers and slightly crisp edges. Pair that with earthy sage, melted cheese, and a hint of nutmeg, and you’ve got a dish that rivals any restaurant’s fall pasta recipes. For another seasonal twist, you might love my 10-Minute Greek Yogurt Pumpkin Muffins as a sweet breakfast companion to this savory dinner.

    Choosing the Best Ingredients for Flavor

    The secret to an unforgettable baked pumpkin gnocchi recipe starts with quality ingredients. Go for fresh or homemade gnocchi when possible, but even packaged potato gnocchi can work wonders. Use pure pumpkin puree—not pumpkin pie filling—for that naturally sweet, earthy flavor. A rich sauce comes from combining cream, vegetable broth, and a touch of Parmesan. For a vegetarian pumpkin gnocchi that feels hearty, layer in spinach or roasted mushrooms. If you’re craving even more pumpkin-based comfort, my Pumpkin Coconut Curry Chickpeas are a quick stovetop option that’s just as cozy.

    Crafting the Perfect Pumpkin Sauce

    Building Creamy, Rich Layers

    The heart of any baked pumpkin gnocchi lies in its sauce. Start by sautéing garlic and shallots in butter until fragrant. Stir in pumpkin puree for that naturally sweet depth, then whisk in cream and a splash of vegetable broth. This creates a silky base that clings to every piece of gnocchi. Season with salt, pepper, and nutmeg for warmth. For a hint of brightness, add a squeeze of lemon juice—it balances the richness without overpowering the savory pumpkin recipes you love.

    Customizing for Every Craving

    One of the joys of a pumpkin pasta bake is how adaptable it is. If you’re after a vegetarian pumpkin gnocchi with more texture, add roasted mushrooms or caramelized onions. Want a cheesy pumpkin gnocchi bake? Fold in shredded mozzarella and top with Parmesan before sliding it into the oven. For a lighter touch, swap heavy cream for half-and-half or even coconut milk, giving you an easy pumpkin dinner recipe that still feels indulgent. No matter your choice, the sauce should coat the gnocchi generously before baking to achieve that golden, bubbling perfection.

    Baking Techniques for Perfect Results

    Getting That Golden, Cheesy Finish

    When it comes to baked pumpkin gnocchi, the magic happens in the oven. Preheat to 375°F so the heat is steady and even. Spread the gnocchi in a lightly buttered baking dish, making sure every piece is coated in sauce. Sprinkle a mix of mozzarella and Parmesan over the top for that irresistible cheesy pumpkin gnocchi bake effect. Bake uncovered for 20–25 minutes, until the edges are bubbly and the top is a beautiful golden brown. This method works equally well for roasted pumpkin gnocchi variations, giving you a deeper, caramelized flavor.

    Serving Like a Pro

    Presentation makes this dish feel restaurant-worthy. Serve your pumpkin pasta bake straight from the oven with fresh sage leaves for garnish. Pair it with a crisp green salad to balance the richness, or crusty bread to soak up every drop of sauce. For a vegetarian pumpkin gnocchi dinner party, portion into individual ramekins before baking—guests love having their own mini servings. Whether it’s a weeknight easy pumpkin dinner recipe or a holiday side dish, this baked gnocchi is sure to impress.

    Storing, Reheating, and Creative Variations

    Keeping Leftovers Delicious

    Baked pumpkin gnocchi stores beautifully, making it perfect for meal prep. Once cooled, transfer leftovers to an airtight container and refrigerate for up to three days. To reheat, cover with foil and warm in a 350°F oven until hot, which helps preserve the creamy texture of your cheesy pumpkin gnocchi bake. If you’re short on time, the microwave works too—just heat in short intervals and stir to keep the sauce smooth. This dish even freezes well; assemble without baking, wrap tightly, and freeze for up to a month for a ready-to-bake pumpkin pasta bake.

    Flavor Twists to Try

    Once you master the classic, experimenting is half the fun. For a smoky note, add crisp bacon or pancetta before baking. To make a vegetarian pumpkin gnocchi with extra greens, stir in kale or spinach. Love bold flavors? A sprinkle of crumbled blue cheese over the top before baking turns this into a gourmet roasted pumpkin gnocchi experience. You can even swap mozzarella for sharp cheddar in your pumpkin pasta bake for a tangy twist. Each variation keeps the comforting essence while letting you customize your easy pumpkin dinner recipe to suit any craving.

    Serving of baked pumpkin gnocchi with sage and salad.

    When You Want Comfort in Minutes

    Some nights, even baked pumpkin gnocchi feels like too much effort. That’s when I turn to my microwave for a little magic. If you love pumpkin flavors but only have five minutes, try this Pumpkin Mac and Cheese in a Mug from MugMeal Magic. It’s creamy, comforting, and brings those same cozy fall vibes—just in a fraction of the time. I like to make it as a quick lunch, or even as a side while my gnocchi is baking in the oven. Two comfort foods, one meal… that’s my idea of perfect.

    Conclusion

    Baked pumpkin gnocchi has become more than just a recipe in my kitchen—it’s a little piece of fall magic I can pull out anytime. From the first whiff of bubbling cheese to that soft, pumpkin-kissed bite, it’s comfort food that never fails to make my family linger a little longer at the table. Whether you keep it classic, make it a cheesy pumpkin gnocchi bake, or experiment with roasted pumpkin gnocchi variations, the joy is in making it your own.

    So, here’s my challenge: pick one of these seven amazing ways, try it at home this week, and share your creation with me. Tag me in your photos in facebook or Social media—I can’t wait to see how your version of this pumpkin pasta bake turns out.

    Frequently Asked Questions for Baked Pumpkin Gnocchi

    Can I make baked pumpkin gnocchi ahead of time?

    Yes. You can assemble your pumpkin pasta bake up to 24 hours in advance, store it covered in the refrigerator, and bake just before serving.

    Can I use homemade gnocchi instead of store-bought?

    Absolutely. Homemade gnocchi makes your baked pumpkin gnocchi extra tender and flavorful, but packaged potato gnocchi works just as well for convenience.

    What cheeses work best for a cheesy pumpkin gnocchi bake?

    Mozzarella and Parmesan are classics, but you can mix in Fontina, Gruyère, or even cheddar for a unique twist.

    Is baked pumpkin gnocchi vegetarian-friendly?

    Yes, as long as you use vegetable broth and avoid meat-based add-ins. You can also enhance vegetarian pumpkin gnocchi with roasted vegetables or fresh greens.

  • 10-Minute Greek Yogurt Pumpkin Muffins You’ll Love

    10-Minute Greek Yogurt Pumpkin Muffins You’ll Love

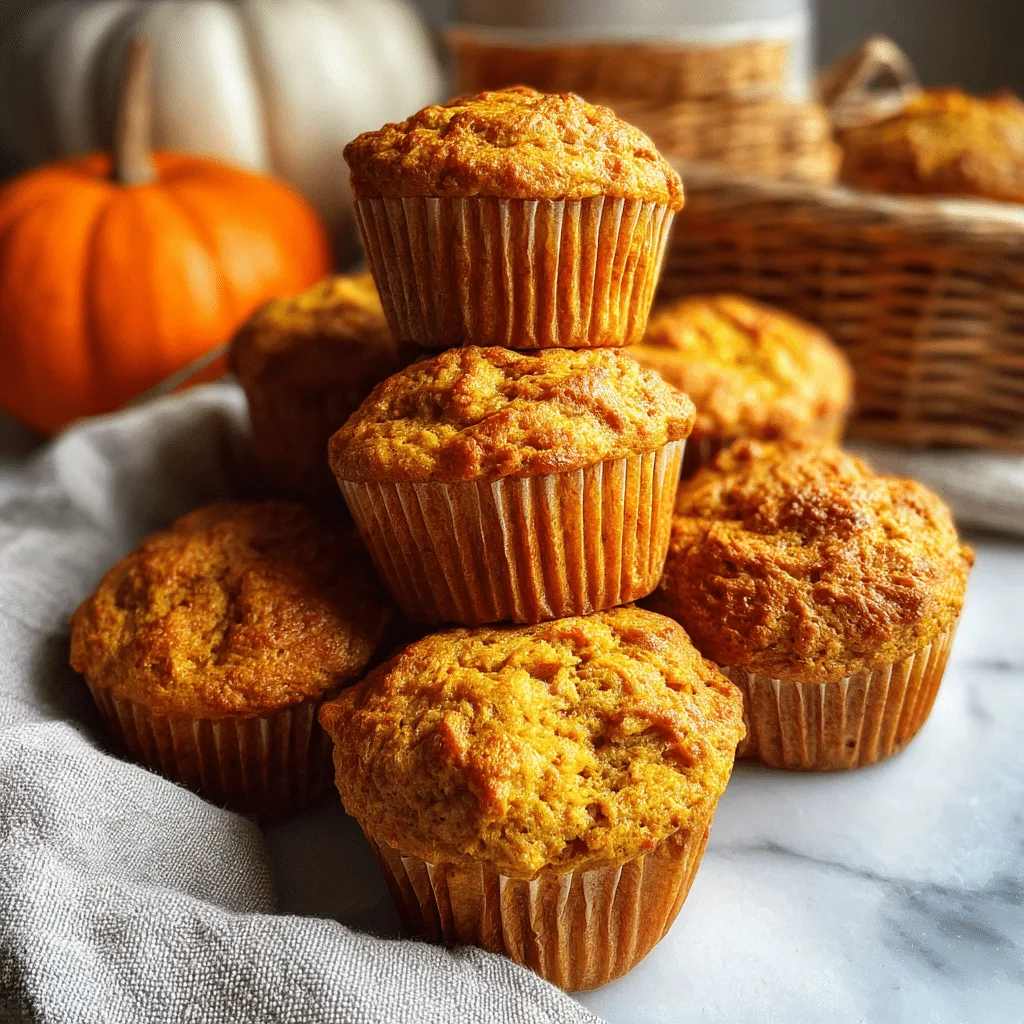
    10-Minute Greek Yogurt Pumpkin Muffins aren’t just another quick recipe—they’re the reason my mornings don’t end in cereal-for-dinner chaos. Hey! I’m Darleen Vamce—34, Salt Lake City native, and a woman who used to think slow cookers were my only “easy meal” trick. I was wrong. One crisp fall morning, with a baby on my hip and three hungry kids circling like sharks, I whisked together Greek yogurt, pumpkin puree, and warm spices. By the time the oven timer beeped, the house smelled like a coffee shop in October, and my crew thought I’d worked some kind of magic. Truth? It took 10 minutes to mix. Now, these muffins are my secret weapon for cozy mornings without the chaos.

    10-Minute Greek Yogurt Pumpkin Muffins fresh from oven
    Table of Contents

    Recipe

    Why These 10-Minute Greek Yogurt Pumpkin Muffins Work

    If you love a muffin that’s moist, fluffy, and just the right amount of sweet, these 10-Minute Greek Yogurt Pumpkin Muffins will win you over. They’re quick enough for busy mornings yet cozy enough to feel like a fall treat. The Greek yogurt keeps them light and tender, while the pumpkin puree adds that rich autumn flavor we all crave. With cinnamon, nutmeg, and a hint of pumpkin spice, each bite tastes like a hug in muffin form. Plus, they’re made in one bowl—less mess, more joy.

    A Healthy Twist on a Fall Favorite

    Unlike many traditional pumpkin muffin recipes loaded with oil, these are naturally lighter thanks to the Greek yogurt swap. That simple change boosts the protein, making them a satisfying grab-and-go breakfast or snack. Pair that with whole wheat flour and just enough sweetness, and you’ve got a treat that feels indulgent but still fits into a balanced lifestyle. Whether you’re looking for healthy pumpkin muffins, a quick pumpkin muffin recipe, or the perfect low-fat pumpkin muffins for your family, this one checks all the boxes.

    How to Make 10-Minute Greek Yogurt Pumpkin Muffins

    The beauty of these muffins is that you don’t need fancy equipment—just a mixing bowl, a whisk, and a muffin tin. In 10 minutes, the batter is ready for the oven, which means you can have warm, fluffy pumpkin muffins on the table in less than half an hour. Start by whisking together Greek yogurt, pumpkin puree, eggs, and a splash of vanilla. Then fold in the dry ingredients—whole wheat flour, baking powder, pumpkin spice, and a pinch of salt—just until combined.

    Quick Baking Tips for Perfect Results

    For the best texture, avoid overmixing the batter. Overworking it can make muffins dense instead of light and tender. Use a cookie scoop to portion the batter evenly so every muffin bakes at the same pace. If you like extra sweetness, sprinkle a little cinnamon sugar on top before baking. And here’s a bonus tip: these muffins freeze beautifully, making them an easy breakfast muffin recipe you can prep ahead. Just reheat in the microwave for a fresh-from-the-oven feel any morning of the week.

    Fun Variations for 10-Minute Greek Yogurt Pumpkin Muffins

    One of the best things about 10-Minute Greek Yogurt Pumpkin Muffins is how easy they are to customize. If you’re in the mood for something extra cozy, fold in a handful of dark chocolate chips for a dessert-style treat. For a bit of crunch, sprinkle chopped pecans or walnuts on top before baking. You can also swap half the whole wheat flour for oat flour to create a slightly denser, heartier muffin that pairs beautifully with your morning coffee.

    Seasonal Flavor Twists

    Come holiday season, a pinch of ground ginger and cloves can turn these into classic pumpkin spice muffins with yogurt. Or, pair a warm muffin with a spoonful of homemade pumpkin butter for an extra cozy treat — I’ve got 5 fantastic ways to make pumpkin butter in the crockpot you’ll love. And if you can’t get enough pumpkin desserts, these 5 pumpkin pie crisp recipes are a must-try.

    Serving Ideas for 10-Minute Greek Yogurt Pumpkin Muffins

    Fresh out of the oven, 10-Minute Greek Yogurt Pumpkin Muffins are perfect on their own, but they’re even better with a pat of butter or a drizzle of honey. They make a cozy breakfast alongside a hot cup of coffee or tea, and they’re a hit tucked into lunchboxes for a mid-morning treat. For a weekend brunch, serve them with scrambled eggs and fresh fruit for a balanced spread that feels special but comes together in minutes.

    Serving Greek yogurt pumpkin muffins with coffee
    Warm muffins served with coffee for the perfect fall breakfast.

    Storing and Freezing Your Muffins

    These fluffy pumpkin muffins stay moist for up to three days when stored in an airtight container at room temperature. For longer storage, freeze them in a single layer on a baking sheet, then transfer to a freezer-safe bag. This way, they won’t stick together, and you can grab just what you need. To reheat, pop a muffin in the microwave for about 20 seconds or warm it in the oven at a low temperature. Whether you make a batch for the week or keep some frozen for quick snacks, this easy breakfast muffin recipe will be ready whenever you need it.

    Make-Ahead & Storage Hacks for 10-Minute Greek Yogurt Pumpkin Muffins

    One reason I adore these 10-Minute Greek Yogurt Pumpkin Muffins is how well they work for meal prep. Bake a double batch on Sunday, and you’ve got breakfast covered all week. Store them in an airtight container at room temperature for up to three days, or keep them in the fridge if you prefer a slightly denser, chilled muffin.

    Filling muffin liners with pumpkin muffin batter

    For long-term storage, wrap each muffin individually in plastic wrap and place them in a freezer-safe bag. This method keeps freezer burn away and locks in that fresh-baked taste. When you’re ready to enjoy one, just microwave it for 20 seconds or warm it in a toaster oven. It’s an easy breakfast muffin recipe that’s always ready when life gets busy.

    Conclusion

    10-Minute Greek Yogurt Pumpkin Muffins prove that you don’t need hours in the kitchen to bake something warm, cozy, and absolutely delicious. From busy school mornings to lazy fall weekends, this recipe delivers on flavor, texture, and simplicity every single time. The Greek yogurt keeps them moist, the pumpkin adds rich seasonal flavor, and the one-bowl method makes cleanup a breeze.

    So, preheat your oven, grab your mixing bowl, and let these muffins fill your home with that irresistible autumn aroma. When you bake them, tag me on Facebook and social media—I’d love to see your batch and hear how they turned out!

    FAQ – 10-Minute Greek Yogurt Pumpkin Muffins

    1. Can I make these muffins gluten-free?

    Yes! Simply swap the whole wheat flour for a 1:1 gluten-free baking blend. The Greek yogurt and pumpkin puree will still keep the muffins moist and tender.

    2. Can I use plain yogurt instead of Greek yogurt?

    You can, but Greek yogurt is thicker and adds more protein, which helps the muffins hold their shape and stay fluffy. If you use plain yogurt, reduce the liquid slightly.

    3. How do I keep my muffins from being dense?

    Avoid overmixing the batter. Stir just until the dry ingredients are combined—this helps keep your fluffy pumpkin muffins light and airy.

    4. Can I make these muffins without added sugar?

    Yes, replace the sugar with mashed ripe bananas or unsweetened applesauce. You’ll still get naturally sweet, healthy pumpkin muffins that are perfect for breakfast.