Category: Dinner

Easy, tasty dinner ideas for busy nights. Simple recipes, quick prep, and family-friendly meals you’ll make again and again.

  • Whipped Chocolate Chip Cookie Dough Dip: 7-Minute Sensation

    Whipped Chocolate Chip Cookie Dough Dip: 7-Minute Sensation

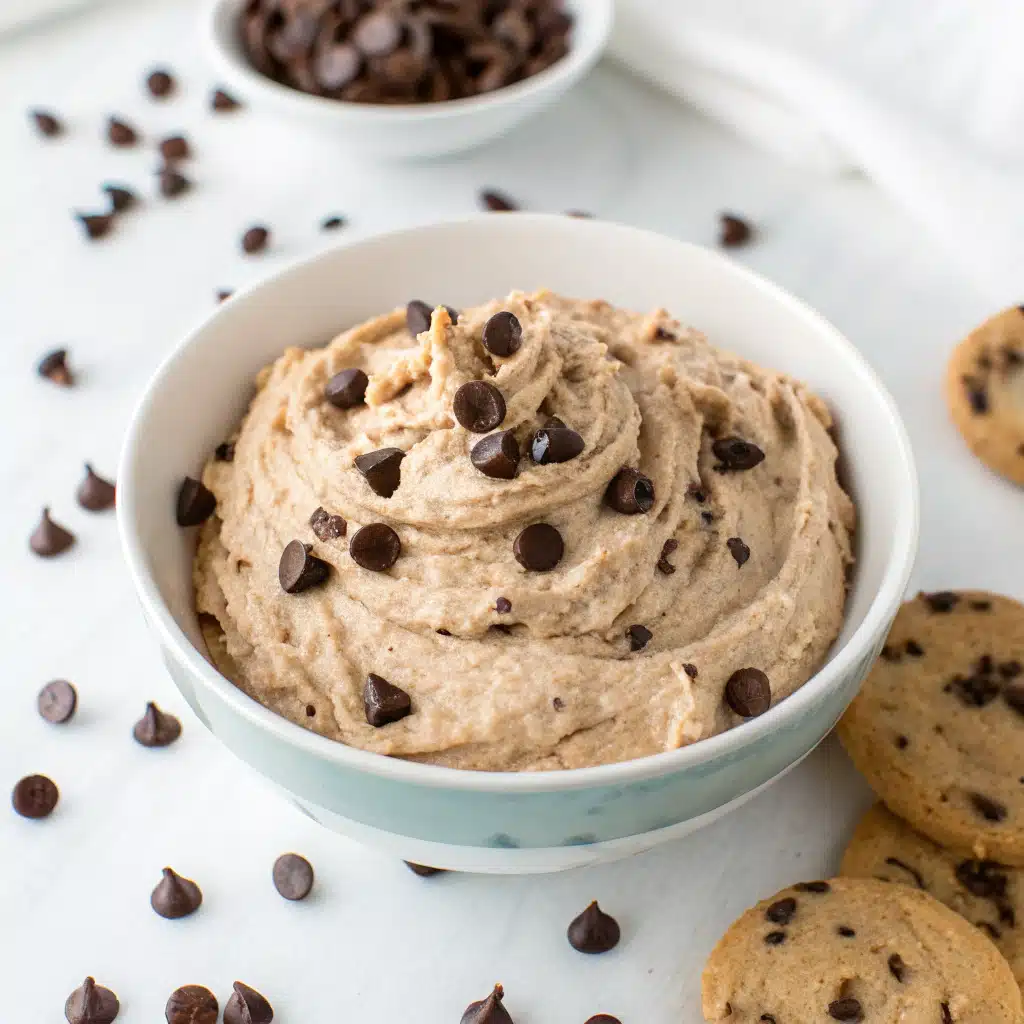
    Whipped Chocolate Chip Cookie Dough Dip is my secret party trick when the doorbell rings early and my mixer cord is tangled in a drawer. The day I perfected this, my twins were “helping” by power-tasting the chocolate chips and the dog stole the graham crackers. Still, Whipped Chocolate Chip Cookie Dough Dip saved the snack board. It’s lush, fluffy, safe-to-eat cookie dough you can scoop with fruit, pretzels, or spoons (no judgment). I’m sharing the exact method, the fastest swaps, and foolproof tips so you can make it in minutes—even in real-life kitchen chaos.
    Chocolate Chip Cookie Dough Dip

    Recipe

    Structured JSON-LD Schema

    What makes this whipped cookie dough dip irresistible

    Whipped Chocolate Chip Cookie Dough Dip hits every joy button: creamy, light, nostalgic, and ready fast. It blends tangy cream cheese with brown sugar and vanilla for that classic cookie dough flavor, then whips in airy cream so the texture feels like clouds. Mini chocolate chips mean perfect bite distribution. Because it’s a no-bake dessert dip, you get edible cookie dough vibes with zero oven time. The texture stays fluffy, scoopable, and party-proof. I designed this Whipped Chocolate Chip Cookie Dough Dip to deliver big cookie dough flavor while staying safe and dippable for snack boards, birthdays, and game-day spreads.

    The trending dessert board star you can make in minutes

    Social feeds love a dip that looks luxe but takes under 20 minutes. This Whipped Chocolate Chip Cookie Dough Dip is camera-ready: swirl it high, sprinkle extra chips, and finish with flaky salt so every photo shouts “scoop me.” Pair it with crisp apples, strawberries, pretzels, and graham crackers for a sweet-salty balance. I once plopped it center stage between bowls of crackers and fruit while reheating cocoa—my crew slurped Crock-Pot Hot Chocolate and demolished the dip before I could snap a picture. Kitchen chaos aside, the dip stole the show and the video went viral in my family chat.

    Ingredients that make it safe and truly edible

    The backbone of this fluffy cookie dough dip is cream cheese and butter for luscious body, brown sugar for that cookie-dough chew vibe, and powdered sugar for smooth sweetness. Heat-treated flour keeps it safe to eat—just bake the flour briefly to 165°F before mixing. Vanilla, salt, and mini chocolate chips lock in the signature chocolate chip cookie taste. Then we whip cold heavy cream to soft peaks and fold it in to create a Whipped Chocolate Chip Cookie Dough Dip that’s ultra-light and not cloying. It’s a no-bake dessert dip that tastes like classic dough but scoops like a dream.

    Pro tips for a cloud-like, whipped texture

    Chill your bowl for whipping cream; cold tools produce stable soft peaks. Ensure the heat-treated flour cools completely so it doesn’t deflate the Whipped Chocolate Chip Cookie Dough Dip. Beat cream cheese and butter until satiny before adding sugars—no lumps! Use mini chips for even distribution and that perfect scoop shot. If you prefer a lighter sweetness, reduce powdered sugar by two tablespoons, then add a splash of milk to keep it dippable. During a rainy Tuesday bake-a-thon, I learned the hard way: warm flour turned my dip streaky. Fifteen minutes later, I re-whipped, folded gently, and the cookie dough dip bounced back, photo-ready.

    Serve it on a dessert snack board

    Build a dessert board around Whipped Chocolate Chip Cookie Dough Dip for guaranteed applause. Think pretzel twists, graham crackers, vanilla wafers, apple slices, strawberries, and even waffle cone shards for crunch. Add a second color moment with berries and a savory nook—like a small bowl of nuts or cheese—to balance sweetness. For seasonal parties, surround the cookie dough dip with ginger snaps or cinnamon pita chips. When I hosted a last-minute movie night, my kids set the board while I piped a swirl on top. Someone knocked the bowl, we caught it mid-air, and still served it with a flourish—no-bake hero status achieved.

    Pinterest-famous swaps and flavor variations

    Turn this Whipped Chocolate Chip Cookie Dough Dip into new flavors fast. Stir in crushed Oreos for cookies-and-cream, swap chips for chopped peanut butter cups, or add mini M&Ms for a party sprinkle. For fall tables, swirl in 2 tablespoons pumpkin puree plus pumpkin pie spice and serve alongside my savory seasonal favorite, Pumpkin Hummus with Pita Chips for a sweet-meets-savory duo. Gluten-free? Use heat-treated gluten-free flour. Dairy-free? Sub vegan cream cheese, plant butter, and coconut whip. Each variation keeps that whipped, cloudlike cookie dough dip texture folks crave, while the chocolate chip base ensures classic comfort.

    Make-ahead timing for parties

    Make Whipped Chocolate Chip Cookie Dough Dip up to 24 hours in advance. Store covered in the fridge, then re-whip for 10–15 seconds or fold once or twice to restore the pillowy texture. If serving outdoors, nestle the bowl in a larger bowl filled with ice to keep the no-bake dessert dip cool. I’ve hauled this to potlucks between sheet pans and soup thermoses (try my cozy Crockpot Creamy Tomato Basil Tortellini Soup next time), and the cookie dough dip always emerges intact—fluffy, glossy, and scoop-ready.

    Storage, troubleshooting, and quick fixes

    Refrigerate Whipped Chocolate Chip Cookie Dough Dip up to 4 days; freeze up to 1 month, then thaw overnight and re-whip gently. Too thick? Stir in 1–2 teaspoons milk. Too soft? Chill 15 minutes. Grainy? Keep whipping until sugars dissolve, or let it rest 5 minutes and beat again. Chips sinking? Fold in an extra tablespoon of flour. If the dip turns heavy, whip 1/4 cup cold cream to soft peaks and fold in for lift. In a power outage once, I whisked by hand—my arms were noodles, but the cookie dough dip still whipped into a smooth, party-perfect bowl.

    FAQs

    Is Whipped Chocolate Chip Cookie Dough Dip safe to eat?

    Yes. Heat-treating the flour makes it safe, and there are no raw eggs. Always let the flour cool before mixing.

    Can I make this cookie dough dip without cream cheese?

    Use mascarpone for similar richness or whipped ricotta for a lighter vibe. Keep the whipping step to maintain the fluffy texture.

    How do I keep the dip fluffy on a party table?

    Chill before serving, swirl into a cool bowl, and refresh with a quick fold if it sits out. Nest in an ice bowl for longer events.

    What should I serve with Whipped Chocolate Chip Cookie Dough Dip?

    Pretzels, graham crackers, vanilla wafers, apple slices, strawberries, waffle cone pieces, and rice cakes all pair beautifully.

    Conclusion

    There’s a reason Whipped Chocolate Chip Cookie Dough Dip sweeps parties: it’s luscious, no-bake, and wildly scoopable. The heat-treated flour keeps it safe, the cream-cheese-and-cream base makes it cloud-light, and the mini chips deliver that nostalgic, chocolatey crunch. Whether you’re building a dessert board, feeding a crowd, or sneaking a spoonful at midnight, this cookie dough dip brings instant joy. Make it once and watch it become your fastest signature treat—then explore more quick wins like my 30-minute favorite, Baked Feta Pasta. Try Whipped Chocolate Chip Cookie Dough Dip at home and tag me so I can cheer your dip game on!
  • Easy Slow Cooker French Onion Roast: 7 Irresistible Secrets

    Easy Slow Cooker French Onion Roast: 7 Irresistible Secrets

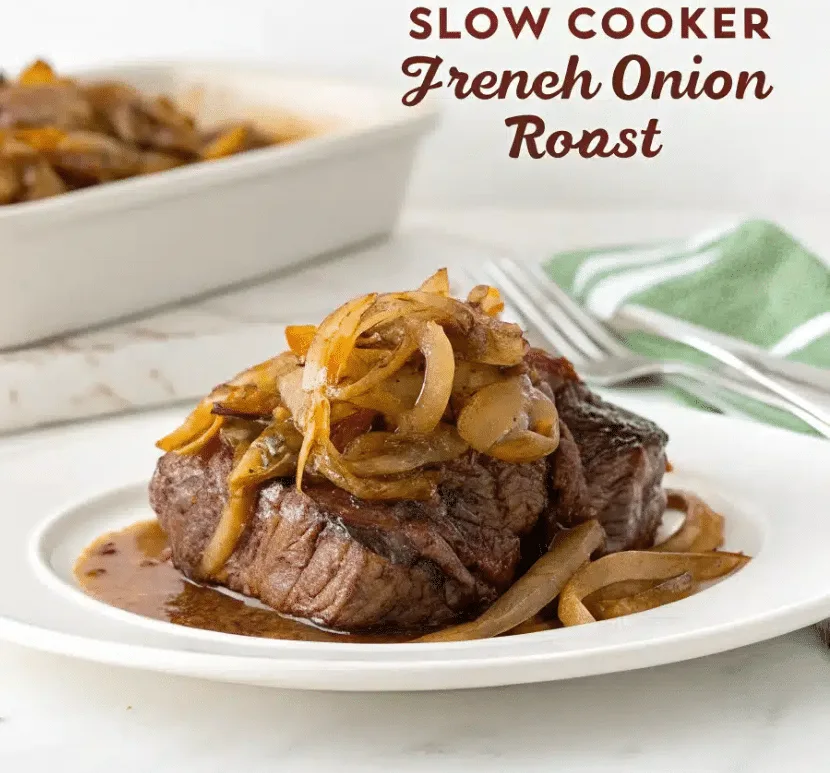
    Easy Slow Cooker French Onion Roast saved my Tuesday—and maybe my sanity. I was Darleen Vance, juggling soccer cleats, a science fair project, and a dog determined to steal an onion peel. I tossed onions into a skillet, seared a chuck roast, and let the slow cooker do its magic. Hours later, the house smelled like a bistro. Easy Slow Cooker French Onion Roast turned my kitchen chaos into comfort, and the kids asked for seconds between science fair questions. If your week needs a hands-off hero with serious flavor, this is it.

    slow cooker French onion roast is the ultimate comfort food.

    Recipe


    Easy Slow Cooker French Onion Roast: Why It Works

    The caramelized onion advantage

    Easy Slow Cooker French Onion Roast leans on low-and-slow science. Caramelized onions bring deep, sweet-savory complexity that bathes a chuck roast in luscious umami. As the crockpot simmers, the beef relaxes into fork-tender perfection while onions transform into a jammy, golden tangle. Think French onion soup—but with hearty beef that soaks up every drop of oniony jus. For a true bistro finish, a blanket of Gruyère turns the roast into a melty, irresistible showstopper.

    With this Easy Slow Cooker French Onion Roast, you get set-and-forget comfort food that still tastes chef-driven. Using Worcestershire and a splash of wine (or broth) builds layers of flavor quickly. A touch of balsamic balances richness, and thyme adds a whisper of herb that makes the kitchen smell like Sunday supper.

    Comfort-food trends are all about big flavor with minimal effort—exactly what this crockpot French onion pot roast delivers. It’s perfect for game day, cozy weekends, or weeknights when you want dinner to basically cook itself. I once tried to “multitask” by caramelizing onions while assembling a volcano for a school project—flour erupted everywhere. Still, the onions turned a perfect amber, and dinner was a win. Real life, real mess, real flavor.

    Love slow cooker classics? You’ll also enjoy my Slow Cooker Beef Barley Stew and crowd-pleasing Crockpot Sweet Chili BBQ Ribs. Both follow the same “build bold flavor, then relax” philosophy.


    Crockpot French Onion Pot Roast: Ingredients, Cuts & Pro Tips

    Best beef cuts and onion choices

    For a succulent French onion beef roast, choose a 3.5–4 lb chuck roast—its marbling melts into tenderness. Brisket or bottom round work too, but chuck is my MVP. Onions matter: yellow onions are classic; sweet onions become decadently jammy; red onions add color but a slightly sharper finish. Garlic, thyme, Worcestershire, and beef broth make the backbone. A dash of balsamic lifts the savoriness, while an optional onion soup mix shortcut punches up “French onion” vibes without extra effort.

    Gruyère or provolone give you that bistro-style crown. If you want a gluten-free slow cooker onion soup roast, pick GF broth and a certified GF soup mix or skip it entirely and season with extra onion powder.

    Practical searing and slow-cooking tips

    • Sear for flavor: Browning creates fond—the flavor gold. Even a quick 3-minute sear per side boosts your Easy Slow Cooker French Onion Roast substantially.
    • Caramelize smart: Don’t rush the onions. Medium heat and patience bring the prized amber hue and concentrated sweetness.
    • Deglaze: White wine or extra broth dissolves browned bits for a richer jus in your slow cooker French onion roast.
    • Layer liquids right: Pour around the meat, not directly over it, to keep your sear intact.
    • Low and slow: Low for 8–9 hours gives the most tender, shreddable results.

    Once, I tried to skip searing because my toddler hid one shoe and we were late. The roast was still good—but the time I seared? The family literally cheered. Lesson learned.

    Easy Slow Cooker French Onion Roast: 7 Irresistible Secrets
    Easy Slow Cooker French Onion Roast: 7 Irresistible Secrets

    French Onion Beef Roast: Variations & Viral-Worthy Swaps

    Broth vs. wine vs. beer

    Every liquid paints your Easy Slow Cooker French Onion Roast a little differently. Beef broth is classic—clean, savory, and reliable. Dry white wine adds brightness and restaurant-level depth. Prefer a cozy pub vibe? Try a malty brown ale for a rich, gently sweet character. No alcohol? Stick with broth and boost with a splash more Worcestershire. If you’re chasing a true French onion soup roast, a squeeze of lemon at the end wakes up the flavors beautifully.

    • Cheese pull moment: Top servings with Gruyère and broil for that melty, viral-worthy finish.
    • Mushroom upgrade: Add 8 oz cremini mushrooms for extra umami in your slow cooker French onion roast.
    • Herb twist: Swap thyme for rosemary or herbes de Provence.
    • Creamy onion gravy: Stir in 1–2 tbsp of cream or sour cream at the end for a silky onion jus.
    • Low-carb and gluten-free: Serve over cauliflower mash; use GF broth and skip soup mix.

    During a football watch party, I made a double batch and set out mini rolls. Guests built French onion sliders, then demanded the “recipe link.” I sent them here and watched it spread faster than the cheese. If you like fun twists, you’ll also love my zesty Crockpot Honey Lime Chicken Tacos—another set-it-and-forget-it star.


    Slow Cooker French Onion Roast: Serving, Storage & Fixes

    Serve it bistro-style

    Serve Easy Slow Cooker French Onion Roast over Parisian-style mashed potatoes, buttered egg noodles, or toasted garlic bread with a ladle of onion jus. For the full French onion moment, broil slices with Gruyère until bubbly and finish with parsley. A crisp green salad with Dijon vinaigrette balances the richness, and roasted carrots or green beans make it a complete, weeknight-friendly feast.

    Storage, troubleshooting, and quick FAQs

    Storage: Refrigerate in an airtight container up to 4 days; freeze up to 3 months. Reheat gently with a splash of broth. If the jus separates, whisk it while warming.

    Fixes: If your French onion pot roast tastes flat, add a pinch of salt or a few drops of balsamic or lemon for lift. Too thin? Thicken with another teaspoon of cornstarch slurry. Too salty (often from soup mix)? Stir in unsalted broth and a knob of butter to balance.

    Real-kitchen moment: I once forgot the bay leaf and over-salted. A splash of cream and unsalted broth rescued it—and the kids never noticed as they mopped up the sauce with bread. That’s the beauty of this slow cooker onion soup roast: it forgives, then delights.


    FAQs

    Can I skip searing the roast?

    Yes, but searing dramatically improves flavor. If you skip it, add 15–20 minutes to the cook time and season your roast generously.

    What if I don’t cook with wine?

    Use extra beef broth. For brightness, finish with a squeeze of lemon or an extra teaspoon of balsamic.

    Which onions are best?

    Yellow onions are classic for French onion beef roast. Sweet onions are great for a richer, jammy result; red onions are sharper and less traditional.

    How do I make it gluten-free?

    Use gluten-free beef broth and a certified GF onion soup mix—or skip the mix and add onion powder and extra thyme. Thicken with arrowroot if preferred.


    Conclusion

    Comfort cooks itself when Easy Slow Cooker French Onion Roast is on the menu. Caramelized onions, thyme, and a rich onion jus turn an everyday chuck roast into a cozy, bistro-inspired dinner with minimal effort. Whether you serve it with mashed potatoes or crisp sourdough, this slow cooker French onion roast hits the sweet spot of weeknight simple and weekend special. I hope my real-life kitchen chaos and tips help you discover how forgiving, flavorful, and family-pleasing this recipe is. Make Easy Slow Cooker French Onion Roast, savor every oniony bite, and let me know how you serve it. Try it at home and tag me!

  • Baked Feta Pasta That Breaks the Internet: 7 Simple Steps

    Baked Feta Pasta That Breaks the Internet: 7 Simple Steps

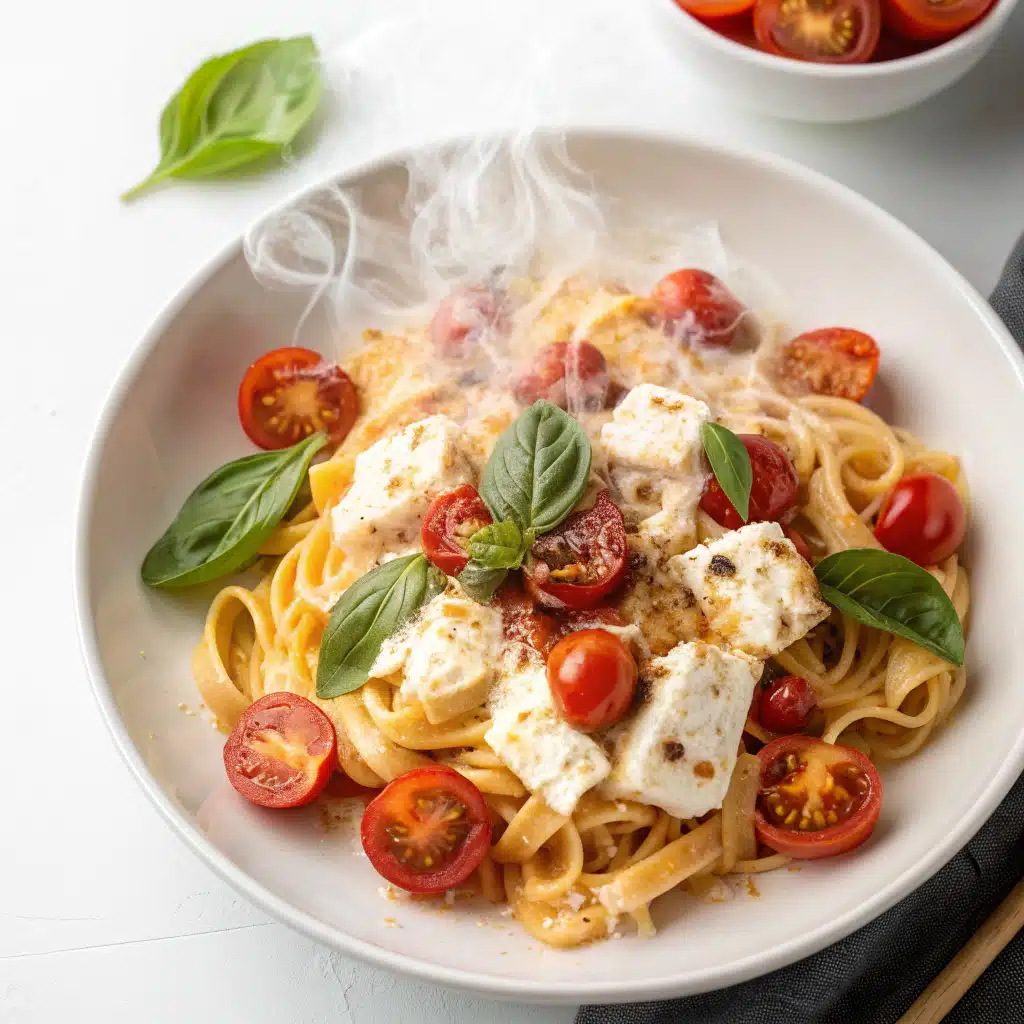
    Baked Feta Pasta saved my Tuesday. I’m Darleen Vance, and last week my pantry looked like a game of Tetris gone wrong. I tossed cherry tomatoes and a feta block in a dish, and as the oven did its magic, my toddler decided the pasta box was a drum. When that Baked Feta Pasta came out creamy, tangy, and bursting with roasted tomato flavor we all quieted down and ate like it was a tiny miracle in a casserole dish.

    Baked Feta Pasta Recipe – Why This Version Goes Viral Every Time

    Recipe

    Baked Feta Pasta Basics: Creamy, Tangy, Weeknight Magic

    Why this viral Baked Feta Pasta works every time

    Baked Feta Pasta is the rare recipe that’s both simple and wildly satisfying. A single baking dish turns a block of feta and cherry tomatoes into a silky, tangy sauce that clings to al dente pasta. The secret is oven roasting: tomatoes collapse into a jammy base while the feta melts into a creamy feta pasta sauce. With garlic, olive oil, and a hit of red pepper flakes, the flavor sings with Mediterranean pasta vibes—bright, savory, and a little spicy. The best part? It’s a one-pan pasta bake with big pay-off and minimal dishes.

    The TikTok pasta that became a dinner staple

    This Baked Feta Pasta became a viral TikTok pasta for good reason. It’s fast, crowd-pleasing, and endlessly customizable. You can keep it vegetarian, add protein, or swap in gluten-free pasta. Stir in lemon zest and fresh basil at the end, and the sauce blossoms with brightness. I love how roasted cherry tomatoes sweeten and balance the briny feta block—no cream needed for that luscious finish. When you want comfort food without babysitting a stovetop sauce, Baked Feta Pasta is the easy pasta recipe to reach for.

    Quick Darleen kitchen moment: I once doubled Baked Feta Pasta for a last-minute neighborhood potluck. Halfway through, I realized I’d only bought one feta block. I grabbed a small log of goat cheese from the fridge, tucked it alongside the feta, and let the oven decide. The result? A tangy-twisty version everyone asked me to “accidentally” repeat. That’s the kind of flexible, forgiving energy this creamy feta pasta brings to your table.

    Want more cozy bowls? Try my One-Pot Mediterranean Chicken & Vegetables for another set-it-and-forget-it favorite.

    How to Make Baked Feta Pasta: Step-by-Step Perfection

    Choose the best ingredients for standout flavor

    For Baked Feta Pasta that’s restaurant-good, start with quality ingredients. Use a firm feta block packed in brine—it melts into a creamy, tangy sauce. Choose ripe cherry or grape tomatoes; their natural sweetness concentrates as they roast. Extra-virgin olive oil emulsifies the sauce, while sliced garlic infuses everything with warmth. For pasta, pick a shape with ridges or curves (rigatoni, fusilli, or cavatappi) so the creamy feta pasta clings to every bite. A pinch of red pepper flakes adds buzz; lemon zest and basil finish the Mediterranean pasta profile.

    Timing tips for flawless Baked Feta Pasta

    Preheat to 400°F (200°C). While the tomatoes and feta bake for 30–35 minutes, boil your pasta so everything hits the bowl hot. Reserve pasta water; it’s liquid gold for loosening and glossing your sauce. After roasting, smash the tomatoes and feta into a luscious base, then fold in pasta, lemon zest, and a splash of water until it’s silky. Season Baked Feta Pasta to taste—salt (go easy), pepper, and more red pepper flakes if you love heat. For creamy feta pasta without dairy heaviness, avoid over-reducing; keep it creamy, not pasty.

    Darleen’s real-life tip: I’ve made Baked Feta Pasta while fielding homework questions and stepping over a trail of crayons. Once, I forgot to reserve pasta water and used a splash of hot kettle water with a drizzle of olive oil instead. It worked in a pinch, but pasta water really makes the sauce cling. If your kitchen gets chaotic too, measure out 1 cup of pasta water before you drain—future you will thank you.

    Craving comfort soup next? Check out my Crockpot Creamy Tomato Basil Tortellini Soup for a slow-cooker hug in a bowl.

    Variations: Spin Your Baked Feta Pasta Like a Pro

    Add protein, veggies, and bold flavors

    Baked Feta Pasta is a canvas. For protein, fold in shredded rotisserie chicken, sautéed shrimp, or crispy chickpeas. Add Mediterranean pasta flair with Kalamata olives, capers, or sun-dried tomatoes. Stir in baby spinach or kale to wilt into the sauce, or add roasted red peppers for sweetness. Want extra richness? A spoonful of pesto makes creamy feta pasta even silkier. Keep it bright with lemon zest and lots of basil, or swirl in a little Greek yogurt off heat for tang and body. The beauty of Baked Feta Pasta is that it welcomes your pantry—and your cravings.

    Pinterest-trending swaps you’ll love

    Try a half-and-half feta and ricotta situation for ultra-velvety texture. Swap the pasta for zucchini noodles for a lighter Baked Feta Pasta twist (pat the zoodles dry before tossing). Roast a handful of cherry tomatoes with sliced red onion for natural sweetness and color. If you love heat, add Calabrian chiles for a smoky kick. For a fun Greek-inspired take, finish with oregano, lemony dill, and toasted pine nuts. This is the Baked Feta Pasta era—don’t be shy about elevating it with bold, Pinterest-worthy add-ins.

    Darleen’s oops-that-worked story: During a fridge clean-out, I made Baked Feta Pasta with a handful of briny olives and a scoop of leftover roasted squash. The creamy feta pasta hugged the sweet squash like they were meant to be. My kids called it “confetti pasta,” and I called it dinner magic. If your fridge has oddballs, fold them in—you might discover your signature spin.

    If you’re into veggie-loaded dinners, my Quinoa Stuffed Bell Peppers will fit right into your rotation.

    Baked Feta Pasta Tips: Storage, Reheating, and Fixes

    Get the texture right—every single time

    If your Baked Feta Pasta feels too thick, add warm reserved pasta water 1–2 tablespoons at a time and toss until glossy. If it’s thin, let it rest for 1–2 minutes; pasta will absorb sauce and thicken. Over-salted? Add a squeeze of lemon and a handful of chopped tomatoes or spinach to balance. For extra-creamy feta pasta, reserve more pasta water than you think you’ll need and add it slowly while tossing over low heat. A drizzle of olive oil at the end adds shine and Mediterranean pasta depth.

    Storage, reheating, and troubleshooting FAQs

    Store leftovers of Baked Feta Pasta in an airtight container for up to 3 days. Reheat gently on the stovetop with a splash of water or milk to revive the creamy sauce. For meal prep, keep cooked pasta and sauce separate and combine when reheating to avoid mushiness. If your tomatoes didn’t burst, prick them with a fork and bake an extra 5 minutes. If your feta didn’t soften, it likely needed more time or was very firm; cover and bake 5–10 minutes more, then smash. Remember: Baked Feta Pasta is forgiving—taste, adjust, and keep it simple.

    Darleen’s storage confession: I once hid a bowl of Baked Feta Pasta behind the yogurt so I could eat it for lunch the next day. I reheated with a splash of hot water and a squeeze of lemon, and it tasted freshly made. Sometimes the cook deserves the leftovers!

    FAQs

    Can I use crumbled feta instead of a block?

    Yes, but a feta block melts creamier. If using crumbles, pack them tightly in the center of the dish and add 1–2 extra tablespoons of olive oil to help them meld into a smooth sauce.

    What pasta shape is best for Baked Feta Pasta?

    Short, ridged shapes like rigatoni, fusilli, or cavatappi work best because the creamy feta pasta sauce clings to curves and grooves. Penne is a classic, fuss-free choice.

    How do I make it spicier without overpowering the feta?

    Start with 1/2 teaspoon red pepper flakes in the bake, then finish with more to taste. Calabrian chiles add fruity heat that plays nicely with the briny feta block and roasted tomatoes.

    Can I make Baked Feta Pasta gluten-free?

    Absolutely. Use your favorite gluten-free short pasta and cook to just-al-dente. Reserve extra pasta water; gluten-free shapes can benefit from more liquid to keep the sauce silky.

    Conclusion

    Baked Feta Pasta is weeknight gold: creamy, tangy, and packed with roasted cherry tomatoes, garlic, and basil. It’s a one-pan Mediterranean pasta that feels special but cooks itself while you wrangle life. Keep the essentials—feta block, tomatoes, olive oil—and make it yours with olives, spinach, or shrimp. The secret to unforgettable Baked Feta Pasta is simple: roast until jammy, smash into a creamy feta pasta sauce, and finish with lemon and herbs for brightness. I hope this becomes your back-pocket dinner as it is mine. Try it at home and tag me so I can cheer on your delicious bowls! For more cozy inspiration, browse my recipe archive and don’t miss the family-friendly Zucchini Noodle Alfredo Bake.

  • Crock Pot Hot Chocolate – 7 Reasons It’s a Cozy Favorite

    Crock Pot Hot Chocolate – 7 Reasons It’s a Cozy Favorite

    crock pot hot chocolate saved my sanity one snowy afternoon when my twins staged a marshmallow mutiny. I poured everything into the slow cooker, and within an hour the whole house smelled like a cocoa shop. The dog stole a marshmallow, my timer sang off-key, and I still had the creamiest crock pot hot chocolate waiting for us. I’m Darleen Vance, and I promise this is the most forgiving, crowd-pleasing winter warmer you’ll ever make—especially when chaos is your sous chef.

    Finished crock pot hot chocolate in mug

    Recipe

    Crock Pot Hot Chocolate Recipe Essentials

    Slow Cooker Hot Cocoa Basics

    If you want ultra-creamy comfort with minimal effort, crock pot hot chocolate is your new winter ritual. This crock pot hot chocolate gently warms milk, cream, cocoa powder, and real chocolate chips until the texture is silky and rich. Unlike stovetop cocoa, crock pot hot chocolate holds perfectly on WARM, making it a star at parties, kids’ sleepovers, and after-sledding gatherings. The slow-and-low method extracts deep chocolate flavor without scalding, and it turns your kitchen into a cocoa-scented hug. LSI favorites like slow cooker hot cocoa and crockpot hot cocoa prove this set-it-and-sip approach is a lifesaver.

    When I say this recipe is chaos-proof, I mean it. During a cookie-baking showdown, my mixer went rogue and my daughter painted frosting on a spatula like it was a wand. I whisked together crock pot hot chocolate, closed the lid, and returned to the chaos. Ninety minutes later, the cocoa was luscious, and my kitchen squad was calm and smiling—well, marshmallow-sticky but smiling.

    Crock pot hot chocolate ingredients on a counter

    Because crock pot hot chocolate scales effortlessly, it’s a natural for hot chocolate bars and open-house gatherings. Trend-watchers love toppings like crushed peppermint, salted caramel drizzle, and mini marshmallows. It’s the make-ahead, hands-off dessert drink that keeps guests happy while you focus on mains like Crockpot Honey Lime Chicken Tacos or cozy bowls of Slow Cooker Beef Barley Stew. Serve crock pot hot chocolate in heat-proof mugs, set out ladles, and let everyone DIY. It’s comfort, but with party energy.

    Slow Cooker Hot Cocoa Step-by-Step + Pro Tips

    The Creamiest Base, Explained

    The magic of crock pot hot chocolate is balance. Whole milk keeps it drinkable, heavy cream brings body, and sweetened condensed milk adds velvety sweetness. Dutch-process cocoa deepens the flavor while semisweet chips create a double-chocolate effect. For a classic crock pot hot chocolate, whisk everything cold, then cook on LOW. Stir every 30 minutes so the chocolate melts cleanly. The result? Slow cooker hot cocoa that tastes like a European sipping chocolate but still feels family-friendly.

    Pro move: A pinch of kosher salt intensifies chocolatey notes without making the cocoa salty. Another crock pot hot chocolate trick—don’t overheat. Keep it on WARM once melted to prevent scorching and that dreaded milk “skin.” If you want extra sheen, an immersion blender (off heat) gives a micro-foamy finish worthy of a café.

    My Real-Kitchen Tips

    One game night, my son yelled “Touchdown!” and startled me into dropping a measuring spoon clean into the crock. I fished it out, whisked, and the crock pot hot chocolate never missed a beat. Here are tips I trust:

    • Use a 6-quart slow cooker for even melting and easy ladling.
    • Lightly spray the crock with neutral oil to reduce milk film.
    • Whisk cocoa powder with a little warm milk first to prevent lumps.
    • Switch to WARM to hold for hours; stir occasionally.
    • Pair with savory bites like Parmesan Pretzel Bites to balance sweetness.

    Follow these, and your crock pot hot chocolate will be smooth, glossy, and ready for encore mugs.

    Crock pot hot chocolate cooking with steam
    Let your slow cooker work its cozy magic.

    Variations & Pinterest-Worthy Swaps

    Flavor Ideas Everyone Loves

    Upgrade your crock pot hot chocolate with flavor twists that trend hard on Pinterest. Try Peppermint Bark (add crushed candy canes and peppermint extract), Mexican Hot Chocolate (cinnamon + a whisper of cayenne), or Mocha (swap 1 cup milk with hot brewed coffee). For Salted Caramel crock pot hot chocolate, stir in caramel sauce and a tiny pinch of flaky salt at the end. White Chocolate Raspberry? Use white chocolate chips and a spoon of raspberry jam swirled into each mug. These crockpot hot cocoa riffs feel fancy but use the same effortless base.

    If you’re dairy-free, make crock pot hot chocolate with full-fat oat milk plus canned coconut milk and dairy-free chips. Sweeten to taste with maple syrup. Vegan marshmallows finish it beautifully. For kids, set up a toppings bar: mini marshmallows, chocolate shavings, sprinkles, and crushed cookies. It’s a guaranteed “Can I have seconds?” moment.

    My Pinterest-Famous Swap

    I once swapped half the chocolate chips for chopped dark chocolate with sea salt, and the internet went wild. My crock pot hot chocolate tasted like a dessert you’d linger over at a ski lodge. Another day, I forgot vanilla and added a spoon of Nutella—cue applause. Don’t be afraid to improvise; crock pot hot chocolate is forgiving and fabulous.

    Make-Ahead Crock Pot Hot Chocolate

    Plan, Store, Reheat

    For parties, make crock pot hot chocolate up to 3 days ahead. Cool, refrigerate in jars, and reheat in the crock on LOW, then hold on WARM. Thin with milk if it’s thicker after chilling. If you need to transport crock pot hot chocolate, seal the lid with foil, then the lid, and wrap the base in a towel to retain heat.

    To avoid grainy texture, whisk gently and avoid boiling. If crock pot hot chocolate separates, blend briefly off heat. A little extra milk can smooth over-thick cocoa. And if sweetness creeps too high after reducing, stir in a splash of strong coffee to restore balance. This slow cooker hot cocoa really can take what life throws at it.

    Troubleshooting + Mini-FAQ

    • Too sweet? Add unsweetened cocoa or more milk.
    • Too thick? Whisk in warm milk 1/4 cup at a time.
    • Lumpy? Blend with immersion blender off heat.
    • Scorched edges? Don’t scrape; ladle from the center and lower heat.

    Once, my ladle slipped and painted a chocolate comet across the counter. I laughed, wiped, ladled fresh mugs, and my crock pot hot chocolate still stole the show. That’s the beauty of this recipe—it’s resilient and irresistibly cozy.

    FAQs

    Can I make crock pot hot chocolate dairy-free?

    Yes. Use full-fat oat milk plus canned coconut milk, dairy-free chocolate chips, and sweeten to taste. It’s creamy and rich without dairy.

    How long can I keep crock pot hot chocolate on WARM?

    Up to 3 hours. Stir occasionally to maintain texture and keep the chocolate evenly suspended.

    Can I halve the recipe for a smaller crowd?

    Absolutely. Halve all ingredients and use a smaller slow cooker if possible. Reduce cook time slightly and monitor melting.

    What’s the best cocoa for crock pot hot chocolate?

    Dutch-process cocoa delivers deeper chocolate flavor and a smoother finish, though natural cocoa works in a pinch.

    Conclusion

    When you need a guaranteed crowd-pleaser, crock pot hot chocolate delivers every time. It’s hands-off, decadent, and endlessly customizable—just what winter calls for. From peppermint to mocha, from classic kid-friendly mugs to grown-up salted caramel, this slow cooker hot cocoa does it all. I’ve leaned on crock pot hot chocolate during bake-sale meltdowns, snow days, and sleepy movie nights, and it always brings the room together. Try it at home and tag me—I can’t wait to see your toppings bar and cozy mugs. Warm spoons up, friends!

  • Crockpot Creamy Tomato Basil Tortellini Soup: Must-Try

    Crockpot Creamy Tomato Basil Tortellini Soup: Must-Try

    Crockpot creamy tomato basil tortellini soup is comfort food at its best—rich, cheesy, and effortlessly cozy. But here’s the twist: I didn’t always believe in the slow cooker. Hey! I’m Darleen Vamce—34, Salt Lake City native, and a woman who once thought crockpots were only good for mushy potlucks. I was wrong. Very wrong. My “Great Mealtime Struggle” with three hungry kids and a job that never quit at 5 changed everything. Out of desperation, I tossed tomatoes, basil, cream, and tortellini into my crockpot—and what came out was pure, magical, family-approved soup.

    Crockpot creamy tomato basil tortellini soup

    Recipe

    Crockpot Creamy Tomato Basil Tortellini Soup Secrets

    Why this creamy slow cooker soup wins every busy night

    Crockpot Creamy Tomato Basil Tortellini Soup is the ultimate weeknight dinner because it turns pantry staples into a velvety, restaurant-level bowl without hovering over the stove. This slow cooker tomato basil tortellini soup simmers crushed tomatoes, Italian herbs, and garlic until the flavors deepen, then swirls in heavy cream for that luscious, creamy tomato soup finish. Add cheese tortellini and baby spinach at the end, and the crock pot does all the magic. The result is comfort food that’s family-friendly, freezer-aware, and perfect for meal prep. Whether you’re building a cozy menu alongside my Pumpkin Hummus with Pita Chips or need a one-pot lifesaver, this Crockpot Creamy Tomato Basil Tortellini Soup delivers every single time.

    Comfort classics are trending, and this Crockpot Creamy Tomato Basil Tortellini Soup hits all the notes: creamy texture, basil brightness, and a touch of Parmesan umami. The slow cooker method coaxes sweetness from tomatoes while a hint of red pepper flakes brings warmth. If you love viral spins on tomato soup, you’ll adore how pillowy tortellini turns this into a hearty meal. Darleen Vance moment: once, I dropped my immersion blender attachment on the floor right as the timer beeped—cue the dog sprinting over and me diving like a goalie. The soup stayed silky, the kitchen slightly chaotic, and dinner still earned applause.

    Slow Cooker Creamy Tomato Basil Tortellini Soup Tips

    Ingredient intel for maximum flavor

    Ingredients for creamy tomato basil tortellini soup

    For the most flavorful Crockpot Creamy Tomato Basil Tortellini Soup, choose quality canned tomatoes—San Marzano style if possible—for a naturally sweet base. A spoonful of tomato paste deepens the body, while onion and garlic build that classic Italian soup aroma. Heavy cream gives the creamiest finish, but half-and-half works for a lighter slow cooker tomato basil tortellini soup. A touch of sugar balances acidity; don’t skip it. Fresh basil at the end preserves its peppery fragrance. And yes, cheese tortellini is your weeknight hero—refrigerated cooks reliably in the crock pot without getting mushy. Finish with Parmesan for savory depth and a glossy finish.

    Pro tips to nail texture and timing

    Timing matters in Crockpot Creamy Tomato Basil Tortellini Soup. Let the base simmer low and slow, then blend to your ideal texture before adding dairy. Stir in cream and cream cheese toward the end so they won’t curdle. Add tortellini and spinach during the last 15–20 minutes on HIGH to keep pasta tender, not soggy. If your slow cooker runs hot, check early. Salt in stages, especially if your broth is salty. Darleen Vance PSA: I once grabbed cinnamon instead of red pepper flakes—don’t do that. Label your spice jars, friends. For a full comfort spread, pair with a crisp salad or these fan-fave Parmesan Pretzel Bites with Garlic Dip.

    Tomato Basil Tortellini Soup in the Crock Pot

    Tomatoes, broth, and basil in crockpot before cooking

    Step-by-step for set-and-forget success

    Start Crockpot Creamy Tomato Basil Tortellini Soup by sautéing onion and garlic for deeper flavor—optional but worth it. Load the slow cooker with crushed tomatoes, tomato sauce, paste, broth, basil, oregano, sugar, salt, pepper, and the sautéed aromatics. Cook on LOW 6–7 hours (or HIGH 3–4). Before adding dairy, blend with an immersion blender for that creamy tomato soup vibe. Stir in heavy cream and softened cream cheese; let everything melt into a velvety base. Then add tortellini and spinach; cook just until al dente. Finish with Parmesan and fresh basil ribbons. Pro move: warm your bowls with hot water while the tortellini cooks for extra-cozy serving.

    Pinterest-worthy swaps and variations

    Customize Crockpot Creamy Tomato Basil Tortellini Soup with simple swaps. Try roasted red pepper puree for smoky-sweet depth. Stir in sun-dried tomatoes for an umami boost. Use spinach or kale, or add sautéed mushrooms for earthiness. Want protein? Browned Italian chicken sausage or rotisserie chicken transforms this slow cooker tomato basil tortellini soup into a heartier crock pot dinner. Dairy swap: mascarpone or coconut cream (for a subtle twist) both work. Gluten-free? Use gluten-free tortellini and check broth labels. Darleen Vance confession: I once added extra tortellini because “the bag was almost done”—we called it pasta stew and nobody complained.

    Creamy Tomato Basil Tortellini Soup Crockpot

    Serving ideas, pairings, and sensory finishes

    Finished creamy tomato basil tortellini soup in crockpot
    Comfort food, crockpot-style.

    Serve Crockpot Creamy Tomato Basil Tortellini Soup with garlicky sourdough, a peppery arugula salad, or a simple grilled cheese cut into dippers. A drizzle of olive oil, cracked black pepper, and a shower of Parmesan take this creamy tomato basil tortellini soup from great to unforgettable. Keep basil fresh by adding it right before serving. For wine, try a Sangiovese or a bright Pinot Grigio. Hosting? Set out toppings: chili flakes, lemon zest, balsamic glaze, or pesto swirls for a garnish bar.

    Storage, troubleshooting, and make-ahead

    Store Crockpot Creamy Tomato Basil Tortellini Soup airtight up to 4 days; the tortellini will continue to soften. For best texture, cook tortellini separately if planning leftovers and add to bowls when reheating. Freeze the tomato-basil base (without dairy or pasta) for up to 3 months; add cream and tortellini after thawing and reheating. If soup tastes acidic, add a pinch more sugar or an extra splash of cream. If too thick, thin with warm broth. If too thin, simmer uncovered on HIGH to reduce. Darleen Vance lesson from last winter: always label freezer containers—mystery red sauce became happy soup night, but it took a sniff-test adventure first.

    FAQs

    Can I use frozen tortellini?

    Yes. Add frozen tortellini during the last 20–25 minutes on HIGH, tasting for doneness. Avoid overcooking to keep pasta tender.

    How do I make it lighter?

    Use half-and-half instead of heavy cream and skip the cream cheese. The soup will still be creamy and satisfying.

    Will dairy curdle in the slow cooker?

    Add cream and cream cheese after the long simmer, during the final 20–30 minutes on HIGH, and stir gently for a silky finish.

    Can I blend without an immersion blender?

    Yes. Carefully transfer batches to a stand blender, vent the lid, and blend until smooth. Return to the crock pot and proceed.

    Conclusion

    Crockpot Creamy Tomato Basil Tortellini Soup is the kind of slow cooker tomato basil tortellini soup that turns a regular night into comfort central. The crock pot coaxes sweetness from tomatoes, basil stays bright, and the creamy tomato soup texture hugs every tortellini. Whether you’re feeding a crowd or stocking lunches, this creamy tomato basil tortellini soup delivers big flavor with minimal stress. I’m Darleen Vance, cheering you on from my happily messy kitchen—where bowls clink, basil perfumes the air, and dinner is easy. Make Crockpot Creamy Tomato Basil Tortellini Soup tonight, enjoy the applause, and tell me how you served it. Try it at home and tag me!

  • Slow Cooker Veggie-Loaded Stuffed Peppers: 7 Genius Secrets

    Slow Cooker Veggie-Loaded Stuffed Peppers: 7 Genius Secrets

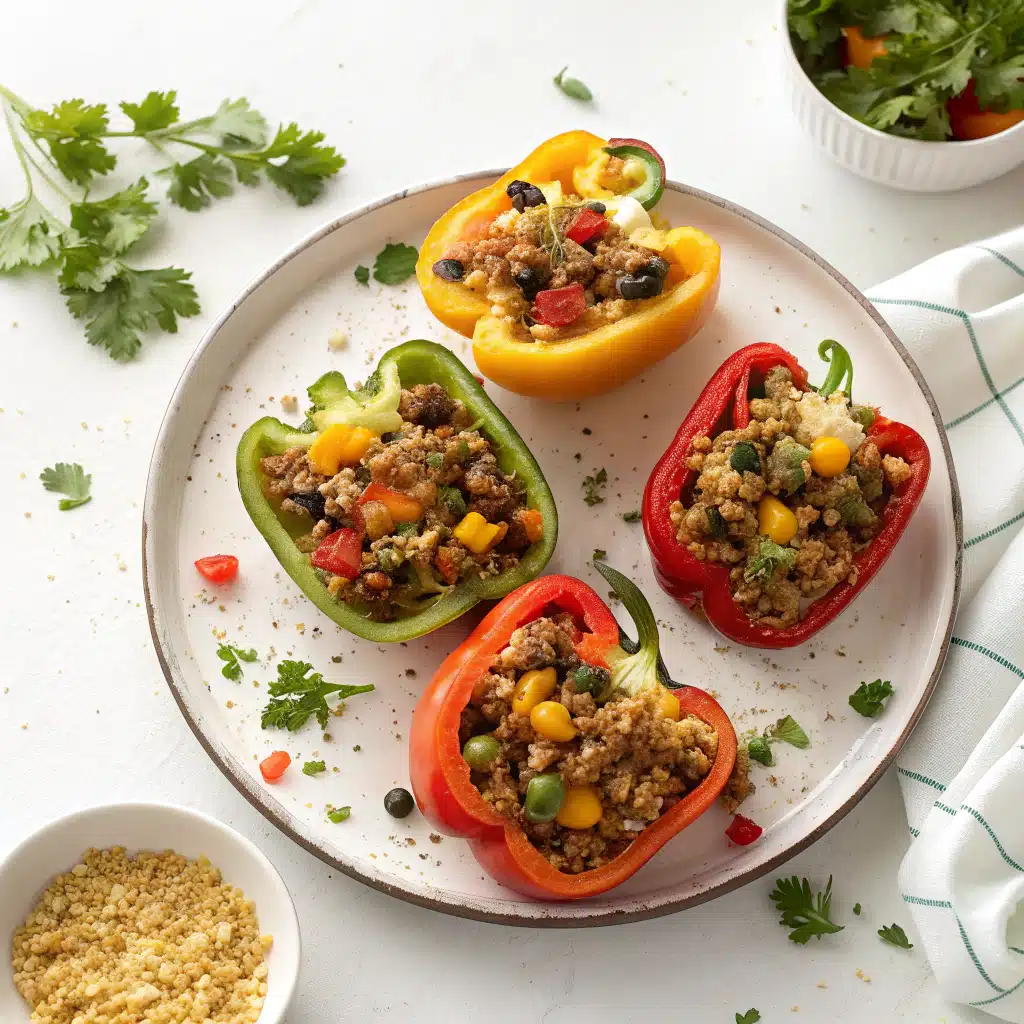
    Slow Cooker Veggie-Loaded Stuffed Peppers saved my Tuesday. I’d promised dinner to the soccer carpool, my mixer was clanking, and my cat swatted the measuring spoons off the counter—classic Darleen Vance kitchen chaos. I stuffed peppers, tossed them into the crock, and sprinted to practice. When we came home, Slow Cooker Veggie-Loaded Stuffed Peppers were tender, saucy, and veggie-packed. The kids ate two each, and I pretended this was my plan all along. If your weeknight needs a miracle, these crockpot stuffed peppers deliver it with zero drama and all the flavor.

    Stuffed peppers inside slow cooker before cooking
    Table of Contents

    Recipe

    Why Slow Cooker Veggie-Loaded Stuffed Peppers Work

    Crockpot stuffed peppers, simplified

    Slow Cooker Veggie-Loaded Stuffed Peppers are the definition of hands-off comfort food. The slow cooker does the heavy lifting, coaxes sweetness from peppers, and gently cooks quinoa and veggies to a tender, juicy filling. If you love vegetarian stuffed peppers, this is the slow cooker recipe that guarantees dinner without hovering over the stove. Because the filling simmers inside the peppers, every bite is infused with smoky spices, bright tomato, and rich pepper flavor. These crockpot stuffed peppers make meal prep easy, family-friendly, and budget-conscious while staying gluten-free and naturally high in fiber and plant protein.

    On busy nights, Slow Cooker Veggie-Loaded Stuffed Peppers shine because they’re the ultimate set-and-forget dinner. They’re highly shareable, too—colorful, saucy, and perfect for Pinterest. In my house, I (Darleen Vance) call this my “laundry-load dinner.” I stuff, press start, and fold towels while the slow cooker works. Once, I forgot to plug it in—yes, chaos—then plugged it in late and switched to High. The peppers still turned out tender and delicious. Pro tip: place the slow cooker near your coffee maker so you see the indicator light. With this slow cooker stuffed bell peppers method, dinner is reliable, healthy, and craveable.

    How to Make Slow Cooker Veggie-Loaded Stuffed Peppers

    Ingredients that pack veggies and flavor

    To build Slow Cooker Veggie-Loaded Stuffed Peppers, you need bell peppers, quinoa, black beans, fire-roasted tomatoes, corn, zucchini, mushrooms, carrots, and a bright spice blend: chili powder, cumin, smoked paprika, and oregano. Tomato paste and crushed tomatoes add body and sauciness, while lime juice and cilantro keep the flavor fresh. Optional cheese (regular or dairy-free) gives that melty finish without overpowering your vegetarian stuffed peppers. This slow cooker recipe layers textures—creamy beans, tender quinoa, and juicy peppers—for a hearty dinner that’s satisfying and balanced. It’s a wholesome base that welcomes swaps, from different legumes to seasonal veggies.

    Pro tips for flawless crockpot stuffed peppers

    • Stand them up: Trim pepper bottoms slightly so Slow Cooker Veggie-Loaded Stuffed Peppers sit upright.
    • Steam cushion: Add 1/2 cup crushed tomatoes to the cooker base to protect from scorching.
    • Don’t peek: Keep the lid closed for the first two hours for even, efficient cooking.
    • Season generously: Salt to taste at the end; peppers release liquid, so flavors mellow as they cook.
    • Melt late: Add cheese in the last 15 minutes to avoid sogginess.
    Stuffed peppers inside slow cooker before cooking

    True Darleen Vance moment: I once overstuffed the peppers so much the lids popped off like tiny hats. Still delicious! If you prefer a similar stove/oven route, peek at my Quinoa Stuffed Bell Peppers with Veggies for oven timing while you keep this as your slow cooker stuffed bell peppers go-to.

    Slow Cooker Veggie-Loaded Stuffed Peppers Variations

    Make it yours: spice and protein options

    Slow Cooker Veggie-Loaded Stuffed Peppers are endlessly customizable. For extra heat, add minced jalapeño or a pinch of chipotle powder. Swap black beans for chickpeas or lentils. Want more protein? Stir in crumbled tofu, tempeh, or cooked ground turkey if you’re not strictly vegetarian. For Mediterranean vibes, add olives, feta, oregano, and a drizzle of olive oil; for Tex-Mex, use pepper jack, extra cumin, and top with salsa verde. These crockpot stuffed peppers keep their structure while absorbing the flavors you choose—perfect for meal prep and for feeding different palates at one table.

    Pinterest-loved swaps and seasonal twists

    • Fall favorite: Add diced butternut squash and sage. Serve with Pumpkin Hummus with Pita Chips for a cozy spread.
    • Summer garden: Fold in cherry tomatoes and basil; finish with balsamic glaze.
    • Southwest crunch: Top Slow Cooker Veggie-Loaded Stuffed Peppers with crushed tortilla chips and cilantro-lime yogurt.
    • Dairy-free cheesy: Use a meltable vegan shred and a spoon of nutritional yeast in the filling.

    Darleen Vance confession: I once tossed in leftover grilled corn and a rogue half-cup of salsa—instant upgrade. That’s the magic of slow cooker stuffed bell peppers: flexible, forgiving, and photogenic. If you crave another crockpot win, try my crowd-pleasing Crockpot Honey Lime Chicken Tacos on your next busy night.

    Serving, Storing, and Troubleshooting Slow Cooker Veggie-Loaded Stuffed Peppers

    Serve like a pro

    Spoon slow cooker juices over Slow Cooker Veggie-Loaded Stuffed Peppers for gloss and flavor. Add avocado, yogurt, and hot sauce for creamy-spicy balance. A side of mixed greens or garlic rice completes the plate. For a lighter pairing, sip a citrusy seltzer or crisp white wine. These vegetarian stuffed peppers plate beautifully for company but are simple enough for weeknights.

    Storage, reheating, and quick FAQs

    • Fridge: 4 days in airtight containers.
    • Freeze: Wrap individually; freeze up to 2 months. Thaw overnight for best texture.
    • Reheat: Microwave 2–3 minutes, or oven at 350°F for 15–20 minutes, covered.
    • Too much liquid? Ladle excess into a bowl—instant chip dip or rice topper.
    • Quinoa undercooked? Cook 30 minutes longer on High; keep lid closed.

    Darleen Vance reality check: I’ve reheated these in a hotel microwave between soccer games. They’re still stellar. For more wholesome comfort, see my cold-weather favorite Sweet Potato Lentil Stew.

    FAQs

    Can I use rice instead of quinoa?

    Yes. Use 1 cup parboiled brown rice and increase total cook time by about 30 minutes, or pre-cook rice and reduce broth to 1/2 cup.

    Do Slow Cooker Veggie-Loaded Stuffed Peppers get soggy?

    No, if you keep the lid closed and finish with cheese at the end. Add crushed tomatoes to the base for moisture without drowning the peppers.

    How do I make this vegan and gluten-free?

    It’s naturally gluten-free if your broth is GF. Skip dairy cheese or use a dairy-free cheese and plant-based yogurt topping for vegan stuffed peppers.

    Can I assemble these the night before?

    Yes. Stuff peppers, cover, and refrigerate. In the morning, place in the slow cooker, add base sauce, and cook as directed.

    Conclusion

    Slow Cooker Veggie-Loaded Stuffed Peppers are the weeknight win you’ll make on repeat: colorful, hearty, and blissfully hands-off. This slow cooker recipe turns simple pantry staples into vegetarian stuffed peppers with cozy spices, tender quinoa, and juicy bell peppers. Whether you love crockpot stuffed peppers for meal prep or for impressing guests without stress, this method delivers reliable results and flexible flavors. From Tex-Mex heat to Mediterranean freshness, Slow Cooker Veggie-Loaded Stuffed Peppers adapt to your mood and your fridge. Try it at home and tag me—Darleen Vance—so I can cheer on your delicious dinner!

  • Creamy Chicken Pumpkin Enchiladas: Irresistible Secrets

    Creamy Chicken Pumpkin Enchiladas: Irresistible Secrets

    Creamy Chicken Pumpkin Enchiladas saved my Tuesday. Creamy Chicken Pumpkin Enchiladas also made my kids forget I’d scorched the first batch of tortillas. I’m Darleen Vance, and on a night when the dog stole a tortilla and my toddler colored the recipe card, I whisked pumpkin, chiles, and spices into a silky sauce, rolled it around juicy chicken, and baked until bubbly. The kitchen chaos faded as we sliced into the saucy, cheesy layers. It’s a little fall magic with big comfort, and yes—still delicious even if you drop a spoon on the floor mid-stir. Real life, real flavor, and just enough spice to keep things exciting.

    Creamy Chicken Pumpkin Enchiladas : 7 Irresistible Secrets

    Recipe

    Why You’ll Crave These Creamy Chicken Pumpkin Enchiladas

    Cozy flavor with weeknight speed

    Creamy Chicken Pumpkin Enchiladas are the best of both worlds: an easy weeknight dinner that eats like a slow-simmered, restaurant-quality pan of creamy enchiladas. The velvety pumpkin enchilada sauce clings to every tortilla, wrapping seasoned shredded chicken and melty cheese in fall-forward comfort. The touch of cinnamon, cumin, and smoked paprika balances the pumpkin’s natural sweetness, while green chiles bring a gentle, family-friendly heat. Each bite of these Creamy Chicken Pumpkin Enchiladas tastes like cozy spice, creamy sauce, and cheesy bliss—without feeling heavy. If you love baked enchiladas, this pumpkin twist is your new go-to for chilly nights and game-day spreads.

    Yes, pumpkin belongs in dinner. Creamy Chicken Pumpkin Enchiladas take the internet’s favorite fall ingredient and proves it plays beautifully with Mexican-inspired flavors. Pinterest boards are bursting with “pumpkin pasta,” “pumpkin chili,” and now “pumpkin enchilada sauce.” Why? Pumpkin adds body without extra cream, making these creamy enchiladas luscious and still balanced. I once filmed this recipe while my stand mixer wandered off the counter (dough hook karma!), and dinner still turned out spectacular. When real life gets wobbly, Creamy Chicken Pumpkin Enchiladas hold steady: creamy, cheesy, golden-bubbled comfort ready in under an hour.

    Looking for more cozy wins? Try my Pumpkin Hummus with Pita Chips as a starter and keep the fall flavors rolling.

    How to Make Creamy Chicken Pumpkin Enchiladas

    Build a silky pumpkin enchilada sauce

    Start with aromatics: onion and garlic sautéed until sweet. Whisk in pumpkin puree, chicken broth, and green chiles. Season generously—cumin, chili powder, smoked paprika, oregano, a whisper of cinnamon, salt, and pepper. The simmer transforms the base into a glossy pumpkin enchilada sauce. Off heat, stir in sour cream or Greek yogurt to get that signature creamy finish. The sauce is the soul of Creamy Chicken Pumpkin Enchiladas—spoon-licking good and surprisingly light for something so decadent. If the sauce looks too thick, add a splash of broth. Too thin? Simmer a minute more. You want “spoon ribbons” that slowly fold back into the pan.

    Smart assembly tips (from my chaotic kitchen)

    Warm your tortillas so they don’t crack. I stack corn tortillas in a damp towel and microwave for 30–45 seconds. Spread a thin base of sauce in the baking dish so nothing sticks. For Creamy Chicken Pumpkin Enchiladas, toss shredded chicken with a cup of sauce, cheese, cilantro, and lime juice before rolling—this keeps the filling juicy. Roll snugly and line them seam-side down. Pour sauce, blanket with cheese, and bake until bubbly. The time my timer didn’t go off (thanks, low battery), I pulled the pan at 22 minutes and they were still perfect: saucy edges, bronzed cheese. Creamy Chicken Pumpkin Enchiladas are forgiving like that.

    Craving more creamy comfort? You’ll love the yogurt trick in my Greek Yogurt Chicken Curry—another weeknight hero.

    Variations for Creamy Chicken Pumpkin Enchiladas

    Protein, tortilla, and cheese swaps

    Creamy Chicken Pumpkin Enchiladas are endlessly adaptable. Try leftover turkey after the holidays, or rotisserie chicken on busy nights. For a vegetarian version, swap in black beans and roasted sweet potatoes. Corn tortillas bring classic flavor, but flour tortillas roll smoothly if that’s your style. Cheese-wise, Monterey Jack melts like a dream; pepper jack brings a little kick; Oaxaca or Chihuahua cheeses keep things authentically melty. Want a lighter feel? Half cheese inside, then finish with a modest sprinkle on top. However you riff, keep the creamy pumpkin enchilada sauce front and center—it’s the signature of these Creamy Chicken Pumpkin Enchiladas and the reason everyone asks for seconds.

    For a Pinterest-ready pan, drizzle a little crema and sprinkle pomegranate arils for jeweled color. Try a verde-pumpkin mashup by stirring a few tablespoons of salsa verde into the sauce. Make bite-sized “taquito enchiladas” with street-size tortillas for parties. Gluten-sensitive? Use certified gluten-free corn tortillas and check your broth and chiles. Dairy light? Use Greek yogurt instead of sour cream and top with a modest amount of cheese. I once decorated a tray of Creamy Chicken Pumpkin Enchiladas with cilantro leaves and paper-thin jalapeño coins while my kiddo sang the taco song—somehow it tasted better. A dramatic finish makes a humble casserole feel like a celebration.

    Hosting a crowd? Add a second pan and a taco-bar vibe with my Crockpot Honey Lime Chicken Tacos for variety.

    Storing, Reheating, and Troubleshooting

    Make-ahead, freeze, and reheat like a pro

    Creamy Chicken Pumpkin Enchiladas are weeknight-friendly and meal-prep gold. Assemble up to one day ahead; cover and refrigerate. Bake covered for 10 minutes, then uncover and continue until bubbly. For freezing, assemble in a foil pan without baking, wrap tightly, and freeze up to 2 months. Bake from frozen at 350°F, covered, for 30–35 minutes, then uncover until hot and melty. For leftovers, microwave individual portions or reheat in a 325°F oven so the tortillas stay tender. The creamy pumpkin enchilada sauce helps these creamy enchiladas reheat beautifully without drying out, which is why Creamy Chicken Pumpkin Enchiladas are on my monthly rotation.

    Sticky spots, solved (FAQs inside, too)

    If tortillas crack, they weren’t warmed enough or were overfilled. If sauce splits, your heat was too high when adding dairy—pull the pan off heat first. If the center isn’t hot, your rolls are extra plump; bake covered for 5–10 more minutes. Sauce too mild? Add a pinch more chili powder or a dash of chipotle. Salt brings everything into focus—taste as you go. The night I learned that, I’d lost my measuring spoon in the drawer abyss and eyeballed the cumin. Still terrific. Creamy Chicken Pumpkin Enchiladas are resilient, creamy, and consistently crowd-pleasing.

    FAQs

    Can I make Creamy Chicken Pumpkin Enchiladas ahead of time?

    Yes. Assemble, cover, and refrigerate up to 24 hours. Bake covered 10 minutes, then uncover and continue until hot and bubbly.

    Are Creamy Chicken Pumpkin Enchiladas spicy?

    They’re mild to medium. Use mild green chiles and Monterey Jack for gentle heat, or add jalapeño/pepper jack for more spice.

    Can I use flour tortillas instead of corn?

    Absolutely. Flour tortillas roll easily and bake well. If using larger tortillas, you may yield fewer but bigger enchiladas.

    What can I substitute for sour cream?

    Plain Greek yogurt works perfectly and lightens the sauce while keeping it creamy and tangy.

    Conclusion

    Creamy Chicken Pumpkin Enchiladas bring the comfort of baked enchiladas and the velvet of pumpkin enchilada sauce to your table in under an hour. With tender shredded chicken, warm spices, green chiles, and melty cheese, they deliver an unforgettable, creamy fall dinner without fuss. I love serving Creamy Chicken Pumpkin Enchiladas with a crisp salad and lime wedges, then sending leftovers for lunch—still saucy, still satisfying. If you’re exploring cozy mains this season, add these creamy enchiladas to your must-make list and browse more on our pinterest account for fresh weeknight inspiration. Try it at home and tag me!

  • Savory Pumpkin and Bacon Risotto: 7 Irresistible Secrets

    Savory Pumpkin and Bacon Risotto: 7 Irresistible Secrets

    Savory Pumpkin and Bacon Risotto had me laughing and stirring at the same time. I’m Darleen Vance, and last Tuesday my toddler turned a measuring cup into a drum while our dog stole a piece of bacon—chaos, but dinner magic followed. Savory Pumpkin and Bacon Risotto rewards patience with creamy comfort food, smoky crunch, and a cozy fall aroma that wraps the whole house. One pot, a little stirring, and you’re about to taste why this creamy risotto wins weeknights.

    Savory Pumpkin and Bacon Risotto: 7 Irresistible Secrets

    Recipe

    Savory Pumpkin and Bacon Risotto Recipe Secrets

    Creamy Arborio + Pumpkin Puree: The Cozy Core

    What makes Savory Pumpkin and Bacon Risotto so irresistible? Start with Arborio rice. This short-grain superstar releases starch as you stir, creating that signature creamy risotto texture we crave in fall comfort food. Stirring in pumpkin puree brings silkiness and a gentle sweetness that plays beautifully with smoky bacon. Parmesan adds umami while sage or thyme layers herb fragrance. The result is a savory pumpkin risotto that’s both elegant and weeknight-easy, a one-pot stovetop risotto that tastes like a restaurant bowl.

    Use warm broth so each ladle melts into the grains. Toasting the Arborio opens the door to deeper flavor, and white wine lifts the richness. It’s the balance—smoky bacon, creamy pumpkin, and nutty Parmesan—that makes this bacon risotto a fall dinner favorite.

    Food feeds all the senses, which is why adding texture makes your Savory Pumpkin and Bacon Risotto pop on social feeds. Reserve some bacon to stay ultra-crispy, and pan-fry sage leaves in a teaspoon of bacon fat for 10–15 seconds until crisp. That salty-herb crunch over creamy risotto is a total scroll-stopper. Drizzle a whisper of browned butter if you’re feeling extra. It’s the kind of creamy, cozy, savory pumpkin and bacon risotto you’ll want to photograph before eating.

    Darleen Vance anecdote: Last fall, my skillet snapped me back to reality when the sage leaves somersaulted like confetti. I was half-laughing, half-guarding the bowl from curious hands. Kitchen chaos, delicious payoff.

    How to Make Savory Pumpkin and Bacon Risotto (Step-by-Step)

    Stirring, Sizzle, and Timing

    Making Savory Pumpkin and Bacon Risotto is soothing once you know the rhythm. Start by crisping bacon so you can cook onions in that flavorful fat. Toast Arborio rice until the edges look translucent—this step prevents mushiness and builds nutty aroma. Deglaze with dry white wine; it evaporates quickly, leaving acidity to balance the creamy risotto. Then, ladle warm broth bit by bit, stirring gently. Each addition should transform into a glossy wave before the next. In 18–20 minutes, the rice turns al dente and creamy, not soupy. Fold in pumpkin puree, sage or thyme, nutmeg, butter, and Parmesan. Now your savory pumpkin risotto is glossy, velvety, and ready for crispy bacon on top.

    Pro Tips for Creamy Success

    • Use a heavy pot to keep heat steady for stovetop risotto.
    • Keep broth warm; cold liquid shocks rice and slows starch release.
    • Stir consistently, not aggressively—gentle movement coaxes creaminess.
    • Season late; bacon and cheese add salt. Taste before adding more.
    • Finish off heat with butter and Parmesan for a silky emulsion.

    Darleen Vance anecdote: I once tried to fold laundry between ladles—bad idea. My risotto still turned out lush, but I learned to treat Savory Pumpkin and Bacon Risotto like a mini spa session: stir, breathe, sip, repeat. For more cozy bowls, try my Warm Apple Cinnamon Quinoa Bowl when you want sweet comfort next time.

    Savory Pumpkin and Bacon Risotto Variations & Swaps

    Cheeses, Herbs, and Broth Choices

    One joy of Savory Pumpkin and Bacon Risotto is how adaptable it is. Swap Parmesan for Pecorino Romano for a saltier edge, or fold in a spoon of mascarpone for ultra-lush creamy risotto. Broth sets the tone—chicken broth is classic, but mushroom broth makes a deeper umami-forward pumpkin risotto. Love herbs? Sage is autumn’s star, but fresh thyme or rosemary bring balance. Add sautéed mushrooms, roasted butternut cubes, or a handful of baby spinach at the end for color and nutrients. A squeeze of lemon or zest brightens the smoky bacon, while a pinch of red pepper flakes adds warmth without overpowering the comforting pumpkin.

    Pinterest-Favorite Twists

    • Goat Cheese Swirl: Dollop into bowls for tangy ribbons through bacon risotto.
    • Brown Butter Drizzle: Nutty aroma amplifies the fall dinner vibes.
    • Turkey Bacon or Pancetta: Keep the smoky vibe with your favorite cut.
    • Gluten-Free Adaptation: Rice is naturally GF—just use verified GF broth.
    • Veg-Forward: Replace bacon with crispy mushrooms and finish with toasted pepitas.

    Darleen Vance anecdote: The night I tried goat cheese, my spoon stopped mid-air—instant upgrade. Meanwhile, my teen swore the browned butter “smelled like a cozy cabin.” If you’re building a fall menu, pair this with my Maple-Glazed Squash & Brussels Sprouts or kick off with Pumpkin Hummus with Pita Chips for a pumpkin-forward celebration.

    Savory Pumpkin and Bacon Risotto: Serving, Storage, Troubleshooting

    How to Serve It Like a Pro

    Serve Savory Pumpkin and Bacon Risotto immediately; risotto waits for no one. Spoon into warm bowls and crown with crispy bacon, fried sage, and extra Parmesan. If the risotto tightens while plating, loosen with a splash of warm broth. This creamy, savory pumpkin and bacon risotto pairs with simply roasted greens or a crisp salad to balance richness. For an elevated dinner party, follow with light seafood like my Garlic Lemon Baked Salmon.

    Storage, Reheat, and Quick Fixes

    • Storage: Refrigerate in an airtight container up to 3 days. Keep bacon separate for crunch.
    • Reheat: Warm gently on the stovetop with a splash of broth or water, stirring to revive creaminess.
    • Freezing: Not ideal—dairy and rice texture can suffer. If you must, freeze up to 1 month and reheat slowly with extra liquid.
    • Too thick? Add warm broth, a little at a time.
    • Too salty? Balance with a splash of cream or a squeeze of lemon.
    • Gummy rice? You may have overcooked or under-stirred. Next time, toast rice well and add liquid gradually.

    Darleen Vance anecdote: I once reheated leftover Savory Pumpkin and Bacon Risotto for a lunch Zoom call—camera off while I coaxed it back to creamy glory with hot broth. Ten minutes later: silky, bacon-kissed heaven.

    This savory pumpkin and bacon risotto is creamy, comforting, and packed with flavor. A cozy fall dinner that’s rich, hearty, and perfect for weeknights. Try it this week!

    Savory Pumpkin and Bacon Risotto Recipe

    This is the exact creamy risotto method I use on repeat: toasty Arborio, warm broth, pumpkin puree, and a final swirl of butter, Parmesan, and bacon. The stovetop rhythm gives that luscious finish every time.

    FAQs

    Can I make Savory Pumpkin and Bacon Risotto without wine?

    Yes. Replace wine with an equal amount of warm broth and add a teaspoon of lemon juice at the end to balance richness.

    What rice works best for creamy risotto?

    Arborio is easiest to find, but Carnaroli creates an even silkier texture and is more forgiving to overcooking.

    How do I keep bacon crispy on top?

    Cook bacon first, reserve some pieces, and add them at the very end. You can briefly re-crisp in a skillet before serving.

    Is this risotto gluten-free?

    Rice is naturally gluten-free. Use a certified gluten-free broth and bacon, and you’re set.

    Conclusion

    When you crave a cozy bowl, Savory Pumpkin and Bacon Risotto delivers creamy comfort food with smoky bacon, umami-rich Parmesan, and herb-laced pumpkin. The stovetop method is simple, the flavor is luxurious, and the texture is that perfect wave of creamy risotto we all love. Whether it’s a weeknight dinner or a fall dinner party, this savory pumpkin risotto checks every box: one-pot ease, al dente grains, and a balanced, irresistible finish. Make Savory Pumpkin and Bacon Risotto this week, then try your own twist—goat cheese, browned butter, or mushroom broth. Try it at home and tag me! I can’t wait to see your bowls and bacon-sage crowns.