Category: Dinner

Easy, tasty dinner ideas for busy nights. Simple recipes, quick prep, and family-friendly meals you’ll make again and again.

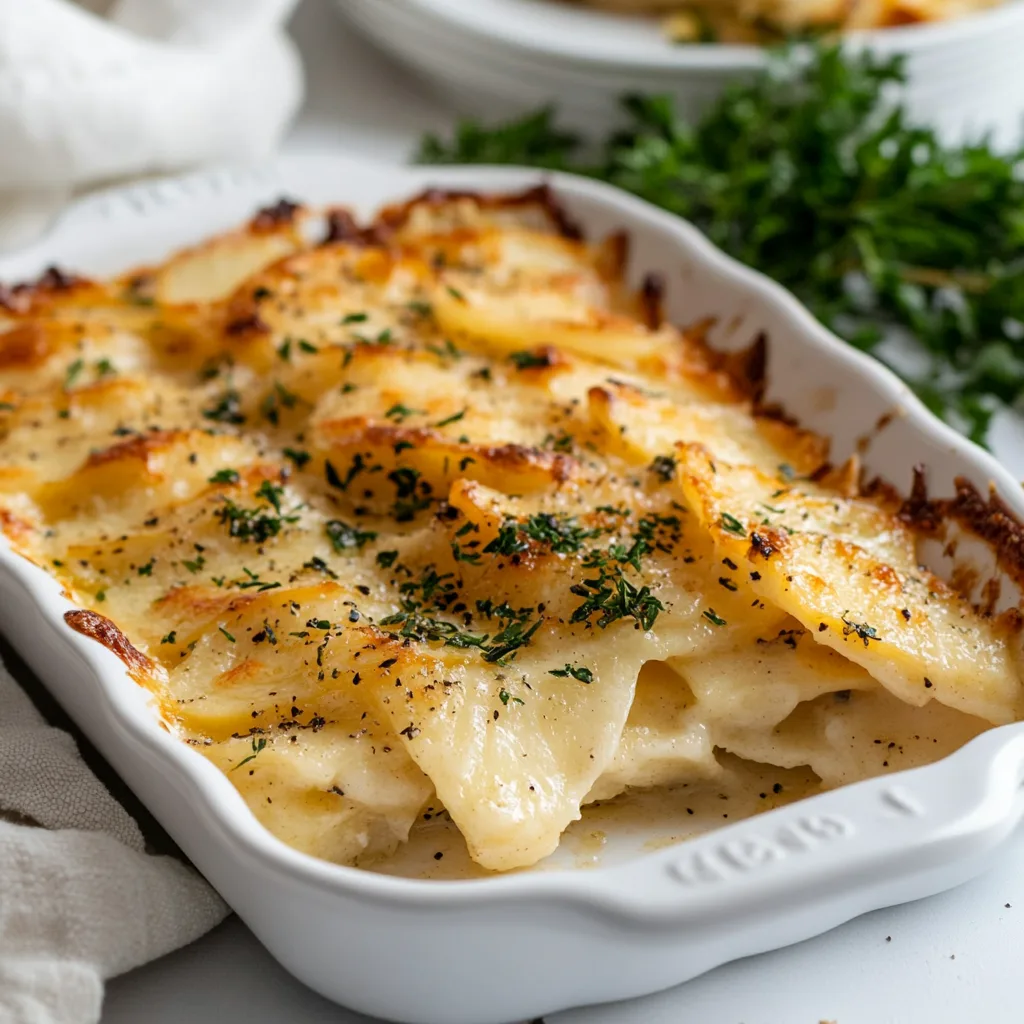
  • Swede, Kale, and Sweet Potato Gratin – Cozy and Irresistible

    Swede, Kale, and Sweet Potato Gratin – Cozy and Irresistible

    Swede, Kale, and Sweet Potato Gratin was born on a Tuesday when my oven timer and my toddler’s bath time staged a duel. While stirring cream with one hand and wrangling kale with the other, I layered this Swede, Kale, and Sweet Potato Gratin like a calm chef in a storm. The swede (rutabaga) adds earthy sweetness, the sweet potato brings velvet comfort, and kale keeps everything bright and brave. When it came out bubbling and golden, even my skeptical neighbor asked for seconds—and the recipe.

    Swede, Kale, and Sweet Potato Gratin

    Recipe

    WHY YOU’LL LOVE THIS RECIPE

    What Makes This Swede, Kale, and Sweet Potato Gratin So Irresistible

    I once joked that my casserole dish is my sous-chef. On the night Swede, Kale, and Sweet Potato Gratin saved dinner, I had precisely 20 minutes and a very opinionated cat sitting on the recipe notebook. Still, this easy dinner came together like a dream. Swede, Kale, and Sweet Potato Gratin delivers layers of homemade comfort food with a creamy, golden top and a savory, herb-kissed interior. It’s the kind of one-pan meal that makes weeknights feel special without fussy technique or a sink full of dishes.

    • Comforting and creamy: a rich, golden top with tender layers beneath.
    • Simple ingredients: swede (rutabaga), sweet potato, kale, cream, garlic, and cheese.
    • Family-friendly and crowd-pleasing: balanced sweetness and hearty greens.
    • Easy prep: slice, layer, pour, and bake—minimal hands-on time.
    • Flexible: works as a vegetarian main or a cozy side for a bigger spread.

    If you love creamy comfort food and a fuss-free homemade bake, Swede, Kale, and Sweet Potato Gratin is about to become your reliable favorite. Ready to cook? Let’s head to the recipe card.

    Fall and winter call for nourishing, colorful casseroles that feel good to eat. This recipe packs a vegetable trifecta: earthy swede, naturally sweet sweet potato, and vibrant kale, swaddled in seasoned cream and bubbling cheese. The result is cozy flavor, a crispy top, and a restaurant-level finish with home-cook ease. It’s the homemade hero you can slide into the oven while chatting with friends or catching up on messages. Pair it with a simple green salad or roasted veg for a complete easy dinner.

    TIPS, TRICKS & EXPERT SECRETS

    Chef Tips for Perfect Swede, Kale, and Sweet Potato Gratin Every Time

    During a cooking class, I learned a tiny trick that changed my gratins forever: season the cream, not just the vegetables. When you pour well-seasoned cream through the layers, every bite sings. Here are my best cooking tips for Swede, Kale, and Sweet Potato Gratin so your easy recipe tastes like a pro’s homemade version.

    • Slice evenly: Aim for 2–3 mm slices for both swede and sweet potato. Uniform thickness ensures tender, evenly cooked layers.
    • Season the cream: Whisk salt, pepper, thyme, nutmeg, and Dijon into the cream and stock. This quick fix ensures flavor reaches every layer.
    • Wilt the kale: A quick sauté softens the greens and removes excess moisture, avoiding a watery gratin.
    • Rest before slicing: A 10–15 minute rest sets the layers so slices stay tall and neat.

    Smart Ingredient Swaps & Practical Cooking Advice

    • Vegan: Replace dairy with full-fat coconut milk + unsweetened oat cream (50/50), and use vegan cheeses or nutritional yeast. Brush the top with olive oil for a golden finish.
    • Gluten-free: Skip the panko topping or use a certified GF breadcrumb. The gratin is naturally gluten-free without the crumbs.
    • Lighter option: Use half-and-half instead of heavy cream and reduce cheese by one-third; cover during most of the bake to retain moisture.
    • What not to do: Don’t crank the heat too high to “speed up” browning—this risks a burnt top and undercooked swede. Keep to the suggested temperature and timing.

    With these cooking tips, your Swede, Kale, and Sweet Potato Gratin will bake up silky, flavorful, and beautifully golden every time.

    SERVING IDEAS & CREATIVE VARIATIONS

    How to Serve Swede, Kale, and Sweet Potato Gratin for Maximum Enjoyment

    When I plated this gratin for friends, I learned a simple truth: a crisp top and clean slice make everyone ooh and ahh. Serve Swede, Kale, and Sweet Potato Gratin as the star with a bright side, or let it support a larger spread. Here are easy serving ideas and pairing suggestions:

    • Pair with a tangy salad or green veg: Try Green Beans with Garlic and Almonds for crunch and freshness.
    • Holiday or Sunday roast side: This gratin sits beautifully beside roast chicken, glazed tofu, or seared mushrooms.
    • Contrast with bold roasted roots: Serve alongside my spicy-sweet Gochujang Roasted Root Veg for a cozy-meets-fiery combo.
    Swede, Kale, and Sweet Potato Gratin

    Flavor Twists and Seasonal Variations

    • Cheese swap: Try smoked gouda or a sharp aged cheddar for deeper, toastier notes.
    • Herb forward: Add rosemary and sage for a wintery, aromatic twist; garnish with chives for spring brightness.
    • Crunch topper: Mix crushed hazelnuts or walnuts with GF crumbs for a nutty finish.

    Content creators: For plating suggestions and photography, slice after the 10–15 minute rest for clean layers, then style with a few fresh thyme sprigs. A corner slice with the bubbling, golden top in frame is Pinterest-friendly perfection. If you love creamy bakes, bookmark my equally cozy Cauliflower Cheese Gratin too.

    STORAGE & TROUBLESHOOTING GUIDE

    How to Store and Reheat Swede, Kale, and Sweet Potato Gratin

    I once hid the last slice behind the yogurt—no regrets. If you’re lucky enough to have leftovers, here’s how to store this Swede, Kale, and Sweet Potato Gratin so it stays delicious.

    • Room temperature: Keep out for serving up to 2 hours.
    • Fridge: Store airtight for 3–4 days. Use a lidded glass container to keep the top from getting soggy.
    • Freezer: Wrap slices tightly and freeze up to 2 months. Thaw overnight in the fridge before reheating.
    • Reheat: Oven at 175°C/350°F, covered, 12–18 minutes for slices (20–25 minutes for a larger portion). Uncover for the last 3–5 minutes to re-crisp the top. Air fryer option: 160°C/320°F for 6–8 minutes for a fast, crispy finish.

    Troubleshooting Common Swede, Kale, and Sweet Potato Gratin Issues

    • Too watery: Kale may have released moisture. Sauté greens first and don’t skip the foil for the initial bake; it helps the vegetables steam-tender before reducing.
    • Too dry: Add 2–4 tbsp extra cream or stock next time, and cover longer. Check slices are 2–3 mm for even tenderness.
    • Uneven texture: Ensure even slicing and consistent layering. Rotate the pan halfway for even browning.
    • Underbrowned top: Broil/grill for 1–2 minutes at the end, watching closely to avoid burning.

    Follow this storage advice and quick fixes to keep your gratin creamy, crisp-topped, and ready for easy reheat nights. You’ve got this—leftovers never tasted so good.

    FAQs

    Can I make Swede, Kale, and Sweet Potato Gratin ahead of time?

    Yes. Assemble up to 24 hours in advance, cover, and refrigerate. Add 5–10 minutes to the bake time since it starts cold.

    Do I have to peel the swede and sweet potatoes?

    Yes for swede (its skin is tough and waxy). For sweet potatoes, peeling yields a silkier texture, but thinly scrubbed skin is fine if you prefer.

    How thin should I slice the vegetables?

    About 2–3 mm (1/8 inch). Even, thin slices ensure the gratin bakes tender without overcooking the top.

    What cheese works best?

    Gruyère for nutty richness, mature cheddar for bold comfort, and Parmesan for salty depth. A half-and-half mix is perfect.

    Conclusion

    Swede, Kale, and Sweet Potato Gratin is the cozy, creamy bake that proves comfort food can also be vibrant and veggie-forward. With earthy swede, sweet potato silkiness, and hearty kale tucked into a homemade creamy sauce, this easy dinner brings golden edges and a spoonful of joy to every plate. Whether you serve it as a vegetarian main or a side beside roasted mains, it’s a one-pan meal that delivers flavor and convenience. Try Swede, Kale, and Sweet Potato Gratin at home, share your version, and tag me—I can’t wait to see your bubbling, golden masterpiece.
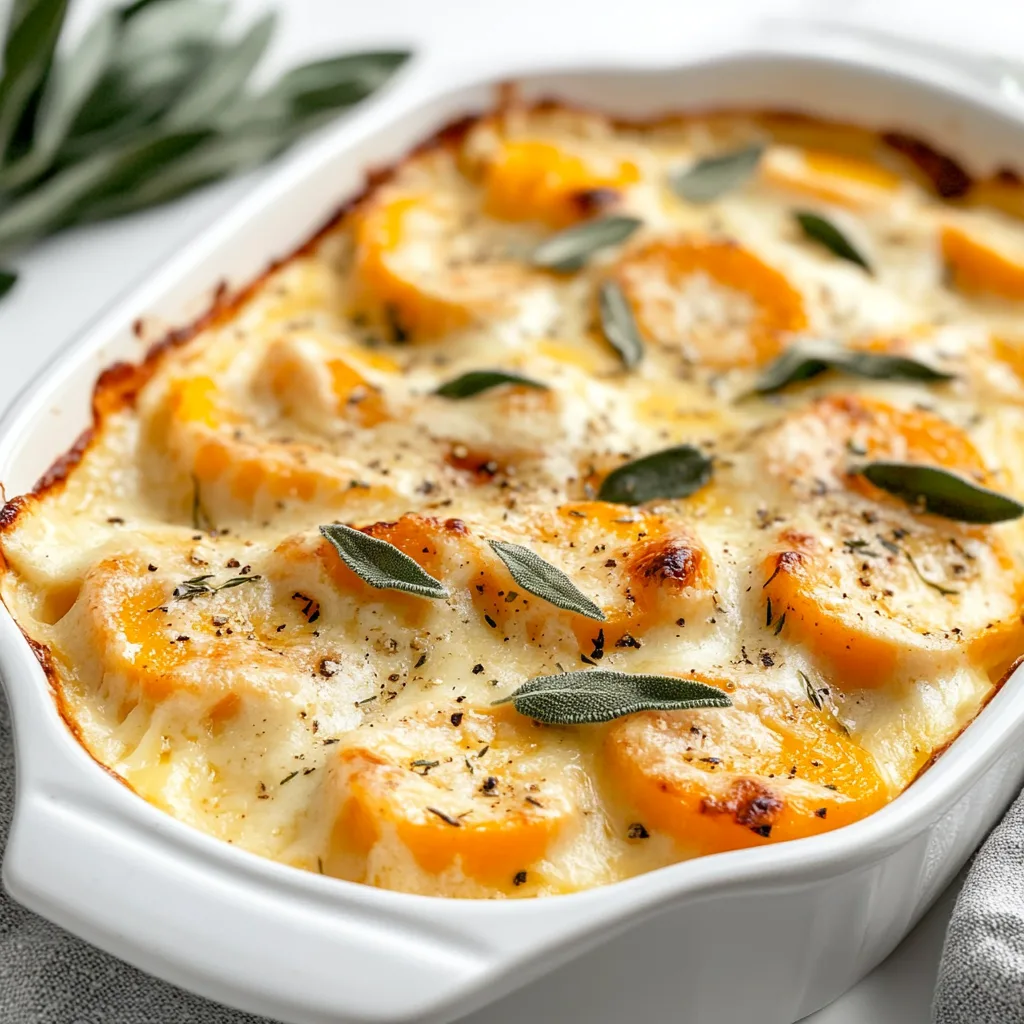
  • Creamy Butternut Squash & Sage Gratin – Cozy, Irresistible

    Creamy Butternut Squash & Sage Gratin – Cozy, Irresistible

    Creamy Butternut Squash & Sage Gratin came to life on a Tuesday when I realized my mandoline was set to “paper-thin” and my toddler was set to “turbo.” I layered, whisked, and dodged a flying toy truck, and still — Creamy Butternut Squash & Sage Gratin emerged bubbling and golden. My husband claimed dibs on the corner pieces while I pretended I wasn’t scraping the baking dish for crispy bits. If your kitchen feels like a sitcom, this gratin is your laugh track and cozy finale.

    Creamy Butternut Squash & Sage Gratin – Cozy, Irresistible

    Recipe

    WHY YOU’LL LOVE THIS RECIPE

    What Makes This Creamy Butternut Squash & Sage Gratin So Irresistible

    I first made Creamy Butternut Squash & Sage Gratin after a grocery run where I forgot half my list and remembered all the snacks. The payoff? A bubbling pan of comfort food that tasted like I’d planned it for weeks. Creamy Butternut Squash & Sage Gratin hits that sweet spot: a homemade, one-pan meal that feels fancy but is wildly approachable. When you crave an easy dinner with big flavor, this gratin steps up without drama. I love how the fresh sage perfumes the whole kitchen while Parmesan and Gruyère turn silky cream into a golden blanket. This Creamy Butternut Squash & Sage Gratin is the kind of dish you make once and crave forever — cozy, creamy, and totally weeknight-friendly.

    • Comforting, creamy layers baked until golden and bubbly.
    • Simple, store-cupboard ingredients that deliver restaurant-level flavor.
    • Hands-off oven time — perfect for busy nights and holiday prep.
    • Kid- and guest-approved; ideal as a side or vegetarian main.
    • One-pan ease with a crispy top and tender interior.

    Ready to get a pan of Creamy Butternut Squash & Sage Gratin into the oven? Let’s cook.

    It’s the modern take on classic gratin: lighter than potatoes, deeply flavorful, and effortlessly Instagrammable. The balance of savory sage, sweet squash, and nutty cheese makes this Creamy Butternut Squash & Sage Gratin the homemade hero of your comfort-food lineup.

    TIPS, TRICKS & EXPERT SECRETS

    Chef Tips for Perfect Creamy Butternut Squash & Sage Gratin Every Time

    When I taught this at a small community class, I learned a powerful lesson mid-demo: I’d sliced some squash too thick. Five extra minutes in the oven fixed it, but the texture wasn’t as silky. Since then, my cooking tip is simple — slice evenly for a flawless, easy recipe every time. For a consistently dreamy Creamy Butternut Squash & Sage Gratin, try these quick fixes and homemade tweaks:

    • Slice to 1/8–1/4 inch: Thin, even slices cook tender without losing texture.
    • Salt in layers: A light sprinkle of salt between layers makes flavor pop.
    • Press gently: After pouring the cream, press the layers so everything bathes in sauce.
    • Rest before serving: 10–15 minutes helps the gratin set for clean slices.

    Smart Ingredient Swaps & Practical Cooking Advice

    • Cheese swap: Use white cheddar or fontina instead of Gruyère for a budget-friendly homemade version.
    • Vegan option: Sub cashew cream and vegan cheeses; brush the top with olive oil for browning.
    • Gluten-free: Skip the panko or use a gluten-free crumb; still crispy, still lovely.
    • Low-fat tweak: Replace half the cream with evaporated milk — still creamy, still comforting.
    • What not to do: Don’t overbake; if the top is browning too fast, tent with foil to prevent a dry Creamy Butternut Squash & Sage Gratin.

    With these quick fixes, your Creamy Butternut Squash & Sage Gratin will be a reliable, crowd-pleasing, easy dinner every single time.

    Creamy Butternut Squash & Sage Gratin

    SERVING IDEAS & CREATIVE VARIATIONS

    How to Serve Creamy Butternut Squash & Sage Gratin for Maximum Enjoyment

    I once served this gratin at a casual friendsgiving and watched it disappear while the turkey was still resting. The plating suggestion is simple: scoop generous squares and let the creamy edges glide onto the plate. Pair this Creamy Butternut Squash & Sage Gratin with crisp greens or roasted veg for color and contrast.

    Flavor Twists and Seasonal Variations

    • Maple-chili twist: Drizzle 1 tbsp maple syrup and a pinch of chili flakes into the cream for sweet heat.
    • Mushroom umami: Add a layer of sautéed mushrooms for depth and a woodland vibe.
    • Harvest crunch: Swap panko for crushed hazelnuts or pecans for a seasonal twist and texture punch.

    Sharing on socials? Plate on a dark stoneware dish to highlight the golden crust; sprinkle a few fried sage leaves and cracked pepper for a photogenic finish. Your Creamy Butternut Squash & Sage Gratin will look as incredible as it tastes — true comfort food with style.

    STORAGE & TROUBLESHOOTING GUIDE

    How to Store and Reheat Creamy Butternut Squash & Sage Gratin

    Leftovers of Creamy Butternut Squash & Sage Gratin are a treasured breakfast in our house — yes, I’ve eaten it cold over the sink. To keep your gratin fresh and ready for round two, follow this storage advice:

    • Room temperature: Keep out no longer than 2 hours.
    • Refrigerator: Store in an airtight container 3–4 days; press parchment onto the surface to keep the top from softening.
    • Freezer: Wrap tightly (dish + foil + freezer bag) for up to 2 months. Thaw overnight in the fridge.
    • Reheat: Oven at 350°F, covered, 15–20 minutes; uncover the last 5 minutes to re-crisp. Air fryer works too — 325°F for 6–8 minutes in a small, oven-safe pan.

    Troubleshooting Common Creamy Butternut Squash & Sage Gratin Issues

    • Too watery: Squash was sliced thick or not fully baked. Bake 5–10 more minutes uncovered; let it rest to set.
    • Too dry: Added too little cream or overbaked. Warm 2–3 tbsp cream and drizzle over slices when reheating.
    • Uneven texture: Slices varied in thickness. Use a mandoline and keep to 1/8–1/4 inch next time.
    • Pale top: Broil 1–2 minutes at the end — watch closely for a golden, crunchy finish.

    With these quick fixes, your Creamy Butternut Squash & Sage Gratin will stay luscious, easy to reheat, and ready for comfort-driven seconds.

    FAQs

    Can I make Creamy Butternut Squash & Sage Gratin ahead?

    Yes. Assemble up to 24 hours in advance, cover, and refrigerate. Add 5–10 minutes to the bake time if going straight from the fridge.

    Do I have to peel the butternut squash?

    For the best texture, yes. The peel can be tough in a gratin. A sharp peeler makes quick work of it.

    What cheeses work best?

    Gruyère is classic for melt and nuttiness. White cheddar, fontina, or a Gruyère–Parmesan blend also deliver great flavor.

    Can I skip the panko topping?

    Absolutely. The gratin still gets beautifully golden; the panko just adds extra crunch.

    Conclusion

    This Creamy Butternut Squash & Sage Gratin is your ticket to a warm, homemade, comfort food moment — the kind that brings everyone to the table and keeps them there. With silky layers, fresh sage perfume, and a golden, cheesy crust, Creamy Butternut Squash & Sage Gratin doubles as an easy dinner or a show-stealing holiday side. It’s a one-pan meal that bakes up beautifully, reheats like a dream, and tastes like a hug. Try it at home, share your twist, and tag me — I can’t wait to see your Creamy Butternut Squash & Sage Gratin shine.

  • Cauliflower Cheese Gratin – Creamy, Irresistible Comfort

    Cauliflower Cheese Gratin – Creamy, Irresistible Comfort

    Cauliflower Cheese Gratin is my weeknight hero and my holiday secret weapon. Last Sunday, I pulled a bubbling Cauliflower Cheese Gratin from the oven just as the smoke alarm chirped from a rogue breadcrumb that jumped ship. I waved a dish towel, my dog cheered (barked), and we sat down to a rich, creamy gratin that disappeared faster than my patience with that alarm. This recipe is cozy, forgiving, and the kind of comfort food that wins the dinner hour—every time.

    Cauliflower Cheese Gratin

    Recipe

    WHY YOU’LL LOVE THIS RECIPE

    What Makes This Cauliflower Cheese Gratin So Irresistible

    I first fell for Cauliflower Cheese Gratin on a rainy Tuesday when my pantry looked bleak and my mood looked bleaker. A head of cauliflower, cheese odds and ends, and a flash of stubborn optimism turned into the most comforting, creamy Cauliflower Cheese Gratin. The sauce was velvety, the top was crispy, and the table went quiet in that rare, blissful way only comfort food can manage.

    • Comfort-in-a-dish: Cauliflower Cheese Gratin is classic comfort food with a creamy center and golden crunch.
    • Simple, homemade ingredients: butter, milk, cheese, and cauliflower—your easy dinner essentials.
    • Quick prep, big flavor: From stovetop to oven, this homemade gratin is weeknight-friendly.
    • Family-friendly and freezer-friendly: Make ahead, bake later, and enjoy reliable results.
    • One-pan meal vibes: Serve Cauliflower Cheese Gratin solo as a vegetarian main or as the star side.

    When you need something cozy and unfussy, Cauliflower Cheese Gratin delivers a creamy gratin you’ll crave on repeat. Ready to make your kitchen smell incredible? Let’s get to the recipe card.

    Beyond nostalgia, Cauliflower Cheese Gratin is trending because it hits all the right notes: budget-friendly, satisfying, and naturally gluten-adaptable. It’s the easy recipe home cooks are sharing for its rich texture—cheesy without being heavy, and bright with a whisper of Dijon. The homemade version bakes into a bubbly, golden dish that looks like it took all day. It didn’t. But we can keep that our little secret.

    TIPS, TRICKS & EXPERT SECRETS

    Chef Tips for Perfect Cauliflower Cheese Gratin Every Time

    Years ago, a chef friend watched me make Cauliflower Cheese Gratin and gently said, “Let it steam-dry.” Life-changing! That quick fix meant no watery gratin ever again. Here’s what else I learned the delicious way.

    • Steam-dry the florets: After blanching, spread cauliflower on a towel to release excess moisture. Dry cauliflower equals creamy Cauliflower Cheese Gratin.
    • Low and slow whisking: Cook the roux 1 minute, then whisk in milk gradually for a silky, lump-free sauce.
    • Season the sauce, not the pan: Salt, pepper, Dijon, garlic, and nutmeg go into the sauce so every bite sings.
    • Layer the cheese: Melt most into the sauce, reserve a little for the top for that oozy, golden finish.

    Smart Ingredient Swaps & Practical Cooking Advice

    • Gluten-free: Swap all-purpose flour for a 1:1 gluten-free blend or sweet rice flour. The homemade gratin stays creamy.
    • Lighter: Use 2% milk and skip heavy cream; add extra cauliflower for volume. Still a comforting, easy dinner.
    • Vegan: Use plant-based butter, unsweetened oat milk, and vegan cheddar. Add nutritional yeast for depth.
    • Cheese bench: Try Gruyère, aged cheddar, or a sharp Parmesan blend for a bold, deeply savory Cauliflower Cheese Gratin.

    What not to do: Don’t overcrowd the dish or overbake. Overcrowding traps water; overbaking dries the sauce. Aim for a lightly golden, bubbly top and a just-tender center to keep your Cauliflower Cheese Gratin luscious and irresistible.

    Cauliflower Cheese Gratin – Creamy, Irresistible Comfort

    SERVING IDEAS & CREATIVE VARIATIONS

    How to Serve Cauliflower Cheese Gratin for Maximum Enjoyment

    When friends pop over, I slide Cauliflower Cheese Gratin into a warm oven, then plate it family-style with bright sides. It looks elegant but it’s easy hosting at its best. A little green, a little crunch, and the cheesy center steals the show.

    For plating suggestions, scoop Cauliflower Cheese Gratin with a shallow spoon to capture sauce and crunchy topping in each portion. Garnish with parsley and a tiny grate of nutmeg for a restaurant-style finish.

    Flavor Twists and Seasonal Variations

    • Smoky paprika twist: Stir 1/2 teaspoon smoked paprika into the sauce and top with a pinch more before baking for a bold Cauliflower Cheese Gratin.
    • Autumn mushroom gratin: Fold in sautéed mushrooms and thyme for a seasonal twist that’s earthy and elegant.
    • Pinterest-favorite broccoli blend: Swap half the cauliflower for broccoli for a colorful, crowd-pleasing flavor variation.

    Content creators: Shoot overhead and then a side-angle forkful to capture the creamy pull. Natural light makes the golden crust on Cauliflower Cheese Gratin shine on Instagram, Pinterest, and beyond.

    STORAGE & TROUBLESHOOTING GUIDE

    How to Store and Reheat Cauliflower Cheese Gratin

    Leftover Cauliflower Cheese Gratin doesn’t last long at my house, but when it does, I stash it like treasure. Here’s how to keep it fresh.

    • Room temperature: Keep out no more than 1–2 hours.
    • Fridge: Store in an airtight container 3–4 days. For best texture, use a shallow container so the topping stays crisp.
    • Freezer: Wrap tightly in foil and freeze up to 2 months. Thaw overnight in the fridge before baking.
    • Reheat: Oven at 350°F (175°C), 12–18 minutes, loosely covered with foil. Uncover for the last few minutes to re-crisp. Air fryer at 325°F works in a pinch.

    Troubleshooting Common Cauliflower Cheese Gratin Issues

    • Too watery: You likely skipped the steam-dry. Next time, drain well and pat dry. Quick fix: bake uncovered 5–10 more minutes.
    • Too dry: Sauce may be over-reduced or it overbaked. Stir in a splash of warm milk and reheat gently to restore the creamy gratin texture.
    • Grainy sauce: Cheese overheated. Melt cheese off the heat and whisk gently. Use blocks of cheese you grate yourself for a smoother homemade version.
    • Uneven texture: Cut florets into similar sizes and avoid overcrowding the dish to keep Cauliflower Cheese Gratin evenly tender.

    With a few small habits—steam-dry, gentle whisking, and proper reheating—your Cauliflower Cheese Gratin will stay gorgeously creamy, comforting, and dinner-table ready.

    FAQs

    Can I make Cauliflower Cheese Gratin ahead?

    Yes. Assemble up to 24 hours ahead, cover, and refrigerate. Bake from cold at 375–400°F, adding 5–10 minutes. Top with breadcrumbs just before baking to keep them crisp.

    How do I keep Cauliflower Cheese Gratin from getting watery?

    Steam-dry the cauliflower after blanching and avoid overcrowding the dish. A thicker sauce and a hot oven help evaporate excess moisture.

    Can I use frozen cauliflower for Cauliflower Cheese Gratin?

    You can. Thaw fully and pat very dry. Expect a slightly softer texture, but the flavor remains delicious.

    What cheeses are best for Cauliflower Cheese Gratin?

    Sharp cheddar for punch, Gruyère for nutty depth, and a little Parmesan for a salty, crisp top. Mix and match to taste.

    Conclusion

    When life calls for cozy, Cauliflower Cheese Gratin answers with creamy richness, a golden crust, and that made-from-scratch magic. It’s the easy dinner that doubles as a showy side and the homemade comfort food you’ll pull out for holidays and Tuesdays alike. Pair it with bright veggies or hearty mains—try it next to slow-simmered favorites like my Pot Roast (Slow Cooker Recipe)—and watch the table go quiet. Cauliflower Cheese Gratin is reliable, irresistible, and endlessly adaptable. Try it at home and tag me so I can see your golden, bubbly gratin!

  • Green Beans with Garlic & Almonds – Cozy, Irresistible Flavor

    Green Beans with Garlic & Almonds – Cozy, Irresistible Flavor

    Green Beans with Garlic & Almonds saved me last Tuesday when the smoke alarm serenaded my attempts at chicken. I tossed these beans in the skillet, my kid timed the garlic, and boom—dinner hero. The sizzle, the toasted almonds, the lemony finish—my kind of kitchen save. If you love fast flavor and minimal fuss, Green Beans with Garlic & Almonds will be your new go-to side that tastes like it took all day.

    Winter Greens with Pine Nuts and Garlic

    Recipe

    Why You’ll Love This Green Beans with Garlic & Almonds Recipe

    What Makes This Green Beans with Garlic & Almonds So Irresistible

    I always joke that my stove has two moods: feast or fiasco. On a busy night, Green Beans with Garlic & Almonds keeps me squarely in feast mode. With one skillet and pantry staples, the beans turn vivid, the garlic goes golden, and the almonds bring a crunchy, cozy finish. This Green Beans with Garlic & Almonds recipe is the easy dinner side I lean on when everything else is a question mark. It’s homemade comfort food that still tastes fresh and bright. And yes, it’s a true one-pan meal vibe—minimal dishes, maximum flavor. Make Green Beans with Garlic & Almonds once and you’ll see why my family requests it weekly.

    • Quick prep and cook time—on the table in about 20 minutes.
    • Simple, affordable ingredients you likely have on hand.
    • Crisp-tender texture with toasty, buttery almond crunch.
    • Family-friendly, weeknight-approved, and naturally gluten-free.
    • Bright lemon and garlic make it feel restaurant-worthy at home.

    Two words: speed and satisfaction. Green Beans with Garlic & Almonds is trending because it transforms a basic veggie into a bold, crowd-pleasing side without extra steps. It’s an easy dinner companion that delivers comfort food flavor, a homemade finish, and that crunchy almond topper everyone loves. Ready to cook? Let’s dive into the recipe card and get sizzling.

    Tips, Tricks & Expert Secrets for Green Beans with Garlic & Almonds

    Chef Tips for Perfect Green Beans with Garlic & Almonds Every Time

    During a cooking demo, I once burned the garlic while explaining how not to burn garlic. Classic Darleen. Here’s how I’ve perfected Green Beans with Garlic & Almonds since that humbling moment, so your easy recipe always tastes like the best homemade version.

    • Dry the beans thoroughly after blanching. Moisture = soggy texture. Dry beans sear better and keep that crisp-tender bite in Green Beans with Garlic & Almonds.
    • Toast almonds first, remove, then add back at the end. This prevents over-browning and guarantees crunch.
    • Slice garlic thinly for even golden edges and mellow flavor. Add it once the pan has calmed slightly so it doesn’t scorch.
    • Steam-toss with a splash of water under a lid for 60 seconds. It’s a quick fix that finishes cooking without losing snap.

    Smart Ingredient Swaps & Practical Cooking Advice

    • Dairy-free/Vegan: Skip butter and use all olive oil; Green Beans with Garlic & Almonds stays rich and bright.
    • Citrus Options: Swap lemon with orange zest for a softer, sweeter finish—still excellent with garlic and almonds.
    • What not to do: Don’t add lemon juice too early. Acid can dull the green color and soften texture; finish at the end for the freshest pop.
    • Season in layers. Salt the blanching water, season the sauté, then adjust after the lemon and almonds—your Green Beans with Garlic & Almonds will sing.

    With these cooking tips, your easy recipe becomes a reliable, quick fix—crisp beans, golden garlic, and a homemade finish every time you make Green Beans with Garlic & Almonds.

    Serving Ideas & Creative Variations for Green Beans with Garlic & Almonds

    How to Serve Green Beans with Garlic & Almonds for Maximum Enjoyment

    When friends come over, I plate Green Beans with Garlic & Almonds on a wide platter so the almonds sparkle on top—instant dinner party polish. For a cozy weeknight, it’s a one-pan side that plays nice with whatever’s roasting. Here are serving ideas that make your Green Beans with Garlic & Almonds look and taste extra special:

    Flavor Twists and Seasonal Variations

    • Smoky Shallot Almondine: Sauté shallots in a touch of smoked paprika before adding garlic for a bolder Green Beans with Garlic & Almonds twist.
    • Holiday Sparkle: Swap almonds for toasted hazelnuts and finish with orange zest and a few pomegranate arils—festive color and crunch.
    • Summer Garden: Add blistered cherry tomatoes and fresh basil at the end for a bright, juicy take on Green Beans with Garlic & Almonds.

    Plating suggestion: Use a shallow white platter so the greens and almond gold pop in photos. If you’re sharing your Green Beans with Garlic & Almonds on social, angle the camera slightly above to catch that glossy lemon sheen and crunchy topping.

    Green Beans with Garlic & Almonds – Cozy, Irresistible Flavor

    Storage & Troubleshooting Guide for Green Beans with Garlic & Almonds

    How to Store and Reheat Green Beans with Garlic & Almonds

    I’m the queen of “planned leftovers,” so I always make extra Green Beans with Garlic & Almonds. Let them cool no more than 2 hours at room temp, then store to keep fresh.

    • Fridge: 3–4 days in an airtight container lined with a paper towel to absorb moisture.
    • Freezer: Up to 2 months in freezer-safe bags with excess air pressed out. Texture softens slightly after thawing but flavor stays delicious.
    • Reheat: Skillet over medium with a dab of oil 3–4 minutes; Air fryer at 350°F for 3–4 minutes; Oven at 350°F for 8–10 minutes; Microwave 60–90 seconds (cover to keep splatter down). Add a squeeze of lemon to refresh.

    Troubleshooting Common Green Beans with Garlic & Almonds Issues

    • Soggy beans: You may have overcooked or didn’t dry them well. Next time, blanch briefly and pat dry before sautéing. For a quick fix, reheat in a hot skillet to evaporate moisture.
    • Bitter or burnt garlic: Heat was too high or timing was off. Add garlic once the oil calms and cook just to pale gold. If it burns, start the garlic step over—bitterness lingers.
    • Watery finish: Too much residual water from blanching. Dry beans thoroughly and use only a tablespoon of water to steam-toss.
    • Bland flavor: Salt the blanching water, season during the sauté, and finish with lemon. Layering seasoning makes Green Beans with Garlic & Almonds pop.
    • Soft almonds: Add toasted almonds at the end and reserve a few for topping to keep that crunch.

    You’ve got this. With a few smart storage moves and quick fixes, your Green Beans with Garlic & Almonds stays vibrant, crunchy, and weeknight-ready.

    FAQs

    Do I have to blanch the beans first?

    No, you can skip blanching and sauté with a splash of water, covered, for 4–6 minutes until crisp-tender. Blanching just locks in color and speed.

    Can I make Green Beans with Garlic & Almonds ahead?

    Yes. Blanch and chill the beans up to 24 hours ahead. Toast almonds and prep garlic. Sauté just before serving for the best texture.

    What nuts can replace almonds?

    Try toasted hazelnuts, pecans, or pine nuts. The method stays the same for this Green Beans with Garlic & Almonds style side.

    Is this recipe gluten-free and vegetarian?

    Yes, it’s naturally gluten-free and vegetarian. For vegan, use all olive oil instead of butter.

    Conclusion

    If you’re craving a side that’s fast, flavorful, and truly homemade, Green Beans with Garlic & Almonds delivers every time. The crisp-tender beans, the toasty almond crunch, and that pop of lemon create comfort food energy without weighing down your plate. It’s an easy dinner win that feels special enough for guests and sturdy enough for meal prep. Pair it with hearty mains or an all-veg spread—this one-pan, easy side dish will become a repeat request. Make Green Beans with Garlic & Almonds tonight, share your plate, and tag me so I can cheer you on. And if you need more cozy inspiration, browse the full collection at RecipesDarleen Try it at home and tag me!

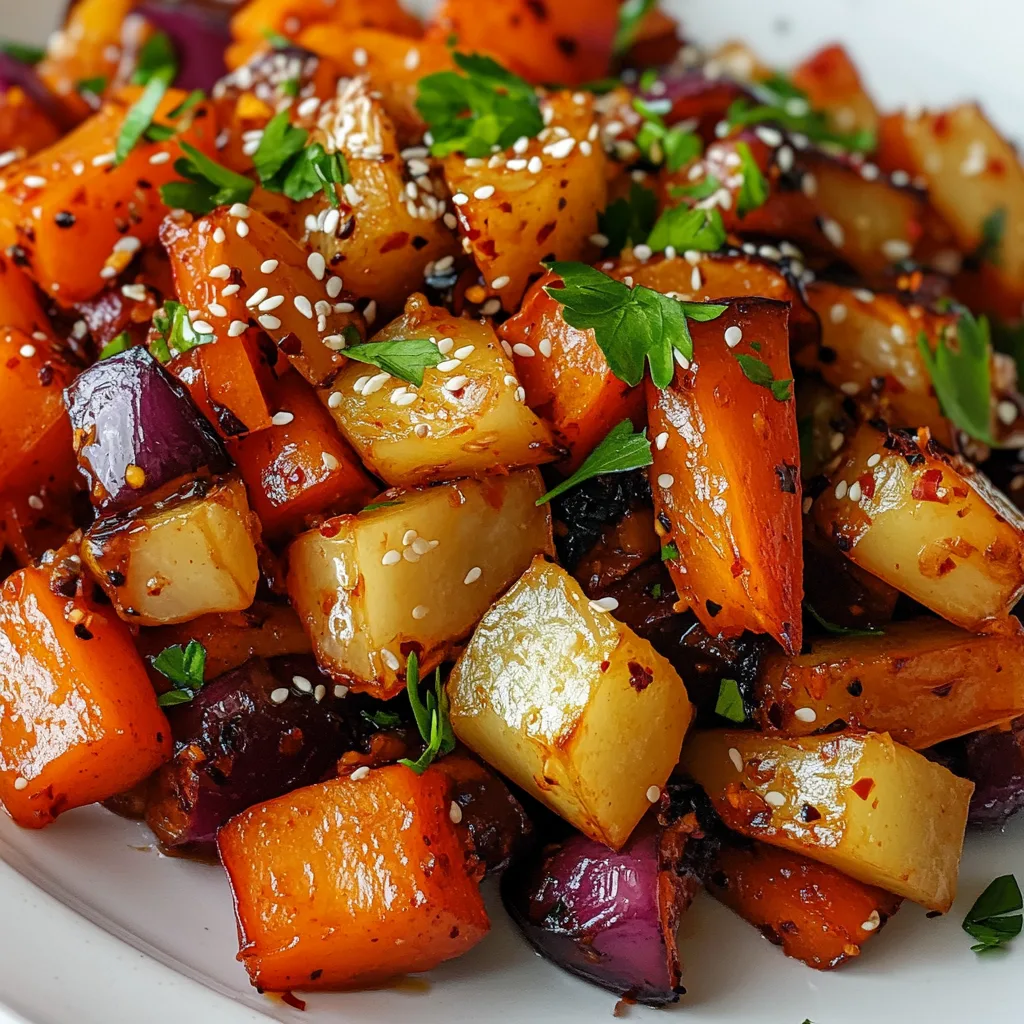
  • Gochujang Roasted Root Veg – Cozy, Bold, and Irresistible

    Gochujang Roasted Root Veg – Cozy, Bold, and Irresistible

    Gochujang Roasted Root Veg is what I make when dinner needs to be both exciting and easy. Last week, I pulled a classic Darleen move: tossed everything on one sheet pan, then realized I preheated the toaster oven instead of the big one. Kitchen chaos! Still, Gochujang Roasted Root Veg saved the night with caramelized edges and that cozy, spicy-sweet glaze. The kids kept stealing bites right off the pan while I tried to plate it. Pro tip from my circus to yours: line the pan, crank the heat, and let the gochujang do the heavy lifting.

    Gochujang Roasted Root Veg

    Recipe

    Why You’ll Love This Gochujang Roasted Root Veg

    What Makes This Gochujang Roasted Root Veg So Irresistible

    I once pulled this pan from the oven and my son asked if the vegetables were wearing lipstick. That glossy gochujang sheen does look glamorous, and that’s the charm of Gochujang Roasted Root Veg: it’s weeknight-easy yet dinner-party-pretty. Gochujang Roasted Root Veg brings cozy, spicy-sweet comfort food vibes with minimal work—just toss, roast, and serve. The homemade glaze clings to every edge, giving you crispy bits and soft centers in every bite.

    • One-pan meal energy: sheet pan simplicity with almost no cleanup.
    • Comforting taste: sweet potatoes, carrots, and parsnips soak up bold, umami-rich gochujang.
    • Quick prep: 15 minutes of chopping, then the oven does the rest.
    • Flexible and family-friendly: adjust the heat and add your favorite roots.
    • Homemade glaze, big payoff: pantry staples turn into a glossy, craveable finish.

    Gochujang is the flavor trend that refuses to fade—and for good reason. It’s a quick fix for bland vegetables, offering deep umami, mild heat, and just enough sweetness. Plus, this easy dinner strategy plays beautifully with bowls, proteins, and holiday spreads. If you love make-ahead comfort food like my Slow Cooker Red Lentil Curry or hearty classics like Chicken and Dumplings with Biscuits, this Gochujang Roasted Root Veg belongs on your weekly rotation. Ready to roast?

    Tips, Tricks & Expert Secrets for Gochujang Roasted Root Veg

    Chef Tips for Perfect Gochujang Roasted Root Veg Every Time

    During a cooking demo, I learned the hard way that crowding the pan turns crisp dreams into a soft, steamy situation. Since then, my Gochujang Roasted Root Veg has been all about space, heat, and timing—little tweaks for big wins in any homemade version of this easy recipe.

    • Cut evenly: aim for 1-inch chunks so everything roasts at the same pace and gets caramelized edges.
    • High heat rules: 425°F (220°C) delivers that gorgeous browning without drying out the centers.
    • Use parchment: it minimizes sticking and helps glaze cling to the vegetables.
    • Toss mid-roast: flipping at the 20-minute mark promotes even color and texture.

    Smart Ingredient Swaps & Practical Cooking Advice

    • Swap-ins: butternut squash or baby potatoes work beautifully in place of parsnips or carrots.
    • Vegan and gluten-free: choose maple syrup and tamari to keep this Gochujang Roasted Root Veg friendly for both diets.
    • Lighter option: reduce neutral oil to 1 tablespoon and add a splash of water to the glaze to coat more thinly.

    What not to do: Don’t overcrowd the pan. If your vegetables are piled up, they’ll steam instead of roast. Use two sheet pans if needed. For more weeknight-friendly ideas, peek at my cozy Pot Roast (Slow Cooker)—different method, same stress-free dinner magic.

    Serving Ideas & Creative Variations for Gochujang Roasted Root Veg

    How to Serve Gochujang Roasted Root Veg for Maximum Enjoyment

    I served this to friends on a big white platter with a sprinkle of sesame seeds, and it disappeared before the roast chicken even hit the table. Presentation matters, but with Gochujang Roasted Root Veg, the flavor does the heavy lifting. Try these serving ideas to make it pop.

    • Build a bowl: spoon over jasmine rice or quinoa, add a soft-boiled egg, and drizzle with a little extra sesame oil.
    • Pair with protein: roasted salmon, crispy tofu, or grilled chicken all love that spicy-sweet glaze.
    • Fresh contrast: finish with lime, cilantro, or a dollop of tangy yogurt to balance the heat.

    Flavor Twists and Seasonal Variations

    • Miso-maple twist: add 1 teaspoon white miso to the glaze for extra umami.
    • Fall harvest: include cubed delicata or butternut squash; in spring, use baby carrots and radishes for a seasonal twist.
    • Garlic-sesame crunch: top hot vegetables with a quick sizzle of garlic in oil plus extra sesame seeds for a TikTok-worthy finish.

    Plating suggestion: use a wide, shallow platter so the glossy edges are visible, then scatter scallions and sesame seeds for texture. Snapping photos? Angle toward natural light and let a few pieces tumble off the platter for that relaxed, homemade vibe. For holiday brunch pairings, this is dreamy alongside my Holiday Red & Green Veggie Strata.

    Storage & Troubleshooting Guide for Gochujang Roasted Root Veg

    How to Store and Reheat Gochujang Roasted Root Veg

    I always make extra and call it “future me’s lunch.” Leftover Gochujang Roasted Root Veg is a gift for busy days—just add a fried egg and you’ve got a quick fix that tastes like you planned it.

    • Room temperature: keep out for serving up to 2 hours.
    • Fridge: store in an airtight container for 3–4 days. A shallow container keeps the edges from getting soggy.
    • Freezer: freeze up to 2 months; thaw overnight in the fridge for best texture.
    • Reheat: oven or air fryer at 400°F (205°C) for 6–10 minutes to re-crisp; skillet with a teaspoon of oil works in a pinch.

    Troubleshooting Common Gochujang Roasted Root Veg Issues

    • Too soft or watery: increase oven temp to 425–450°F and spread vegetables across two pans to avoid steaming.
    • Dry texture: toss with a teaspoon of sesame oil after reheating or drizzle with a little maple and soy for moisture.
    • Uneven browning: rotate the pan halfway through and flip vegetables at the 20-minute mark.
    • Too spicy: stir in extra maple or serve with yogurt or sour cream to cool things down.

    With a little storage advice and a warm oven, your Gochujang Roasted Root Veg will keep its cozy crunch. You’ve got this—tomorrow’s lunch is already winning.

    FAQs

    Can I make Gochujang Roasted Root Veg ahead of time?

    Yes. Roast fully, cool, and refrigerate up to 3–4 days. Re-crisp in a 400°F oven or air fryer just before serving.

    What vegetables work best besides carrots and sweet potatoes?

    Parsnips, butternut squash, baby potatoes, and even radishes roast beautifully. Keep pieces about 1 inch for even cooking.

    Is gochujang very spicy in this recipe?

    It’s warm and cozy, not fiery. Reduce gochujang by 1 tablespoon or skip the extra chili flakes for a milder version.

    Can I make Gochujang Roasted Root Veg gluten-free or vegan?

    Absolutely. Use tamari instead of soy sauce and maple syrup instead of honey. The rest is naturally vegan and gluten-free.

    Conclusion

    There’s something magical about how a hot oven and a glossy glaze can transform everyday roots into a show-stealing side. Gochujang Roasted Root Veg checks every easy dinner box—simple ingredients, one-pan meal cleanup, and restaurant-level flavor that still feels homemade. Whether you’re building cozy bowls, brightening up a roast chicken, or laying out a comfort food spread, this dish brings the spicy-sweet balance that gets everyone reaching for seconds. If you love weeknight winners like my Slow Cooker French Onion Chicken, you’ll adore the depth and ease here. Try Gochujang Roasted Root Veg at home, share your plate, and tag me so I can cheer you on!

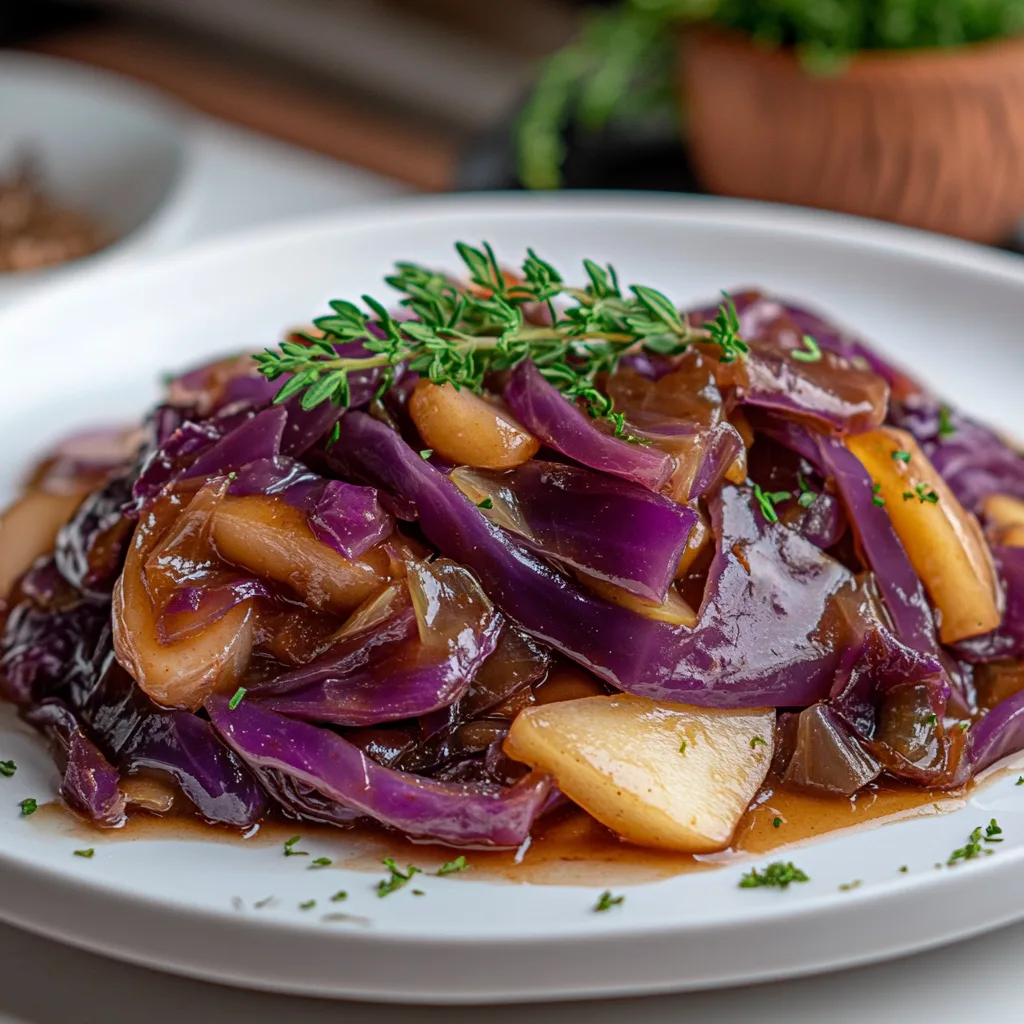
  • Braised Red Cabbage with Apples & Spices – Cozy, Irresistible

    Braised Red Cabbage with Apples & Spices – Cozy, Irresistible

    Braised Red Cabbage with Apples & Spices is my secret for turning a simple dinner into a cozy celebration. Last week, the lid clattered off my favorite Dutch oven while my toddler was “stirring,” and the kitchen smelled like a cinnamon-scented snow globe. Braised Red Cabbage with Apples & Spices still came out glossy, tender, and tangy—proof this one-pan wonder forgives a little chaos. I plated it next to sausages, and my family inhaled it. Now it’s our go-to side when we want comfort fast.

    Braised Red Cabbage with Apples & Spices

    Recipe

    WHY YOU’LL LOVE THIS RECIPE

    What Makes This Braised Red Cabbage with Apples & Spices So Irresistible

    I first made Braised Red Cabbage with Apples & Spices because I needed a quick side while a roast hogged the oven. Then the lid rattled, my dog sneezed cinnamon, and somehow dinner still tasted like a holiday hug. Braised Red Cabbage with Apples & Spices is the kind of homemade, one-pan comfort food that looks fancy but is actually an easy dinner helper. It’s cozy, balanced with sweet-tangy flavors, and perfumed with warm spices.

    • Quick prep, mostly hands-off: slice, simmer, and let the braise do the work.
    • Comfort food payoff: tender cabbage, soft apples, and warm spices that feel like a blanket.
    • Simple pantry staples: apple cider vinegar, cinnamon, and a splash of cider or water.
    • One-pan side dish: fewer dishes, more weeknight ease.
    • Family-friendly flavor: sweet-savory balance wins over picky eaters.

    If you love an easy, homemade side that elevates everything from sausages to roast chicken, Braised Red Cabbage with Apples & Spices will be your new favorite. Grab a pot—let’s cook!

    On social feeds, Braised Red Cabbage with Apples & Spices is trending because it’s budget-friendly, vibrant, and fits everything from Oktoberfest vibes to cozy Sunday suppers. The one-pan meal energy is strong: it’s an easy dinner upgrade that makes plates pop with color and adds that tangy-sweet sparkle. Make a batch, enjoy it tonight, then reheat like a pro for the rest of the week.

    TIPS, TRICKS & EXPERT SECRETS

    Chef Tips for Perfect Braised Red Cabbage with Apples & Spices Every Time

    During a cooking class, I learned that low-and-slow is the quiet hero for Braised Red Cabbage with Apples & Spices. When I rushed it at home, the texture was fine but the flavor didn’t bloom. The next time I let it lazily simmer—and boom: glossy, tender, and deeply aromatic. Here’s how to nail this easy recipe, every time, with quick fixes ready to go.

    • Salt in layers: Season the onions, then the cabbage, then adjust at the end. It builds a full, homemade flavor.
    • Low heat, covered, then uncovered: Braise covered to soften, then uncover to reduce for a lush glaze.
    • Balance sweet and tangy: Taste at the end—add a splash more vinegar or a teaspoon of maple for perfect harmony.
    • Slice evenly: Thin, even shreds help Braised Red Cabbage with Apples & Spices cook consistently and stay tender.

    Smart Ingredient Swaps & Practical Cooking Advice

    • Vegan option: Use olive oil instead of butter; the homemade version is just as silky.
    • Gluten-free friendly: This easy recipe is naturally GF; check Dijon mustard if using.
    • No cider? Use water and a teaspoon extra brown sugar—quick fix, still delicious.
    • What not to do: Don’t crank the heat high. Overheating makes cabbage watery then scorched, dulling spices.

    For truly irresistible Braised Red Cabbage with Apples & Spices, let time and gentle heat do the heavy lifting. The payoff is a cozy side that’s as practical as it is beautiful.

    Braised Red Cabbage with Apples & Spices – Cozy, Irresistible
    Braised Red Cabbage with Apples & Spices – Cozy, Irresistible

    SERVING IDEAS & CREATIVE VARIATIONS

    How to Serve Braised Red Cabbage with Apples & Spices for Maximum Enjoyment

    Last winter, I set out warm bowls of Braised Red Cabbage with Apples & Spices at a casual dinner party, and the glistening purple won the table before the first bite. It’s photogenic, comforting, and wildly versatile—perfect for easy dinner nights and celebratory spreads alike. Here’s how I love to serve it.

    • Classic pairings: Bratwurst, roast chicken, pork chops, or seared tofu cutlets.
    • Holiday plate: Next to mashed potatoes and gravy, it brightens up rich mains like this Slow Cooker Pot Roast.
    • Plant-powered spread: Serve with Slow Cooker Red Lentil Curry for a colorful, hearty table.

    Plating suggestion: Scoop Braised Red Cabbage with Apples & Spices into a shallow white bowl, drizzle any glossy juices, and finish with fresh parsley for a pop of green. For creators, shoot near a window with a gray linen to make the purple tones sing.

    Flavor Twists and Seasonal Variations

    • Orange-Ginger Glow: Add 1 tsp grated fresh ginger and the zest of one orange for a bright seasonal twist.
    • Smoky Savory: Stir in 1 tsp smoked paprika and a splash of balsamic for deeper, savory notes.
    • Festive Cran-Apple: Add 1/2 cup fresh cranberries in the last 10 minutes for a tangy, Pinterest-friendly flavor variation.

    Whether you keep Braised Red Cabbage with Apples & Spices classic or play with flavor twists, it’s a reliable, homemade side that always feels special. For brunchy pairings, try it on a holiday table with Fluffy Gingerbread Pancakes—trust me, the sweet-spice duet slaps.

    STORAGE & TROUBLESHOOTING GUIDE

    How to Store and Reheat Braised Red Cabbage with Apples & Spices

    I stash Braised Red Cabbage with Apples & Spices in glass containers so it’s ready for lunches all week. This easy recipe keeps beautifully, and the spices bloom even more by day two—homemade magic. Here’s how to store and reheat to keep it fresh and glossy.

    • Room temperature: Up to 2 hours max, then refrigerate.
    • Fridge: 4–5 days in airtight containers; I like shallow glass for quick, even reheating.
    • Freezer: Up to 2 months. Cool completely, pack in freezer-safe bags, press flat to remove air.
    • Reheat: Skillet over medium with a splash of water or cider; or microwave covered in 45-second bursts, stirring once. For large batches, warm in a covered dish at 325°F until hot.

    Troubleshooting Common Braised Red Cabbage with Apples & Spices Issues

    • Too watery: Uncover and simmer 5–10 minutes to reduce. A teaspoon of Dijon helps emulsify the glaze.
    • Too sour: Stir in 1–2 teaspoons brown sugar or maple; let it cook 2 minutes to meld.
    • Too sweet: Add a splash of apple cider vinegar and a pinch of salt for balance.
    • Texture too soft: Next time, shorten the covered braise by 5 minutes and finish uncovered to keep bite.
    • Not enough flavor: Taste and layer salt, then add a pinch of cinnamon and a drizzle of vinegar—quick fix for depth.

    With this storage advice and quick fixes, your Braised Red Cabbage with Apples & Spices will stay vivid, tender, and delicious all week long. You’ve got this!

    FAQs

    Can I make Braised Red Cabbage with Apples & Spices ahead?

    Yes. Make up to 2 days ahead and reheat gently with a splash of water or cider. Flavors deepen beautifully overnight.

    What apples work best?

    Firm, slightly tart apples like Granny Smith, Honeycrisp, or Pink Lady hold shape and balance the spices.

    Can I use red wine instead of cider?

    Absolutely. Swap half the cider for dry red wine for a richer, dinner-party vibe. Adjust sweetness to taste.

    Is Braised Red Cabbage with Apples & Spices freezer-friendly?

    Yes. Cool completely, pack airtight, and freeze up to 2 months. Thaw overnight and reheat with a splash of liquid.

    Conclusion

    Braised Red Cabbage with Apples & Spices delivers cozy comfort and bright, balanced flavor in one pan. It’s the homemade, easy dinner side that looks gorgeous and tastes like you spent hours—when really, the gentle braise does the magic. Whether you’re serving sausages, tofu, or a Sunday roast, this comfort food classic brings color, aroma, and that perfect sweet-tangy pop. Try Braised Red Cabbage with Apples & Spices for your next gathering, then enjoy leftovers all week. If you’re planning a full holiday lineup, peek at my make-ahead favorites on Recipes Darleen. Make it, savor it, and tag me so I can cheer on your cozy plate!

  • Parmesan-Baked Parsnips – Irresistibly Crispy & Comforting

    Parmesan-Baked Parsnips – Irresistibly Crispy & Comforting

    Parmesan-Baked Parsnips saved my Tuesday. I was juggling school pickup, a zoom call, and a hungry dog when I tossed parsnips on a sheet pan, showered them with Parmesan, and prayed. The timer beeped, the kitchen calmed, and the first bite was golden, garlicky bliss. I tested these Parmesan-Baked Parsnips three more times that week, because my kids kept asking for “the cheesy fries that aren’t fries.” Real kitchen chaos, real comfort.

    Parmesan-Baked Parsnips

    Recipe

    Why You’ll Love Parmesan-Baked Parsnips

    What Makes This Parmesan-Baked Parsnips So Irresistible

    I made Parmesan-Baked Parsnips for a weeknight emergency dinner and my son asked, “Can we have these every Tuesday?” Parmesan-Baked Parsnips turn humble roots into crackly, cheesy comfort food with almost no effort. The edges go caramelized, the centers stay tender, and the Parmesan melts into a savory, golden crust that tastes like a cozy hug. It’s the kind of easy dinner side that makes a homemade meal feel restaurant-worthy without the fuss.

    • Quick prep: Peel, slice, toss, and roast—hands-off cooking at its finest.
    • Big flavor: Garlic, thyme, lemon zest, and Parmesan create a bold, savory bite.
    • One-pan meal side: Bake on a single sheet for simple cleanup.
    • Family-friendly: Tastes like cheesy fries, but it’s a veggie win.
    • Foolproof texture: Crisp edges + tender centers every time.

    Whether you serve them next to roast chicken or bowl meals, Parmesan-Baked Parsnips deliver that craveable, homemade comfort food you’ll want on repeat. Ready to bake?

    These make-ahead-friendly, oven-roasted gems are trending because they hit today’s sweet spot: uncomplicated, wholesome, and dramatic on the plate. Parmesan-Baked Parsnips photograph beautifully, reheat well, and feel like a treat without deep-frying. They’re an easy recipe that satisfies weeknight cravings and holiday spreads alike, proving once again that simple ingredients + smart technique is the winning combo.

    Tips, Tricks & Expert Secrets for Parmesan-Baked Parsnips

    Chef Tips for Perfect Parmesan-Baked Parsnips Every Time

    Years ago, a chef friend told me, “Heat is an ingredient.” I finally believed it when a lukewarm sheet pan turned my first batch of Parmesan-Baked Parsnips into wilted wedges. Once I preheated the pan, those parsnips snapped to attention—crispy, golden, glorious.

    • Preheat the pan: Slide the empty sheet pan into the oven for 5 minutes. Hot pan = instant sizzle and browned edges.
    • Cut evenly: Aim for 3-inch-by-1/2-inch batons so your easy recipe roasts uniformly.
    • Add Parmesan twice: Halfway through to adhere, and again at the end for a melty, salty finish.
    • Don’t crowd: Give space between pieces to prevent steaming and guarantee a homemade version with crunch.
    Parmesan-Baked Parsnips – Irresistibly Crispy & Comforting
    Parmesan-Baked Parsnips – Irresistibly Crispy & Comforting

    Smart Ingredient Swaps & Practical Cooking Advice

    • Diet swaps: Use vegetarian rennet Parmesan or a vegan hard-style cheese alternative. For gluten-free, choose GF panko or skip the crumbs.
    • Oil options: Olive oil adds fruitiness; avocado oil tolerates higher heat—both are a quick fix for great texture.
    • What not to do: Don’t add all the cheese at the start—Parmesan can scorch. Layer flavor strategically.
    • Seasoning shift: Lemon zest brightens, smoked paprika adds warmth, and thyme keeps it classic—mix and match to taste.

    With these cooking tips, your Parmesan-Baked Parsnips will be crisp at the edges, tender in the middle, and richly savory every single time.

    Serving Ideas & Creative Variations for Parmesan-Baked Parsnips

    How to Serve Parmesan-Baked Parsnips for Maximum Enjoyment

    When I first plated Parmesan-Baked Parsnips for friends, I stacked them like steak frites with a lemony aioli. They disappeared before the roast even hit the table. For serving ideas that wow, try these pairing and plating suggestions:

    • Pair with succulent mains like this cozy Slow Cooker Pot Roast or my savory French Onion Chicken.
    • Sauce it up: Garlic-lemon yogurt, herby chimichurri, or a quick honey-mustard for sweet-tangy contrast.
    • Beverage pairing: Crisp white wine (Sauvignon Blanc), a malty ale, or sparkling water with a lemon twist.

    Flavor Twists and Seasonal Variations

    • Truffle-Parmesan Deluxe: Finish with truffle salt or a drizzle of white truffle oil for an elegant flavor variation.
    • Herb Garden: Swap thyme for rosemary and parsley; add a whisper of grated garlic for a rustic, homemade vibe.
    • Holiday Glow: Mix in a pinch of nutmeg and orange zest for a seasonal twist that sings with roasts and festive spreads. Serve alongside Make-Ahead Christmas Combos for easy entertaining.

    Plating suggestion: Stack the parsnips in a shallow bowl, sprinkle with extra Parmesan, and tuck in lemon wedges. For social media, shoot in natural light and dust the top with just-grated cheese to catch that gorgeous, melty sparkle. Parmesan-Baked Parsnips are camera-ready.

    Storage & Troubleshooting Guide for Parmesan-Baked Parsnips

    How to Store and Reheat Parmesan-Baked Parsnips

    Leftover Parmesan-Baked Parsnips are my favorite lunch hack. I pop them under the broiler and dunk in yogurt sauce—instant satisfaction.

    • Room temperature: Keep out for up to 2 hours for serving.
    • Fridge: Store in an airtight container for 3–4 days. Layer with parchment to keep them from getting soggy.
    • Freezer: Freeze in a single layer, then move to a freezer bag up to 2 months. Reheat from frozen for best texture.
    • Reheat: Bake at 400°F on a hot sheet 8–10 minutes, air fry at 375°F for 5–7 minutes, or skillet-toast with a touch of oil. Avoid microwaving if you want crisp edges.

    Troubleshooting Common Parmesan-Baked Parsnips Issues

    • Too soft or watery: You likely crowded the pan. Use two sheets or roast in batches.
    • Dry texture: Pull back the time by 3–4 minutes and add a light drizzle of oil or squeeze of lemon to revive.
    • Uneven browning: Cut parsnips evenly and preheat the pan for a reliable, crisp finish.
    • Burnt cheese: Add Parmesan mid-roast and at the end, not at the start; it melts and crisps without scorching.

    With a few storage tips and a quick fix or two, your Parmesan-Baked Parsnips will keep fresh, reheat beautifully, and stay irresistibly delicious. You’ve got this—just bake, taste, adjust, and enjoy.

    FAQs

    Can I make Parmesan-Baked Parsnips ahead of time?

    Yes. Roast until just tender, cool, and refrigerate. Reheat on a hot sheet at 400°F to re-crisp, then finish with fresh Parmesan.

    Do I need to peel parsnips?

    For the crispiest edges and even browning, peeling is best. Very young parsnips can be scrubbed well and left unpeeled.

    Can I use a different cheese?

    Absolutely. Pecorino Romano or Grana Padano both work. For a milder profile, add a little shredded mozzarella in the last minutes.

    What main dishes pair well with Parmesan-Baked Parsnips?

    They’re great with roasts, grilled chicken, or cozy slow-cooker meals like Vertical Crockpot Lasagna.

    Conclusion

    Parmesan-Baked Parsnips bring that golden, savory magic to your table with minimal effort and maximum flavor. The garlic, thyme, and lemon zest make this comfort food feel bright and special, while the Parmesan turns every baton into a crispy, cheesy bite. Whether you’re planning an easy dinner, a homemade holiday spread, or a one-pan meal to support a slow-cooked main, Parmesan-Baked Parsnips deliver every time. Try them with my Slow Cooker Pot Roast or cozy up with the French Onion Chicken—they’re a match made in weeknight heaven. Make these tonight, and tag me so I can see your beautiful pans of Parmesan-Baked Parsnips!

  • Roasted Brussels Sprouts – Crispy and Irresistible

    Roasted Brussels Sprouts – Crispy and Irresistible

    Roasted Brussels Sprouts were my peace offering the night I set off the smoke alarm with a “quick” broil. I yanked the pan, laughed off the chaos, and tried again—this time with a steady 425°F. These Roasted Brussels Sprouts came out caramelized, tender inside, and crisp at the edges. Even my most sprout-skeptical kid grabbed seconds. When dinner needs an easy win, this is the side that always saves the night.

    Roasted Brussels Sprouts were my peace offering the night I set off the smoke alarm with a “quick” broil.

    Recipe

    WHY YOU’LL LOVE THIS RECIPE

    What Makes This Roasted Brussels Sprouts So Irresistible

    I learned fast that Roasted Brussels Sprouts don’t need fuss—just heat, space, and a little patience. The first time I nailed them, my pan looked like a tray of tiny golden roses. Roasted Brussels Sprouts deliver crispy edges, buttery centers, and a sweet, nutty aroma that’s pure comfort food. When you want an easy dinner helper, these homemade, one-pan roasted vegetables are the answer.

    • Crispy outside, tender inside—high-heat magic for texture lovers.
    • Simple ingredients—olive oil, salt, pepper, and pantry spices.
    • Hands-off cooking—one-pan meal vibe while you prep the main.
    • Family-friendly—crowd-pleasing, holiday-worthy, weeknight-easy.
    • Endlessly customizable—balsamic, lemon, garlic, or parmesan.

    Roasted Brussels Sprouts are trending because they taste like a cozy, homemade upgrade to any plate. They’re a quick fix when dinner needs balance: rich mains, simple salads, or a sheet pan feast. If you love easy recipes with big payoff, this is your new ritual. Ready? Let’s get these Roasted Brussels Sprouts in the oven.

    On social feeds and at potlucks, Roasted Brussels Sprouts keep stealing the show. The appeal is simple: a fast, easy dinner side that tastes restaurant-level with almost no effort. A high-heat roast concentrates sweetness while the edges frizzle into irresistibly crisp bites. Add a drizzle of balsamic or a sprinkle of parmesan and you’ve got a homemade version of a bistro favorite—no reservations needed. Roasted Brussels Sprouts are the kind of comfort food that suits a Tuesday night or a holiday table. Once you master this cooking tip, you’ll make them on repeat.

    TIPS, TRICKS & EXPERT SECRETS

    Chef Tips for Perfect Roasted Brussels Sprouts Every Time

    My big breakthrough with Roasted Brussels Sprouts happened after a tiny lesson from a chef friend: “Moisture is the enemy of crisp.” I dried those little gems like I was polishing glassware—and boom, shatter-crisp edges. Here’s how to get repeatable results for Roasted Brussels Sprouts in your own kitchen.

    • Dry thoroughly: After rinsing, pat sprouts very dry. Water steams; dry sprouts roast.
    • Cut for contact: Halve (or quarter large ones) so the cut side sears against the pan.
    • Space matters: Use a large sheet pan and avoid crowding for even browning.
    • High-heat roast: 425°F hits that sweet spot between caramelization and tenderness.
    • Flip with intention: Start cut-side down for color; flip once for even crisping.

    Smart Ingredient Swaps & Practical Cooking Advice

    • Vegan-friendly: Skip parmesan; finish with lemon zest, toasted nuts, or balsamic.
    • Low-fat tweak: Reduce oil to 2 tbsp and add a splash of broth halfway if needed.
    • Gluten-free as written: Roasted Brussels Sprouts naturally fit a gluten-free plate.
    • Flavor boost: Garlic powder won’t burn like fresh garlic—add fresh garlic in the last 3–4 minutes if you want it.

    What not to do: Don’t pile sprouts—overcrowding causes steaming, not roasting. Give those Roasted Brussels Sprouts breathing room. This easy recipe turns into a quick fix for weeknights when you follow a few small moves. Use this cooking tip playbook and your homemade version will taste like a chef roasted them for you.

    SERVING IDEAS & CREATIVE VARIATIONS

    How to Serve Roasted Brussels Sprouts for Maximum Enjoyment

    When I serve Brussels Sprouts to guests, I use a warm platter and a last-second glossy drizzle, so they look as good as they taste. For serving ideas that make this easy side dish feel special, try these pairing and plating suggestions:

    Plating suggestion: Pile Roasted Brussels Sprouts high, then finish with lemon zest, flaky salt, and a few shaved parmesan ribbons. For social shares, shoot near a window, add a linen napkin, and garnish with a lemon wedge for a seasonal twist.

    Flavor Twists and Seasonal Variations

    • Maple-Balsamic Glaze: Toss the hot Brussels Sprouts with 1 tbsp balsamic vinegar and 1 tsp maple syrup for a glossy, sweet-tangy finish.
    • Garlic-Parmesan Crunch: Add fresh minced garlic during the last 3–4 minutes; shower with parmesan and toasted panko.
    • Autumn Harvest: Mix in roasted grapes or chopped apples and walnuts for a fall flavor variation that feels party-ready.

    These creative twists keep Roasted Brussels Sprouts exciting from weeknight dinners to holidays. Use these serving ideas to build a colorful, craveable plate—proof that simple, oven roasted vegetables can steal the spotlight.

    STORAGE & TROUBLESHOOTING GUIDE

    How to Store and Reheat Roasted Brussels Sprouts

    Leftover Roasted Brussels Sprouts are a gift—toss them into salads, bowls, or omelets and dinner basically makes itself. Here’s how to store and reheat to keep them crisp and tasty.

    • Room temperature: Keep at room temp only during serving (up to 2 hours).
    • Fridge: Store in an airtight container for 3–4 days. Line the container with a paper towel to keep them dry and keep fresh texture.
    • Freezer: Freeze up to 2 months in a zip-top bag; expect slightly softer texture after thawing.
    • Reheat: Oven or air fryer at 400°F for 5–8 minutes to revive crispness. A hot skillet with a teaspoon of oil also works. Avoid microwaving if you want the edges crisp.

    Troubleshooting Common Roasted Brussels Sprouts Issues

    • Too soggy/watery: You likely crowded the pan or didn’t dry them fully. Next time, use two pans and pat dry.
    • Uneven browning: Flip halfway and keep cut-sides down for the first roast stretch.
    • Overcooked centers: Lower the heat to 400°F and reduce the time by 3–4 minutes.
    • Too dry: Drizzle with a little olive oil or a splash of lemon-balsamic after roasting to restore moisture and brightness.

    With these storage advice tips and quick fixes, your Roasted Brussels Sprouts will taste great on day one and beyond. You’ve got this—crisp edges and all.

    FAQs

    Do I need to parboil Brussels sprouts before roasting?

    No. For Roasted Brussels Sprouts, high-heat roasting is enough for tender centers and crispy edges—no parboil needed.

    Should I use fresh or frozen Brussels sprouts?

    Fresh is ideal for Roasted Brussels Sprouts because they dry and brown better. If using frozen, thaw and pat very dry before roasting.

    What temperature is best for crispy Roasted Brussels Sprouts?

    Roast at 425°F for deep caramelization without burning. This temp gives Roasted Brussels Sprouts a golden, crisp finish.

    Can I make Roasted Brussels Sprouts ahead?

    Yes. Roast, cool, and chill up to 2 days. Reheat in a 400°F oven or air fryer to re-crisp the Roasted Brussels Sprouts before serving.

    Conclusion

    Roasted Brussels Sprouts prove that a simple, homemade side can feel like comfort food and taste like a restaurant favorite. With a hot oven, a little space on the pan, and smart seasoning, Roasted Brussels Sprouts turn into a weeknight staple or a holiday star. Whether you go classic or try maple-balsamic, this easy recipe brings savory balance to mains, bowls, and brunch boards. Want more cozy inspiration? Explore the dinner ideas on my site starting with Chicken and Dumplings or create a festive spread with a Breakfast Board. Make these Roasted Brussels Sprouts, then tell me how you served them—try it at home and tag me!