Category: Dinner

Easy, tasty dinner ideas for busy nights. Simple recipes, quick prep, and family-friendly meals you’ll make again and again.

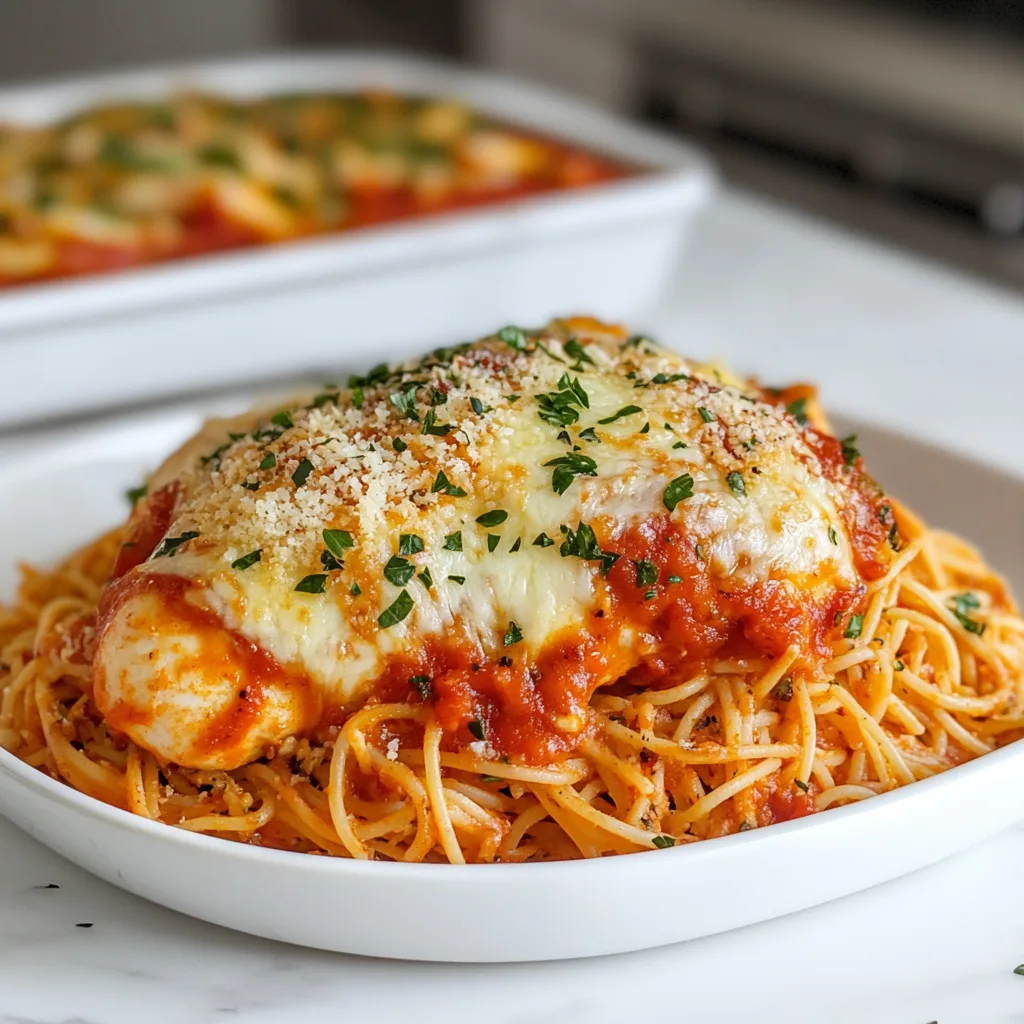
  • Baked Chicken Parmesan with Spaghetti | Irresistibly Delicious!

    Baked Chicken Parmesan with Spaghetti | Irresistibly Delicious!

    Baked Chicken Parmesan with Spaghetti | Irresistibly Delicious!

    Baked Chicken Parmesan with Spaghetti and Marinara is the ultimate comfort food that brings restaurant-quality Italian cuisine right to your dinner table. The crispy, golden-brown chicken cutlets layered with melty mozzarella and tangy marinara, nestled atop a bed of perfectly cooked spaghetti—it’s pure magic on a plate! I still remember the first time I made this dish for my family; the kitchen filled with the aromatic blend of herbs and tomatoes while everyone gathered around, drawn by the irresistible smell. This recipe has since become our Friday night tradition, and I’m thrilled to share it with you at Recipes Darleen.

    Recipe

    Why You’ll Love This Baked Chicken Parmesan with Spaghetti and Marinara

    A Healthier Take on the Classic

    This baked version gives you all the flavor without the excessive oil from traditional frying. The chicken turns out incredibly crispy on the outside while remaining juicy and tender inside. I’ve perfected this technique over years of trial and error—discovering that a quick spray of olive oil before baking creates that golden exterior we all crave. Plus, using panko breadcrumbs mixed with parmesan creates an extra crunchy coating that holds up beautifully, even under the marinara sauce. Your family won’t believe it’s not fried!

    Simple Ingredients, Extraordinary Flavor

    What I adore about this Baked Chicken Parmesan with Spaghetti and Marinara is how everyday ingredients transform into something spectacular. The depth of flavor comes from layering simple elements—garlic-infused marinara, freshly grated cheeses, and Italian herbs. Last month, my neighbor asked for the recipe after joining us for dinner, convinced I’d used some secret ingredient! The truth is, it’s all about quality basics and proper technique. The marinara sauce simmers just long enough to concentrate those rich tomato flavors, creating the perfect companion for the crispy chicken.

    Essential Tips & Tricks

    Perfecting Your Chicken Cutlets

    The foundation of amazing Baked Chicken Parmesan starts with properly prepared chicken. I always butterfly thicker breasts or pound them to an even 1/4-inch thickness for consistent cooking. My game-changing tip? Pat the chicken completely dry before breading—this ensures the egg mixture adheres properly. Then, after breading, let the cutlets rest for 10-15 minutes before baking. This little pause allows the coating to set, preventing it from sliding off during baking. I learned this the hard way after several disappointing attempts with soggy chicken!

    The Three-Step Breading Method

    For that restaurant-quality crust that makes Baked Chicken Parmesan with Spaghetti and Marinara truly special, follow my foolproof three-step breading process. First, dust with seasoned flour, then dip in beaten eggs with a splash of milk, and finally coat with a parmesan-panko mixture. The key is using one hand for dry ingredients and the other for wet—this prevents the dreaded “breading fingers” that can ruin your coating. For extra flavor, try adding a pinch of garlic powder and dried oregano to your breadcrumb mixture, just like in my Cheesy Scalloped Potatoes and Beef Bake.

    Serving Ideas & Creative Variations

    Beyond Basic Spaghetti

    While classic spaghetti is the traditional base for Baked Chicken Parmesan, don’t be afraid to experiment! I often serve it over creamy polenta for a luxurious twist that my husband absolutely raves about. Zucchini noodles offer a lighter, low-carb option that still soaks up all that delicious sauce. For a more substantial meal, try pairing with garlic bread or a simple Caesar salad. The versatility of this dish reminds me of my One Pot American Goulash—it’s adaptable to whatever you have on hand while still maintaining its comforting essence.

    Make-Ahead and Freezer Options

    This Baked Chicken Parmesan with Spaghetti and Marinara is perfect for busy weeknights because so much can be prepared ahead. The marinara sauce actually improves overnight as the flavors meld together. You can bread the chicken cutlets and refrigerate them (separated by parchment) for up to 8 hours before baking. For even greater convenience, freeze fully cooked chicken cutlets without sauce or cheese, then reheat and top them when ready to serve. I do this regularly for my teenage son who has late basketball practices—he can assemble a restaurant-quality dinner in minutes!

    Storage & Troubleshooting Guide

    Keeping It Fresh

    Properly stored, Baked Chicken Parmesan with Spaghetti and Marinara stays delicious for several days. Store the components separately when possible—chicken in one container, sauce in another, and pasta in a third. This prevents the breading from becoming soggy. When reheating, the oven works best for maintaining that crispy exterior (about 10 minutes at 350°F), while a microwave is fine for the sauce and pasta. For an extra crispy refresh, try a few minutes in an air fryer! I learned this trick after accidentally making too much for a dinner party last summer.

    Fixing Common Problems

    If your chicken coating turns out soggy, try elevating it on a wire rack while baking to allow air circulation underneath. For sauce that’s too acidic, a pinch of sugar or a grated carrot while simmering works wonders to balance the flavors. If your cheese isn’t browning properly, switch to the broiler for the final 1-2 minutes, watching carefully to prevent burning. And for pasta that’s clumping together, remember to save some of that starchy cooking water—a splash mixed with your sauce creates a silky texture that helps everything cling together beautifully.

    Frequently Asked Questions

    Can I use chicken thighs instead of breasts for Baked Chicken Parmesan?

    Absolutely! Boneless, skinless thighs work beautifully. They’re naturally juicier but will need slightly longer baking time (about 5-7 minutes more). Pound them to even thickness for best results.

    How do I prevent my breading from getting soggy under the sauce?

    Bake the breaded chicken until completely crisp before adding sauce and cheese. Another trick is to add the marinara and cheese just for the last 5 minutes of baking time.

    Can I make this dish gluten-free?

    Yes! Use gluten-free panko breadcrumbs and flour for the chicken coating, and serve with gluten-free pasta or zucchini noodles. The flavor will be nearly identical to traditional Baked Chicken Parmesan with Spaghetti and Marinara.

    What’s the best cheese to use?

    Fresh mozzarella provides the best melt and flavor, but pre-shredded works too. For extra flavor, mix in some fontina or provolone. Always finish with freshly grated Parmesan on top!

    Can I prepare this in advance for a dinner party?

    Definitely! Bread the chicken and prepare the sauce up to a day ahead. Bake the chicken just before guests arrive, then add sauce and cheese for the final minutes before serving.

    Final Thoughts

    Baked Chicken Parmesan with Spaghetti and Marinara brings together simple ingredients to create a meal that feels like a warm hug on a plate. The contrast between the crispy chicken, gooey cheese, tangy sauce, and tender pasta creates a perfect harmony of textures and flavors. Whether you’re cooking for a special occasion or just a cozy family dinner, this dish never disappoints. I’d love to see your creations—share them with us on Pinterest and let me know how this recipe worked for your family!
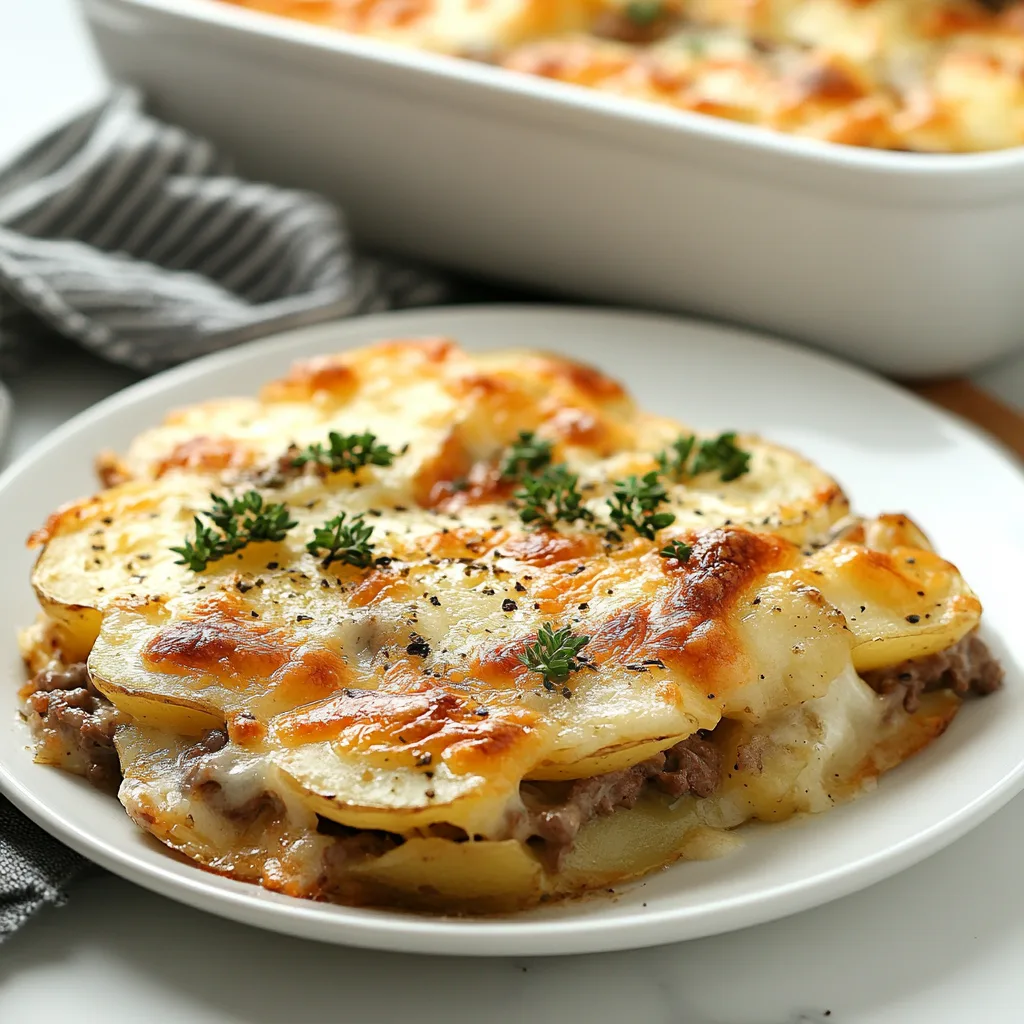
  • Cheesy Scalloped Potatoes & Beef Bake: Ultimate Comfort Feast!

    Cheesy Scalloped Potatoes & Beef Bake: Ultimate Comfort Feast!

    Cheesy Scalloped Potatoes & Beef Bake: Ultimate Comfort Feast!

    The aroma of Cheesy Scalloped Potatoes and Beef Bake wafting through my kitchen instantly transports me back to Sunday dinners at my grandmother’s farmhouse. This hearty casserole combines tender slices of potato layered with savory ground beef, all enveloped in a rich, creamy cheese sauce that bubbles to golden perfection in the oven. I’ve perfected this recipe over countless family gatherings, and it never fails to bring everyone to the table with eager anticipation. If you’re craving the ultimate comfort food that satisfies both potato and beef lovers, this classic dish deserves a permanent spot in your recipe collection.

    Recipe

    Why You’ll Love This Cheesy Scalloped Potatoes and Beef Bake

    Perfect Comfort Food for Any Occasion

    There’s something magical about the combination of thinly sliced potatoes and seasoned ground beef that makes this dish irresistible. The layers meld together during baking, creating a texture that’s both creamy and substantial. Last winter, when we were snowed in for three days, I made this casserole with pantry staples, and my family still talks about how it made that cold spell bearable. The beauty of this recipe is its versatility—it’s elegant enough for holiday gatherings but simple enough for weeknight dinners when you need something reliable and satisfying.

    Make-Ahead Friendly and Budget Conscious

    This Cheesy Scalloped Potatoes and Beef Bake is a meal-prep champion. You can assemble it entirely the day before, refrigerate overnight, and simply pop it in the oven when you’re ready to eat. The flavors actually develop beautifully during this rest time. I love that it uses affordable ingredients that stretch your grocery budget without sacrificing flavor. Ground beef goes further when layered with potatoes, and the cheese sauce transforms these humble ingredients into something that feels indulgent. For busy families, this recipe is truly a sanity-saving solution.

    Essential Tips & Tricks

    Perfecting the Potato Layers

    The secret to exceptional scalloped potatoes lies in the consistent thickness of your potato slices. I recommend using a mandoline slicer for uniform, thin cuts—around 1/8 inch thick is ideal. This ensures even cooking and the perfect texture. Yukon Gold potatoes are my go-to choice for their buttery flavor and ability to hold their shape while becoming tender. Before layering, I always pat the slices dry with paper towels to remove excess moisture. This prevents a watery casserole and helps the potatoes absorb all that creamy, cheesy goodness that makes this dish so irresistible.

    Creating the Ultimate Cheese Sauce

    The backbone of this casserole is undoubtedly the velvety cheese sauce. Start with a proper roux using equal parts butter and flour, cooking until it turns slightly golden and smells nutty. Warm your milk before adding it to prevent lumps, then whisk constantly as it thickens. For the cheese, a combination creates the best flavor profile—sharp cheddar for punch, Gruyère for nutty depth, and a touch of Parmesan for savory notes. Always grate your own cheese rather than using pre-shredded, which contains anti-caking agents that can make your sauce grainy instead of silky smooth.

    Serving Ideas & Creative Variations

    Complementary Side Dishes

    This hearty casserole shines as the star of your meal, but thoughtful side dishes can elevate the experience. I love serving it with a crisp green salad dressed simply with vinaigrette—the acidity beautifully cuts through the richness of the cheese sauce. Steamed green beans or roasted Brussels sprouts also provide welcome color and texture contrast. For special occasions, consider adding homemade dinner rolls to soak up every last bit of that delicious sauce. When entertaining, I arrange everything on a wooden board with fresh herbs scattered around for a rustic presentation that always impresses guests.

    Exciting Flavor Variations

    While the classic version is always a crowd-pleaser, this recipe welcomes creative adaptations. For a Mexican-inspired twist, add taco seasoning to your beef, layer in some black beans, and top with pepper jack cheese and fresh cilantro before serving. An Italian variation works beautifully with Italian seasoning, a layer of sautéed mushrooms, and provolone cheese. For extra indulgence, try folding crispy bacon bits into your cheese sauce or adding a layer of caramelized onions between the potatoes. These variations keep the dish exciting even if you serve it regularly.

    Storage & Troubleshooting Guide

    Proper Storage and Reheating Methods

    This casserole is a leftover champion, often tasting even better the next day as the flavors continue to meld. Store cooled leftovers in an airtight container in the refrigerator for up to 4 days. For reheating, cover with foil and warm in a 325°F oven until heated through (about 20-25 minutes), removing the foil for the last few minutes to re-crisp the top. For individual portions, the microwave works well at 70% power. You can also freeze this dish either before or after baking—just wrap tightly and use within 3 months, adding about 20 extra minutes to the baking time when cooking from frozen.

    Troubleshooting Common Issues

    If your Cheesy Scalloped Potatoes and Beef Bake turns out watery, the culprit is likely the potatoes. Always pat them dry before layering and consider par-boiling high-moisture potato varieties. For undercooked potatoes, the slices may have been cut too thick—cover with foil and continue baking until tender. If your cheese sauce breaks or appears grainy, it was likely heated too quickly or the cheese was added while the base was too hot. Next time, remove the sauce from heat before adding cheese and stir gently until just melted. A curdled appearance can also result from using pre-shredded cheese.

    Frequently Asked Questions

    Can I make Cheesy Scalloped Potatoes and Beef Bake ahead of time?

    Absolutely! Assemble the casserole up to 24 hours in advance, cover with plastic wrap, and refrigerate. Remove from the refrigerator 30 minutes before baking, and add 10-15 minutes to the baking time.

    What’s the best type of potato to use?

    Yukon Gold potatoes are ideal for their buttery flavor and ability to hold shape while becoming tender. Russets work well too but may break down more during baking.

    Can I substitute the beef for another protein?

    Yes! Ground turkey, Italian sausage, or even shredded rotisserie chicken work beautifully. For a vegetarian option, try sautéed mushrooms and bell peppers instead.

    Why did my cheese sauce turn grainy?

    This typically happens when cheese is added to a sauce that’s too hot. Always remove the sauce from heat before adding cheese and use freshly grated cheese rather than pre-shredded.

    Can I freeze individual portions for quick meals?

    Definitely! Freeze in single-serving containers for up to 3 months. Thaw overnight in the refrigerator and reheat in the microwave or oven until piping hot.

    Final Thoughts

    There’s something deeply satisfying about watching family and friends enjoy a dish you’ve prepared with love, and this Cheesy Scalloped Potatoes and Beef Bake never disappoints. The combination of creamy potatoes, savory beef, and rich cheese sauce creates the ultimate comfort food experience that bridges generations and creates lasting memories around the table. I’d love to see your creation if you try this recipe—share your photos on Pinterest and tag me so I can celebrate your culinary success!

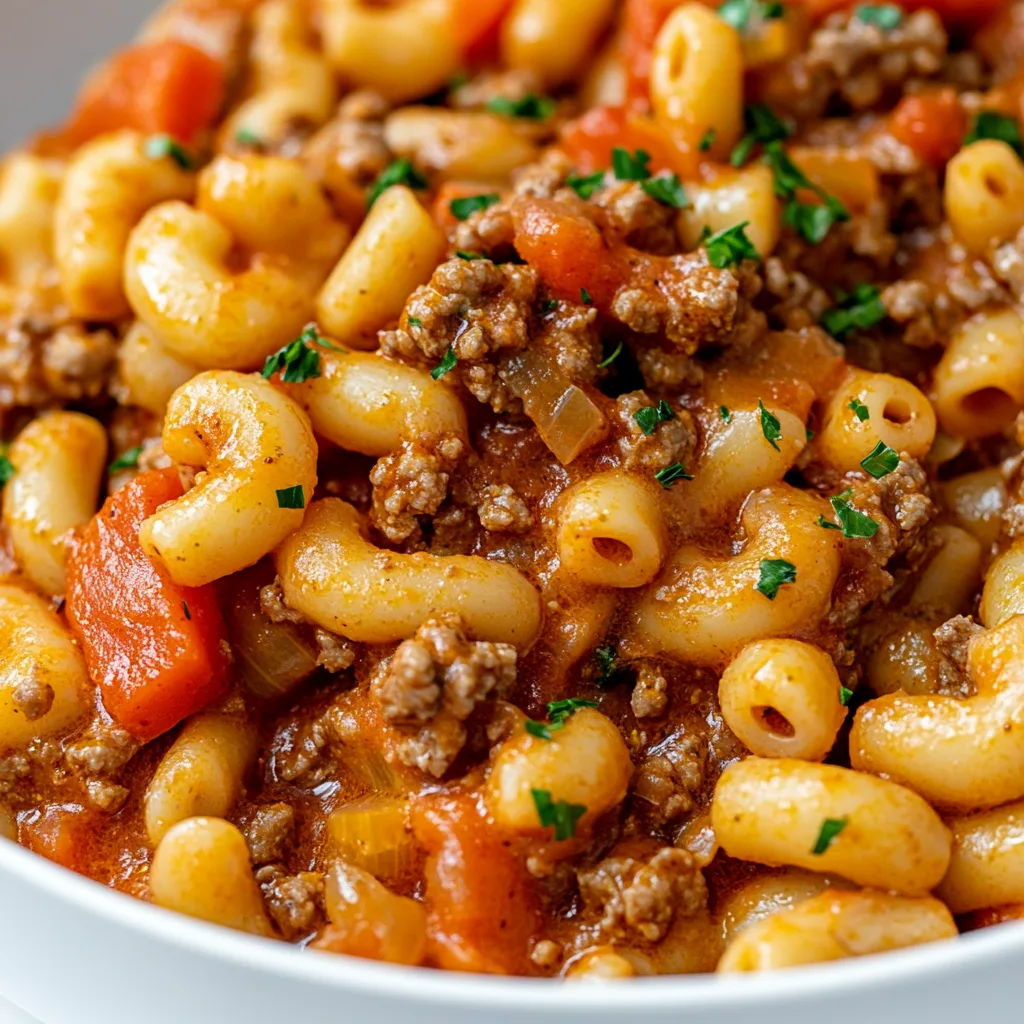
  • One-Pot American Goulash Recipe That Will Steal Your Heart!

    One-Pot American Goulash Recipe That Will Steal Your Heart!

    One-Pot American Goulash Recipe That Will Steal Your Heart!

    There’s something magical about One-Pot American Goulash that instantly transports me back to my grandmother’s kitchen. That rich tomato sauce bubbling away with tender pasta and seasoned ground beef, filling the house with an aroma that whispers “come and gather.” This classic comfort dish has been gracing American dinner tables for generations, and for good reason! It’s incredibly simple to prepare, uses budget-friendly ingredients, and somehow manages to taste even better the next day. My family requests this hearty meal at least twice a month, especially when the weather turns chilly and we need something warm and satisfying to bring us together around the table.

    Recipe

    Why You’ll Love This One-Pot American Goulash

    Perfect Weeknight Solution

    When life gets hectic (and when doesn’t it?), this One-Pot American Goulash becomes my kitchen superhero. The beauty lies in its true one-pot nature – everything cooks together, developing deep flavors while saving you from a sink full of dishes. I’ve made this on busy weeknights when homework help, dog walking, and laundry were all competing for my attention, and still managed to get dinner on the table in about 30 minutes. The combination of pantry staples means you likely have everything you need already, making this the ultimate “I forgot to plan dinner” rescue meal.

    Budget-Friendly Comfort

    In times when grocery prices make me wince, this goulash recipe remains a wallet-friendly option that doesn’t sacrifice flavor. Ground beef stretches beautifully when combined with pasta and tomatoes, easily feeding a family of four with leftovers for lunch the next day. Last month when my in-laws surprised us with a visit, I quickly doubled the recipe without doubling the cost. The humble ingredients transform into something so satisfying that nobody realizes you’re serving an economical meal – they’re too busy reaching for seconds and asking for your secret recipe!

    Essential Tips & Tricks

    Perfect Pasta Every Time

    The trickiest part of One-Pot American Goulash is getting the pasta texture just right. The key is to use elbow macaroni which holds up well to the one-pot cooking method, and to slightly undercook it initially since it continues absorbing liquid as it sits. I learned this the hard way after serving mushy goulash one too many times! Add the pasta to simmering (not boiling) liquid, and test it 2 minutes before the package directions suggest. For extra flavor, try beef broth instead of water – it creates a richer base that infuses every bite with savory goodness. For more pasta perfection, check out my baked macaroni and cheese recipe too!

    Flavor-Boosting Techniques

    The difference between good goulash and amazing goulash lies in a few simple techniques. Always take time to properly brown your ground beef, creating those flavorful caramelized bits on the bottom of the pot. This is where the magic happens! Then deglaze with a splash of red wine or beef broth, scraping up all those wonderful brown bits. I also recommend blooming your spices in the beef fat for 30 seconds before adding liquids – this releases their essential oils and intensifies their flavor. A bay leaf and a teaspoon of Worcestershire sauce are my secret weapons for depth that makes people wonder what makes it taste so good.

    Serving Ideas & Creative Variations

    Family-Style Presentations

    One-Pot American Goulash shines brightest when served family-style, creating that warm, communal dining experience. I love bringing the entire pot to the table in my favorite Dutch oven, garnished with fresh parsley and a sprinkle of sharp cheddar cheese that melts into the hot goulash. Pair it with a simple green salad and some crusty bread for sopping up the sauce. For a complete comfort food experience, you might want to finish the meal with my hot chocolate poke cake with whipped marshma – the contrast of warm goulash and cool, sweet cake is absolutely divine!

    Regional Twists and Add-Ins

    While traditional American Goulash has its charms, don’t be afraid to make it your own with regional twists. In the Southwest, add a can of fire-roasted green chiles and a teaspoon of cumin for a Tex-Mex version. For a Midwestern twist, stir in a cup of corn and top with crushed potato chips. My Italian-American husband convinced me to add a splash of red wine and some fennel seeds, which was a delicious surprise! For veggie-lovers, try folding in baby spinach during the last minute of cooking – it wilts perfectly into the hot goulash and adds beautiful color and nutrition without changing the comfort-food essence.

    Storage & Troubleshooting Guide

    Making Ahead and Freezing

    One of the greatest attributes of One-Pot American Goulash is how well it stores for future meals. It actually tastes better the next day as the flavors meld together overnight in the refrigerator. Store in airtight containers for up to 4 days, adding a splash of broth when reheating to refresh the sauce. For freezing, slightly undercook the pasta, then cool completely before portioning into freezer bags. Lay flat to freeze for space efficiency! Thaw overnight in the refrigerator and reheat gently on the stovetop with a bit of added liquid to restore the perfect consistency.

    Troubleshooting Common Issues

    Even experienced cooks occasionally run into goulash challenges. If your sauce is too watery, remove the lid and simmer for 5-10 minutes to reduce the liquid. Conversely, if it’s too thick, add beef broth ¼ cup at a time until you reach your desired consistency. Pasta overcooked? Try adding a handful of fresh pasta to absorb excess liquid and provide textural contrast. For bland goulash, a splash of red wine vinegar or a squeeze of tomato paste can brighten flavors, while a pinch of sugar balances acidity. Remember that goulash is forgiving – almost any issue can be remedied with simple adjustments!

    Frequently Asked Questions

    What’s the difference between American Goulash and Hungarian Goulash?

    American Goulash contains elbow macaroni and tomato sauce, while Hungarian Goulash is a paprika-seasoned beef stew without pasta. The American version evolved from the European original but became its own distinct comfort food classic.

    Can I make One-Pot American Goulash in a slow cooker?

    Yes! Brown the meat and onions first, then transfer to the slow cooker with remaining ingredients except pasta. Cook on low for 6 hours, adding the pasta during the final 30 minutes.

    What can I substitute for ground beef?

    Ground turkey, chicken, or plant-based meat alternatives work well. For vegetarian options, try mushrooms and lentils which provide similar texture and heartiness.

    How do I adjust the spice level for kids?

    Reduce the amount of black pepper and omit any cayenne or hot sauce. You can serve hot sauce on the side for adults who prefer more heat.

    Can I use gluten-free pasta in my One-Pot American Goulash?

    Absolutely! Use gluten-free elbow macaroni but check it frequently while cooking as it may have different cooking times than traditional pasta.

    Final Thoughts

    One-Pot American Goulash represents everything I love about home cooking – it’s unpretentious, adaptable, and brings people together. There’s something deeply satisfying about creating a meal that nourishes both body and soul with minimal fuss. Whether you’re cooking for a busy family weeknight or looking for comfort food on a budget, this recipe delivers every time. I’d love to see your goulash creations – tag me on Pinterest to share your versions of this beloved classic!

  • Chicken Pot Pie Casserole with Biscuits: Comfort Food That Wows!

    Chicken Pot Pie Casserole with Biscuits: Comfort Food That Wows!

    Chicken Pot Pie Casserole with Biscuits: Comfort Food That Wows!

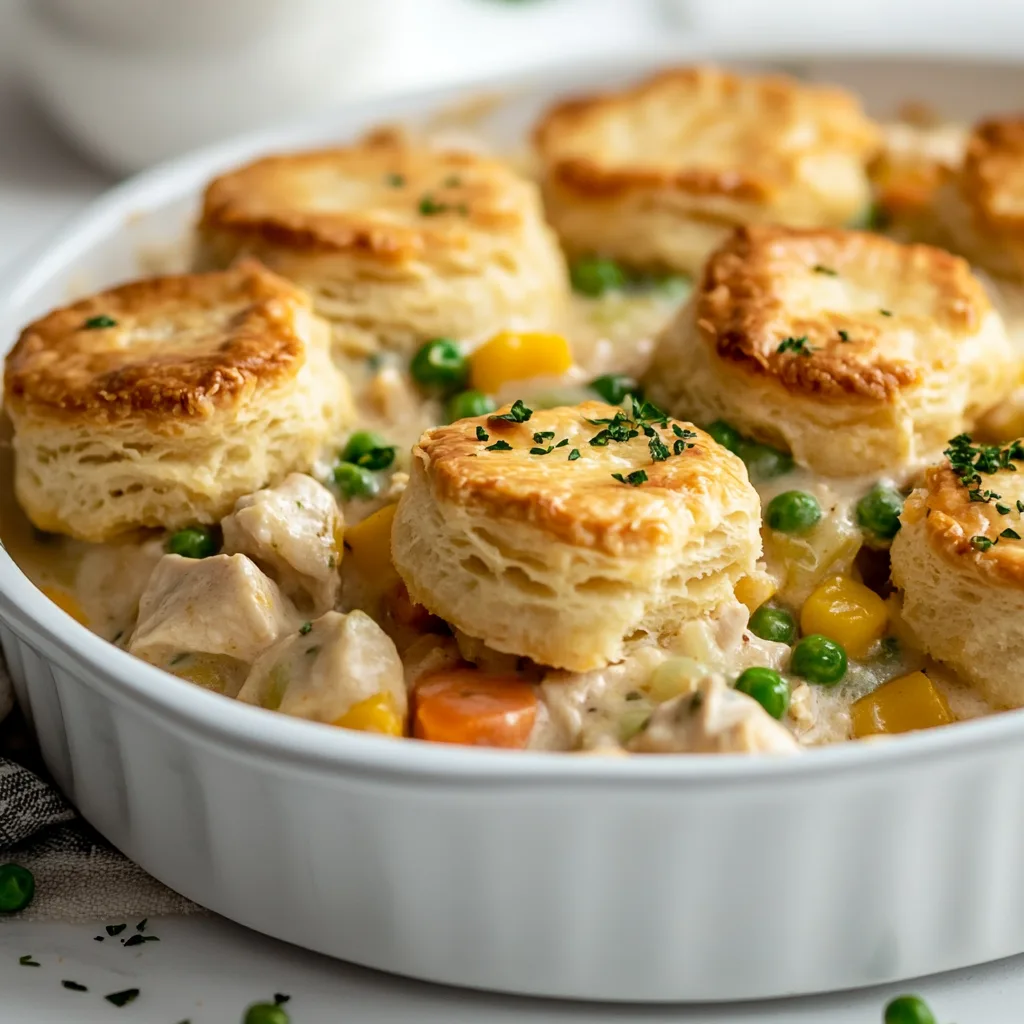
    There’s something magical about pulling a bubbling Chicken Pot Pie Casserole with Biscuits from the oven on a chilly evening. The aroma of herbs, tender chicken, and buttery biscuits creates an instant sense of home. I discovered this recipe during a particularly harsh winter when comfort food became my love language. The golden biscuits rising above creamy filling never fails to bring my family running to the table. It’s the perfect balance of convenience and homemade goodness that reminds me why simple casseroles hold such a special place in our hearts.

    Recipe

    Why You’ll Love This Chicken Pot Pie Casserole with Biscuits

    Perfect Comfort Food for Any Season

    This casserole strikes that beautiful balance between hearty and homey without being heavy. The velvety sauce coats each vegetable perfectly while tender chicken adds satisfying protein. I love how the vegetables maintain their texture, giving each bite a wonderful contrast against the creamy base. What makes this dish truly special is how it brings people together—there’s something about breaking through those golden biscuits that makes everyone smile. Even my pickiest eater cleans their plate when this appears on our dinner table!

    Time-Saving Alternative to Traditional Pot Pie

    Unlike traditional pot pie with its fussy crust, this casserole version with biscuits cuts prep time nearly in half while delivering all the same comforting flavors. The refrigerated biscuits are my secret weapon for busy weeknights—they puff up beautifully and soak up just enough sauce to be tender but not soggy. I’ve made this on countless evenings when time was tight but still wanted something that felt lovingly homemade. The hands-on time is minimal, letting you focus on whatever else needs your attention while dinner essentially makes itself.

    Essential Tips & Tricks

    Getting the Perfect Biscuit Topping

    For that picture-perfect golden topping, brush your biscuits with a little melted butter or egg wash before baking. This creates that irresistible shine that makes the casserole look as good as it tastes. I’ve found that spacing the biscuits about half an inch apart allows them to expand while baking without becoming one giant mass. For extra flavor, try sprinkling the tops with herbs, garlic powder, or even a touch of parmesan cheese before baking. The biscuits should be placed on the filling when it’s already hot to ensure they cook through perfectly from the bottom up.

    Creating the Creamiest Filling

    The secret to an amazing filling lies in creating a silky, well-seasoned base that coats every ingredient. Start with a roux made from butter and flour, cooking it until it smells slightly nutty before adding your liquids. This prevents lumps and creates the perfect texture. I learned through trial and error that adding a splash of white wine or a tablespoon of dijon mustard gives the sauce complexity without overpowering. For extra richness, stir in a few tablespoons of cream cheese or a touch of sour cream during the final minutes of cooking.

    Serving Ideas & Creative Variations

    Seasonal Adaptations

    This casserole welcomes seasonal adjustments that keep it exciting year-round. In spring, I love adding fresh peas, asparagus tips, and a hint of lemon zest for brightness. Summer calls for sweet corn, cherry tomatoes, and fresh herbs from my garden. Fall versions shine with butternut squash and sage, while winter iterations get cozy with root vegetables and thyme. The beauty of this dish is its flexibility—I’ve even made a holiday version with leftover turkey and cranberries that disappeared faster than the Thanksgiving turkey itself!

    Side Dishes That Complete the Meal

    While this casserole stands beautifully on its own, thoughtful sides elevate it to a complete meal experience. A crisp green salad with a bright vinaigrette provides the perfect contrast to the rich casserole. For heartier appetites, consider roasted garlic bread or a simple grain like quinoa. I often serve mine with quick-pickled vegetables that cut through the richness with their tangy bite. For special occasions, start with a light soup like butternut squash or tomato bisque—just enough to whet appetites without filling everyone up before the main attraction.

    Storage & Troubleshooting Guide

    Freezing and Reheating Successfully

    This casserole freezes beautifully, making it perfect for meal prep or unexpected guests. For best results, prepare the filling completely but freeze without biscuits—add those fresh when you’re ready to bake. Cool the filling completely before freezing in an airtight container for up to three months. When reheating, thaw overnight in the refrigerator, then warm in a 350°F oven until bubbling before adding fresh biscuits to the top. Individual portions can be microwaved, though the biscuits won’t maintain their crisp texture as well as when reheated in an oven.

    Fixing Common Issues

    If your sauce seems too thin, create a quick slurry with a tablespoon each of cornstarch and cold water, then stir it into the simmering filling. For sauce that’s too thick, gradually add more broth or a splash of cream until you reach your desired consistency. If your biscuits aren’t browning properly, move the casserole to the upper third of the oven for the final few minutes of baking. To prevent soggy bottoms, make sure your filling isn’t excessively liquid and that it’s hot when you add the biscuits—this gives them a head start on baking from the bottom up.

    Frequently Asked Questions

    Can I use homemade biscuits instead of refrigerated ones?

    Absolutely! Homemade biscuits add a wonderful touch. Prepare your favorite recipe, but don’t bake them separately—place the raw dough directly on the hot filling and bake according to the casserole instructions.

    How do I prevent my Chicken Pot Pie Casserole with Biscuits from being watery?

    Ensure your filling simmers long enough to thicken properly. If using frozen vegetables, thaw and drain them thoroughly before adding. The roux should be cooked until it smells slightly nutty for best thickening power.

    Can I make this vegetarian?

    Yes! Substitute the chicken with chickpeas, white beans, or plant-based chicken alternatives. Use vegetable broth instead of chicken broth and add extra mushrooms for a meaty texture and umami flavor.

    What’s the best chicken to use for this recipe?

    Rotisserie chicken provides excellent flavor and convenience. Alternatively, poached chicken breasts or thighs work wonderfully. Dark meat tends to stay more tender throughout the baking process.

    How can I make this gluten-free?

    Use a cup-for-cup gluten-free flour blend in the filling and top with gluten-free biscuits. Many stores now carry excellent gluten-free refrigerated biscuit options, or you can make your own.

    Final Thoughts

    This Chicken Pot Pie Casserole with Biscuits has become my go-to recipe when I need something that feels like a hug in food form. There’s something deeply satisfying about creating a dish that bridges the gap between convenience and homemade comfort. I love seeing the joy on people’s faces as they break through those golden biscuits to reveal the creamy goodness beneath. Whether you’re feeding a family on a busy weeknight or looking for something special to bring to a potluck, this casserole delivers every time. Find more cozy recipes on Pinterest for your comfort food collection!

  • Sheet Pan Meatloaf Dinner with Crispy Green Beans & Potatoes

    Sheet Pan Meatloaf Dinner with Crispy Green Beans & Potatoes

    Sheet Pan Meatloaf Dinner with Crispy Green Beans & Potatoes

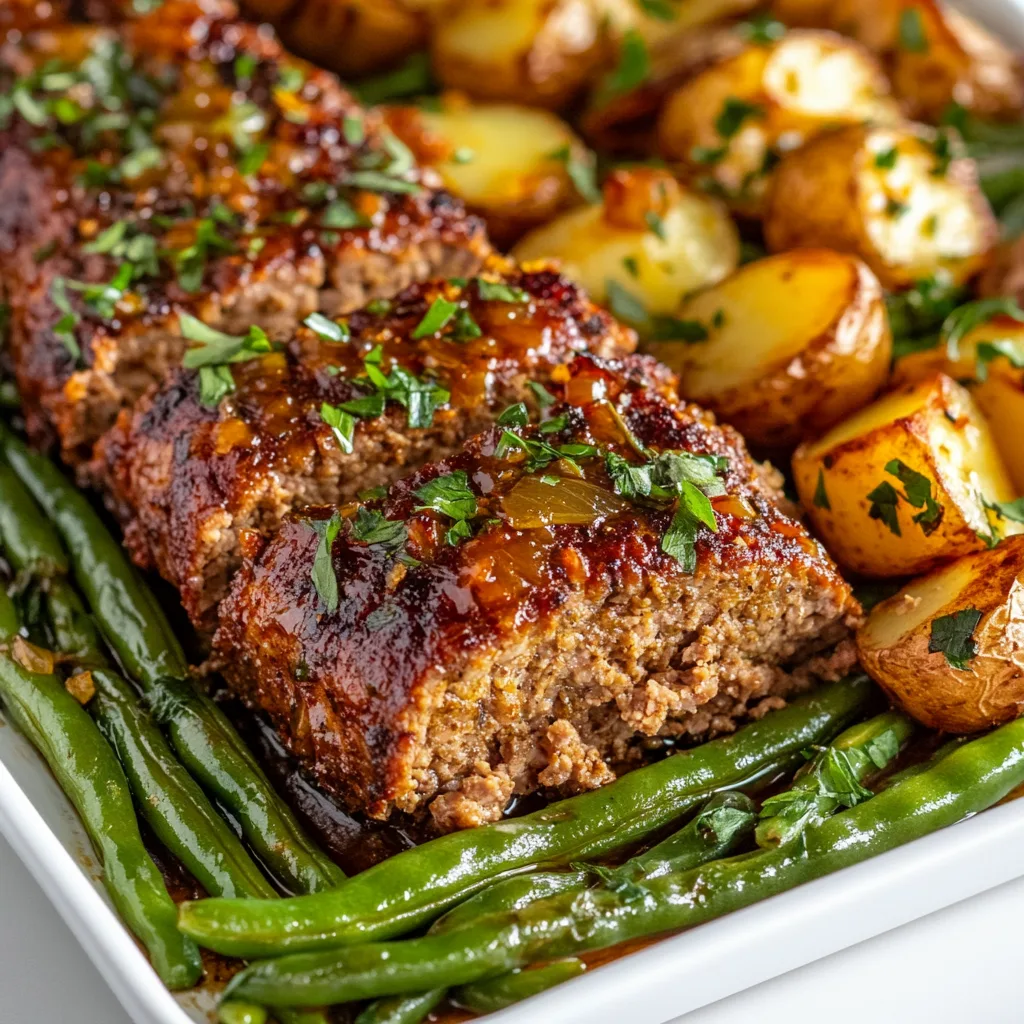
    This Sheet Pan Meatloaf Dinner with Roasted Green Beans and Potatoes has become my absolute lifesaver on those chaotic weeknights when I’m juggling deadlines and hungry family members. There’s something magical about the way the savory meatloaf juices mingle with the crispy potatoes and tender green beans as they roast together. I discovered this one-pan wonder last winter when my oven was acting up, forcing me to get creative with limited cooking space. Now it’s in our regular rotation because it delivers that cozy, homemade comfort with minimal cleanup—exactly what my soul needs after a long day. If you love hearty beef dishes, this sheet pan version will quickly become your new favorite.

    Recipe

    Why You’ll Love This Sheet Pan Meatloaf Dinner with Roasted Green Beans and Potatoes

    Perfect for Busy Weeknights

    This sheet pan meatloaf dinner is the ultimate time-saver when life gets hectic. Everything cooks together on one pan, meaning you’ll spend less time washing dishes and more time actually enjoying your evening. I love how the prep takes just 15 minutes—slice potatoes, trim green beans, mix and shape the meatloaf—then the oven does all the heavy lifting. The hands-off cooking gives me time to help with homework or simply take a moment to breathe. The delicious aromas filling your kitchen will make everyone think you’ve been cooking all day!

    Complete Balanced Meal in One Pan

    What I adore most about this sheet pan meatloaf dinner is that it delivers protein, veggies, and starch all at once. The juicy meatloaf provides that satisfying protein, while the green beans offer fiber and nutrients, and the golden-brown potatoes bring comforting carbs to round everything out. No need to juggle multiple pots and pans or worry about side dishes. The flavors meld beautifully as everything roasts together, with the meatloaf’s savory juices seasoning the vegetables. It’s the perfect solution for those nights when you want wholesome food without the fuss.

    Essential Tips & Tricks

    Getting the Timing Right

    The secret to a perfect sheet pan meatloaf dinner lies in the timing and arrangement. I’ve learned through trial and error that giving the potatoes a head start (about 15 minutes) ensures everything finishes cooking at the same time. Shape your meatloaf slightly flattened rather than tall and domed—this helps it cook more quickly and evenly. For the green beans, add them during the last 20 minutes so they stay vibrant and tender-crisp rather than mushy. I always position the meatloaf in the center of the pan with vegetables arranged around it to allow for proper heat circulation and even cooking.

    Flavor Boosting Techniques

    Elevating this sheet pan dinner is all about layering flavors at every opportunity. I like to toss the potatoes in a mixture of olive oil, garlic powder, and smoked paprika before roasting—it creates a delicious crust as they cook. For the meatloaf, don’t skip adding grated onion rather than chopped; it releases more moisture and flavor. My favorite trick is brushing the meatloaf with a mixture of ketchup, brown sugar, and a splash of balsamic vinegar during the last 15 minutes of cooking. This creates a gorgeous glaze that reminds me of my slow cooker beef recipes but with a wonderful caramelized finish.

    Serving Ideas & Creative Variations

    Family-Friendly Adaptations

    This sheet pan meatloaf dinner is incredibly versatile and can be customized to please even picky eaters. For kids who aren’t green bean fans, try substituting with carrots or broccoli—they roast beautifully alongside the meatloaf. If your family prefers a lighter option, use ground turkey or chicken instead of beef for the meatloaf. I’ve found that adding a handful of quick oats to the turkey mixture helps retain moisture. For a fun twist that my nieces and nephews love, try making individual mini meatloaves instead of one large one—they cook faster and everyone gets their own special portion!

    Seasonal Swaps and Upgrades

    One of the reasons I make this sheet pan meatloaf dinner year-round is how easily it adapts to seasonal ingredients. In summer, I’ll swap green beans for zucchini and yellow squash with cherry tomatoes. Fall calls for sweet potatoes and Brussels sprouts, while winter is perfect for parsnips and carrots alongside the potatoes. For an elevated dinner party version, try adding a sprinkle of blue cheese over the vegetables during the last few minutes of cooking, or drizzle everything with a balsamic reduction before serving. These simple touches transform this humble dinner into something worthy of special occasions.

    Storage & Troubleshooting Guide

    Proper Storage and Reheating

    Leftovers from this sheet pan meatloaf dinner make fantastic next-day meals when stored properly. Allow everything to cool completely before transferring to airtight containers—I recommend storing the meatloaf separately from the vegetables to maintain their different textures. They’ll keep well in the refrigerator for up to 3 days. For reheating, the microwave works in a pinch, but for best results, use a 350°F oven for about 10-15 minutes. The vegetables might need a quick spritz of olive oil before reheating to restore their moisture. For meal prep, you can even portion complete meals into microwave-safe containers for grab-and-go lunches.

    Troubleshooting Common Issues

    If you find your sheet pan meatloaf dinner isn’t turning out perfectly, a few simple adjustments can make all the difference. For potatoes that aren’t crisping, try cutting them smaller and making sure they’re thoroughly dried after washing—excess moisture prevents browning. If your meatloaf is coming out dry, incorporate a panade (bread soaked in milk) into your meat mixture, or add grated zucchini for hidden moisture. Green beans turning out too soft? Add them even later in the cooking process. And if your sheet pan is overcrowded, causing steaming instead of roasting, simply use two pans—it’s worth the extra space for properly caramelized vegetables.

    Frequently Asked Questions

    Can I make this Sheet Pan Meatloaf Dinner ahead of time?

    You can prep components ahead—mix the meatloaf and shape it, then cover and refrigerate. Cut potatoes and store submerged in cold water. Assemble everything on the sheet pan just before baking for best results.

    How do I know when the meatloaf is fully cooked?

    Use a meat thermometer inserted into the center of the meatloaf—it should read 160°F when fully cooked. The meatloaf should also feel firm to the touch and have a browned exterior.

    Can I use frozen green beans in this recipe?

    Fresh green beans work best for proper roasting. If using frozen, thaw and pat them completely dry first, then add them during the final 15 minutes of cooking to prevent sogginess.

    What’s the best sheet pan to use for this recipe?

    Use a heavy-duty rimmed baking sheet (18×13 inches) for even heating. Avoid overcrowding—if needed, divide between two pans so vegetables can properly roast rather than steam.

    Can I make this Sheet Pan Meatloaf Dinner gluten-free?

    Absolutely! Substitute breadcrumbs with gluten-free alternatives or crushed gluten-free crackers in the meatloaf. Double-check that your Worcestershire sauce is gluten-free, as some brands contain wheat.

    Final Thoughts

    This Sheet Pan Meatloaf Dinner with Roasted Green Beans and Potatoes has truly changed my weeknight cooking game. There’s something deeply satisfying about pulling a complete meal from the oven on a single pan—the meatloaf juicy and glazed, the potatoes golden and crispy, and the green beans perfectly tender-crisp. I love watching my family’s faces light up when they smell it cooking, and I appreciate having fewer dishes to wash afterward even more! For more delicious dinner ideas, check out my Pinterest collection where I’m always adding new sheet pan inspirations to make your life easier and more delicious.

  • Creamy Tuscan Sausage Pasta with Spinach & Sun-Dried Tomatoes!

    Creamy Tuscan Sausage Pasta with Spinach & Sun-Dried Tomatoes!

    Creamy Tuscan Sausage Pasta with Spinach & Sun-Dried Tomatoes!

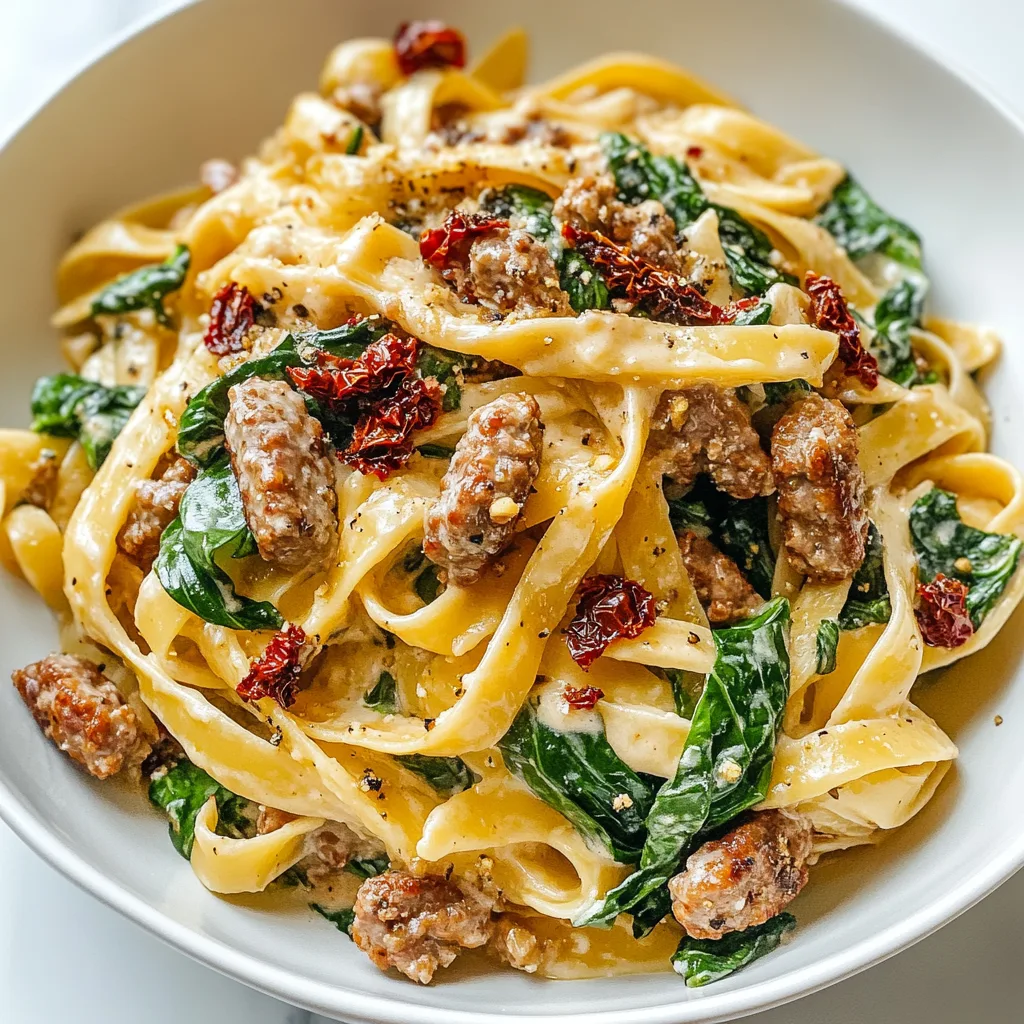
    Creamy Tuscan Sausage Pasta with Spinach and Sun-Dried Tomatoes has become my absolute go-to comfort meal when I want to impress without spending hours in the kitchen. There’s something magical about the way the creamy sauce clings to every strand of pasta, carrying little bursts of sun-dried tomato sweetness and savory Italian sausage in each bite. I first made this dish during a rainy Sunday when my sister dropped by unexpectedly, and now it’s requested at nearly every family gathering. The combination of rich cream, zesty sausage, and vibrant spinach creates a restaurant-worthy meal that comes together in just one pan.

    Recipe

    Why You’ll Love This Creamy Tuscan Sausage Pasta with Spinach and Sun-Dried Tomatoes

    A Perfect Balance of Flavors and Textures

    This pasta dish is a symphony of complementary tastes and textures that dance on your palate. The slight chew of al dente pasta provides the perfect backdrop for the rich, velvety sauce that’s punctuated by savory Italian sausage bits. The sun-dried tomatoes add concentrated bursts of sweet-tart flavor, while the spinach brings a fresh, earthy element that cuts through the richness. I love how the garlic and Italian herbs infuse the cream, creating layers of flavor that make each forkful slightly different from the last. It’s comfort food that feels indulgent yet balanced.

    Quick and Easy One-Pan Wonder

    Despite its impressive flavor profile, this Tuscan sausage pasta comes together with surprising ease. The entire meal cooks in under 30 minutes in just one pan, making it perfect for busy weeknights when you want something delicious without mountains of dishes. I’ve made this on days when I’m absolutely exhausted, and it still turns out perfectly. The pasta cooks right in the sauce, absorbing all those amazing flavors while simultaneously thickening the cream with its starch. It’s one of those magical recipes where convenience doesn’t compromise quality—a true weeknight hero in my kitchen.

    Essential Tips & Tricks

    Selecting and Preparing Your Ingredients

    The quality of ingredients makes all the difference in this Tuscan pasta. Choose high-quality Italian sausage with visible herbs and spices—I prefer the bulk variety so I can break it into perfectly bite-sized pieces while browning. For sun-dried tomatoes, the oil-packed variety brings extra flavor, and I always save a tablespoon of that infused oil to start the dish. When it comes to pasta, shapes with ridges or curves like fusilli or penne work best for catching the creamy sauce. Similar to my Baked Macaroni and Cheese, the pasta shape can really impact how each bite delivers flavor.

    Mastering the Creamy Sauce

    The secret to a silky-smooth sauce lies in the technique. Always reduce your heat before adding the heavy cream to prevent curdling, and stir constantly as it thickens. For extra richness, I add a generous handful of freshly grated Parmesan directly into the sauce rather than just as a garnish—it melts beautifully and adds incredible depth. The spinach should be added just before serving; it wilts almost instantly in the hot sauce, maintaining its vibrant color and nutrients. If your sauce becomes too thick, add a splash of reserved pasta water—the starch helps maintain that perfect creamy consistency without thinning the flavor.

    Serving Ideas & Creative Variations

    Perfect Pairings for a Complete Meal

    This Tuscan sausage pasta is substantial enough to stand alone, but I love serving it with simple accompaniments that complement without competing. A light arugula salad with lemon vinaigrette provides a peppery, acidic counterpoint to the rich pasta. Warm crusty bread is non-negotiable for sopping up every last drop of the incredible sauce. For a special occasion, start with Spinach Artichoke Dip as an appetizer—the flavor profiles complement each other beautifully. A crisp white wine like Pinot Grigio or Sauvignon Blanc cuts through the creaminess perfectly, elevating the entire dining experience.

    Delicious Twists on the Classic Recipe

    This versatile recipe welcomes creative adaptations to suit your taste or what’s in your pantry. Swap Italian sausage for grilled chicken or shrimp for a lighter option, or use spicy sausage for a dish with more heat. For a vegetarian version, substitute mushrooms sautéed until golden and caramelized—they provide a similar umami satisfaction. Artichoke hearts make a wonderful addition alongside the sun-dried tomatoes. For a lighter version, substitute half the cream with chicken broth and add a touch more Parmesan to maintain richness. Fresh herbs like basil or oregano scattered over the finished dish brighten the flavors beautifully.

    Storage & Troubleshooting Guide

    Proper Storage and Reheating Methods

    This Tuscan pasta stores beautifully, actually improving in flavor as the ingredients meld together overnight. Refrigerate leftovers in an airtight container for up to 3 days. When reheating, add a splash of cream or milk to revive the sauce, which tends to thicken when chilled. Warm gently over medium-low heat, stirring frequently to prevent scorching. Microwave reheating works in a pinch, but use 50% power and stir halfway through for even warming. I don’t recommend freezing this pasta, as cream-based sauces can separate upon thawing, but if properly stored, you’ll likely finish every last bite before that’s even a consideration!

    Fixing Common Issues

    Even experienced cooks encounter challenges, but most pasta problems have simple solutions. If your sauce breaks or appears curdled, lower the heat immediately and whisk in a tablespoon of cold cream. Too thick? Add pasta water tablespoon by tablespoon until you reach the desired consistency. If the sauce is too thin, a sprinkle of grated Parmesan or a teaspoon of cornstarch slurry can help thicken it. Pasta overcooked? Unfortunately, there’s no fixing that, but you can distract from it with extra toppings like toasted pine nuts or fresh herbs. Always taste before serving and adjust seasonings—a splash of lemon juice can brighten flavors if the dish tastes flat.

    Frequently Asked Questions

    Can I make Creamy Tuscan Sausage Pasta with Spinach and Sun-Dried Tomatoes ahead of time?

    Yes! Prepare it up to a day ahead, stopping just before adding the spinach. Refrigerate, then reheat gently on the stove with a splash of cream, adding fresh spinach just before serving.

    What can I substitute for heavy cream to make this lighter?

    Half-and-half or whole milk can work, though the sauce won’t be as rich. For a dairy-free option, try full-fat coconut milk or cashew cream, which both maintain creaminess.

    Can I use frozen spinach instead of fresh?

    Yes, but thaw completely and squeeze out excess moisture first. Use about 1/2 cup of thawed frozen spinach for every 2 cups of fresh called for in the recipe.

    What’s the best pasta shape for this dish?

    Shapes that catch sauce work best—penne, fusilli, farfalle, or orecchiette. Avoid long, slippery noodles like spaghetti that won’t hold the chunky sauce components well.

    How spicy is this dish?

    It’s mild unless you choose spicy Italian sausage. The creaminess balances heat, but you can add red pepper flakes to taste if you prefer more kick.

    Final Thoughts

    This Creamy Tuscan Sausage Pasta with Spinach and Sun-Dried Tomatoes has earned its place as a staple in my recipe collection for good reason. It strikes that perfect balance between impressive and achievable, making it suitable for both Tuesday night dinners and special occasions. I’ve shared this recipe with countless friends who’ve made it their own, each adding personal touches that make it special for their families. For more delicious pasta inspiration, be sure to check out my Pinterest boards where I’m always adding new comfort food ideas!

  • Instant Pot Beef Stew with Carrots & Potatoes – Cozy Comfort Ready!

    Instant Pot Beef Stew with Carrots & Potatoes – Cozy Comfort Ready!

    Instant Pot Beef Stew with Carrots & Potatoes – Cozy Comfort Ready!

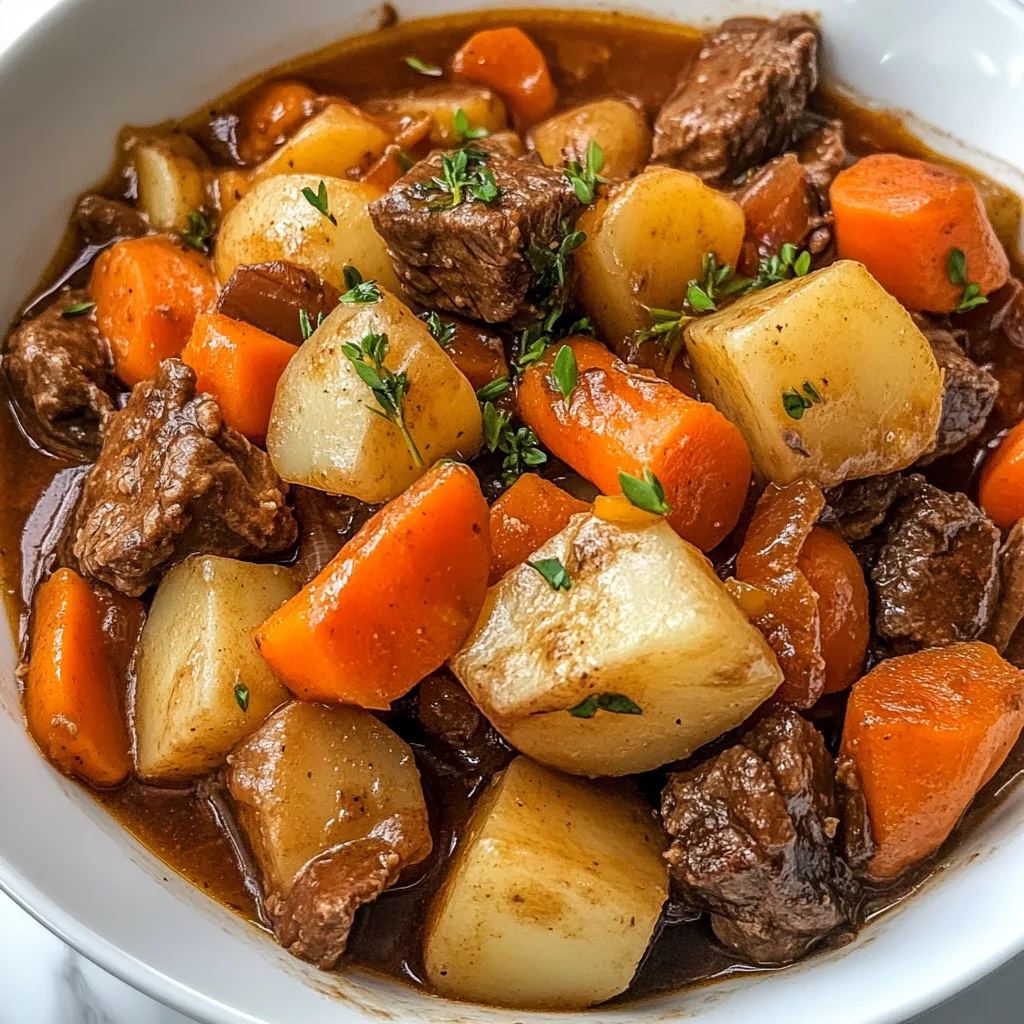
    Instant Pot Beef Stew with Carrots and Potatoes is the ultimate comfort food that warms both body and soul on chilly evenings. There’s something almost magical about the rich aroma that fills your kitchen as tender beef, earthy potatoes, and sweet carrots simmer together in a savory broth. I still remember the first time I made this in my Instant Pot—my kitchen windows fogged up, and my husband came running from the garage asking what smelled so heavenly! This recipe transforms simple ingredients into a hearty masterpiece in a fraction of the traditional cooking time, making it perfect for busy weeknights when you need comfort without compromise.

    Recipe

    Why You’ll Love This Instant Pot Beef Stew with Carrots and Potatoes

    Time-Saving Comfort Food

    The beauty of making beef stew in an Instant Pot lies in its incredible time efficiency. What traditionally takes hours of simmering on the stovetop or in a slow cooker transforms into a weeknight-friendly meal in about 45 minutes total. I used to reserve beef stew for lazy Sunday afternoons, but now it’s become my Wednesday night hero! The pressure cooking method not only speeds up the process but actually intensifies the flavors, forcing the rich broth into every fiber of the meat and vegetables. The carrots maintain their sweet integrity while the potatoes become perfectly tender without turning to mush.

    Rich Depth of Flavor

    The concentrated cooking environment of the Instant Pot creates a flavor explosion that rivals traditional slow-cooking methods. When you sauté the beef using the pot’s built-in function, those gorgeous caramelized bits (the fond) become the foundation of your stew’s complex flavor profile. The sealed pressure environment then traps all the aromatic elements—the sweet onions, earthy herbs, and umami-rich broth—allowing them to meld together rather than evaporate away. I love adding a splash of red wine or a tablespoon of tomato paste for extra depth. The result is a stew with layers of flavor that taste like they’ve been developing for hours, not minutes.

    Essential Tips & Tricks

    Perfect Meat Selection and Preparation

    Choosing the right cut of beef makes all the difference in your Instant Pot stew. Look for chuck roast or beef stew meat, which contains enough marbling to become fork-tender under pressure. Cut your meat into uniform 1½-inch cubes to ensure even cooking. Before adding to the pot, pat the meat completely dry with paper towels—this is non-negotiable! Moist meat will steam rather than brown, robbing your stew of crucial flavor. Season generously with salt and pepper, then brown in batches using the sauté function. Don’t rush this step; proper browning creates the rich foundation that makes your hearty beef and vegetable soup so satisfying.

    Vegetable Timing Secrets

    The key to perfectly cooked vegetables in Instant Pot beef stew is understanding their cooking rates. Carrots and potatoes should be cut into chunks slightly larger than bite-size (about 1-inch pieces) since they’ll continue cooking during the natural pressure release. For firmer vegetables like celery or bell peppers, add them after the pressure cooking cycle when you’re thickening the stew. I learned this the hard way after serving my family mushy, indistinguishable vegetables one too many times! For the potatoes, I prefer Yukon Golds or red potatoes as they hold their shape better than russets. This staggered approach ensures every vegetable maintains its distinct texture and flavor.

    Serving Ideas & Creative Variations

    Perfect Pairings for Your Stew

    Serving this Instant Pot beef stew with the right accompaniments elevates it from merely delicious to absolutely memorable. My family’s favorite is a chunk of crusty sourdough bread for soaking up every last drop of that rich gravy. For a complete meal, consider a simple green salad with a light vinaigrette to cut through the richness of the stew. If you’re hosting guests, serve the stew in hollowed-out bread bowls for a rustic presentation that never fails to impress. For wine lovers, a medium-bodied red like Merlot or Syrah complements the deep flavors beautifully. You could also serve it alongside classic shepherd’s pie for a hearty feast when feeding a crowd.

    Exciting Flavor Variations

    Don’t be afraid to put your personal spin on this classic Instant Pot beef stew recipe! For an Italian twist, add a can of diced tomatoes, a teaspoon of Italian seasoning, and finish with a sprinkle of Parmesan cheese. Craving something with a kick? Try a Southwestern version by adding black beans, corn, and a tablespoon of taco seasoning. I once made a French-inspired variation with herbes de Provence, mushrooms, and a splash of cognac that had my dinner guests raving for weeks! For a heartier winter meal, stir in some barley or farro during the last few minutes of cooking. These grains soak up the flavorful broth while adding satisfying texture.

    Storage & Troubleshooting Guide

    Proper Storage for Maximum Flavor

    Like many stews, this Instant Pot beef stew actually tastes even better the next day after the flavors have had time to meld. Allow the stew to cool completely before transferring to airtight containers. It will keep in the refrigerator for 3-4 days, making it perfect for meal prep. For longer storage, freeze portions in freezer-safe containers or heavy-duty freezer bags for up to 3 months. I like to freeze individual portions for quick lunches—just label with the date! When reheating, thaw overnight in the refrigerator if frozen, then warm gently on the stovetop or microwave until heated through. Add a splash of broth if needed to restore the original consistency.

    Solving Common Stew Problems

    If your Instant Pot beef stew turns out too thin, there’s an easy fix: create a slurry by mixing 1-2 tablespoons of cornstarch with equal parts cold water, then stir it into the hot stew using the sauté function until it reaches your desired thickness. For stew that’s too thick, simply add more beef broth until you reach the perfect consistency. If your meat isn’t tender enough, it likely needs more cooking time—reset the Instant Pot for an additional 5-10 minutes under pressure. Encountering a “burn” notice? This usually happens when there’s not enough liquid or when thick ingredients settle at the bottom. Always deglaze the pot thoroughly after sautéing to prevent this issue.

    Frequently Asked Questions

    Can I use frozen meat in my Instant Pot Beef Stew with Carrots and Potatoes?

    Yes, but skip the browning step and add 10-12 minutes to your cooking time. The flavor won’t be quite as rich, but it’s a great time-saver in a pinch. Remember to ensure you have enough liquid to prevent burning.

    How can I thicken my beef stew if it’s too watery?

    Make a cornstarch slurry with 1-2 tablespoons cornstarch mixed with equal parts cold water. Use the sauté function after pressure cooking and stir in the slurry until it reaches your desired thickness.

    Can I add wine to my Instant Pot beef stew?

    Absolutely! Add ½ cup of red wine after sautéing the meat and vegetables. Let it simmer for 2-3 minutes to cook off the alcohol before adding other liquids. It adds wonderful depth of flavor.

    What’s the best way to avoid mushy vegetables?

    Cut potatoes and carrots into larger chunks (about 1-inch pieces). For very tender vegetables like peas or fresh herbs, stir them in after pressure cooking during the thickening stage.

    How long does Instant Pot beef stew last in the refrigerator?

    Store cooled stew in airtight containers for 3-4 days in the refrigerator. The flavors actually improve overnight, making this perfect for meal prep or make-ahead dinner plans.

    Final Thoughts

    This Instant Pot Beef Stew with Carrots and Potatoes has become my go-to recipe for those evenings when I crave something deeply satisfying without hours of cooking. The magic of pressure cooking transforms humble ingredients into something truly special—tender beef that falls apart with the touch of a fork, sweet carrots, and potatoes that have soaked up all that savory goodness. I love seeing my family’s faces light up when they smell this cooking! For more delicious comfort food recipes, check out my Pinterest board where I’m always adding new favorites. Happy cooking!

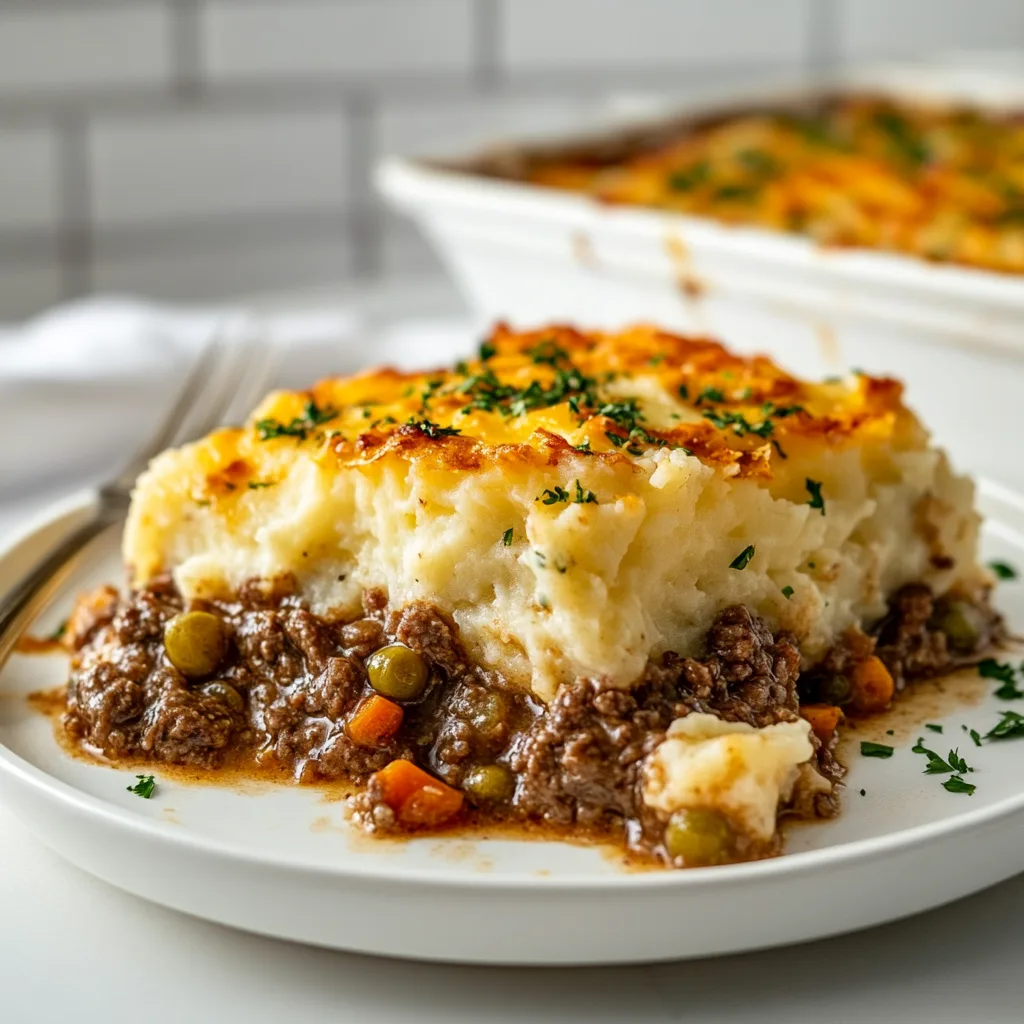
  • Classic Shepherd’s Pie: Rich Beef Gravy & Cheesy Mash Bliss

    Classic Shepherd’s Pie: Rich Beef Gravy & Cheesy Mash Bliss

    Classic Shepherd’s Pie: Rich Beef Gravy & Cheesy Mash Bliss

    There’s something deeply comforting about a Classic Shepherd’s Pie with Rich Beef Gravy and Cheesy Mash that speaks to my soul on chilly evenings. The way the savory beef filling mingles with that golden potato topping creates pure magic on your plate. I remember making this for my family during our first snowfall last year—the windows frosted over while inside, the aroma of herbs and beef filled our kitchen. This hearty dish isn’t just dinner; it’s a warm hug in food form, perfect for gathering loved ones around your table. Let me show you how to create this ultimate comfort classic that never fails to impress.

    Recipe

    Why You’ll Love This Classic Shepherd’s Pie with Rich Beef Gravy and Cheesy Mash

    Perfect Comfort Food For Any Season

    There’s something magical about breaking through that crispy cheese crust to find perfectly seasoned beef below. This shepherd’s pie recipe strikes the perfect balance between hearty and refined. The rich gravy develops incredible depth as it simmers, while the vegetables add both nutrition and texture. I love how the kitchen fills with the most incredible savory aroma while it bakes—it’s like an invitation for everyone to gather. Plus, it’s wonderfully adaptable to whatever vegetables you have on hand, making it perfect for using up those odds and ends in your crisper drawer.

    Make-Ahead Friendly For Busy Weeknights

    As a busy home cook, I appreciate recipes that work with my schedule, not against it. This shepherd’s pie shines in that department! You can prepare the entire dish up to two days ahead and refrigerate it unbaked. When you’re ready, simply pop it in the oven and dinner is served. The flavors actually develop beautifully during their rest in the refrigerator, making this possibly even better the next day. I often make a double batch on Sunday afternoons, baking one for dinner and freezing the other for those inevitable hectic weeknights when cooking from scratch feels impossible.

    Essential Tips & Tricks

    Creating The Perfect Beef Filling

    The heart of any great shepherd’s pie lies in its deeply flavored filling. Start with good quality ground beef (80/20 is ideal for flavor) and take time to properly brown it—this develops those rich, caramelized notes that elevate the entire dish. Deglaze your pan with a splash of red wine or beef broth, scraping up those flavorful browned bits. For an extra-rich gravy, add a tablespoon of tomato paste and let it cook until it darkens slightly before adding your liquids. This simple step creates incredible depth that makes your shepherd’s pie stand out from basic versions. Just like in my Hearty Beef and Vegetable Soup, these flavor-building techniques make all the difference.

    Mastering The Cheesy Potato Topping

    The crowning glory of shepherd’s pie is undoubtedly that golden potato layer. For the creamiest, most luxurious mash, use starchy potatoes like Russets or Yukon Golds. After draining, return them to the hot pot for a minute to evaporate excess moisture before mashing—this prevents waterlogged potatoes. Warm your butter and milk before adding them in, which helps maintain the potatoes’ temperature and prevents gumminess. For that irresistible cheesy crust, mix sharp cheddar directly into your mash, then sprinkle more on top before baking. Create texture by using a fork to make peaks and valleys that will crisp beautifully in the oven.

    Serving Ideas & Creative Variations

    Perfect Pairings For A Complete Meal

    While this hearty shepherd’s pie is practically a complete meal on its own, a few simple sides can round out your dinner beautifully. I love serving it with a crisp green salad dressed with a tangy vinaigrette to cut through the richness. For special occasions, add some Roasted Brussels Sprouts for a touch of caramelized sweetness that complements the savory pie perfectly. A simple steamed green vegetable like peas or broccoli adds color and freshness. For bread lovers, warm crusty sourdough is ideal for sopping up every last bit of that incredible gravy—because trust me, you won’t want to leave a drop behind!

    Creative Twists On The Classic Recipe

    While traditional shepherd’s pie is perfect as is, don’t be afraid to make it your own! For a Mediterranean twist, add olives, feta, and oregano to the filling. Craving something spicy? Incorporate chipotle peppers, corn, and black beans for a Southwestern version. I recently made a fall-inspired variation with sweet potatoes instead of regular potatoes, adding a touch of cinnamon and nutmeg to the mash—my guests couldn’t stop raving about it! For a lighter option, try cauliflower mash on top, or go luxurious with a blend of potatoes and parsnips for sweet, earthy notes that elevate the entire dish.

    Storage & Troubleshooting Guide

    Proper Storage For Leftovers

    Shepherd’s pie makes fantastic leftovers that sometimes taste even better the next day! Once cooled, cover your leftover shepherd’s pie tightly with foil or transfer portions to airtight containers. It will keep beautifully in the refrigerator for up to 4 days. For longer storage, freeze individual portions wrapped well in foil and placed in freezer bags—they’ll keep for up to 3 months. When reheating, thaw overnight in the refrigerator if frozen, then warm in a 350°F oven until heated through. For quickest results, microwave individual portions, though you’ll lose some of that delightful crusty top texture that makes this dish so special.

    Solving Common Shepherd’s Pie Problems

    Even experienced cooks sometimes encounter issues with shepherd’s pie. If your gravy filling seems too watery, simmer it longer before assembling, or add a cornstarch slurry (1 teaspoon cornstarch mixed with 1 tablespoon cold water) to thicken it. For potatoes that won’t hold their shape, make sure you’re using starchy varieties and avoid overmixing. If your topping browns too quickly before the filling heats through, cover with foil for part of the baking time. And if you’re concerned about the filling bubbling over, place your baking dish on a sheet pan before putting it in the oven—this saves potential cleanup and prevents that dreaded burning smell!

    Frequently Asked Questions

    What’s the difference between Shepherd’s Pie and Cottage Pie?

    Traditional Shepherd’s Pie uses ground lamb, while Cottage Pie uses beef. In America, both names are often used interchangeably, but purists maintain this distinction. Either meat creates a delicious dish when properly seasoned and prepared.

    Can I make Classic Shepherd’s Pie with Rich Beef Gravy and Cheesy Mash ahead of time?

    Absolutely! Assemble completely, cover, and refrigerate for up to 2 days before baking. Add 10-15 minutes to the baking time if cooking directly from the refrigerator. The flavors actually improve with time.

    What’s the best cheese for the potato topping?

    Sharp cheddar provides the best flavor balance and melting properties. For variations, try mixing in Gruyère for nuttiness or Parmesan for a salty kick. Avoid pre-shredded cheeses as they contain anti-caking agents.

    Can I make this recipe gluten-free?

    Yes! Replace flour with cornstarch for thickening (use half the amount) or a 1:1 gluten-free flour blend. Ensure your beef broth is also gluten-free, as many commercial brands contain wheat derivatives.

    How do I know when my shepherd’s pie is done baking?

    The pie is done when the potato topping is golden brown with crispy edges and the filling is bubbling around the sides. Internal temperature should reach 165°F for food safety.

    Final Thoughts

    There’s something truly special about serving a Classic Shepherd’s Pie with Rich Beef Gravy and Cheesy Mash to people you love. The way faces light up at that first bite, the comfortable silence as everyone enjoys those savory flavors—these are the moments that make cooking worthwhile. This dish represents what I love most about home cooking: simple ingredients transformed into something extraordinary through a little time and care. Whether you’re making it for a weeknight family dinner or a gathering with friends, this shepherd’s pie recipe promises to deliver both comfort and joy to your table. Happy cooking! For more comforting recipes, visit our Pinterest page.