Category: Dinner

Easy, tasty dinner ideas for busy nights. Simple recipes, quick prep, and family-friendly meals you’ll make again and again.

  • Polish Sausage Sauerkraut & Potatoes: Irresistible Comfort Feast!

    Polish Sausage Sauerkraut & Potatoes: Irresistible Comfort Feast!

    Polish Sausage Sauerkraut & Potatoes: Irresistible Comfort Feast!

    Polish sausage, sauerkraut and potatoes combine to create the ultimate comfort food trifecta that warms both body and soul. The first time I made this hearty dish, the aroma transported me straight to my grandmother’s kitchen where she’d simmer similar ingredients on cold winter afternoons. There’s something magical about how these simple components transform into a rich, satisfying meal that feels like a warm hug in food form. This one-pot wonder balances tangy sauerkraut with savory sausage and tender potatoes for a classic combination that’s stood the test of time for good reason.

    Recipe

    Why You’ll Love This Polish sausage Sauerkraut and potatoes

    Perfect Balance of Flavors and Textures

    The beauty of Polish sausage sauerkraut and potatoes lies in its perfect harmony of contrasting elements. The smoky richness of the kielbasa provides a savory foundation that pairs beautifully with the bright, tangy crunch of sauerkraut. When these bold flavors mingle with creamy potatoes that absorb all those wonderful juices, magic happens on your plate. I love how each bite offers something different—sometimes the snap of the sausage casing, sometimes the tender yield of a potato chunk. The caraway seeds add subtle aromatic notes that elevate the entire dish from simple to sublime.

    Simple One-Pot Preparation

    There’s something deeply satisfying about a meal that delivers maximum flavor with minimum fuss. This Polish sausage sauerkraut and potatoes dish is the epitome of efficient cooking—everything goes into one pot, meaning fewer dishes and more time to enjoy your evening. I particularly appreciate how it builds flavor as it cooks, with each ingredient contributing to the rich broth that develops. On busy weeknights when I’m tempted to order takeout, I remind myself that this hearty meal requires just about 10 minutes of hands-on time before it simmers away on its own, filling my home with irresistible aromas.

    Essential Tips & Tricks

    Selecting the Best Ingredients

    The quality of your Polish sausage sauerkraut and potatoes dish depends heavily on starting with the right components. For sausage, look for authentic kielbasa with a high meat content and natural casing that provides that satisfying snap. Fresh-packed sauerkraut from the refrigerated section offers brighter flavor than shelf-stable varieties—I drain but never rinse it, preserving those tangy juices. Choose waxy potatoes like Yukon Golds or red potatoes that hold their shape during cooking. A splash of good beer adds depth, while caraway seeds bring traditional flavor. When I splurged on smoked kielbasa from my local Polish deli last month, the difference was remarkable!

    Perfecting the Cooking Process

    The secret to exceptional Polish sausage sauerkraut and potatoes lies in the layering technique and timing. Start by browning the sausage first to render its flavorful fat—this becomes the foundation for everything else. Layer potatoes on the bottom where they’ll absorb the developing broth, then add sauerkraut and nestle the browned sausage on top. A slow simmer is essential; rushing the cooking process won’t allow the flavors to meld properly. I’ve learned through trial and error to keep the lid slightly ajar during the final 15 minutes, allowing some liquid to reduce and concentrate the flavors while maintaining enough moisture to keep everything tender.

    Serving Ideas & Creative Variations

    Complementary Side Dishes

    Polish sausage sauerkraut and potatoes shines as a standalone meal, but thoughtful accompaniments can elevate the experience. A slice of dark rye bread with sweet butter makes the perfect vehicle for soaking up the savory broth—something I never skip! For a fresh contrast to the rich main dish, serve a simple cucumber salad dressed with dill, vinegar, and a touch of sour cream. When hosting guests, I add a platter of pickled vegetables like beets and mushrooms for an authentic Polish spread. For special occasions, consider starting with a cup of borscht or mushroom soup to create a complete feast that honors Eastern European culinary traditions.

    Regional and Seasonal Adaptations

    This versatile dish welcomes adaptation based on regional preferences and seasonal availability. In summer, I love adding fresh herbs like dill and parsley right before serving for brightness. For a Southern twist, substitute smoked andouille and add a dash of Cajun seasoning—surprisingly delicious! Apple-lovers might appreciate adding thinly sliced Granny Smith apples during the last 15 minutes of cooking, creating a sweet-tart counterpoint to the savory elements. During autumn harvest, I sometimes substitute half the potatoes with chunks of butternut squash, which adds gorgeous color and subtle sweetness that complements the tangy sauerkraut beautifully.

    Storage & Troubleshooting Guide

    Proper Storage and Reheating

    Polish sausage sauerkraut and potatoes actually improves with time, making it perfect for meal prep and leftovers. Store cooled portions in airtight containers in the refrigerator for up to 4 days—the flavors will continue to develop and meld. When reheating, add a splash of chicken broth or water to maintain moisture, and warm gently over medium-low heat rather than blasting with high temperatures. For freezing, portion into freezer-safe containers, leaving room for expansion, and use within 3 months. I’ve found that potatoes can become slightly mealy after freezing, but the overall flavor remains delicious—perfect for those nights when cooking from scratch isn’t an option.

    Common Issues and Solutions

    Even experienced cooks occasionally encounter challenges with Polish sausage sauerkraut and potatoes. If your dish turns out too watery, simply remove the lid and increase heat slightly to reduce excess liquid—but watch carefully to prevent scorching. Conversely, if it’s too dry, add small amounts of chicken stock or beer. Sauerkraut too tangy? Rinse it lightly before adding or balance with a teaspoon of brown sugar. Potatoes not cooking evenly? Next time, ensure they’re cut to uniform size and layer them beneath the sauerkraut where they’ll cook more consistently in the developing broth.

    Frequently Asked Questions

    Can I make Polish sausage sauerkraut and potatoes in a slow cooker?

    Absolutely! Brown the sausage first, then combine all ingredients in your slow cooker. Cook on low for 6-7 hours or high for 3-4 hours until potatoes are tender. This method intensifies the flavors beautifully.

    What’s the best type of Polish sausage to use?

    Traditional smoked kielbasa offers authentic flavor, but any smoked Polish sausage works well. Look for varieties with visible garlic and spices for the richest taste experience.

    Can I use fresh cabbage instead of sauerkraut?

    Yes, though it creates a different dish. If using fresh cabbage, sauté it first with onions until softened, and add a splash of vinegar to mimic some of the sauerkraut’s tanginess.

    How can I make this dish less acidic?

    Rinse the sauerkraut before adding it, or include 1-2 tablespoons of brown sugar to balance the acidity. Adding sliced apples also helps neutralize tanginess while adding subtle sweetness.

    What’s the best potato variety for this recipe?

    Waxy potatoes like Yukon Golds or red potatoes hold their shape best during cooking, absorbing flavors without falling apart in the simmering broth.

    Final Thoughts

    Polish sausage sauerkraut and potatoes embodies everything wonderful about comfort food—it’s hearty, flavorful, and carries the weight of culinary tradition in every bite. The magic happens when these humble ingredients transform through slow cooking into something greater than their parts. I hope this dish brings the same warmth and satisfaction to your table that it’s brought to mine over the years. Whether you’re connecting with your heritage or simply exploring new flavor combinations, this one-pot wonder deserves a regular spot in your meal rotation. Find more inspiration for your cooking adventures on Pinterest.

  • Sheet Pan Fajita Chicken with Charred Veggies – Easy, Flavorful!

    Sheet Pan Fajita Chicken with Charred Veggies – Easy, Flavorful!

    Sheet Pan Fajita Chicken with Charred Veggies – Easy, Flavorful!

    There’s something magical about Sheet Pan Fajita Chicken with Charred Vegetables that makes weeknight dinners feel special without the fuss. The sizzling sound as the chicken and veggies hit the hot pan takes me back to my grandmother’s kitchen, where the aroma of smoky spices would fill every corner. This one-pan wonder combines juicy chicken thighs with rainbow-bright bell peppers and onions, all caramelized to perfection. I love how the edges get that beautiful char that mimics restaurant-style fajitas, but with half the effort and all the flavor. Trust me, this recipe will become your new weeknight hero.

    Recipe

    Why You’ll Love This Sheet Pan Fajita Chicken with Charred Vegetables

    Perfect for Busy Weeknights

    Sheet Pan Fajita Chicken with Charred Vegetables is the answer to that eternal question: “What can I make that’s quick but doesn’t taste rushed?” The beauty lies in its simplicity—just toss everything with zesty fajita seasoning, spread it on a pan, and let your oven do the heavy lifting. I’ve made this countless times after long workdays when cooking feels impossible, yet I still want something homemade. The minimal prep (about 10 minutes) and easy cleanup make this a true sanity-saver. Plus, the hands-off cooking time gives you a moment to unwind with a glass of wine or help with homework.

    A Flavor Explosion in Every Bite

    The magic of Sheet Pan Fajita Chicken happens when the vegetables begin to caramelize and the chicken develops that irresistible golden crust. The natural sugars in the bell peppers and onions concentrate as they roast, creating sweet, smoky notes that balance perfectly with the spicy, savory chicken. I’m always amazed at how the simple act of high-heat roasting transforms ordinary ingredients into something extraordinary. The charred edges of the vegetables bring that authentic fajita experience right to your dining table. My family actually prefers this to restaurant versions now—they say the flavors are more intense!

    Essential Tips & Tricks

    Mastering the Perfect Char

    To achieve that coveted restaurant-style char on your Sheet Pan Fajita Chicken with Charred Vegetables, temperature and spacing are key. Always preheat your sheet pan in the oven before adding ingredients—this creates immediate searing when food hits the surface. Arrange ingredients in a single layer with some breathing room; overcrowding causes steaming instead of charring. I learned this the hard way after several soggy attempts! For extra color, switch to broil for the final 2-3 minutes, watching carefully. This technique creates those beautiful blackened edges that make fajitas so irresistible, just like my favorite Mexican restaurant serves.

    Seasoning Secrets for Maximum Flavor

    The difference between good and mind-blowing Sheet Pan Fajita Chicken lies in the seasoning. While store-bought fajita mix works in a pinch, making your own blend with smoked paprika, cumin, chili powder, and a touch of brown sugar creates deeper, more complex flavors. Don’t be shy with lime juice—add some before cooking and squeeze fresh lime over everything right after it comes out of the oven. The acid brightens all the flavors and cuts through the richness. My secret ingredient? A tablespoon of orange juice in the marinade. It adds subtle sweetness and helps caramelize the chicken edges beautifully without burning the spices.

    Serving Ideas & Creative Variations

    Beyond Traditional Tortillas

    While warm flour tortillas are the classic vehicle for Sheet Pan Fajita Chicken with Charred Vegetables, thinking outside the tortilla opens up endless possibilities. Try serving over cilantro-lime rice for a hearty bowl meal, or atop crisp lettuce for a refreshing fajita salad. One of my favorite discoveries was using the mixture to stuff baked sweet potatoes—the sweetness pairs beautifully with the spicy chicken. For a low-carb option, butter lettuce cups create perfect little fajita boats. My kids love when I serve this as a “build-your-own” bar with different bases and toppings. It’s similar to how I approach my Creamy Coconut Milk Chicken—versatile enough for everyone to customize.

    Creative Protein Swaps

    While chicken thighs are my go-to for Sheet Pan Fajita Chicken with Charred Vegetables, this recipe welcomes experimentation with different proteins. Flank steak sliced thinly against the grain creates a delicious beef version—just reduce cooking time to avoid toughness. Shrimp works beautifully too, added in the last 5-7 minutes of cooking. For plant-based options, try extra-firm tofu or portobello mushrooms, which develop amazing meaty texture when roasted. My vegetarian sister raves about my chickpea version—they get wonderfully crispy edges while staying tender inside. The key is adjusting cooking times for each protein while keeping the vegetable preparation consistent.

    Storage & Troubleshooting Guide

    Meal Prep and Leftovers

    Sheet Pan Fajita Chicken with Charred Vegetables makes exceptional leftovers that actually improve overnight as the flavors meld. Store in airtight containers in the refrigerator for up to 4 days. For best results, reheat in a skillet rather than microwave to maintain those crispy edges. This dish freezes surprisingly well too—portion into freezer bags, removing as much air as possible. Thaw overnight before reheating. I often double the recipe specifically for meal prep, creating grab-and-go lunches for the week. Pro tip: store the components separately from tortillas or other bases to prevent sogginess, assembling just before eating.

    Fixing Common Fajita Fails

    Even experienced cooks sometimes encounter issues with Sheet Pan Fajita Chicken with Charred Vegetables. If your vegetables are turning out soggy instead of charred, your oven may be too cool or the pan overcrowded. Try increasing temperature by 25°F and using two sheet pans if needed. For chicken that’s dry, check that you’re using thighs rather than breasts (which have less fat), or try marinating the meat longer—even 15 minutes helps. If spices are burning before vegetables caramelize, mix spices with a bit more oil to protect them from direct heat. And remember that different ovens vary significantly—get to know yours and adjust accordingly.

    Frequently Asked Questions

    Can I use chicken breasts instead of thighs for Sheet Pan Fajita Chicken?

    Yes, but reduce cooking time to about 18-20 minutes and consider slicing them into strips first. Chicken breasts cook faster and can dry out more easily than thighs, so watch them carefully for doneness.

    How do I prevent vegetables from getting soggy?

    Ensure your oven is fully preheated, use a large enough pan to prevent overcrowding, and pat vegetables dry before adding oil and seasonings. The high heat (425°F minimum) is essential for proper charring.

    Can I prepare this recipe ahead of time?

    Absolutely! Slice all vegetables and chicken up to 24 hours ahead, storing them separately in the refrigerator. You can even mix the seasoning in advance, but toss everything together just before cooking.

    What’s the best way to warm tortillas for serving?

    Wrap a stack of tortillas in foil and place in the oven during the last 5 minutes of cooking time. Alternatively, char them directly over a gas flame for 10-15 seconds per side for authentic flavor.

    How can I make Sheet Pan Fajita Chicken spicier?

    Add 1/4-1/2 teaspoon of cayenne pepper to your seasoning mix, include sliced jalapeños with your vegetables, or serve with hot sauce on the side. Chipotle powder also adds heat with smoky depth.

    Final Thoughts

    Sheet Pan Fajita Chicken with Charred Vegetables has saved countless dinner times in my home, bringing restaurant-quality flavors to my table with minimal effort. There’s something deeply satisfying about creating a meal that looks and tastes impressive while being wonderfully straightforward. The versatility means it never gets boring—switch up your proteins, play with toppings, or change how you serve it. I encourage you to make this recipe your own. And don’t forget to share your creations on Pinterest for inspiration! This dish proves that sometimes the simplest cooking methods deliver the most spectacular results.

  • Bigos Stew Recipe: Irresistible Flavor That Warms Your Soul!

    Bigos Stew Recipe: Irresistible Flavor That Warms Your Soul!

    Bigos Stew Recipe: Irresistible Flavor That Warms Your Soul!

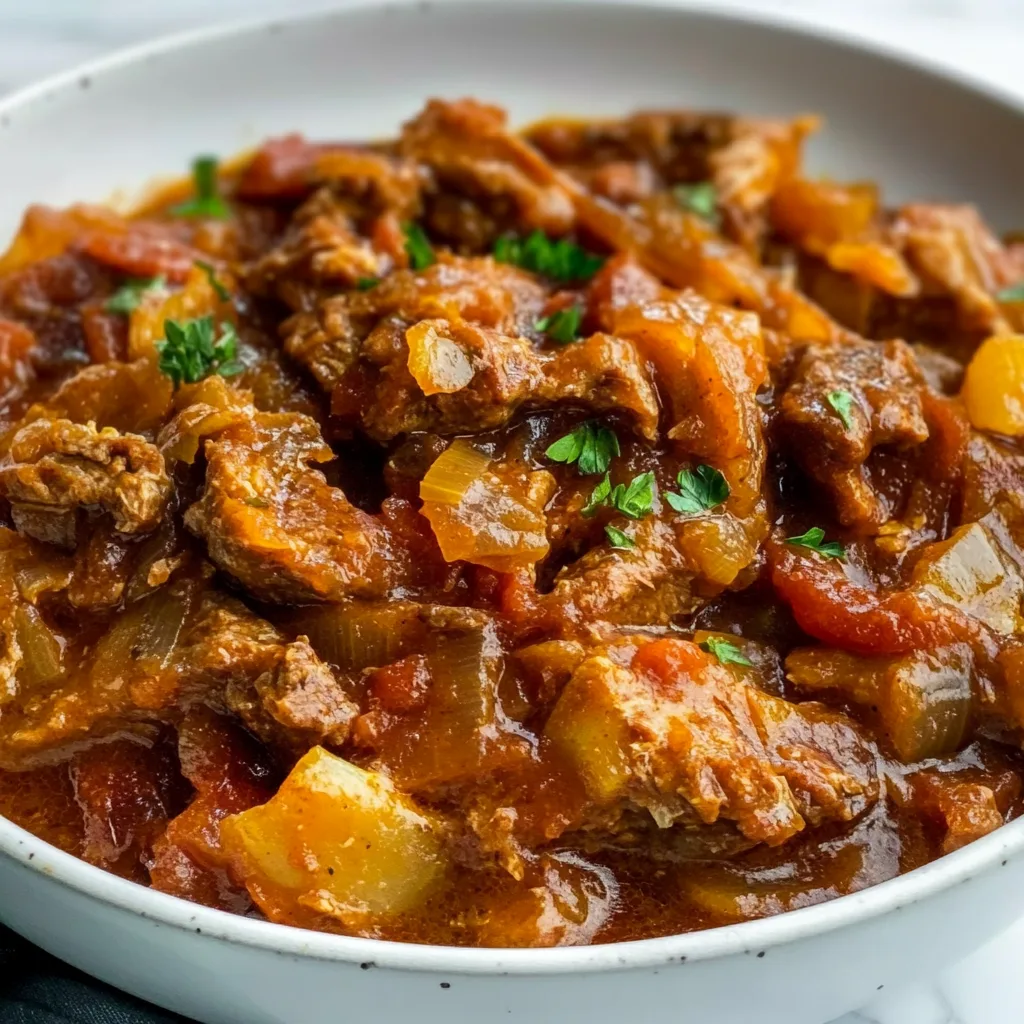
    Bigos stew, often called “hunter’s stew,” is Poland’s beloved national dish that has captured my heart with its rich, complex flavors. The first time I tasted this hearty medley of sauerkraut, fresh cabbage, and various meats, I was standing in my grandmother’s steamy kitchen on a snowy December evening. The tangy aroma filled the house, drawing everyone to the kitchen like a magnet. This traditional Polish stew develops its signature depth through slow cooking, allowing the smoky kielbasa, tender pork, and tangy sauerkraut to meld into something truly magical. Today, I’m sharing my family’s treasured bigos stew recipe that’s perfect for cold winter evenings when you need something truly satisfying.

    Recipe

    Why You’ll Love This BIGOS STEW

    A Flavor Symphony That Improves With Time

    What makes bigos stew truly special is how it transforms over time. The first day it’s delicious, but by day two or three? Absolutely magnificent. This is because the complex flavors continue to develop as the stew rests. The tanginess of sauerkraut mellows, the smokiness from the kielbasa permeates every bite, and the meats become incredibly tender. I’ve found myself making a double batch just to ensure we have leftovers. There’s something deeply satisfying about opening the refrigerator to find this waiting for you, knowing it’s only getting better with each passing day.

    Versatile Comfort Food For Any Occasion

    Bigos stew shines as both everyday comfort food and special occasion fare. Its rustic heartiness makes it perfect for casual family dinners, while its rich heritage makes it worthy of holiday celebrations. I’ve served it for everything from snow day lunches to Christmas Eve dinner. The stew’s ability to feed a crowd economically is another bonus—it stretches beautifully with a side of crusty bread or potatoes. Plus, it’s forgiving with substitutions, allowing you to use whatever meats you have on hand, much like my Southern Collard Green Potato Stew adapts to what’s available.

    Essential Tips & Tricks

    Building Layers of Flavor

    The secret to exceptional bigos stew lies in building layers of flavor. Start by browning the meats properly—don’t rush this step! Those caramelized bits at the bottom of the pot are pure gold. I like to deglaze with a splash of red wine to capture every morsel of flavor. When adding the sauerkraut, don’t rinse it completely; that tangy brine contributes to the stew’s character. For depth, I incorporate dried mushrooms (preferably porcini) that have been rehydrated, adding both the mushrooms and their soaking liquid to the pot. This creates an earthy undertone that balances the bright acidity.

    Patience Is Your Most Important Ingredient

    Bigos stew is not a dish for the impatient cook. The slow simmering process is essential for breaking down the cabbage and allowing flavors to meld harmoniously. I’ve learned (sometimes the hard way) that rushing bigos leads to disappointment. Plan for at least 2-3 hours of cooking time, and if possible, make it a day ahead. After cooking, let it cool completely before refrigerating overnight. The next day, gently reheat it, adding a splash of broth if needed. This approach mimics the traditional method of repeatedly heating and cooling the stew, which develops the flavors much like aging a fine wine.

    Serving Ideas & Creative Variations

    Traditional Polish Accompaniments

    Serve your bigos stew with hearty sides that complement its robust character. Crusty rye bread is traditional and perfect for sopping up the flavorful sauce. I also love pairing it with boiled or mashed potatoes, which provide a mild counterpoint to the stew’s intensity. For a complete Polish feast, consider adding a side of pickled beets or cucumber salad to cut through the richness. A dollop of sour cream on top adds creamy luxury, while a sprinkle of fresh dill brightens each bowl. This combination creates a balanced meal that honors bigos stew’s heritage while satisfying modern palates.

    Modern Twists On A Classic

    While I respect tradition, I also enjoy creating creative variations on bigos stew. For a lighter version, increase the vegetables and reduce the meat ratio. I sometimes add parsnips, turnips, or sweet potatoes for natural sweetness. For an unexpected twist, try incorporating a tablespoon of plum butter (powidła) or a handful of dried cranberries, which add subtle sweetness against the sauerkraut’s tang. Vegetarians can enjoy a mushroom-forward version using various wild mushrooms, smoked tofu, and vegetable broth. The key is maintaining the balance between sour, savory, and slightly sweet elements that makes bigos so distinctive.

    Storage & Troubleshooting Guide

    Optimal Storage For Maximum Flavor

    Bigos stew isn’t just amenable to storage—it actively improves with proper keeping. After cooking, cool the stew completely before transferring to airtight containers. It will keep in the refrigerator for up to 5 days, with many Polish cooks insisting day 3 is the peak of flavor perfection. For longer storage, bigos freezes beautifully for up to 3 months. I portion it into meal-sized containers for easy thawing. When reheating, do so gently over medium-low heat, stirring occasionally and adding a splash of broth if it seems too thick. The flavors will reawaken and often taste even better than before.

    Solving Common Bigos Challenges

    Even experienced cooks occasionally face challenges with bigos stew. If your stew tastes too sour, add a grated apple or a teaspoon of honey to balance the acidity. For a stew that’s too watery, remove the lid and simmer until it reaches your desired consistency. Conversely, if it’s too thick, add some beef broth or even a splash of beer. If the cabbage remains too tough after hours of cooking, it may have been overmatured—next time, cook it longer or choose a fresher head. Remember that bigos should have a complex flavor profile; if it seems one-dimensional, try adding more herbs like juniper berries, bay leaves, or allspice.

    Frequently Asked Questions

    What is traditional bigos stew made of?

    Traditional bigos stew combines sauerkraut, fresh cabbage, various meats (often pork, beef, and kielbasa), dried mushrooms, and spices like bay leaves and allspice. Some recipes include prunes or wine for depth of flavor.

    How long does bigos stew need to cook?

    Bigos stew needs a minimum of 2-3 hours of slow simmering. However, for the best flavor development, cook it, cool it, and reheat it over 2-3 days.

    Can I make bigos stew in advance?

    Absolutely! Bigos stew actually improves with time, making it perfect for advance preparation. Make it 1-3 days before serving for the most developed flavors.

    Is bigos stew healthy?

    Bigos stew contains nutritious ingredients like cabbage (high in vitamin C) and protein-rich meats. The fermented sauerkraut offers probiotic benefits, though the dish is hearty rather than light.

    What can I substitute for kielbasa in bigos stew?

    Any smoked sausage works well in place of kielbasa. Smoked ham, bacon, or even smoked turkey can provide the essential smoky flavor that defines good bigos stew.

    Final Thoughts

    Bigos stew represents the heart of Polish cuisine—resourceful, flavorful, and deeply satisfying. There’s something magical about how simple ingredients transform through time and technique into something greater than the sum of their parts. Every time I make this dish, I feel connected to generations of cooks who found ways to create abundance even in lean times. I encourage you to embrace the process, make it your own, and share it with those you love. For more recipe inspiration, visit our Pinterest page. The joy of bigos stew is not just in the eating, but in the sharing of a tradition that continues to nourish body and soul.

  • Creamy Coconut Milk Chicken Recipe That Will Melt Your Heart!

    Creamy Coconut Milk Chicken Recipe That Will Melt Your Heart!

    Creamy Coconut Milk Chicken Recipe That Will Melt Your Heart!

    Creamy coconut milk chicken is the ultimate comfort food that wraps you in a blanket of rich, velvety goodness. I discovered this recipe during a rainy weekend when I craved something that felt like a warm hug in a bowl. The gentle simmer of aromatic spices mingling with silky coconut milk creates an irresistible sauce that clings perfectly to tender chicken pieces. This dish strikes that magical balance between everyday simplicity and special-occasion decadence that keeps everyone coming back for seconds. Trust me, once you master this creamy coconut delight, it’ll become a regular in your dinner rotation.

    Recipe

    Why You’ll Love This Creamy Coconut Milk Chicken

    A Symphony of Flavors and Textures

    The magic of creamy coconut milk chicken lies in its perfect harmony of flavors. The natural sweetness of coconut milk creates a luxurious base that balances beautifully with aromatic spices like ginger, garlic, and curry powder. I love how the sauce thickens just enough to coat each piece of chicken without becoming heavy. When you take that first bite, you’ll experience layers of flavor unfolding—a hint of heat from chili flakes, brightness from lime juice, and that unmistakable coconut richness that makes this dish so special. It’s comfort food that feels sophisticated yet accessible.

    Quick Weeknight Wonder

    What makes creamy coconut milk chicken a true kitchen hero is how it delivers restaurant-quality results with minimal effort. On busy evenings when I’m juggling work deadlines and household tasks, I can still pull this together in about 30 minutes. The one-pan approach means less cleanup, and the ingredients are likely already in your pantry. I love that you can prep the components ahead of time—chop the onions, slice the chicken, and measure the spices in the morning, then simply toss everything together when you’re ready to cook. It’s the perfect solution for those “what’s for dinner?” moments.

    Essential Tips & Tricks

    Selecting the Right Coconut Milk

    Not all coconut milk is created equal, and choosing the right one makes all the difference in your creamy coconut milk chicken. I always reach for full-fat coconut milk in cans rather than the refrigerated drinking variety. The drinking kind simply doesn’t have enough fat content to create that luscious sauce we’re after. Look for brands without additives or stabilizers—the ingredient list should ideally just say “coconut extract and water.” For extra richness, don’t shake the can before opening; scoop out the solid cream that rises to the top and use it to start your sauce. This technique creates a velvety base similar to my Creamy Lemon Garlic Pan-Seared Scallops.

    The Perfect Chicken Technique

    The secret to tender, flavorful chicken in this dish is all in the technique. I prefer using boneless thighs for their inherent juiciness and flavor, but breasts work beautifully too if you’re careful not to overcook them. The key step many people skip: pat the chicken completely dry before seasoning and searing. This ensures you get that gorgeous golden crust that adds depth to the final dish. Don’t crowd the pan—cook in batches if necessary—and resist the urge to constantly move the pieces. Let them develop that caramelization for 3-4 minutes per side before removing. They’ll finish cooking when returned to the coconut sauce, absorbing all those amazing flavors.

    Serving Ideas & Creative Variations

    Perfect Pairings for a Complete Meal

    Creamy coconut milk chicken shines brightest when paired with the right accompaniments. My favorite way to serve it is over a bed of fragrant jasmine rice that soaks up every drop of that luscious sauce. For a lower-carb option, cauliflower rice works surprisingly well too. Don’t forget a side of vegetables—steamed broccoli, sautéed spinach, or even a simple cucumber salad provides the perfect fresh contrast. I love adding a sprinkle of fresh herbs like cilantro or Thai basil right before serving, along with a wedge of lime for guests to squeeze over their portions. For a truly impressive spread, consider serving alongside Garlic Butter Steak with Parmesan Cream Sauce for a surf and turf inspired feast.

    Global Flavor Twists

    One of the joys of creamy coconut milk chicken is how adaptable it is to different flavor profiles. For a Thai-inspired version, add a tablespoon of red curry paste and finish with fresh Thai basil and lime leaves. Looking for Indian flavors? Incorporate garam masala, turmeric, and a touch of cardamom. I recently made a Caribbean variation by adding allspice, thyme, and a splash of rum that was absolutely divine. For heat lovers, stir in sambal oelek or sriracha to taste. You can also play with add-ins like bell peppers, snow peas, or baby corn for extra texture and nutrition. The coconut base is like a blank canvas waiting for your creative touch.

    Storage & Troubleshooting Guide

    Proper Storage for Maximum Flavor

    Creamy coconut milk chicken actually improves with time as the flavors meld together, making it perfect for meal prep. Store leftovers in airtight containers in the refrigerator for up to 3 days. When reheating, do so gently over low heat to prevent the sauce from separating. Add a splash of chicken broth or coconut milk if needed to restore the creamy consistency. This dish also freezes beautifully for up to 2 months—I portion it into individual servings for quick weeknight dinners. Just thaw overnight in the refrigerator before reheating. The texture of the chicken remains tender, though you may notice the sauce becomes slightly thinner after freezing.

    Troubleshooting Common Issues

    Even experienced cooks occasionally encounter challenges with creamy coconut milk chicken. If your sauce breaks or appears curdled, don’t panic! Lower the heat immediately and whisk in a tablespoon of cornstarch slurry (cornstarch mixed with cold water). Another common issue is sauce that’s too thin—simply simmer uncovered for a few extra minutes to reduce. If it’s too thick, add coconut milk or chicken broth a tablespoon at a time until you reach your desired consistency. For bland results, brighten with lime juice, fish sauce, or a pinch of salt. And if your chicken turned out tough, next time try the velveting technique: marinate the chicken pieces in a mixture of cornstarch and egg white for 30 minutes before cooking.

    Frequently Asked Questions

    Can I use light coconut milk instead of full-fat for creamy coconut milk chicken?

    You can, but the sauce won’t be as rich. I recommend using full-fat for the best texture and flavor, or mixing light coconut milk with a tablespoon of coconut cream to enhance creaminess.

    How do I prevent the coconut sauce from curdling?

    Keep the heat medium-low after adding coconut milk and avoid boiling. Stir gently and consistently. Adding the milk gradually while stirring also helps maintain that silky texture.

    Can I make this dish vegetarian?

    Absolutely! Substitute the chicken with firm tofu, chickpeas, or hearty vegetables like cauliflower and eggplant. The creamy coconut sauce works beautifully with these alternatives.

    Is this recipe gluten-free?

    Yes, creamy coconut milk chicken is naturally gluten-free, but always check your curry paste and other pre-packaged ingredients for hidden gluten sources.

    How can I add more vegetables to this dish?

    Bell peppers, spinach, snow peas, and zucchini all work wonderfully. Add firmer vegetables with the chicken and more delicate ones during the last 3-5 minutes of cooking.

    Final Thoughts

    This creamy coconut milk chicken has become my go-to recipe when I want to impress without stress. There’s something magical about how a few simple ingredients transform into something so luxurious. I love watching friends’ and family’s faces light up with that first bite—the moment when the creamy sauce hits their palate and all conversation briefly pauses. Whether you’re cooking for a special occasion or simply treating yourself on a Tuesday night, this dish delivers comfort and elegance in equal measure. For more inspiration, check out my Pinterest board where I share new recipe ideas weekly.

  • Southern Collard Green Potato Stew Recipe That Warms Your Soul Fast

    Southern Collard Green Potato Stew Recipe That Warms Your Soul Fast

    Southern Collard Green Potato Stew Recipe That Warms Your Soul Fast

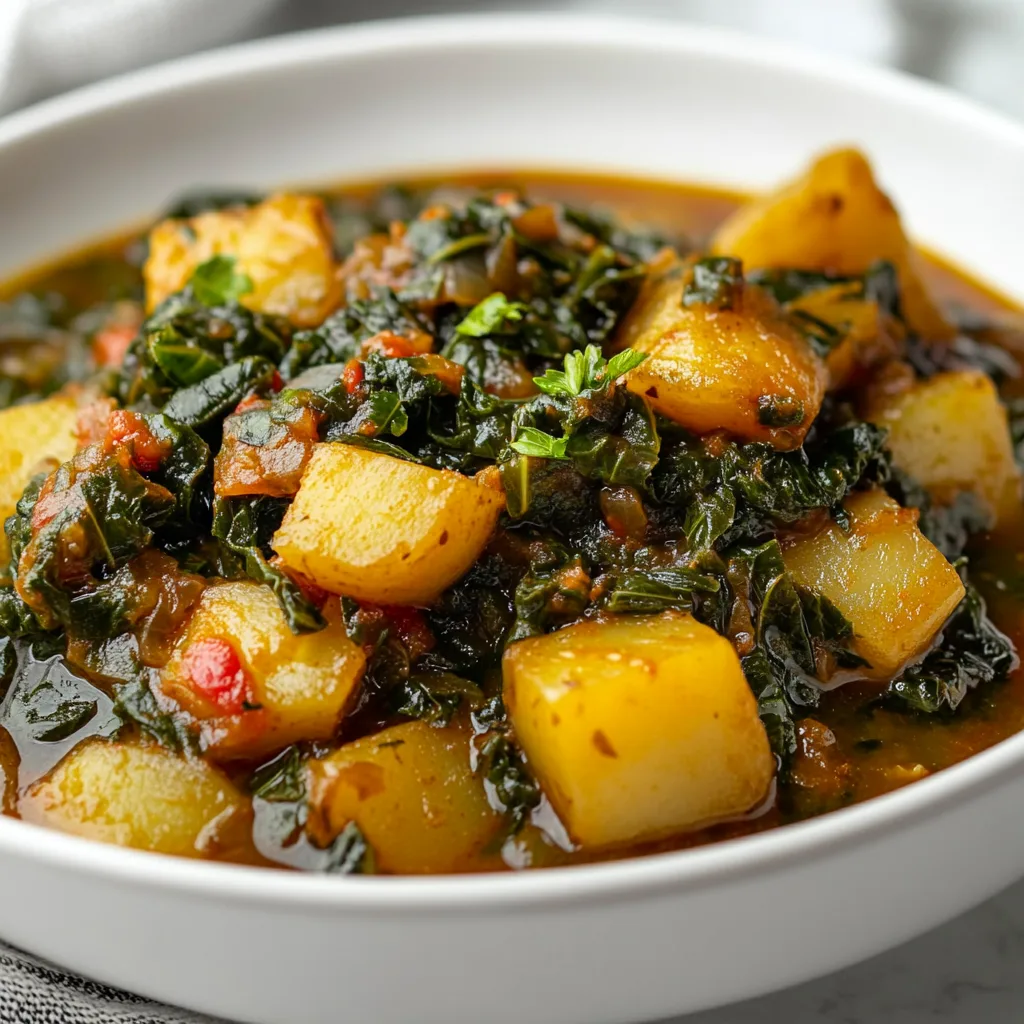
    Southern Collard Green Potato Stew is a soul-warming dish that brings together the earthy richness of collard greens with hearty potatoes in a broth that simmers with generations of Southern tradition. The first time I made this stew, the aroma filled my kitchen with memories of my grandmother’s cooking—robust, nurturing, and deeply satisfying. There’s something magical about how these humble ingredients transform into a velvety, flavor-packed meal that feels like a warm hug on a chilly evening. This nourishing one-pot wonder delivers both comfort and nutrition in every spoonful.

    Recipe

    Why You’ll Love This Southern Collard Green Potato Stew

    Perfect Balance of Flavors and Textures

    The deep earthiness of collard greens mellows beautifully as they simmer alongside creamy potatoes, creating a perfect textural contrast that makes each bite interesting. I love how the greens retain just enough bite while the potatoes become tender and begin to thicken the broth naturally. The subtle heat from red pepper flakes dances with smoky bacon notes, creating a flavor profile that’s complex without being complicated. This Southern Collard Green Potato Stew hits that sweet spot between hearty and refined—substantial enough to satisfy but with layers of flavor that keep you coming back for another spoonful.

    Nutritional Powerhouse with Southern Comfort

    This stew transforms nutrient-dense collards—packed with vitamins K, A, and C—into a crave-worthy comfort food. The bitter notes that sometimes put people off raw collards mellow dramatically during cooking, revealing their sweeter, more complex flavor profile. I’ve served this to countless “greens skeptics” who ended up requesting the recipe! The addition of potatoes provides satisfying carbohydrates while beans or ham add protein, making this Southern Collard Green Potato Stew a complete meal in one bowl. It’s soul food that actually nourishes your soul and your body—a rare combination that makes this recipe a true keeper.

    Essential Tips & Tricks

    Mastering the Collard Prep

    The key to exceptional Southern Collard Green Potato Stew starts with proper green preparation. Remove the tough stems completely—don’t just trim them—by folding each leaf in half and slicing along the stem line. Then stack several leaves, roll them tightly like a cigar, and slice into ribbons (chiffonade). This technique prevents those awkward long strands that are difficult to eat. For the most flavor development, sauté your aromatics until truly fragrant before adding the collards, and don’t rush the wilting stage. Those few extra minutes of careful preparation elevate this stew from good to memorably delicious, much like the care taken in this Crockpot Black-Eyed Peas and Collard Greens.

    Building Layers of Flavor

    The foundational flavor of authentic Southern Collard Green Potato Stew comes from a proper sofrito base—onions, celery, and bell peppers sautéed until they release their aromatic oils. For maximum depth, deglaze your pot with a splash of apple cider vinegar after sautéing your vegetables—this lifts all those caramelized bits from the bottom of the pot and adds a subtle tang that balances the richness. Don’t skip the bay leaf and thyme, which infuse the broth with earthy notes as it simmers. For vegetarians, smoked paprika and a dash of liquid smoke can replicate that traditional hamhock flavor without the meat.

    Serving Ideas & Creative Variations

    Perfect Pairings for a Complete Meal

    Serve this Southern Collard Green Potato Stew with a slice of warm cornbread for the ultimate Southern comfort meal. The slightly sweet, crumbly texture creates the perfect contrast to the savory stew. For a lighter option, a simple side salad with a vinaigrette dressing provides refreshing balance. This stew also pairs beautifully with crusty sourdough bread for sopping up every last drop of the flavorful broth. For special occasions, I serve smaller portions as a starter before a main course of Baked Cajun Salmon with Creamy Avocado Lime Sauce for a Southern-inspired feast that always impresses guests.

    Regional and Seasonal Adaptations

    Transform this classic into a coastal variation by adding shrimp during the final 5 minutes of cooking—the seafood and collards combination is a Lowcountry tradition that’s absolutely divine. For a summer version, stir in fresh corn kernels and diced tomatoes from the garden. In fall, substitute sweet potatoes for white potatoes and add a pinch of nutmeg. For a heartier winter version, incorporate smoked sausage and white beans to create a more substantial stew. These seasonal adaptations keep this Southern Collard Green Potato Stew in my regular rotation year-round, each version bringing its own special character to the table.

    Storage & Troubleshooting Guide

    Proper Storage for Maximum Flavor

    Like many soups and stews, Southern Collard Green Potato Stew actually improves overnight as the flavors meld together in the refrigerator. Store cooled stew in airtight containers for up to 4 days. For freezing, slightly undercook the potatoes, as they’ll soften more upon reheating. Portion into freezer-safe containers, leaving an inch of headspace for expansion, and freeze for up to 3 months. When reheating, add a splash of broth if the stew seems too thick. I often make a double batch specifically to freeze—having this soul-warming meal ready to go on busy weeknights feels like a gift to my future self.

    Fixing Common Issues

    If your Southern Collard Green Potato Stew tastes too bitter, add a teaspoon of brown sugar or a splash of cream to balance the flavors. For a too-thin stew, mash some of the potatoes against the side of the pot to naturally thicken the broth without adding flour. If it’s too thick, simply add more broth or water. Should you find the flavor lacking depth, a splash of Worcestershire sauce or a parmesan rind simmered in the broth works wonders. Remember that collards can vary in bitterness depending on their age and growing conditions, so taste as you go and adjust seasonings accordingly.

    Frequently Asked Questions

    Can I use frozen collard greens for Southern Collard Green Potato Stew?

    Yes! Frozen collards work well and save prep time. No need to thaw—add them directly to the pot, but reduce cooking time by about 10 minutes since they’re partially cooked before freezing.

    How do I reduce the bitterness in collard greens?

    Add a teaspoon of sugar or a splash of apple cider vinegar to balance bitterness. Proper cooking time is crucial—fully cooked collards have a much milder flavor than undercooked ones.

    Can I make this stew vegetarian?

    Absolutely! Skip the bacon/ham and use vegetable broth. Add smoked paprika and a dash of liquid smoke for that traditional smoky flavor, plus extra olive oil for richness.

    What makes Southern Collard Green Potato Stew different from regular vegetable soup?

    The slow cooking method, specific seasonings, and traditional Southern ingredients like collards create a unique, silky texture and depth of flavor that distinguishes it from ordinary vegetable soups.

    How can I make this stew in a slow cooker?

    Brown aromatics and meat on the stovetop first, then transfer everything to a slow cooker. Cook on low for 6-7 hours or high for 3-4 hours until potatoes are tender.

    Final Thoughts

    Southern Collard Green Potato Stew embodies the heart of comfort food—simple ingredients transformed through time and care into something extraordinary. This dish has carried me through countless cold evenings, family gatherings, and quiet Sundays at home. There’s a reason these traditional recipes endure through generations; they speak a universal language of nourishment and love. I hope this stew brings the same warmth to your table that it has to mine. For more Southern-inspired recipes, visit our Pinterest collection where comfort meets tradition in every bite.

  • Kielbasa and Sauerkraut: Irresistible Flavor Boost That WOWs!

    Kielbasa and Sauerkraut: Irresistible Flavor Boost That WOWs!

    Kielbasa and Sauerkraut: Irresistible Flavor Boost That WOWs!

    Kielbasa and sauerkraut is a classic comfort dish that brings together smoky sausage and tangy fermented cabbage in perfect harmony. Every time I make this hearty meal, I’m transported back to my grandmother’s kitchen, where the aromatic blend of caraway and savory kielbasa would fill the air on chilly evenings. The beauty of this dish lies in its simplicity—just a handful of ingredients that transform into something truly magical when they meld together. It’s one of those recipes that feels like a warm hug on a plate, especially when served alongside some creamy mashed potatoes.

    Recipe

    Why You’ll Love This Kielbasa and Sauerkraut

    Perfect Balance of Flavors

    There’s something utterly satisfying about the way the smoky kielbasa complements the tangy sauerkraut in this dish. The sausage releases its rich, garlicky flavors as it cooks, while the sauerkraut softens and mellows, creating a perfect balance that dances on your taste buds. I always add a touch of brown sugar to mine, which helps tame the sauerkraut’s acidity while adding a subtle sweetness that brings everything together. When those flavors meld together in the pot, the aroma is absolutely intoxicating—earthy, tangy, and deeply savory all at once.

    One-Pot Simplicity

    One of the greatest joys of making kielbasa and sauerkraut is how effortlessly it comes together in just one pot. On busy weeknights when I’m juggling work deadlines and family needs, I can still get this hearty meal on the table with minimal effort. Simply brown the kielbasa, add the sauerkraut and seasonings, and let everything simmer together until the flavors meld perfectly. The cleanup is just as easy as the cooking! This dish also reheats beautifully, making it perfect for meal prep or when you need something reliable that the whole family will devour without complaint.

    Essential Tips & Tricks

    Selecting the Best Ingredients

    Starting with high-quality kielbasa makes all the difference in this dish. I prefer Polish-style kielbasa with its robust garlic and marjoram flavors, but any smoked sausage will work wonderfully. For the sauerkraut, look for refrigerated varieties rather than canned when possible—they have a fresher, crispier texture and brighter flavor. Don’t forget to rinse and drain your sauerkraut if you prefer a milder taste, or leave it unrinsed for that full-bodied tanginess. Fresh caraway seeds are non-negotiable in my kitchen; they add that distinctive earthy flavor that makes this dish truly authentic.

    Perfect Cooking Technique

    The secret to exceptional kielbasa and sauerkraut lies in the layering of flavors. Always start by browning your sliced kielbasa in a Dutch oven to develop those delicious caramelized edges—this step adds incredible depth to the final dish. When adding your sauerkraut, don’t rush the cooking process. A low, slow simmer allows the flavors to meld beautifully while softening the cabbage to the perfect texture. For an extra layer of flavor, deglaze the pan with a splash of apple cider after browning the kielbasa. The slight sweetness balances the tanginess of the sauerkraut perfectly.

    Serving Ideas & Creative Variations

    Classic Pairings

    Kielbasa and sauerkraut shines brightest when served with hearty, comforting sides. Buttery mashed potatoes create the perfect canvas for soaking up all those delicious juices. I’ve found that a slice of dark rye bread slathered with sweet butter is absolutely non-negotiable—the earthy bread complements the tangy sauerkraut beautifully. For a complete meal that will satisfy even the heartiest appetites, add a simple side salad with a vinaigrette dressing to cut through the richness. During the cooler months, I love serving this with a dollop of whole grain mustard on the side for an extra punch of flavor.

    Modern Twists

    While I treasure the traditional preparation, sometimes I like to give my kielbasa and sauerkraut a contemporary update. Try adding diced Granny Smith apples during the last 15 minutes of cooking—their tartness and slight crunch bring a wonderful freshness to the dish. For a German-inspired variation, stir in a tablespoon of whole grain mustard and a splash of dark beer to the simmering pot. Another favorite twist in my household is adding caramelized onions and a handful of juniper berries, which introduce a subtle piney sweetness that complements the sauerkraut beautifully.

    Storage & Troubleshooting Guide

    Proper Storage Methods

    Kielbasa and sauerkraut actually improves with time as the flavors continue to develop, making it perfect for meal prepping. Once cooled completely, store leftovers in an airtight container in the refrigerator for up to 4 days. The dish reheats beautifully on the stovetop—just add a splash of chicken broth if it seems dry. For longer storage, this dish freezes exceptionally well for up to 3 months. I recommend portioning it into individual servings before freezing for easy weeknight dinners. Just thaw overnight in the refrigerator and gently reheat until steaming hot.

    Common Issues Solved

    If your kielbasa and sauerkraut turns out too tangy, don’t worry—there’s an easy fix! Add a tablespoon of brown sugar or a drizzle of honey to balance the acidity. For a dish that’s too bland, brighten it with a splash of apple cider vinegar and extra caraway seeds. If your sauerkraut seems too watery, simply remove the lid and simmer uncovered for 10-15 minutes to reduce the liquid. Conversely, if the mixture becomes too dry during cooking, add a splash of chicken broth or apple juice to create more sauce without diluting the flavors.

    Frequently Asked Questions

    Can I make kielbasa and sauerkraut in a slow cooker?

    Absolutely! Brown the kielbasa first, then combine all ingredients in your slow cooker. Cook on low for 6-7 hours or high for 3-4 hours until the flavors meld beautifully.

    What’s the best type of kielbasa to use?

    Traditional Polish smoked kielbasa works best, but any smoked sausage variety will work. The key is finding one with a good balance of garlic and spices.

    Should I rinse the sauerkraut before cooking?

    It depends on your preference. Rinsing reduces tanginess, while unrinsed sauerkraut provides more robust flavor. I usually rinse mine halfway for balanced flavor.

    How can I make my kielbasa and sauerkraut less acidic?

    Add a tablespoon of brown sugar, a drizzle of honey, or some sliced apples during cooking. These naturally balance acidity while adding subtle sweetness.

    Can I add other vegetables to my kielbasa and sauerkraut?

    Definitely! Sliced onions, diced bell peppers, carrots, or potatoes all work wonderfully. Add firmer vegetables earlier in the cooking process for proper tenderness.

    Final Thoughts

    This kielbasa and sauerkraut recipe has been my go-to comfort food for years—reliable, deeply satisfying, and bursting with flavor in every bite. There’s something magical about how a few simple ingredients transform into such a memorable meal. The way the smoky sausage complements the tangy cabbage creates a perfect harmony that keeps my family requesting it again and again. I hope this dish brings the same warmth and comfort to your table that it has to mine. For more cozy recipes, visit my Pinterest collection where I share my favorite comfort food inspirations.

  • Crockpot Black Eyed Peas & Collard Greens: Comfort in Every Bite!

    Crockpot Black Eyed Peas & Collard Greens: Comfort in Every Bite!

    Crockpot Black Eyed Peas & Collard Greens: Comfort in Every Bite!

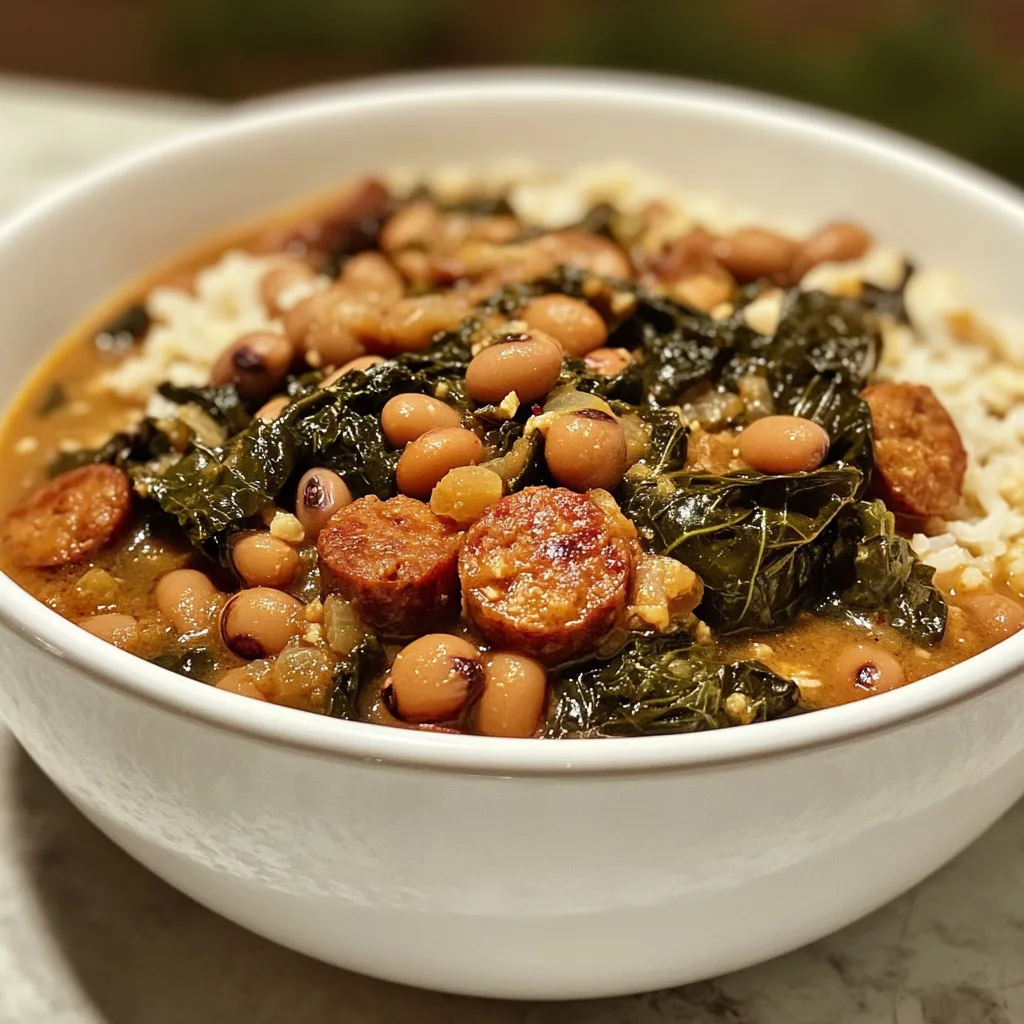
    Crockpot Black Eyed Peas and Collard Greens might just be the ultimate comfort food that speaks to my soul on chilly winter days. There’s something magical about the way these humble ingredients transform into a rich, smoky pot of goodness with barely any effort. I discovered this recipe during my first winter in the South, when my neighbor brought over a steaming container on New Year’s Day. The tender beans, silky greens, and that incredible pot liquor had me instantly hooked. This slow cooker version captures all that traditional flavor while fitting perfectly into our busy lives. Let’s dive into this cozy, hearty dish that feeds both body and spirit.

    Recipe

    Why You’ll Love This Crockpot Black Eyed Peas and Collard Greens

    Perfect Set-It-and-Forget-It Meal

    This Crockpot Black Eyed Peas and Collard Greens recipe is the definition of effortless cooking. I love throwing everything into the slow cooker in the morning and coming home to the most incredible aromas filling my kitchen. The beans become perfectly tender without any babysitting, while the collards break down into silky, flavorful bites. There’s something deeply satisfying about creating such a nourishing meal with just 10 minutes of hands-on time. Plus, it’s budget-friendly comfort food at its finest—feeding a crowd for pennies per serving.

    Packed With Nutrition and Flavor

    Don’t let the simplicity fool you—this dish delivers serious nutrition alongside incredible taste. The combination of black-eyed peas and collard greens creates a nutritional powerhouse rich in protein, fiber, vitamins A and C, and iron. I’m always amazed at how the humble ingredients transform as they simmer. The smoky notes from the ham hock (or smoked turkey) infuse everything with depth, while the greens develop a silky texture that soaks up all that savory broth. It’s soul-satisfying food that happens to be good for you too.

    Essential Tips & Tricks

    Perfect Bean Preparation

    For truly exceptional Crockpot Black Eyed Peas and Collard Greens, proper bean prep makes all the difference. While you can use canned beans in a pinch, dried beans deliver superior texture and flavor absorption. I recommend soaking dried beans overnight, which reduces cooking time and improves digestibility. No time to soak? Try the quick-soak method: boil beans for 2 minutes, then let stand covered for 1 hour. For extra flavor, replace some of the cooking water with chicken broth. This simple swap creates a richer base that transforms the entire dish, similar to how broth elevates my Slow Cooker Creamy Tuscan Chicken Orzo.

    Layering Flavors for Maximum Impact

    The secret to incredible Crockpot Black Eyed Peas and Collard Greens lies in building flavor layers. Start with a quick sauté of onions, garlic, and celery before adding to the crockpot—those caramelized aromatics make a world of difference. Don’t skip the smoked meat component (ham hock, bacon, or smoked turkey wing); it provides that signature smoky depth. For vegetarians, add a tablespoon of smoked paprika and a dash of liquid smoke instead. I always add a splash of apple cider vinegar during the last 30 minutes—that subtle acidity brightens all the flavors and cuts through the richness.

    Serving Ideas & Creative Variations

    Traditional Southern Pairings

    Serving Crockpot Black Eyed Peas and Collard Greens the traditional way creates an authentic Southern experience. Ladle this soulful dish over a scoop of fluffy white rice or alongside a piece of golden cornbread for soaking up that precious pot liquor. I love adding a splash of pepper vinegar or hot sauce at the table—that tangy heat perfectly balances the earthy flavors. For a complete meal, pair with German Goulash or simple fried chicken. Don’t forget to serve with sliced sweet onions and tomatoes on the side for a fresh contrast to the rich, slow-cooked flavors.

    Creative Modern Twists

    While traditional is delicious, don’t be afraid to give your Crockpot Black Eyed Peas and Collard Greens some creative spins. Try a Mediterranean version with olive oil, lemon zest, and crumbled feta added just before serving. For a Cajun twist, add andouille sausage, bell peppers, and a bold spice blend of cayenne, thyme, and oregano. My family loves it served unconventionally as a topping for baked sweet potatoes or stuffed into warm pita with yogurt sauce. You can even transform leftovers into an incredible soup by adding more broth, diced tomatoes, and a handful of small pasta shapes.

    Storage & Troubleshooting Guide

    Proper Storage for Maximum Freshness

    Like many slow-cooked dishes, Crockpot Black Eyed Peas and Collard Greens actually improves with time as the flavors meld. Store leftovers in airtight containers in the refrigerator for up to 4 days. The dish also freezes beautifully—portion into freezer-safe containers, leaving some headspace, and freeze for up to 3 months. I often make a double batch specifically for freezing. When reheating, add a splash of broth or water as the mixture tends to thicken considerably. For best results, thaw frozen portions overnight in the refrigerator before gently reheating on the stovetop over medium-low heat.

    Solving Common Problems

    If your Crockpot Black Eyed Peas and Collard Greens isn’t turning out perfectly, a few simple fixes can help. Beans still tough after cooking? They might be old—dried beans over a year old take significantly longer to soften. Next time, try adding ¼ teaspoon of baking soda to the cooking liquid. Dish too watery? Remove the lid for the final hour of cooking or thicken with a cornstarch slurry. If the flavor seems flat or bland, brighten with acid (vinegar or lemon juice), add more salt gradually, or stir in additional spices. Remember that salt is best adjusted at the end, as beans can toughen if salted too early.

    Frequently Asked Questions

    Can I make Crockpot Black Eyed Peas and Collard Greens vegetarian?

    Absolutely! Skip the ham hock and use vegetable broth instead of chicken broth. Add 1 tablespoon of smoked paprika, 2 tablespoons of olive oil, and a dash of liquid smoke for that savory depth without meat.

    Do I have to soak the black-eyed peas first?

    While soaking isn’t strictly necessary for black-eyed peas, it reduces cooking time and improves digestibility. For unsoaked beans, add 1-2 hours to your cooking time and possibly more liquid.

    Can I use frozen collard greens instead of fresh?

    Yes! Frozen collards work beautifully in this recipe. No need to thaw—add them directly to the crockpot about halfway through the cooking time. You’ll need approximately 2 pounds of frozen greens.

    How do I know when my Crockpot Black Eyed Peas and Collard Greens is done?

    The dish is ready when the beans are tender but still hold their shape and the greens are silky soft. This typically takes 6-8 hours on low or 3-4 hours on high, depending on your slow cooker.

    Can I cook this on the stovetop instead?

    Yes! Simmer everything in a large Dutch oven over low heat for about 2-3 hours, stirring occasionally and adding more liquid if needed. The stovetop method requires more attention but works well.

    Final Thoughts

    This Crockpot Black Eyed Peas and Collard Greens recipe has become my go-to comfort food for good reason. It transforms humble ingredients into something truly special with minimal effort. I love how it connects me to Southern traditions while fitting perfectly into modern life. Whether you’re serving it for a New Year’s Day gathering or a simple weeknight dinner, this dish delivers soul-satisfying warmth in every bite. The combination of tender beans, silky greens, and that incredible savory broth creates something greater than the sum of its parts. Find more cozy recipes at Pinterest.

  • Oven-Baked Cheesy Tacos: Irresistibly Crispy, Melty & Easy!

    Oven-Baked Cheesy Tacos: Irresistibly Crispy, Melty & Easy!

    Oven-Baked Cheesy Tacos: Irresistibly Crispy, Melty & Easy!

    Oven-Baked Cheesy Tacos have completely transformed taco night at my house! That perfect crunch when you bite into the golden, toasty shell filled with seasoned beef and melty cheese is truly irresistible. I discovered this method last winter when a sudden craving hit during a snowstorm, and I couldn’t bear the thought of standing over the stove frying individual tacos. The genius of this method is that all your tacos bake together, creating that restaurant-quality crispness while you relax. If you love comforting meals that bring everyone to the table with minimal fuss, these cheesy tacos are about to become your new weeknight hero!

    Recipe

    Why You’ll Love These Oven-Baked Cheesy Tacos

    Perfect Texture Every Time

    There’s something magical about the texture contrast in these oven-baked tacos that keeps me coming back again and again. The shells develop this incredible crispness around the edges while staying slightly tender where they cradle all that delicious filling. I love how the cheese gets just slightly browned and bubbly on top, creating those irresistible crispy cheese bits that everyone fights over. The beef stays juicy inside, and when you add that final fresh topping of lettuce and tomato, you get this beautiful temperature and texture play that makes each bite absolutely perfect.

    Easy Make-Ahead Option

    One of my favorite things about these oven-baked cheesy tacos is their meal prep potential. I often brown the taco meat mixture on Sunday afternoons while my daughter’s doing homework at the kitchen counter. The fragrant spices fill the kitchen with the most comforting aroma! Store the cooled meat mixture in the fridge, and when Tuesday’s dinner chaos hits, you can assemble and bake these tacos in just minutes. They’re also perfect for entertaining since you can prepare a whole batch at once instead of standing at the stove making individual tacos to order.

    Essential Tips & Tricks

    Preventing Soggy Shells

    The secret to perfectly crispy oven-baked cheesy tacos is managing moisture. I learned this the hard way after one sadly soggy taco night! First, drain your seasoned beef thoroughly—I even blot it with paper towels sometimes. Then, create a protective barrier by sprinkling a thin layer of shredded cheese on the bottom of each shell before adding the meat. This cheese melts during baking and forms a seal against moisture. Finally, don’t overfill your tacos, and bake them standing upright (not laying flat) to allow steam to escape rather than soften your shells.

    Cheese Selection Matters

    The right cheese blend makes all the difference in these oven-baked cheesy tacos! While pre-shredded Mexican blends work fine, I’ve found that creating my own mix produces the best flavor and melt. I like combining sharp cheddar for flavor with Monterey Jack for its incredible meltability. Freshly grated cheese also melts more evenly than pre-packaged options. For an extra-special batch, try adding a sprinkle of cotija on top after baking or mixing in some pepper jack for a subtle kick, similar to how I layer cheeses in my Greek Meatballs in Lemon Sauce.

    Serving Ideas & Creative Variations

    Build a Taco Bar

    Transform your oven-baked cheesy tacos into an interactive family feast by setting up a taco bar! After the tacos come out of the oven all golden and bubbling, I arrange them on a large platter surrounded by colorful bowls of toppings. My must-haves include diced avocado, fresh cilantro, lime wedges, sliced jalapeños, and at least two kinds of salsa. For special occasions, I’ll add quick-pickled red onions and a bowl of Mexican crema. This setup is perfect for family dinners but also works beautifully for casual entertaining, similar to my approach with Garlic Parmesan Cheeseburger Bombs.

    Creative Protein Swaps

    While traditional ground beef is delicious in these oven-baked cheesy tacos, don’t be afraid to experiment with proteins! Shredded chicken tossed with taco seasoning creates a lighter version that’s equally delicious. For a vegetarian option, I love using a mixture of black beans and roasted sweet potatoes seasoned with the same spices—the sweetness against the savory spices is incredible. Ground turkey works beautifully too, though I add a tablespoon of olive oil to keep it juicy. For special occasions, try seasoned grilled shrimp chopped into bite-sized pieces!

    Storage & Troubleshooting Guide

    Proper Storage Techniques

    The best way to store leftover oven-baked cheesy tacos is to separate the components strategically. I recommend removing any fresh toppings like lettuce and storing them separately in airtight containers. Place the filled taco shells in a single layer in a shallow container, loosely covered with foil (not airtight, which traps moisture). When reheating, use a 350°F oven for about 7-10 minutes to restore crispness. For meal prep, you can store assembled but unbaked tacos covered in the refrigerator for up to 24 hours before baking—just add an extra minute or two to the baking time.

    Fixing Common Problems

    If your oven-baked cheesy tacos aren’t turning out perfectly, a few simple adjustments can make all the difference. For shells that aren’t crisping properly, try preheating your baking sheet before adding the tacos. If your filling is too dry, mix in 2-3 tablespoons of tomato sauce or beef broth to the meat mixture before filling. For tacos that keep falling over during baking, crumple small pieces of aluminum foil to create “holders” between each taco, or invest in a taco baking rack. If cheese isn’t melting evenly, try grating it more finely and sprinkling it throughout the filling, not just on top.

    Frequently Asked Questions

    Can I make oven-baked cheesy tacos ahead of time?

    Yes! Prepare the meat filling up to 3 days ahead and refrigerate. Assemble the tacos up to 24 hours before baking, keeping them covered in the refrigerator. Add 2-3 extra minutes to the baking time if starting from cold.

    What’s the best temperature for baking tacos?

    Bake at 375°F for optimal results. This temperature creates perfectly crispy shells while melting the cheese without burning it. Your oven-baked cheesy tacos should take about 10-12 minutes to reach golden perfection.

    Can I use soft tortillas instead of hard shells?

    Absolutely! Lightly brush corn tortillas with oil, drape them over two bars of your oven rack to form a taco shape, and bake at 375°F for 7-8 minutes until crisp before filling and baking again.

    How do I keep the tacos standing upright?

    Use a specialized taco baking rack, or create your own by scrunching aluminum foil into a snake-like form and shaping it into curves to hold each taco. Alternatively, pack them tightly in a baking dish.

    What sides go well with oven-baked tacos?

    Mexican rice, refried beans, corn salad, or a simple green salad make perfect accompaniments. For a complete fiesta, add guacamole and chips or a refreshing cucumber-tomato salad with lime dressing.

    Final Thoughts

    These oven-baked cheesy tacos have earned their place in my regular dinner rotation because they deliver that perfect combination of convenience and crave-worthy flavor. There’s something so satisfying about pulling out a tray of perfectly crispy, cheese-filled tacos all at once instead of frying them individually. The way the family gathers around, customizing their toppings and diving in while everything’s still hot and bubbling, creates the kind of everyday food memories I cherish. Find more delicious recipes on my Pinterest page!