Category: Dinner

Easy, tasty dinner ideas for busy nights. Simple recipes, quick prep, and family-friendly meals you’ll make again and again.

  • Crockpot Cottage Cheese Tikka Masala: Irresistibly Creamy & Easy!

    Crockpot Cottage Cheese Tikka Masala: Irresistibly Creamy & Easy!

    Crockpot Cottage Cheese Tikka Masala: Irresistibly Creamy & Easy!

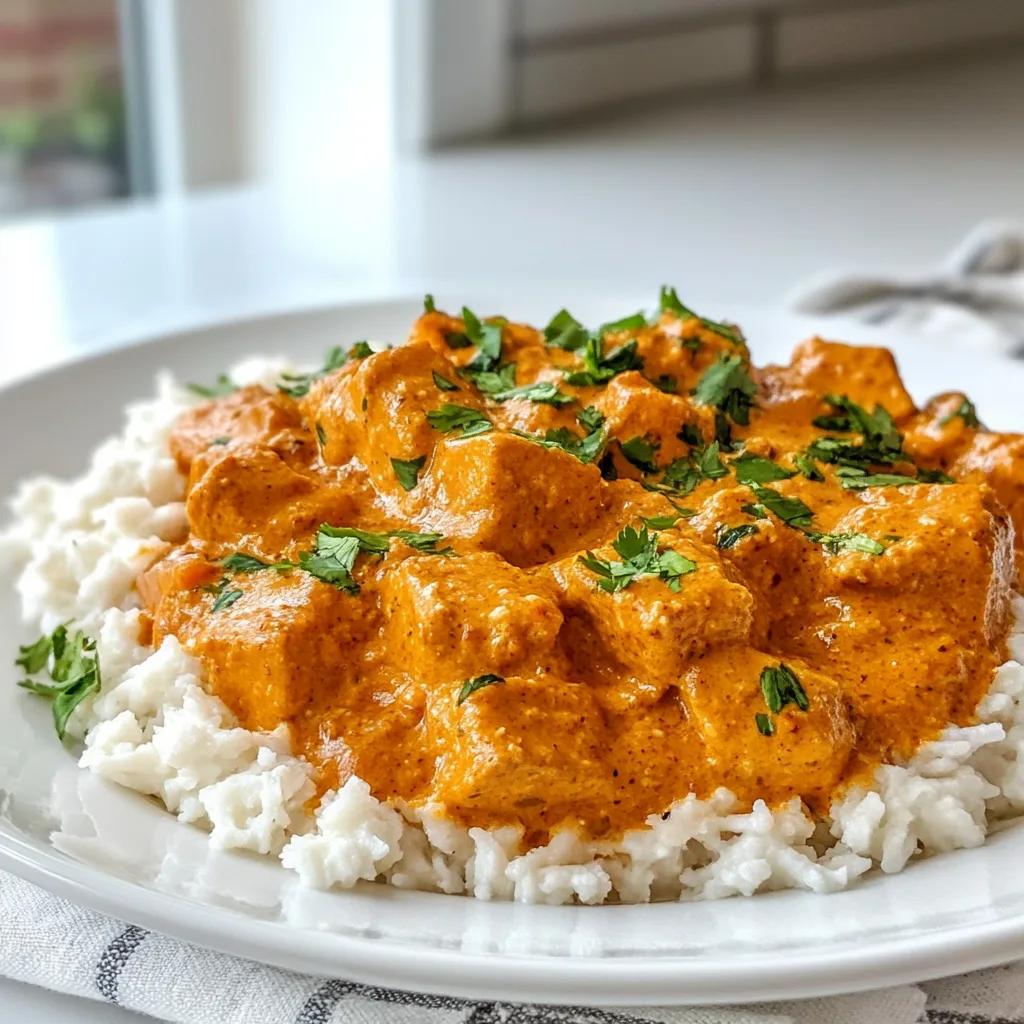
    Crockpot Cottage Cheese Tikka Masala transformed my weeknight dinner routine when I discovered this protein-packed twist on a classic Indian favorite. The first time I made this dish, the aroma of warm spices filled my kitchen, transporting me back to that little restaurant in Chicago where I first fell in love with Indian cuisine. This creamy, comforting meal combines the protein power of cottage cheese with traditional tikka masala flavors, all while your slow cooker does the heavy lifting. Perfect for busy days when you want something that tastes like it took hours of effort but actually requires minimal hands-on time.

    Recipe

    Why You’ll Love This Crockpot Cottage Cheese Tikka Masala

    A Protein-Packed Comfort Food

    This Crockpot Cottage Cheese Tikka Masala delivers an impressive protein boost while satisfying your comfort food cravings. Unlike traditional tikka masala that relies solely on heavy cream, the cottage cheese adds a protein-rich creaminess that transforms this dish into a more balanced meal. I love how the cottage cheese curds maintain their integrity while absorbing all those gorgeous spices. The slow cooking process allows the flavors to develop deeply, creating that authentic restaurant-quality taste without having to simmer a pot on the stove for hours. Your kitchen will smell absolutely heavenly!

    Effortless Preparation with Maximum Flavor

    What truly makes this Crockpot Cottage Cheese Tikka Masala special is the incredible flavor-to-effort ratio. Simply combine your ingredients in the morning, set your crockpot, and return to a perfectly cooked meal. The slow cooking process allows the spices—garam masala, turmeric, cumin—to bloom fully and infuse the sauce with complex flavors. I’ve found this method actually produces a more developed flavor profile than quick-cooking versions. Plus, the cottage cheese slowly melds with the tomato base, creating that signature creamy texture without needing to add cream at the last minute.

    Essential Tips & Tricks

    Perfecting Your Spice Blend

    The soul of any tikka masala lies in its spice blend, and this Crockpot Cottage Cheese version is no exception. I recommend toasting whole spices (cumin seeds, cardamom pods, coriander seeds) in a dry pan for 1-2 minutes before grinding them—this quick step makes a remarkable difference in flavor depth. If you’re using pre-ground spices, add them to the hot oil at the beginning to bloom their flavors. For heat customization, adjust the cayenne pepper gradually—you can always add more later but can’t take it away! Check out my White Chicken Chili with Crispy Tortilla Strips for another perfectly spiced slow cooker meal.

    Cottage Cheese Selection and Preparation

    Choosing the right cottage cheese is crucial for this Crockpot Cottage Cheese Tikka Masala. Opt for full-fat cottage cheese with large curds for the best texture and flavor retention during the long cooking process. Before adding to your crockpot, I recommend draining excess liquid if your cottage cheese seems particularly wet. For an even creamier result, blend half the cottage cheese until smooth and leave the other half as curds—this creates a luxurious texture with delightful pockets of cheese throughout the sauce. The protein content makes this dish substantially more filling than traditional versions.

    Serving Ideas & Creative Variations

    Perfect Pairings

    Serve your Crockpot Cottage Cheese Tikka Masala over a bed of fluffy basmati rice to soak up all that glorious sauce. For a lower-carb option, cauliflower rice works beautifully too. I love adding a side of warm naan bread for dipping—nothing beats that moment when you tear off a piece of naan and scoop up the creamy sauce! Fresh cilantro, a squeeze of lime, and a dollop of yogurt make perfect garnishes that brighten the rich flavors. For a complete Indian-inspired feast, pair with my Buckwheat Kasha with Caramelized Mushrooms and Onions as an unexpected but delicious side.

    Exciting Flavor Twists

    Don’t be afraid to make this Crockpot Cottage Cheese Tikka Masala your own! For a vegetable-packed version, add diced bell peppers, peas, or spinach during the last 30 minutes of cooking. For a meatier variation, add chicken thighs or chickpeas for additional protein and texture. I recently experimented with adding a tablespoon of mango chutney for subtle sweetness, and it was absolutely divine. You can also adjust the creaminess—stir in a splash of coconut milk or heavy cream at the end for an even more indulgent sauce. The versatility of this dish makes it perfect for weekly meal rotations.

    Storage & Troubleshooting Guide

    Proper Storage for Maximum Freshness

    Your Crockpot Cottage Cheese Tikka Masala stores beautifully, actually improving in flavor over time as the spices continue to meld. Refrigerate leftovers in airtight containers for up to 4 days—I like to divide them into individual portions for easy grab-and-go lunches. For longer storage, freeze in freezer-safe containers for up to 3 months. When reheating, add a splash of water or broth if the sauce has thickened too much. I’ve found that gentle reheating on the stovetop yields better results than microwave heating, preserving the texture of the cottage cheese curds.

    Troubleshooting Common Issues

    If your Crockpot Cottage Cheese Tikka Masala sauce is too thin, there’s an easy fix. Remove the lid during the final 30 minutes of cooking to allow some liquid evaporation. Alternatively, create a slurry with 1 tablespoon cornstarch and 2 tablespoons cold water, then stir it in and cook for an additional 15 minutes with the lid off. If your sauce is too thick, simply add a splash of broth or water. For cottage cheese that separated too much during cooking, try blending a portion of the finished dish and mixing it back in—this creates a smoother, more cohesive texture while maintaining some of those delightful cheese pockets.

    Frequently Asked Questions

    Can I use low-fat cottage cheese for this Crockpot Cottage Cheese Tikka Masala?

    You can, but full-fat cottage cheese provides better texture and doesn’t separate as easily during long cooking. If using low-fat, consider adding a tablespoon of heavy cream at the end for richness.

    How spicy is this recipe?

    The spice level is moderate but customizable. Adjust cayenne pepper to your preference—start with less and add more near the end of cooking if needed.

    Can I make this in an Instant Pot instead?

    Absolutely! Use the sauté function for spices, then pressure cook for 10 minutes with a natural release. Add cottage cheese after pressure cooking.

    Is this recipe gluten-free?

    Yes, this recipe is naturally gluten-free, but always check your spice blends and tomato products for hidden gluten ingredients.

    How can I make this recipe vegetarian?

    Simply omit any meat and add extra vegetables like bell peppers, cauliflower, or chickpeas for a hearty vegetarian version.

    Final Thoughts

    This Crockpot Cottage Cheese Tikka Masala has become a staple in my kitchen for good reason—it delivers restaurant-quality flavor with minimal effort while packing in protein. The slow-cooked depth of flavor combined with the creamy texture makes for a truly satisfying meal that works for both everyday dinners and special occasions. I hope you’ll give this unique twist on a classic a try! For more delicious recipes, check out my collection on Pinterest where I’m always sharing new comfort food inspirations.
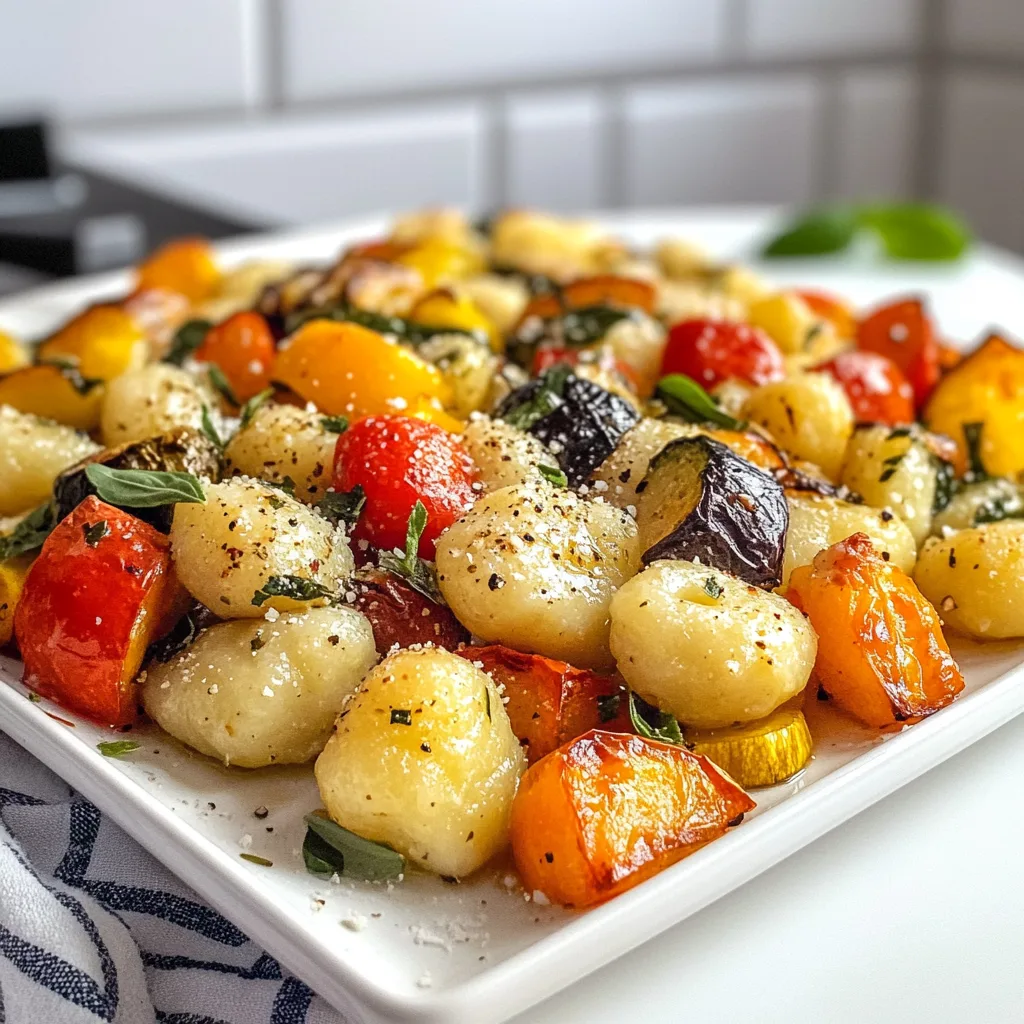

  • Sheet Pan Cottage Cheese Gnocchi with Roasted Veggies – Easy & Delicious!

    Sheet Pan Cottage Cheese Gnocchi with Roasted Veggies – Easy & Delicious!

    Sheet Pan Cottage Cheese Gnocchi with Roasted Veggies – Easy & Delicious!

    Sheet Pan Cottage Cheese Gnocchi with Roasted Vegetables is my absolute go-to dinner when I want something cozy yet impressive without the fuss. There’s something magical about how the pillowy gnocchi gets crispy on the outside while staying tender inside, all while the vegetables caramelize to sweet perfection. I discovered this recipe last winter when my kitchen was under renovation, and I needed meals that required minimal cleanup. One sheet pan, thirty minutes, and you’ve got a protein-packed dinner that feels like it came from a rustic Italian kitchen. Trust me, this might become your new weeknight favorite too!

    Recipe

    Why You’ll Love This Sheet Pan Cottage Cheese Gnocchi with Roasted Vegetables

    Perfect Balance of Nutrition and Comfort

    This dish strikes that elusive balance between nourishing and deeply satisfying. The cottage cheese gnocchi delivers an impressive protein punch (about 15g per serving!) while maintaining that pillowy texture we all crave. I love how the edges get golden and crispy while the centers stay tender. The roasted vegetables add fiber, vitamins, and those beautiful caramelized flavors that develop in the oven. When my daughter—who typically avoids anything remotely “healthy”—asks for seconds, I know I’ve hit the sweet spot between nutritious and utterly delicious.

    Weeknight Time-Saver with Gourmet Results

    Let’s be honest—on busy weeknights, the last thing anyone wants is a sink full of dishes. That’s where this one-pan wonder truly shines! Everything roasts together, meaning minimal prep and practically zero cleanup. I timed myself last Tuesday: 10 minutes of hands-on prep, 20 minutes in the oven, and dinner was served. The beauty is how it looks and tastes like something that required far more effort. Those beautiful charred edges on the vegetables and the golden gnocchi create a restaurant-worthy presentation that belies its simple preparation.

    Essential Tips & Tricks

    Achieving the Perfect Texture

    The secret to crispy-edged gnocchi lies in two critical steps. First, don’t overcrowd your sheet pan—give everything breathing room so steam can escape (I use two pans if cooking for more than four people). Second, toss everything halfway through cooking, but be gentle with the gnocchi to maintain their shape. For the vegetables, cut them into uniform sizes—about 1-inch pieces work perfectly—to ensure even cooking. I’ve found that a drizzle of olive oil and a sprinkle of salt before roasting makes all the difference in developing those delicious caramelized edges that make this dish irresistible.

    Seasoning Secrets for Maximum Flavor

    While the base recipe is delicious on its own, the right seasonings elevate this dish to new heights. I always include garlic powder and dried herbs (rosemary and thyme are my go-to combination) in the initial toss. For an extra dimension, add a pinch of red pepper flakes if you enjoy a subtle heat. The game-changer? A light drizzle of balsamic glaze over everything in the last five minutes of cooking. This adds a sweet-tangy complexity that ties all the flavors together beautifully. For more flavor inspiration, check out my Creamy Cottage Cheese Baked Orzo with Roasted Garlic for complementary flavor profiles.

    Serving Ideas & Creative Variations

    Perfect Pairings to Complete Your Meal

    This versatile dish works beautifully as a standalone meal or as part of a larger spread. For a complete dinner, I love serving it with a simple arugula salad dressed with lemon juice and olive oil—the peppery greens and bright acidity balance the richness of the gnocchi perfectly. For a heartier option, add a side of Garlic Butter Chicken Wraps for those with bigger appetites. When entertaining, I serve this family-style on a large platter with fresh basil scattered over the top and lemon wedges on the side. The vibrant colors make for a stunning presentation that always impresses guests.

    Seasonal Adaptations and Dietary Swaps

    One of the reasons I return to this recipe year-round is its incredible adaptability to whatever produce is in season. In summer, I use bell peppers, zucchini, and cherry tomatoes. Fall calls for butternut squash, Brussels sprouts, and red onion. Winter? Think root vegetables like parsnips and carrots. For dietary needs, this recipe is naturally vegetarian, but you can make it vegan by using plant-based gnocchi. Gluten-free? Simply swap in gluten-free gnocchi (most cottage cheese versions are naturally GF, but always check labels). For extra protein, add chickpeas to roast alongside everything else.

    Storage & Troubleshooting Guide

    Proper Storage for Optimal Leftovers

    Leftover Sheet Pan Cottage Cheese Gnocchi with Roasted Vegetables maintains its delicious flavor, though the texture changes slightly. Store in an airtight container in the refrigerator for up to 3 days. For best results when reheating, avoid the microwave which can make the gnocchi rubbery. Instead, spread leftovers on a baking sheet and reheat at 375°F for 7-10 minutes until warmed through. This revives some of the crispy edges. For meal prep, you can prepare all vegetables ahead of time and store them in the refrigerator for up to 2 days. Just remember to bring them to room temperature before roasting for more even cooking.

    Solving Common Cooking Challenges

    If your gnocchi turns out soggy rather than crispy, there are a few likely culprits. The most common issue is overcrowding the pan, which causes steaming instead of roasting. Always use a large enough sheet pan or divide between two pans. Another potential problem is vegetables releasing too much moisture—particularly zucchini and tomatoes. For wetter vegetables, consider roasting them separately or giving them a head start before adding the gnocchi. If your vegetables are burning while the gnocchi remains undercooked, your oven temperature may be too high. Try reducing the heat to 375°F and extending the cooking time slightly.

    Frequently Asked Questions

    Can I use regular store-bought gnocchi instead of cottage cheese gnocchi?

    Absolutely! Regular potato gnocchi works perfectly in this recipe. You’ll lose some protein content but gain convenience, as potato gnocchi is widely available in most grocery stores.

    How do I know when the Sheet Pan Cottage Cheese Gnocchi with Roasted Vegetables is done?

    Look for golden-brown gnocchi with slightly crisp edges and vegetables that are tender when pierced with a fork. The edges of the vegetables should show caramelization.

    Can I prepare any components of this dish ahead of time?

    Yes! Chop all vegetables up to 2 days in advance and store them in airtight containers in the refrigerator. You can also pre-measure and mix your seasonings to save time.

    Is this recipe suitable for freezing?

    While possible, I don’t recommend freezing this dish as the texture of both the gnocchi and vegetables changes significantly. If necessary, freeze for up to 1 month and reheat from frozen at 375°F.

    What vegetables work best in this recipe?

    Hardy vegetables that roast well are ideal: bell peppers, zucchini, eggplant, Brussels sprouts, butternut squash, carrots, red onions, and cherry tomatoes all perform beautifully.

    Final Thoughts

    Sheet Pan Cottage Cheese Gnocchi with Roasted Vegetables has become a staple in my kitchen for good reason—it delivers on flavor, nutrition, and convenience without compromise. I love how it adapts to whatever’s in season and satisfies everyone from picky eaters to gourmet food lovers. The protein-rich gnocchi combined with the sweet caramelized vegetables creates a perfect harmony of textures and flavors that feels like comfort food with benefits. For more delicious recipe inspiration, follow me on Pinterest where I share new ideas weekly!

  • Easy Crockpot Cheesy Crack Beef Pasta – Irresistibly Delicious!

    Easy Crockpot Cheesy Crack Beef Pasta – Irresistibly Delicious!

    Easy Crockpot Cheesy Crack Beef Pasta – Irresistibly Delicious!

    Easy Crockpot cheesy Crack Beef Pasta is the ultimate comfort food that practically makes itself! This irresistible one-pot wonder combines tender ground beef, velvety cheese, and perfectly cooked pasta in your slow cooker. I first discovered this recipe during a particularly hectic week when I needed something that would feed my family without me hovering over the stove. The aroma that filled my kitchen as it simmered away was nothing short of magical! With minimal prep and maximum flavor, this dish has become my go-to for busy weeknights when I crave something hearty and satisfying without the fuss. Trust me, once you try this creamy creation, you’ll wonder how you ever lived without it.

    Recipe

    Why You’ll Love This Easy Crockpot cheesy Crack Beef Pasta

    Perfect for Busy Weeknights

    There’s something incredibly liberating about tossing ingredients into your slow cooker and walking away. This Easy Crockpot cheesy Crack Beef Pasta is the epitome of set-it-and-forget-it cooking that doesn’t sacrifice flavor. On those days when soccer practice runs late or work meetings drag on, knowing dinner is practically done brings immense peace of mind. The hands-off cooking time allows the flavors to meld beautifully while you tackle other priorities. Plus, the minimal prep work—just brown the beef, toss everything in, and let your crockpot work its magic—makes this recipe accessible even to kitchen novices.

    Crowd-Pleasing Flavor Combination

    The name “crack” pasta isn’t an exaggeration—this dish is genuinely addictive! The combination of savory ground beef, creamy cheese sauce, and perfectly tender pasta creates a comfort food trifecta that’s impossible to resist. What makes it special is how the pasta absorbs all those amazing flavors as it cooks slowly. My teenagers, who typically turn their noses up at many of my dinner creations, actually request this by name. The rich, cheesy goodness paired with the seasoned beef creates a depth of flavor that tastes like you spent hours in the kitchen, when in reality, your crockpot did all the heavy lifting.

    Essential Tips & Tricks

    Perfecting Your Pasta Texture

    Getting the pasta texture just right in a slow cooker can be tricky, but I’ve learned a few secrets through trial and error. The most important rule: never add the pasta too early! Add it during the final 30-45 minutes of cooking time to prevent it from becoming mushy. I prefer using heartier pasta shapes like rotini, penne, or cavatappi as they hold up better in the slow cooker environment. Another game-changing tip is to slightly undercook the pasta if you’re planning to keep it on the “warm” setting for any length of time, as it will continue to soften. This approach has saved many family dinners from crossing into overcooked territory!

    Cheese Selection Matters

    The cheese blend you choose can elevate this dish from good to absolutely memorable. While the recipe calls for cheddar, I’ve found that a combination of sharp cheddar and cream cheese creates the silkiest, most luxurious sauce. For an extra dimension of flavor, try adding a handful of smoked gouda or pepper jack for a subtle kick. When adding cheese to your crockpot, always grate it yourself rather than using pre-shredded varieties, which contain anti-caking agents that can make your sauce grainy. For a similar creamy texture in a different dish, you might enjoy my Creamy Tomato Garlic Pasta which uses a similar technique for velvety results.

    Serving Ideas & Creative Variations

    Perfect Pairings

    This hearty pasta dish stands beautifully on its own, but a few simple sides can turn it into a feast. I love serving it with a bright, crisp garden salad dressed simply with lemon and olive oil to balance the richness. Garlic bread or buttery Texas toast makes an excellent vehicle for scooping up any extra cheese sauce—trust me, you won’t want to waste a drop! For a complete comfort food experience, consider pairing it with roasted broccoli or asparagus; the slight char from roasting adds a wonderful contrast to the creamy pasta. These vegetables also provide a nutritional boost that helps me feel slightly less guilty about indulging in this cheesy masterpiece.

    Exciting Flavor Twists

    Don’t be afraid to make this recipe your own by experimenting with different flavor profiles. For a Southwestern spin, add a can of diced tomatoes with green chilies, corn kernels, and a sprinkle of taco seasoning. My family goes crazy for the Italian version where I mix in pepperoni slices, Italian seasoning, and top with mozzarella for a pizza-inspired treat. For seafood lovers, try substituting the beef with cooked shrimp added in the last 15 minutes—it pairs beautifully with the cheesy sauce, similar to my Shrimp Creamy Cheddar Grits. These variations keep the dish exciting even when it becomes a regular in your meal rotation.

    Storage & Troubleshooting Guide

    Proper Storage Solutions

    This Easy Crockpot cheesy Crack Beef Pasta makes excellent leftovers, but proper storage is key to maintaining its delicious texture. Allow the pasta to cool completely before transferring to airtight containers. It will keep in the refrigerator for 3-4 days, making it perfect for meal prep or quick lunches. When freezing, I recommend slightly undercooking the pasta since it will soften further during reheating. Portion it into freezer-safe containers and store for up to 2 months. The cheese sauce might separate slightly when thawed, but gently reheating with a splash of milk while stirring frequently will bring it back to its creamy glory.

    Fixing Common Issues

    Even the most foolproof recipes can sometimes go awry, but most issues with this dish are easily fixed. If your pasta turns out too dry, simply add a splash of warm milk or broth and stir gently until it reaches your desired consistency. For sauce that’s too thin, mix a tablespoon of cornstarch with cold water to create a slurry, then stir it in and let cook for an additional 15 minutes. If you find your cheese sauce has broken or become grainy, lower the heat immediately and whisk in a tablespoon of cream cheese until smooth. Remember that slow cooker temperatures vary, so you might need to adjust cooking times slightly based on your specific model.

    Frequently Asked Questions

    Can I use different pasta shapes in this Easy Crockpot cheesy Crack Beef Pasta?

    Absolutely! Short pasta shapes like rotini, penne, or bowties work best. Avoid long pasta like spaghetti as it tends to clump together. Just remember to add the pasta in the last 30-45 minutes of cooking time.

    Can I make this recipe ahead of time?

    Yes! Prepare everything except the pasta and refrigerate the mixture for up to 24 hours. When ready to cook, add to your crockpot, heat through, then add pasta during the final 30-45 minutes.

    Is there a way to make this recipe lighter?

    Definitely. Use lean ground beef or turkey, reduced-fat cream cheese, and light cheddar. You can also increase vegetables like bell peppers or spinach for added nutrition.

    My sauce is too thin. How can I thicken it?

    Create a cornstarch slurry by mixing 1-2 tablespoons cornstarch with equal parts cold water. Stir into the crockpot, cover, and cook on high for 15 minutes until thickened.

    Can I cook this on high instead of low?

    Yes, you can cook on high for 2-3 hours instead of low for 4-5 hours. However, watch carefully as higher heat can cause dairy products to separate more easily.

    Final Thoughts

    This Easy Crockpot cheesy Crack Beef Pasta has become more than just a recipe in my household—it’s a reliable friend on hectic days when cooking feels overwhelming. There’s something magical about the combination of minimal effort and maximum satisfaction that makes this dish a true kitchen hero. I love seeing the smiles around my dinner table when this pasta makes an appearance, and I hope it brings the same joy to your family. Don’t forget to check out more comforting recipes on Pinterest for inspiration that will keep your meal rotation fresh and exciting!

  • Quick Mediterranean Chicken Tenders: Irresistibly Crisp & Flavor-Packed!

    Quick Mediterranean Chicken Tenders: Irresistibly Crisp & Flavor-Packed!

    Quick Mediterranean Chicken Tenders: Irresistibly Crisp & Flavor-Packed!

    Quick Mediterranean Chicken Tenders are my absolute lifesaver on those evenings when I want something delicious but don’t have hours to spend in the kitchen. I still remember the first time I made these – my kitchen filled with the aromatic blend of herbs and lemon while my family gathered around, drawn by the irresistible scent. These tender, juicy chicken strips coated in Mediterranean flavors transform an ordinary weeknight dinner into something special in just 20 minutes. Perfect for busy parents or anyone craving a flavorful protein without the fuss!

    Recipe

    Why You’ll Love This Quick Mediterranean Chicken Tenders

    Perfect Balance of Flavors and Simplicity

    There’s something magical about the combination of oregano, garlic, and lemon that transports you straight to a seaside taverna. I adore how these Mediterranean flavors infuse the chicken so quickly, making this recipe perfect for those “I need dinner now!” moments. The first time my daughter tried these, she declared them “fancy restaurant chicken,” which made me laugh – our little secret is how ridiculously simple they are to prepare! The tender texture comes from a quick marinade that works its magic in just minutes, not hours.

    Weeknight-Friendly and Versatile

    On busy Tuesdays when soccer practice runs late and homework awaits, these tenders have become my secret weapon. The entire dish comes together in about 20 minutes flat, from prep to plate. I’ve made these with both chicken breast strips and thighs – both work beautifully! What I particularly love is how adaptable they are; sometimes I’ll add a sprinkle of sumac or za’atar when I want to change things up, or a touch of honey for a subtle sweetness. They’re equally delicious hot from the pan or chilled for lunch the next day.

    Essential Tips & Tricks

    Perfecting the Marinade

    The real magic happens in the marinade, even though it’s quick! I’ve found that using fresh lemon juice rather than bottled makes a noticeable difference in brightness. For maximum flavor infusion, make sure to massage the marinade into the chicken with your hands (messy but worth it!). Don’t skip the olive oil – it helps carry the flavors into the meat and keeps everything juicy. If you have an extra five minutes, letting the chicken sit with the marinade while you prep other ingredients allows the flavors to deepen without adding much time.

    Cooking for Maximum Juiciness

    The biggest mistake I made when I first started cooking chicken tenders was overcooking them. Now I know the secret is a hot, quick sear followed by a brief rest. Heat your pan until it’s properly hot before adding the chicken – you want to hear that satisfying sizzle! For perfectly juicy tenders, cook just until they reach 165°F internal temperature. I love serving these alongside my Broccoli with Garlic Butter and Cashews for a complete meal that comes together in minutes.

    Serving Ideas & Creative Variations

    Family-Friendly Serving Suggestions

    These tenders are incredibly versatile when it comes to serving options. My personal favorite is to slice them and stuff them into warm pita pockets with crisp lettuce, juicy tomatoes, and a generous drizzle of tzatziki sauce. For a lower-carb option, I’ll often serve them atop a Greek salad with plenty of feta cheese and kalamata olives. When my niece and nephew visit (my toughest food critics!), I serve the tenders with simple dipping sauces – honey mustard for him and garlic yogurt for her – alongside some quick-roasted potatoes.

    Creative Twists and Variations

    Don’t be afraid to play with this recipe! I’ve created a lemon-dill variation by swapping the oregano for fresh dill that was absolutely divine. For a spicier kick, add a pinch of red pepper flakes or a dash of harissa to the marinade. When I’m feeling extra fancy, I’ll add some crumbled feta on top of the hot tenders so it gets slightly melty. These also work beautifully in meal prep – I often make a double batch to use in Quick and Easy Creamy Mushroom Soup for lunch the next day, creating a completely different meal with minimal effort.

    Storage & Troubleshooting Guide

    Proper Storage and Reheating

    These Mediterranean chicken tenders maintain their delicious flavor when stored properly. Place cooled leftovers in an airtight container and refrigerate for up to three days. For reheating, avoid the microwave if possible – it tends to dry them out. Instead, I place them in a covered skillet with a tablespoon of water and warm over medium-low heat until just heated through. This gentle method preserves their moisture and flavor. If you’re meal prepping, consider slicing the cooled tenders before storing to make them even more versatile for salads and wraps later in the week.

    Common Issues and Simple Fixes

    If your tenders are coming out dry, you’re likely cooking them too long – chicken tenders need just 3-4 minutes per side. Another common issue is bland flavor, which usually means you need more salt in the marinade or a longer marinating time. If your pan isn’t hot enough when you add the chicken, you’ll miss that beautiful golden sear that locks in juices. For those times when the chicken sticks to the pan (we’ve all been there!), make sure you’re using enough oil and that your pan is properly preheated. A well-seasoned cast iron or quality non-stick pan makes a world of difference.

    Frequently Asked Questions

    Can I make Quick Mediterranean Chicken Tenders in the air fryer?

    Absolutely! Preheat your air fryer to 380°F and cook for 8-10 minutes, flipping halfway through. They’ll come out beautifully crisp on the outside while staying juicy inside.

    How can I make this recipe spicier?

    Add 1/2 teaspoon of crushed red pepper flakes to the marinade or serve with a side of harissa paste for dipping. Cayenne pepper works well too if you prefer a more intense heat.

    Can I use chicken thighs instead of tenders?

    Yes! Boneless, skinless chicken thighs work beautifully. They’ll need about 2-3 minutes longer cooking time but offer even more juiciness and flavor.

    Is this recipe gluten-free?

    Yes, this recipe is naturally gluten-free as written. Just be careful with store-bought seasoning blends if you use them, as some may contain gluten as a filler.

    How do I know when the chicken tenders are done cooking?

    Chicken tenders are done when they reach an internal temperature of 165°F or when the meat is opaque throughout with no pink remaining.

    Final Thoughts

    Quick Mediterranean Chicken Tenders have truly been a game-changer in my kitchen routine. There’s something special about a recipe that delivers such bright, satisfying flavors with so little effort. I find myself returning to this dish again and again, not just for convenience but because everyone at my table genuinely enjoys it. Whether you’re serving them with a simple salad, stuffed in a pita, or as part of a larger Mediterranean feast, these tenders bring a touch of sunshine to any meal. Check out more of my favorite quick dinner ideas on Pinterest!

  • Creamy Rasta Pasta with Jerk Chicken: Irresistibly Flavorful Bliss!

    Creamy Rasta Pasta with Jerk Chicken: Irresistibly Flavorful Bliss!

    Creamy Rasta Pasta with Jerk Chicken: Irresistibly Flavorful Bliss!

    Creamy Rasta Pasta with Jerk Chicken brings the vibrant flavors of Jamaica right to your dinner table. This colorful fusion dish combines spicy jerk-marinated chicken with al dente pasta and a velvety coconut cream sauce that will transport your taste buds straight to the Caribbean. The first time I made this for my family, the kitchen filled with the most intoxicating aroma of scotch bonnet peppers and warm spices. Everyone gathered around before I’d even called them to dinner! Let me show you how to create this perfect balance of heat, creaminess, and island-inspired flavors.

    Recipe

    Why You’ll Love This Creamy Rasta Pasta with Jerk Chicken

    A Perfect Balance of Flavors and Textures

    This dish is all about beautiful contrasts that dance on your palate. The spicy kick from authentic jerk seasoning plays against the cooling creaminess of the coconut sauce, while the tender chicken and al dente pasta provide satisfying texture in every bite. I love how the bell peppers add pops of color and sweetness that brighten the entire dish. The sauce clings perfectly to the pasta, ensuring every forkful delivers that perfect flavor combination. It’s like a Caribbean vacation on a plate—bold, exciting, and utterly comforting all at once.

    Quick Enough for Weeknights, Special Enough for Guests

    Despite its impressive flavor profile, this Creamy Rasta Pasta with Jerk Chicken comes together in about 30 minutes, making it weeknight friendly! The most time-consuming part is marinating the chicken, which you can do the night before. The actual cooking process moves quickly, with the pasta and sauce coming together while the chicken cooks. I’ve served this at casual family dinners and at dinner parties where guests have begged for the recipe. It’s that perfect sweet spot of a dish that feels special without requiring hours in the kitchen.

    Essential Tips & Tricks

    Mastering the Jerk Chicken

    The heart of this dish lies in properly preparing the jerk-marinated chicken. For authentic flavor, use a combination of scotch bonnet peppers (or habaneros if you can’t find scotch bonnets), allspice, thyme, ginger, and green onions. Let the chicken marinate for at least 4 hours, though overnight is even better. When cooking, don’t overcrowd your pan—this ensures each piece gets that beautiful caramelization without steaming. If you’re sensitive to heat, remove the seeds from your peppers or substitute with a milder variety. The goal is a perfect balance of spice that doesn’t overwhelm the dish.

    Creating the Perfect Creamy Sauce

    The secret to an irresistible sauce is starting with quality ingredients and building flavors in layers. Begin by sautéing aromatics in butter until fragrant, then deglaze with a splash of white wine to release those brown bits of goodness. Use full-fat coconut milk for the richest texture—light versions can separate when heated. A touch of heavy cream adds silkiness, while Parmesan cheese introduces a subtle umami note that complements the Caribbean flavors beautifully. For a sauce that rivals what you’d find in my creamy tomato garlic pasta, be patient and let it reduce slightly to coat the back of a spoon.

    Serving Ideas & Creative Variations

    Perfect Pairings and Presentation

    Serve your Creamy Rasta Pasta with Jerk Chicken in warm bowls to keep everything at the perfect temperature. A simple side of garlic bread makes an excellent accompaniment for sopping up extra sauce. For a complete Caribbean-inspired meal, pair with kickin’ collard greens or a bright citrus salad with avocado. When plating, arrange the colorful components thoughtfully—the vibrant bell peppers, green onions, and golden-brown chicken create a feast for the eyes. A final sprinkle of fresh thyme leaves and a squeeze of lime juice just before serving brightens all the flavors.

    Exciting Twists on the Classic Recipe

    This versatile recipe welcomes creative adaptations to suit your taste or what’s available in your pantry. Swap chicken for shrimp or salmon for a seafood version that cooks even faster. For a vegetarian option, substitute jerk-seasoned tofu, mushrooms, or roasted cauliflower. Play with the pasta shapes—fettuccine is traditional, but penne or rotini hold the sauce beautifully in their crevices. Add extra vegetables like zucchini or corn for more color and nutrition. For special occasions, a splash of dark rum in the sauce adds complexity and a touch of authentic island spirit.

    Storage & Troubleshooting Guide

    Keeping and Reheating for Maximum Flavor

    This Creamy Rasta Pasta with Jerk Chicken stores beautifully, making it perfect for meal prep. Refrigerate leftovers in an airtight container for up to 3 days. When reheating, add a splash of cream or coconut milk to revive the sauce, as pasta continues to absorb liquid while stored. For best results, reheat gently on the stovetop rather than microwave to prevent the sauce from separating. The flavors often deepen overnight, making day-two pasta sometimes even better than fresh! I don’t recommend freezing this dish, as cream-based sauces can become grainy when thawed.

    Fixing Common Recipe Challenges

    If your sauce seems too thin, simmer it a few minutes longer to reduce or add a teaspoon of cornstarch slurry (equal parts cornstarch and cold water mixed together). For sauce that’s too thick, thin with additional coconut milk or pasta water. If your jerk seasoning made the dish too spicy, balance it with more cream, a squeeze of lime juice, or serve with cooling sides like cucumber salad or mango chutney. For pasta that’s clumping together, always reserve some pasta water before draining and use it to loosen the sauce and pasta as needed. Remember that the dish will continue to thicken as it sits.

    Frequently Asked Questions

    Can I make Creamy Rasta Pasta with Jerk Chicken ahead of time?

    Yes! Prepare the components separately up to a day ahead. Store the jerk chicken and sauce separately, then reheat and combine with freshly cooked pasta when ready to serve.

    What’s the best pasta shape for Rasta Pasta?

    Fettuccine is traditional, but penne, rotini, or cavatappi work beautifully too. Choose shapes that will hold the creamy sauce in their ridges or curves.

    How can I adjust the spice level?

    Control heat by adjusting the amount of scotch bonnet/habanero peppers. For milder flavor, remove seeds and membranes or substitute with bell peppers while keeping the other jerk seasonings.

    Is there a dairy-free version of this recipe?

    Absolutely! Use full-fat coconut milk exclusively and substitute the butter with coconut oil. Skip Parmesan cheese or use nutritional yeast for a similar umami flavor.

    Can I use store-bought jerk seasoning for convenience?

    Yes, quality store-bought jerk seasoning works well. Look for versions with authentic ingredients like allspice, thyme, and scotch bonnet peppers for the most traditional flavor profile.

    Final Thoughts

    This Creamy Rasta Pasta with Jerk Chicken has become one of my most-requested recipes, bringing a taste of the Caribbean to countless family dinners. There’s something magical about how the spicy jerk flavors harmonize with the cooling cream sauce, creating a dish that’s both exciting and comforting. I hope you’ll try this recipe and let it transport you to island time, if only for one delicious meal. Don’t forget to check out more of my pasta recipes on Pinterest for endless inspiration!

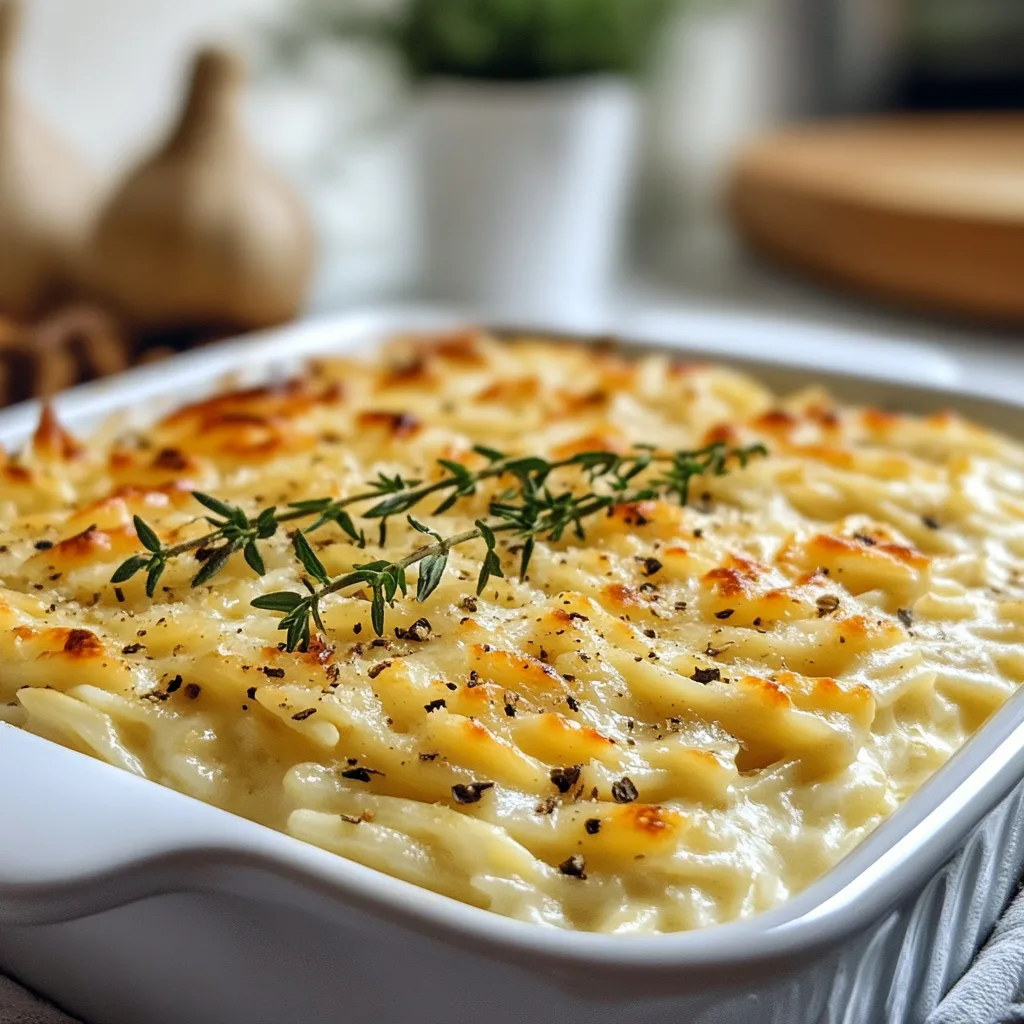
  • Creamy Cottage Cheese Baked Orzo with Roasted Garlic – Pure Comfort!

    Creamy Cottage Cheese Baked Orzo with Roasted Garlic – Pure Comfort!

    Creamy Cottage Cheese Baked Orzo with Roasted Garlic – Pure Comfort!

    Creamy Cottage Cheese Baked Orzo with Roasted Garlic has become my absolute go-to comfort dish when I want something that feels indulgent but isn’t overly heavy. The first time I made this, my kitchen filled with the most intoxicating aroma of roasted garlic and herbs that had my neighbor knocking at my door! There’s something magical about how the cottage cheese melts into the orzo, creating pockets of creamy goodness while maintaining its protein-packed benefits. This dish strikes that perfect balance between comforting and nourishing that makes it ideal for everything from cozy weeknight dinners to impressive entertaining. Trust me, this one’s a keeper!

    Recipe

    Why You’ll Love This Creamy Cottage Cheese Baked Orzo with Roasted Garlic

    Perfect Texture & Flavor Combination

    The magic of this dish lies in its incredible textural contrast. The orzo pasta bakes to a perfect al dente while surrounded by pockets of melty, creamy cottage cheese that creates an almost custard-like quality throughout. The roasted garlic adds deep, caramelized notes that transform the entire dish into something extraordinary. I love how the top layer gets slightly crispy while the inside stays lusciously creamy. The first time I served this at a dinner party, my friend Sarah actually closed her eyes while taking her first bite – that’s how good the sensory experience is! The herbs add fresh brightness that cuts through the richness perfectly.

    Nutritional Powerhouse That Doesn’t Sacrifice Flavor

    What makes this baked orzo truly special is how it manages to be both incredibly satisfying and nutritious. The cottage cheese provides a protein boost that transforms this from a simple pasta dish into a complete meal. With approximately 25g of protein per serving, it keeps you full for hours without weighing you down. I started making this during my busy work weeks when I needed something that would fuel my afternoons without causing that heavy, post-lunch crash.

    The calcium content is impressive too – about 30% of your daily needs in each serving! Plus, the roasted garlic isn’t just delicious; it’s packed with immune-boosting compounds that make this as good for your body as it is for your taste buds.

    Essential Tips & Tricks

    Perfecting Your Roasted Garlic

    Roasted garlic is the flavor foundation of this dish, so taking time to get it right makes all the difference. I prefer roasting a whole head of garlic rather than individual cloves – simply slice off the top, drizzle with olive oil, wrap in foil, and roast at 400°F for about 40 minutes until golden and butter-soft. The smell that fills your kitchen is worth the wait alone! For a deeper flavor, add a sprig of fresh thyme to the foil packet.

    Let the garlic cool slightly before squeezing the cloves out – they should slip right out of their papery skins. For busy weeknights, I often roast several heads on Sunday to use throughout the week, similar to how I prep ingredients for my Quick and Easy Creamy Mushroom Soup.

    Selecting & Preparing the Perfect Cottage Cheese

    The cottage cheese selection is crucial for achieving that dreamy, creamy texture. Look for a full-fat, small or medium curd variety for the best melting quality. If you’re watching calories, 2% works well too, but avoid fat-free versions as they won’t create the same luxurious texture. Before folding into the orzo, I recommend draining excess liquid if your cottage cheese seems watery – simply place it in a fine-mesh strainer for 15 minutes. For an extra-smooth consistency, pulse the cottage cheese in a food processor 3-4 times.

    This breaks down some of the curds while maintaining enough texture for those delightful creamy pockets. Season the cottage cheese directly with a pinch of salt and pepper before mixing for the most flavorful result.

    Serving Ideas & Creative Variations

    Seasonal Pairings & Side Dishes

    This versatile baked orzo works beautifully as both a main dish or a sophisticated side. In spring, I love serving it alongside roasted asparagus drizzled with lemon. Summer calls for a fresh tomato and basil salad to complement the creamy pasta. For fall gatherings, pair it with Broccoli with Garlic Butter and Cashews for a delightful textural contrast. During winter months, it’s perfect alongside slow-roasted chicken or as a vegetarian main with a side of glazed carrots. For entertaining, I serve it in individual ramekins for an elegant presentation. The dish holds its heat well, making it perfect for buffet-style serving. A sprinkle of fresh herbs just before serving brings a pop of color and freshness.

    Creative Flavor Twists & Add-Ins

    The beauty of this recipe is its adaptability to whatever ingredients you have on hand. For a Mediterranean twist, fold in chopped sun-dried tomatoes, kalamata olives, and crumbled feta instead of some of the cottage cheese. Spinach and artichoke hearts create a delicious variation reminiscent of the classic dip. For a protein boost, add shredded rotisserie chicken or sautéed shrimp. Mushroom lovers can fold in sautéed wild mushrooms for an earthy, umami-rich version. My personal favorite variation includes roasted butternut squash and crispy sage in the fall – the sweetness of the squash plays beautifully against the creamy, garlicky base. For heat lovers, a pinch of red pepper flakes or chopped jalapeños adds a welcome kick.

    Storage & Troubleshooting Guide

    Proper Storage & Reheating Methods

    This orzo dish is a meal-prepper’s dream as it stores beautifully for up to 4 days in the refrigerator in an airtight container. The flavors actually develop and deepen overnight, making leftovers something to look forward to! When reheating, add a splash of milk or broth to restore the creamy texture, as the pasta will absorb moisture during storage. Microwave on medium power with a damp paper towel over top to prevent drying.

    For best results, reheat in a 350°F oven for 15-20 minutes with a bit of extra cheese on top. While technically freezable for up to 2 months, the texture is best when fresh or refrigerated. If freezing, portion into individual servings and thaw overnight in the refrigerator before reheating.

    Fixing Common Issues

    If your orzo turns out too dry, the most common culprit is either too high a cooking temperature or too much time in the oven. Next time, try covering with foil for part of the baking time to trap moisture. For immediate fixing, stir in a few tablespoons of warm broth or cream. If your dish seems too wet, let it rest for 5-10 minutes after baking – the pasta will continue absorbing liquid. For separation issues with the cottage cheese, make sure you’re using a variety with at least 2% fat content. If the garlic flavor isn’t pronounced enough, try mashing the roasted cloves into a paste before mixing for more even distribution.

    For uneven cooking, ensure your baking dish conducts heat well – ceramic or enameled cast iron works best.

    Frequently Asked Questions

    Can I make Creamy Cottage Cheese Baked Orzo with Roasted Garlic ahead of time?

    Absolutely! Prepare everything up to the baking step, refrigerate covered for up to 24 hours, then add an extra 10 minutes to the baking time when ready to serve. The flavors actually develop beautifully overnight.

    Is there a substitute for cottage cheese?

    Ricotta works wonderfully as a substitute, though the texture will be slightly different. Greek yogurt can work in a pinch, but mix it with a bit of cream cheese for the best consistency.

    Can I use pre-minced garlic instead of roasting my own?

    Fresh roasted garlic provides an incomparable sweetness and depth. Pre-minced won’t achieve the same flavor, but in a time crunch, sauté 2 tablespoons in butter until fragrant before adding.

    What’s the best way to make this gluten-free?

    Simply substitute gluten-free orzo pasta. The cooking time may vary slightly, so check for doneness a few minutes earlier than the recipe suggests.

    How can I add more protein to this dish?

    Fold in shredded rotisserie chicken, sautéed shrimp, or white beans. For vegetarian options, add toasted pine nuts or chopped walnuts for extra protein and a pleasant crunch.

    Final Thoughts

    This Creamy Cottage Cheese Baked Orzo with Roasted Garlic has become a staple in my recipe collection for good reason. It strikes that perfect balance between everyday comfort food and special occasion worthy dish. I love how it transforms humble ingredients into something truly magnificent through simple techniques. The way the garlic perfumes the entire kitchen as it roasts is almost as rewarding as the first creamy, satisfying bite. Whether you’re cooking for yourself, your family, or guests, this versatile dish delivers both nourishment and joy – and isn’t that what the best food should do? For more inspiration, check out my Pinterest board for serving ideas!

  • Chimichurri Beef Tender Pot Roast – Juicy, Flavor-Packed Delight!

    Chimichurri Beef Tender Pot Roast – Juicy, Flavor-Packed Delight!

    Chimichurri Beef Tender Pot Roast - Juicy, Flavor-Packed Delight!

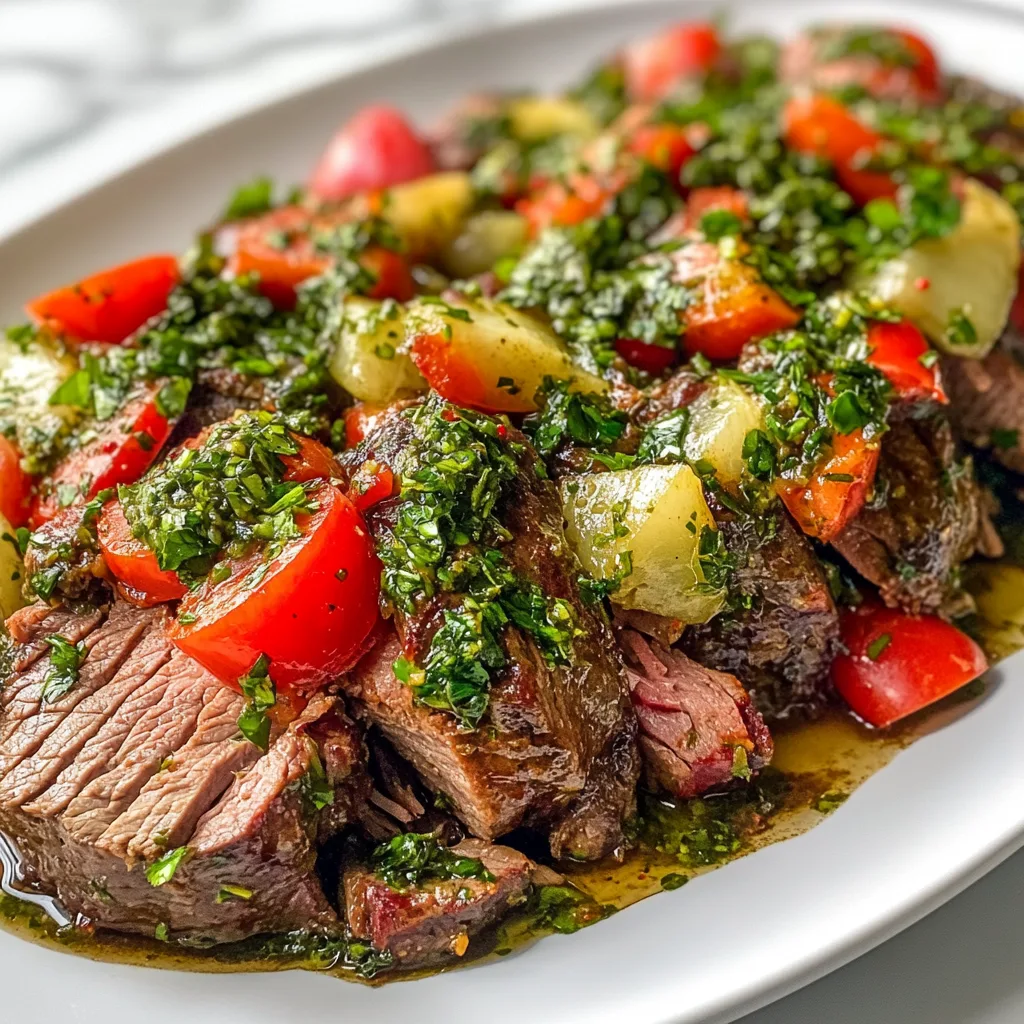
    Chimichurri Beef Tender Pot Roast transforms an ordinary Sunday dinner into something extraordinary. The first time I made this dish, the vibrant green chimichurri sauce drizzled over fork-tender beef created such a beautiful contrast that my family actually applauded before taking their first bite! There’s something magical about how the bright, herbaceous sauce cuts through the richness of a slow-cooked roast. I’ve perfected this recipe through countless family gatherings, and I’m thrilled to share my secrets for creating this show-stopping centerpiece that balances traditional comfort with unexpected zesty flavors.

    Recipe

    Why You’ll Love This Chimichurri Beef Tender Pot Roast

    Perfect Balance of Flavors

    The beauty of this Chimichurri Beef Tender Pot Roast lies in its contrasting elements. The beef develops deep, rich flavors during its long, slow cook, becoming meltingly tender as it bathes in savory broth. Meanwhile, the chimichurri sauce brings bright acidity and fresh herbal notes that wake up your taste buds. This isn’t your grandmother’s pot roast! The garlicky, slightly spicy chimichurri cuts through the richness of the beef, creating a perfect harmony that makes each bite more exciting than the last. It’s comfort food with a sophisticated twist.

    Impressive Yet Effortless

    Don’t let the stunning presentation fool you – this Chimichurri Beef Tender Pot Roast is remarkably simple to prepare. The hands-on work takes just 20 minutes, then your slow cooker or Dutch oven does all the heavy lifting. I often prep this before Sunday church, and return to a house filled with mouthwatering aromas. The chimichurri sauce comes together in minutes with fresh herbs and a food processor. When guests ask for your secret, you’ll smile knowing how little effort it actually took. It’s my go-to recipe when I want to impress without spending hours in the kitchen.

    Essential Tips & Tricks

    Choosing and Preparing the Perfect Cut

    For an exceptional Chimichurri Beef Tender Pot Roast, start with the right cut of meat. I recommend a chuck roast or bottom round, as they have the perfect amount of marbling that melts during cooking, creating that fall-apart tenderness we crave. Before cooking, bring your roast to room temperature (about 30 minutes) and season generously with salt and pepper. Don’t skip the initial searing step! Those caramelized edges create rich flavor compounds that infuse the entire roast. Like my Slow Cooker Beef Stroganoff, this step makes all the difference in depth of flavor.

    Mastering the Chimichurri Sauce

    The chimichurri sauce is the crown jewel of this dish, so use the freshest herbs possible. Traditional chimichurri uses parsley, but I love adding cilantro for complexity. Pulse rather than purée your herbs—you want texture, not a smooth paste. Make the sauce at least 30 minutes before serving to allow the flavors to meld, but for maximum vibrancy, don’t make it more than a few hours ahead. The raw garlic becomes increasingly powerful over time. Taste before serving and adjust with a splash of vinegar if it needs more brightness or a drizzle of olive oil if it’s too acidic.

    Serving Ideas & Creative Variations

    Perfect Pairings for a Complete Meal

    Chimichurri Beef Tender Pot Roast pairs beautifully with sides that can soak up its flavorful juices. Creamy mashed potatoes are my family’s favorite, but roasted fingerlings or crusty bread work wonderfully too. For vegetables, try my Broccoli with Garlic Butter and Cashews for an elegant touch. A simple green salad with vinaigrette provides a refreshing contrast to the rich beef. If you’re serving wine, a medium-bodied Malbec or Tempranillo complements the chimichurri’s herbal notes. For a complete presentation, serve the roast on a wooden board with the sauce in a small bowl alongside, allowing guests to add as much as they desire.

    Exciting Twist Options

    While traditional chimichurri is perfection, don’t be afraid to experiment! Add roasted red peppers to the sauce for sweetness and color, or substitute half the parsley with mint for a cooling effect. For a Mexican-inspired variation, use adobo seasoning on the beef and add lime zest to the chimichurri. Leftover roast makes incredible sandwiches—layer thin slices on crusty bread with chimichurri, provolone, and caramelized onions. You can also transform extras into tacos with avocado and quick-pickled red onions, or toss with pasta and a splash of cream for a luxurious next-day dinner.

    Storage & Troubleshooting Guide

    Keeping It Fresh

    To maintain the quality of your Chimichurri Beef Tender Pot Roast, store the beef and sauce separately. The cooked beef will keep in an airtight container in the refrigerator for up to 4 days. For the chimichurri sauce, add a thin layer of olive oil on top before refrigerating to prevent oxidation—this keeps it vibrant for 2-3 days. When freezing leftover beef, slice it first and store with some of the cooking liquid to prevent dryness. Thaw overnight in the refrigerator for best texture. While the sauce can be frozen in ice cube trays, fresh is always best—I prefer making a new batch rather than freezing.

    Solving Common Issues

    If your pot roast isn’t as tender as expected, it likely needs more time. Unlike steaks, tough cuts become more tender with extended cooking. Return it to the pot with additional liquid and continue cooking until it passes the fork test. For sauce that’s too pungent, add more olive oil and herbs to dilute the garlic and vinegar. If your chimichurri separates or looks oily, simply whisk it vigorously before serving. And if the beef seems bland, don’t just add salt—try enhancing with a splash of Worcestershire sauce or beef bouillon, which adds depth without overwhelming the meat’s natural flavor.

    Frequently Asked Questions

    What cut of beef works best for Chimichurri Beef Tender Pot Roast?

    Chuck roast is ideal for its marbling and connective tissue that breaks down during slow cooking. Bottom round or brisket are excellent alternatives that become wonderfully tender with proper cooking time.

    Can I make chimichurri sauce ahead of time?

    Yes, but it’s best prepared 1-2 hours before serving. The flavors meld nicely in this timeframe without the garlic becoming overpowering. Store in the refrigerator with a thin layer of olive oil on top.

    How do I know when my pot roast is done?

    The beef should easily shred with two forks and reach an internal temperature of 195-205°F. If there’s resistance when pulling with a fork, continue cooking—it’s not done yet.

    What’s the difference between chimichurri and pesto?

    Chimichurri uses parsley and/or cilantro with red wine vinegar for tanginess, while pesto features basil, pine nuts, and cheese. Chimichurri is looser in texture and has a brighter, more acidic profile.

    Can I make Chimichurri Beef Tender Pot Roast in an Instant Pot?

    Absolutely! Cook on high pressure for 60-70 minutes (depending on size), followed by a 15-minute natural release. Make the chimichurri while it cooks for a quick but impressive meal.

    Final Thoughts

    This Chimichurri Beef Tender Pot Roast has become my signature dish for good reason. The contrast between the rich, meltingly tender beef and the vibrant, zesty chimichurri creates a memorable dining experience that feels both comforting and special. I love watching guests’ expressions as they taste that first perfect bite! Whether for Sunday family dinner or a celebration-worthy meal, this recipe strikes the perfect balance between impressive and achievable. Visit my Pinterest for more inspiration and let me know how your Chimichurri Beef Tender Pot Roast turns out!

  • Buckwheat Kasha with Caramelized Mushrooms & Onions Recipe

    Buckwheat Kasha with Caramelized Mushrooms & Onions Recipe

    Buckwheat Kasha with Caramelized Mushrooms & Onions Recipe

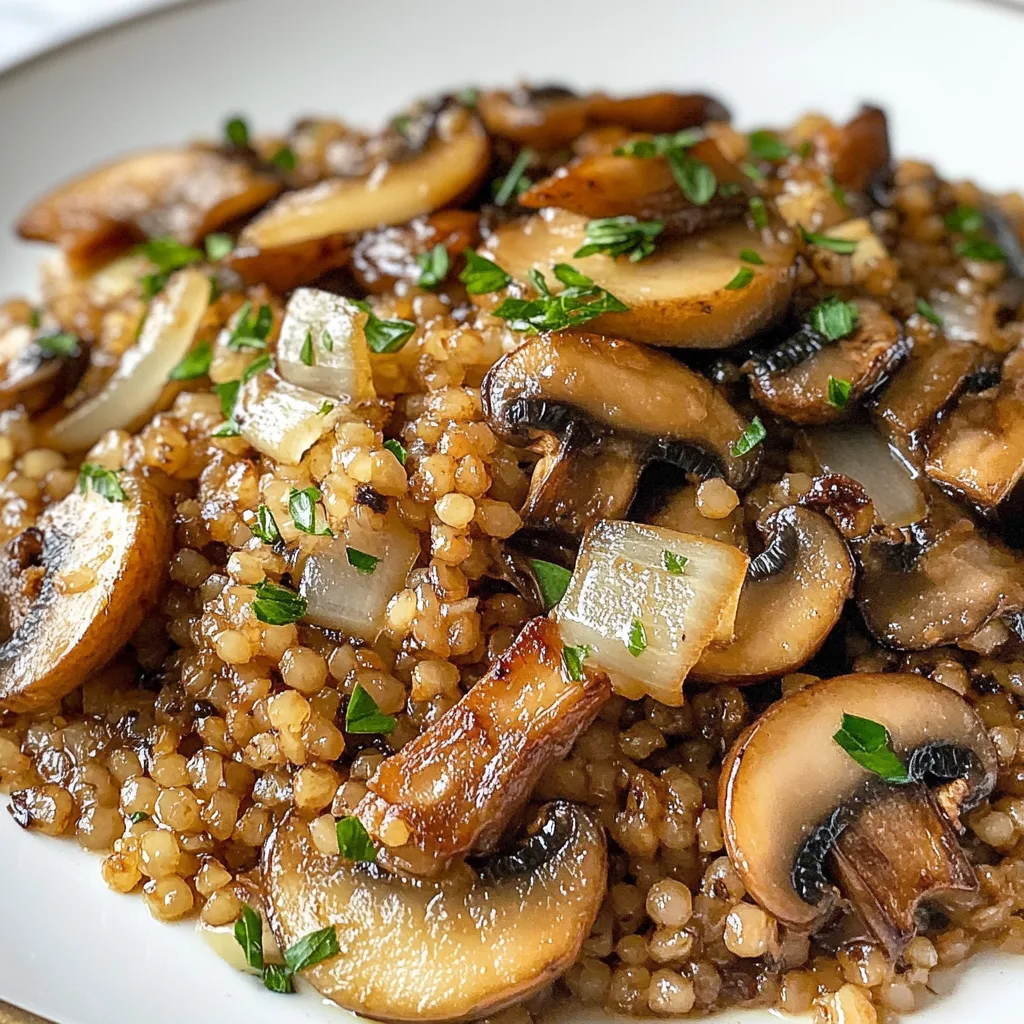
    Buckwheat Kasha With Caramelized Mushrooms And Onions brings rustic Eastern European comfort food right to your dinner table. The first time I made this dish, the nutty aroma of toasted buckwheat filled my kitchen, instantly transporting me back to my grandmother’s cozy dining room. There’s something magical about the way the earthy buckwheat pairs with sweet caramelized onions and umami-rich mushrooms. This hearty, gluten-free dish delivers both incredible flavor and satisfying texture that will have you reaching for seconds. Perfect for chilly evenings when you need something substantial yet nourishing to warm your soul.

    Recipe

    Why You’ll Love This Buckwheat Kasha With Caramelized Mushrooms And Onions

    A Nutritional Powerhouse with Incredible Flavor

    Buckwheat isn’t actually wheat at all – it’s a seed that’s packed with protein, fiber, and essential minerals. When toasted and cooked into kasha, it develops a nutty intensity that forms the perfect canvas for other flavors. The caramelization process transforms ordinary mushrooms and onions into sweet, complex delights that complement the earthy buckwheat perfectly. I love how this dish satisfies my comfort food cravings while still being incredibly nutritious. The combination of protein from the buckwheat and the rich umami from mushrooms creates a deeply satisfying meal that keeps you full for hours.

    Quick Weeknight Dinner with Gourmet Results

    Despite its impressive flavor profile, this buckwheat kasha comes together in just about 30 minutes, making it perfect for busy weeknights. The hands-off cooking approach means you can caramelize the onions and mushrooms while the buckwheat simmers away. I often prep the vegetables while waiting for my kettle to boil, maximizing efficiency without sacrificing flavor. What I appreciate most is how this humble dish transforms basic ingredients into something that tastes like it took hours to prepare. Your family will think you’ve been slaving away all afternoon when you’ve actually been relaxing with a cup of tea!

    Essential Tips & Tricks

    Perfecting the Buckwheat Texture

    The secret to perfect buckwheat kasha is in the toasting step – don’t skip it! Dry-toasting the groats in a skillet until they’re fragrant and golden develops their nutty flavor and helps maintain the perfect texture. I learned the hard way that adding too much liquid results in mushy kasha, so stick with a 1:2 ratio of buckwheat to liquid. For extra flavor, try using vegetable or mushroom broth instead of water. Another game-changer is letting the cooked kasha rest, covered, for 5-10 minutes after cooking. This allows the grains to fully absorb any remaining moisture and achieve that perfect tender-but-distinct texture that makes quick and easy creamy mushroom soup so satisfying.

    Mastering Caramelized Mushrooms and Onions

    Patience is key when caramelizing onions and mushrooms. Use a heavy-bottomed pan and medium-low heat to slowly draw out their natural sugars without burning them. I like to start with the onions, giving them a 5-minute head start before adding mushrooms since they take longer to caramelize. Don’t crowd the pan – mushrooms release moisture when cooking, and overcrowding prevents proper caramelization. Season with salt early to help draw out moisture, but add garlic and herbs only in the final few minutes to prevent burning. For an extra flavor boost, deglaze the pan with a splash of white wine or sherry vinegar to scrape up those delicious browned bits before combining with the kasha.

    Serving Ideas & Creative Variations

    Perfect Pairings for a Complete Meal

    Buckwheat kasha with caramelized mushrooms and onions works beautifully as a hearty side dish or a satisfying main. For protein, try topping it with a fried egg with a runny yolk that creates a luscious sauce when broken. Alternatively, serve alongside roasted chicken or grilled sausages for a more substantial meal. For a refreshing contrast, pair with a simple green salad dressed with lemon vinaigrette. The bright acidity cuts through the earthy richness of the kasha. During colder months, I love serving this alongside broccoli with garlic butter and cashews for a complete vegetarian feast that satisfies even dedicated meat-eaters.

    Seasonal and Regional Adaptations

    This versatile dish welcomes seasonal adaptations throughout the year. In spring, add tender asparagus tips or fresh peas in the last few minutes of cooking. Summer calls for zucchini and bell peppers caramelized alongside the mushrooms and onions. Fall is perfect for incorporating roasted butternut squash or sweet potatoes. For regional variations, try a Russian-inspired version with dill and a dollop of sour cream, or go Hungarian with paprika and caraway seeds. I’ve even created a Mediterranean version with sun-dried tomatoes, olives, and feta cheese sprinkled on top. The possibilities are endless, making this humble dish a year-round staple in my kitchen.

    Storage & Troubleshooting Guide

    Proper Storage for Maximum Freshness

    Buckwheat kasha with caramelized mushrooms and onions stores beautifully, often tasting even better the next day as the flavors meld together. Store leftovers in an airtight container in the refrigerator for up to 4 days. When reheating, add a splash of broth or water to prevent dryness, and warm gently on the stovetop or microwave. For meal prep, you can freeze portions in freezer-safe containers for up to 3 months. I like to portion mine into individual servings for quick lunches. Thaw overnight in the refrigerator before reheating. The texture may change slightly after freezing, but a drizzle of olive oil and fresh herbs will revive it beautifully.

    Troubleshooting Common Issues

    If your kasha turns out too mushy, you likely used too much liquid or overcooked it. Next time, reduce the liquid by about ¼ cup and check for doneness earlier. For too-dry kasha, simply add a splash more hot broth and fluff with a fork. If your mushrooms aren’t caramelizing properly, they’re probably overcrowded in the pan – cook them in batches if necessary. For bland results, boost flavor with umami-rich ingredients like soy sauce, nutritional yeast, or even a tiny bit of miso paste. If the dish seems heavy, brighten it with a squeeze of lemon juice or a sprinkle of fresh herbs just before serving. Remember that buckwheat has a distinctive flavor that some may need time to appreciate.

    Frequently Asked Questions

    What is buckwheat kasha and is it gluten-free?

    Kasha is toasted buckwheat groats. Despite its name, buckwheat isn’t related to wheat but is a seed from a flowering plant. It’s naturally gluten-free, making it perfect for those with celiac disease or gluten sensitivity.

    Can I make buckwheat kasha with caramelized mushrooms and onions ahead of time?

    Absolutely! This dish actually improves with time as flavors meld. Make it up to 2 days ahead and refrigerate. Reheat gently with a splash of broth to refresh the texture.

    What mushrooms work best in this recipe?

    Button or cremini mushrooms are most accessible and work perfectly. For more complex flavor, try a mix including shiitake, oyster, or porcini mushrooms. Wild mushrooms add exceptional depth.

    Is buckwheat kasha nutritious?

    Very! Buckwheat is high in protein, fiber, and minerals like manganese, copper, and magnesium. It also contains resistant starch, which benefits gut health and helps stabilize blood sugar.

    Can I make this dish vegan?

    Yes! The basic buckwheat kasha with caramelized mushrooms and onions is naturally vegan. Just ensure you use vegetable broth and olive oil or plant-based butter for cooking.

    Final Thoughts

    Buckwheat Kasha With Caramelized Mushrooms And Onions represents comfort food at its finest – nutritious, satisfying, and deeply flavorful. There’s something special about transforming simple ingredients into a dish that nourishes both body and soul. I hope you’ll give this recipe a chance to shine at your table. Whether served as a hearty side or a satisfying main, this versatile dish deserves a regular spot in your meal rotation. Don’t forget to check out more cozy recipes on Pinterest for inspiration!