Category: Dinner

Easy, tasty dinner ideas for busy nights. Simple recipes, quick prep, and family-friendly meals you’ll make again and again.

  • Spinach Mushroom Spaghetti Recipe That Will Blow Your Mind!

    Spinach Mushroom Spaghetti Recipe That Will Blow Your Mind!

    Spinach Mushroom Spaghetti Recipe That Will Blow Your Mind!

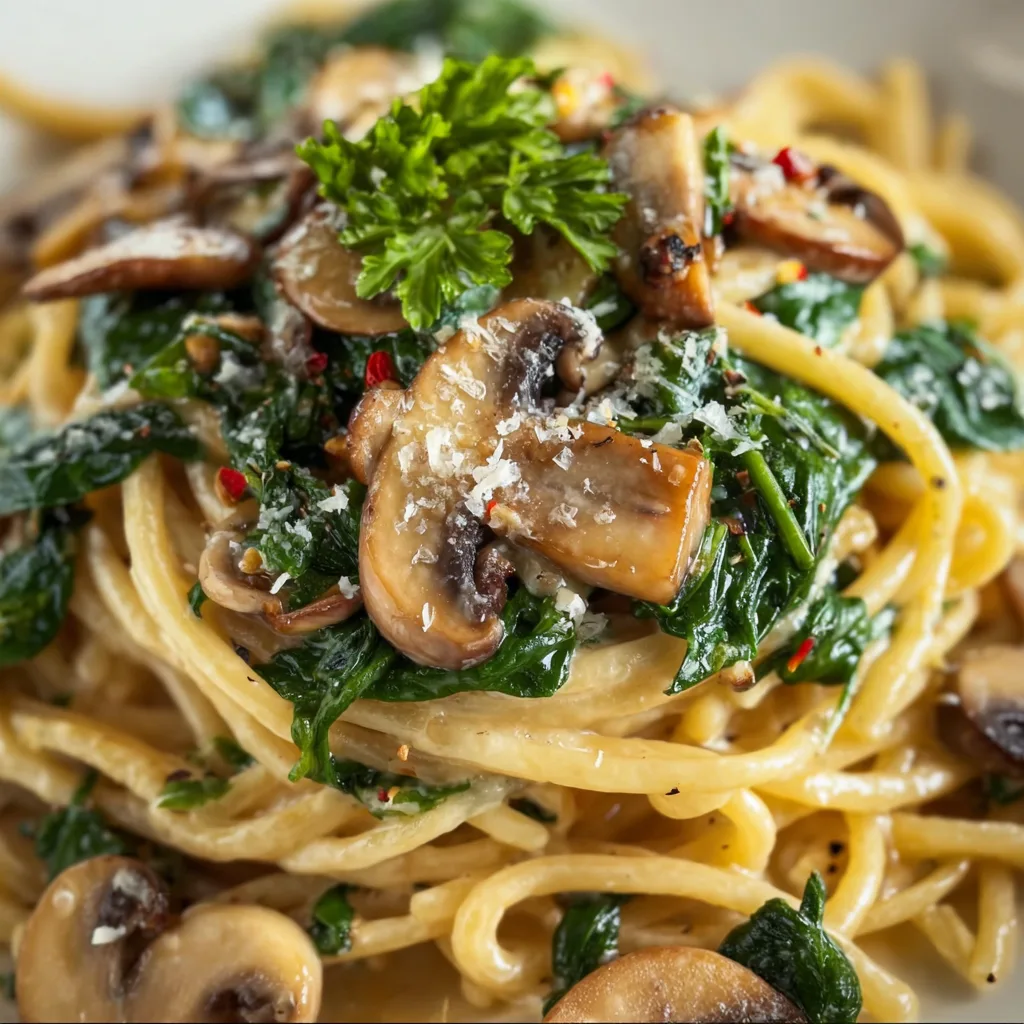
    There’s something magical about a steaming plate of Spinach Mushroom spaghetti that speaks to my soul on chilly evenings. The earthy mushrooms, vibrant spinach, and al dente pasta strands come together in a symphony of flavors that feels both indulgent and nourishing. I first created this recipe during a rainy weekend when the cupboard was nearly bare, and it’s since become my go-to comfort meal. The way the garlic-infused olive oil coats each strand of spaghetti makes this simple dish feel like a warm hug in pasta form. Best of all, it comes together in under 30 minutes—perfect for those evenings when you crave something delicious but effortless.

    Recipe

    Why You’ll Love This Spinach Mushroom spaghetti

    A Perfect Balance of Flavors and Textures

    There’s something incredibly satisfying about the textural contrast in this dish—tender spinach wilts into silky ribbons while the mushrooms maintain that perfect meaty bite. I love how the earthy mushrooms develop a beautiful caramelization when properly sautéed, creating deep umami notes that elevate the entire dish. The spinach adds brightness, color, and a gentle sweetness that balances the savory elements. When these ingredients mingle with perfectly cooked spaghetti and that garlicky olive oil base, each twirl of your fork delivers a perfect bite that feels both comforting and sophisticated.

    Quick, Nutritious, and Budget-Friendly

    This Spinach Mushroom spaghetti has saved my weeknight dinner plans more times than I can count. It requires just a handful of ingredients that I typically have on hand, making it incredibly budget-friendly. The combination of mushrooms and spinach packs serious nutritional value—fiber, vitamins, and minerals—while keeping the calorie count reasonable. I love that I can have a complete, satisfying meal on the table in about 25 minutes, from chopping to plating. On particularly hectic evenings, I’ve been known to prep the vegetables earlier in the day, making the actual cooking process even faster.

    Essential Tips & Tricks

    Perfecting Your Mushroom Technique

    The secret to exceptional Spinach Mushroom spaghetti lies in how you handle those mushrooms. First, never wash mushrooms under running water—they’re like little sponges and will absorb too much moisture. Instead, wipe them gently with a damp paper towel. When cooking, give them space in the pan and resist the urge to stir constantly. Let them develop a golden-brown crust before flipping. This patient approach creates that gorgeous caramelization that transforms basic button mushrooms into flavor powerhouses. I learned this technique after years of rushing the process and wondering why my mushrooms lacked depth.

    Creating the Perfect Sauce Base

    The foundation of this dish is a simple but flavor-packed sauce that coats every strand of spaghetti perfectly. Start with quality olive oil and fresh garlic—this isn’t the place for the pre-minced stuff. Allow the garlic to gently infuse the oil without browning, which creates bitterness. A splash of white wine or pasta water creates the perfect light sauce that carries the flavors without heaviness. For an extra dimension, consider adding a touch of cream or a sprinkle of red pepper flakes for heat. Remember to reserve some pasta water—that starchy liquid is liquid gold for binding your sauce.

    Serving Ideas & Creative Variations

    Elegant Presentation Touches

    Transform this humble Spinach Mushroom spaghetti into a dinner-party worthy dish with a few simple presentation upgrades. A dramatic swirl of pasta in the center of a wide, shallow bowl creates an impressive foundation. Top with additional sautéed mushrooms and a few fresh spinach leaves for color contrast. A light dusting of microplaned Parmesan creates a snow-like effect that melts beautifully into the warm pasta. For special occasions, I love adding a drizzle of truffle oil or balsamic glaze in a thin spiral pattern. These small touches elevate the visual appeal without requiring additional cooking skills.

    Delicious Flavor Variations

    While the classic version of this dish is perfection, I love experimenting with different flavor profiles. For a Mediterranean twist, add sun-dried tomatoes, kalamata olives, and crumbled feta cheese. Craving something heartier? Incorporate Italian sausage or pancetta for richness. For a creamy variation, stir in a spoonful of mascarpone or cream cheese just before serving. Plant-based diners can add protein with white beans or chickpeas. My personal favorite variation includes wild mushroom varieties like oyster or shiitake mixed with the standard cremini—the complex flavor profile is worth the splurge for special occasions.

    Storage & Troubleshooting Guide

    Proper Storage for Leftovers

    This Spinach Mushroom spaghetti makes excellent leftovers when stored properly. Allow the pasta to cool completely before transferring to an airtight container—this prevents condensation that can make pasta soggy. Refrigerate for up to three days. When reheating, add a splash of water or broth to revive the sauce, as pasta tends to absorb liquid as it sits. For the best texture, reheat gently in a skillet rather than the microwave. The flavors actually develop beautifully overnight, making day-two pasta sometimes even better than the original. I often make a double batch specifically to enjoy these enhanced next-day flavors.

    Troubleshooting Common Issues

    Even experienced cooks encounter challenges with pasta dishes. If your Spinach Mushroom spaghetti turns out too dry, the solution is simple: add reserved pasta water a tablespoon at a time until you reach your desired consistency. Dealing with clumpy pasta? Be sure to stir frequently during cooking and add a drizzle of olive oil to the cooking water. If your mushrooms released too much liquid and created a watery sauce, continue cooking uncovered until it reduces to your preferred thickness. For spinach that turned slimy rather than silky, try adding it at the very last minute, letting the residual heat wilt it gently.

    Frequently Asked Questions

    Can I use frozen spinach in this Spinach Mushroom spaghetti?

    Yes, but thaw and squeeze out excess moisture first. Use about 1/3 the quantity of frozen compared to fresh spinach, as it’s more concentrated. Add it to the pan slightly earlier than fresh to ensure it heats thoroughly.

    What mushroom varieties work best?

    Cremini (baby bella) mushrooms offer the best flavor-to-price ratio. White button mushrooms work well too, while shiitake, oyster, or portobello add more complex flavors for special occasions. A mixture creates interesting texture variations.

    Can I make this dish ahead of time?

    I recommend preparing components separately if making ahead. Cook pasta al dente, rinse with cool water, and toss with olive oil. Sauté mushrooms and store separately. Combine and add fresh spinach when reheating for best results.

    Is this recipe suitable for vegans?

    Absolutely! The base recipe is naturally vegan if you skip the Parmesan. For added richness, nutritional yeast makes an excellent substitute, providing that savory, cheesy flavor without dairy products.

    How can I add protein to this dish?

    White beans, chickpeas, or tofu work beautifully for plant-based options. For non-vegetarians, grilled chicken, Italian sausage, or shrimp complement the flavors perfectly. Just cook protein separately and add when combining ingredients.

    Final Thoughts

    This Spinach Mushroom spaghetti has become my kitchen salvation on countless occasions—elegant enough for impromptu dinner guests yet simple enough for Tuesday night dinner. The magic lies in respecting each ingredient: perfectly cooked pasta, caramelized mushrooms, and just-wilted spinach coming together in harmonious balance. I hope this recipe brings the same comfort and joy to your table that it has to mine. Remember that cooking is about making something that satisfies your soul as much as your appetite. For more pasta inspiration, visit our Pinterest board where we share new recipes weekly!
  • Cheeseburger Pasta Skillet: Irresistibly Easy Comfort Food Delight

    Cheeseburger Pasta Skillet: Irresistibly Easy Comfort Food Delight

    Cheeseburger Pasta Skillet: Irresistibly Easy Comfort Food Delight

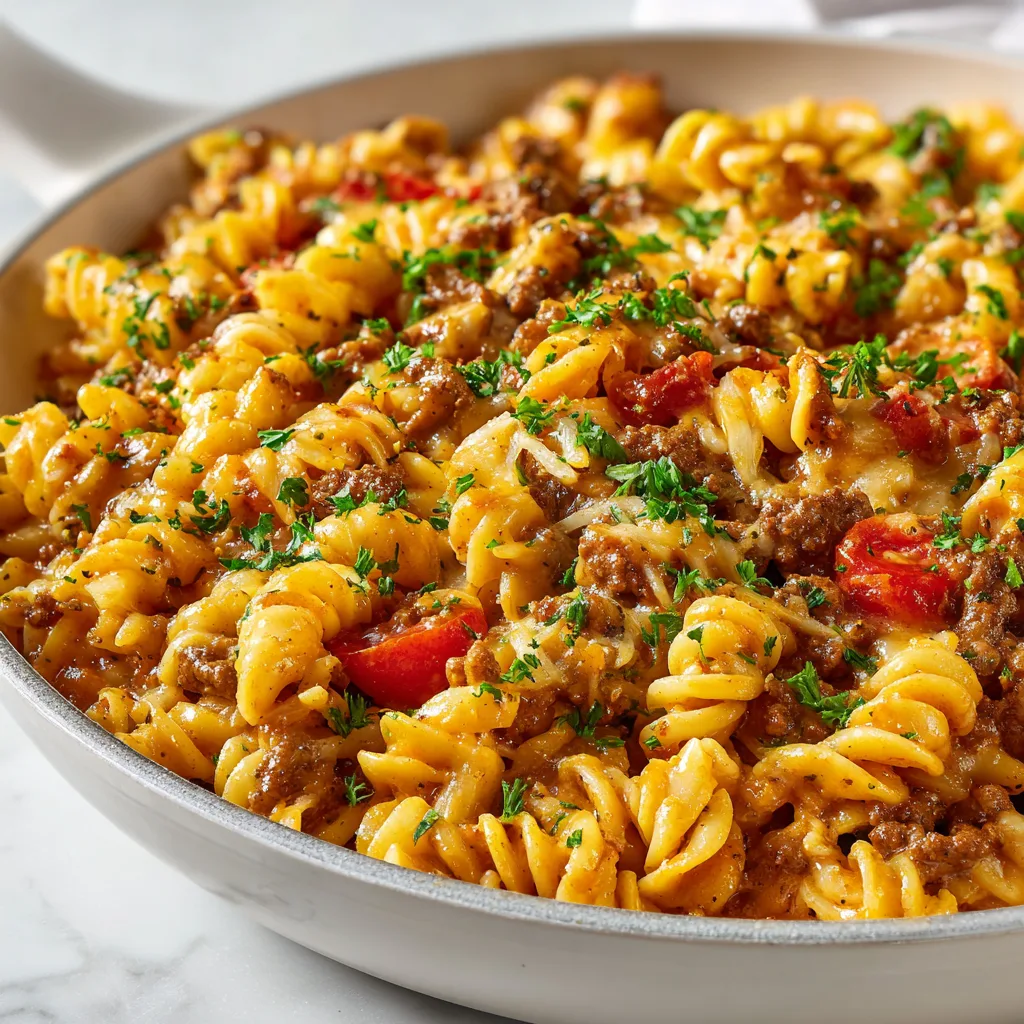
    Cheeseburger pasta skillet combines two comfort food favorites into one irresistible meal that’s ready in under 30 minutes. The first time I made this dish, my kitchen filled with the savory aroma of seasoned beef and melting cheese, instantly transporting me back to family dinners where we’d gather around sizzling skillets of goodness. There’s something magical about the way pasta soaks up all those juicy burger flavors, creating a dish that satisfies both pasta lovers and burger enthusiasts alike. If you’re looking for a weeknight dinner that brings smiles to the table, this creamy one-pot wonder deserves a permanent spot in your recipe collection.

    Recipe

    Why You’ll Love This Cheeseburger Pasta Skillet

    Perfect One-Pot Convenience

    This cheeseburger pasta skillet truly shines in its simplicity. Everything cooks in a single pan, which means minimal cleanup afterward—music to my ears after a long day! The pasta cooks directly in the seasoned beef broth, absorbing all those rich flavors while creating a naturally creamy sauce. I still remember the first time I made this for my sister who hates doing dishes; her eyes lit up not just from the delicious taste but when she realized there was only one pan to wash. The convenience factor alone makes this recipe worth its weight in gold for busy weeknights when you want something hearty without the hassle.

    Family-Friendly Flavor Profile

    If you’re cooking for picky eaters, this cheeseburger pasta skillet is your new secret weapon. The familiar burger flavors transform ordinary pasta into something extraordinary that even the most selective family members will devour. My nephew, who normally picks around vegetables, happily gobbles this up—even with diced onions and tomatoes mixed in! The melted cheese creates that gooey, comforting texture kids love, while the seasoned beef provides the satisfying richness adults crave. It’s that rare unicorn of a recipe that bridges the gap between sophisticated flavor and kid-approved comfort food, making dinner time peaceful instead of a battlefield.

    Essential Tips & Tricks

    Choosing the Right Pasta

    The pasta you select can make or break this dish. Short, sturdy shapes like elbow macaroni, rotini, or medium shells work best because they catch all that delicious sauce in their nooks and crannies. Avoid long pasta like spaghetti, which can be unwieldy in a skillet dish. I once attempted this recipe with angel hair pasta (big mistake!) and ended up with a clumpy mess. The pasta should be able to withstand the entire cooking process without breaking down or becoming mushy. For an extra nutrition boost, try whole wheat pasta—it adds a nutty flavor that complements the beef beautifully, just like in my honey pepper chicken mac & cheese.

    Perfecting the Cheese Blend

    The cheese is not just a topping—it’s an essential component that creates that authentic cheeseburger experience. For best results, use freshly shredded cheese rather than pre-packaged varieties, which often contain anti-caking agents that prevent proper melting. I prefer a combination of sharp cheddar for flavor and mozzarella or American cheese for that stretchy, gooey texture. Add the cheese in two stages: stir some into the hot pasta to create a creamy sauce, then sprinkle the remainder on top and cover briefly to melt. This two-step approach ensures maximum cheesy goodness throughout the entire dish.

    Serving Ideas & Creative Variations

    Burger-Inspired Toppings

    Transform your cheeseburger pasta skillet into a truly customizable experience by setting up a topping bar with all the classic burger fixings. Crispy bacon bits, diced pickles, fresh tomatoes, and shredded lettuce allow everyone to garnish their portion exactly how they like their burgers. I started doing this for family dinner nights, and it’s become our favorite way to serve this dish. A drizzle of special sauce (mix mayo, ketchup, and a dash of pickle juice) takes it to the next level. For a fun presentation, serve in individual bowls with toasted sesame seed buns on the side, just like you might enjoy with homemade Big Mac wraps.

    Global Flavor Twists

    While the classic American cheeseburger flavor is delicious, don’t be afraid to experiment with international variations. For a Mexican-inspired version, add taco seasoning instead of burger seasoning, mix in black beans and corn, then top with avocado and cilantro. My personal favorite is the Italian twist—incorporate Italian seasoning, sun-dried tomatoes, and finish with fresh basil and a dollop of ricotta. For an Asian-fusion approach, try adding a splash of soy sauce, ginger, and green onions to the beef, then garnish with sesame seeds. These variations keep the dish exciting when it becomes a regular in your meal rotation.

    Storage & Troubleshooting Guide

    Proper Storage Techniques

    This cheeseburger pasta skillet makes excellent leftovers if stored correctly. Allow the dish to cool completely before transferring to airtight containers—this prevents condensation that could make the pasta soggy. Refrigerate for up to 3-4 days for best quality. When reheating, add a splash of beef broth or milk to revive the creamy texture, as the pasta will have absorbed much of the sauce overnight. For freezing portions, slightly undercook the pasta initially, as it will soften during the thawing and reheating process. I often make a double batch specifically to freeze individual portions for quick lunches when I’m working from home.

    Fixing Common Issues

    Even experienced cooks occasionally encounter challenges with one-pot pasta dishes. If your sauce seems too watery, simply simmer uncovered for a few extra minutes to reduce the liquid. Conversely, if the pasta has absorbed too much liquid and seems dry, add ¼ cup of beef broth or milk and gently stir to incorporate. For pasta that’s still too firm after the recommended cooking time, add ¼ cup more liquid, cover, and cook for an additional 2-3 minutes. And if your cheese has become stringy rather than creamy, try lowering the heat and adding a splash of cream while stirring constantly—this usually smooths out the sauce beautifully.

    Frequently Asked Questions

    Can I use ground turkey instead of beef in the cheeseburger pasta skillet?

    Absolutely! Ground turkey works wonderfully as a leaner alternative. Add 1-2 teaspoons of Worcestershire sauce to enhance the savory flavor that beef naturally provides. Turkey may release less fat, so you might need a touch more oil when browning.

    How can I make this recipe gluten-free?

    Simply substitute your favorite gluten-free pasta and ensure your broth and seasonings are certified gluten-free. Gluten-free pasta often requires less cooking time, so check for doneness about 2 minutes earlier than the recipe suggests.

    Can I prep this cheeseburger pasta skillet ahead of time?

    You can brown the meat with onions and garlic up to two days ahead. Store refrigerated, then continue with the recipe when ready to serve, adding a few extra minutes to heat the meat mixture thoroughly.

    What vegetables can I add to make this more nutritious?

    Bell peppers, zucchini, spinach, and mushrooms all work beautifully. Add firmer vegetables like peppers when sautéing the onions, and stir in leafy greens like spinach during the last minute of cooking.

    Why is my sauce separating or looking grainy?

    This usually happens when cheese is added to too high heat. Always remove the skillet from direct heat for 1-2 minutes before adding cheese, and use freshly shredded cheese for the smoothest results.

    Final Thoughts

    This cheeseburger pasta skillet has become my go-to recipe when I need comfort food that doesn’t require hours in the kitchen. There’s something magical about transforming simple ingredients into a meal that feels like a warm hug at the end of a long day. The beauty lies in its versatility—dress it up for guests or keep it simple for a weeknight dinner. I’d love to see your versions of this dish on Pinterest! However you customize your cheeseburger pasta skillet, I guarantee it will bring that special combination of nostalgia and novelty to your dinner table.

  • Crispy Baked Chicken Wings: Irresistibly Crunchy & Juicy Delight!

    Crispy Baked Chicken Wings: Irresistibly Crunchy & Juicy Delight!

    Crispy Baked Chicken Wings: Irresistibly Crunchy & Juicy Delight!

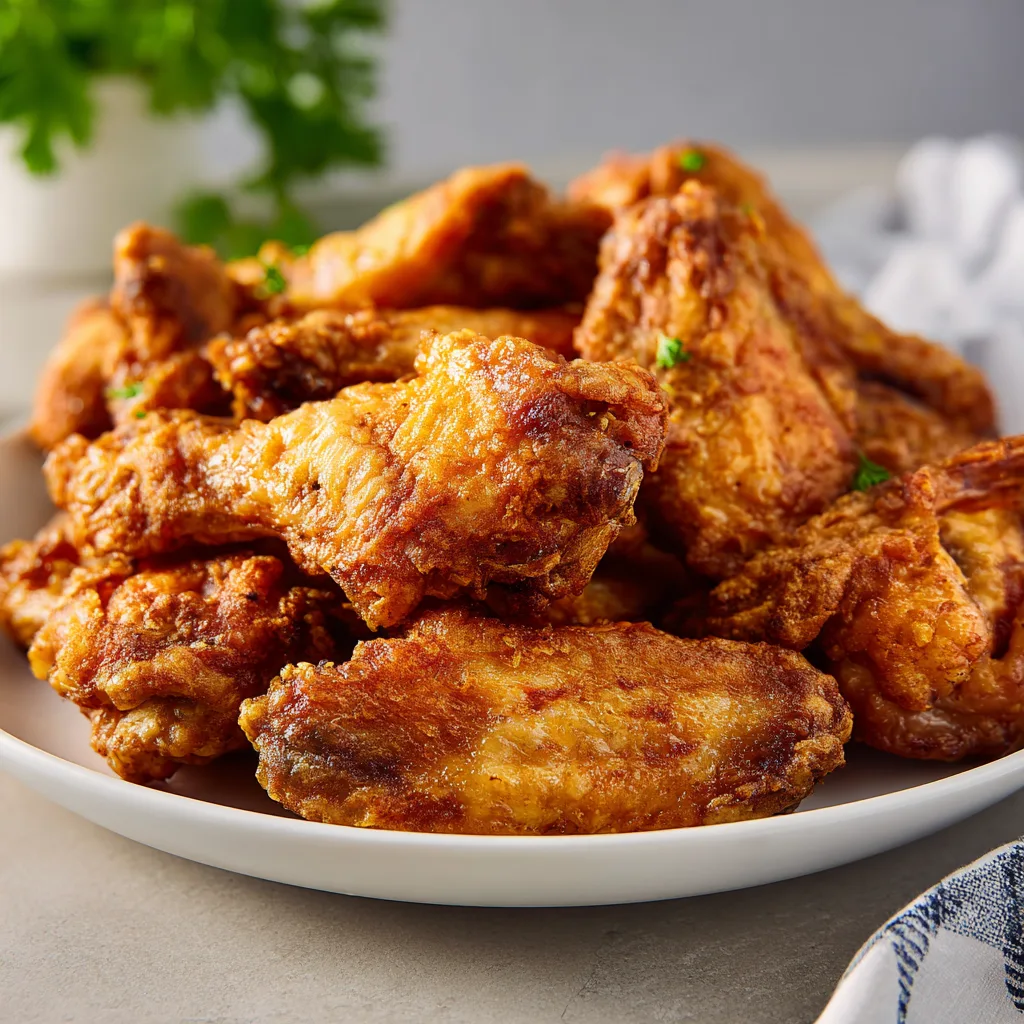
    Crispy Baked Chicken Wings have become my absolute obsession lately. There’s something magical about that perfect crunch giving way to tender, juicy meat underneath—without the mess and guilt of deep-frying! I’ve tested countless methods in my kitchen, and I’m thrilled to share the secrets I’ve discovered for achieving that coveted restaurant-quality crispiness right in your home oven. Whether you’re planning game day snacks or just craving something deliciously satisfying, these wings deliver that irresistible texture that’ll have everyone reaching for seconds. Check out my pesto chicken flatbreads for another crowd-pleasing option!

    Recipe

    Why You’ll Love These Crispy Baked Chicken Wings

    Perfect Texture Without Deep Frying

    The secret technique I’m sharing creates that coveted crispy exterior while keeping the inside perfectly juicy. By patting the wings completely dry and using a special coating mixture with baking powder (not soda!), you’ll achieve a texture that rivals any deep-fried version. I still remember the first time I tried this method—my husband couldn’t believe they weren’t from our favorite wing spot! The skin gets delightfully crunchy while the meat stays tender and full of flavor, giving you that satisfying contrast in every bite.

    Simple Ingredients, Maximum Flavor

    What I adore about these wings is how they transform basic pantry ingredients into something extraordinary. You’ll need just chicken wings, baking powder, salt, garlic powder, and your favorite seasonings. The baking powder (aluminum-free works best) creates a chemical reaction with the chicken skin that produces those crispy results. I love customizing the flavor profile—sometimes going for a spicy cajun blend, other times leaning into garlic parmesan territory. The versatility means you can adapt them to whatever you’re craving or what your guests prefer.

    Essential Tips & Tricks

    The Drying Method That Changes Everything

    The single most important step is thoroughly drying your wings before seasoning. I place mine on a wire rack in the refrigerator, uncovered, for at least 2 hours (overnight is even better). This might seem fussy, but trust me—this air-drying process removes surface moisture that would otherwise steam the wings instead of crisping them. I learned this trick after countless batches of disappointing wings, and it was the game-changer that finally delivered that satisfying crackle when you bite in.

    Temperature Techniques for Maximum Crispiness

    Start with a lower temperature (250°F) for about 30 minutes, then crank it up to 425°F for the final 40-50 minutes. This two-temperature approach renders the fat slowly first, then creates that beautiful crispy finish. Make sure to flip the wings halfway through the high-temperature cooking. For even better results, place them on a wire rack over your baking sheet so hot air circulates completely around each wing. Check out my crispy chicken parmesan zucchini boats for another delicious crispy chicken option!

    Serving Ideas & Creative Variations

    Sauce Strategies That Preserve Crispiness

    The timing of saucing is crucial—apply too early and you’ll sacrifice that perfect crunch. I serve my wings with dipping sauces on the side, or if coating them, I wait until just before serving and toss them quickly. For an extra layer of flavor without compromising texture, brush a thin layer of sauce during the last 5 minutes of baking. My family goes wild for buffalo sauce with blue cheese dressing, but honey garlic and sweet chili are close runners-up. Remember that less is more when it comes to preserving that crispy exterior.

    Unexpected Flavor Combinations

    Move beyond traditional buffalo and try bold flavor profiles that will surprise your taste buds. My current obsession is a maple-sriracha glaze that creates the perfect sweet-heat balance. Another winner is lemon-pepper with a touch of honey—it’s bright, zesty, and slightly sweet. For an Asian-inspired twist, try a mixture of soy sauce, ginger, and a touch of five-spice powder. These unexpected combinations keep this classic appetizer feeling fresh and exciting. Try pairing them with my garlic butter parmesan knots for a complete spread!

    Storage & Troubleshooting Guide

    Maintaining Crispiness When Reheating

    The challenge with leftover wings is keeping that crispy texture when reheating. Skip the microwave (which creates steam and soggy skin) and opt for a 375°F oven for about 10-15 minutes. For even better results, place them on a wire rack during reheating. Air fryers work beautifully too—just 3-4 minutes at 390°F brings back that wonderful crunch. I store leftover wings in a paper towel-lined container in the refrigerator, which helps absorb excess moisture and preserves their texture better than airtight containers.

    Troubleshooting Common Wing Problems

    If your wings aren’t crisping properly, a few common culprits might be to blame. First, check that you’re using baking powder, not baking soda (which creates a metallic taste). Second, ensure your wings are completely dry before baking. If they’re still not crisping, your oven temperature might be off—an inexpensive oven thermometer can help verify. Finally, overcrowding the pan creates steam and prevents proper crisping, so give those wings plenty of space. I learned this lesson the hard way during a Super Bowl party when I tried to cram too many on one tray!

    Frequently Asked Questions

    Can I use frozen chicken wings for this recipe?

    Yes, but thaw them completely first and pat them very dry. Frozen wings contain excess moisture that prevents proper crisping. I recommend thawing in the refrigerator overnight for best results.

    How do I know when my crispy baked chicken wings are done?

    Wings should reach an internal temperature of 165°F. The skin should be visibly crispy and golden brown, and the meat should pull easily from the bone when tested.

    Can I make these wings ahead of time for a party?

    Absolutely! Bake them fully, let cool, then refrigerate. Reheat at 375°F for 10-15 minutes just before serving. They’ll maintain most of their crispiness with this method.

    What’s the difference between party wings and whole wings?

    Party wings are separated into drumettes and flats, while whole wings include these sections plus the wing tip. I prefer party wings for more consistent cooking and easier eating.

    Why is baking powder essential for crispy baked chicken wings?

    Baking powder raises the pH level of the chicken skin, breaking down proteins and creating tiny bubbles during baking. This results in that crackly, crispy texture without deep frying.

    Final Thoughts

    These crispy baked chicken wings have become my go-to recipe whenever I’m craving that perfect combination of juicy meat and crunchy exterior. The beauty lies in their simplicity—just a few ingredients and techniques transform an ordinary cut into something extraordinary. Whether you’re hosting a game day gathering or simply treating yourself to a delicious dinner, these wings deliver restaurant-quality results without the mess or expense of deep-frying. I’d love to see your wing creations on Pinterest!

  • Brussels Sprouts with Hot Bacon: Irresistibly Crispy & Savory!

    Brussels Sprouts with Hot Bacon: Irresistibly Crispy & Savory!

    Brussels Sprouts with Hot Bacon: Irresistibly Crispy & Savory!

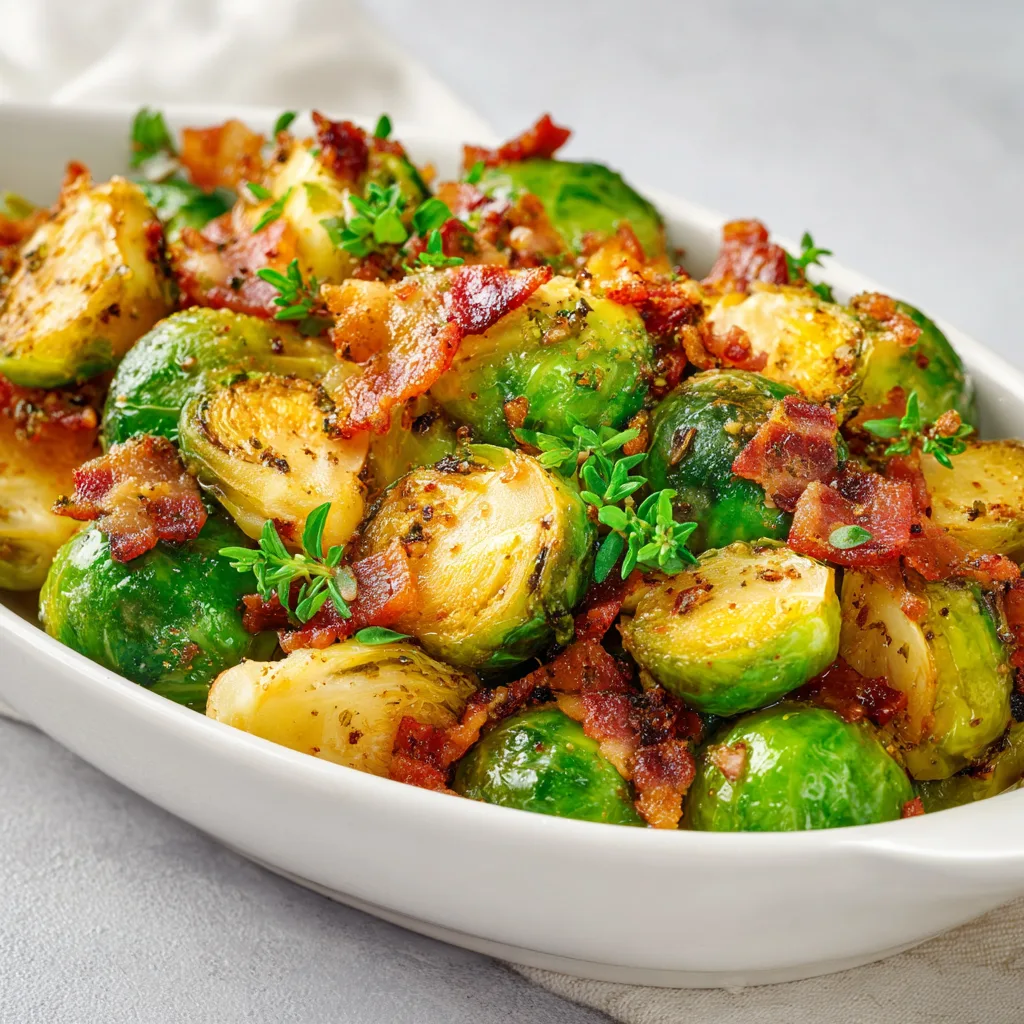
    Brussels Sprouts with Hot Bacon is one of those dishes that completely transformed my relationship with these humble green orbs. The first time I made it, my kitchen filled with that intoxicating aroma of sizzling bacon, and I watched as my vegetable-avoiding nephew actually asked for seconds! There’s something magical about how the smoky bacon fat renders down, creating a hot dressing that slightly wilts the sprouts while keeping their center crisp. It’s the perfect balance of textures that makes this side dish absolutely irresistible.

    Recipe

    Why You’ll Love This Brussels Sprouts with Hot Bacon

    Perfect Balance of Flavors

    The beauty of Brussels Sprouts with Hot Bacon lies in its contrasting elements. The natural bitterness of the sprouts mellows beautifully when they meet the salty, smoky bacon. I like to add a splash of apple cider vinegar that cuts through the richness with just enough tang. The bacon fat creates this incredible hot dressing that coats each shred or half of sprout, ensuring every bite delivers that perfect flavor combination. When I serve this at family gatherings, even the most devoted sprout-haters find themselves reaching for seconds!

    Quick & Impressive Side Dish

    What I adore about this recipe is how it transforms humble ingredients into something spectacular in under 20 minutes. The visual impact alone—vibrant green sprouts glistening with bacon drippings, studded with crispy bacon bits—makes it dinner party worthy. Yet it’s simple enough for weeknight cooking when I need something nutritious alongside my Creamy Garlic Parmesan Chicken Pasta. The minimal prep work (just slicing sprouts and chopping bacon) means more time enjoying dinner and less time cooking!

    Essential Tips & Tricks

    Selecting & Preparing Brussels Sprouts

    The foundation of this dish starts with choosing the right sprouts. Look for bright green, firm heads with tightly packed leaves—the smaller ones tend to be sweeter. I learned the hard way that those yellowish, loose-leafed ones at the bottom of the bin lead to bitter disappointment! Trim the woody stems and remove any discolored outer leaves. For quicker cooking and maximum flavor absorption, halve larger sprouts or shred them with a knife or food processor. This creates more surface area for the bacon fat to work its magic and ensures even cooking.

    Perfecting Your Bacon Technique

    The secret to exceptional Brussels Sprouts with Hot Bacon is all about the bacon rendering process. Start with cold, thick-cut bacon in a cold pan—this allows the fat to render slowly, creating those perfectly crispy bits without burning. I prefer using a cast iron skillet which maintains consistent heat and adds a subtle rustic flavor. Save a few tablespoons of that liquid gold bacon fat to coat the sprouts, but don’t overdo it—you want them glistening, not swimming. For extra flavor depth, try adding a drizzle of honey right at the end.

    Serving Ideas & Creative Variations

    Complementary Pairings

    Brussels Sprouts with Hot Bacon shines as a versatile side dish that elevates practically any protein. I love serving it alongside a juicy roasted chicken or next to a perfectly seared steak where the bacon complements the meat beautifully. For holiday meals, it adds a sophisticated yet comforting element to the table. The slight acidity cuts through richer dishes, making it perfect with Sausage Southern Cornbread Stuffing. For a complete meal, pair with simple mashed potatoes and your favorite protein—the sprouts provide both vegetable and flavor complexity in one dish.

    Exciting Flavor Twists

    While the classic version is perfection, I love experimenting with variations that keep this dish exciting. Try adding a handful of toasted walnuts or pecans for extra crunch and nutty depth. A sprinkle of blue cheese or parmesan just before serving creates a creamy, salty dimension. For sweetness, add dried cranberries or a drizzle of maple syrup to balance the savory bacon. Sometimes I’ll toss in some thinly sliced shallots to caramelize with the bacon, or add red pepper flakes for heat. Each variation maintains the soul of the dish while creating a new experience.

    Storage & Troubleshooting Guide

    Proper Storage Methods

    Brussels Sprouts with Hot Bacon tastes best fresh from the pan, but proper storage can preserve its deliciousness. Allow leftovers to cool completely before transferring to an airtight container—this prevents condensation that would make your sprouts soggy. They’ll keep in the refrigerator for up to 3 days. For reheating, a quick sauté in a hot skillet works better than the microwave, which can make them mushy. The bacon won’t stay quite as crispy, but a minute in a hot pan can help restore some of that textural magic without overcooking the sprouts.

    Solving Common Challenges

    If your Brussels sprouts turn out bitter, try blanching them briefly in salted water before sautéing—this removes some of the compounds responsible for bitterness. For sprouts that won’t crisp properly, ensure you’re not overcrowding the pan. They need space to release moisture and caramelize. If your bacon burns before rendering enough fat, lower the heat and be patient—good bacon fat is worth the wait. Too greasy? Drain some excess fat before adding the sprouts. And if you accidentally overcooked your sprouts to mushiness, transform them into a creamy soup by blending with stock and a touch of cream!

    Frequently Asked Questions

    Can I make Brussels Sprouts with Hot Bacon ahead of time?

    You can prep the components ahead—trim and slice sprouts, and pre-cook the bacon—but final assembly works best just before serving. The hot bacon dressing loses its magic when reheated.

    What’s the best type of bacon to use?

    Thick-cut, smoky bacon provides the best flavor and texture. Applewood or hickory-smoked varieties complement the sprouts beautifully with their robust flavor profile.

    How do I prevent my Brussels sprouts from becoming mushy?

    Don’t overcook them! Keep your heat high and cooking time brief. The sprouts should remain bright green with a slight crunch in the center.

    Can I use frozen Brussels sprouts for this recipe?

    Fresh is preferable, but if using frozen, thaw completely and pat dry to remove excess moisture. They won’t get as crispy but will still absorb the bacon flavor nicely.

    What makes Brussels Sprouts with Hot Bacon different from regular roasted Brussels sprouts?

    The hot bacon technique creates an immediate flavor infusion as the warm fat wilts and seasons the sprouts, creating a delicious contrast between crisp exteriors and tender centers.

    Final Thoughts

    Brussels Sprouts with Hot Bacon represents comfort food at its finest—simple ingredients transformed through technique into something extraordinary. I’ve watched this dish convert countless sprout skeptics into believers with just one bite of those crispy, bacon-kissed leaves. The beauty lies in its versatility; it fits perfectly on both weeknight tables and holiday spreads. Whether you follow the classic recipe or experiment with your own twists, this dish proves that sometimes the most memorable flavors come from the simplest combinations. Don’t forget to share your creations on Pinterest!

  • French Onion Chicken Mac and Cheese That Will Blow Your Mind!

    French Onion Chicken Mac and Cheese That Will Blow Your Mind!

    French Onion Chicken Mac and Cheese That Will Blow Your Mind!

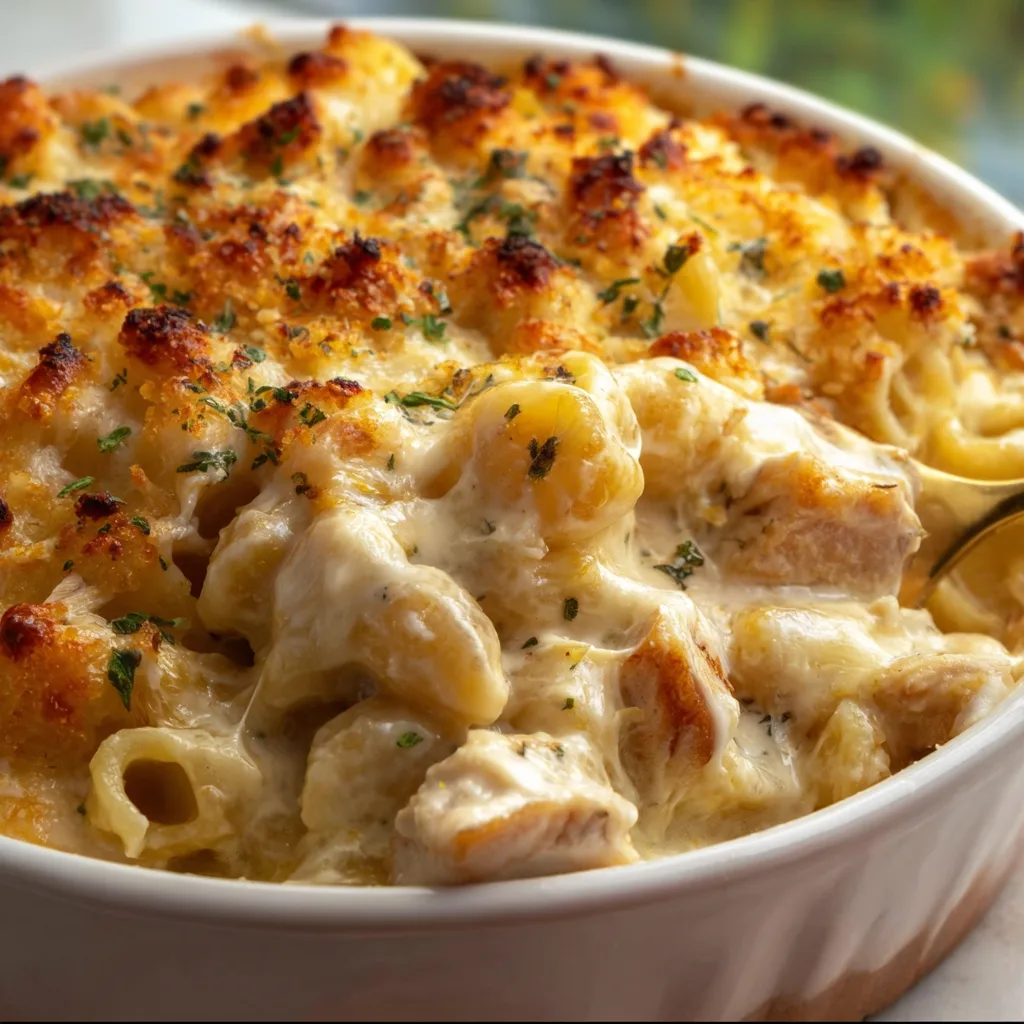
    French Onion Chicken Mac and Cheese combines two comfort food classics into one irresistible dish that’ll have everyone asking for seconds. The rich, caramelized onion flavor paired with tender chicken and gooey cheese creates a flavor explosion that elevates ordinary mac and cheese to something truly special. I discovered this recipe during a rainy weekend when I was craving something cozy but wanted to surprise my family with a twist on our usual pasta night. It’s since become our favorite indulgence when we need a little extra comfort. If you enjoy creative pasta dishes, you’ll also love my Creamy Garlic Parmesan Chicken Pasta.

    Recipe

    Why You’ll Love This French Onion Chicken Mac and Cheese

    Perfect Comfort Food Fusion

    This dish marries the savory depth of French onion soup with the creamy indulgence of mac and cheese, creating something greater than the sum of its parts. The sweet caramelized onions infuse every bite with rich flavor while tender chicken adds satisfying protein. I love how the gooey cheese pulls into long strands when you serve it – that moment always makes my kids’ eyes light up! The golden, bubbly top layer with its slight crunch gives way to creamy pasta underneath, creating that perfect textural contrast that makes comfort food so irresistible.

    Simple Yet Impressive

    Despite its gourmet flavor profile, this French Onion Chicken Mac and Cheese is surprisingly approachable for cooks of all skill levels. The ingredients are pantry staples you likely already have on hand, and the techniques are straightforward. I’ve served this at everything from casual family dinners to dinner parties where guests assumed I’d spent hours in the kitchen. The truth? Most of the cooking time is hands-off while the onions caramelize to sweet perfection. It’s my secret weapon recipe that always impresses without causing kitchen stress – perfect for those nights when you want something special without the fuss.

    Essential Tips & Tricks

    Mastering the Onions

    The caramelized onions are the heart and soul of this dish, so don’t rush this step! Slice your onions thinly and cook them low and slow for at least 30 minutes until they’re deeply golden and jammy. I like to add a pinch of sugar halfway through to help them caramelize more evenly. If they start to stick, deglaze the pan with a splash of broth rather than turning up the heat. The patience pays off in developing that signature French onion flavor that makes this mac and cheese so special. Trust me – this is where the magic happens!

    Creating the Perfect Cheese Sauce

    For a silky-smooth cheese sauce without any graininess, start with a proper roux and add your liquids gradually. I always grate my own cheese rather than using pre-shredded, which contains anti-caking agents that can affect the texture. My favorite blend is gruyère for authentic French onion flavor, sharp cheddar for punch, and a bit of mozzarella for that irresistible stretch. Remove the sauce from heat before adding the cheese and stir in a figure-eight motion until melted. For an extra flavor boost, try my Honey Pepper Chicken Mac & Cheese technique of infusing the milk with herbs first.

    Serving Ideas & Creative Variations

    Perfect Pairings

    This hearty dish stands beautifully on its own, but I love serving it with a crisp green salad dressed simply with lemon and olive oil to cut through the richness. A side of roasted broccoli or Brussels sprouts also works wonderfully. For special occasions, pair it with a crusty baguette for sopping up any extra cheese sauce – no judgment here! If you’re serving wine, a light-bodied Pinot Noir or unoaked Chardonnay complements the caramelized onions perfectly. For a complete comfort food spread, consider starting with my Thick and Creamy Tomato Soup as a first course.

    Exciting Twists

    While the classic version is divine, this recipe welcomes creative adaptations. Try swapping the chicken for crispy bacon or pancetta for a smokier flavor profile. Vegetarians can substitute mushrooms sautéed until golden and slightly crispy. I’ve experimented with adding a layer of garlic butter breadcrumbs on top for extra crunch, and sometimes I mix in roasted red peppers or sun-dried tomatoes for bursts of brightness. For a spicy kick, add a few dashes of hot sauce or red pepper flakes to the cheese sauce. The versatility of this dish is one of the reasons it’s become a staple in my recipe collection.

    Storage & Troubleshooting Guide

    Proper Storage & Reheating

    This French Onion Chicken Mac and Cheese stores beautifully for leftovers, which might be even better the next day as the flavors meld. Refrigerate in an airtight container for up to 4 days. When reheating, add a splash of milk or cream to restore the creamy texture, as the pasta will have absorbed some of the sauce. I prefer reheating in the oven at 350°F for about 15-20 minutes until bubbly rather than the microwave, which can make the texture uneven. For meal prep, you can also freeze individual portions for up to 2 months – just thaw overnight in the refrigerator before reheating.

    Troubleshooting Common Issues

    If your sauce looks curdled or broken, it usually means the heat was too high when adding cheese. To fix it, try whisking in a tablespoon of cream cheese or a mixture of cornstarch and cold milk. For soupy mac and cheese, let it rest 5-10 minutes after baking – it will thicken as it cools slightly. If it’s too dry, stir in warm milk until you reach your desired consistency. Bland flavor? Don’t be shy with seasonings – a splash of Worcestershire sauce, dijon mustard, or even a bit of soy sauce can add depth. Remember that good mac and cheese should be creamy but still hold its shape when served.

    Frequently Asked Questions

    Can I make French Onion Chicken Mac and Cheese ahead of time?

    Yes! Prepare it up to the baking stage, cover, and refrigerate for up to 24 hours. Add 10-15 minutes to the baking time if cooking from cold, and consider adding a splash of milk before baking.

    What’s the best pasta shape for this recipe?

    Medium shells, cavatappi, or elbow macaroni work best as they capture the cheese sauce in their crevices. Avoid long pasta shapes like spaghetti or linguine.

    Can I use rotisserie chicken instead of cooking chicken from scratch?

    Absolutely! Shredded rotisserie chicken is a perfect time-saver that adds great flavor. About 2 cups of shredded chicken works perfectly in this recipe.

    Is there a way to make this gluten-free?

    Yes, simply substitute gluten-free pasta and use a gluten-free flour blend for the roux. The texture might be slightly different but still delicious.

    What makes French Onion Chicken Mac and Cheese different from regular mac and cheese?

    The caramelized onions and gruyère cheese give it the classic French onion soup flavor, while the addition of chicken makes it a heartier, complete meal rather than just a side dish.

    Final Thoughts

    French Onion Chicken Mac and Cheese represents comfort food at its finest – familiar yet exciting, simple yet sophisticated. There’s something magical about how the sweet caramelized onions transform an everyday dish into something that feels special enough for any occasion. I hope this recipe brings as much joy to your table as it has to mine! For more cozy comfort food inspiration, follow me on Pinterest where I’m always sharing new twists on classic favorites.

  • Baked Bang Bang Cauliflower: Crispy, Spicy & Irresistible!

    Baked Bang Bang Cauliflower: Crispy, Spicy & Irresistible!

    Baked Bang Bang Cauliflower: Crispy, Spicy & Irresistible!

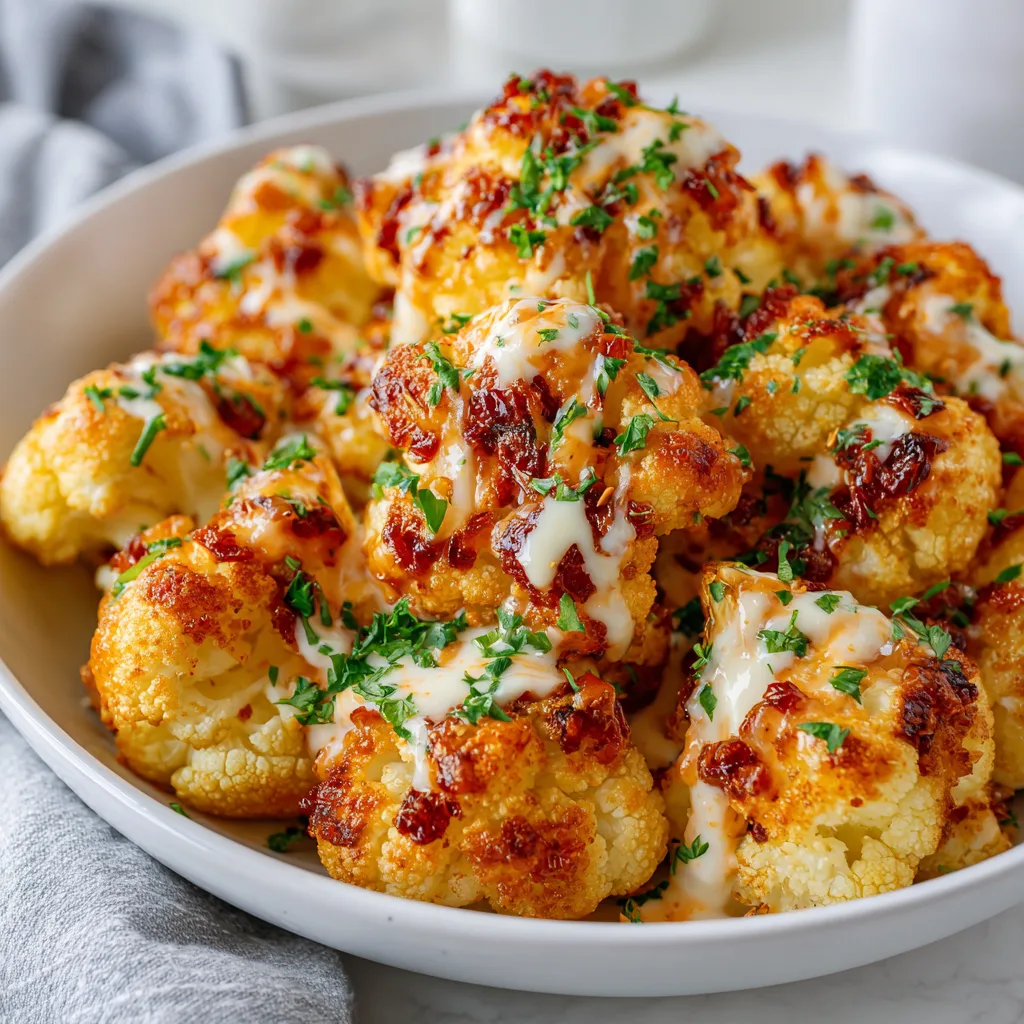
    Baked Bang Bang Cauliflower has completely transformed how I think about vegetable sides. The first time I made this crispy, spicy-sweet delight, my kitchen filled with the most intoxicating aroma that had my family hovering near the oven door! There’s something magical about how the cauliflower gets perfectly tender inside while developing that irresistible golden crust outside. If you’re looking for a dish that delivers big flavor with minimal effort, this recipe is about to become your new obsession.

    Recipe

    Why You’ll Love This Baked Bang Bang Cauliflower

    Perfect Texture Combination

    The textural contrast in this dish is what makes it truly special. Unlike deep-fried versions, baking creates cauliflower with a satisfying crunch without being greasy. I love how each floret develops a crisp exterior while maintaining that tender bite inside. The panko breadcrumb coating gets beautifully golden and creates that satisfying crackle when you bite in. My daughter, who typically pushes vegetables around her plate, actually asked for seconds the first time I made this – a kitchen miracle I still celebrate!

    Flavor That Packs a Punch

    The bang bang sauce is the star of this show – creamy, sweet, spicy, and utterly addictive. The combination of mayo, sweet chili sauce, and sriracha creates this perfect balance that coats each piece of cauliflower beautifully. I find myself adjusting the heat level depending on who’s joining us for dinner. For family meals, I go lighter on the sriracha, but when friends come over for game night, I dial up the spice! The subtle nuttiness of the roasted cauliflower pairs perfectly with the bold sauce.

    Essential Tips & Tricks

    Prep for Perfect Crispiness

    Proper drying is absolutely crucial for achieving that golden crunch we’re after. After washing your cauliflower, take the extra few minutes to thoroughly pat each floret dry with paper towels. Any excess moisture will create steam in the oven, resulting in soggy coating instead of crispy perfection. I also recommend cutting uniform pieces – about 1½-inch florets ensure even cooking. Last weekend, I rushed this step and ended up with some pieces overcooked while others were still too firm.

    Coating Technique Matters

    The secret to perfect coating adhesion is following the right sequence: flour mixture first, then egg wash, then breadcrumbs. This three-step process creates a substantial coating that won’t fall off during baking. I’ve found that using one hand for dry ingredients and one for wet prevents the dreaded “breading fingers” that can make a mess of your kitchen. For extra crispiness, try misting the coated cauliflower with olive oil right before baking – this little trick makes all the difference!

    Serving Ideas & Creative Variations

    Perfect Pairings

    Serve this Baked Bang Bang Cauliflower as an appetizer with extra sauce on the side for dipping and watch it disappear within minutes! For a complete meal, pair it with honey garlic butter roasted carrots and steamed jasmine rice to balance the spicy kick. I love setting these out as the starter for Asian-inspired dinner parties – they’re always the first empty plate! The vibrant orange-red sauce against the golden cauliflower makes for a stunning presentation that impresses guests before they even take a bite.

    Exciting Flavor Twists

    Get creative with your bang bang sauce by adding a tablespoon of honey for extra sweetness or a squeeze of lime for brightness. For a coconut version, replace half the mayo with coconut cream and add a dash of curry powder – absolutely divine! My personal favorite variation came from a happy accident when I was low on ingredients and added a spoonful of peanut butter to the sauce. The nutty depth it created was incredible! You can also experiment with different coatings – try crushed cornflakes or a mix of panko and sesame seeds for added texture.

    Storage & Troubleshooting Guide

    Keeping It Fresh

    These cauliflower bites are at their absolute best when served immediately after baking. However, leftovers can be stored in an airtight container in the refrigerator for up to 3 days. To reheat, avoid the microwave which will make them soggy. Instead, place them on a baking sheet in a 375°F oven for 5-7 minutes until heated through and crispy again. I like to sprinkle a few drops of water on the baking sheet (not on the cauliflower) to create a bit of steam that helps revive them.

    Solving Common Issues

    If your cauliflower turns out soggy rather than crispy, the most likely culprit is overcrowding the baking sheet. The florets need space around them for hot air to circulate. Use two baking sheets if necessary rather than cramming everything onto one. Another common issue is pale coating – this usually means your oven temperature isn’t hot enough. I recommend investing in an oven thermometer to ensure accuracy. For sauce that’s too spicy, simply add more mayo or a tablespoon of honey to balance the heat.

    Frequently Asked Questions

    Can I make Baked Bang Bang Cauliflower ahead of time?

    While best fresh, you can prep the cauliflower and coating ingredients separately up to 24 hours ahead. Coat and bake just before serving for the crispiest results.

    Is there a gluten-free option for this recipe?

    Absolutely! Simply substitute regular flour with your favorite gluten-free flour blend and use gluten-free panko breadcrumbs for the coating.

    How spicy is Baked Bang Bang Cauliflower?

    The spice level is customizable! Adjust the sriracha amount to your preference – start with just 1 teaspoon for mild heat or go up to 2 tablespoons for serious spice lovers.

    Can I air fry instead of bake?

    Yes! Air fry at 375°F for about 12-15 minutes, shaking the basket halfway through. You’ll get extra crispy results with even less oil.

    What can I substitute for mayonnaise in the sauce?

    Greek yogurt makes a great lower-fat alternative, though the sauce will be slightly tangier. For a vegan version, use plant-based mayo.

    Final Thoughts

    Baked Bang Bang Cauliflower has become my go-to when I want to impress without spending hours in the kitchen. There’s something so satisfying about transforming a humble vegetable into something this crave-worthy. The combination of crispy texture and bold, spicy-sweet flavor creates a dish that even vegetable skeptics will love. I hope you’ll give this recipe a try and discover just how exciting cauliflower can be! Don’t forget to check out more delicious recipes on our Pinterest page for more inspiration.

  • High Protein Baked Mac and Cheese That Will Blow Your Mind!

    High Protein Baked Mac and Cheese That Will Blow Your Mind!

    High Protein Baked Mac and Cheese That Will Blow Your Mind!

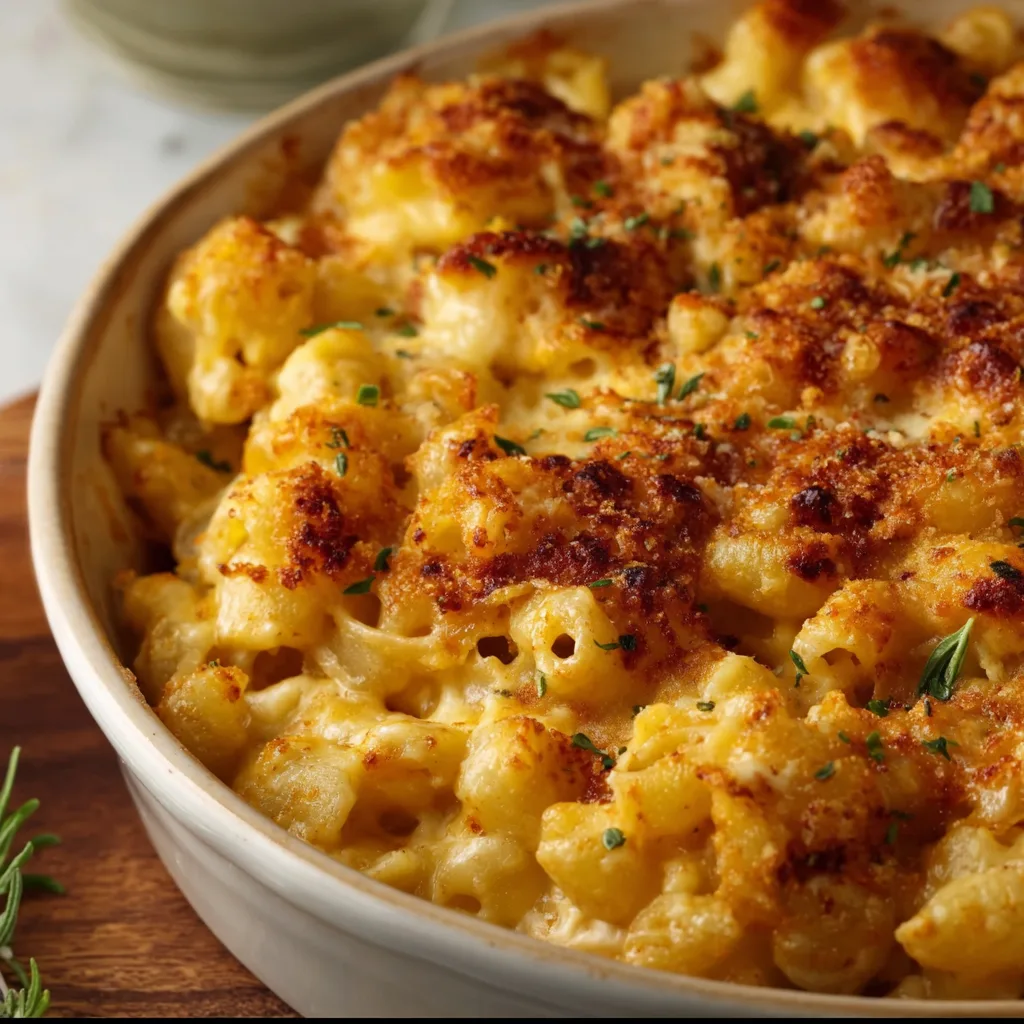
    High Protein Baked Mac and Cheese isn’t just comfort food—it’s a game-changer for those evenings when you’re craving something indulgent but don’t want to sacrifice your nutrition goals. I discovered this recipe during my post-workout hunger panics, when a regular mac and cheese just wasn’t cutting it protein-wise. The first time I pulled this bubbling dish from the oven, with its golden-brown crust and the aroma of sharp cheddar mingling with herbs, I knew I’d found my new favorite. This protein-packed version delivers all the creamy satisfaction of traditional mac and cheese while keeping you fuller longer—perfect for busy weeknight dinners.

    Recipe

    Why You’ll Love This High Protein Baked Mac and Cheese

    Perfect Balance of Flavor and Nutrition

    The magic of this high protein baked mac and cheese lies in its thoughtful ingredients. By incorporating protein-rich elements like cottage cheese, Greek yogurt, and chicken breast, you’ll get about 30-35 grams of protein per serving without sacrificing that classic mac and cheese experience. The blend of sharp cheddar and gruyere creates depth while a touch of mustard powder and garlic adds dimension that elevates it beyond basic comfort food. I love how the protein additions actually improve the texture, making it creamier and more satisfying than traditional versions that can sometimes feel one-dimensional.

    Simple Prep with Maximum Impact

    Don’t let the “high protein” label fool you—this isn’t complicated fitness food. The beauty of this dish is how effortlessly it comes together using mostly pantry staples. You’ll spend about 15 minutes of active prep time, then let your oven do the heavy lifting. The pasta cooks right in the sauce, absorbing all those incredible flavors while creating fewer dishes to wash. My favorite shortcut? Using rotisserie chicken when I’m really pressed for time. The protein boost transforms this from a side dish into a complete meal that keeps everyone at the table satisfied for hours.

    Essential Tips & Tricks

    Choosing the Right Pasta and Proteins

    The pasta you select makes a significant difference in your high protein baked mac and cheese. I recommend protein-enriched pasta varieties like chickpea, lentil, or whole wheat options that add 5-7 extra grams of protein per serving. For the creamiest texture, slightly undercook your pasta by 1-2 minutes before baking. When it comes to protein additions, cottage cheese provides incredible creaminess while boosting protein content, but you can also incorporate shredded chicken, ground turkey, or even chopped ham for variety without compromising that classic mac and cheese experience.

    Perfecting Your Cheese Sauce

    The heart of any mac and cheese is its sauce, and this high-protein version deserves special attention. Start by creating a roux with butter and flour, whisking constantly until it smells slightly nutty. Add warm milk gradually, whisking between additions to prevent lumps. For maximum protein impact, substitute part of the milk with Greek yogurt—it adds tanginess and creaminess while boosting protein content. Always grate your own cheese rather than using pre-shredded varieties which contain anti-caking agents that can make your sauce grainy. My secret ingredient? A tablespoon of Dijon mustard which enhances the cheese flavor without tasting “mustardy.”

    Serving Ideas & Creative Variations

    Family-Friendly Add-Ins

    Transform your high protein baked mac and cheese into a complete meal by incorporating colorful vegetables. Roasted broccoli florets, sautéed spinach, or diced bell peppers not only add nutritional value but also bring beautiful color contrast to the golden cheese. For picky eaters, try blending cooked cauliflower directly into the cheese sauce—it’s virtually undetectable while adding fiber and nutrients. My kids particularly love when I add crispy bacon bits or caramelized onions on top. These little touches make the dish feel special without complicating the preparation, and they’re perfect for introducing vegetables in a way that even the most selective eaters will enjoy.

    Gourmet Twists for Special Occasions

    When I’m serving this high protein baked mac and cheese for guests, I love elevating it with sophisticated flavor combinations. Try adding sun-dried tomatoes and fresh basil for a Mediterranean twist, or incorporate caramelized mushrooms and thyme for an earthy, elegant variation. For seafood lovers, fold in lump crab meat or sautéed shrimp just before baking. A drizzle of truffle oil or a sprinkle of smoked paprika adds a gourmet touch that transforms this comfort food classic. For a stunning presentation, serve individual portions in ramekins topped with a parmesan and panko crust that gets perfectly golden under the broiler for the last two minutes.

    Storage & Troubleshooting Guide

    Make-Ahead and Freezing Instructions

    This high protein baked mac and cheese is perfect for meal prep because it reheats beautifully. You can assemble the entire dish up to 24 hours before baking—just cover tightly and refrigerate. For freezing, prepare the dish but stop before baking, cool completely, then wrap in a double layer of foil and freeze for up to 3 months. When ready to enjoy, thaw overnight in the refrigerator and add an extra 15-20 minutes to the baking time. For individual portions, freeze in silicone muffin cups or small containers for grab-and-go lunches that can be microwaved directly from frozen in 2-3 minute intervals until heated through.

    Fixing Common Issues

    If your high protein baked mac and cheese turns out grainy, it’s likely due to overheating the cheese or using pre-shredded varieties. To fix a broken sauce, try whisking in a tablespoon of lemon juice or cream while gently reheating. For a dish that’s too dry after baking, drizzle in warm milk mixed with a tablespoon of Greek yogurt and gently fold to incorporate. If your mac and cheese lacks flavor, boost the umami with a teaspoon of miso paste or Worcestershire sauce. Remember that high-protein ingredients like cottage cheese can release moisture during baking, so if your dish seems too wet, let it rest for 10 minutes before serving.

    Frequently Asked Questions

    How much protein is in this baked mac and cheese?

    Each serving contains approximately 25-30 grams of protein, depending on your specific protein additions. This is roughly triple the amount found in traditional mac and cheese recipes.

    Can I make this high protein baked mac and cheese vegetarian?

    Absolutely! Replace chicken with white beans, tofu crumbles, or additional cottage cheese. You can also use chickpea or lentil pasta for even more plant-based protein.

    What cheeses work best for flavor and protein content?

    Sharp cheddar, gruyere, and parmesan create the best flavor profile. For additional protein, incorporate cottage cheese, Greek yogurt, or even a small amount of nutritional yeast.

    How can I make this recipe gluten-free?

    Simply substitute your favorite gluten-free pasta and use rice flour or cornstarch for thickening the sauce. The protein content remains high regardless of these substitutions.

    Will kids enjoy this healthier version?

    Yes! The creamy texture and familiar cheese flavor appeal to children, while the protein keeps them fuller longer. The nutrition boost is our little secret!

    Final Thoughts

    This High Protein Baked Mac and Cheese has become my go-to solution for satisfying comfort food cravings without derailing my nutrition goals. The beauty lies in its versatility—whether you’re feeding picky eaters, meal prepping for the week, or hosting a dinner party, this dish delivers on both flavor and function. I love seeing the surprised expressions when I tell people it’s packed with protein! For more protein-rich comfort foods that don’t compromise on taste, check out my Pinterest collection where I’m constantly adding new favorites.

  • Crockpot Steak Bites with Garlic: Juicy, Tender & Irresistible!

    Crockpot Steak Bites with Garlic: Juicy, Tender & Irresistible!

    Crockpot Steak Bites with Garlic: Juicy, Tender & Irresistible!

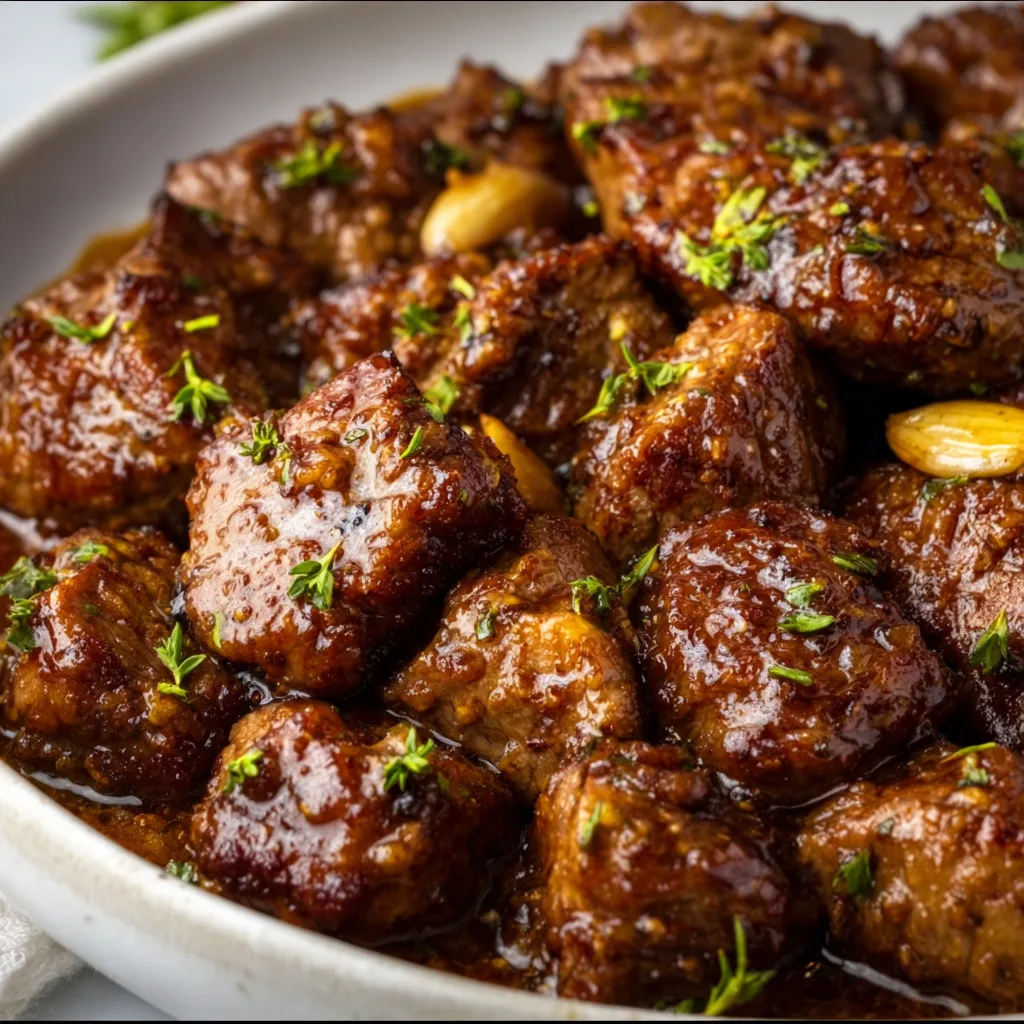
    Crockpot Steak Bites with Garlic might just become your new weeknight hero. I discovered this recipe during a particularly hectic week when I needed something that would practically cook itself while filling my home with that irresistible aroma of garlic-infused beef. The tender, juicy steak chunks swimming in a rich, buttery garlic sauce are nothing short of magical. What makes this dish truly special is how the slow cooking transforms even budget-friendly cuts into melt-in-your-mouth bites that taste like they came from a fancy steakhouse. If you love quick, flavorful meals, this one’s about to become a regular in your rotation.

    Recipe

    Why You’ll Love This Crockpot Steak Bites with Garlic

    Effortless Preparation with Maximum Flavor

    There’s something deeply satisfying about a recipe that delivers restaurant-quality results with minimal effort. These garlic steak bites require just 10 minutes of prep before your crockpot takes over the heavy lifting. I love that I can quickly cube the beef, toss it with seasonings, and then walk away. The slow cooking process allows the garlic to infuse every bite while the beef releases its juices, creating a self-basting environment that keeps everything incredibly tender. Even on my busiest days, I can manage this preparation in the morning and come home to a dinner that tastes like I spent hours in the kitchen.

    Budget-Friendly Gourmet Experience

    One of my favorite things about this recipe is how it transforms economical beef cuts into something truly special. Chuck roast or sirloin tip—cuts that might be tough with quick cooking methods—become buttery-soft in the crockpot. I discovered this by accident when I was trying to stretch my grocery budget during the holidays. The slow cooking breaks down the connective tissues, resulting in steak bites so tender they practically melt on your tongue. The rich garlic butter sauce elevates everything, making an affordable meal feel like a special occasion dinner that would impress even my pickiest dinner guests.

    Essential Tips & Tricks

    Selecting and Preparing the Perfect Beef

    Choosing the right cut makes all the difference in this recipe. Look for well-marbled beef like chuck roast, sirloin tip, or even stew meat. The fat distributed throughout the meat will render during cooking, creating more flavor and tenderness. I’ve found that cutting the beef into uniform 1-inch cubes ensures even cooking. Pat the meat dry with paper towels before seasoning—this might seem like an extra step, but it helps the seasonings adhere better and creates a better sear if you’re browning the meat first. For an extra flavor boost, marinate the cubed beef overnight with a tablespoon of Worcestershire sauce and a clove of minced garlic.

    Mastering the Garlic Flavor Profile

    The garlic intensity in this dish is completely customizable to your preference. For a subtle background note, 4-5 cloves of minced garlic work perfectly. If you’re a garlic enthusiast like me (no vampire problems here!), don’t hesitate to double that amount. I discovered a game-changing technique: add half the garlic at the beginning of cooking and reserve the rest to stir in during the final 30 minutes. This creates layers of garlic flavor—deeply infused notes plus that fresh, vibrant punch. For an even more complex profile, try roasting a whole head of garlic and adding the soft, caramelized cloves to the creamy sauce during the final hour.

    Serving Ideas & Creative Variations

    Perfect Pairing Suggestions

    These succulent steak bites deserve worthy accompaniments that can stand up to their rich, garlicky goodness. My go-to option is buttery mashed potatoes that soak up all that incredible sauce—I’ve literally seen dinner guests scraping their plates to get every last drop. Creamy polenta or pearl couscous also make excellent bases. For a lighter option, try serving over roasted vegetables like cauliflower, Brussels sprouts, or asparagus. The slight char on the vegetables complements the tender meat beautifully. Don’t forget a simple side salad with a bright vinaigrette to cut through the richness, or some crusty bread for sauce-mopping duties.

    Exciting Flavor Twists

    While the classic garlic butter version is divine, this recipe welcomes creative adaptations. Try adding a balsamic glaze during the last 30 minutes for a sweet-tangy dimension that caramelizes beautifully on the meat. For a Mediterranean twist, incorporate sun-dried tomatoes, olives, and a sprinkle of feta just before serving. My family goes wild for the spicy Cajun variation—just add Cajun seasoning to your initial spice blend and finish with a dash of hot sauce. For special occasions, a splash of red wine and some sautéed mushrooms transform this into a sophisticated bourguignon-inspired dish that never fails to impress dinner guests.

    Storage & Troubleshooting Guide

    Proper Storage and Reheating Methods

    These garlic steak bites reheat beautifully, sometimes tasting even better the next day as the flavors continue to meld. Store leftovers in an airtight container in the refrigerator for up to 3 days. When reheating, add a splash of beef broth to restore moisture and prevent the meat from drying out. The microwave works in a pinch, but for best results, reheat gently on the stovetop over medium-low heat. If you’re meal prepping, you can freeze portions for up to 2 months—just thaw overnight in the refrigerator before reheating. I like to portion leftovers with some sauce over rice for grab-and-go lunches that make my coworkers jealous.

    Solving Common Cooking Challenges

    If your steak bites turn out tougher than expected, the most likely culprit is either the cut of meat or cooking time. For maximum tenderness, make sure you’re using a well-marbled cut and cooking on low for the full recommended time. If your sauce seems too thin, remove the lid during the last 30 minutes of cooking to allow some liquid to evaporate. Alternatively, make a quick slurry with 1 tablespoon cornstarch mixed with 2 tablespoons cold water and stir it in. For overly salty results, add a quartered potato to absorb some salt, or balance with a teaspoon of brown sugar or honey.

    Remember that crockpot sizes vary—a too-large slow cooker might cook faster and dry out the meat.

    Frequently Asked Questions

    Can I use frozen beef for Crockpot Steak Bites with Garlic?

    While possible, I don’t recommend it. Frozen meat cooks unevenly and releases excess water, diluting flavors. For best results, thaw your beef completely and pat dry before cooking to achieve that perfect tender texture and concentrated garlic flavor.

    What’s the best cut of beef to use?

    Chuck roast, sirloin tip, or stew meat work beautifully. Look for well-marbled cuts that become tender with slow cooking. Even tougher, economical cuts transform into buttery-soft bites after several hours in the crockpot.

    Can I make this recipe dairy-free?

    Absolutely! Substitute the butter with olive oil or a dairy-free butter alternative. The garlic flavor will still shine through, and you’ll maintain that luscious mouthfeel without any dairy ingredients.

    How can I thicken the sauce?

    Create a cornstarch slurry with 1 tablespoon cornstarch mixed with 2 tablespoons cold water. Stir into the crockpot during the last 30 minutes of cooking with the lid off to achieve a silky, thickened sauce.

    Can I add vegetables to the crockpot?

    Yes! Hardy vegetables like carrots, mushrooms, and onions work wonderfully. Add them at the beginning of cooking. For quicker-cooking vegetables like bell peppers or zucchini, add during the last hour to prevent them from becoming mushy.

    Final Thoughts

    These Crockpot Steak Bites with Garlic have become my secret weapon for those days when I want to impress without stress. There’s something magical about walking through the door after a long day to the aroma of garlic-infused beef that’s been slowly simmering to perfection. This dish strikes that perfect balance between effortless preparation and incredible results—proving that sometimes the simplest recipes deliver the most satisfaction. Whether you’re serving it for a weeknight family dinner or a casual gathering with friends, these tender, flavorful bites never disappoint. For more delicious inspiration, check out my Pinterest collection of comfort food favorites!