Category: Dinner

Easy, tasty dinner ideas for busy nights. Simple recipes, quick prep, and family-friendly meals you’ll make again and again.

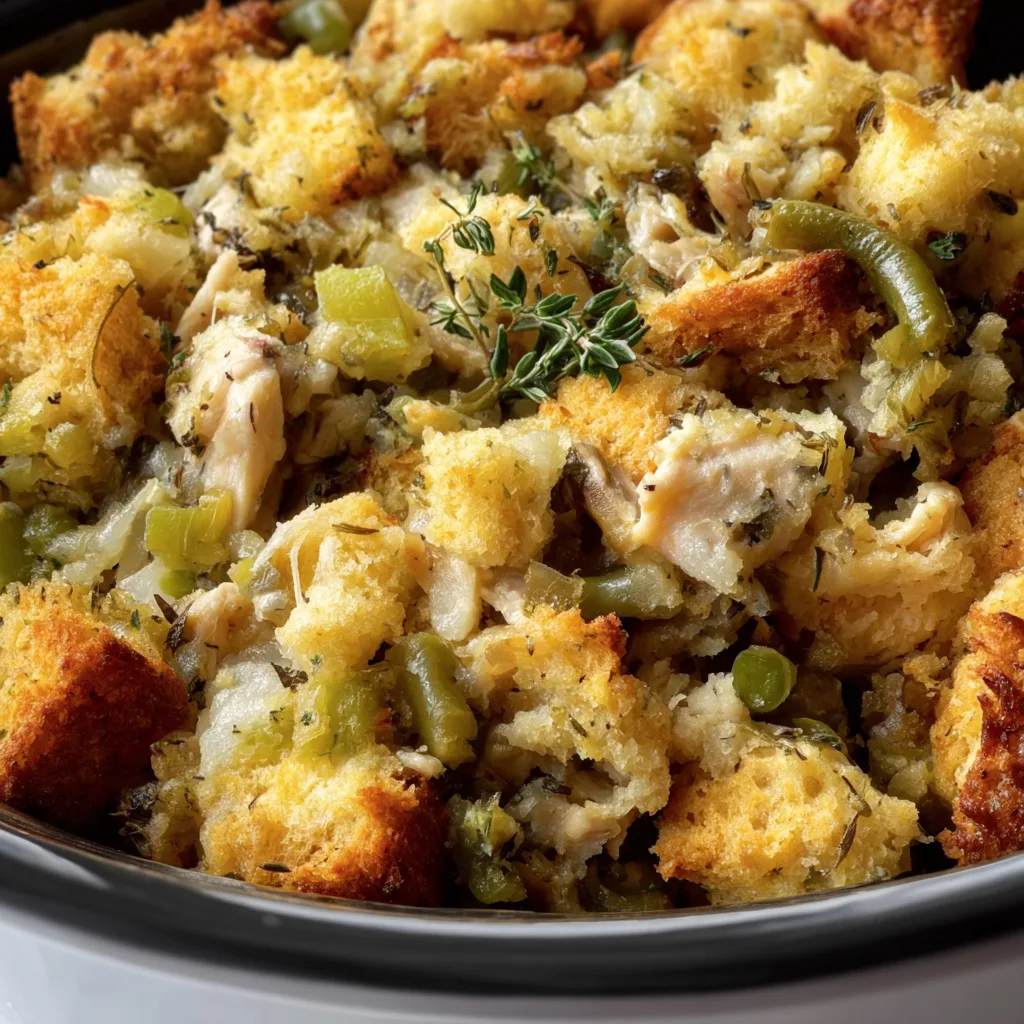
  • Slow Cooker Chicken Stuffing Recipe That Will Melt Your Heart!

    Slow Cooker Chicken Stuffing Recipe That Will Melt Your Heart!

    Slow Cooker Chicken Stuffing Recipe That Will Melt Your Heart!

    Slow Cooker Chicken Stuffing has completely transformed my weeknight dinner routine. There’s something magical about walking through the door after a long day and being greeted by the comforting aroma of herbs, tender chicken, and savory stuffing melding together. The first time I made this dish, my kitchen smelled exactly like Thanksgiving, even though it was just a random Tuesday in April! This set-it-and-forget-it meal combines juicy chicken breasts with traditional stuffing flavors for a dinner that tastes like it took hours of loving attention when really your slow cooker did all the work. It’s pure comfort food that brings everyone to the table with minimal effort.

    Recipe

    Why You’ll Love This Slow Cooker Chicken Stuffing

    Perfect One-Pot Comfort Food

    This dish is the definition of effortless comfort. The slow cooker transforms simple ingredients into something truly special as the chicken releases its juices into the stuffing mixture, creating layers of flavor that simply can’t be rushed. I remember making this during a particularly chaotic week when deadlines were piling up, and it felt like such a victory to still serve something homemade and delicious. The combination of tender chicken with herb-infused stuffing creates that soul-warming satisfaction we all crave, especially during busy weeknights when cooking from scratch seems impossible.

    Make-Ahead Friendly for Busy Lives

    One of the greatest gifts of slow cooker chicken stuffing is its flexibility with timing. You can prep everything the night before—chop your veggies, measure out your seasonings, and store them separately in the refrigerator. Then in the morning, it takes just 5 minutes to layer everything in the slow cooker before heading out the door. I’ve even assembled the entire dish (minus the liquid) in the ceramic insert and refrigerated it overnight. This make-ahead capability has saved countless dinners during sports seasons when we’re rushing from work to practices with barely a moment to breathe.

    Essential Tips & Tricks

    Perfecting Your Chicken-to-Stuffing Ratio

    Finding the right balance between chicken and stuffing is crucial for the perfect texture. I recommend using boneless chicken breasts (about 2 pounds for a standard recipe) and positioning them on top of the stuffing mixture rather than buried within it. This allows the chicken juices to slowly seep into the stuffing while cooking, adding flavor without making things soggy. If you prefer a drier stuffing, use slightly less chicken broth in your recipe. For a more casserole-like consistency, add an extra 1/4 cup of liquid. The first time I made this, I accidentally added too much broth and ended up with a delicious but very soft stuffing—now I adjust based on my family’s preferences.

    The Secret to Avoiding Dry Chicken

    The biggest challenge with slow-cooked chicken is avoiding that dreaded dryness. The magic cooking window for chicken in most slow cookers is 4-5 hours on low, not the 6-8 hours many recipes suggest. If you’ll be away longer, consider using chicken thighs instead, as they’re more forgiving. Another game-changing trick I discovered after several batches: brush the chicken with a tablespoon of melted butter mixed with a teaspoon of poultry seasoning before cooking. This creates a protective flavor barrier that helps lock in moisture while infusing more savory goodness into each bite.

    Serving Ideas & Creative Variations

    Seasonal Add-Ins That Elevate the Dish

    Transform your basic slow cooker chicken stuffing with seasonal ingredients that add color, texture, and nutrition. In fall, I love folding in 1 cup of diced apples and 1/3 cup dried cranberries for sweet-tart pops of flavor. Winter calls for hearty additions like roasted butternut squash cubes or chestnuts. Spring versions shine with fresh peas and asparagus tips (added during the final 30 minutes). Summer brings opportunities for garden-fresh herbs and cherry tomatoes. My family went wild for a version with caramelized onions and mushrooms that I made last Thanksgiving as a test run—it almost outshined the turkey!

    Turning Leftovers Into Brand New Meals

    Leftover slow cooker chicken stuffing becomes the foundation for quick second-day dinners. Spoon cold leftovers into portobello mushroom caps, top with cheese, and bake for 20 minutes for stuffed mushrooms. Or press the mixture into patties, coat with breadcrumbs, and pan-fry for delicious stuffing cakes—perfect with a side of cranberry sauce. My personal favorite transformation happened by accident when I had just a small amount left: I used it as the filling for breakfast burritos with scrambled eggs and a sprinkle of cheese. The herby stuffing added incredible flavor to an otherwise ordinary breakfast.

    Storage & Troubleshooting Guide

    Proper Storage for Maximum Freshness

    To maintain the optimal texture and flavor, cool your slow cooker chicken stuffing completely before transferring to airtight containers. Refrigerated leftovers stay fresh for 3-4 days, but I find the stuffing tends to absorb more moisture over time. When reheating, add a sprinkle of fresh herbs or a light drizzle of butter to revive the flavors. For longer storage, portion cooled stuffing into freezer-safe containers, leaving some expansion space. Label with the date and freeze for up to 2 months. I learned this lesson the hard way after discovering an unmarked container of what I thought was soup, only to find forgotten stuffing from who-knows-when!

    Fixing Common Texture Issues

    The most common issue with slow cooker stuffing is texture—either too dry or too soggy. If your stuffing turns out too dry, simply sprinkle 2-3 tablespoons of warm chicken broth over the top before serving and gently fold it in. For stuffing that’s too wet, there’s an easy fix: transfer to a baking dish, sprinkle with 1/2 cup of fresh breadcrumbs or crushed stuffing mix, and broil for 2-3 minutes until golden and crisp on top. This creates a delicious textural contrast that my family actually requests now, even when the stuffing consistency is perfect straight from the slow cooker!

    Frequently Asked Questions

    Can I use frozen chicken for slow cooker chicken stuffing?

    For food safety reasons, always use fully thawed chicken. Frozen chicken won’t reach safe temperatures quickly enough in a slow cooker, potentially allowing bacteria to multiply. Thaw chicken completely in the refrigerator before adding to your recipe.

    How do I know when the slow cooker chicken stuffing is done?

    The chicken should reach an internal temperature of 165°F and be easily shredded with a fork. The stuffing should be moist but not soggy, with no visible raw egg or uncooked vegetables.

    Can I make slow cooker chicken stuffing vegetarian?

    Absolutely! Replace chicken with 2 cups of roasted vegetables like butternut squash, mushrooms, and Brussels sprouts. Use vegetable broth instead of chicken broth and add 1/2 cup chickpeas for protein.

    What stuffing mix works best for this recipe?

    Any herb-seasoned stuffing mix works well. I prefer the cubed variety for texture, but traditional fine bread crumbs create a softer result. Cornbread stuffing offers a sweeter alternative that pairs beautifully with chicken.

    Why is my slow cooker chicken stuffing turning out mushy?

    Too much liquid or overcooking are typically the culprits. Reduce broth by 1/4 cup next time, or try cooking on low for 4 hours instead of 6-8. Adding toasted bread cubes at the end can help absorb excess moisture.

    Final Thoughts

    Slow cooker chicken stuffing has become a cornerstone in my meal rotation because it delivers that rare combination of ease and comfort that busy home cooks treasure. The gentle, slow cooking process allows flavors to develop in ways that quick-cooking methods simply can’t match. Whether you’re serving it as a weeknight dinner solution or as a stress-free side for holiday gatherings, this adaptable dish proves that delicious, homemade meals don’t require hours of active cooking time. I hope your slow cooker chicken stuffing becomes a beloved staple in your home too! For more cozy comfort food ideas, check out my Pinterest collection.
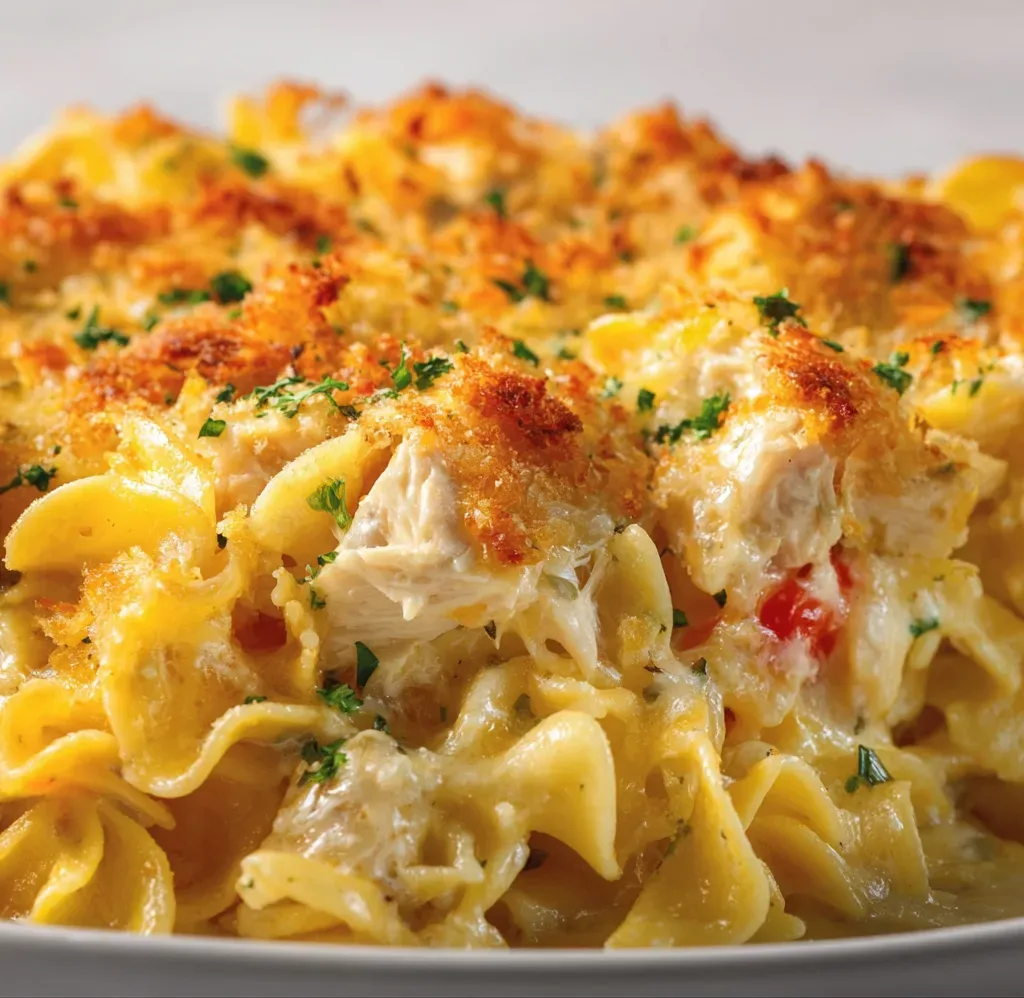

  • Chicken Cheddar Noodle Bake: Irresistibly Cheesy Comfort Food Delight!

    Chicken Cheddar Noodle Bake: Irresistibly Cheesy Comfort Food Delight!

    Chicken Cheddar Noodle Bake: Irresistibly Cheesy Comfort Food Delight!

    This Chicken Cheddar Noodle Bake transforms ordinary ingredients into pure comfort food magic. The first time I made this casserole, my kitchen filled with the most intoxicating aroma of melted cheese and savory herbs that literally pulled my husband in from the garage! There’s something about the combination of tender chicken, al dente egg noodles, and that irresistibly gooey cheddar cheese that makes this dish an instant family favorite. Perfect for busy weeknights when you need something hearty yet simple that everyone will devour. Trust me, this creamy pasta bake will become your new go-to comfort meal!

    Recipe

    Why You’ll Love This Chicken Cheddar Noodle Bake

    Perfect Comfort Food Balance

    This casserole hits all the comfort food notes without being overly heavy. The tender chicken provides satisfying protein while the egg noodles offer that perfect chewy texture that soaks up all the creamy goodness. What I adore most is how the sharp cheddar creates those crispy, bubbly edges that everyone fights over! My daughter always claims the corner piece with the most browned cheese. The beauty lies in its simplicity—familiar ingredients transforming into something that feels like a warm hug on a plate. It’s the dish I turn to when the weather turns chilly or when someone needs a pick-me-up.

    Make-Ahead Miracle Worker

    As a busy mom, I’m always looking for time-saving options, and this Chicken Cheddar Noodle Bake delivers spectacularly. You can prep it entirely the night before—just cover and refrigerate, then bake when you’re ready. The flavors actually deepen overnight, making it even more delicious! I’ve also started portioning it into smaller baking dishes for quick lunches throughout the week. The versatility extends to freezing too—simply assemble, freeze before baking, and you’ve got an emergency meal ready to go. This has saved dinner on countless occasions when life gets chaotic.

    Essential Tips & Tricks

    Perfecting Your Cheese Strategy

    The secret to an exceptional Chicken Cheddar Noodle Bake lies in your cheese approach. Rather than mixing all the cheese into the casserole, reserve about a third for the top. This creates that coveted golden, bubbly crust while ensuring creamy pockets throughout. I prefer using freshly grated cheddar—pre-shredded varieties contain anti-caking agents that prevent proper melting. For extra flavor dimension, try mixing sharp cheddar with a bit of Gruyère or Monterey Jack. And don’t rush the final few minutes of baking! Those last 5 minutes under the broiler transform good into unforgettable.

    Noodle Know-How

    Always cook your egg noodles slightly underdone (about 2 minutes less than package directions). They’ll continue cooking in the oven, and this prevents them from becoming mushy in the final dish. After draining, toss the hot noodles with a tablespoon of butter to prevent sticking and add richness. For a textural contrast similar to my Sour Cream Noodle Bake, consider adding a crispy topping—buttered panko or crushed Ritz crackers work beautifully. And don’t forget to season your noodles with salt while boiling; this is your only chance to flavor them directly!

    Serving Ideas & Creative Variations

    Perfect Pairing Partners

    This Chicken Cheddar Noodle Bake pairs beautifully with bright, acidic sides that cut through the richness. A simple arugula salad with lemon vinaigrette or roasted broccoli with a squeeze of fresh lemon creates perfect balance. For a complete meal that impresses guests, serve alongside Crispy Garlic Air Fryer Broccoli and warm crusty bread for sopping up the sauce. During summer months, I love serving it with a tomato-cucumber salad dressed simply with olive oil and herbs. The temperature and texture contrasts make every bite more exciting.

    Flavor Remix Options

    Don’t be afraid to make this recipe your own with creative twists! Southwestern version? Add a can of diced green chilies, corn, black beans, and swap some cheddar for pepper jack. For an Italian spin, mix in sundried tomatoes, spinach, and Italian seasoning, then top with mozzarella and a sprinkle of Parmesan. My family loves the buffalo chicken variation—add hot sauce to the chicken mixture and top with blue cheese crumbles. For a lighter option, substitute Greek yogurt for some of the cream and increase the vegetables. Each variation keeps this dish exciting week after week!

    Storage & Troubleshooting Guide

    Proper Storage Solutions

    Store leftover Chicken Cheddar Noodle Bake properly to maintain its creamy texture. Refrigerate in an airtight container within two hours of cooking—it keeps beautifully for 3-4 days. For reheating, add a splash of milk or chicken broth before microwaving to revive the sauce. If freezing, I recommend portioning into individual servings for easier thawing. Freeze for up to 3 months in freezer-safe containers. When ready to enjoy, thaw overnight in the refrigerator before reheating. The texture may change slightly after freezing, but the flavor remains delicious!

    Fixing Common Issues

    If your Chicken Cheddar Noodle Bake turns out dry, the likely culprit is overbaked noodles or insufficient sauce. Next time, cook noodles even less or add an extra ¼ cup of liquid to the sauce. For a soupy casserole, let it rest 15 minutes before serving—the sauce will thicken as it stands. If the top browns too quickly before the center is hot, cover with foil for part of the baking time. And if your cheese separates or becomes oily, try using a lower heat setting and different cheese blend next time. Remember that full-fat dairy products generally yield the creamiest results.

    Frequently Asked Questions

    Can I use rotisserie chicken for my Chicken Cheddar Noodle Bake?

    Absolutely! Rotisserie chicken is a perfect time-saver. Simply shred about 3 cups and mix it in. The roasted flavor adds wonderful depth to the casserole.

    Can I make this casserole vegetarian?

    Yes! Substitute the chicken with 2 cups of sautéed mushrooms and 1 cup of diced bell peppers. The earthy mushrooms provide similar satisfaction with a completely different flavor profile.

    What’s the best cheese to use if I don’t have cheddar?

    Monterey Jack, Colby, or Gruyère work beautifully. For extra tang, mix in some cream cheese or a sprinkle of Parmesan on top.

    How can I make this Chicken Cheddar Noodle Bake healthier?

    Use whole wheat noodles, increase the vegetables, substitute half the cheese with nutritional yeast, and use low-fat milk instead of cream.

    Can I freeze individual portions?

    Definitely! Portion into freezer-safe containers, leaving slight headspace. Thaw overnight in the refrigerator and microwave with a splash of milk to refresh.

    Final Thoughts

    This Chicken Cheddar Noodle Bake has earned its place in my family’s regular rotation for good reason. It’s the perfect intersection of convenience and comfort—simple enough for weeknights yet satisfying enough for Sunday dinner. The versatility means it never gets boring, and the make-ahead potential makes it practical for real life. I hope this casserole brings the same warmth and joy to your table that it has to mine! For more comforting recipes, check out my Pinterest collection of family favorites.

  • Chicken Kofta with Garlic Yogurt: Irresistibly Creamy & Flavor-Packed!

    Chicken Kofta with Garlic Yogurt: Irresistibly Creamy & Flavor-Packed!

    Chicken Kofta with Garlic Yogurt: Irresistibly Creamy & Flavor-Packed!

    Chicken Kofta with Garlic Yogurt has been my go-to recipe for both casual weeknight dinners and impressive entertaining. There’s something magical about the way these aromatic spiced meat patties sizzle in the pan, releasing that intoxicating blend of cumin, coriander, and garlic that fills my kitchen. Paired with cooling garlic yogurt sauce, each bite delivers the perfect balance of bold flavors and creamy contrast. I first discovered this Middle Eastern treasure during a cooking class where the instructor’s simple technique transformed humble ground chicken into something extraordinary. Trust me, this dish will become a staple in your recipe collection too!

    Recipe

    Why You’ll Love This Chicken Kofta with Garlic Yogurt

    Perfect Balance of Flavors & Textures

    The magic of chicken kofta lies in its incredible depth of flavor packed into each tender patty. Ground chicken gets transformed with a symphony of spices – earthy cumin, fragrant coriander, warming cinnamon, and zingy garlic. I love how the herbs bring brightness while the grated onion adds moisture and sweetness. The texture is equally impressive – crispy exterior giving way to a juicy interior that practically melts in your mouth. And that cooling garlic yogurt sauce? Pure heaven. The tangy creaminess cuts through the richness of the kofta, creating that perfect bite that makes your taste buds dance with joy.

    Quick & Versatile Meal Solution

    What truly makes this Chicken Kofta with Garlic Yogurt a weeknight hero is how quickly it comes together. I can have dinner on the table in under 30 minutes – perfect for those evenings when I’m rushing between work and my daughter’s soccer practice. The versatility is another huge plus. Shape them into patties for sandwiches, form them around skewers for a fun presentation, or make mini versions as appetizers. The mixture can even be prepared ahead and refrigerated, making your future self very grateful. Whether served with fluffy rice, wrapped in warm pita, or nestled atop a crisp salad, these kofta adapt to whatever mood strikes.

    Essential Tips & Tricks

    Perfecting Your Kofta Mixture

    The secret to incredibly tender kofta lies in how you handle the meat mixture. I’ve learned to gently mix the ingredients just until combined – overmixing leads to tough, dense patties. Adding a touch of breadcrumbs (about 2-3 tablespoons per pound) helps bind everything while keeping the texture light. For extra moisture, don’t skip the grated onion! I squeeze out some excess liquid but leave enough to keep the chicken juicy. Letting the mixture rest for 15 minutes before shaping allows the flavors to meld beautifully. If your mixture feels too wet, pop it in the refrigerator for 30 minutes – this makes shaping much easier and helps the kofta hold together when cooking.

    Mastering the Cooking Technique

    The difference between good and amazing chicken kofta comes down to cooking technique. I’ve found that a medium-high heat creates that perfect golden crust while ensuring the inside cooks through without drying out. Whether you’re pan-frying, grilling, or baking, avoid the temptation to constantly flip or move the kofta – let that beautiful crust develop! For pan-frying, about 4-5 minutes per side usually does the trick. When making skewered versions, slightly flattening the meat around the skewer ensures even cooking. For the garlic yogurt sauce, make it at least 30 minutes ahead so those flavors have time to develop their full potential.

    Serving Ideas & Creative Variations

    Perfect Pairings for a Complete Meal

    Chicken Kofta with Garlic Yogurt shines brightest when paired with complementary sides that enhance its Middle Eastern flavors. I love serving them with warm pita bread and a simple cucumber-tomato salad dressed with lemon and olive oil. Fluffy saffron rice makes an excellent bed for these flavorful patties, soaking up any juices and that creamy yogurt sauce. For a lighter option, try them atop a vibrant tabbouleh salad or alongside roasted vegetables sprinkled with za’atar. My family goes crazy for a mezze-style spread with hummus, olives, and crispy zucchini rings – perfect for casual entertaining that always impresses guests without hours in the kitchen.

    Exciting Flavor Twists to Try

    Don’t be afraid to put your own spin on traditional chicken kofta! My favorite variation adds feta cheese crumbles to the meat mixture, creating pockets of tangy saltiness throughout. For heat lovers, incorporate a finely chopped jalapeño or a teaspoon of harissa paste into the mix. I’ve experimented with different herbs too – mint adds unexpected freshness, while cilantro brings a vibrant twist. For the yogurt sauce, try stirring in cucumber and dill for a tzatziki-inspired version, or add avocado for creamy richness. You can even play with the protein – ground turkey works beautifully, and a combination of chicken and lamb creates incredible depth of flavor that will transport you straight to a Mediterranean seaside taverna.

    Storage & Troubleshooting Guide

    Proper Storage for Maximum Freshness

    Keeping your Chicken Kofta with Garlic Yogurt fresh is simple with the right approach. Store cooked kofta in an airtight container in the refrigerator for up to 3 days – they actually taste even better the next day as the flavors continue to develop! For meal prep, I often make a double batch and freeze the shaped but uncooked patties between layers of parchment paper in a freezer-safe container. They’ll keep beautifully for up to 3 months. Just thaw overnight in the refrigerator before cooking. The yogurt sauce should be stored separately in the refrigerator and will stay fresh for 2-3 days. I recommend giving it a good stir before serving as it may separate slightly during storage.

    Solving Common Kofta Challenges

    Even experienced cooks encounter challenges with kofta sometimes. If your patties are falling apart during cooking, the mixture might be too wet. Add a tablespoon of extra breadcrumbs or refrigerate the mixture for 30 minutes to firm up. Dry kofta usually means either overcooking or not enough moisture in the mixture – try adding more grated onion or even a tablespoon of olive oil next time. If your kofta taste bland, be generous with those spices and don’t skimp on salt – chicken needs proper seasoning to shine. For yogurt sauce that’s too thin, strain your yogurt through cheesecloth for an hour before mixing in the other ingredients. Too thick? Simply thin with a splash of milk or lemon juice.

    Frequently Asked Questions

    Can I make Chicken Kofta with Garlic Yogurt ahead of time?

    Absolutely! Mix and shape the kofta up to 24 hours ahead, keeping them covered in the refrigerator. The yogurt sauce can also be prepared a day in advance – the flavors actually improve with time.

    What’s the best way to prevent dry chicken kofta?

    Don’t overcook them! Cook just until they reach 165°F internally. Adding grated onion and a tablespoon of olive oil to the mixture helps maintain moisture during cooking.

    Can I bake these instead of frying?

    Yes! Bake at 400°F for about 15-18 minutes, turning halfway through. Brush with olive oil before baking for a golden exterior similar to pan-fried versions.

    How can I make these kofta gluten-free?

    Simply substitute the breadcrumbs with gluten-free alternatives like crushed rice crackers, certified gluten-free oats, or almond flour. The texture will be slightly different but equally delicious.

    What’s the secret to perfectly seasoned Chicken Kofta with Garlic Yogurt?

    Don’t be shy with spices! Bloom them in a little oil before adding to the meat mixture to intensify their flavor. Always taste-test by cooking a small portion before shaping all your kofta.

    Final Thoughts

    Chicken Kofta with Garlic Yogurt represents everything I love about cooking – simple ingredients transformed into something truly special through thoughtful preparation and bold flavors. The way these aromatic patties pair with cool, creamy yogurt creates that perfect harmony that makes a meal memorable. I hope you’ll experience the same joy I feel when my kitchen fills with those incredible spice aromas and my family gathers eagerly around the table. Whether you’re making them for a quick weeknight dinner or an impressive spread for guests, these kofta deliver satisfaction in every bite. Find more inspiration for your next culinary adventure on Pinterest!

  • Marry Me Chicken Creamy Parmesan: Irresistibly Delicious Recipe!

    Marry Me Chicken Creamy Parmesan: Irresistibly Delicious Recipe!

    Marry Me Chicken Creamy Parmesan: Irresistibly Delicious Recipe!

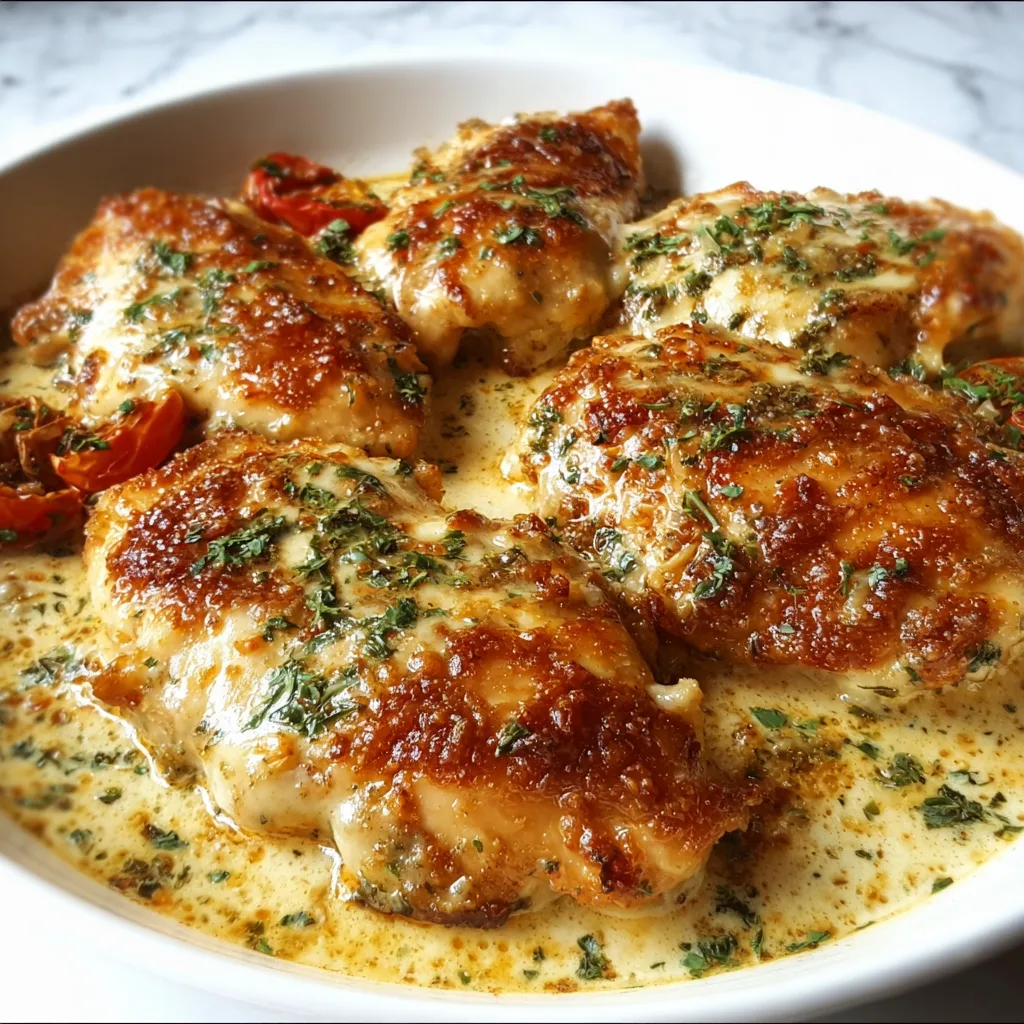
    Marry Me Chicken Creamy Parmesan has earned its romantic name for good reason – one bite of this irresistibly rich, sun-dried tomato infused chicken dish might just inspire a proposal! The first time I made this for my partner, the kitchen filled with an aroma so intoxicating that he wandered in from the living room, eyes wide with anticipation. That’s the magic of this dish – it transforms ordinary chicken breasts into something extraordinary with its velvety sauce that coats each bite in creamy, garlicky perfection. If you’re looking for a dinner that impresses without stress, you’ve found your match.

    Recipe

    Why You’ll Love This Marry Me Chicken Creamy Parmesan

    A Restaurant-Quality Dish Made Simple

    This Marry Me Chicken Creamy Parmesan delivers restaurant-worthy flavor in your own kitchen without the hefty price tag. The combination of tender chicken breasts nestled in a silky sauce punctuated with sun-dried tomatoes and fresh basil creates a symphony of flavors that dance on your tongue. What I adore most is how the cream sauce reduces to this gorgeous consistency that clings to each piece of chicken, infusing it with garlic, Italian herbs, and that distinctive sun-dried tomato tang. And despite its impressive presentation, you’ll only need one pan and about 30 minutes from start to finish!

    The Perfect Balance of Flavors and Textures

    Every element of this dish plays a crucial role in creating that swoon-worthy experience. The chicken develops a beautiful golden crust from the initial sear, while staying incredibly juicy inside. The sauce strikes that perfect balance – rich and indulgent without being overwhelmingly heavy. Little bursts of intensity come from the concentrated sun-dried tomatoes, while fresh basil adds brightness that cuts through the creaminess. The subtle heat from red pepper flakes warms each bite without overwhelming. It’s this careful orchestration of textures and flavors that elevates this from just another chicken dish to something truly special.

    Essential Tips & Tricks

    Mastering the Perfect Sear

    The foundation of exceptional Marry Me Chicken Creamy Parmesan begins with a proper sear. Start with room-temperature chicken breasts (let them sit out for 15-20 minutes before cooking) and pat them completely dry with paper towels. This prevents steaming and promotes that gorgeous golden crust. Don’t overcrowd your pan – work in batches if needed to maintain high heat. The sizzle when the chicken hits the pan should be immediate and enthusiastic! Allow the chicken to develop that crust undisturbed for at least 4-5 minutes before flipping. This initial sear locks in moisture and creates the flavor base that makes this dish irresistible.

    Creating the Silkiest Sauce

    The soul of this dish is its velvety sauce, and a few simple techniques will ensure perfection. After removing the chicken, don’t clean the pan – those browned bits (fond) are flavor gold! Sauté your garlic just until fragrant (about 30 seconds) to prevent bitterness. When adding cream, scrape the bottom of the pan thoroughly to incorporate all those caramelized bits. For the smoothest texture, reduce your heat to medium-low once the cream is added and let it gently simmer rather than boil. If you’re serving with pasta like my Creamy Mushroom Chicken Pasta, reserve some of that starchy pasta water to help the sauce cling beautifully to every bite.

    Serving Ideas & Creative Variations

    Perfect Pairings for a Complete Meal

    This Marry Me Chicken Creamy Parmesan deserves worthy companions on the plate. My favorite way to serve it is over al dente linguine or fettuccine that eagerly soaks up that luxurious sauce. For a lighter option, try zucchini noodles or cauliflower rice. A simple side salad with arugula, lemon vinaigrette, and shaved parmesan provides the perfect peppery contrast to the rich chicken. For bread lovers, nothing beats crusty Italian bread or Garlic Butter Parmesan Knots for sauce-mopping duty. Complete the experience with a glass of crisp Pinot Grigio or unoaked Chardonnay to cut through the richness.

    Exciting Twists on the Classic Recipe

    While the traditional recipe is divine, I love experimenting with these flavor variations. For a Mediterranean twist, add kalamata olives, artichoke hearts, and a sprinkle of feta at the end. Seafood lovers can incorporate jumbo shrimp or scallops alongside the chicken for an elegant surf and turf. Mushroom enthusiasts, try adding sautéed cremini or shiitake mushrooms for earthy depth. For a touch of sweetness, stir in roasted red peppers. If you’re watching calories, substitute half the heavy cream with unsweetened almond milk and chicken broth (though the texture will be slightly less rich). Each variation maintains the dish’s soul while offering a new experience.

    Storage & Troubleshooting Guide

    Keeping It Fresh for Later Enjoyment

    This Marry Me Chicken Creamy Parmesan actually develops even more flavor overnight, making it perfect for meal prep. Store leftovers in an airtight container in the refrigerator for up to 3 days. To reheat, add a splash of chicken broth or cream to restore the sauce’s silky texture and warm gently over medium-low heat. For microwave reheating, use 50% power in 30-second intervals, stirring between each. While technically freezable for up to 2 months, cream sauces can sometimes separate when thawed, so I prefer enjoying it fresh or within those first few days when the flavors are at their peak.

    Troubleshooting Common Challenges

    Even experienced cooks occasionally face challenges with cream-based sauces. If your sauce looks too thin, let it simmer uncovered for a few extra minutes to reduce. For sauce that’s too thick, gradually whisk in chicken broth until you reach your desired consistency. If you notice any curdling (tiny white specks in the sauce), lower your heat immediately and whisk vigorously – adding a splash of cold cream can help stabilize it. For chicken that seems dry, slice it thinly across the grain before returning it to the sauce and let it sit for 5 minutes before serving to reabsorb moisture. Remember that patience is key with cream sauces – gentle heat and constant attention yield the best results.

    Frequently Asked Questions

    Can I make Marry Me Chicken Creamy Parmesan ahead of time?

    Yes! Prepare it up to 24 hours ahead, but store the chicken and sauce separately. Reheat the sauce gently, then add the chicken for the final 5 minutes to warm through without overcooking.

    What can I substitute for heavy cream?

    Half-and-half works well for a lighter version. For dairy-free options, full-fat coconut milk provides similar richness, though it will add a subtle coconut flavor.

    How do I prevent the cream sauce from breaking?

    Keep your heat medium-low after adding the cream and avoid boiling. Stir frequently and remove from heat once it reaches your desired consistency.

    Can I use chicken thighs instead of breasts?

    Absolutely! Boneless, skinless chicken thighs make an even juicier version of this dish. They typically need 2-3 minutes less cooking time than breasts.

    What makes Marry Me Chicken Creamy Parmesan so special?

    The combination of sun-dried tomatoes, fresh herbs, and garlic-infused cream sauce creates an irresistible flavor profile that elevates simple chicken to an unforgettable meal worthy of its romantic name.

    Final Thoughts

    Marry Me Chicken Creamy Parmesan isn’t just a meal—it’s an experience that transforms ordinary evenings into special occasions. The magic happens in that perfect balance between simplicity and sophistication, creating a dish that feels indulgent yet approachable. I find myself returning to this recipe whenever I need a foolproof way to impress guests or simply want to treat myself to something extraordinary. For more delicious inspiration, check out my collection on Pinterest. Whether it inspires a proposal or just happy sighs around your dinner table, this chicken dish promises to create moments worth savoring.

  • BBQ Sausage Bites That Will Ignite Your Taste Buds Instantly!

    BBQ Sausage Bites That Will Ignite Your Taste Buds Instantly!

    BBQ Sausage Bites That Will Ignite Your Taste Buds Instantly!

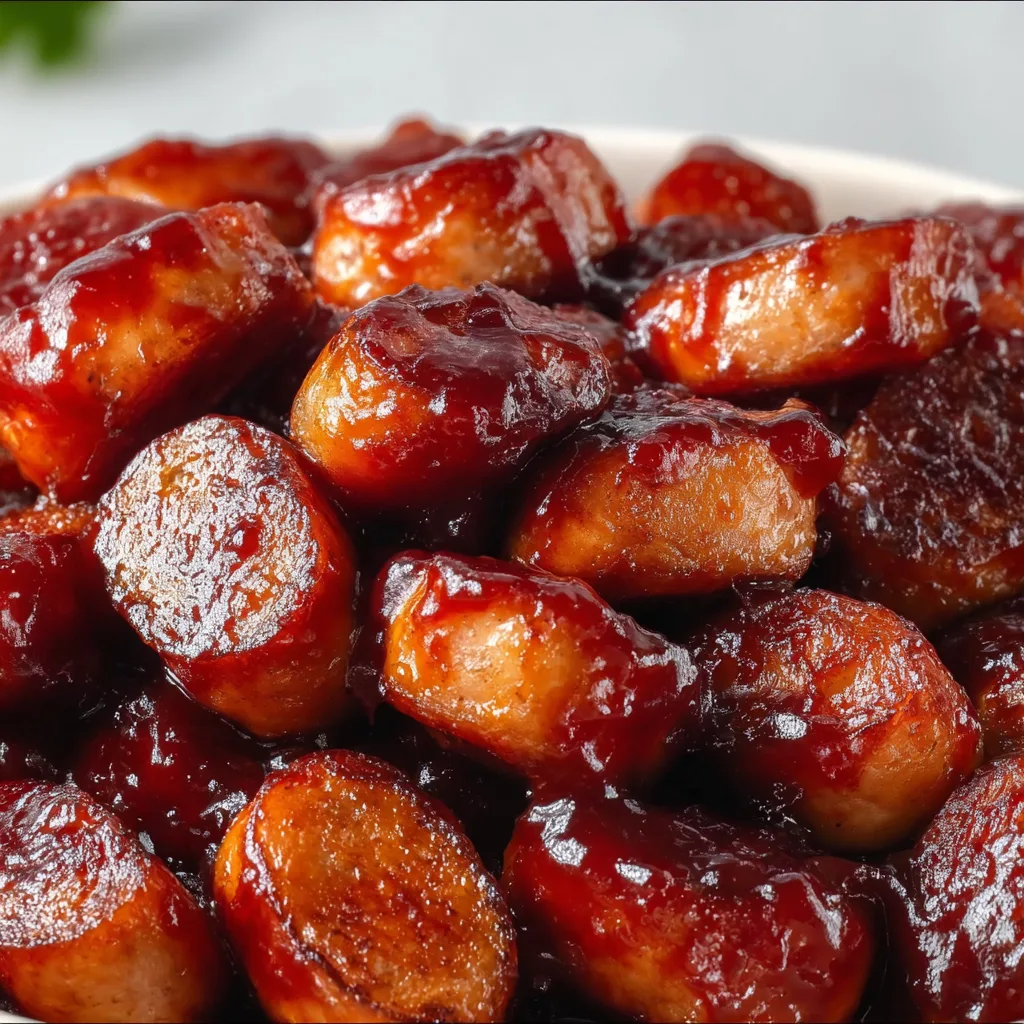
    These BBQ Sausage Bites are the party appetizer you never knew you needed in your life. The first time I made these little flavor bombs was for my sister’s backyard gathering last summer, and they disappeared faster than I could refill the serving platter! There’s something magical about the way the sweet-smoky BBQ sauce caramelizes around each juicy sausage bite, creating that irresistible sticky-crispy exterior that makes you reach for “just one more.” Perfect for game days, holiday gatherings, or anytime you need a crowd-pleasing finger food that delivers big on flavor without hours in the kitchen. Check out my Crispy Zucchini Rings for another appetizer that pairs beautifully with these bites!

    Recipe

    Why You’ll Love These BBQ Sausage Bites

    Quick Prep, Maximum Flavor

    You know those recipes that give you the biggest flavor payoff for minimal effort? These BBQ Sausage Bites are exactly that kind of kitchen hero. With just 5-6 ingredients and about 10 minutes of active prep time, you’ll create an appetizer that tastes like you spent hours perfecting it. The caramelized edges develop naturally as they bake, creating little pockets of intensified flavor that make these bites completely addictive. I love that I can prep these while simultaneously getting other party dishes ready—multitasking at its most delicious!

    Perfect Party Food Psychology

    There’s a reason these BBQ Sausage Bites vanish so quickly at gatherings—they hit all the right notes psychologically. The bite-sized format means guests don’t commit to a full-sized portion (though they’ll likely eat more this way!). The toothpicks make them easy to grab while holding a drink in the other hand. Plus, that sweet-savory-smoky flavor profile appeals to almost everyone. I’ve watched the most reserved guests unconsciously drift back to the appetizer table for “just one more” of these little morsels. They’re conversation starters in the most delicious way.

    Essential Tips & Tricks

    Choosing the Right Sausage

    The foundation of amazing BBQ Sausage Bites starts with selecting the right sausage. I recommend using high-quality smoked sausage or kielbasa for that perfect texture—firm enough to hold up when cut and skewered, but not so tough that guests struggle to bite through. Andouille adds a spicy kick if you want more heat, while chicken or turkey sausage works beautifully for a lighter option. The key is finding sausage with some fat content, as this renders during baking to help caramelize the BBQ sauce. Avoid raw sausages—they won’t give you that perfect texture we’re after.

    The BBQ Sauce Strategy

    Not all BBQ sauces perform equally in this recipe! Look for a thicker sauce that will cling to the sausage rather than sliding off during baking. I prefer sauces with some sweetness (honey or brown sugar-based) as they caramelize beautifully in the oven. For an extra flavor dimension, try mixing your favorite BBQ sauce with a tablespoon of apricot preserves or a splash of bourbon. Apply the sauce in two stages—once before baking and once halfway through—for the most flavor-packed results. Check out my Baked BBQ Sausages recipe for more BBQ inspiration!

    Serving Ideas & Creative Variations

    Perfect Pairings

    These BBQ Sausage Bites shine brightest when served with complementary flavors and textures. I love offering a cooling dip alongside—try a simple ranch, blue cheese, or even a tangy mustard sauce to cut through the richness. For a complete appetizer spread, pair with something fresh like cucumber rounds or bell pepper strips. The temperature contrast between hot sausage bites and cool vegetables creates a delightful sensory experience. For larger gatherings, I arrange these on a platter with Crispy Southwest Egg Rolls and watch the entire spread disappear within minutes!

    Flavor Twist Adventures

    While classic BBQ sauce is delicious, don’t be afraid to experiment with flavor variations! Try teriyaki glaze with a sprinkle of sesame seeds for an Asian-inspired bite. Or toss in buffalo sauce and serve with blue cheese for heat lovers. My personal favorite variation involves brushing with honey-sriracha sauce and finishing with finely chopped cilantro. For holiday gatherings, cranberry BBQ sauce adds a festive touch. The versatility of the basic sausage bite means you can create a different experience each time you make them—perfect for hosts who entertain frequently.

    Storage & Troubleshooting Guide

    Make-Ahead Magic

    These BBQ Sausage Bites are surprisingly meal-prep friendly! You can cut the sausage up to two days ahead and store in an airtight container in the refrigerator. For partially prepared bites, you can even coat them in the initial layer of sauce and refrigerate for up to 24 hours before baking. If you need to make them completely ahead of time, they reheat beautifully in a 350°F oven for 7-10 minutes—just enough to warm through without drying out. I find the flavor actually intensifies slightly after resting, making this a perfect stress-free party option.

    Solving Common Challenges

    The most common issue with BBQ Sausage Bites is sauce sliding off during baking. Combat this by ensuring your sausage pieces are patted completely dry before applying sauce. If you notice the sauce pooling in the pan rather than sticking, try a higher oven temperature (425°F) for the first few minutes to help it adhere. For bites that aren’t caramelizing properly, a quick minute under the broiler works wonders—just watch carefully to prevent burning! If your toothpicks keep rolling around, create small slices in each sausage piece to give them a flat side.

    Frequently Asked Questions

    Can I make BBQ Sausage Bites in an air fryer?

    Absolutely! Cook at 380°F for 8-10 minutes, shaking the basket halfway through. The air fryer creates extra crispy edges that are absolutely delicious.

    What’s the best way to serve BBQ Sausage Bites for a large crowd?

    Keep them warm in a slow cooker on the “warm” setting. Add a fresh drizzle of sauce just before serving to maintain that glossy appearance.

    How many BBQ Sausage Bites should I make per person?

    Plan for 4-6 bites per person for appetizers, or 8-10 if they’re the main finger food. I always make extra because they disappear quickly!

    Can I use vegetarian sausage for this recipe?

    Yes! Plant-based sausages work well, but they may need less cooking time. Look for firmer varieties that won’t fall apart when skewered.

    How do I prevent my BBQ Sausage Bites from burning?

    Place the baking sheet on the middle rack and check at the 10-minute mark. If they’re browning too quickly, lower the temperature by 25°F.

    Final Thoughts

    These BBQ Sausage Bites have earned their place in my permanent recipe collection for good reason—they deliver big flavor with minimal fuss. There’s something deeply satisfying about serving an appetizer that consistently elicits that “mmm” reaction from guests. Whether you’re hosting a casual game day gathering or an elegant holiday cocktail party, these versatile bites rise to any occasion. The combination of juicy sausage and caramelized BBQ sauce creates an irresistible flavor experience that keeps everyone coming back for more. Find more delicious inspiration on my Pinterest page!

  • Salted Caramel Apple Pie Cheesecake with Crumble – Irresistibly Delicious!

    Salted Caramel Apple Pie Cheesecake with Crumble – Irresistibly Delicious!

    Salted Caramel Apple Pie Cheesecake with Crumble – Irresistibly Delicious!

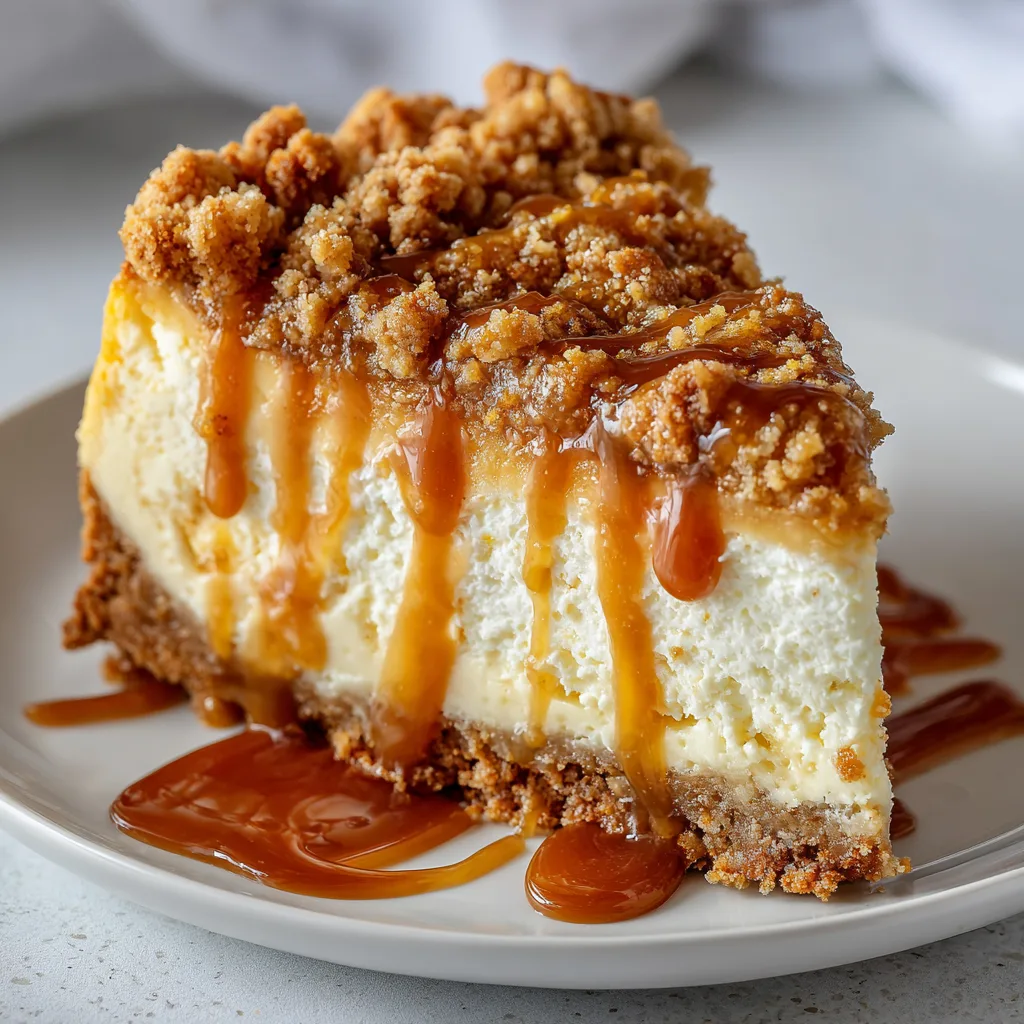
    The moment I pulled my Salted Caramel Apple Pie Cheesecake with crumble from the oven, my kitchen filled with an irresistible aroma that took me straight back to my grandmother’s autumn baking marathons. This decadent dessert marries the creamy richness of cheesecake with the warm spices of apple pie, all crowned with a buttery crumble and drizzled with homemade salted caramel. It’s the dessert I turn to when I need something that will genuinely impress guests or simply comfort my soul on a chilly evening. Trust me, this showstopper is worth every minute spent creating it! If you love apple-cinnamon combinations, this recipe takes that classic pairing to heavenly new heights.

    Recipe

    Why You’ll Love This Salted Caramel Apple Pie Cheesecake with crumble

    The Perfect Texture Combination

    There’s something magical about the contrasting textures in this dessert that makes each bite an adventure. The velvety smooth cheesecake layer provides a rich creaminess that melts in your mouth, while the tender cinnamon-spiced apples add juicy pockets of fruit throughout. What truly elevates this creation is the buttery crumble topping that brings a satisfying crunch against the silky filling. I’ve had friends literally close their eyes while taking their first bite, savoring how these textures play together. The final drizzle of warm salted caramel sauce creates glossy rivers of sweetness that balance the slight tanginess of the cream cheese perfectly.

    A Seasonal Showstopper for Any Occasion

    This Salted Caramel Apple Pie Cheesecake with crumble isn’t just delicious—it’s a conversation starter. I’ve brought this to Thanksgiving gatherings, holiday parties, and even summer barbecues (because why limit apple desserts to fall?), and it always disappears faster than anything else on the dessert table. The beautiful layers visible in each slice make it instantly Instagram-worthy, while the familiar flavors with an elevated twist appeal to both traditional dessert lovers and adventurous eaters. The combination of classic comfort and sophisticated presentation makes this the perfect dessert when you want to impress without straying too far from beloved flavors.

    Essential Tips & Tricks

    Perfecting Your Cheesecake Base

    The foundation of an exceptional Salted Caramel Apple Pie Cheesecake starts with properly handling your ingredients. Always bring cream cheese to room temperature before mixing to prevent lumps—I let mine sit out for at least 2 hours. Mix on low speed to avoid incorporating excess air, which can cause cracks during baking. For the crust, press the graham cracker mixture firmly into your springform pan using the bottom of a measuring cup for even compression. The water bath is non-negotiable! It regulates temperature and creates steam that prevents the surface from drying out. I wrap my pan in three layers of heavy-duty foil to ensure no water seeps in during baking.

    Apple Preparation Secrets

    The apple layer requires specific attention for the perfect Salted Caramel Apple Pie Cheesecake with crumble. I recommend using a combination of apple varieties for complex flavor—Granny Smith for tartness and Honeycrisp for sweetness creates the perfect balance. Cut your apples into uniform, small pieces (about 1/4 inch) so they cook evenly and don’t create air pockets in your cheesecake. Pre-cooking the apples with butter, cinnamon, and a touch of brown sugar helps release excess moisture that could otherwise make your cheesecake soggy. Allow the apple mixture to cool completely before layering it into your cheesecake to prevent melting the cream cheese filling prematurely.

    This attention to detail makes all the difference! Check out more dessert inspiration for your next baking adventure.

    Serving Ideas & Creative Variations

    Seasonal Twists on the Classic

    While this Salted Caramel Apple Pie Cheesecake with crumble is already spectacular, you can easily adapt it throughout the year with seasonal variations. In summer, add fresh berries between the apple and cheesecake layers for a fruity twist. For winter holidays, incorporate a teaspoon of orange zest into the filling and garnish with sugared cranberries for a festive appearance. Fall calls for adding 1/4 cup of pumpkin puree and pumpkin pie spice to the filling for an autumn harvest flavor. Spring celebrations benefit from a light lemon infusion in the cheesecake base with a touch of fresh thyme in the apple mixture. These simple adjustments keep the recipe exciting year-round without losing its signature charm.

    Elegant Presentation Techniques

    Elevate your Salted Caramel Apple Pie Cheesecake with thoughtful presentation details that make it restaurant-worthy. For special occasions, I serve individual slices on chilled plates with a swoosh of caramel sauce beneath and a quenelle of cinnamon whipped cream alongside. Create a dramatic tableside moment by warming the salted caramel sauce and pouring it over each slice just before serving. For a modern touch, place thin apple chips standing upright in each slice, or garnish with delicate caramel shards for height and visual interest. These presentation techniques work equally well for casual gatherings or sophisticated dinner parties, making every serving memorable.

    Storage & Troubleshooting Guide

    Proper Storage Methods

    Storing your Salted Caramel Apple Pie Cheesecake properly ensures it maintains its perfect texture for days. After the cheesecake has completely cooled, refrigerate it uncovered for 1 hour to set the surface, then cover it loosely with plastic wrap. Avoid pressing the wrap against the surface to prevent sticking to your beautiful creation. The cheesecake will keep in the refrigerator for up to 5 days, though the crumble topping may soften slightly over time. For longer storage, freeze individual slices on a baking sheet until solid, then wrap each in plastic followed by foil. Frozen slices will maintain quality for up to 2 months—just thaw in the refrigerator overnight before serving.

    Fixing Common Issues

    Even experienced bakers encounter challenges, but most Salted Caramel Apple Pie Cheesecake issues have simple solutions. If your cheesecake develops cracks, don’t panic—the crumble topping and caramel drizzle will beautifully disguise them. For a soggy bottom crust, try pre-baking it for 10 minutes before adding filling. If your caramel crystallizes, add a tablespoon of hot water and gently rewarm it while stirring. When the cheesecake doesn’t set properly, it likely needs more chilling time—give it at least 6 hours, preferably overnight. For a crumble that’s too soft, pop the finished cheesecake under the broiler for 30 seconds to crisp it up. Remember, perfection comes with practice!

    Frequently Asked Questions

    Can I make this Salted Caramel Apple Pie Cheesecake with crumble ahead of time?

    Absolutely! This dessert actually benefits from being made 1-2 days ahead. The flavors meld beautifully during refrigeration, and having it ready in advance reduces day-of stress when entertaining.

    What’s the best way to slice this cheesecake cleanly?

    Dip a sharp knife in hot water and wipe it dry between each cut. The warm blade glides through the different layers without dragging the filling or crumbling the topping.

    Can I use store-bought caramel sauce instead of making my own?

    Yes, but homemade delivers superior flavor. If using store-bought, choose a high-quality salted caramel sauce and warm it slightly before drizzling for the best consistency.

    How do I prevent my cheesecake from cracking?

    Avoid overmixing your batter, always use a water bath, and cool gradually—turn off the oven, prop the door open slightly, and let it cool for an hour before removing.

    Can this recipe be made gluten-free?

    Definitely! Substitute graham crackers with gluten-free cookies for the crust and use a gluten-free flour blend in the crumble topping. The cheesecake filling is naturally gluten-free.

    Final Thoughts

    This Salted Caramel Apple Pie Cheesecake with crumble has become my signature dessert for good reason—it captures the essence of comfort food while delivering an elevated experience that feels special. The harmonious blend of creamy, crunchy, tangy, and sweet creates a symphony of flavors that makes this more than just dessert; it’s an experience to be savored. Whether you’re baking for a holiday gathering or simply treating yourself, this recipe bridges the gap between homey tradition and impressive indulgence. Share your creations with me on Pinterest and discover why this dessert continues to earn rave reviews from everyone who tries it!

  • Mary Berry Chicken and Leek Pie Recipe That Will Melt Your Heart

    Mary Berry Chicken and Leek Pie Recipe That Will Melt Your Heart

    Mary Berry Chicken and Leek Pie Recipe That Will Melt Your Heart

    Mary Berry Chicken and Leek Pie has been my comfort food salvation on countless rainy Sunday afternoons. There’s something magical about the way the creamy sauce envelops tender chicken and sweet leeks, all tucked beneath a golden puff pastry crust. This British classic combines simple ingredients into something truly extraordinary. The first time I made this pie, my kitchen filled with an aroma so inviting that my neighbor actually texted to ask what I was baking! Whether you’re seeking comfort food perfection or looking to impress dinner guests, this recipe delivers warmth in every bite.

    Recipe

    Why You’ll Love This Mary Berry Chicken and Leek Pie

    Perfect Balance of Flavors and Textures

    The genius of Mary Berry’s chicken and leek pie lies in its perfect harmony of flavors. Tender chicken pieces soak up the delicate leek-infused sauce, while the buttery pastry provides a satisfying contrast. I love how the leeks become silky and sweet when cooked slowly, losing their sharp edge and melting into the creamy sauce. The first forkful is a revelation – crisp pastry giving way to that velvety filling. It’s comfort food that doesn’t feel heavy, with each component playing its essential role in creating a dish that’s greater than the sum of its parts.

    Make-Ahead Convenience

    What I adore about this Mary Berry chicken and leek pie is its impressive versatility for busy schedules. You can prepare the filling up to two days ahead, storing it in the refrigerator until you’re ready to assemble. I’ve even frozen the cooled filling for up to a month with excellent results! On particularly hectic weeknights, I assemble the entire pie in the morning, refrigerate it covered, and simply pop it in the oven when I get home. The pastry stays crisp, the filling remains luscious, and dinner is served with minimal evening effort – perfect for those days when cooking feels like too much.

    Essential Tips & Tricks

    Mastering the Perfect Filling

    The secret to an exceptional Mary Berry chicken and leek pie filling is gentle cooking and proper seasoning. I always cook my leeks slowly until they’re buttery soft but not browned – about 10 minutes on medium-low heat does the trick. For the chicken, I prefer thighs over breasts for their richer flavor and resistance to drying out. A splash of white wine deglazes all those flavorful bits from the pan, adding complexity. My personal touch? A teaspoon of Dijon mustard whisked into the sauce for subtle warmth. Remember to let your filling cool completely before topping with pastry to prevent a soggy bottom.

    Perfecting Your Pastry

    Whether using homemade or store-bought, the pastry technique makes all the difference in your Mary Berry chicken and leek pie. I always bring refrigerated pastry to room temperature for 15 minutes before rolling – this prevents cracking while maintaining its structure. For that signature golden finish, brush with beaten egg rather than just egg white, and don’t forget to cut a small vent in the center to release steam. For extra insurance against a soggy bottom, try brushing the rim of your pie dish with beaten egg before adding pastry, creating a waterproof seal. Similar techniques work beautifully when making classic British fish & chips for a complete UK-inspired meal.

    Serving Ideas & Creative Variations

    Complementary Side Dishes

    A Mary Berry chicken and leek pie deserves thoughtful accompaniments that enhance without overwhelming. I love serving it with buttered green beans or peas that echo the spring-like flavors in the pie. For something heartier, try a simple watercress salad dressed with lemon and olive oil – the peppery greens cut through the richness beautifully. On chillier evenings, a small portion of buttery mashed potatoes makes this meal absolutely unbeatable. The key is balance: you want sides that complement rather than compete with your star attraction. For a complete comfort food experience, consider following with no-bake mini Biscoff cheesecakes for dessert.

    Exciting Flavor Twists

    While the classic Mary Berry chicken and leek pie is perfect as-is, I’ve discovered some delightful variations worth trying. For a hint of brightness, add the zest of one lemon to your filling. Seeking more depth? Stir in 2 tablespoons of fresh tarragon or thyme. For a luxurious twist, fold in 100g of sautéed mushrooms and a splash of cream right before assembling. My personal favorite adaptation is adding a handful of crispy pancetta pieces for a subtle smoky note. These simple additions respect the original while creating something uniquely yours – each variation maintaining the comforting essence that makes this pie so beloved.

    Storage & Troubleshooting Guide

    Proper Storage Methods

    Storing your Mary Berry chicken and leek pie properly ensures extended enjoyment without sacrificing quality. Once cooled completely, cover any leftovers with foil and refrigerate for up to 3 days. For reheating, I’ve found that 20 minutes in a 350°F oven works perfectly, with a piece of foil loosely covering the top to prevent over-browning. If freezing the unbaked pie, wrap it tightly in plastic followed by foil and freeze for up to one month. There’s no need to thaw before baking – simply add 15-20 minutes to the baking time and cover with foil for the first half of cooking.

    Fixing Common Issues

    Even experienced bakers encounter challenges with Mary Berry chicken and leek pie, but most are easily fixed with simple adjustments. If your filling seems too watery, whisk 1 tablespoon of cornstarch with 2 tablespoons of cold water and stir it into the simmering sauce. For pastry that’s browning too quickly, loosely cover with foil for the remainder of baking time. If your bottom crust turns soggy, try blind baking the base for 10 minutes before adding filling. And if your filling lacks flavor, don’t hesitate to add a chicken stock cube or a splash of Worcestershire sauce – these little flavor bombs can transform a good pie into an exceptional one.

    Frequently Asked Questions

    Can I use rotisserie chicken for Mary Berry chicken and leek pie?

    Absolutely! Shredded rotisserie chicken works beautifully and saves time. Just add it toward the end of cooking your filling since it’s already cooked through.

    What’s the best pastry for this pie?

    All-butter puff pastry delivers the best flavor and flakiness, but shortcrust works wonderfully too if you prefer a sturdier base.

    Can I make this pie vegetarian?

    Yes! Replace chicken with a mix of mushrooms and white beans. Add a teaspoon of smoked paprika to compensate for the lost chicken flavor.

    Why is my filling too runny?

    Your sauce likely needs more reduction or thickening. Simmer longer uncovered or add a cornstarch slurry (1 tablespoon cornstarch mixed with 2 tablespoons cold water).

    How do I prevent a soggy bottom crust?

    Ensure your filling is completely cool before adding it to the pastry. You can also blind bake the bottom crust for 10-12 minutes before filling.

    Final Thoughts

    Mary Berry chicken and leek pie represents comfort food at its finest – approachable yet impressive, familiar yet special. I find myself returning to this recipe whenever I need a dose of culinary self-care or want to share something truly heartwarming with loved ones. The beauty lies in its perfect simplicity, allowing quality ingredients to shine through thoughtful preparation. Whether following the classic method or adding your personal twist, this pie promises to deliver that rare combination of comfort and elegance that makes British cooking so enduringly appealing. Find more inspiration for your next cooking adventure on Pinterest.

  • One-Pan Garlic Potatoes & Asparagus: Easy, Crispy, Flavor Boost!

    One-Pan Garlic Potatoes & Asparagus: Easy, Crispy, Flavor Boost!

    One-Pan Garlic Potatoes & Asparagus: Easy, Crispy, Flavor Boost!

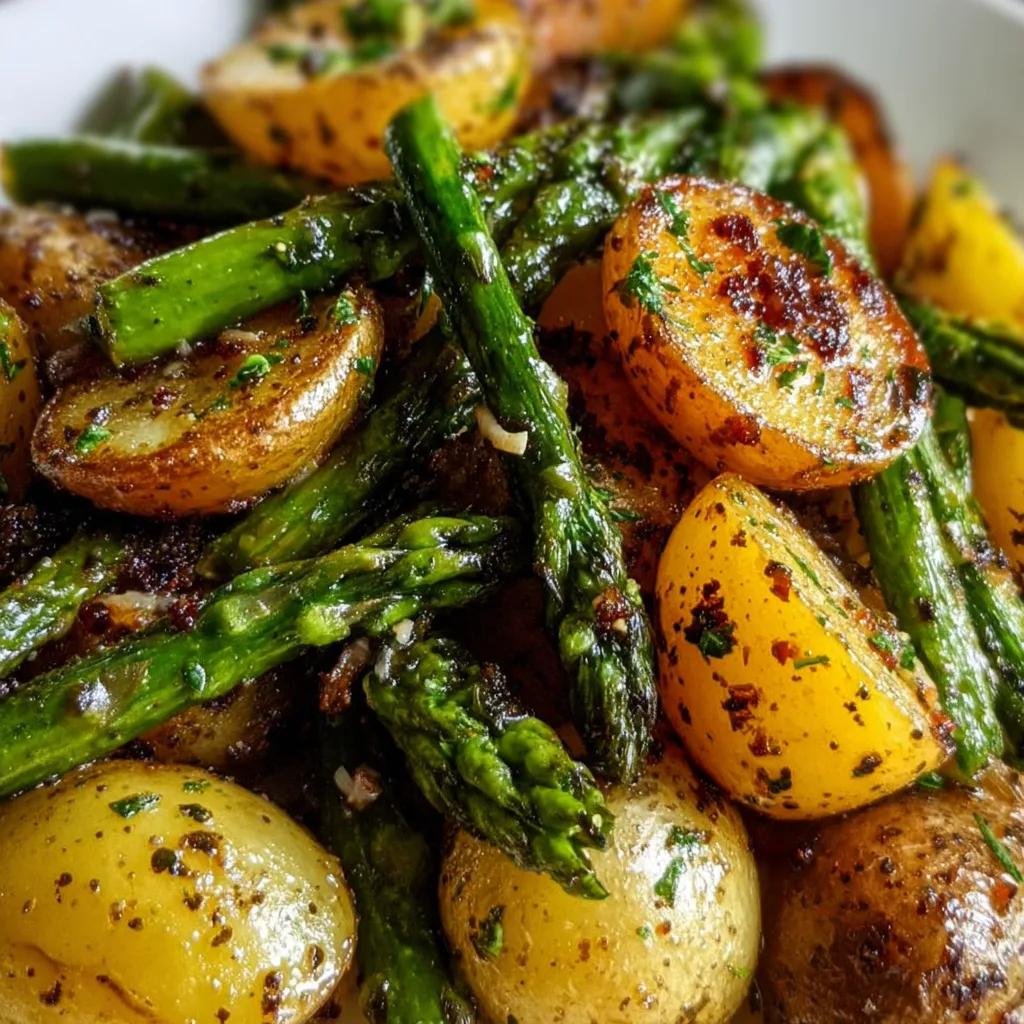
    One-Pan Garlic Potatoes and Asparagus has become my absolute go-to when I need something impressive yet effortless for dinner parties. There’s something magical about the way the potatoes get perfectly crispy while the asparagus maintains that satisfying snap. I discovered this recipe during a chaotic Thursday when unexpected guests announced they’d be over in an hour—and it’s been saving my weeknight dinners ever since! The best part? Everything roasts together on one baking sheet, creating an incredible aroma that fills your kitchen with that unmistakable garlic comfort.

    Recipe

    Why You’ll Love This One-Pan Garlic Potatoes and Asparagus

    Perfect Texture Combination

    The contrasting textures in this dish create a truly satisfying eating experience. The potatoes develop this gorgeous golden crust outside while staying fluffy and tender inside—a texture achievement that still makes me smile every time. Meanwhile, the asparagus retains just the right amount of bite, not too crunchy and definitely not mushy. I remember serving this at my sister’s birthday dinner, and my nephew (who typically avoids anything green) actually asked for seconds! The way these vegetables complement each other creates a harmony on your plate that feels surprisingly sophisticated for such a simple preparation.

    Time-Saving Convenience

    This recipe is a weeknight miracle that has saved me countless times when I’m exhausted but still want something delicious. Everything cooks together on one pan, which means minimal prep and practically no cleanup—just line your baking sheet with parchment and you’re golden! The active hands-on time is under 10 minutes, letting your oven do all the heavy lifting. Last Tuesday, after a particularly draining workday, I managed to throw this together while simultaneously helping my daughter with homework. The efficiency of this dish makes it perfect for those nights when cooking feels overwhelming but takeout isn’t calling your name.

    Essential Tips & Tricks

    Perfect Potato Prep

    The secret to evenly cooked potatoes lies in how you cut them. I aim for uniform 1-inch pieces to ensure they all finish cooking at the same time—a lesson I learned the hard way after serving partially raw chunks to my in-laws (mortifying!). For extra crispiness, pat the potatoes dry before tossing them with oil and seasonings. I’ve found that Yukon Golds or red potatoes work beautifully here, developing that perfect crisp exterior while maintaining a buttery interior. If you’re feeling adventurous, try the technique from my Crispy Pickle Potatoes for an extra flavor dimension.

    Asparagus Timing Perfection

    The trickiest part of this recipe is getting both vegetables perfectly cooked, as asparagus needs significantly less time than potatoes. My foolproof approach: give the potatoes a 15-minute head start, then add the asparagus for the final 10-12 minutes of roasting. The thickness of your asparagus matters tremendously—pencil-thin spears might need only 8 minutes, while thicker ones could require up to 15. I’ll never forget serving sadly overcooked, mushy asparagus at a dinner party until I discovered this staggered cooking method. Look for that vibrant green color with slight browning at the tips as your visual cue for perfection.

    Serving Ideas & Creative Variations

    Complementary Protein Pairings

    This versatile side dish becomes a complete meal when paired with the right protein. I love serving it alongside a simple roasted chicken breast or pan-seared salmon that can cook while the vegetables roast. The garlic flavor profile complements almost any protein beautifully. For vegetarian options, a fried egg with a runny yolk creates magic when it breaks over the vegetables, or try adding white beans tossed with lemon during the last five minutes of cooking. Last weekend, I served this with Ginger Soy Glazed Salmon, and the combination of flavors had my husband asking for the recipe to share at work!

    Flavor Variations

    While the classic garlic version is wonderful, this recipe welcomes creative adaptations. Try adding a sprinkle of parmesan cheese during the last few minutes of cooking for a nutty, savory crust. For brightness, squeeze fresh lemon over everything right after roasting. My personal favorite variation includes a teaspoon of smoked paprika and a pinch of red pepper flakes added to the original seasoning mix—it adds a subtle heat that transforms the dish entirely. During summer months, I often toss in halved cherry tomatoes with the asparagus, creating little bursts of sweetness that complement the savory potatoes perfectly.

    Storage & Troubleshooting Guide

    Proper Storage Methods

    For maximum freshness, allow leftover One-Pan Garlic Potatoes and Asparagus to cool completely before storing in an airtight container in the refrigerator for up to 3 days. The texture will change slightly upon refrigeration—the asparagus softens and the potatoes lose some crispness—but the flavor remains delicious. To reheat, I avoid the microwave which can make everything soggy. Instead, spread the vegetables on a baking sheet and warm in a 350°F oven for about 7-10 minutes. This method helps restore some of the original texture that makes this dish so special in the first place.

    Common Problems & Solutions

    The most frequent issue with this recipe is uneven cooking—either potatoes that remain firm while asparagus overcooks, or perfectly done potatoes with raw asparagus. If your potatoes aren’t crisping properly, check that your oven is actually reaching the correct temperature (an oven thermometer is worth the investment!). Crowding the pan is another common mistake; vegetables need space to roast rather than steam. I once tried to double the recipe without increasing the pan size and ended up with soggy results. If your asparagus browns too quickly, simply cover just the asparagus portion of the pan loosely with foil while the potatoes finish cooking.

    Frequently Asked Questions

    Can I make One-Pan Garlic Potatoes and Asparagus ahead of time?

    Yes! Prep the vegetables and store them separately in the refrigerator. The potatoes can be partially roasted earlier in the day, then finish cooking with the asparagus just before serving for the best texture.

    What’s the best type of potato to use?

    Yukon Gold potatoes are ideal because they have the perfect balance of starch and moisture. They develop a beautiful golden crust while maintaining a creamy interior when roasted.

    Can I substitute other vegetables?

    Absolutely! Green beans, brussels sprouts, or broccoli work wonderfully in place of asparagus. Just adjust cooking times accordingly—broccoli needs about the same time as asparagus.

    How do I know when the asparagus is perfectly cooked?

    Look for vibrant green color with slight browning at the tips. The spears should be tender but still have a slight resistance when pierced with a fork.

    What if I don’t have fresh garlic for my One-Pan Garlic Potatoes and Asparagus?

    Garlic powder works in a pinch—use 1 teaspoon for the recipe. While fresh garlic provides more complex flavor, powder distributes more evenly throughout the dish.

    Final Thoughts

    This One-Pan Garlic Potatoes and Asparagus recipe proves that spectacular flavor doesn’t require complicated techniques or endless ingredients. It’s become my reliable kitchen hero—elegant enough for company yet simple enough for hectic weeknights. The magic lies in how it transforms humble ingredients into something truly special with minimal effort. I encourage you to make this recipe your own by playing with seasonings and complementary proteins. For more inspiration, check out my other vegetable-forward recipes on Pinterest and discover your next kitchen favorite!