Category: Dinner

Easy, tasty dinner ideas for busy nights. Simple recipes, quick prep, and family-friendly meals you’ll make again and again.

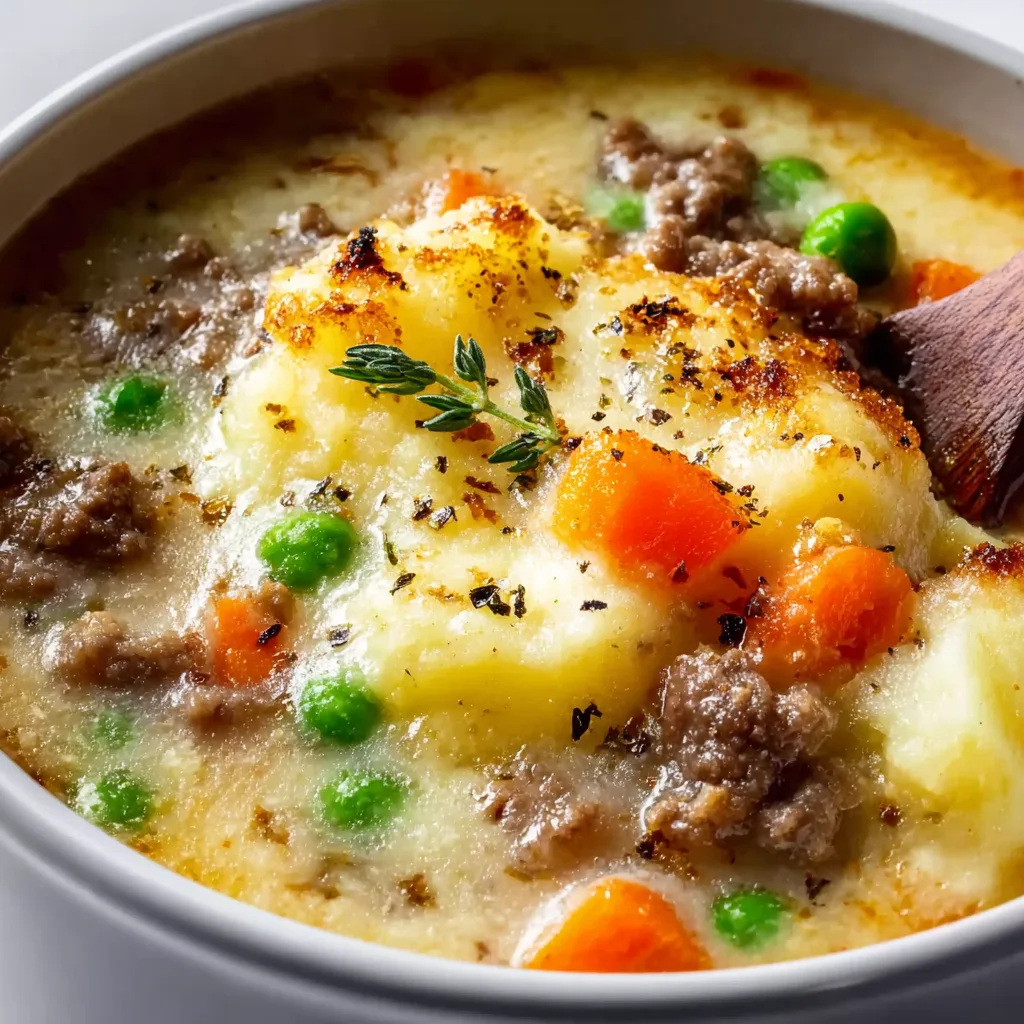
  • Shepherd’s Pie Soup Recipe That Warms Your Soul Instantly

    Shepherd’s Pie Soup Recipe That Warms Your Soul Instantly

    Shepherd’s Pie Soup Recipe That Warms Your Soul Instantly

    Shepherd’s Pie Soup transforms the classic comfort dish into a hearty, spoonable delight that warms you from the inside out. The first time I made this soul-satisfying soup on a blustery winter evening, my kitchen filled with the most incredible aroma of herbs, beef, and vegetables simmering together. There’s something magical about how this recipe captures all the familiar flavors of traditional shepherd’s pie—savory ground meat, sweet carrots, earthy peas—but in a wonderfully cozy soup form. It’s like wrapping yourself in your favorite blanket, only it’s edible! Perfect for those nights when you crave comfort but want something a bit lighter than the classic casserole version found in my beef and barley soup recipe.

    Recipe

    Why You’ll Love This Shepherd’s Pie Soup

    A Complete Meal in One Pot

    This Shepherd’s Pie Soup isn’t just delicious—it’s practical. Everything simmers together in one glorious pot, meaning fewer dishes and more time to enjoy your evening. The rich broth becomes infused with rosemary and thyme, while tender chunks of potato provide that satisfying heartiness that makes shepherd’s pie so beloved. I love watching my family’s faces light up as they dip their spoons in and discover all the layers of flavor. Plus, with protein, vegetables, and starch all swimming together, you’ve got a complete nutritional profile without any fuss.

    Versatile and Adaptable

    What I adore about this Shepherd’s Pie Soup is how easily it bends to your preferences. Traditional ground lamb gives the most authentic flavor, but ground beef works beautifully too. Vegetarians can swap in lentils or a plant-based meat alternative without sacrificing that rich, satisfying texture. My neighbor tried it with ground turkey and added a splash of Worcestershire sauce for depth—she said it was a hit with her picky teenagers! The vegetables are equally flexible; I’ve tossed in leftover roasted Brussels sprouts, corn, or whatever was hiding in my produce drawer, and it’s always turned out wonderfully.

    Essential Tips & Tricks

    Building Deep Flavor Foundations

    The secret to an exceptional Shepherd’s Pie Soup lies in layering flavors from the very beginning. Don’t rush the browning of your meat—those caramelized bits on the bottom of the pot are pure gold for your soup’s flavor profile. I learned this the hard way after once hurrying through this step! Take your time sautéing the onions until they’re translucent and slightly golden. A splash of red wine (optional but recommended) helps deglaze the pan and adds wonderful complexity. For an extra umami boost, add a tablespoon of tomato paste and let it cook for a minute before adding your liquids, just like in my French onion short rib soup.

    Perfecting the Texture

    Achieving the ideal texture in your Shepherd’s Pie Soup requires a bit of finesse with the potatoes and thickening. Choose waxy potatoes like Yukon Golds that hold their shape when simmered. Cut them into uniform 1/2-inch cubes so they cook evenly. For the signature shepherd’s pie thickness, you have options: a simple flour slurry works beautifully, but for a more authentic touch, I sometimes mash a few potato cubes against the side of the pot. This releases their starch naturally into the broth. The soup should coat your spoon nicely without being gluey—think silky and substantial rather than thick and pasty.

    Serving Ideas & Creative Variations

    Delightful Garnishes

    Elevate your Shepherd’s Pie Soup with thoughtful toppings that echo the classic casserole version. My favorite way to serve this is with a small dollop of mashed potatoes floating on top—it’s like the best part of shepherd’s pie in every spoonful! Crispy fried onions add wonderful texture contrast, while a sprinkle of sharp cheddar slowly melting into the hot soup creates pockets of creamy goodness. For special occasions, I’ve been known to pipe rosettes of mashed potatoes onto each bowl and run them under the broiler for a minute, creating a beautiful golden crust that makes everyone reach for their phones to snap a picture before digging in.

    Seasonal Adaptations

    This Shepherd’s Pie Soup transforms beautifully with the changing seasons. In spring, I lighten it up with fresh peas, tender asparagus tips, and a handful of chopped fresh herbs. Summer versions welcome zucchini and fresh corn kernels. Fall calls for diced butternut squash and a hint of nutmeg. Winter versions get heartier with extra root vegetables and perhaps a splash of cream. During the holidays, I serve it alongside my Italian herbs and cheese bread for a meal that feels special yet comforting. The versatility makes this soup a year-round favorite that never feels repetitive.

    Storage & Troubleshooting Guide

    Proper Storage Techniques

    Shepherd’s Pie Soup actually improves with time as the flavors meld together, making it perfect for meal prep Sundays. Allow the soup to cool completely before transferring to airtight containers—I divide mine into single-serving portions for easy lunches. It keeps beautifully in the refrigerator for up to 4 days. For longer storage, freeze for up to 3 months. One tip I’ve learned: the potatoes can sometimes get a bit mealy after freezing, so if you know you’ll be freezing a batch, consider slightly undercooking them. When reheating, do so gently over medium-low heat, stirring occasionally to prevent scorching.

    Fixing Common Issues

    Even experienced cooks encounter soup challenges! If your Shepherd’s Pie Soup seems too thin or watery, don’t panic. Make a quick slurry with 1 tablespoon cornstarch and 2 tablespoons cold water, then stir it into the simmering soup until it reaches your desired thickness. Conversely, if it’s too thick, gradually add more broth until you reach the perfect consistency. Bland flavor is easily fixed with a splash of Worcestershire sauce, a teaspoon of Better Than Bouillon, or my secret weapon—a parmesan rind simmered in the broth. Remember that potatoes absorb salt, so you may need to adjust seasoning after they’ve cooked through.

    Frequently Asked Questions

    Can I make Shepherd’s Pie Soup in a slow cooker?

    Absolutely! Brown the meat and sauté the vegetables first, then transfer everything to your slow cooker. Cook on low for 6-7 hours or high for 3-4 hours, adding the peas in the last 30 minutes.

    What’s the difference between Shepherd’s Pie Soup and Cottage Pie Soup?

    Traditional Shepherd’s Pie Soup uses ground lamb, while Cottage Pie Soup uses ground beef. Both are delicious, so use whichever meat you prefer or have on hand.

    Can I make this soup vegetarian?

    Yes! Substitute the meat with lentils, mushrooms, or plant-based ground meat alternatives. Use vegetable broth instead of beef broth for a fully vegetarian version.

    How do I make this soup gluten-free?

    Simply use cornstarch instead of flour for thickening, and ensure your broth is certified gluten-free. The rest of the ingredients are naturally gluten-free.

    How can I make my Shepherd’s Pie Soup creamier?

    For a creamier Shepherd’s Pie Soup, add 1/4 cup of heavy cream or a dollop of sour cream just before serving. You can also increase the amount of mashed potatoes.

    Final Thoughts

    Shepherd’s Pie Soup brings together the best of two worlds—the comforting flavors of a classic casserole with the soothing qualities of a hearty soup. It’s become my go-to recipe when I need something nourishing yet simple, impressive yet unfussy. There’s a reason this dish has earned a permanent spot in my winter rotation! I’d love to see your version of this versatile soup—tag me on Pinterest if you give it a try. Whether you stick to tradition or make it entirely your own, this Shepherd’s Pie Soup promises to deliver comfort by the spoonful.
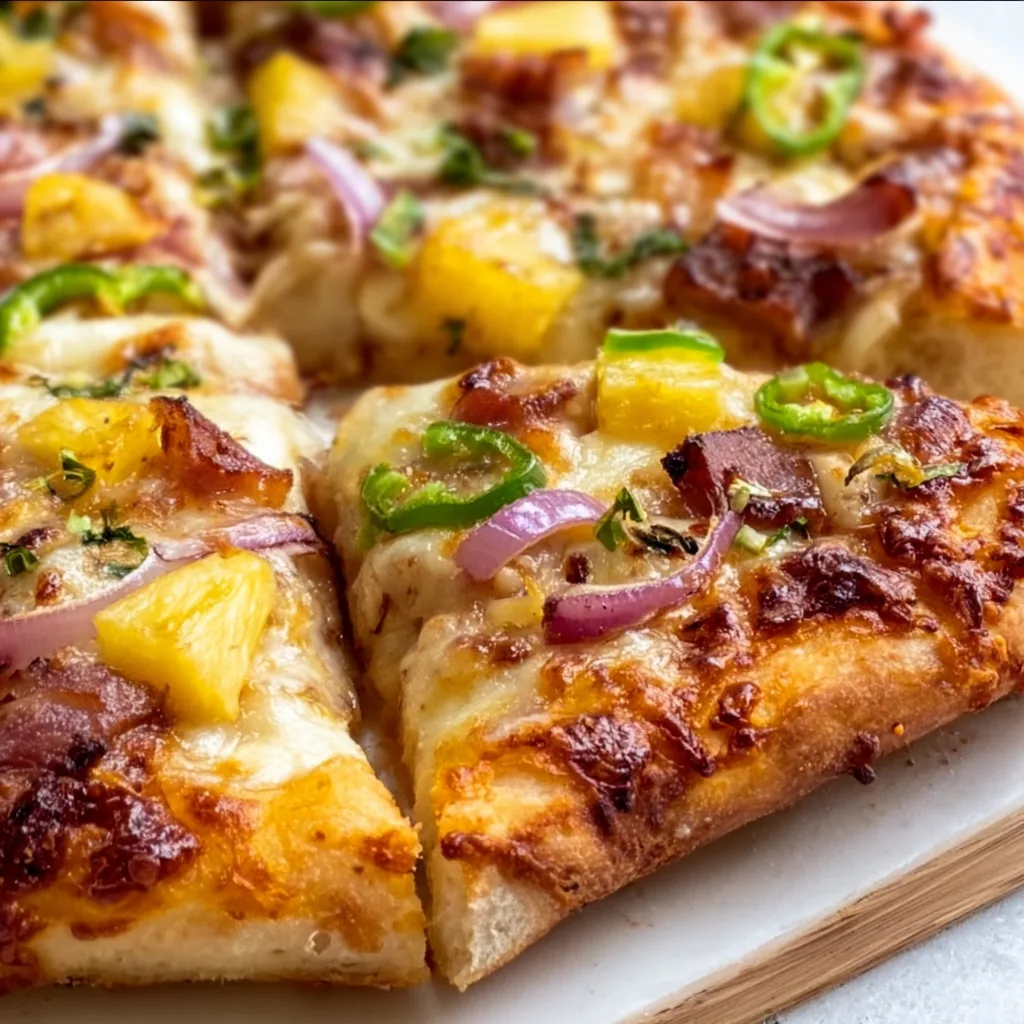
  • Homemade Hawaiian Pizza Recipe That Will Blow Your Mind!

    Homemade Hawaiian Pizza Recipe That Will Blow Your Mind!

    Homemade Hawaiian Pizza Recipe That Will Blow Your Mind!

    Homemade Hawaiian pizza has been my guilty pleasure since college days, when I discovered the magic of sweet pineapple against savory ham on a bed of melty cheese. There’s something about that perfect balance of tangy and savory that makes this controversial pizza style an absolute winner in my kitchen. I still remember the first time I made it from scratch—my tiny apartment filled with the aroma of baking dough while rain pattered against the windows. Whether you’re team pineapple or a curious skeptic, this homemade Hawaiian pizza recipe might just convert you! Let’s create a pizza that would make even the pickiest eaters smile.

    Recipe

    Why You’ll Love This Homemade Hawaiian Pizza

    Perfect Sweet-Savory Balance

    The magic of homemade Hawaiian pizza lies in its perfect flavor harmony. The sweetness of juicy pineapple chunks plays beautifully against salty ham and tangy tomato sauce. I find using fresh pineapple rather than canned makes a world of difference—it caramelizes slightly in the oven, creating little pockets of tropical sweetness. The key is balancing your toppings; too much pineapple overwhelms, while too little leaves you wanting. My trick? Pat the pineapple pieces dry before adding them to prevent a soggy crust. The result is a pizza with distinct flavor zones that dance across your palate with each bite.

    Customizable Family Favorite

    Making homemade Hawaiian pizza turns dinner into an event everyone can participate in. My niece loves arranging pineapple pieces into smiley faces, while my brother insists on extra cheese around the edges. The beauty is how infinitely adaptable this pizza can be. Swap traditional ham for Canadian bacon, prosciutto, or even bacon bits. Add jalapeños for heat, red onions for sharpness, or drizzle with hot honey after baking. For a vegetarian version, substitute ham with roasted red peppers or plant-based alternatives. This flexibility makes homemade Hawaiian pizza perfect for family pizza nights where everyone gets to customize their portion.

    Essential Tips & Tricks

    Dough Perfection

    The foundation of any great homemade Hawaiian pizza is the perfect crust. I prefer a medium-thickness dough that supports the toppings while maintaining a crisp bottom and chewy interior. Let your dough come to room temperature before stretching—cold dough springs back stubbornly. For that authentic pizzeria flavor, brush the edges with olive oil mixed with a touch of garlic powder before baking. If you’re short on time, quality store-bought dough works wonderfully too. My secret weapon is a preheated pizza stone or steel, which mimics the intense heat of professional ovens. This creates that coveted crisp bottom that prevents sogginess from the pineapple’s moisture.

    Topping Strategy

    When assembling your homemade Hawaiian pizza, layering technique matters more than you might think. Start with a thin layer of sauce—too much creates a soupy center. Next, add a base layer of cheese, followed by ham, then another light cheese sprinkle. Place pineapple pieces last, which allows them to caramelize beautifully. For extra flavor, try sprinkling some crushed red pepper flakes between layers for a gentle heat that complements the sweetness. Remember that less is more with toppings—overcrowding leads to uneven cooking and a soggy middle. I always set aside extra pineapple for snacking while the pizza bakes!

    Serving Ideas & Creative Variations

    Perfect Pairings

    Homemade Hawaiian pizza shines brightest with thoughtful accompaniments. I love serving it with a crisp green salad dressed simply with lemon and olive oil—the brightness cuts through the pizza’s richness beautifully. For gatherings, pair with garlic knots or cheesy breadsticks for a complete feast. Beverage-wise, a cold IPA or fruity rosé complements the sweet-savory profile, while pineapple soda offers a fun, alcohol-free alternative that echoes the tropical notes. For dessert, keep the island vibes going with coconut ice cream. I’ve found that serving the pizza on a wooden board with fresh basil scattered over the top adds a restaurant-quality presentation that elevates the whole experience.

    Global Hawaiian Twists

    Take your homemade Hawaiian pizza on a world tour by incorporating international flavors. For a Korean-inspired version, replace tomato sauce with gochujang and top with kimchi alongside the pineapple and ham. A Mexican variation using salsa verde, chorizo instead of ham, and finishing with fresh cilantro creates a fiesta of flavors. My personal favorite is a Caribbean twist with jerk-seasoned chicken replacing the ham, mango joining the pineapple, and a light coconut-infused sauce base. These creative variations maintain the sweet-savory spirit of traditional Hawaiian pizza while introducing exciting new flavor profiles that keep this controversial classic feeling fresh and innovative.

    Storage & Troubleshooting Guide

    Leftover Magic

    Homemade Hawaiian pizza makes excellent leftovers when stored properly. Cool completely before refrigerating to prevent condensation that leads to sogginess. Rather than stacking slices, place them in a single layer in an airtight container, or wrap individually in foil. They’ll keep for up to 3 days. For reheating, skip the microwave which makes the crust chewy. Instead, use a skillet over medium-low heat with a lid to melt the cheese while crisping the bottom, or a 350°F oven for 5-7 minutes. My favorite leftover hack? Chop cold pizza into bite-sized pieces and toss into scrambled eggs for an incredible breakfast that transforms yesterday’s dinner into today’s morning treat.

    Troubleshooting Common Issues

    Even experienced bakers encounter challenges with homemade Hawaiian pizza. If your crust turns out soggy, the likely culprit is excess moisture from the pineapple. Next time, thoroughly drain and pat dry your pineapple, or pre-roast it for 10 minutes to remove excess moisture. For a crust that’s too dense or tough, you might be overworking the dough—handle it gently and allow proper rising time. If cheese browns too quickly before the crust is done, start with the pizza on a lower rack and move it up for the final few minutes. And for those dreaded “topping slides” where everything shifts to one side when cutting, let your pizza rest 3-5 minutes after baking to allow the cheese to set.

    Frequently Asked Questions

    Is fresh or canned pineapple better for homemade Hawaiian pizza?

    Fresh pineapple offers superior flavor and caramelizes beautifully. However, canned works in a pinch—just drain thoroughly and pat dry to prevent soggy crust. I recommend fresh for special occasions and canned for convenience.

    Can I make homemade Hawaiian pizza dough ahead of time?

    Absolutely! Make dough up to 3 days ahead and refrigerate. The slow fermentation actually improves flavor. Bring to room temperature for 1-2 hours before stretching for best results.

    What cheese works best for authentic homemade Hawaiian pizza?

    Traditional mozzarella provides that classic stretch, but I love a blend—80% low-moisture mozzarella with 20% provolone or mild cheddar adds complexity while maintaining meltability.

    How can I prevent my Hawaiian pizza crust from getting soggy?

    Pre-bake your crust for 3-4 minutes before adding toppings. Also, thoroughly drain pineapple, use a moderate amount of sauce, and consider a thin layer of cheese beneath the toppings as a moisture barrier.

    Why do some people dislike pineapple on homemade Hawaiian pizza?

    The controversy stems from mixing sweet fruit with savory elements. Texture differences and temperature contrasts can be divisive. But balanced properly, homemade Hawaiian pizza showcases how opposing flavors can create something magical!

    Final Thoughts

    Creating the perfect homemade Hawaiian pizza is about embracing that delicious tension between sweet and savory. There’s something wonderfully rebellious about loving this controversial pizza style—it’s a reminder that food should be fun, personal, and occasionally divisive! Whether you’re a lifelong fan or a recent convert, homemade Hawaiian pizza brings tropical vibes to your table any day of the week. I hope you’ll share your creations with me on Pinterest and experiment with your own signature touches. The pizza world is divided, but in my kitchen, pineapple will always have a place of honor atop a perfectly cheesy slice.

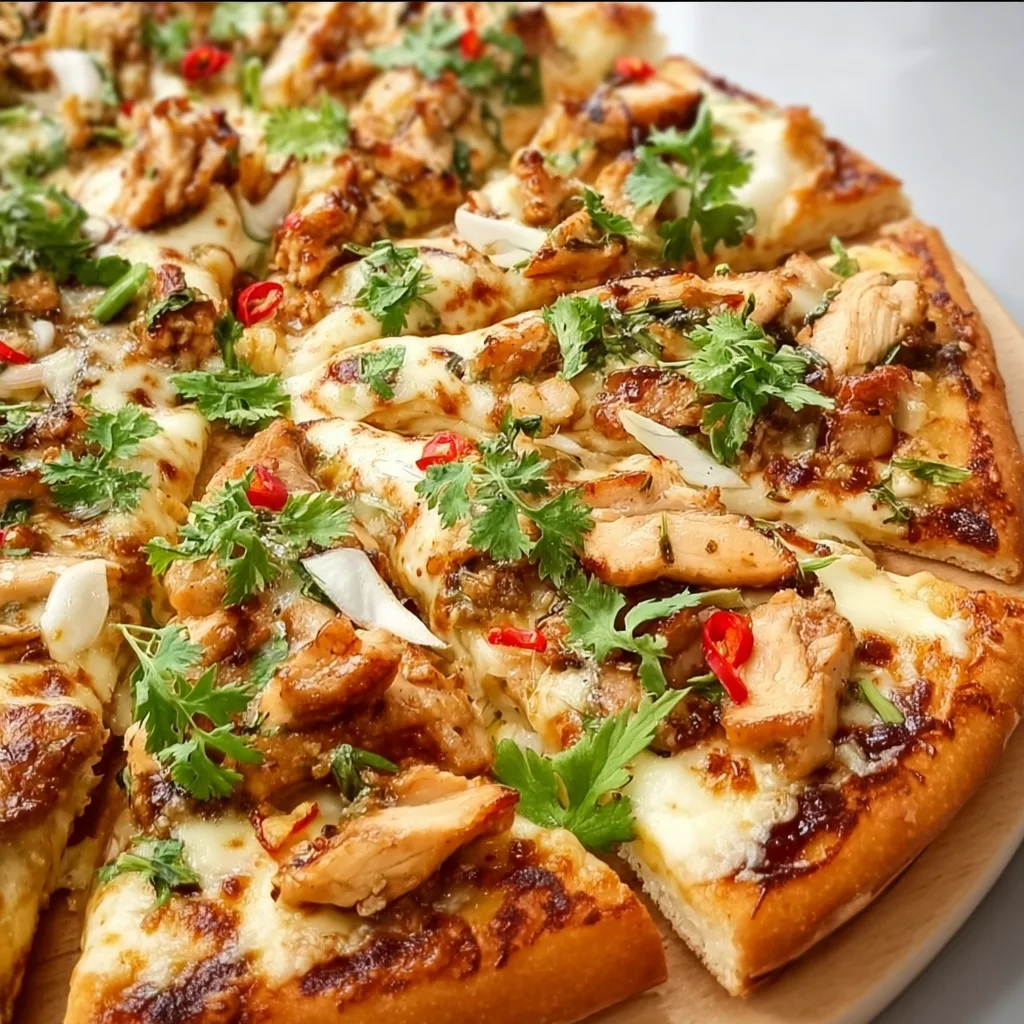
  • Kitchen Thai Chicken Pizza Recipe That’ll Blow Your Mind!

    Kitchen Thai Chicken Pizza Recipe That’ll Blow Your Mind!

    Kitchen Thai Chicken Pizza Recipe That’ll Blow Your Mind!

    Kitchen Thai Chicken Pizza combines two of my favorite culinary worlds in one irresistible dish. The first time I made this fusion masterpiece, my kitchen filled with the aromatic blend of peanut sauce and fresh cilantro, transporting me straight to the streets of Bangkok. This isn’t just any pizza – it’s a flavor explosion that balances sweet, savory, and spicy notes in perfect harmony. The tender chicken, crunchy vegetables, and that signature Thai peanut drizzle create a memorable meal that’ll have everyone asking for seconds. If you love exploring global flavors like I do, this recipe deserves a spot in your regular rotation.

    Recipe

    Why You’ll Love This Kitchen Thai Chicken Pizza

    A Perfect Fusion of Flavors

    This Kitchen Thai Chicken Pizza delivers an incredible flavor profile that dances between worlds. The rich, slightly sweet peanut sauce creates a perfect base that’s miles away from traditional tomato sauce. I love how the tender chicken soaks up all those Thai-inspired seasonings – a hint of ginger, garlic, and a touch of lime that brightens everything. The first bite always surprises guests with its complexity. It’s comfort food with an adventurous spirit, perfect for those nights when you want something familiar yet exciting. My neighbor actually requested this for her birthday dinner last year!

    Quick and Customizable

    One thing I adore about this Kitchen Thai Chicken Pizza is how incredibly adaptable it is. You can have it ready in under 30 minutes, especially if you use pre-cooked chicken and store-bought pizza dough. The heat level is entirely in your control – add sriracha for spice lovers or keep it mild for sensitive palates. I’ve made this with leftover rotisserie chicken on busy weeknights and with carefully marinated chicken thighs for weekend dinner parties. The vegetable toppings are equally flexible – red peppers, bean sprouts, or even mango slices work beautifully. It’s a recipe that grows with your mood.

    Essential Tips & Tricks

    Perfecting Your Pizza Base

    The foundation of an amazing Kitchen Thai Chicken Pizza starts with the perfect crust. I’ve found that pre-baking the dough for 3-5 minutes before adding toppings prevents sogginess, especially important with the sauce-heavy Thai toppings. For an extra flavor boost, brush the edges with a mixture of sesame oil and garlic before baking. Temperature matters tremendously here – make sure your oven is fully preheated to 475°F for that ideal crispy-yet-chewy texture. I learned this the hard way after one sadly underbaked attempt! If you’re feeling adventurous, try our Hot Honey and Feta Pizza technique for the crust.

    Balancing Thai Flavors

    The magic of this pizza lies in the harmony of flavors. The peanut sauce should be creamy but not overpowering – I recommend thinning it slightly with coconut milk for perfect spreadability. When preparing your chicken, marinating it in lime juice, fish sauce, and a touch of brown sugar creates that authentic Thai profile. Always layer ingredients strategically: sauce first, then cheese (a mix of mozzarella and Monterey Jack works beautifully), followed by chicken and vegetables. Save fresh elements like cilantro, green onions, and crushed peanuts for after baking. This layering technique ensures every flavor gets its moment to shine.

    Serving Ideas & Creative Variations

    Perfect Pairings

    This Kitchen Thai Chicken Pizza pairs wonderfully with light, refreshing sides that complement its bold flavors. I love serving it with a simple cucumber salad dressed in rice vinegar and a touch of sugar – the cooling crunch balances the pizza’s richness perfectly. For beverages, try a cold Thai iced tea or a crisp lager beer. When entertaining, I arrange slices on a large wooden board surrounded by small bowls of extra toppings like lime wedges, chopped peanuts, and fresh herbs, allowing guests to customize their experience. This interactive serving style always sparks conversation about the unique flavors in each bite.

    Exciting Variations

    Don’t be afraid to experiment with this versatile recipe! My favorite variation swaps chicken for crispy tofu marinated in the same Thai seasonings – it’s become a staple for my vegetarian friends. For seafood lovers, try small cooked shrimp with a squeeze of lime. You could also create a breakfast version with a sunny-side-up egg on top, where the runny yolk creates an amazing sauce. For a lower-carb option, use a cauliflower crust or try my Spinach Artichoke Pizza technique but with Thai toppings. The possibilities are endless, which is why this recipe never gets boring in my kitchen.

    Storage & Troubleshooting Guide

    Proper Storage Methods

    To maintain the vibrant flavors of your Kitchen Thai Chicken Pizza, proper storage is essential. Refrigerate leftover slices in an airtight container, separating layers with parchment paper to prevent sticking. This pizza will keep well for up to 3 days. For reheating, skip the microwave which makes the crust soggy – instead, use a 350°F oven for 5-7 minutes until warmed through. I’ve found that adding a few fresh toppings like cilantro or a drizzle of sauce after reheating brings back that just-made magic. If you want to prep ahead, you can make the peanut sauce and cook the chicken up to two days before assembly.

    Common Issues & Solutions

    The most frequent challenge with Kitchen Thai Chicken Pizza is preventing sogginess. If your pizza base turns out wet, try reducing the moisture in your toppings – pat chicken dry and pre-cook vegetables to release excess water. For sauce that’s too thick and difficult to spread, add a tablespoon of warm water or coconut milk until you reach desired consistency. If the edges are burning before the center cooks, cover the perimeter with foil. Finding the cheese doesn’t melt properly? Try grating it yourself rather than using pre-shredded varieties which contain anti-caking agents that affect melting. These simple adjustments make all the difference!

    Frequently Asked Questions

    Can I make Kitchen Thai Chicken Pizza ahead of time?

    Yes! Prepare components separately (peanut sauce, cooked chicken, chopped vegetables) and store refrigerated for up to 2 days. Assemble and bake just before serving for the freshest results.

    What’s the best cheese for Thai Chicken Pizza?

    A combination of mozzarella and Monterey Jack works beautifully. The mozzarella provides stretch while the Monterey Jack adds a buttery flavor that complements the Thai seasonings.

    Can I freeze leftover pizza?

    Absolutely. Wrap individual slices tightly in plastic wrap then foil and freeze for up to 1 month. Reheat from frozen in a 375°F oven until hot throughout.

    Is there a gluten-free option?

    Yes! Use a store-bought gluten-free crust or cauliflower crust as your base. Just ensure all other ingredients (especially the peanut sauce) are certified gluten-free.

    What if I don’t have all the Thai ingredients?

    No worries! Start with a simple base of peanut butter, soy sauce, honey, and lime juice for an easy substitute peanut sauce. The essence of Kitchen Thai Chicken Pizza comes from these core flavors.

    Final Thoughts

    Creating Kitchen Thai Chicken Pizza at home brings the joy of culinary exploration right to your dinner table. There’s something magical about that first bite – when the creamy peanut sauce meets the tender chicken, melty cheese, and fresh herbs. It’s become my go-to recipe when I want to impress without spending hours in the kitchen. The beauty of this dish lies in its adaptability and bold flavors that somehow feel both exotic and comforting at once. I hope you’ll share your Kitchen Thai Chicken Pizza creations with me on Pinterest – I’m always inspired by your unique twists!

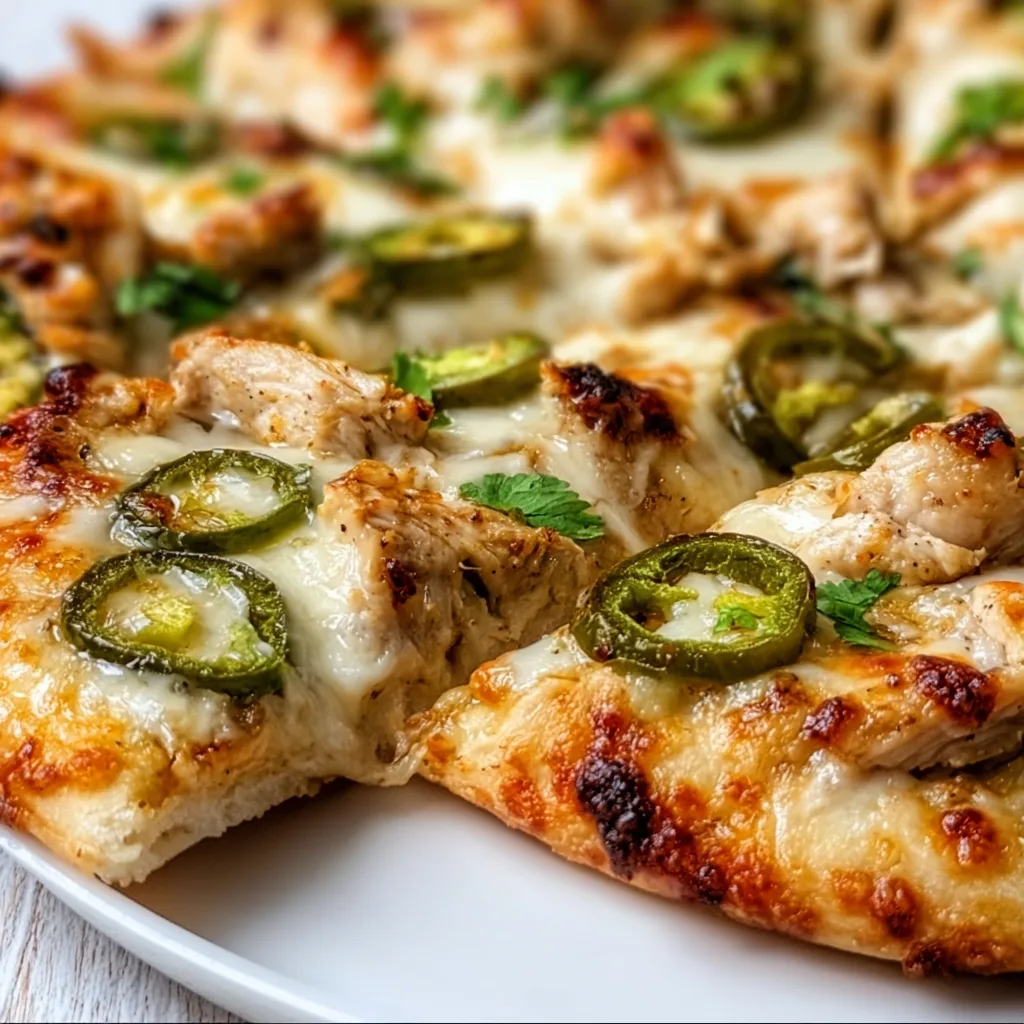
  • Chicken and Pickled Jalapeno Pizza That Will Blow Your Mind!

    Chicken and Pickled Jalapeno Pizza That Will Blow Your Mind!

    Chicken and Pickled Jalapeno Pizza That Will Blow Your Mind!

    This Chicken and Pickled Jalapeno Pizza brings together two of my favorite worlds—tender, juicy chicken and the zingy pop of pickled jalapeños—all on a perfectly crispy crust. The first time I made this for my Friday night pizza tradition, my kitchen filled with an irresistible aroma that had everyone hovering nearby. There’s something magical about that moment when the cheese starts bubbling and the edges turn golden brown. If you love that perfect balance of savory comfort with a hint of tangy heat, this pizza deserves a permanent spot in your recipe collection. It’s become my go-to when I want to spice up a regular pizza night.

    Recipe

    Why You’ll Love This Chicken and Pickled Jalapeno Pizza

    Perfect Balance of Flavors

    The magic of this pizza lies in its flavor harmony—creamy mozzarella mellows the bright acidity of pickled jalapeños, while tender chicken adds satisfying protein. I still remember serving this at my sister’s birthday gathering and watching everyone’s eyes widen with that first bite. The jalapeños deliver just enough heat without overwhelming your taste buds. What makes this combination special is how the pickling brine infuses the entire pizza with a subtle tanginess that cuts through the richness of the cheese. It’s that perfect sweet-spicy-savory balance that keeps you reaching for another slice.

    Quick and Customizable

    One of my favorite things about this Chicken and Pickled Jalapeno Pizza is how incredibly adaptable it is to whatever you have on hand. Running short on time? Use rotisserie chicken and pre-made dough from your local grocery store. Want it spicier? Add more jalapeños or a drizzle of hot honey before serving. The basic recipe comes together in under 30 minutes of active time, making it weeknight friendly without sacrificing flavor. I’ve made this on busy Thursdays and for weekend gatherings alike—it always delivers that “made from scratch” feeling even when I’ve taken shortcuts.

    Essential Tips & Tricks

    Preparing the Perfect Crust

    The foundation of any great pizza is its crust, and this Chicken and Pickled Jalapeno Pizza deserves the best base possible. I’ve found that pre-baking the crust for 3-4 minutes before adding toppings prevents the dreaded soggy middle. For extra flavor, brush the edges with a mixture of olive oil, minced garlic, and a sprinkle of salt before that initial bake. Temperature matters tremendously here—make sure your oven is fully preheated to at least 450°F. If you’re using store-bought dough, let it come to room temperature for easier stretching. That 20-minute rest makes all the difference between fighting with elastic dough and creating the perfect canvas for your toppings.

    Balancing Heat and Flavor

    The key to perfect Chicken and Pickled Jalapeno Pizza lies in balancing the heat level to your preference. I always pat dry the pickled jalapeños before adding them to prevent excess moisture from making the pizza soggy. For milder heat that everyone can enjoy, remove the seeds and membranes from the jalapeños. Want to add complexity? Try mixing in different pickled peppers like banana peppers or pepperoncini for varied heat levels and flavors. When seasoning the chicken, I love using a touch of hot honey in the marinade—it creates a wonderful sweet-heat undertone that complements the pickled jalapeños perfectly.

    Serving Ideas & Creative Variations

    Perfect Pairings

    This Chicken and Pickled Jalapeno Pizza creates opportunities for thoughtful pairings that elevate your meal. I serve it with a simple arugula salad dressed with lemon and olive oil—the peppery greens and bright acidity cut through the richness perfectly. For beverages, an ice-cold Mexican lager or a citrusy IPA complements the jalapeño heat beautifully. If you’re going alcohol-free, try sparkling water with lime and a splash of pineapple juice. When entertaining, I arrange slices on a wooden board surrounded by small bowls of extra toppings like pickled red onions, cilantro, and crema for guests to customize their experience. The interactive element always gets people talking!

    Exciting Flavor Twists

    Don’t be afraid to put your own spin on this Chicken and Pickled Jalapeno Pizza! My favorite variation includes a thin layer of bacon alfredo sauce instead of traditional tomato sauce—the creamy base pairs beautifully with the tangy jalapeños. For a Mexican-inspired version, swap mozzarella for a blend of Monterey Jack and queso fresco, then finish with fresh cilantro and a squeeze of lime after baking. Feeling adventurous? Try adding small chunks of pineapple alongside the jalapeños for a sweet-spicy combination that’s surprisingly addictive. During summer months, I love adding fresh corn kernels cut straight from the cob—they add a sweet pop that balances the heat perfectly.

    Storage & Troubleshooting Guide

    Proper Storage Methods

    To maintain the quality of leftover Chicken and Pickled Jalapeno Pizza, proper storage is essential. Allow pizza to cool completely before refrigerating to prevent condensation that leads to sogginess. I arrange slices in a single layer in an airtight container with parchment paper between layers if stacking is necessary. Refrigerated pizza stays fresh for up to 3 days. For longer storage, freeze individual slices on a baking sheet until solid, then transfer to freezer bags with the air pressed out. When reheating, skip the microwave! Instead, use a skillet over medium-low heat with a lid, or a 350°F oven for 7-10 minutes to restore that crispy-chewy texture we all crave.

    Fixing Common Pizza Problems

    Even experienced cooks encounter pizza challenges. If your Chicken and Pickled Jalapeno Pizza crust turns out too soggy, try reducing moisture in your toppings—always pat dry pickled jalapeños and pre-cook chicken to release excess liquid. For a crust that’s too hard or burnt, your oven may be running hot; use an oven thermometer for accuracy and lower the temperature by 25°F next time. If cheese isn’t browning properly, switch to the broiler for the final minute of cooking (watching carefully!). When pizza sticks to the pan, try a light dusting of cornmeal under the dough before baking. Remember that pizza-making improves with practice—each “mistake” teaches you something valuable for your next delicious creation.

    Frequently Asked Questions

    Can I make Chicken and Pickled Jalapeno Pizza ahead of time?

    Yes! Prep components separately up to 2 days ahead—marinate and cook chicken, slice jalapeños, and shred cheese. Store separately in the refrigerator. Assemble and bake just before serving for the freshest result.

    How spicy is this pizza with the pickled jalapeños?

    The pickling process actually mellows the jalapeños’ heat while adding tanginess. For milder flavor, remove seeds and membranes or reduce the quantity. For extra kick, add fresh jalapeños alongside the pickled ones.

    What’s the best cheese to use for Chicken and Pickled Jalapeno Pizza?

    Low-moisture mozzarella provides the perfect melt and mild flavor that complements the jalapeños. For more complexity, try a blend with monterey jack, provolone, or a sprinkle of cotija on top after baking.

    Can I use a different meat instead of chicken?

    Absolutely! Cooked bacon, pepperoni, seasoned ground beef, or even chorizo work beautifully. For a vegetarian version, substitute firm tofu marinated in similar seasonings or use hearty mushrooms.

    How do I prevent my pizza from getting soggy with wet toppings?

    Pre-bake your crust for 3-4 minutes before adding toppings. Always pat pickled jalapeños dry with paper towels, and make sure your chicken is well-drained of excess moisture.

    Final Thoughts

    This Chicken and Pickled Jalapeno Pizza has become my reliable crowd-pleaser that strikes the perfect balance between familiar comfort and exciting flavor. The combination of tender chicken, tangy-spicy jalapeños, and melty cheese creates something truly greater than the sum of its parts. Don’t be surprised when friends request this specifically the next time you host! I’d love to see your creations—tag me on Pinterest with your version of this recipe. Remember that cooking is about making something that brings you joy, so adjust the heat level and toppings to create your perfect pizza experience.

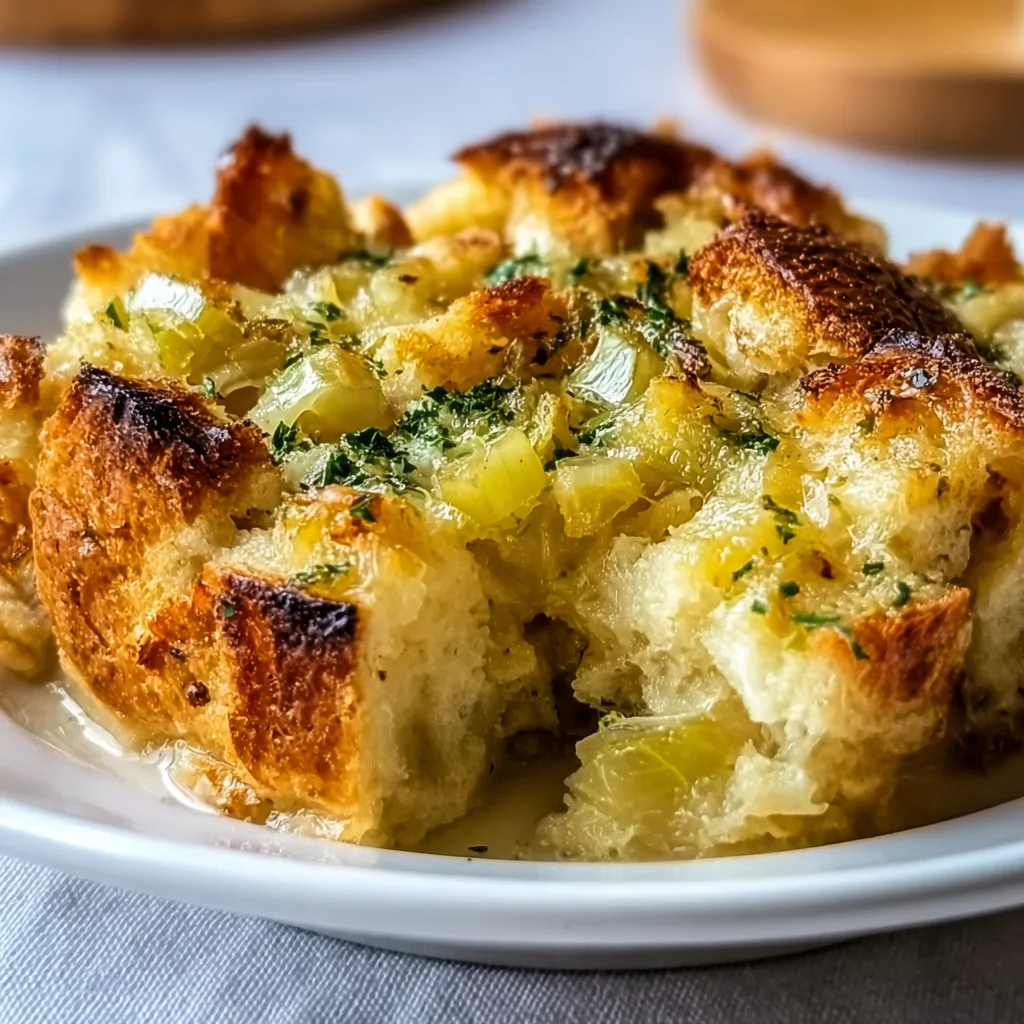
  • Gruyere and Leek Bread Pudding Recipe That Will Melt Your Heart!

    Gruyere and Leek Bread Pudding Recipe That Will Melt Your Heart!

    Gruyere and Leek Bread Pudding Recipe That Will Melt Your Heart!

    Gruyere and Leek Bread Pudding is what happens when comfort food meets sophisticated flavor. The first time I made this dish, my kitchen filled with the most intoxicating aroma of caramelized leeks and nutty Gruyere cheese. There’s something magical about watching crusty bread transform as it soaks up the savory custard. This recipe strikes that perfect balance between rustic simplicity and elegant indulgence—making it ideal for everything from Sunday brunch to holiday gatherings. If you love the concept of bread pudding but crave something savory, this recipe will become your new favorite.

    Recipe

    Why You’ll Love This Gruyere and Leek Bread Pudding

    A Perfect Balance of Flavors and Textures

    The magic of this Gruyere and Leek Bread Pudding lies in its incredible textural contrast. The top develops a golden, slightly crispy crust while the interior remains wonderfully tender and custard-like. The leeks bring a subtle sweetness that perfectly complements the nutty depth of the Gruyere cheese. I love how the cheese creates these little pockets of melty goodness throughout each bite. The bread soaks up the savory egg mixture but still maintains enough structure to give the dish substance. It’s that rare recipe where each forkful delivers multiple layers of flavor and texture.

    Versatile for Any Occasion

    What I adore about this Gruyere and Leek Bread Pudding is how it effortlessly transitions between casual and upscale settings. I’ve served it for lazy weekend brunches in my pajamas and for elegant dinner parties where guests raved. It works beautifully as a stand-alone entrée with a simple green salad or as a sophisticated side dish alongside roasted chicken or beef. The make-ahead potential makes it perfect for busy hosts—assemble it the night before, refrigerate, and bake when needed. Plus, it’s equally delicious warm from the oven or at room temperature, giving you flexibility few dishes offer.

    Essential Tips & Tricks

    Choosing the Right Bread and Cheese

    The foundation of an exceptional Gruyere and Leek Bread Pudding starts with quality ingredients. For bread, I recommend a sturdy artisan loaf with a good crust—sourdough, French, or Italian all work beautifully. Day-old or slightly stale bread actually works better as it absorbs the custard without becoming soggy. For the cheese, authentic Gruyere offers that perfect nutty flavor and superior melting quality, but if it’s not available, Emmental or Swiss cheese make good substitutes. Don’t pre-shred your cheese; freshly grated melts more evenly and delivers better flavor than the pre-packaged variety. Just like my Brioche Bread Pudding, quality ingredients make all the difference.

    Mastering the Custard Mixture

    The custard is where the magic happens in this Gruyere and Leek Bread Pudding. The key is achieving the perfect egg-to-liquid ratio—too much liquid and you’ll end up with soup; too little and it becomes dry. I use a combination of whole milk and cream for richness, but you can adjust based on your preference for decadence. Whisk your eggs thoroughly before adding the dairy to ensure a silky-smooth mixture. Season generously—the bread will absorb much of the flavor, so don’t be shy with salt and pepper. Allow at least 30 minutes (or overnight in the refrigerator) for the bread to fully absorb the custard before baking for that perfect pudding-like consistency.

    Serving Ideas & Creative Variations

    Perfect Pairings for a Complete Meal

    Gruyere and Leek Bread Pudding pairs beautifully with so many accompaniments to create a memorable meal. For brunch, I love serving it with a bright arugula salad dressed simply with lemon and olive oil to cut through the richness. For dinner, it’s spectacular alongside Melt-in-Your-Mouth Beef Short Ribs or a simple roast chicken. A side of roasted asparagus or broccolini adds a welcome vegetal note. If you’re hosting a gathering, consider serving smaller portions as a sophisticated starter. Don’t forget a glass of crisp white wine like Sauvignon Blanc or a light Chardonnay—the acidity perfectly balances the creamy, cheesy goodness.

    Exciting Flavor Twists to Try

    While the classic Gruyere and leek combination is heavenly, this bread pudding welcomes creative adaptations. Try adding caramelized onions for deeper sweetness or sautéed mushrooms for an earthy dimension. Incorporating herbs like thyme, rosemary, or sage infuses aromatic complexity—I particularly love fresh thyme with leeks. For a protein boost, add crispy bacon bits or diced ham. Experiment with cheese combinations—a bit of sharp cheddar or creamy goat cheese alongside the Gruyere creates interesting flavor profiles. For a touch of brightness, fold in roasted cherry tomatoes or red peppers. The beauty of this dish is its flexibility while maintaining that comforting, satisfying essence.

    Storage & Troubleshooting Guide

    Proper Storage and Reheating Methods

    Gruyere and Leek Bread Pudding stores beautifully, making it perfect for meal prep or leftovers. Refrigerate any cooled leftovers in an airtight container for up to 3 days. When reheating, cover with foil and warm in a 325°F oven for about 15-20 minutes until heated through—this method preserves the texture better than microwaving. For make-ahead preparation, you can assemble the entire dish, cover, and refrigerate overnight before baking. You can even freeze individual portions for up to 1 month; thaw overnight in the refrigerator before reheating. Just know that the texture may be slightly less perfect than fresh, but the flavor remains delicious.

    Solving Common Bread Pudding Problems

    If your Gruyere and Leek Bread Pudding turns out too dry, the likely culprit is insufficient soaking time or too little custard. Next time, ensure your bread fully absorbs the liquid and consider adding an extra 1/4 cup of milk to the custard. Conversely, if it’s too wet, your bread might have been too fresh or you may need more soaking time. For soggy bottoms, try using a water bath during baking to promote even cooking. If your top isn’t browning nicely, switch to broil for the last 2-3 minutes, watching carefully. Remember that different bread types absorb liquid differently, so adjustments may be needed based on your specific loaf.

    Frequently Asked Questions

    Can I make Gruyere and Leek Bread Pudding ahead of time?

    Absolutely! Assemble it up to 24 hours in advance, cover and refrigerate. Let it sit at room temperature for 30 minutes before baking. This actually improves the flavor as the bread fully absorbs the custard mixture.

    What’s the best bread to use for this recipe?

    Day-old artisan bread works best—sourdough, French, or Italian loaves with a good crust. The slight staleness helps the bread absorb the custard without becoming mushy.

    Can I substitute the Gruyere cheese?

    Yes! Emmental, Swiss, Comté, or Fontina make excellent substitutes. For a different flavor profile, try a combination of cheeses, keeping at least half as a good melting variety.

    How do I know when the bread pudding is fully cooked?

    The top should be golden brown and slightly crisp. Insert a knife in the center—it should come out mostly clean with no liquid custard, though it will be moist. The internal temperature should reach 160°F.

    Can I freeze leftover Gruyere and Leek Bread Pudding?

    Yes, freeze individual portions in airtight containers for up to 1 month. Thaw overnight in the refrigerator and reheat covered in a 325°F oven until warmed through.

    Final Thoughts

    This Gruyere and Leek Bread Pudding has become one of my signature dishes for good reason—it transforms simple ingredients into something truly special. The way the leeks melt into the custard while the Gruyere creates pockets of savory richness makes each bite a little revelation. What I love most is how it bridges the gap between comfort food and elegant cuisine. It’s the kind of recipe that creates moments around the table, whether for a special occasion or turning an ordinary day into something memorable. I hope this savory bread pudding brings as much joy to your table as it has to mine. For more cozy recipes, visit Pinterest.

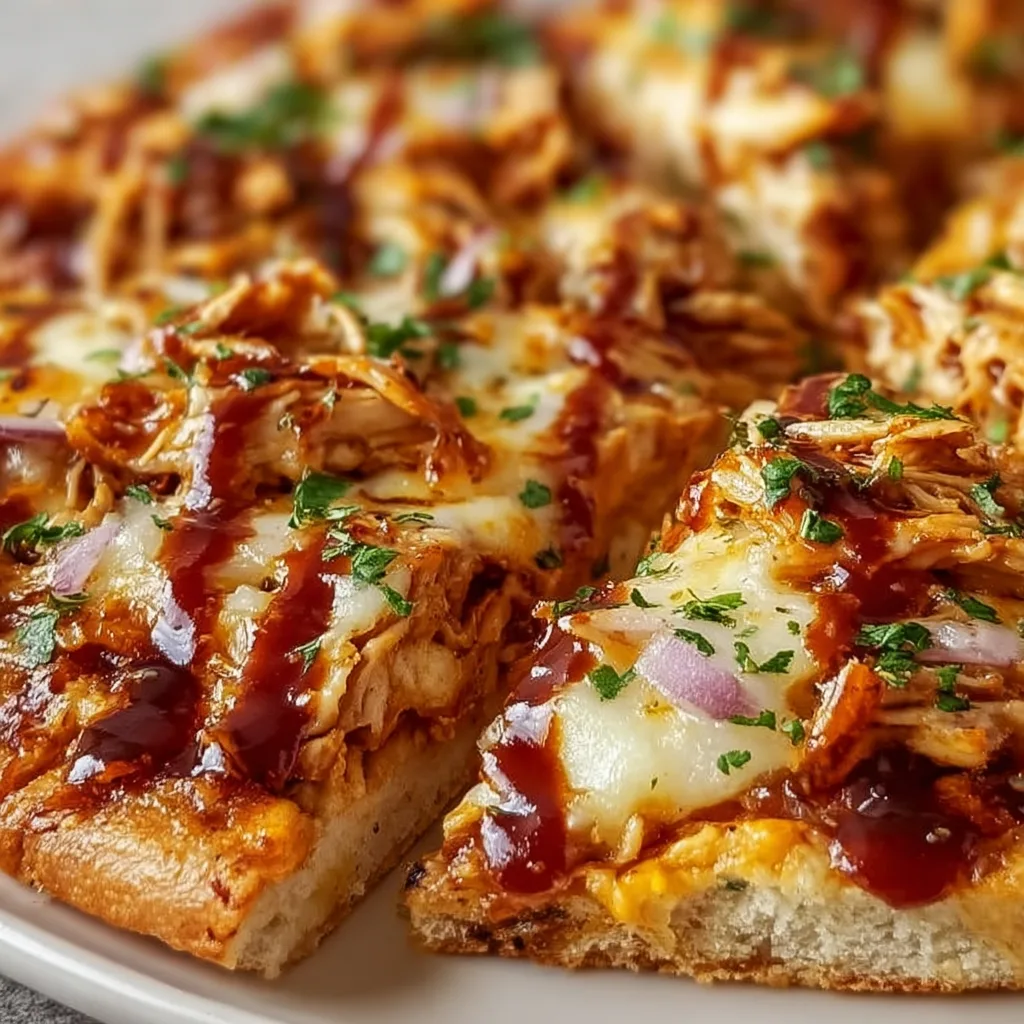
  • Cheesy BBQ Chicken Pizza Explosion: Irresistible, Mouthwatering Flavor!

    Cheesy BBQ Chicken Pizza Explosion: Irresistible, Mouthwatering Flavor!

    Cheesy BBQ Chicken Pizza Explosion: Irresistible, Mouthwatering Flavor!

    Cheesy BBQ Chicken Pizza brings together everything I crave on a Friday night – tangy barbecue sauce, tender chicken, and a blanket of melted cheese that stretches with each bite. The first time I made this pizza, my kitchen filled with an aroma so mouthwatering that my neighbor actually texted to ask what I was cooking! There’s something magical about the way the sweet-smoky BBQ sauce mingles with savory chicken and that irresistible cheese pull that makes this homemade pizza better than anything delivery can offer. Perfect for family pizza nights or weekend gatherings, this recipe has quickly become my go-to when I want to impress without stressing in the kitchen.

    Recipe

    Why You’ll Love This Cheesy BBQ Chicken Pizza

    A Flavor Explosion in Every Bite

    The magic of this Cheesy BBQ Chicken Pizza lies in its perfect balance of flavors. The tangy-sweet BBQ sauce creates an incredible base that’s both familiar and exciting – I use a mix of store-bought sauce with a splash of honey for depth. The chicken, seasoned and tender, adds satisfying protein while red onions bring a subtle sharpness that cuts through the richness. What really makes this pizza sing is the cheese blend – mozzarella for that classic stretch, cheddar for sharpness, and a sprinkle of smoked gouda that echoes the BBQ’s smokiness. I love watching my guests’ eyes light up with that first bite when all these flavors come together.

    Quick and Customizable for Any Occasion

    What I adore most about this Cheesy BBQ Chicken Pizza is how adaptable it is for different situations. Expecting last-minute guests? Use a pre-made crust and rotisserie chicken for a 15-minute miracle. Meal prepping for the week? The toppings can be prepared days ahead, making assembly lightning-fast when you’re hungry. You can easily adjust the spice level by choosing mild or spicy BBQ sauce, or adding jalapeños for heat-lovers. I’ve made mini versions on naan bread for my daughter’s birthday party and a giant sheet pan version for game day. The versatility makes this recipe perfect whether you’re feeding picky eaters or adventurous foodies.

    Essential Tips & Tricks

    Perfecting Your Pizza Base

    The foundation of an amazing Cheesy BBQ Chicken Pizza starts with the crust. Whether you’re using homemade dough (my weekend preference) or store-bought (my weeknight savior), the key is proper pre-baking. I always give my crust a 3-5 minute head start in a screaming hot oven before adding toppings. This prevents the dreaded soggy middle that can happen with sauce-heavy pizzas. Another game-changer? Brush the edges with olive oil mixed with a pinch of garlic powder before baking. This creates a golden, flavorful crust that’s impossible to resist. If you’re feeling adventurous, try my Italian Herbs and Cheese Bread technique on your crust!

    Layering Strategy for Maximum Flavor

    The order of your toppings matters more than you might think! After years of pizza-making, I’ve discovered the perfect layering technique for Cheesy BBQ Chicken Pizza. Start with a thin layer of BBQ sauce (don’t overdo it or your pizza will become soggy). Next comes a light sprinkle of cheese – this creates a barrier that keeps the crust crispy. Then add your chicken and thinly sliced red onions. Finally, add the remaining cheese on top. This method ensures every bite has the perfect balance of flavors, and the cheese gets that beautiful golden color while protecting the chicken from drying out. The result is pizza perfection that rivals any restaurant version.

    Serving Ideas & Creative Variations

    Perfect Pairings for a Complete Meal

    Elevate your Cheesy BBQ Chicken Pizza night with thoughtfully chosen sides that complement those bold flavors. My family’s favorite pairing is a crisp apple-walnut salad with a light vinaigrette – the brightness cuts through the pizza’s richness beautifully. For a heartier meal, try serving alongside some sweet potato fries with a cilantro-lime dipping sauce. Beverage pairings matter too! A cold craft beer or homemade lemonade works wonders with the BBQ notes. For dessert, something simple like vanilla ice cream with a drizzle of caramel balances the meal. These combinations transform a casual pizza night into what my friends now request as my “famous BBQ pizza dinner experience.”

    Exciting Twists on the Classic Recipe

    Once you’ve mastered the basic Cheesy BBQ Chicken Pizza, the variations are endless! My current obsession is the Hawaiian BBQ version – adding pineapple chunks and crispy bacon bits creates a sweet-salty-smoky masterpiece. For spice lovers, try the Buffalo BBQ fusion by mixing hot sauce with your BBQ base and adding blue cheese crumbles on top. Vegetarian guests? Replace chicken with roasted cauliflower tossed in BBQ sauce – surprisingly delicious! For something truly special, check out my Hot Honey and Feta Pizza for inspiration on combining sweet and savory flavors in unexpected ways.

    Storage & Troubleshooting Guide

    Keeping Leftover Pizza Perfect

    Let’s be honest – cold pizza for breakfast is one of life’s simple pleasures, but Cheesy BBQ Chicken Pizza deserves proper storage to maintain its magic. Allow leftover pizza to cool completely before refrigerating to prevent condensation that makes the crust soggy. I arrange slices in a single layer in an airtight container with parchment paper between layers if stacking is necessary. Refrigerate for up to 3 days. For reheating, skip the microwave! Instead, use a skillet over medium-low heat with a lid for 3-4 minutes, or an air fryer at 350°F for 2-3 minutes. This restores the crispy crust while keeping the cheese perfectly melty.

    Solving Common Pizza Problems

    Even experienced home cooks encounter pizza challenges, but I’ve developed solutions through years of trial and error. If your crust is browning too quickly while the cheese isn’t melted, try moving the pizza to a lower rack and reducing the temperature by 25°F. For a crust that’s too pale, brush the edges with olive oil before baking. Dealing with toppings that slide off? Let your pizza rest 2-3 minutes before slicing – this allows the cheese to set slightly. And for that frustrating scenario where the middle is undercooked, par-bake your crust first and use a pizza stone if you have one. It absorbs moisture and ensures even cooking.

    Frequently Asked Questions

    Can I make Cheesy BBQ Chicken Pizza ahead of time?

    Yes! Prepare all toppings and store separately in the refrigerator for up to 2 days. You can even par-bake the crust for 3-4 minutes, cool completely, and wrap tightly. When ready to serve, simply assemble and bake for 8-10 minutes until bubbly.

    What’s the best cheese for BBQ Chicken Pizza?

    A combination works best: mozzarella for stretch, sharp cheddar for flavor, and smoked gouda for depth. This trio complements the BBQ sauce perfectly while creating that Instagram-worthy cheese pull we all love.

    Can I freeze Cheesy BBQ Chicken Pizza?

    Absolutely! Bake the pizza completely, cool, then slice. Freeze slices on a baking sheet until solid, then transfer to freezer bags. Reheat frozen slices in a 375°F oven for 8-10 minutes until hot and crispy.

    How do I prevent my pizza from getting soggy?

    Don’t overload with sauce, pre-cook toppings to remove excess moisture, and consider par-baking your crust for 3-5 minutes before adding toppings. A hot pizza stone also helps create a crispy bottom.

    What can I use instead of chicken for a vegetarian version?

    Roasted cauliflower, plant-based chicken substitutes, or extra-firm tofu marinated in BBQ sauce work beautifully. Add extra veggies like bell peppers and corn for more texture and flavor.

    Final Thoughts

    This Cheesy BBQ Chicken Pizza has become more than just a recipe in my household – it’s a tradition that brings everyone to the table with smiles. The combination of tangy sauce, tender chicken, and that perfect cheese blend creates something truly special that store-bought pizza simply can’t match. What I love most is watching friends and family reach for second slices, eyes closed in appreciation of those bold, comforting flavors. Whether you’re cooking for a crowd or treating yourself to something delicious, this pizza delivers satisfaction in every bite. Don’t forget to share your creations on Pinterest!

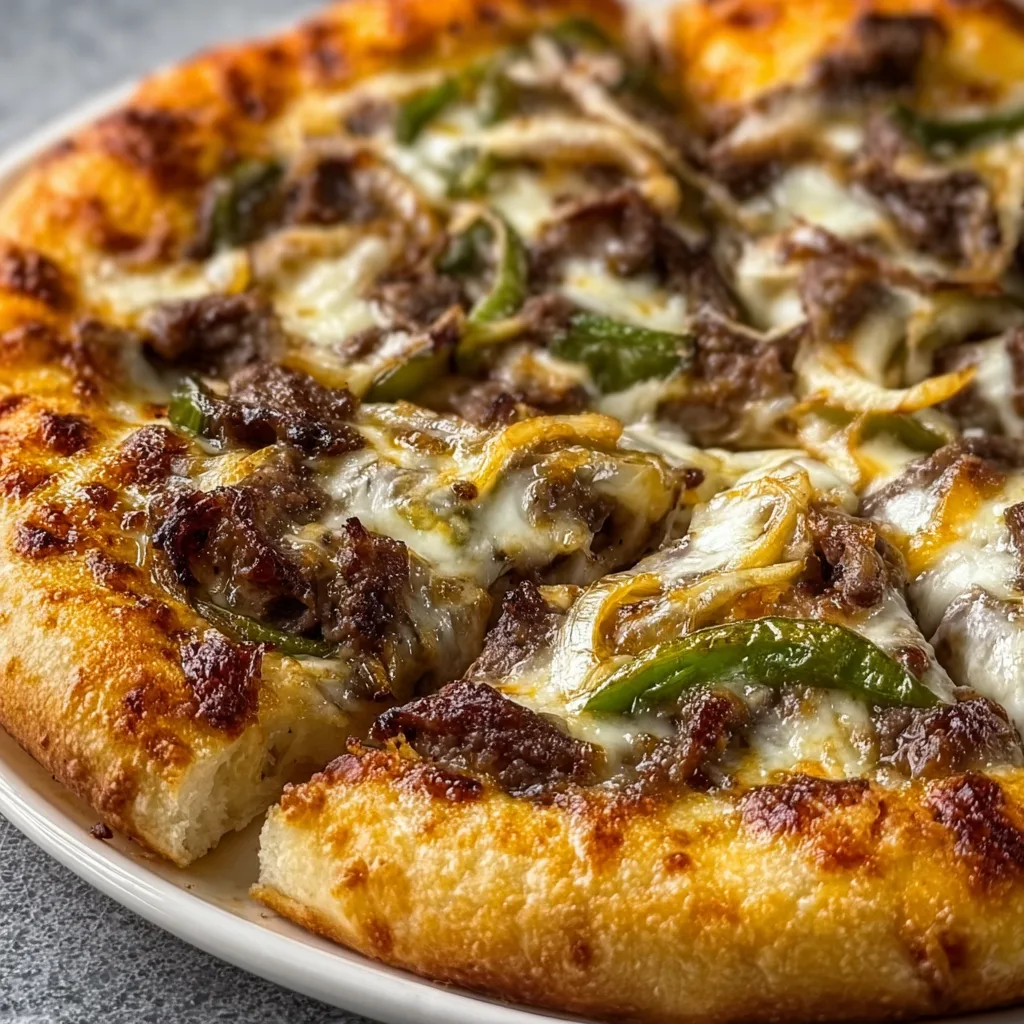
  • Philly Cheesesteak Pizza: Irresistibly Cheesy & Loaded Flavor!

    Philly Cheesesteak Pizza: Irresistibly Cheesy & Loaded Flavor!

    Philly Cheesesteak Pizza: Irresistibly Cheesy & Loaded Flavor!

    Philly Cheesesteak Pizza combines two beloved classics into one mouthwatering masterpiece that never fails to impress. The first time I made this for my family game night, there was a moment of complete silence as everyone took their first bite – then pure food bliss! That magical combination of thinly sliced beef, melty provolone, and caramelized onions atop a crispy crust creates something truly special. It’s become our Friday night tradition, and I’m thrilled to share my perfected recipe with you. If you love creative pizza combinations, this one rivals even my spicy sausage pepper pizza for flavor impact.

    Recipe

    Why You’ll Love This Philly Cheesesteak Pizza

    Perfect Fusion of Flavors

    There’s something almost magical about how the savory steak and sweet caramelized onions play together on this pizza. The rich beef flavor infuses the melty cheese layer, creating that authentic cheesesteak experience in every bite. I’ve found that using provolone as the base cheese layer and finishing with mozzarella gives you that perfect cheese pull we all crave. The bell peppers add a fresh pop of color and slight sweetness that balances the richness. My husband claims this pizza actually tastes better than the cheesesteaks we had on our Philadelphia trip!

    Quick Weeknight Wonder

    Despite its impressive taste, this Philly Cheesesteak Pizza comes together surprisingly fast. The prep work is minimal – especially if you use pre-sliced steak or leftover roast beef. I’ve made this on hectic weeknights when I had just 30 minutes to get dinner on the table. The most time-consuming part is caramelizing the onions, but even that can be done ahead of time (I often make extra and refrigerate them for quick meals). The pizza itself bakes in just 12-15 minutes, making it perfect for those evenings when you want something delicious without hours of cooking.

    Essential Tips & Tricks

    Beef Selection & Preparation

    The right cut of beef makes all the difference in your Philly Cheesesteak Pizza. Ribeye is traditional and offers amazing flavor, but sirloin works beautifully too and is often more budget-friendly. The key is slicing it ultra-thin against the grain. A pro tip: freeze the steak for about 20 minutes before slicing to make it easier to get those paper-thin pieces. Don’t overcook the beef during the initial sauté – it will continue cooking in the oven. I aim for medium-rare in the pan, knowing it will reach perfect doneness on the pizza. Season generously with salt and pepper right before cooking.

    Perfecting Your Pizza Base

    Starting with the right pizza dough sets you up for success. While homemade dough is wonderful, a quality store-bought dough works perfectly for busy nights. The secret to a crispy crust is preheating your pizza stone or baking sheet before adding the dough. I learned this trick from my hot honey and feta pizza recipe, and it’s been a game-changer! Brush the edges with olive oil mixed with a little garlic powder for that extra flavor boost. For an even more authentic experience, try using a thin smear of Cheez Whiz under your provolone layer – it sounds unconventional, but it’s deliciously authentic!

    Serving Ideas & Creative Variations

    Perfect Pairings

    This Philly Cheesesteak Pizza deserves some equally delicious sides to create a complete meal. A simple arugula salad with lemon vinaigrette provides a refreshing contrast to the rich pizza. For heartier appetites, try my loaded dirty fries – the combination is absolutely indulgent but worth every calorie! If you’re serving this for game day, add some pickle spears on the side for that authentic cheesesteak experience. For beverages, a cold craft beer or crisp cider complements the savory flavors beautifully. My husband prefers a robust red wine, which also pairs surprisingly well.

    Creative Twists

    Don’t be afraid to put your own spin on this Philly Cheesesteak Pizza with some exciting variations. Try a white sauce base instead of traditional tomato sauce – a garlic parmesan sauce works wonderfully with these toppings. For a spicy kick, add sliced jalapeños or a drizzle of hot honey just before serving. Mushroom lovers can add sautéed cremini or portobello mushrooms for an earthy dimension. For a breakfast-inspired version, crack a few eggs on top during the last few minutes of baking. My daughter loves when I make mini versions using English muffins as the base for quick after-school snacks.

    Storage & Troubleshooting Guide

    Proper Storage Methods

    Leftover Philly Cheesesteak Pizza maintains its delicious flavor when stored correctly. Allow the pizza to cool completely before refrigerating to prevent sogginess. Place slices in an airtight container with parchment paper between layers to prevent sticking. Refrigerate for up to 3 days. For longer storage, freeze individual slices by wrapping tightly in plastic wrap, then aluminum foil, and place in a freezer bag. When reheating, the air fryer works magic in restoring crispness – just 3-4 minutes at 350°F. Alternatively, a preheated skillet with a lid creates a perfectly crispy bottom and melty top.

    Common Pitfalls & Solutions

    Even experienced cooks occasionally encounter pizza problems, but they’re easily fixed! If your crust turns out soggy, the likely culprit is too many wet toppings. Try patting your steak and vegetables dry before adding them, or pre-cooking them longer to remove excess moisture. If your cheese isn’t browning properly, switch your oven to broil for the final minute of cooking – just watch carefully to prevent burning! For sliced beef that’s turning out tough, try marinating it in a tablespoon of baking soda solution for 15 minutes before cooking – this tenderizing trick has saved many of my quick-cook beef recipes.

    Frequently Asked Questions

    Can I make Philly Cheesesteak Pizza ahead of time?

    Yes! Prepare the toppings up to 2 days ahead and store separately in the refrigerator. Assemble and bake just before serving for the best texture and flavor.

    What’s the best cheese for authentic Philly Cheesesteak Pizza?

    Traditional cheesesteaks use provolone or American cheese, sometimes with Cheez Whiz. For pizza, a combination of provolone and mozzarella gives the best flavor and melt.

    Can I use pre-cooked roast beef for this pizza?

    Absolutely! Deli roast beef works great for a shortcut version. Just add it during the last few minutes of baking to prevent overcooking.

    How do I prevent my Philly Cheesesteak Pizza from getting soggy?

    Pre-cook and drain your vegetables well, don’t overload with toppings, and consider par-baking your crust for 3-4 minutes before adding toppings.

    Is Philly Cheesesteak Pizza freezer-friendly?

    Yes! Freeze fully baked and cooled slices for up to 3 months. Reheat directly from frozen in a 375°F oven until hot and crispy.

    Final Thoughts

    This Philly Cheesesteak Pizza has become my family’s most requested dinner, combining the beloved flavors of a classic sandwich with the comfort of homemade pizza. The joy of watching cheese pull into perfect strands as you lift each slice is matched only by the incredible flavor combination in every bite. Don’t be surprised if this becomes your new go-to recipe for everything from weeknight dinners to game day gatherings! I’d love to see your creations – tag me on Pinterest with your Philly Cheesesteak Pizza masterpieces!

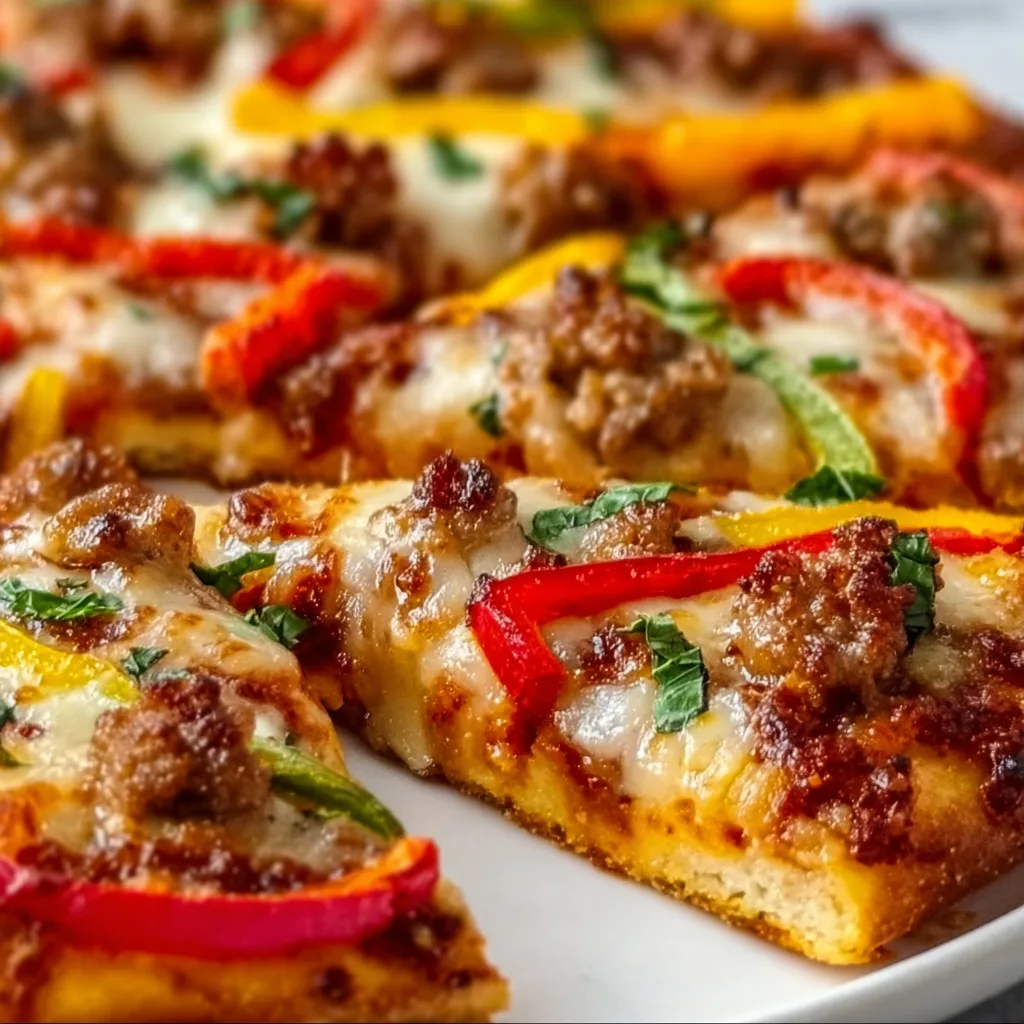
  • Spicy Sausage & Pepper Pizza: Irresistibly Bold, Must-Try Flavor!

    Spicy Sausage & Pepper Pizza: Irresistibly Bold, Must-Try Flavor!

    Spicy Sausage & Pepper Pizza: Irresistibly Bold, Must-Try Flavor!

    This Spicy Sausage & Pepper Pizza is what happens when comfort food meets a flavor explosion. The first time I made this pizza, my kitchen filled with the intoxicating aroma of sizzling Italian sausage and sweet roasted peppers, and I knew I’d created something special. The combination of spicy meat, colorful peppers, and melty cheese on a crispy-yet-chewy crust creates a perfect balance that’ll have everyone reaching for seconds. It’s become my go-to recipe when I want to impress friends without spending hours in the kitchen, just like my Chicken Cheese Steak Sandwiches.

    Recipe

    Why You’ll Love This Spicy Sausage & Pepper Pizza

    A Perfect Balance of Heat and Sweetness

    The magic of this pizza lies in its contrasting flavors that dance together beautifully. The spicy kick from the Italian sausage (I prefer hot, but sweet works too!) meets the natural sweetness of bell peppers that caramelize slightly during baking. I love watching people take their first bite—there’s always that moment of surprise when the heat hits, followed by appreciation as the sweetness of the peppers balances everything out. The cheese acts as the perfect mediator, its creaminess cooling down the spice just enough without dampening the flavor adventure.

    Quick Weeknight Dinner That Feels Special

    On busy weeknights when I’m tempted to order takeout, this pizza reminds me that homemade magic can happen in under 30 minutes. The first time I made this after a particularly exhausting Monday, my partner declared it “better than delivery” – high praise indeed! You can prep components ahead of time (slice those peppers during Sunday meal prep!) and assemble quickly when hunger strikes. The beauty is in its simplicity: quality ingredients doing what they do best without fussy techniques or special equipment. Just honest, delicious food that feels like a treat.

    Essential Tips & Tricks

    Perfecting Your Pizza Base

    The foundation of any great pizza is its base, and this Spicy Sausage & Pepper Pizza deserves the best start. I’ve found that pre-baking the crust for 3-4 minutes before adding toppings prevents the dreaded soggy center. Room temperature dough stretches more easily without springing back, so I always let mine sit out for 30 minutes before shaping. For an extra flavor boost, brush the edges with garlic-infused olive oil before baking. This creates a gorgeous golden crust that’s aromatic and irresistible—the kind that has everyone fighting over the end pieces!

    Layering Strategy for Maximum Flavor

    The order of toppings matters more than you might think! I start with a thin layer of sauce (not too much or it’ll get soggy), followed by a light sprinkle of cheese to create a protective barrier. Then comes the pre-cooked sausage and thinly sliced peppers, finishing with the remaining cheese on top. This layering technique ensures every bite has the perfect balance of flavors. For extra depth, try adding a sprinkle of red pepper flakes between layers rather than just on top—it distributes the heat more evenly, similar to my approach with Wonton Jalapeno Poppers.

    Serving Ideas & Creative Variations

    Complementary Side Dishes

    This Spicy Sausage & Pepper Pizza pairs beautifully with sides that balance its bold flavors. A simple arugula salad with lemon vinaigrette cuts through the richness perfectly—the peppery greens and bright acidity refresh your palate between bites. On cozy nights in, I serve this with a side of garlic knots for the ultimate comfort food experience. For something lighter, try cucumber slices tossed with a little rice vinegar and salt. The cool crispness provides a welcome contrast to the pizza’s warmth and spice, making each bite of pizza feel like the first.

    Exciting Flavor Twists

    While the classic version is divine, don’t be afraid to experiment! Swap the traditional marinara for a white garlic sauce base for a creamier experience that lets the sausage and peppers truly shine. Adding caramelized onions brings a sweet depth that’s absolutely worth the extra 10 minutes of cooking time. For a Mediterranean spin, sprinkle on some crumbled feta and fresh oregano after baking. My personal favorite variation includes a drizzle of hot honey right before serving—the sweet-heat combination is addictive, similar to what makes my Honey Pepperoni Ricotta Pizza so popular!

    Storage & Troubleshooting Guide

    Keeping Leftovers Fresh

    Leftover Spicy Sausage & Pepper Pizza (if you’re lucky enough to have any!) needs proper storage to maintain its deliciousness. Cool completely before refrigerating to prevent condensation that makes the crust soggy. I separate slices with parchment paper, then store in an airtight container for up to 3 days. For longer storage, freeze individual slices on a baking sheet until solid, then transfer to a freezer bag with the air pressed out. This method prevents them from sticking together, allowing you to grab just one slice when a pizza craving strikes.

    Reviving Day-Old Pizza

    Reheating pizza without sacrificing quality is an art form I’ve perfected over years of leftovers. Skip the microwave—it leaves your once-crispy crust sad and chewy. Instead, use a skillet on medium-low heat with a lid. The direct heat crisps the bottom while the covered top gently warms the toppings and melts the cheese. For multiple slices, a 300°F oven on a preheated baking sheet works wonders. Add a sprinkle of water to the pan (not the pizza) and cover with foil for the first few minutes to create steam that revitalizes the cheese.

    Frequently Asked Questions

    Can I make Spicy Sausage & Pepper Pizza ahead of time?

    Yes! Prepare components separately (cook sausage, slice peppers) up to 2 days ahead. You can even par-bake the crust for 5 minutes, cool, and refrigerate. Assemble and finish baking when ready to eat.

    What’s the best cheese to use?

    A combination works best—mozzarella for meltability and either provolone or fontina for flavor depth. For extra punch, add a sprinkle of pecorino romano on top after baking.

    Can I use pre-cooked sausage?

    Absolutely! Pre-cooked sausage saves time. Slice thinly and briefly sauté with a splash of olive oil to release flavors before adding to your pizza.

    How do I prevent my pizza from getting soggy?

    Don’t overload with sauce, pre-cook wet toppings like peppers and sausage to release moisture, and consider par-baking your crust for 3-4 minutes before adding toppings.

    What’s the secret to a really good Spicy Sausage & Pepper Pizza?

    Quality ingredients make all the difference—fresh mozzarella, sausage with visible spices, and peppers in multiple colors. Also, let your dough come to room temperature for easier stretching.

    Final Thoughts

    This Spicy Sausage & Pepper Pizza has become more than just a recipe in my kitchen—it’s a reliable friend that shows up for movie nights, impromptu gatherings, and those evenings when I need something soul-satisfying without a lot of fuss. The beauty lies in its adaptability; make it your own with different pepper combinations or sausage varieties. I’d love to see your creations on Pinterest! Remember, the best pizza is the one that makes you happy, and this spicy, colorful masterpiece never fails to bring joy to my table.