Category: Dinner

Easy, tasty dinner ideas for busy nights. Simple recipes, quick prep, and family-friendly meals you’ll make again and again.

  • Grilled Salsa Verde Pepper Jack Chicken That’ll Blow Your Taste Buds!

    Grilled Salsa Verde Pepper Jack Chicken That’ll Blow Your Taste Buds!

    Grilled Salsa Verde Pepper Jack Chicken That’ll Blow Your Taste Buds!

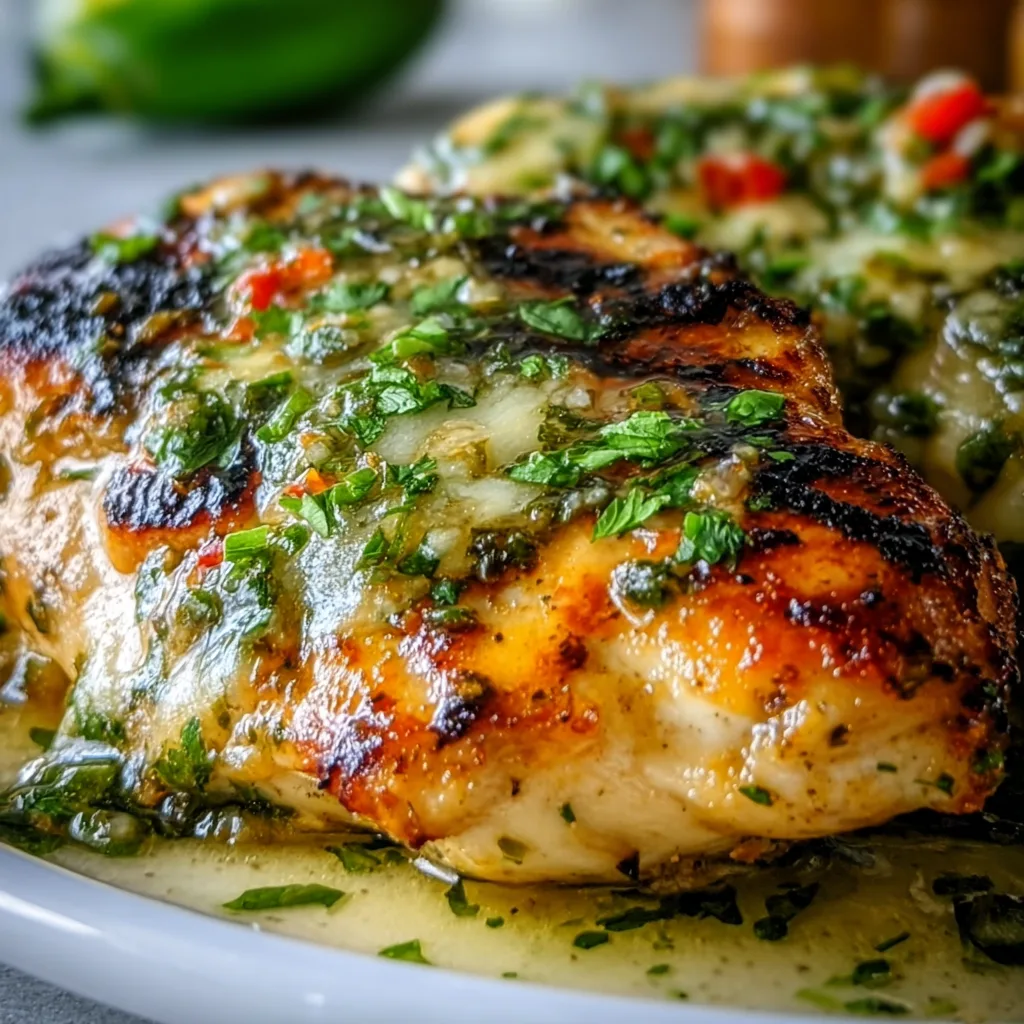
    Grilled Salsa Verde Pepper Jack Chicken brings together zesty tomatillos, smoky chilies, and creamy melted cheese in one spectacular dish that’s become my summer go-to. The first time I made this, the aroma of charring peppers and sizzling chicken filled my backyard, and my neighbors actually peeked over the fence to ask what I was cooking! There’s something magical about that moment when the pepper jack begins to melt into the tangy salsa verde, creating pockets of creamy heat that transform ordinary chicken into something crave-worthy. If you’re looking for a fresh pasta salad to serve alongside, I’ve got you covered too!

    Recipe

    Why You’ll Love This Grilled Salsa Verde Pepper Jack Chicken

    Perfect Balance of Flavors and Textures

    The beauty of this dish lies in its harmonious contrasts. The bright, tangy salsa verde cuts through the richness of the melted pepper jack cheese, while the smoky char from the grill adds depth to every bite. I love how the chicken stays incredibly juicy inside while developing a slight crust on the outside. The heat level is customizable too—you can dial up the spice with extra jalapeños in your salsa verde or keep it mild for family dinners. My husband, who usually reaches for hot sauce with everything, hasn’t touched the bottle since I started making this dish!

    Weeknight-Friendly Yet Impressive

    Don’t let the complex flavors fool you—this Grilled Salsa Verde Pepper Jack Chicken comes together in under 30 minutes of active time. I often prep the salsa verde on Sunday, which means I can have this on the table in about 15 minutes on busy weeknights. The visual impact when you pull this off the grill—with its bubbling cheese and vibrant green sauce—makes it perfect for casual entertaining too. Last month, I served this at a last-minute dinner party, and everyone thought I’d spent hours in the kitchen!

    Essential Tips & Tricks

    Mastering the Chicken

    For truly exceptional Grilled Salsa Verde Pepper Jack Chicken, start with even thickness throughout your chicken breasts. I place them between parchment paper and gently flatten the thicker ends with a rolling pin—no need for violent pounding! Marinating the chicken in a few tablespoons of the salsa verde for at least 30 minutes (or up to overnight) infuses it with flavor from the inside out. When grilling, resist the urge to flip too early—wait until the chicken releases easily from the grate, which signals that perfect sear has formed.

    Salsa Verde Secrets

    While store-bought works in a pinch, homemade salsa verde elevates this dish to restaurant quality. The key ingredient is properly roasted tomatillos—they should be blistered and slightly charred, not just warm. I add a splash of lime juice right at the end for brightness, and a tiny drizzle of honey balances the acidity without making it sweet. For an amazing one-pot meal with similar flavor profiles, check out my taco orzo recipe that uses many of these same ingredients!

    Serving Ideas & Creative Variations

    Perfect Pairings

    This Grilled Salsa Verde Pepper Jack Chicken shines alongside simple, complementary sides. My go-to combination includes cilantro-lime rice that soaks up the extra sauce and a quick avocado and jicama slaw for freshness and crunch. For a heartier meal, warm corn tortillas let everyone build their own tacos with the chicken sliced into strips. When entertaining, I serve it over a bed of grilled vegetables—the sauce mingles with the charred veggies creating an incredible flavor medley that has guests reaching for seconds.

    Exciting Twists

    The versatility of this recipe makes it perfect for creative spins! Try swapping the pepper jack for smoked gouda for a deeper, woodsy flavor profile. For a Mediterranean version, replace the salsa verde with a basil pesto and use fontina cheese instead. My favorite variation might be stuffing the chicken—butterfly the breasts, add a layer of the cheese and extra salsa verde inside before grilling. For a fun appetizer twist, cube the chicken for skewers with cherry tomatoes and bell peppers between pieces of the meat!

    Storage & Troubleshooting Guide

    Proper Storage for Maximum Flavor

    Leftover Grilled Salsa Verde Pepper Jack Chicken maintains its deliciousness when stored correctly. Allow the chicken to cool completely before refrigerating in an airtight container for up to three days. To reheat, I avoid the microwave which can toughen the meat—instead, I cover it with foil and warm in a 300°F oven until just heated through. The salsa verde actually develops deeper flavors overnight, making this dish perfect for meal prep. For freezing, wrap individual portions tightly and thaw overnight in the refrigerator before reheating.

    Common Issues Solved

    If your cheese is sliding off during grilling, you’re likely adding it too early. Cook the chicken almost completely (about 160°F internal temperature) before adding the cheese and closing the grill for the final few minutes. For those struggling with chicken sticking to the grill, ensure your grates are clean and well-oiled before cooking. If your salsa verde is too watery, remember to drain roasted tomatillos briefly on paper towels before blending. And for those who find their chicken dry, try brining it first—even 30 minutes in a simple salt solution makes a remarkable difference.

    Frequently Asked Questions

    Can I make Grilled Salsa Verde Pepper Jack Chicken without a grill?

    Absolutely! Use a cast-iron skillet or grill pan over medium-high heat. Cook the chicken for 5-7 minutes per side, then add cheese and cover briefly to melt. Finish with broiling for a minute if you want that charred effect.

    Is this recipe spicy?

    The heat level depends on your salsa verde and pepper jack cheese. For milder flavor, remove jalapeño seeds and membranes when making salsa verde, or substitute with monterey jack cheese.

    Can I use chicken thighs instead of breasts?

    Yes! Boneless, skinless chicken thighs work beautifully and often stay juicier. Adjust cooking time to about 6-7 minutes per side depending on thickness.

    How do I know when the chicken is done?

    Use a meat thermometer to ensure chicken reaches 165°F at its thickest point. The cheese should be fully melted and the salsa verde bubbling slightly.

    What’s the best way to make homemade salsa verde for this recipe?

    Roast 1 pound of tomatillos, 1 jalapeño, and 2 garlic cloves until charred. Blend with ½ cup cilantro, ¼ cup onion, 1 tablespoon lime juice, and salt to taste.

    Final Thoughts

    This Grilled Salsa Verde Pepper Jack Chicken has become my signature dish for good reason—it strikes that perfect balance between impressive and achievable that we’re all searching for in our cooking. The vibrant flavors transport me to sunny patios and relaxed gatherings even on the busiest weeknights. I find myself craving that perfect bite of tender chicken, tangy salsa, and melty cheese more often than I care to admit! For more inspiration, check out my Pinterest board where I share even more variations on this beloved recipe.
  • Dill Pickle Ranch Smash Chicken Tacos with Crispy Cheese Buzz!

    Dill Pickle Ranch Smash Chicken Tacos with Crispy Cheese Buzz!

    Dill Pickle Ranch Smash Chicken Tacos with Crispy Cheese Buzz!

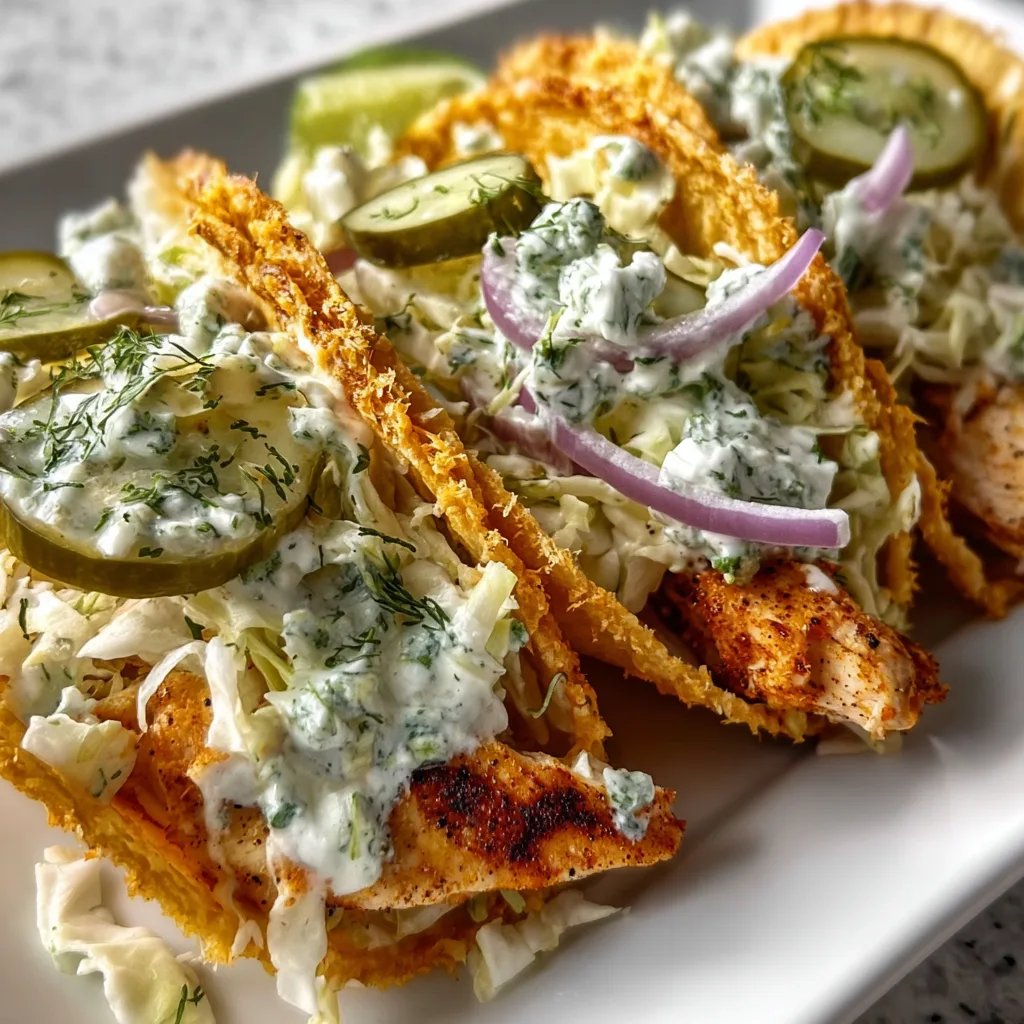
    Dill Pickle Ranch Smash Chicken Tacos with Crispy Cheese are what happens when comfort food meets taco night in the most delicious collision imaginable! I stumbled upon this recipe during a late-night kitchen experiment when all I had was leftover chicken, some pickle brine, and a craving for something crispy. The tangy pickle flavor combined with creamy ranch and that irresistible cheese skirt creates pure magic on your taste buds. Trust me, once you’ve tried these tacos, regular tacos will seem downright boring! They’re perfect for busy weeknights or for impressing friends at your next taco party.

    Recipe

    Why You’ll Love This Dill Pickle Ranch Smash Chicken Tacos with Crispy Cheese

    Perfect Balance of Flavors

    The tangy pickle brine infuses the chicken with a brightness that cuts through the richness of the cheese and ranch. What makes these tacos special is how the flavors build on each other – the pickle-brined chicken gets smashed thin, allowing for maximum crispy surface area when cooking. Then the creamy ranch adds a cooling element that complements the savory chicken perfectly. I remember the first time my husband tried these – he was skeptical about pickle-flavored tacos but ended up asking for seconds before he’d even finished his first one!

    Quick and Satisfying Meal

    These tacos come together in under 30 minutes, making them perfect for those nights when you want something incredibly satisfying without spending hours in the kitchen. The smashing technique means the chicken cooks quickly and evenly, while the cheese gets that coveted crispy edge that extends beyond the tortilla. My teenage son now specifically requests “the pickle tacos with the cheese skirts” at least once a week. They’re filling enough to stand alone as a meal, but simple enough that you can whip them up without breaking a sweat.

    Essential Tips & Tricks

    Mastering the Chicken Marinade

    For maximum flavor, let your chicken marinate in the pickle brine for at least 30 minutes, though overnight is truly magical if you have the time. The acid in the brine actually helps tenderize the chicken while infusing it with that distinctive tangy flavor. I learned the hard way that using both the pickle juice AND chopped pickles creates the perfect flavor intensity. Pro tip: save the premium pickles for topping and use the juice from the less expensive jar for marinating – your wallet will thank you while your taste buds still celebrate.

    Creating the Perfect Cheese Skirt

    The crispy cheese skirt is what elevates these tacos from good to unforgettable. Use a medium-high heat and a well-seasoned cast iron or non-stick pan for best results. Sprinkle the cheese directly onto the hot pan, then immediately place your tortilla on top. Wait for the edges to turn golden brown (about 45 seconds) before adding your fillings. I once tried to rush this step and ended up with floppy cheese instead of crispy – a tasty mistake but not the texture sensation we’re aiming for!

    Serving Ideas & Creative Variations

    Complementary Side Dishes

    These tacos pair beautifully with fresh, crunchy sides that complement the rich, tangy flavors. Try a simple slaw made with cabbage, lime, and a touch of honey, or go for a corn salad with cilantro and red onion. For something heartier, black beans with a hint of cumin make an excellent accompaniment. My family’s favorite pairing is actually sweet potato fries tossed with a little ranch seasoning – the sweetness creates an amazing contrast with the tangy pickle flavor in the tacos.

    Exciting Flavor Twists

    While the classic version is amazing, don’t be afraid to play with variations! Swap the ranch for chipotle mayo for a smoky kick, or try using different pickles – bread and butter pickles create a sweeter profile, while spicy pickles add heat. For a Mediterranean twist, use feta instead of cheddar and add a simple cucumber-tomato relish on top. Last weekend, I tried a buffalo sauce drizzle with blue cheese crumbles instead of cheddar, and my pickle-obsessed neighbor declared it “life-changing.”

    Storage & Troubleshooting Guide

    Make-Ahead Components

    While these tacos are best enjoyed fresh off the skillet, you can prep several components ahead of time. The pickle-brined chicken can be marinated up to 24 hours in advance and even cooked ahead and reheated. Store the cooked chicken in an airtight container in the refrigerator for up to 3 days. Pre-shred your cheese and store in a zip-top bag. However, I recommend always making the cheese skirts fresh – they simply don’t maintain their magical crispiness when stored.

    Fixing Common Issues

    If your cheese isn’t crisping properly, your pan likely isn’t hot enough. Make sure it’s thoroughly preheated before adding the cheese. Too much moisture can also prevent crispiness, so pat your pickles dry before adding them to the tacos. If your chicken is turning out tough, you might be overcooking it – remember that smashed chicken cooks very quickly! And if the pickle flavor isn’t coming through strongly enough, try adding a splash of pickle juice to your ranch dressing for an extra tangy boost.

    Frequently Asked Questions

    Can I use different types of pickles for this recipe?

    Absolutely! Bread and butter pickles create a sweeter profile, while spicy pickles add heat. Just make sure they’re dill-based for that classic tangy flavor that makes these Dill Pickle Ranch Smash Chicken Tacos with Crispy Cheese so special.

    How do I prevent my tortillas from getting soggy?

    Double-toast your tortillas – first directly on the burner for 10-15 seconds per side, then again when you make the cheese skirt. This creates a moisture barrier that keeps everything crispy.

    Can I make these tacos gluten-free?

    Yes! Simply use certified gluten-free corn tortillas and check that your ranch dressing is gluten-free. The pickle brine and chicken are naturally gluten-free.

    What’s the best cheese for the crispy cheese skirt?

    Medium or sharp cheddar works beautifully, but monterey jack, pepper jack, or a mix of cheeses also creates wonderful results. Avoid fresh cheeses like mozzarella that have too much moisture.

    How spicy are these tacos?

    They’re mild as written, but you can easily adjust the heat level by adding hot sauce, jalapeños, or using spicy pickles in your marinade.

    Final Thoughts

    These Dill Pickle Ranch Smash Chicken Tacos with Crispy Cheese represent everything I love about cooking – unexpected flavor combinations that somehow work perfectly together. The contrast between tangy pickle-infused chicken, creamy ranch, and that irresistible crispy cheese skirt creates a taco experience that’s truly memorable. They’ve become a staple in my kitchen not just because they’re delicious, but because they bring smiles to everyone who tries them. For more delicious recipe inspiration, check out my Pinterest boards where I’m always sharing new flavor adventures!

  • Smash Burger Bowl Explosion: Juicy, Crispy, Irresistible Bite!

    Smash Burger Bowl Explosion: Juicy, Crispy, Irresistible Bite!

    Smash Burger Bowl Explosion: Juicy, Crispy, Irresistible Bite!

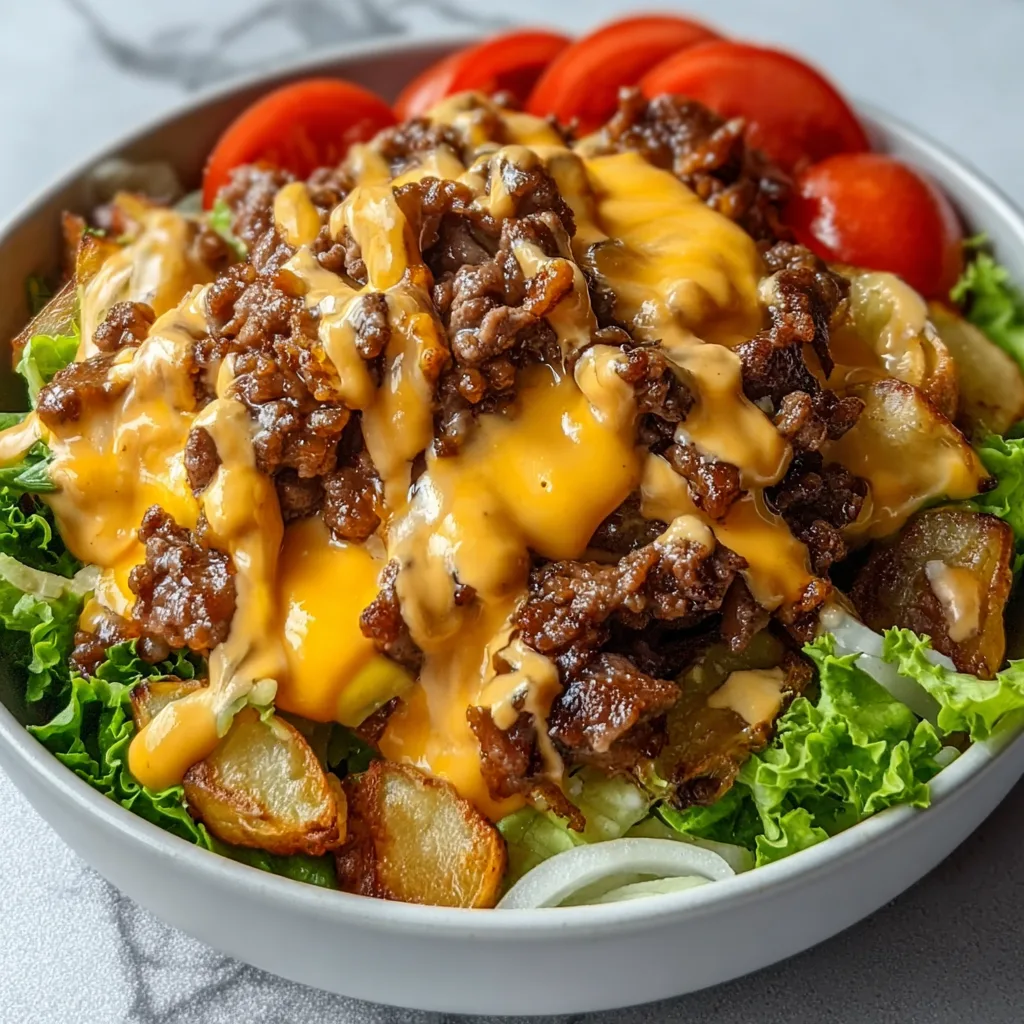
    This Smash Burger Bowl combines everything you love about a juicy smash burger without the bun! Crispy-edged beef patties with that perfect caramelization, nestled on a bed of fresh greens and topped with all your favorite burger fixings. I created this recipe after a particularly indulgent weekend when I wanted the satisfaction of a burger but needed something a bit lighter. The first time I served these to my family, my husband actually said he preferred it to a regular burger! If you’re looking for a low-carb option that doesn’t sacrifice flavor, this bowl is your new best friend.

    Recipe

    Why You’ll Love This Smash Burger Bowl

    Perfect Balance of Indulgence and Nutrition

    There’s something magical about the way these smash burger bowls satisfy cravings while still feeling wholesome. The ultra-thin patties develop those irresistible crispy edges that make smash burgers so special, while the fresh vegetable base keeps things balanced. I love how the warm beef mingles with cool, crisp lettuce creating temperature contrast in each bite. The melty cheese drapes over the hot patty, creating those Instagram-worthy cheese pulls we all secretly chase. Plus, you can customize the veggie-to-meat ratio based on your mood or nutritional goals!

    Quick and Customizable for Any Diet

    These bowls come together in just 15 minutes, making them perfect for busy weeknights when you want something satisfying without a lot of fuss. The base recipe works for nearly any dietary preference—keto friends can load up on meat and avocado, while those watching calories can go heavier on the veggies. My daughter follows a gluten-free diet, and this has become her go-to when we used to do burger night. The versatility extends to toppings too—pickle lovers can double up, sauce enthusiasts can drizzle with abandon, and cheese skeptics (though I can’t relate) can skip it altogether.

    Essential Tips & Tricks

    Mastering the Perfect Smash

    The key to an authentic smash burger bowl lies in how you handle the meat. Start with 80/20 ground beef for the ideal fat content that creates those coveted crispy edges. Form loose meatballs (about 2-3 oz each) rather than pre-flattening them. Get your cast iron skillet screaming hot—I mean really hot—before adding the meat. Once the meatball hits the pan, immediately smash it with a spatula or dedicated smasher. Press firmly for 10 seconds to create maximum surface contact. Season generously with salt and pepper only after smashing to form a savory crust.

    Building Layers of Flavor

    The beauty of a smash burger bowl is in the thoughtful layering of components. Start with a base of crisp lettuce and build upward. Add your warm components (meat and cheese) just before serving to maintain temperature contrast. For an elevated experience, toast your cheese directly on the patty during the last 30 seconds of cooking. Special sauce is non-negotiable—mix mayo, ketchup, mustard, pickle relish, and a dash of smoked paprika for that classic burger joint flavor. Remember that a squeeze of lemon over the greens adds brightness that cuts through the richness.

    Serving Ideas & Creative Variations

    Family-Style Burger Bowl Bar

    Transform dinner into an interactive experience by setting up a smash burger bowl bar. I did this for my son’s birthday, and it was a huge hit! Prepare all components separately—seasoned meat, various toppings, and several sauce options. Let everyone build their own creation. Include unexpected toppings like pickled jalapeños, frizzled onions, or crumbled bacon. This approach is perfect for entertaining since guests with different preferences can customize to their hearts’ content. Plus, the visual appeal of all those colorful ingredients arranged on your table creates an instant party atmosphere.

    Global Flavor Inspirations

    Take your smash burger bowl on a worldwide tour by incorporating international flavors. For a Mediterranean twist, add feta cheese, olives, cucumber, and tzatziki sauce. A Mexican-inspired version might include pepper jack cheese, avocado, pico de gallo, and chipotle mayo. My personal favorite is an Asian-fusion bowl with sriracha mayo, pickled vegetables, cilantro, and a soy-ginger drizzle. The basic technique for the smash patty stays the same, but switching up the toppings and sauces completely transforms the eating experience. This approach keeps the concept fresh even if you make it weekly.

    Storage & Troubleshooting Guide

    Meal Prep Strategies

    While the complete smash burger bowl is best enjoyed fresh, you can prep components ahead for lightning-fast assembly. Cook and cool the patties, then refrigerate for up to 3 days. Store toppings separately in airtight containers, keeping wet ingredients (like tomatoes) apart from items that need to stay crisp. Prepare sauces in advance and refrigerate in small jars. When ready to eat, quickly reheat patties in a hot skillet or microwave for 20-30 seconds. The key is avoiding soggy lettuce, so always assemble just before eating, keeping hot and cold elements separate until the last moment.

    Fixing Common Issues

    Even experienced cooks encounter challenges when making smash burger bowls. If your patties aren’t developing that signature crispy crust, your pan likely isn’t hot enough. Solution: preheat longer and don’t overcrowd the skillet. Dealing with dry meat? You’ve probably chosen too lean a blend—switch to 80/20 ground beef for juicier results. For bowls that feel too heavy, increase the vegetable-to-meat ratio and use a lighter dressing. If flavors seem one-dimensional, add acidic elements like pickles or a squeeze of lemon to brighten everything up. Remember that balance is key—each bite should offer multiple textures and flavors.

    Frequently Asked Questions

    What makes a smash burger bowl different from a regular burger?

    A smash burger bowl eliminates the bun in favor of a vegetable base, making it lower in carbs. The ultra-thin, crispy-edged patties are served over greens with all traditional toppings, creating a fork-friendly version of the classic burger experience.

    Can I make smash burger bowls ahead of time?

    Prep components separately but assemble just before eating. Cook patties, prepare toppings, and mix sauces up to 3 days ahead. Store everything separately in airtight containers in the refrigerator.

    Is a smash burger bowl keto-friendly?

    Absolutely! Smash burger bowls are naturally low-carb when built on greens instead of grains. Choose keto-friendly toppings like avocado, cheese, and bacon while avoiding higher-carb items like carrots or sweet dressings.

    What’s the best cheese for a smash burger bowl?

    American cheese provides that classic melt, but cheddar, pepper jack, or blue cheese work beautifully too. For the best melt, add cheese to the patty during the last 30 seconds of cooking.

    Can I use ground turkey instead of beef for my smash burger bowl?

    Yes! Turkey works well, though add 1 tablespoon of olive oil per pound to compensate for the lower fat content. Cook just until done (165°F) as turkey can dry out quickly.

    Final Thoughts

    The Smash Burger Bowl represents everything I love about modern comfort food—classic flavors reimagined in a way that fits today’s eating preferences. It honors the beloved burger while offering flexibility, nutrition, and those irresistible crispy edges we all crave. I find myself making these bowls almost weekly now, appreciating how they satisfy my burger cravings without the heaviness that sometimes follows. Whether you’re cooking for one or feeding a crowd, this versatile concept deserves a spot in your regular rotation. Don’t forget to share your creations on Pinterest!

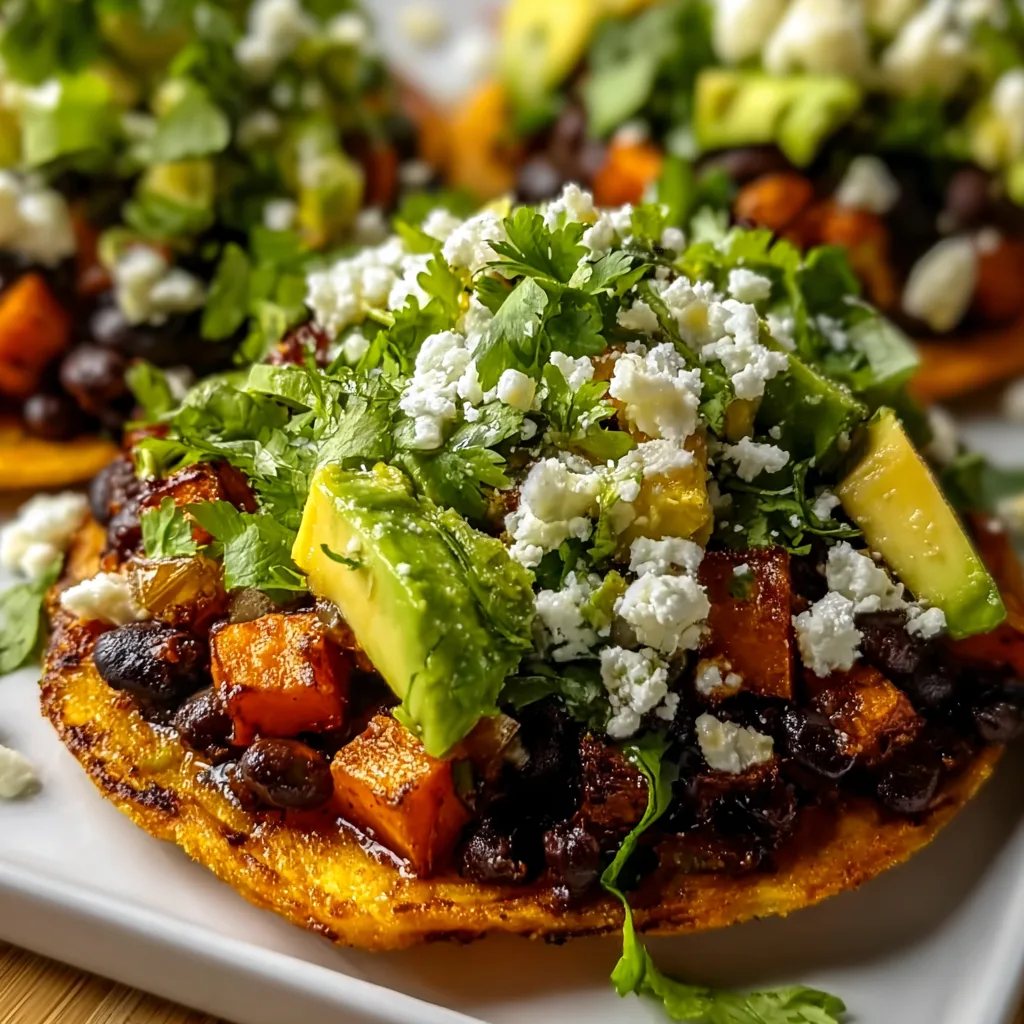
  • Black Bean Sweet Potato Tostadas: Irresistibly Delicious & Healthy!

    Black Bean Sweet Potato Tostadas: Irresistibly Delicious & Healthy!

    Black Bean Sweet Potato Tostadas: Irresistibly Delicious & Healthy!

    Black Bean Sweet Potato Tostadas have completely transformed my weeknight dinner routine! There’s something magical about the combination of creamy sweet potatoes and hearty black beans nestled on a crispy tostada shell that makes my taste buds dance with joy. The first time I made these for my family, my kitchen filled with the most incredible aroma of cumin and lime – everyone wandered in asking what smelled so amazing! These colorful tostadas are not just delicious but also incredibly versatile. You can customize them with your favorite toppings, making them perfect for busy weeknight meals when you need something nutritious and satisfying.

    Recipe

    Why You’ll Love These Black Bean Sweet Potato Tostadas

    Perfect Balance of Flavors and Textures

    The magic of these Black Bean Sweet Potato Tostadas lies in their incredible texture contrast. The crispy tostada shell provides the perfect crunch against the creamy, spiced sweet potato mash. The black beans add a wonderful earthiness and protein boost that makes these so satisfying. I love how the sweetness from the roasted sweet potatoes plays against the savory beans, creating a flavor profile that’s both comforting and exciting. Add a squeeze of lime juice and a sprinkle of fresh cilantro, and you’ve got layers of flavor that make every bite interesting and delicious.

    Quick, Nutritious, and Budget-Friendly

    These tostadas are a nutritional powerhouse without breaking the bank! Sweet potatoes bring vitamin A, fiber, and natural sweetness, while black beans pack protein and additional fiber. I started making these during a particularly busy month when I needed fast, affordable dinners that still felt special. The ingredients are pantry staples that won’t strain your grocery budget, and you can prep components ahead of time. In just about 30 minutes, you’ll have a colorful, nutrient-dense meal that satisfies both vegetarians and meat-lovers alike.

    Essential Tips & Tricks

    Perfecting Your Sweet Potato Base

    The key to amazing Black Bean Sweet Potato Tostadas is getting that sweet potato mash just right. I recommend roasting the sweet potatoes rather than boiling them – this concentrates their flavor and brings out their natural sweetness. Cut them into 1-inch cubes for faster cooking, toss with olive oil, cumin, and a touch of chili powder, then roast at 425°F for about 20-25 minutes until fork-tender. For the creamiest texture, mash them with a little butter or olive oil and a squeeze of lime juice. This creates a velvety base that clings perfectly to your tostada shell.

    Creating Crispy Tostada Shells

    Store-bought tostada shells work perfectly, but making your own is simple and so much fresher! To create perfectly crispy homemade tostadas, brush corn tortillas lightly with oil on both sides, then bake at 400°F for 5-7 minutes per side until golden and crisp. Watch them carefully as they can burn quickly! For extra flavor, sprinkle with a little salt while still hot. If you’re looking for a healthier option, try my gluten-free cottage cheese bagel recipe for inspiration on how to make nutritious substitutions that don’t sacrifice taste.

    Serving Ideas & Creative Variations

    Topping Combinations That Wow

    The beauty of Black Bean Sweet Potato Tostadas lies in the endless topping possibilities! My family’s favorite combination includes crumbled queso fresco, diced avocado, thinly sliced radishes for crunch, and a drizzle of Mexican crema or sour cream. For heat lovers, add pickled jalapeños or a few dashes of your favorite hot sauce. Finely shredded cabbage or lettuce adds a fresh crunch, while pico de gallo brings brightness. Create a tostada bar and let everyone build their own – it’s perfect for casual entertaining and makes dinner feel special with minimal effort.

    Exciting Flavor Twists

    Don’t be afraid to experiment with different flavor profiles for your Black Bean Sweet Potato Tostadas! For a Mediterranean twist, swap the cumin-spiced sweet potatoes for ones seasoned with za’atar, top with feta instead of queso fresco, and add a dollop of tzatziki. For an Asian-inspired version, season the sweet potatoes with ginger and a touch of five-spice powder, then top with quick-pickled vegetables and sriracha mayo. These variations remind me of my baked salmon and vibrant quinoa dish – versatile bases that welcome creative flavor combinations.

    Storage & Troubleshooting Guide

    Make-Ahead and Leftover Strategies

    Black Bean Sweet Potato Tostadas components can be prepped ahead for quick assembly later! The sweet potato mash will keep refrigerated for up to 3 days – just reheat with a splash of water or broth to restore creaminess. Seasoned black beans also store well for 3-4 days. Store all components separately and assemble just before eating. For leftovers, I recommend storing the toppings and bases separately, as assembled tostadas will become soggy. Reheat the beans and sweet potato mixture in a skillet with a touch of oil to revive their flavors before assembling on freshly crisped tostada shells.

    Solving Common Tostada Problems

    The most common issue with tostadas is preventing breakage when eating them. My solution? Don’t pile toppings too high in the center – spread them evenly across the surface instead. Another trick is to spread a thin layer of refried beans or the sweet potato mixture across the entire tostada first – this acts as “glue” for the other toppings. If your tostadas turn out soggy rather than crisp, they likely need more time in the oven. For homemade shells that still aren’t crispy enough, you can return them to the oven for a few more minutes until they reach your desired crispness.

    Frequently Asked Questions

    Can I make Black Bean Sweet Potato Tostadas ahead of time?

    Yes! Prepare the sweet potato mash and black bean mixture up to 3 days ahead. Store separately in the refrigerator and reheat before assembling on freshly crisped tostada shells for best results.

    Are these tostadas vegan?

    They can be! Simply omit the cheese and sour cream or use plant-based alternatives. The sweet potato and black bean base is naturally vegan and full of plant-based protein.

    What can I substitute for black beans?

    Pinto beans, chickpeas, or even lentils work beautifully. For non-vegetarians, shredded chicken or ground turkey seasoned with similar spices makes a delicious alternative.

    How do I keep my tostada shells from getting soggy?

    Assemble just before eating and create a barrier between wet ingredients and the shell. A thin layer of guacamole or refried beans works well as this protective layer.

    Can Black Bean Sweet Potato Tostadas be part of a meal prep routine?

    Absolutely! Prep all components separately and store in airtight containers. Crisp the tostada shells just before serving for a quick, nutritious meal any night of the week.

    Final Thoughts

    These Black Bean Sweet Potato Tostadas have become a staple in my kitchen for good reason – they’re the perfect balance of nutritious, delicious, and adaptable. What I love most is how they bring vibrant colors and flavors to the table without hours of work. They’ve saved many busy weeknights in my home while still making dinner feel special. I hope you’ll give these tostadas a try and make them your own with personal touches that speak to your taste preferences. Find more colorful, nourishing recipes on my Pinterest boards for endless mealtime inspiration!

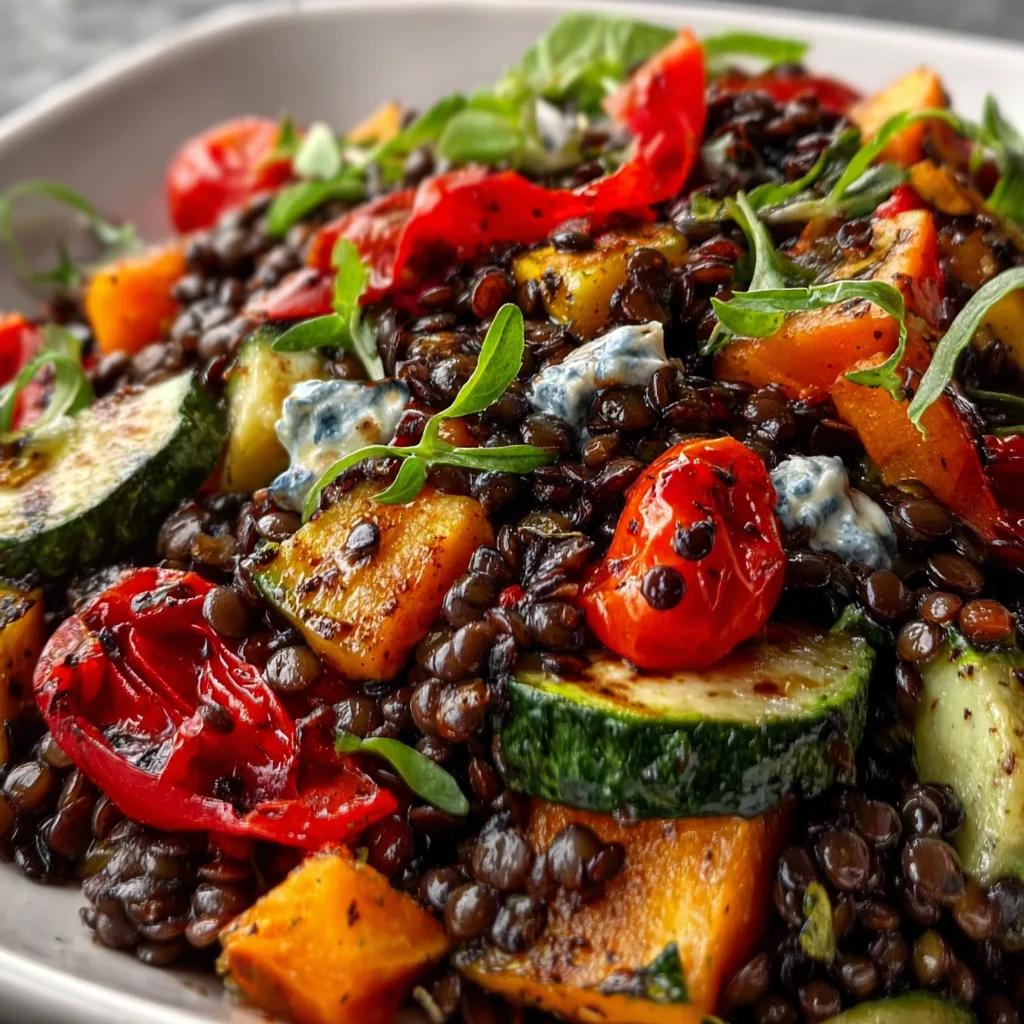
  • Black Lentil Salad with Roasted Veggies: Fresh, Flavorful, Easy!

    Black Lentil Salad with Roasted Veggies: Fresh, Flavorful, Easy!

    Black Lentil Salad with Roasted Veggies: Fresh, Flavorful, Easy!

    This Black Lentil Salad with Roasted Vegetables has become my absolute go-to for those days when I need something nourishing yet deeply satisfying. The first time I made it, the kitchen filled with the most intoxicating aroma of caramelizing vegetables and earthy lentils. I remember standing there, wooden spoon in hand, thinking, “This is what real food should smell like.” The combination of nutty black lentils and sweet, charred vegetables creates a symphony of textures and flavors that’s both comforting and sophisticated. Perfect for meal prep or serving to impressed dinner guests who’ll never guess how simple it was to make.

    Recipe

    Why You’ll Love This Black Lentil Salad with Roasted Vegetables

    A Nutritional Powerhouse

    This Black Lentil Salad with Roasted Vegetables isn’t just delicious—it’s practically a multivitamin in a bowl! Black lentils (sometimes called beluga lentils because they resemble caviar) pack an impressive protein punch at about 18g per cup. They’re also loaded with fiber, iron, and folate. The rainbow of roasted vegetables adds a spectrum of antioxidants and vitamins. I love how this salad keeps me feeling satisfied for hours without that heavy, sluggish feeling. My afternoon energy slump disappeared the week I started meal-prepping this for lunch!

    Perfect Balance of Flavors and Textures

    There’s something magical about the interplay of textures in this Black Lentil Salad with Roasted Vegetables. The slight chew of the lentils against the melt-in-your-mouth roasted vegetables creates the perfect bite every time. The caramelized edges of the vegetables bring a natural sweetness that balances the earthiness of the lentils. I’ve added a bright lemon-herb dressing that cuts through with just the right amount of acidity. Even my husband, who claims to “not like salads,” requested this three times in one week—that’s when I knew I had a winner!

    Essential Tips & Tricks

    Perfecting Your Roasted Vegetables

    The secret to exceptional roasted vegetables lies in three key factors: proper spacing, temperature, and timing. Always spread your vegetables in a single layer with breathing room—crowding leads to steaming instead of roasting. Preheat your oven thoroughly to 425°F for that perfect caramelization. Different vegetables cook at different rates, so group similar ones together (root vegetables take longer than bell peppers or zucchini). A drizzle of good olive oil, a generous sprinkle of salt, and tossing halfway through cooking ensures even browning. My kitchen revelation: adding vegetables to a cold oven results in soggy, sad veggies!

    Cooking Black Lentils to Perfection

    Black lentils require a gentle touch to achieve that ideal al dente texture we’re after. Unlike red lentils that break down quickly, these beautiful black gems hold their shape wonderfully when cooked properly. Always rinse them thoroughly under cold water, then simmer gently in a 3:1 ratio of liquid to lentils. They typically need 20-25 minutes—but start checking at 18! They should be tender but still slightly firm in the center. For an extra flavor boost, try cooking them in vegetable broth instead of water, similar to how I prepare the quinoa in my Baked Salmon and Vibrant Quinoa recipe.

    Serving Ideas & Creative Variations

    Elevate Your Presentation

    Transform this Black Lentil Salad with Roasted Vegetables from a simple meal to a showstopper with thoughtful presentation. Serve it on a large, shallow platter rather than a bowl to showcase the beautiful colors. Layer the components instead of mixing everything together—lentils as the base, arranged vegetables on top, then a drizzle of dressing and a scatter of fresh herbs. For dinner parties, I like to add little accent ingredients like pomegranate seeds, toasted pine nuts, or crumbled feta. Consider warming the lentils slightly while keeping the dressing cool for a delightful temperature contrast.

    Seasonal Adaptations

    One reason I return to this Black Lentil Salad with Roasted Vegetables year-round is how beautifully it adapts to seasonal produce. Summer brings charred zucchini, sweet cherry tomatoes, and colorful bell peppers. Fall transitions to butternut squash, Brussels sprouts, and red onions. Winter calls for hearty roots like parsnips, carrots, and sweet potatoes—similar to my Maple Dijon Roasted Vegetables recipe. Spring welcomes asparagus, snap peas, and radishes. The lentil base stays constant while the vegetables change, creating a completely different experience with each season. It’s like getting four salads in one recipe!

    Storage & Troubleshooting Guide

    Proper Storage for Maximum Freshness

    To keep your Black Lentil Salad with Roasted Vegetables at its peak, proper storage is essential. Store the components separately when possible—lentils in one container, roasted vegetables in another, and dressing on the side. This prevents the vegetables from getting soggy and the lentils from absorbing all the dressing. When stored this way in airtight containers, the salad components last 4-5 days in the refrigerator. If you’ve already mixed everything, consume within 2-3 days. I like to make a big batch on Sunday and assemble fresh portions throughout the week for the best texture.

    Solving Common Issues

    Even experienced cooks encounter challenges with Black Lentil Salad with Roasted Vegetables. If your lentils turned mushy, they likely cooked too long—next time, start checking 5 minutes earlier. For vegetables that steamed instead of roasted, your oven was probably overcrowded or not hot enough. If your salad tastes flat, it needs acid balance—add a splash more lemon juice or a teaspoon of vinegar. Dry salad? Drizzle with extra olive oil or dressing. Bland flavors can be instantly fixed with a pinch of flaky sea salt, fresh herbs, or a sprinkle of nutritional yeast for umami depth.

    Frequently Asked Questions

    Can I use different types of lentils for this Black Lentil Salad with Roasted Vegetables?

    Yes! While black lentils hold their shape beautifully, French green (Puy) lentils make an excellent substitute. Brown lentils work too but cook faster. Avoid red or yellow lentils as they’ll become too soft.

    How can I make this salad more filling?

    Add protein like grilled chicken, salmon, or halloumi cheese. You could also incorporate cooked quinoa or farro for extra heartiness, or top with toasted nuts and seeds.

    Can I make this salad ahead for meal prep?

    Absolutely! Prepare all components separately and store in the refrigerator. Combine just before eating for the freshest texture and flavor. The components will last 4-5 days refrigerated.

    What vegetables work best for roasting in this recipe?

    Root vegetables (carrots, sweet potatoes, beets), cruciferous vegetables (cauliflower, Brussels sprouts), bell peppers, red onions, and zucchini all roast beautifully. Choose a colorful variety for maximum nutrients.

    Is this recipe vegan and gluten-free?

    Yes! This Black Lentil Salad with Roasted Vegetables is naturally vegan and gluten-free, making it perfect for those with dietary restrictions. Just double-check any store-bought dressing ingredients.

    Final Thoughts

    This Black Lentil Salad with Roasted Vegetables has earned its place in my regular rotation for good reason. It’s that rare combination of nutritious, delicious, and adaptable that makes cooking feel effortless. I find myself craving its earthy flavors and satisfying textures, whether as a light lunch or alongside a protein for dinner. The way the sweet caramelized vegetables complement the nutty lentils creates something truly greater than the sum of its parts. For more seasonal inspiration, check out my Pinterest boards where I share new vegetable combinations regularly.

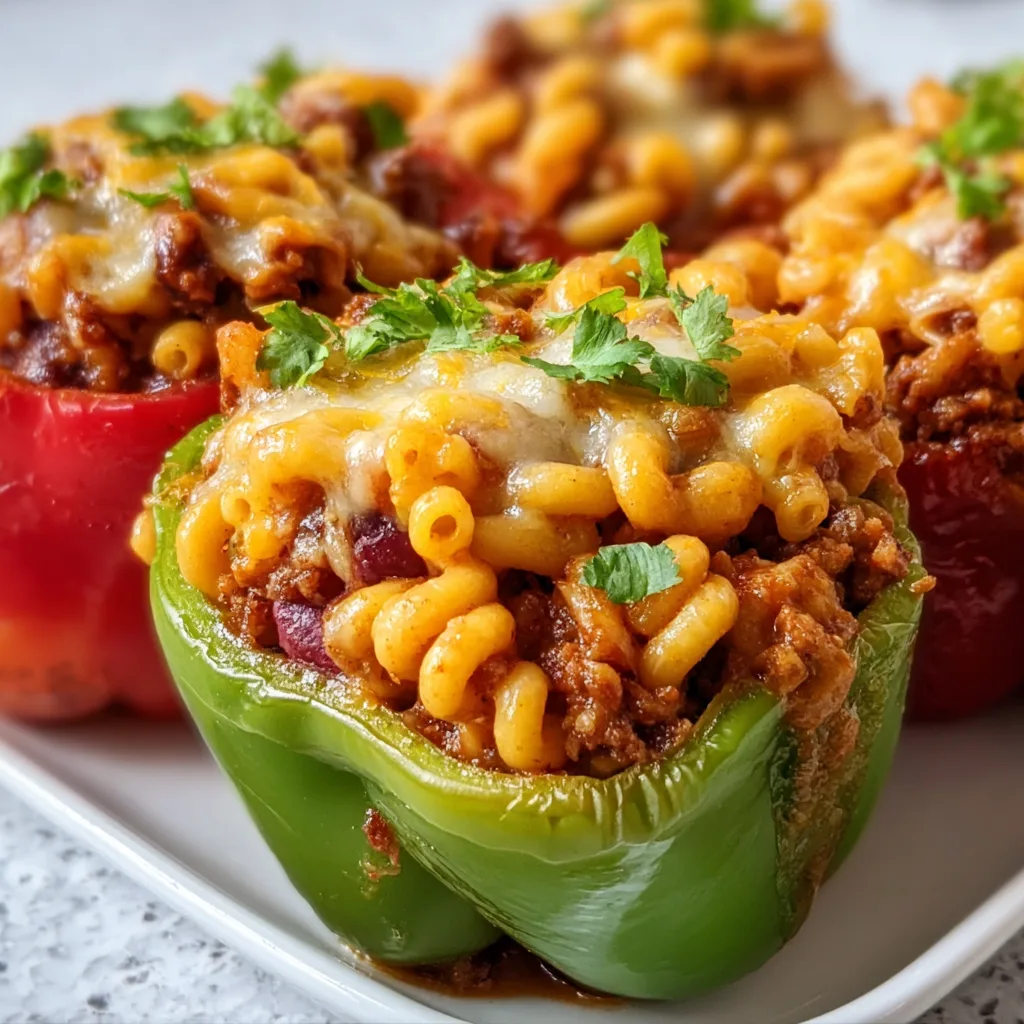
  • Baked Chili Mac Stuffed Peppers That Will Blow Your Mind!

    Baked Chili Mac Stuffed Peppers That Will Blow Your Mind!

    Baked Chili Mac Stuffed Peppers That Will Blow Your Mind!

    Baked Chili Mac Stuffed Peppers combine two comfort food classics into one irresistible dish that’s both impressive and easy to make. The first time I made these for my family, my kitchen filled with the most mouthwatering aroma of spices, cheese, and roasted peppers. There’s something magical about the way the sweet bell peppers cradle that hearty, cheesy chili mac filling. It’s like getting a perfect bite of flavor in every colorful pepper boat! If you’re looking for a creative way to use up leftover chili or mac and cheese, this recipe is about to become your new favorite dinner solution.

    Recipe

    Why You’ll Love This Baked Chili Mac Stuffed Peppers

    A Complete Meal in One Dish

    These Baked Chili Mac Stuffed Peppers are the ultimate all-in-one meal that satisfies every craving. The tender bell peppers provide a serving of vegetables while adding natural sweetness that balances the savory, spiced chili mac filling. I love how the peppers soften in the oven but still maintain enough structure to hold that gooey, cheesy goodness inside. Plus, they’re incredibly filling! The combination of protein-packed ground beef, fiber-rich beans, and hearty pasta means you won’t need to worry about making side dishes. It’s comfort food that actually feels good to eat.

    Make-Ahead and Meal Prep Friendly

    One of my favorite things about Baked Chili Mac Stuffed Peppers is how wonderfully they work for meal planning. You can prep these entirely the day before – stuff those peppers, cover the baking dish, and refrigerate until you’re ready to bake. The flavors actually develop overnight, making them even more delicious! I often make a double batch on Sunday and enjoy them throughout the week. They reheat beautifully in the microwave or oven without losing their texture. For busy weeknights, it’s such a relief to have these colorful, nutritious powerhouses waiting in the fridge. Just 30 minutes in the oven and dinner is served!

    Essential Tips & Tricks

    Pepper Preparation Perfection

    Choosing the right peppers makes all the difference in this dish. Look for bell peppers with flat bottoms so they stand upright in your baking dish without tipping over. I prefer using a rainbow of colors – red, yellow, and orange peppers are slightly sweeter than green ones and create a beautiful presentation. When cutting the tops, leave about ¾ of the pepper intact and carefully remove all seeds and membranes. A little tip I discovered: par-bake your empty peppers for 10 minutes before stuffing them. This pre-cooking step ensures they’ll be perfectly tender by the time your filling is hot and bubbly, avoiding that dreaded raw pepper crunch.

    Creating the Perfect Filling

    The heart of these Baked Chili Mac Stuffed Peppers is the flavorful filling that brings together the best of chili and mac and cheese. I recommend using a medium-sized pasta like elbow macaroni or small shells that will easily fit inside the peppers. Cook your pasta just shy of al dente since it will continue cooking in the oven. For the chili component, don’t skimp on the spices! A blend of chili powder, cumin, smoked paprika, and a dash of cayenne creates depth without overwhelming heat. The secret to that creamy, cohesive texture? Stir in some cream cheese along with the shredded cheddar. It melts beautifully and binds everything together.

    Serving Ideas & Creative Variations

    Toppings and Garnishes

    The beauty of Baked Chili Mac Stuffed Peppers lies in the endless topping possibilities. My family loves setting up a little topping bar so everyone can customize their peppers. Fresh cilantro, sliced green onions, and a dollop of sour cream are classics that cool down the spice. For texture contrast, try crushed tortilla chips or crispy fried onions sprinkled over the top just before serving. A squeeze of lime brightens everything up beautifully. My personal favorite finishing touch? A drizzle of hot honey that creates this amazing sweet-heat combo. Don’t forget extra cheese options like crumbled cotija or queso fresco for those who want to take the cheesiness to the next level.

    Dietary Adaptations

    One thing I absolutely love about this recipe is how easily it adapts to different dietary needs. For a vegetarian version, simply swap the ground beef for black beans, pinto beans, or even a plant-based ground meat alternative. The flavor profile works perfectly with these substitutions! Going low-carb? Replace the pasta with cauliflower rice or extra beans. For dairy-free friends, nutritional yeast and dairy-free cheese alternatives melt surprisingly well in this application. Need it gluten-free? Just use your favorite gluten-free pasta – the shorter shapes tend to work best. These adaptations never feel like compromises because the core flavors of these stuffed peppers shine through regardless.

    Storage & Troubleshooting Guide

    Proper Storage Methods

    These Baked Chili Mac Stuffed Peppers are meal prep champions that store beautifully for future enjoyment. Once cooled completely, place leftovers in an airtight container and refrigerate for up to 4 days. The flavors actually continue to develop, making day-two peppers sometimes even tastier! For longer storage, freeze individual peppers wrapped tightly in foil and placed in freezer bags for up to 3 months. I like to label them with the date and reheating instructions. When ready to enjoy, thaw overnight in the refrigerator before reheating. A little trick I’ve found: sprinkle a tablespoon of water over the peppers before reheating to maintain moisture.

    Fixing Common Issues

    Even experienced cooks occasionally encounter challenges with stuffed peppers. If your peppers won’t stand upright, create a stable base by slicing a thin piece off the bottom – just be careful not to cut through to the hollow center. For filling that’s too dry after baking, stir in a splash of warm beef broth or tomato sauce before serving. Too watery? Next time, drain your beans and tomatoes more thoroughly or add a tablespoon of cornstarch to the mixture. If the peppers are still too firm after baking, cover the dish with foil for the first 20 minutes of baking to steam them properly.

    For peppers that split during baking, simply serve them “fallen over” style with extra sauce and cheese on top!

    Frequently Asked Questions

    Can I make Baked Chili Mac Stuffed Peppers ahead of time?

    Absolutely! Prepare and stuff the peppers up to 24 hours in advance, cover with plastic wrap, and refrigerate. Add an extra 5-10 minutes to the baking time when cooking from cold.

    What’s the best cheese for Baked Chili Mac Stuffed Peppers?

    A combination works best – sharp cheddar provides flavor while monterey jack or mozzarella delivers that perfect stretchy texture. For extra richness, mix in 2 tablespoons of cream cheese.

    Can I freeze these stuffed peppers?

    Yes! Freeze fully cooked and cooled peppers individually wrapped in foil, then stored in freezer bags for up to 3 months. Thaw overnight before reheating.

    What sides go well with this dish?

    Keep it simple with a fresh green salad, crusty bread, or corn on the cob. The peppers are already a complete meal with protein, vegetables, and carbs.

    How can I make these spicier?

    Add diced jalapeños or a tablespoon of hot sauce to the filling mixture. You can also top with sliced serrano peppers or red pepper flakes before serving.

    Final Thoughts

    Baked Chili Mac Stuffed Peppers represent comfort food at its finest – familiar flavors transformed into something special that nourishes both body and soul. I love how they bring together the hearty satisfaction of chili mac with the colorful presentation of stuffed peppers. They’ve become a regular in my dinner rotation not just because they’re delicious, but because they’re so versatile and crowd-pleasing. Whether you’re cooking for a family dinner, meal prepping for the week, or impressing guests, these stuffed peppers deliver every time. Don’t forget to check out more comfort food inspiration on Pinterest!

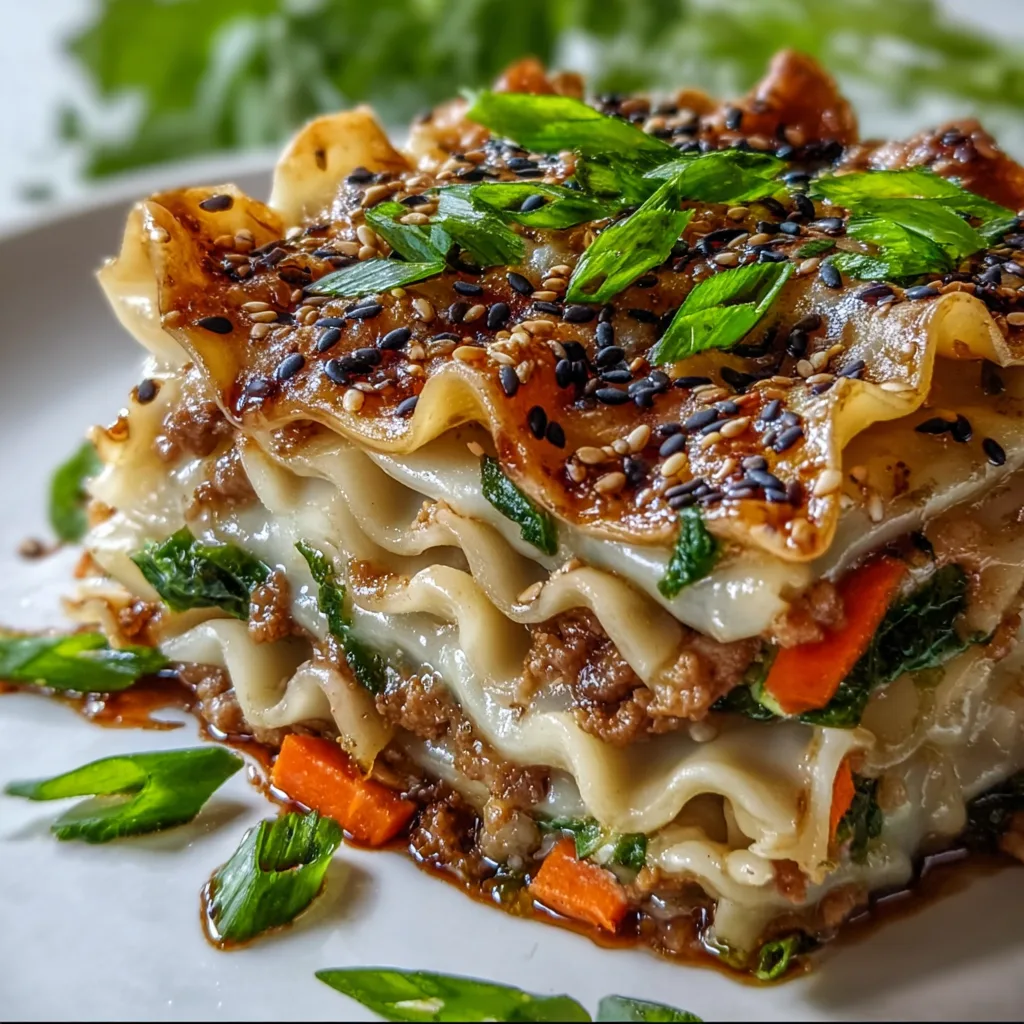
  • Asian Dumpling Lasagna Soy: Irresistibly Delicious & Easy Recipe!

    Asian Dumpling Lasagna Soy: Irresistibly Delicious & Easy Recipe!

    Asian Dumpling Lasagna Soy: Irresistibly Delicious & Easy Recipe!

    Asian Dumpling Lasagna Soy fusion is my newest obsession, combining the best of both culinary worlds into one spectacular dish. The first time I layered those delicate dumpling wrappers with savory soy-infused filling, my kitchen filled with an aroma that transported me straight to my favorite dim sum restaurant. This creative twist marries traditional Italian comfort food with vibrant Asian flavors, resulting in a dish that’s both familiar and excitingly new. The umami-rich soy sauce creates depth while the dumpling wrappers offer a silky texture that’s utterly irresistible. If you’ve been looking for a crowd-pleaser that breaks the mold, you’ll find it in this delicious fusion creation.

    Recipe

    Why You’ll Love This Asian Dumpling Lasagna Soy

    Perfect Fusion of Flavors

    This dish brings together the comforting layers of traditional lasagna with the vibrant umami punch of Asian ingredients. The dumpling wrappers create delicate, silky layers that absorb the rich soy-based sauce beautifully. I was skeptical the first time I tried substituting pasta sheets with dumpling wrappers, but the result was mind-blowing! They maintain their integrity while soaking up all those gorgeous flavors. The soy sauce adds that perfect savory depth that marries the Asian and Italian elements seamlessly. Every bite delivers a harmonious balance that will have your taste buds dancing between familiar comfort and exciting new territory.

    Impressive Yet Approachable

    Don’t let the fusion concept intimidate you – this Asian Dumpling Lasagna Soy recipe is surprisingly weeknight friendly. The components come together more quickly than traditional lasagna, with dumpling wrappers requiring no pre-boiling. I’ve served this at dinner parties to wide-eyed amazement, yet it’s simple enough for a Tuesday night family meal. The layers create a stunning presentation when sliced, revealing distinct strata of filling and wrappers. Your guests will think you spent hours in the kitchen, but your secret is safe with me! The combination of accessible ingredients with an unexpected presentation makes this dish perfect for both special occasions and everyday dining.

    Essential Tips & Tricks

    Perfecting Your Dumpling Wrapper Layers

    The key to exceptional Asian Dumpling Lasagna Soy lies in how you handle those delicate wrappers. Unlike pasta, dumpling wrappers are much thinner and more delicate, requiring gentle handling. I learned the hard way that overlapping them slightly creates the perfect foundation – about ¼ inch overlap prevents gaps while cooking. Keep unused wrappers covered with a damp cloth as you work to prevent them from drying out and cracking. When layering, brush each wrapper lightly with a mixture of sesame oil and soy sauce to enhance flavor and prevent sticking. This simple step transforms the texture and flavor profile dramatically, creating distinct layers that hold together beautifully when served.

    Balancing Your Soy Sauce Mixture

    Finding the right soy sauce balance is crucial to avoid overwhelming the dish with saltiness. I recommend using low-sodium soy as your base and enhancing it with other flavors. My perfect ratio is 3 tablespoons low-sodium soy sauce, 1 tablespoon dark soy (for color and depth), 2 teaspoons rice vinegar, and 1 teaspoon honey to balance. This creates a complex flavor without the salt bomb effect. Remember that the soy will concentrate as it cooks, so what might taste perfect in the bowl could become too intense in the final dish. If you’re concerned about saltiness, try making your own dipping sauce to serve alongside rather than incorporating all the soy directly into the layers.

    Serving Ideas & Creative Variations

    Complementary Side Dishes

    This Asian Dumpling Lasagna Soy pairs beautifully with lighter sides that balance its rich, savory profile. I love serving it with a crisp cucumber salad dressed simply with rice vinegar, a touch of sugar, and sesame seeds. The cool crunch provides the perfect contrast to the warm, layered lasagna. Steamed baby bok choy with a light drizzle of oyster sauce makes another excellent companion, adding a fresh green element to the plate. For a more substantial meal, consider garlic-fried rice or even a simple miso soup to start. The key is choosing sides that complement rather than compete with the complex flavors in your main dish, creating a harmonious Asian-inspired meal.

    Protein and Dietary Adaptations

    The beauty of this Asian Dumpling Lasagna Soy lies in its versatility for different dietary needs. Traditional ground pork or beef works wonderfully, but don’t stop there! For seafood lovers, a mixture of chopped shrimp and scallops creates an elegant variation with delicate sweetness. Vegetarians can enjoy a hearty filling of finely chopped shiitake mushrooms, crumbled tofu, and shredded cabbage that mimics the texture of meat while absorbing all those wonderful soy flavors. For vegan adaptations, substitute the egg wash with cornstarch slurry to help bind the layers. Those watching carbs can try using thinly sliced zucchini or eggplant in place of some dumpling wrapper layers for a lighter version that still captures the essence of this fusion dish.

    Storage & Troubleshooting Guide

    Proper Storage and Reheating

    This Asian Dumpling Lasagna Soy actually improves with a day of rest, making it perfect for make-ahead meals. Store leftovers in an airtight container in the refrigerator for up to 3 days. The flavors will continue to meld, creating an even more delicious experience when reheated. For best results, reheat individual portions in the microwave at 70% power with a damp paper towel over the top to prevent the wrappers from drying out. If reheating the entire lasagna, cover with foil and warm in a 325°F oven for about 20 minutes until heated through. Freezing is also an option – cut into individual portions first, wrap tightly in plastic wrap and foil, then freeze for up to 1 month.

    Troubleshooting Common Issues

    The most frequent challenge with Asian Dumpling Lasagna Soy is managing the moisture balance. If your lasagna turns out too watery, it’s likely from vegetables releasing excess liquid during cooking. Pre-cook and drain vegetables thoroughly before adding to your filling mixture. Another common issue is wrappers tearing during assembly – work on a clean, dry surface and handle them with care. If the final dish seems too dry, brush a mixture of soy sauce and chicken broth between layers next time. For lasagna that falls apart when serving, allow it to rest 15-20 minutes after baking to set properly. This cooling period makes all the difference between a sloppy mess and beautiful, distinct layers that hold their shape on the plate.

    Frequently Asked Questions

    Can I make Asian Dumpling Lasagna Soy ahead of time?

    Absolutely! Assemble the entire lasagna up to 24 hours in advance, cover tightly with plastic wrap, and refrigerate. Remove from the refrigerator 30 minutes before baking. The flavors actually develop beautifully during this rest time.

    What’s the best type of dumpling wrapper to use?

    Look for round gyoza or wonton wrappers in the refrigerated section of Asian markets or well-stocked grocery stores. Square wrappers work too, but round ones create more even layers with less overlap.

    Can I freeze leftovers?

    Yes! Portion cooled leftovers into individual servings, wrap tightly in plastic wrap then foil, and freeze for up to 1 month. Thaw overnight in the refrigerator before reheating.

    How can I make this spicier?

    Add 1-2 teaspoons of chili oil, sambal oelek, or sriracha to your soy sauce mixture. Alternatively, include finely diced fresh chilies in your filling for heat throughout the dish.

    What vegetables work best in Asian Dumpling Lasagna Soy filling?

    Vegetables that don’t release excessive moisture work best: finely diced bell peppers, shredded carrots, chopped spinach (squeezed dry), mushrooms, and green onions all complement the soy flavors beautifully.

    Final Thoughts

    This Asian Dumpling Lasagna Soy represents everything I love about modern cooking – fearlessly crossing culinary boundaries to create something uniquely delicious. The marriage of delicate dumpling wrappers with rich, umami-packed soy filling creates a dish that honors both traditions while becoming something entirely new. Don’t be afraid to make it your own with personal touches and adaptations. The joy of cooking comes from these creative moments! I’d love to see your creations on Pinterest – tag me in your fusion masterpieces and let me know how your family enjoyed this cross-cultural delight!

  • Garlic Herb Dutch Oven Bread – Irresistibly Fresh & Flavor-Packed!

    Garlic Herb Dutch Oven Bread – Irresistibly Fresh & Flavor-Packed!

    Garlic Herb Dutch Oven Bread - Irresistibly Fresh & Flavor-Packed!

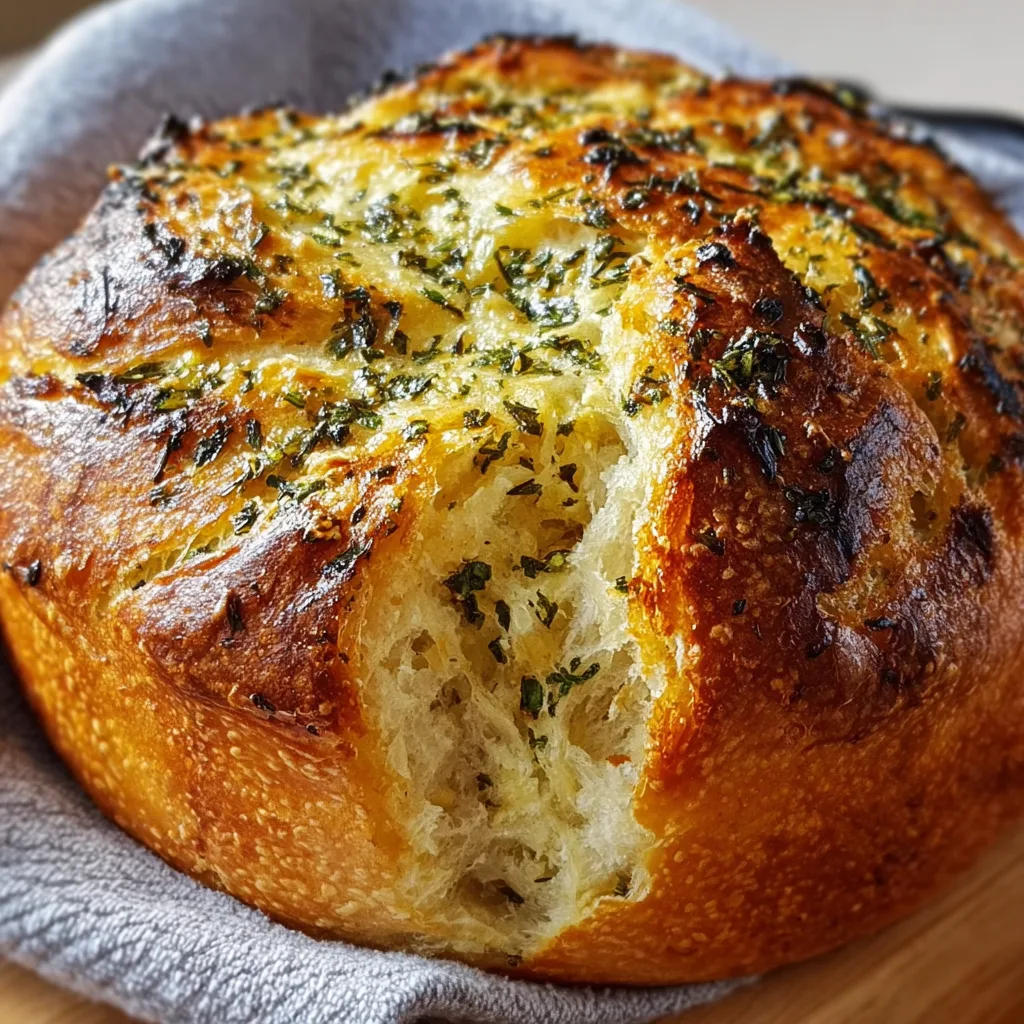
    Garlic Herb Dutch Oven Bread has completely transformed my weekend baking routine. There’s something magical about the moment you lift that heavy lid to reveal a perfectly crusty, aromatic loaf that you created with your own hands. I still remember the first time I made this bread—my kitchen filled with that irresistible bakery scent, and my husband wandered in from the garden asking what smelled so heavenly. This rustic, artisanal bread requires minimal hands-on effort but delivers professional-quality results that will make you feel like a master baker. Perfect for dinner parties or simply elevating your everyday meals with something special.

    Recipe

    Why You’ll Love This Garlic Herb Dutch Oven Bread

    Foolproof for Beginners

    Even if you’ve never baked bread before, this recipe welcomes you with open arms. The no-knead method eliminates the intimidation factor that comes with traditional bread baking. I was terrified of yeast recipes until this became my gateway bread! The dutch oven does the heavy lifting by creating the perfect environment for your dough—trapping steam to develop that coveted crispy crust while keeping the inside tender and airy. You’ll be amazed how a handful of simple ingredients transform into something that looks and tastes like it came from an artisanal bakery.

    Incredible Flavor Complexity

    The combination of fresh garlic and herbs creates a flavor profile that elevates this bread beyond the ordinary. Each bite offers a perfect harmony of savory notes that complement virtually any meal. I love using rosemary and thyme from my little windowsill herb garden, but you can customize the herb blend based on what you have on hand. The slow fermentation process (don’t worry, it’s hands-off!) develops a subtle tanginess that balances the rich garlic and herb infusion. This depth of flavor simply can’t be matched by store-bought alternatives.

    Essential Tips & Tricks

    Mastering the Dutch Oven Method

    The secret to that professional bakery-style crust lies in preheating your dutch oven properly. Place it in the oven during the preheat phase to ensure it’s blazing hot when your dough goes in. This immediate heat shock creates that gorgeous crackling exterior. I learned this the hard way after my first loaf turned out pale and soft! Make sure your dutch oven is rated for high temperatures (most are, but always check). For the best results, remove the lid during the final 15 minutes of baking to allow the crust to develop that beautiful golden-brown color and crispy texture.

    Perfecting Your Dough Consistency

    Achieving the right dough hydration makes all the difference in your final loaf. The dough should be sticky but manageable—wetter than traditional bread dough but not soupy. If it’s too dry, your bread will be dense; too wet, and it’ll spread rather than rise. Don’t panic if your dough seems unusually wet compared to other bread recipes you’ve tried. This high hydration is what creates those beautiful air pockets inside. Use just enough flour during shaping to prevent sticking, but resist the urge to add too much, which would toughen your bread.

    Serving Ideas & Creative Variations

    Perfect Pairings for Any Meal

    This Garlic Herb Dutch Oven Bread elevates practically any meal from ordinary to extraordinary. Serve warm slices alongside hearty soups like Beef and Barley for a comforting dinner that feels like a hug in a bowl. I love tearing chunks to dip into good olive oil and balsamic vinegar as an appetizer when friends come over. For breakfast, toast thick slices and top with avocado and eggs for an Instagram-worthy start to your day. The subtle garlic and herb flavors complement without overpowering, making this bread the perfect supporting character for any culinary story.

    Creative Flavor Twists

    Don’t be afraid to experiment with different flavor combinations that reflect your mood or meal. Add sun-dried tomatoes and olives for a Mediterranean twist that pairs beautifully with pasta dishes. Incorporate grated parmesan and cracked black pepper for an indulgent cheese bread that’s perfect alongside a simple salad. My personal favorite variation includes roasted garlic and caramelized onions folded into the dough for an intensely savory profile. The basic recipe is your canvas—each variation creates a completely different experience while maintaining that perfect texture contrast between crust and crumb.

    Storage & Troubleshooting Guide

    Keeping Your Bread Fresh

    To maintain that perfect crust-to-crumb ratio, store your bread cut-side down on a cutting board for the first day. For longer storage, wrap loosely in a clean kitchen towel rather than plastic, which makes the crust soggy. If you won’t finish the loaf within 2-3 days, slice and freeze it in a ziplock bag—this way you can toast individual slices as needed. Revive day-old bread by spritzing with water and heating in a 350°F oven for 5-10 minutes. The moisture will reactivate the crust while warming the interior to that just-baked texture.

    Solving Common Baking Issues

    If your bread turns out dense or flat, the culprit is usually under-proofing or using inactive yeast. Test your yeast’s freshness before starting, and give your dough adequate time to rise—especially in cooler kitchens where fermentation slows down. For pale crusts, your oven or dutch oven likely wasn’t hot enough; always preheat thoroughly. If your bread sticks to the pot, try dusting the bottom with cornmeal or using parchment paper. Remember that bread baking improves with practice! Each “mistake” teaches you something valuable about the process, bringing you closer to your perfect loaf.

    Frequently Asked Questions

    Can I make Garlic Herb Dutch Oven Bread without a dutch oven?

    While a dutch oven creates the ideal environment, you can use any oven-safe pot with a tight-fitting lid. Alternatively, place a baking dish with water on the bottom rack to create steam while baking your bread on a preheated stone.

    How do I know when my dough has proofed enough?

    Properly proofed dough will have roughly doubled in size and will slowly spring back when gently poked with your finger, leaving a slight indentation that doesn’t completely disappear.

    Can I use dried herbs instead of fresh in this recipe?

    Absolutely! Use about one-third the amount of dried herbs compared to fresh. Dried herbs have more concentrated flavor, so a little goes a long way.

    What’s the best flour for Garlic Herb Dutch Oven Bread?

    Bread flour yields the chewiest texture, but all-purpose flour works perfectly well. For extra flavor depth, substitute up to 25% of your flour with whole wheat.

    Why did my bread not rise properly?

    Under-rising typically results from inactive yeast, too-cold ingredients, or insufficient proofing time. Ensure your kitchen is warm enough and give the dough adequate time to develop.

    Final Thoughts

    This Garlic Herb Dutch Oven Bread has become more than just a recipe in my kitchen—it’s a weekend ritual that signals time to slow down and savor life’s simple pleasures. There’s something deeply satisfying about creating something so beautiful and delicious with just flour, water, yeast, and a few aromatic additions. Whether you’re a seasoned baker or complete novice, this bread welcomes you with open arms and forgiving techniques. I hope this loaf brings as much joy to your table as it has to mine! For more bread inspiration, visit Pinterest.