Category: Dinner

Easy, tasty dinner ideas for busy nights. Simple recipes, quick prep, and family-friendly meals you’ll make again and again.

  • Easy Cheesy Taco Pasta Recipe That Will Melt Your Heart!

    Easy Cheesy Taco Pasta Recipe That Will Melt Your Heart!

    Easy Cheesy Taco Pasta Recipe That Will Melt Your Heart!

    Easy Cheesy Taco Pasta is the ultimate weeknight wonder that’s saved my sanity more times than I can count. Picture this: it’s Wednesday evening, I’m exhausted after a long day, and the thought of complicated cooking makes me want to order takeout. That’s when this 30-minute miracle comes to my rescue! The combination of seasoned ground beef, gooey melted cheese, and tender pasta creates a comfort food masterpiece that my family requests weekly. If you’re looking for simple recipes that deliver big flavor, this dish belongs in your regular rotation—just like my Mediterranean Chicken Orzo that’s another weeknight favorite.

    Recipe

    Why You’ll Love This Easy Cheesy Taco Pasta

    Family-Friendly Comfort Food

    This dish is pure magic when it comes to pleasing picky eaters. The familiar taco flavors wrapped in a creamy pasta package make it impossible to resist! I’ve seen my most vegetable-averse nephew clean his plate and ask for seconds when this appears on the table. The beauty lies in its versatility—you can dial the spice level up or down depending on your family’s preferences. Plus, that moment when you pull it from the stove and see the cheese melting into ribbons of golden deliciousness? Pure kitchen satisfaction that warms my heart every time.

    Quick and Budget-Friendly

    On busy weeknights when time feels like sand slipping through my fingers, this dish is my secret weapon. From pantry to table in just 30 minutes flat, it’s faster than delivery and infinitely more satisfying. The ingredients won’t break the bank either—ground beef (or turkey for a lighter option), pasta, taco seasoning, and cheese are staples that often go on sale. I keep these ingredients on hand specifically for those “I can’t even think about cooking” evenings. One pot means minimal cleanup, and that alone makes this recipe worth its weight in gold when I’m exhausted but still want to nourish my family properly.

    Essential Tips & Tricks

    Perfect Pasta Selection

    The pasta you choose makes a significant difference in the final texture of this dish. I recommend medium shells or rotini that capture little pockets of the sauce in their crevices. Cook the pasta just until al dente—about 1-2 minutes less than package directions—since it will continue cooking when combined with the hot taco mixture. This prevents the dreaded mushy pasta syndrome! For an extra flavor boost, try cooking your pasta in chicken broth instead of water. The subtle savory notes elevate the entire dish and remind me of my Chicken Carbonara where the pasta similarly soaks up all those delicious flavors.

    Seasoning Secrets

    While store-bought taco seasoning works perfectly, making your own signature blend takes this dish from good to unforgettable. My personal mix includes chili powder, cumin, garlic powder, onion powder, oregano, paprika, and a pinch of cinnamon for warmth. The homemade version allows you to control the salt and eliminate preservatives. Don’t skip blooming your spices! Add them to the beef while it’s still cooking and let them toast for 30 seconds before adding liquids. This simple step releases the essential oils in the spices, creating deeper, more complex flavors that make your taste buds dance with joy.

    Serving Ideas & Creative Variations

    Toppings Bar Extravaganza

    Transform dinner into an interactive experience by setting up a toppings bar alongside your pasta. Fresh diced tomatoes, sliced black olives, chopped green onions, and dollops of sour cream create a customizable feast. My personal favorite is adding diced avocado and a squeeze of lime for brightness. When I hosted my sister’s birthday dinner, I created individual pasta bowls with the basic recipe, then let everyone personalize their portions. The joy on everyone’s faces as they created their perfect combination reminded me why I love cooking—it brings people together! This approach works beautifully with my One-Pot Burrito Bowls too.

    Creative Twist Options

    When I’m feeling adventurous, I love giving this classic a fresh spin. Try substituting ground chicken or turkey for beef, or go vegetarian with black beans and corn for protein. For a creamy variation, stir in 4 ounces of cream cheese along with the shredded cheese. Feeling bold? Add a can of diced green chiles or jalapeños for heat. My latest obsession is the “inside-out” version—stuff the mixture into bell peppers, top with more cheese, and bake until bubbly. The peppers add a sweet crunch that complements the savory filling perfectly and transforms this quick dinner into something special enough for weekend entertaining.

    Storage & Troubleshooting Guide

    Make-Ahead and Freezing Tips

    This dish shines as a meal prep champion! Store leftovers in airtight containers in the refrigerator for up to 4 days. The flavors actually deepen overnight, making next-day lunch something to look forward to. For freezing, slightly undercook the pasta, then cool completely before transferring to freezer-safe containers. It keeps beautifully for up to 3 months. When reheating, add a splash of water or broth to revive the sauce. I often make a double batch on Sunday, freezing half in individual portions for those inevitable crazy weeknights when cooking from scratch just isn’t happening.

    Fixing Common Issues

    If your sauce seems too watery, don’t panic! Simply simmer uncovered for a few extra minutes to reduce the liquid. For sauce that’s too thick, add beef broth or water in small increments until you reach your desired consistency. If you accidentally oversalted, add a squeeze of lime juice and a dollop of sour cream to balance the flavors. For pasta that’s clumping together, a drizzle of olive oil and gentle tossing works wonders. Remember that perfection isn’t the goal—even my “kitchen fail” versions of this recipe have been devoured with enthusiasm by my family!

    Frequently Asked Questions

    Can I make Easy Cheesy Taco Pasta vegetarian?

    Absolutely! Substitute the ground beef with black beans, pinto beans, or meat alternatives like Beyond Beef. Add corn and bell peppers for extra texture and nutrition. The taco seasoning works beautifully with plant-based proteins.

    How spicy is this dish?

    The heat level is completely customizable. Use mild taco seasoning and skip the hot sauce for a kid-friendly version, or add diced jalapeños and hot sauce to kick up the spice for heat lovers.

    Can I use gluten-free pasta?

    Yes! Rice, corn, or chickpea pasta works well. Cook it 1-2 minutes less than package directions as gluten-free varieties can become mushy quickly. The sauce components are naturally gluten-free.

    What cheese works best for this recipe?

    A Mexican cheese blend offers the best melt and flavor, but cheddar, Monterey Jack, or pepper jack are excellent alternatives. For extra creaminess, mix in some cream cheese or queso fresco.

    Can I make this in a slow cooker?

    Yes! Brown the meat first, then add all ingredients except pasta and cheese to the slow cooker. Cook on low for 4-6 hours, add cooked pasta and cheese during the final 15 minutes.

    Final Thoughts

    Easy Cheesy Taco Pasta has become my household’s definition of comfort food that doesn’t compromise on flavor or convenience. There’s something magical about how simple ingredients transform into a dish that feels like a warm hug at the end of a long day. I love seeing the smiles around my table when I serve this family favorite. Whether you’re cooking for picky kids or sophisticated adults, this adaptable recipe delivers satisfaction every time. Don’t forget to check out more quick dinner ideas on our Pinterest for daily inspiration!
  • Garlic Parmesan Chicken Meatloaf: Irresistibly Juicy & Easy Recipe

    Garlic Parmesan Chicken Meatloaf: Irresistibly Juicy & Easy Recipe

    Garlic Parmesan Chicken Meatloaf: Irresistibly Juicy & Easy Recipe

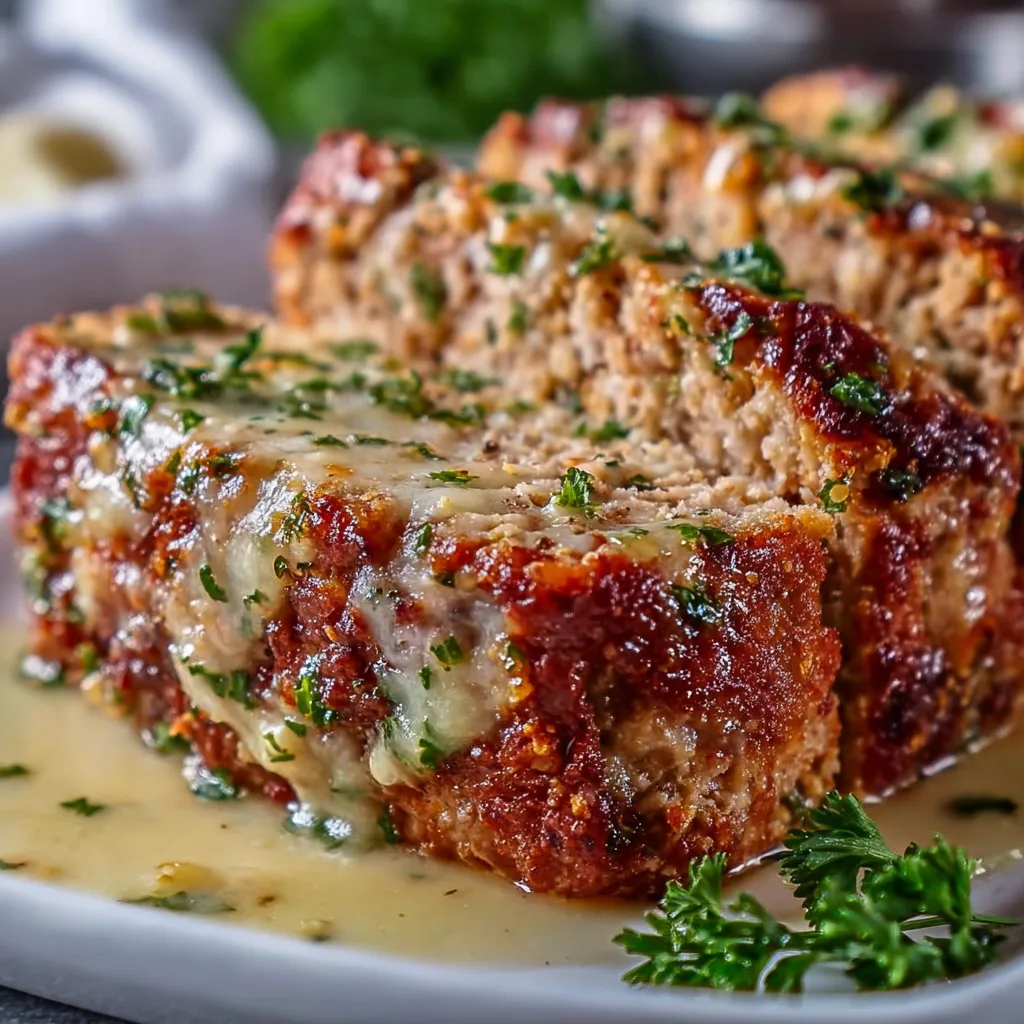
    Garlic Parmesan Chicken Meatloaf brings together two comfort food favorites in one irresistible dish. The first time I made this for my family, the kitchen filled with an aroma so mouthwatering that everyone wandered in asking what was cooking. There’s something magical about the way the garlic and parmesan infuse the tender chicken, creating a flavor profile that’s both familiar and exciting. If you’ve been searching for a lighter alternative to traditional beef meatloaf that doesn’t sacrifice flavor, this recipe deserves a spot in your dinner rotation. It’s become one of my most requested dishes for Sunday family dinners.

    Recipe

    Why You’ll Love This Garlic Parmesan Chicken Meatloaf

    Perfect Balance of Flavors

    The beauty of this Garlic Parmesan Chicken Meatloaf lies in its perfect flavor harmony. The sharpness of aged parmesan cuts through the mild chicken, while fresh garlic adds that unmistakable aromatic punch that makes your mouth water before you even take a bite. I’ve found that adding a touch of Italian herbs—basil, oregano, and a pinch of thyme—elevates the profile from good to extraordinary. The subtle heat from crushed red pepper flakes (optional, but recommended!) creates dimension without overwhelming the palate. It’s comfort food that feels sophisticated enough for company.

    Healthier Without Compromise

    Switching to ground chicken makes this meatloaf significantly lighter than beef versions without sacrificing moisture or flavor. One evening after a particularly indulgent weekend, I wanted comfort food that wouldn’t leave me feeling heavy. This creation was the perfect solution! The parmesan and breadcrumbs help bind everything together while adding richness, so you’ll never miss the beef. Plus, you can easily sneak extra veggies into the mix—finely diced bell peppers, spinach, or grated zucchini blend seamlessly into the mixture, boosting nutrition while keeping the texture perfect. It’s a win-win for flavor and health.

    Essential Tips & Tricks

    Achieving Perfect Moisture

    The secret to a never-dry Garlic Parmesan Chicken Meatloaf is maintaining the right moisture balance. Since ground chicken can dry out faster than beef, I always add 2-3 tablespoons of olive oil to the mixture. Another game-changer? Soaking your breadcrumbs in a little milk before mixing them in. This creates a panade that locks in moisture during baking. I learned this trick after one too many dry meatloaves! For extra insurance, place a small dish of water on the lower rack of your oven while baking. The steam helps maintain humidity, resulting in a meatloaf that’s tender and juicy every time. Trust me, these small steps make all the difference.

    Perfecting the Mix & Shape

    Resist the urge to overmix your meatloaf ingredients! This was my biggest mistake when I first started making chicken meatloaf. Overworking the mixture compacts the proteins too tightly, resulting in a dense, tough texture. Instead, combine ingredients with a light hand, mixing just until incorporated. When forming your loaf, avoid packing it too firmly—a loose shape allows heat to circulate better. For individual portions that cook faster, try making mini loaves in a muffin tin like I do for my weeknight dinner shortcuts. They cook in half the time and create more of those delicious caramelized edges everyone fights over!

    Serving Ideas & Creative Variations

    Perfect Pairings

    Garlic Parmesan Chicken Meatloaf pairs beautifully with both classic and unexpected sides. For a traditional comfort meal, serve alongside creamy mashed potatoes—the sauce from the meatloaf creates an incredible impromptu gravy. On warmer evenings, I love it with a crisp Caesar salad or roasted vegetables that catch all those flavorful drippings. When I’m feeling fancy, I serve it with Ruth’s Chris Style Potatoes Au Gratin for a restaurant-worthy dinner at home. The rich, cheesy potatoes complement the savory meatloaf perfectly. For a lighter option, steamed asparagus drizzled with lemon or a simple arugula salad with balsamic glaze provides a refreshing contrast.

    Exciting Flavor Twists

    The basic Garlic Parmesan Chicken Meatloaf recipe is wonderfully adaptable to different flavor profiles. For a Mediterranean twist, fold in sun-dried tomatoes, olives, and feta instead of parmesan. My family went crazy for this version last summer! For something with Asian flair, replace the Italian seasonings with ginger, scallions, and a brush of hoisin glaze during the last 15 minutes of baking. Buffalo chicken lovers can add hot sauce to the mix and top with blue cheese crumbles. I’ve even made a “pizza” version with mozzarella, pepperoni pieces, and a marinara topping that my kids request constantly. Don’t be afraid to experiment—this recipe provides the perfect canvas for creativity.

    Storage & Troubleshooting Guide

    Proper Storage & Reheating

    Garlic Parmesan Chicken Meatloaf makes excellent leftovers when stored properly. Refrigerate any remaining meatloaf within two hours of cooking, tightly wrapped or in an airtight container. It will maintain its quality for 3-4 days. For reheating, avoid the microwave if possible—it can dry out the chicken quickly. Instead, slice the meatloaf, add a splash of chicken broth or a drizzle of olive oil, cover with foil, and warm in a 300°F oven until heated through. This preserves the moisture and flavor. I often make a double batch specifically for meal prep, slicing the second loaf for sandwiches throughout the week. Trust me, a slice between good bread with some arugula makes the best lunch!

    Solving Common Problems

    If your meatloaf seems too wet or too dry, easy adjustments will save the day. For a mixture that’s too wet and doesn’t hold its shape, gradually add more breadcrumbs or a sprinkle of parmesan until it firms up. Conversely, if your mixture seems too dry or dense, incorporate a tablespoon of olive oil or an extra egg white. If the top browns too quickly during baking, simply tent it with foil for the remainder of the cook time. I once salvaged an overly browned meatloaf by spreading a thin layer of marinara on top during the last 10 minutes—it became a happy accident that my family now requests! Remember that internal temperature is your best guide—chicken meatloaf is done at 165°F.

    Frequently Asked Questions

    Can I make Garlic Parmesan Chicken Meatloaf ahead of time?

    Absolutely! You can prepare the mixture up to 24 hours ahead and refrigerate it uncooked. Just bring it closer to room temperature before baking. You can also fully cook it, refrigerate, and reheat when needed.

    What’s the best ground chicken to use?

    I recommend ground chicken that’s not too lean (around 93% lean). If you can only find very lean ground chicken, add an extra tablespoon of olive oil to maintain moisture.

    Can I freeze this meatloaf?

    Yes! Cool completely, then wrap tightly in plastic wrap followed by foil. Freeze for up to 3 months. Thaw overnight in the refrigerator before reheating.

    How do I know when my Garlic Parmesan Chicken Meatloaf is done?

    The most reliable method is using a meat thermometer. The internal temperature should reach 165°F. The meatloaf should also be lightly browned on top.

    Can I substitute ground turkey for chicken?

    Definitely! Ground turkey works perfectly in this recipe with no other adjustments needed. The garlic and parmesan flavors complement turkey beautifully.

    Final Thoughts

    This Garlic Parmesan Chicken Meatloaf has become my go-to when I want to serve something comforting yet impressive. There’s something special about the way the garlic and cheese transform humble ground chicken into a dish that feels both nostalgic and fresh. I love watching people take that first bite and seeing their surprise at how flavorful chicken meatloaf can be. Whether you’re cooking for picky eaters, health-conscious family members, or just looking to switch up your dinner routine, this recipe delivers every time. Don’t forget to check out more comfort food favorites on Pinterest for inspiration!

  • Creamy White Bean & Mushroom Skillet: Irresistibly Delicious Recipe!

    Creamy White Bean & Mushroom Skillet: Irresistibly Delicious Recipe!

    Creamy White Bean & Mushroom Skillet: Irresistibly Delicious Recipe!

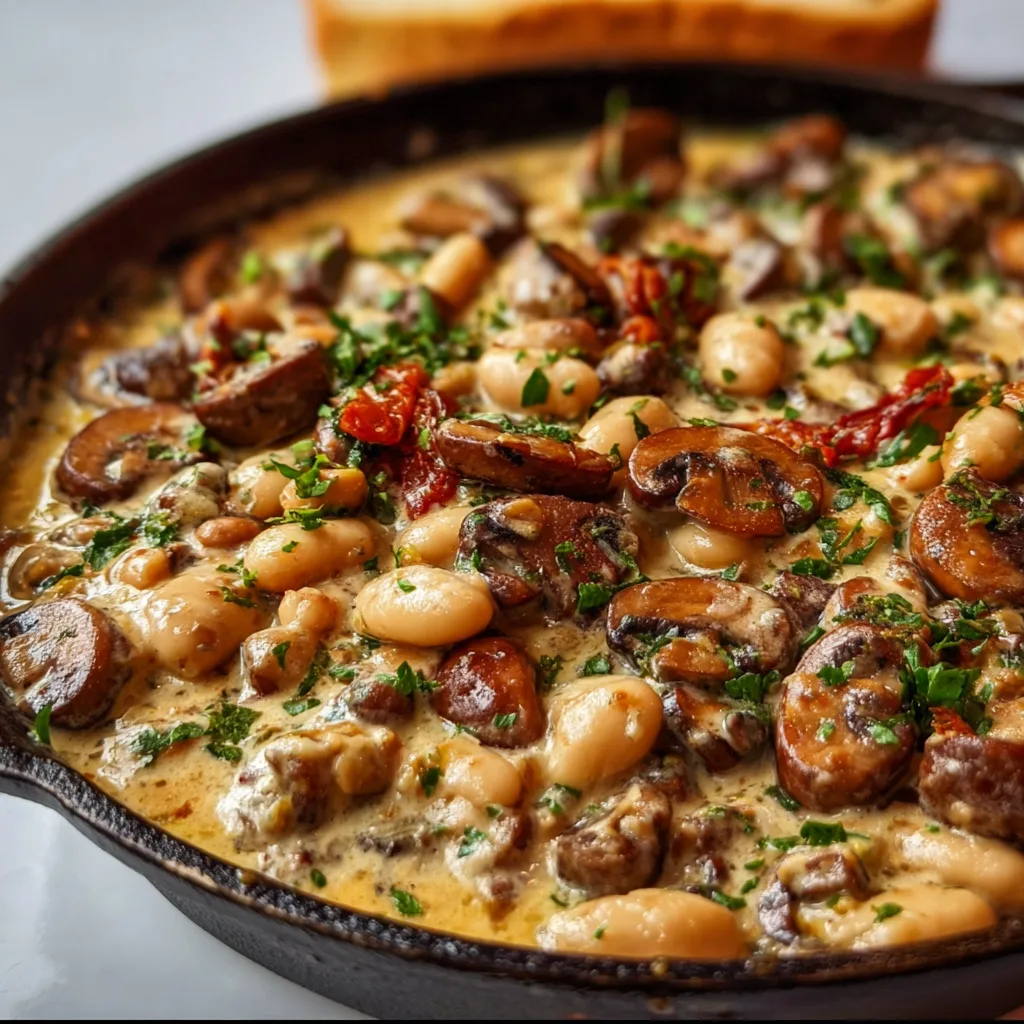
    This Creamy White Bean and Mushroom Skillet has become my absolute weeknight savior. There’s something magical about the way those plump cannellini beans melt into the silky sauce while earthy mushrooms add depth to every bite. I first created this dish on a rainy Tuesday when the pantry was nearly bare, and now it’s requested weekly at my table. The combination of creamy texture and umami flavors creates a cozy hug in a skillet that satisfies without weighing you down—perfect for those evenings when you crave comfort but don’t want to spend hours in the kitchen. Similar to my Thai Coconut Red Lentil Soup, this dish proves simple ingredients can create something extraordinary.

    Recipe

    Why You’ll Love This Creamy White Bean and Mushroom Skillet

    Perfect Balance of Flavors and Textures

    What makes this skillet truly special is the contrast between the velvety beans and meaty mushrooms. The cannellini beans break down slightly during cooking, naturally thickening the sauce without heavy cream (though I do add a splash!). I love how the mushrooms absorb all the garlic and herbs, becoming little flavor bombs in each forkful. The first time my neighbor tried this dish, she couldn’t believe something so luxurious-tasting came together in under 30 minutes. It’s that perfect middle ground between effortless and impressive.

    Versatile One-Pan Wonder

    This dish has saved me countless times when life gets chaotic. Everything cooks in a single skillet, meaning fewer dishes and more time to actually enjoy your evening. I’ve made this on busy weeknights and for impromptu dinner guests with equal success. The ingredients are pantry staples I always have on hand—canned beans, dried herbs, and those mushrooms that might be hiding in the back of your fridge. Plus, it’s endlessly adaptable to what you have available. Last week, I added some wilting spinach and a sprinkle of feta, and it was a completely refreshed experience!

    Essential Tips & Tricks

    Mastering the Mushroom Sauté

    The foundation of this dish’s deep flavor comes from properly sautéing your mushrooms. The cardinal rule: don’t crowd the pan. I learned this the hard way after years of impatient cooking! Work in batches if needed, giving those mushrooms space to develop a beautiful golden crust instead of steaming. This initial caramelization creates rich, complex flavors that elevate the entire dish. Also, resist the urge to stir constantly—let them sit undisturbed for 2-3 minutes before flipping. That sizzling sound is the sound of flavor developing!

    Building Layers of Flavor

    The sequence of adding ingredients makes a surprising difference in the final result. I always start by blooming the garlic and herbs in hot oil until fragrant before adding other components. This infuses the entire dish with aromatic goodness. Another game-changer is adding a splash of white wine or lemon juice to deglaze the pan after sautéing mushrooms—this lifts all those beautiful browned bits from the bottom of the skillet. For an extra layer of richness, try incorporating a parmesan rind while the sauce simmers, just like in my Creamy Miso Butter Beans.

    Serving Ideas & Creative Variations

    Perfect Pairings

    This creamy skillet begs to be served over something that will catch every drop of that luscious sauce. My family’s favorite is a bed of buttery polenta, where the creamy textures meld together beautifully. Crusty bread for dipping is non-negotiable at my table! For a lighter option, try serving over roasted spaghetti squash or alongside a bright arugula salad dressed simply with lemon and olive oil. The contrast of fresh, peppery greens against the rich skillet creates a perfectly balanced plate that feels restaurant-worthy but takes minimal effort.

    Seasonal Adaptations

    The beauty of this dish lies in its flexibility across seasons. In spring, I fold in tender asparagus tips and fresh peas during the last few minutes of cooking. Summer calls for cherry tomatoes that burst and mingle with the sauce, adding pops of brightness. Fall is perfect for incorporating roasted butternut squash cubes or thinly sliced Brussels sprouts. Winter versions get heartier with the addition of kale and a pinch of red pepper flakes for warmth. You might also enjoy pairing this with my Greek Sheet Pan Chicken for a Mediterranean-inspired feast that will impress any dinner guest.

    Storage & Troubleshooting Guide

    Proper Storage for Maximum Flavor

    This skillet actually tastes even better the next day after the flavors have had time to meld together. Store leftovers in an airtight container in the refrigerator for up to 3 days. When reheating, add a splash of broth or water as the beans tend to absorb liquid as they sit. For meal prep, I often make a double batch and portion it into individual containers. One word of caution: the mushrooms will continue to release moisture during storage, which thins the sauce slightly—simply simmer uncovered for a few minutes when reheating to restore the perfect consistency.

    Fixing Common Issues

    If your sauce ends up too thin, don’t panic! The simplest fix is to mash about ¼ cup of the beans against the side of the pan and stir them back in—they’ll release their starch and naturally thicken everything. For a sauce that’s too thick, a splash of broth or plant milk works wonders. If you accidentally oversalt (we’ve all been there!), add a squeeze of fresh lemon juice to brighten and balance the flavors. And if your mushrooms turned out soggy instead of caramelized, next time ensure your pan is screaming hot before adding them.

    Frequently Asked Questions

    Can I use different types of beans for this Creamy White Bean and Mushroom Skillet?

    Absolutely! Navy beans or great northern beans work beautifully. Chickpeas offer a firmer texture if you prefer less creaminess. Just adjust cooking time slightly as some varieties break down faster than others.

    What mushroom varieties work best?

    Cremini (baby portobello) mushrooms are my go-to for their meaty texture and flavor. For a luxury version, mix in some shiitake or oyster mushrooms. Button mushrooms work fine in a pinch.

    Is this recipe vegan-friendly?

    It’s easily adaptable! Replace the cream with coconut milk or cashew cream. Use vegetable broth instead of chicken broth and skip the parmesan or use nutritional yeast for that umami flavor.

    How can I add protein to make this a complete meal?

    Stir in shredded rotisserie chicken, sautéed Italian sausage, or white beans for plant-based protein. For seafood lovers, gently folded-in shrimp works beautifully with the creamy sauce.

    Can I freeze leftovers?

    Yes, though the texture changes slightly upon thawing. Freeze in portions for up to 2 months and thaw overnight in the refrigerator. Reheat gently, adding a splash of broth to revive the creaminess.

    Final Thoughts

    This Creamy White Bean and Mushroom Skillet has earned its place in my regular rotation for good reason—it delivers maximum comfort with minimum effort. There’s something deeply satisfying about creating such a flavorful dish from humble ingredients. The way the kitchen fills with the aroma of garlic and herbs as the sauce bubbles away makes even the most ordinary Tuesday feel special. I hope this recipe brings the same cozy comfort to your table that it has to mine. For more delicious recipes, check out my collection on Pinterest.

  • Mongolian Ground Beef Stir-Fry: Irresistibly Easy & Flavorful!

    Mongolian Ground Beef Stir-Fry: Irresistibly Easy & Flavorful!

    Mongolian Ground Beef Stir-Fry: Irresistibly Easy & Flavorful!

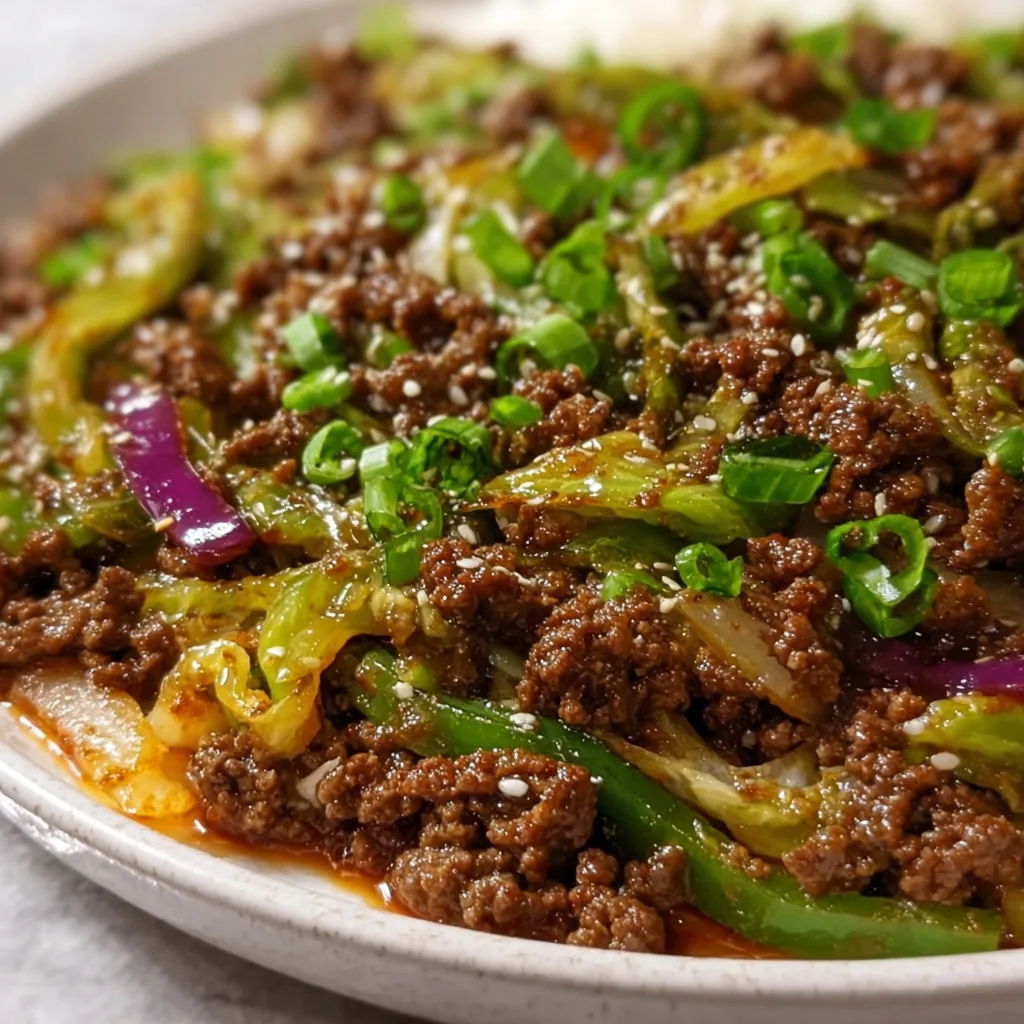
    Mongolian ground Beef Stir-Fry brings all the bold flavors of your favorite takeout right to your kitchen in under 30 minutes! This quick weeknight wonder combines savory ground beef with a sticky-sweet sauce that coats every morsel with that signature umami punch. I first made this recipe after a particularly exhausting Monday, when my takeout cravings were strong but my desire to change out of sweatpants was nonexistent. The sizzle of beef hitting the hot pan and that intoxicating aroma of garlic, ginger, and brown sugar transformed my kitchen into the coziest spot in the house. Trust me, this homemade version will have you questioning why you ever ordered delivery!

    Recipe

    Why You’ll Love This Mongolian ground Beef Stir-Fry

    Quick Weeknight Savior

    When the clock strikes 6 PM and hunger strikes with a vengeance, this Mongolian ground Beef Stir-Fry becomes your dinnertime hero. Unlike traditional stir-fries using sliced beef, ground beef cooks in minutes and absorbs flavors more quickly. I’ve perfected this recipe on those nights when my toddler is hangry and patience is wearing thin. The entire dish comes together in about 20 minutes flat—faster than delivery and infinitely more satisfying. The combination of sweet and savory creates that authentic takeout experience without the wait or the hefty price tag.

    Adaptable to What You Have

    This stir-fry is incredibly forgiving and adaptable to whatever ingredients are lurking in your fridge. No green onions? Regular onion works beautifully. Out of fresh ginger? A teaspoon of ground ginger saves the day. I’ve made this with varying amounts of brown sugar, substituted honey when I ran out, and even tossed in random vegetables needing to be used up. The sauce—that glorious combination of soy sauce, brown sugar, and garlic—transforms whatever you pair it with into something crave-worthy. It’s the ultimate clean-out-the-fridge meal that never feels like a compromise.

    Essential Tips & Tricks

    The Perfect Sauce Balance

    Achieving that restaurant-quality sauce is all about balance and technique. The key lies in the ratio of soy sauce to brown sugar—equal parts create that signature sweet-savory profile that makes Mongolian beef so addictive. I learned through trial and error that adding a splash of water prevents the sauce from becoming too sticky or reducing too quickly. For an authentic touch, use dark soy sauce for deeper color and flavor, though regular soy works perfectly fine. Don’t skip the cornstarch slurry at the end—it creates that glossy, clingy texture that coats every bite of beef and vegetable.

    Maximizing Flavor Development

    The secret to incredible depth of flavor in this quick dish comes from proper sequencing and heat management. Start with a smoking hot pan—I mean really hot—to get that beautiful caramelization on the ground beef. Break it up into small chunks rather than big clumps to maximize surface area for browning. Adding aromatics like garlic and ginger only after the meat has browned prevents them from burning while infusing the oil with their essential flavors. For an extra flavor boost, try adding a splash of shaoxing wine or a teaspoon of sesame oil right at the end.

    Serving Ideas & Creative Variations

    Beyond Basic Rice

    While steamed rice makes a perfect foundation for soaking up that glorious sauce, there are countless ways to elevate your Mongolian ground Beef Stir-Fry experience. I love serving it over cauliflower rice for a lighter option or spooning it into lettuce cups for a fun hand-held dinner. Noodles—particularly udon or rice noodles—transform this into a completely different yet equally delicious meal. For a restaurant-style presentation, serve in a bowl with rice on one side, quick-pickled vegetables on the other, and the beef in the center, topped with a sprinkle of toasted sesame seeds and extra green onions.

    Flavor Twists Worth Trying

    Don’t be afraid to put your personal spin on this versatile recipe! Adding a tablespoon of hoisin sauce brings a complex sweetness that complements the traditional flavors beautifully. For heat lovers, a teaspoon of chili crisp oil or sriracha creates a delicious sweet-spicy combination that tingles the taste buds. My family’s favorite variation includes diced bell peppers and snow peas added during the last two minutes of cooking for color and crunch. For an interesting twist, try incorporating a tablespoon of peanut butter into the sauce for a rich, nutty undertone that pairs wonderfully with the sweet-savory base.

    Storage & Troubleshooting Guide

    Making It Last

    This Mongolian ground Beef Stir-Fry is a meal-prep champion, actually improving in flavor after a day in the refrigerator as the sauce continues to penetrate the meat. Store leftovers in an airtight container for up to 4 days—I like to package the beef separate from any rice to prevent sogginess. For freezing, cool the beef mixture completely before transferring to freezer-safe containers. It maintains quality for about 2-3 months frozen. When reheating, add a splash of water or broth to revive the sauce, and consider adding fresh green onions just before serving to restore that bright flavor contrast.

    Fixing Common Issues

    Even the most straightforward recipes can encounter hiccups along the way. If your sauce becomes too thick and sticky, simply add a tablespoon or two of water or broth to thin it out. Conversely, if it’s too thin, mix a teaspoon of cornstarch with cold water and stir it in while the mixture simmers. For beef that turned out tough rather than tender, try cooking it for less time in future attempts—ground beef only needs a few minutes to cook through. If you find the flavor too salty, balance it with a teaspoon of rice vinegar or a squeeze of lime juice, which adds brightness while counteracting the saltiness.

    Frequently Asked Questions

    Can I use ground turkey instead of beef for this Mongolian ground Beef Stir-Fry?

    Absolutely! Ground turkey works beautifully as a leaner alternative. Just add an extra tablespoon of oil to compensate for the lower fat content, and perhaps a dash more soy sauce for deeper flavor.

    How can I make this recipe gluten-free?

    Simply substitute regular soy sauce with tamari or coconut aminos. Double-check that your hoisin sauce (if using) is also gluten-free, and serve with rice or rice noodles instead of wheat-based options.

    Can I prepare any components of this dish ahead of time?

    Yes! Mix the sauce ingredients and store in the refrigerator for up to 3 days. You can also chop all vegetables and store them in airtight containers until ready to cook.

    What’s the best way to achieve the right sauce consistency?

    The key is patience—let the sauce simmer for 1-2 minutes after adding it to the pan. The cornstarch slurry should be added last, and the mixture should bubble briefly to activate its thickening properties.

    Is this recipe spicy?

    Not traditionally. Mongolian beef is known for being sweet rather than spicy, but you can easily add red pepper flakes, sriracha, or sliced fresh chilis to adjust the heat level to your preference.

    Final Thoughts

    This Mongolian ground Beef Stir-Fry has become my reliable standby when cravings hit but time is short. There’s something deeply satisfying about creating those bold, complex flavors in your own kitchen—watching simple ingredients transform into something that rivals your favorite takeout spot. I hope this recipe finds its way into your regular rotation, adapting to your family’s preferences and whatever ingredients you have on hand. Don’t forget to share your creations on Pinterest and tag me in your delicious results!

  • Slow Cooker Honey Garlic Chicken & Veggies That Wow!

    Slow Cooker Honey Garlic Chicken & Veggies That Wow!

    Slow Cooker Honey Garlic Chicken & Veggies That Wow!

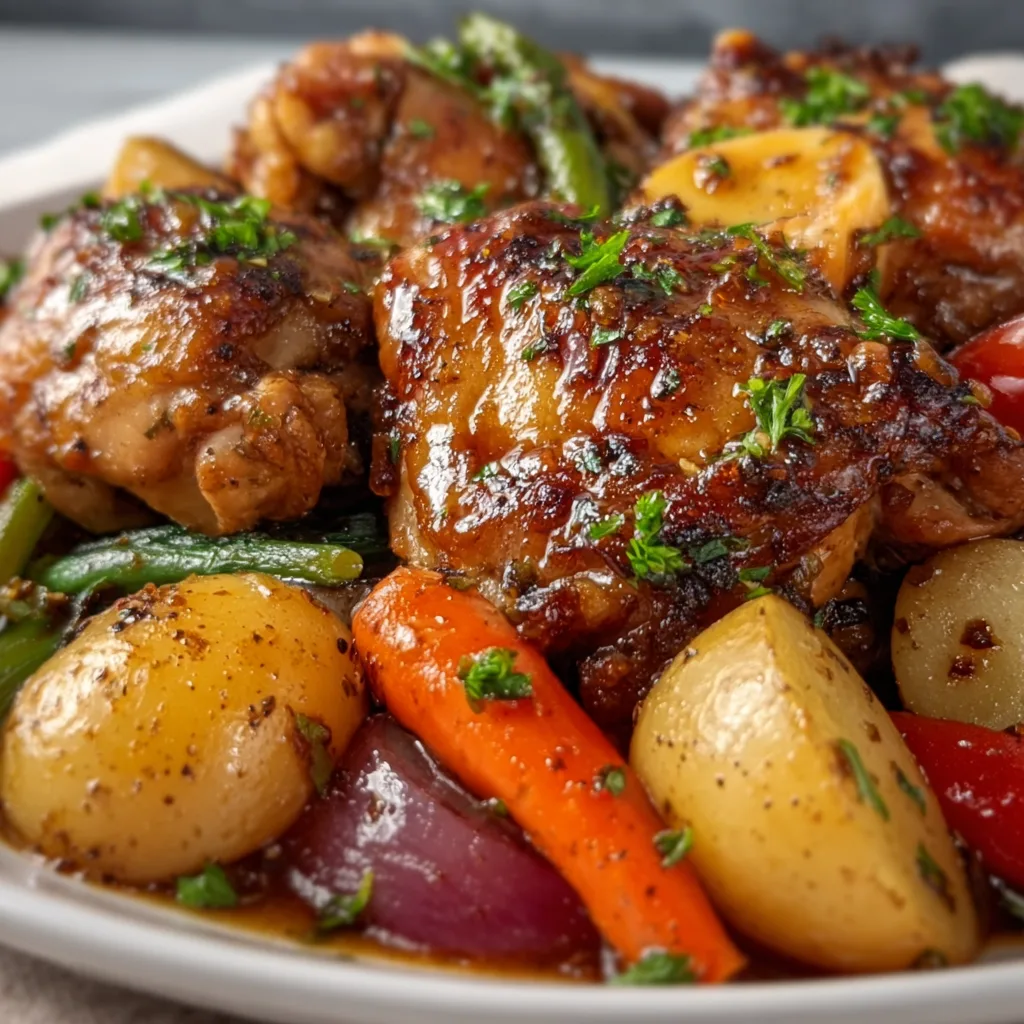
    Slow Cooker Honey Garlic Chicken and Veggies is my ultimate comfort food hack for those evenings when I want something deeply satisfying without the fuss. There’s something magical about walking through your front door to the sweet-savory aroma of honey and garlic mingling with tender chicken and colorful vegetables. I discovered this recipe during my first winter in our little farmhouse, when the snow piled up outside and I craved something warming but had zero energy for complicated cooking. The slow cooker did all the work while I curled up with a book, and now it’s my go-to for busy weeknights or lazy Sundays alike.

    Recipe

    Why You’ll Love This Slow Cooker Honey Garlic Chicken and Veggies

    Perfect Balance of Flavors and Textures

    The sticky-sweet honey paired with pungent garlic creates a sauce that’s absolutely irresistible. It caramelizes slightly around the edges of the chicken while the slow cooking process ensures every bite remains tender and juicy. The vegetables absorb all those wonderful flavors while maintaining just the right amount of bite. I love how the carrots take on a slight sweetness that complements the honey, while the bell peppers add a fresh pop of color and flavor. There’s something deeply satisfying about a dish where every element works in perfect harmony.

    Set-It-and-Forget-It Convenience

    This recipe is the epitome of kitchen freedom – just 15 minutes of prep in the morning rewards you with a complete meal by dinner time. No stirring, no checking, no fussing. The slow cooker transforms simple ingredients into something that tastes like you’ve been cooking all day. On my busiest days when deadlines are looming and the kids have activities, knowing dinner is quietly cooking itself brings such peace of mind. Plus, cleanup is minimal with just one pot to wash, making this perfect for those nights when you want maximum flavor with minimum effort.

    Essential Tips & Tricks

    Ingredient Selection Matters

    Choose bone-in chicken thighs for the richest flavor and moisture retention. They’re more forgiving in the slow cooker than breasts, which can dry out during long cooking times. For vegetables, opt for heartier options like carrots, potatoes, and bell peppers that hold their structure. I learned this the hard way after adding zucchini once and returning to a mushy mess! Fresh garlic rather than pre-minced makes a noticeable difference in the depth of flavor, and local honey adds subtle floral notes that store-bought varieties might miss. These small choices elevate the dish from good to memorable.

    Layering for Perfect Results

    The order of ingredients makes a significant difference in how your dish turns out. Place firmer vegetables like carrots and potatoes at the bottom where they’ll receive more direct heat. Next, position your chicken pieces in a single layer if possible, then scatter softer vegetables like bell peppers around them. Pour the sauce ingredients over everything last, allowing them to drizzle down and coat each component. This technique ensures even cooking and prevents more delicate ingredients from breaking down too much – a trick I learned from my coconut curry chicken crock pot adventures.

    Serving Ideas & Creative Variations

    Complementary Side Dishes

    Serve this honey garlic chicken over fluffy jasmine rice that soaks up all that delicious sauce – it’s practically mandatory in my home! For a lower-carb option, cauliflower rice works beautifully, or try it with quinoa for added protein. A simple green salad with a light vinaigrette provides refreshing contrast to the rich main dish. My family also loves it with crusty bread for sauce-mopping purposes. For special occasions, I’ll whip up some crispy garlic parmesan green beans that add wonderful texture alongside the tender slow-cooked meal.

    Flavor Variations to Try

    Transform this versatile recipe by adding different flavor profiles each time you make it. Incorporate a tablespoon of gochujang for Korean-inspired heat, or add orange zest and a splash of juice for a citrusy twist. Pineapple chunks work wonderfully for a tropical take, caramelizing beautifully in the sweet sauce. For an autumn version, try adding a cinnamon stick and a pinch of nutmeg to the sauce ingredients. When I’m feeling adventurous, I’ll stir in a spoonful of miso paste during the last hour of cooking for incredible umami depth that makes everyone ask for my secret ingredient.

    Storage & Troubleshooting Guide

    Proper Storage Techniques

    This dish makes excellent leftovers that actually improve in flavor overnight as the ingredients continue to meld. Store in airtight containers in the refrigerator for up to 4 days. For freezing, portion into individual servings and freeze for up to 3 months. I like to slightly undercook the vegetables if I know I’ll be freezing portions, as they’ll soften more during reheating. Let frozen portions thaw overnight in the refrigerator before gently reheating on the stovetop with a splash of chicken broth to revive the sauce.

    Common Issues and Solutions

    If your sauce seems too thin, remove the lid during the final 30 minutes of cooking to allow some liquid to evaporate, or create a slurry with 1 tablespoon cornstarch mixed with 2 tablespoons cold water. For sauce that’s too thick, add a splash of chicken broth or water. If your chicken seems dry, it may have cooked too long – next time, check for doneness earlier or use fattier cuts like thighs. Vegetables turning mushy? Add firmer vegetables at the beginning and more delicate ones during the last hour of cooking time.

    Frequently Asked Questions

    Can I use chicken breasts instead of thighs in this Slow Cooker Honey Garlic Chicken and Veggies?

    Yes, but reduce cooking time by about an hour and consider adding a tablespoon of olive oil to compensate for the lower fat content. Chicken breasts are leaner and cook faster than thighs.

    How can I make this recipe gluten-free?

    Simply substitute tamari or coconut aminos for the soy sauce and verify that your honey hasn’t been processed with any gluten-containing additives. Double-check any pre-packaged broth ingredients.

    Can I prep this the night before?

    Absolutely! Prepare all ingredients and store them separately in the refrigerator. In the morning, layer everything in your slow cooker according to the recipe instructions and start cooking.

    What vegetables work best in slow cooker recipes?

    Root vegetables like carrots, potatoes, and parsnips, plus hardier vegetables like bell peppers, onions, and celery hold up well. Avoid delicate vegetables like spinach or zucchini until the final hour.

    My sauce is too watery – what went wrong?

    Slow cookers trap moisture, creating additional liquid. Try reducing the added liquid in the recipe, removing the lid for the last 30 minutes, or thickening with a cornstarch slurry.

    Final Thoughts

    This Slow Cooker Honey Garlic Chicken and Veggies has become my reliable companion through busy seasons and lazy weekends alike. There’s something deeply satisfying about creating such a flavorful, complete meal with minimal effort. The sweet-savory sauce, tender chicken, and perfectly cooked vegetables never fail to bring comfort to our table. I hope this recipe brings the same warmth and ease to your kitchen that it has to mine. For more slow cooker inspiration, check out my Pinterest board where I’m always pinning new ideas!

  • Crispy Chilli Beef Recipe That Will Blow Your Taste Buds Away!

    Crispy Chilli Beef Recipe That Will Blow Your Taste Buds Away!

    Crispy Chilli Beef Recipe That Will Blow Your Taste Buds Away!

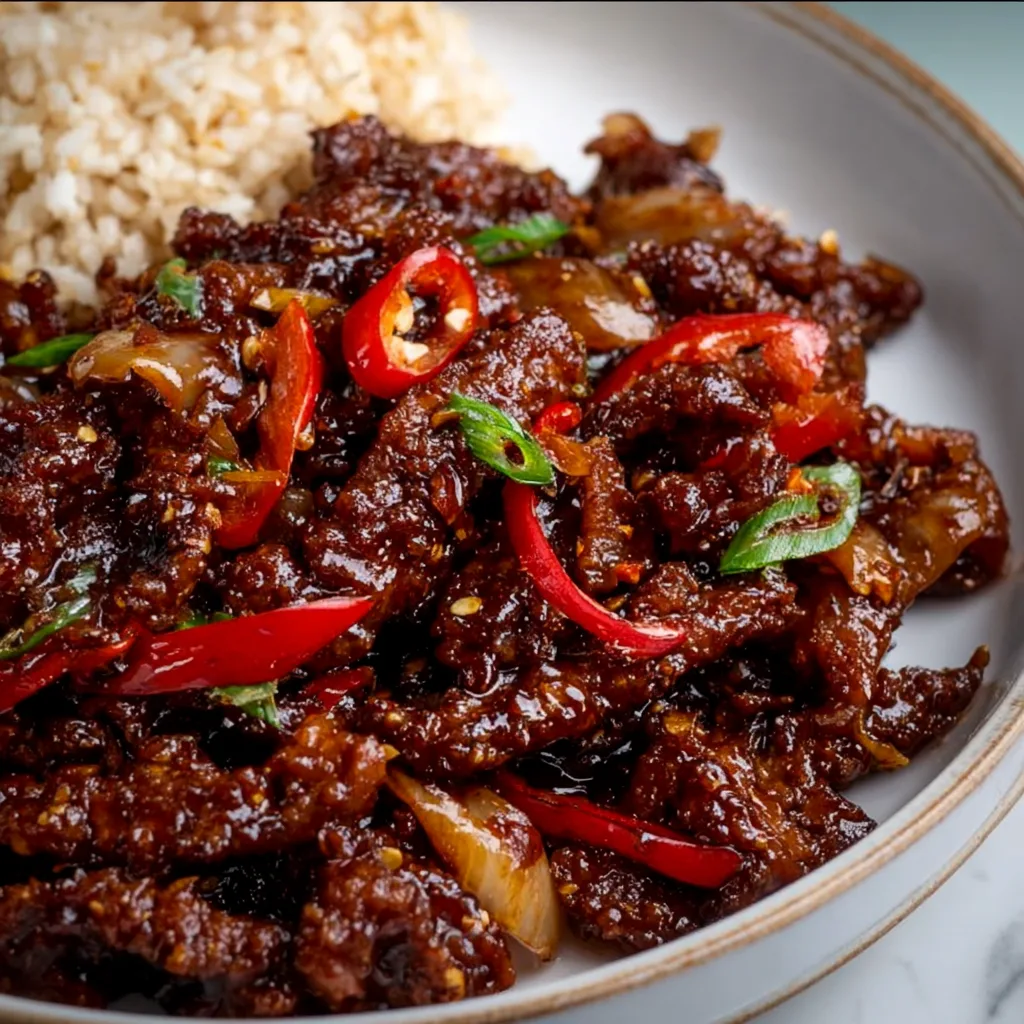
    Crispy chilli beef has completely transformed my weeknight dinner game with its irresistible combination of crispy texture and bold flavors. The first time I made this dish, my kitchen filled with that distinctive aroma of sizzling beef and sweet-spicy sauce that instantly transported me back to my favorite Chinese restaurant. There’s something magical about how the tender strips of beef develop that perfect crackly exterior while soaking up the vibrant sauce. If you’re craving a restaurant-quality Asian dish that delivers big on flavor without hours of effort, this recipe deserves a spot in your regular rotation. It pairs beautifully with fluffy rice for a complete meal that’ll have everyone asking for seconds.

    Recipe

    Why You’ll Love This Crispy Chilli Beef

    Perfect Texture Contrast

    The secret magic of this dish lies in its incredible textural contrast. The beef strips develop this amazing crackly exterior that shatters slightly when you bite into it, while maintaining a tender, juicy center. I still remember the first time I nailed the texture—that satisfying crunch followed by succulent beef had me doing a little happy dance around my kitchen island! The cornstarch coating is essential here, creating that signature crispiness that stands up remarkably well to the sauce. When those crispy beef pieces get tossed in that glossy, sweet-spicy sauce, it’s a texture experience that simply can’t be beaten.

    Bold, Balanced Flavors

    The flavor profile of crispy chilli beef hits all the right notes—sweet, savory, spicy, and tangy in perfect harmony. The sauce consistency is key—not too thick or gloopy, but glossy enough to cling to each piece of beef. I love how the brown sugar caramelizes slightly, balancing the heat from fresh chillies and the zingy brightness from rice vinegar. My husband, who typically reaches for the hot sauce with everything, never adds extra heat to this dish because the balance is already spot-on. The depth comes from garlic and ginger, creating layers of flavor that make each bite more interesting than the last.

    Essential Tips & Tricks

    Beef Selection & Preparation

    Choosing the right cut makes all the difference in crispy chilli beef. I recommend flank steak or sirloin for the perfect balance of tenderness and flavor. The crucial technique is slicing the beef against the grain into thin strips—about 1/4 inch thick. Pop your beef in the freezer for 20 minutes before slicing for easier, cleaner cuts. Pat the strips completely dry with paper towels before coating in cornstarch; any moisture will prevent that gorgeous crispiness we’re after. I learned this the hard way after one soggy attempt that still haunts me! The cornstarch should form a light, even coating that will transform into that signature crackly exterior.

    Perfecting the Frying Technique

    The key to achieving that restaurant-quality crispiness lies in your frying method. Use a neutral oil with a high smoke point like vegetable or peanut oil, and make sure it’s properly hot before adding the beef. When oil shimmers and a tiny cornstarch sprinkle sizzles instantly, you’re ready to go. Work in small batches—overcrowding the pan is the enemy of crispiness! Each batch should take just 2-3 minutes to develop a golden-brown exterior. Once fried, transfer to a paper towel-lined plate while you prepare the sauce. For an easier alternative that’s still delicious, check out these crispy teriyaki chicken wonton tacos which use a similar technique.

    Serving Ideas & Creative Variations

    Perfect Pairings

    Crispy chilli beef shines brightest when served alongside complementary sides that balance its bold flavors. My go-to pairing is fluffy jasmine rice which soaks up that gorgeous sauce perfectly. For a complete meal, add simple steamed broccoli or bok choy—the clean, green flavors provide a wonderful contrast to the rich beef. When I’m feeling extra, I’ll whip up some quick pickled cucumbers with rice vinegar and a touch of sugar for a cooling crunch that cuts through the richness. Spring onions scattered on top aren’t just garnish—they add a fresh bite that elevates the whole dish. For special occasions, start with sweet chili pineapple shrimp appetizers to create a cohesive Asian-inspired feast.

    Exciting Flavor Twists

    While the classic recipe is perfection, I love experimenting with creative variations that keep this dish exciting in my dinner rotation. Try adding orange zest and a splash of juice for a citrusy spin reminiscent of orange beef. For a tropical twist, toss in some pineapple chunks during the final stir-fry—the sweetness works beautifully with the chili heat. Vegetarian? This technique works amazingly with extra-firm tofu or even king oyster mushrooms sliced into strips. When I’m feeling particularly adventurous, I’ll incorporate crushed Sichuan peppercorns for their unique numbing quality that transforms the heat experience. My family’s favorite variation includes thinly sliced bell peppers for extra color and nutrition.

    Storage & Troubleshooting Guide

    Keeping It Crispy

    Maintaining that signature crispiness is the biggest challenge when storing leftover crispy chilli beef. For best results, store the beef and sauce separately in airtight containers in the refrigerator for up to 2 days. When reheating, spread the beef pieces on a baking sheet and warm in a 350°F oven for 5-7 minutes until heated through and re-crisped. Only then should you toss with gently rewarmed sauce. If you must store them together, accept that the texture will change, though the flavor remains delicious. I’ve found that a quick blast in the air fryer at 375°F for 2-3 minutes works wonders for restoring some crispiness to leftovers!

    Fixing Common Issues

    Even experienced cooks encounter challenges with this dish. If your beef isn’t getting crispy, the oil likely isn’t hot enough or the beef wasn’t dried properly before coating. Next time, ensure your oil is shimmering hot and pat the beef completely dry. For sauce that’s too thin, simmer it a bit longer or add a cornstarch slurry (1 teaspoon cornstarch mixed with 1 tablespoon cold water). If it’s too thick, a splash of water or stock will thin it nicely. Finding the sauce too sweet? Balance it with more rice vinegar or a squeeze of lime. Too spicy? A touch more brown sugar or even a spoonful of peanut butter can tame the heat while adding delicious complexity.

    Frequently Asked Questions

    What’s the best cut of beef for crispy chilli beef?

    Flank steak or sirloin work best for their balance of tenderness and flavor. Slice them thinly against the grain for the perfect texture. In a pinch, ribeye is luxuriously tender but more expensive.

    Can I make crispy chilli beef in an air fryer?

    Yes! Spray cornstarch-coated beef strips with oil and air fry at 400°F for 8-10 minutes, shaking halfway through. The texture is slightly different but still delicious with significantly less oil.

    How spicy is this dish typically?

    Traditional crispy chilli beef has a moderate heat level. Adjust to your preference by changing the amount and type of chillies used—remove seeds for milder heat or add extra chillies for more kick.

    Can I prepare any components ahead of time?

    Slice the beef and prepare the sauce ingredients up to 24 hours ahead. Store separately in the refrigerator. The actual frying and final sauce preparation should be done just before serving.

    Is it possible to freeze crispy chilli beef?

    While possible, I don’t recommend freezing as the texture suffers significantly. If necessary, freeze the beef and sauce separately, then reheat the beef in a hot oven before combining.

    Final Thoughts

    Crispy chilli beef represents everything I love about home cooking—simple ingredients transformed into something extraordinary through technique and balance. The contrast between the shatteringly crisp exterior and tender beef inside, all enveloped in that perfect sweet-spicy sauce, creates a dish that feels special even on ordinary weeknights. Don’t be intimidated by the frying step; with practice, you’ll master the technique that makes this dish sing. Share your creations on Pinterest and tag me—I’d love to see your version of this takeout classic! Remember, the beauty of crispy chilli beef lies in making it your own.

  • Crispy Greek Potatoes That Melt in Your Mouth – Irresistibly Delicious!

    Crispy Greek Potatoes That Melt in Your Mouth – Irresistibly Delicious!

    Crispy Greek Potatoes That Melt in Your Mouth – Irresistibly Delicious!

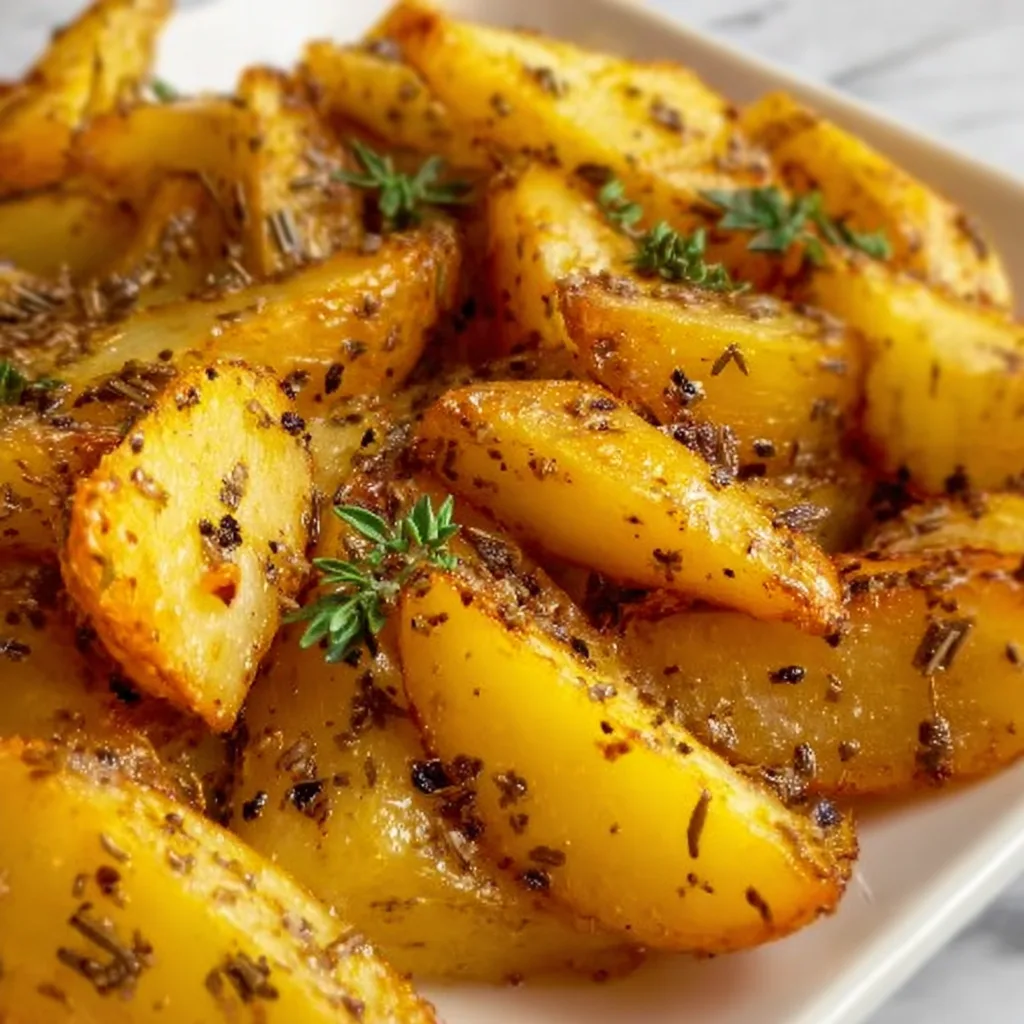
    Crispy Greek Potatoes are the ultimate comfort food that brings the sunny flavors of the Mediterranean right to your dinner table. There’s something magical about that perfect balance of golden, crispy exteriors and fluffy, tender centers, all infused with bright lemon, aromatic garlic, and herbaceous oregano. I discovered this recipe during a cooking class in Santorini years ago, and it’s become my go-to side dish for everything from casual weeknight dinners to special gatherings. The best part? These potatoes require minimal hands-on effort but deliver maximum flavor—exactly what we all need in our recipe collection.

    Recipe

    Why You’ll Love These Crispy Greek Potatoes

    Perfect Texture Combination

    The secret to irresistible Greek potatoes lies in their dual texture—crispy on the outside, cloud-like within. The technique involves a two-temperature roasting method that first cooks the potatoes through in a flavorful broth, then cranks up the heat to achieve that gorgeous golden crust. I love how the edges caramelize and crisp up while the centers remain tender and infused with all those Mediterranean flavors. It’s like having the best of both potato worlds on one plate! The lemon-infused olive oil creates that distinctive Greek flavor that makes these spuds utterly addictive.

    Simple, Accessible Ingredients

    What makes these potatoes a regular in my kitchen is how they transform everyday pantry staples into something extraordinary. You’ll need just Yukon Gold or russet potatoes, olive oil, fresh lemons, garlic, dried oregano, chicken broth, and salt and pepper. That’s it! These humble ingredients work together to create something far greater than the sum of their parts. I’ve made these on busy weeknights and for dinner parties alike—they’re always a hit and never complicated. The ingredients are accessible year-round, making this a recipe you can count on anytime.

    Essential Tips & Tricks

    Perfect Potato Selection & Preparation

    Choosing the right potatoes makes all the difference in this recipe. Yukon Golds are my first choice for their buttery flavor and perfect starch content, but russets work beautifully too. Cut them into evenly sized pieces (about 1.5-inch chunks) to ensure they cook at the same rate. Don’t skip the 10-minute soak in cold water—it removes excess starch and helps achieve maximum crispiness. Pat them completely dry before tossing with the oil mixture; any residual moisture will create steam instead of that beautiful caramelization we’re after. This simple prep step is worth every second!

    The Roasting Method Matters

    The two-stage roasting technique is non-negotiable for authentic Greek potatoes. Start with a 375°F oven with the potatoes partially submerged in the lemon-broth mixture. This gently cooks them through while infusing flavor. After about 30 minutes, increase the temperature to 425°F to evaporate the liquid and create that incredible crispy exterior. For extra crispiness, don’t crowd the pan—give those potatoes room to breathe! I learned this the hard way after making a double batch for a Mediterranean steak bowl night. Spacing matters almost as much as seasoning when it comes to achieving that perfect texture.

    Serving Ideas & Creative Variations

    Classic Mediterranean Pairings

    These potatoes shine brightest when served as part of a Greek-inspired feast. Pair them with grilled lamb chops, roasted chicken, or a simple Greek salad for an authentic Mediterranean meal. The bright lemon notes complement the richness of grilled meats beautifully. I love serving them with tzatziki on the side—the cool, creamy yogurt sauce provides the perfect contrast to the warm, crispy potatoes. For a complete experience, add some warm pita bread and a glass of crisp white wine. These potatoes also make an excellent addition to a mezze platter alongside olives, feta, and hummus.

    Exciting Flavor Twists

    While the classic recipe is perfect as is, I’ve experimented with several delicious variations over the years. Try adding a sprinkle of crumbled feta cheese during the last 5 minutes of baking for a tangy, melty topping. For heat lovers, a pinch of red pepper flakes in the original seasoning mixture adds a pleasant warmth. Swapping traditional oregano for fresh rosemary or thyme creates an entirely different but equally delicious profile. My personal favorite twist is adding thinly sliced lemons among the potatoes before roasting—they caramelize beautifully and can be eaten whole for an intense burst of flavor.

    Storage & Troubleshooting Guide

    Proper Storage Methods

    While these potatoes are at their absolute best fresh from the oven, leftovers can still be delicious if stored properly. Allow them to cool completely before transferring to an airtight container and refrigerating for up to 3 days. To reheat, avoid the microwave which will make them soggy. Instead, spread them on a baking sheet and warm in a 375°F oven for 10-15 minutes until heated through and crispy again. For meal prep, you can par-boil the potatoes and store them in the refrigerator for up to 2 days before completing the roasting process.

    Solving Common Issues

    If your potatoes aren’t crisping properly, a few troubleshooting steps can help. First, ensure you’ve dried them thoroughly after soaking—excess moisture is the enemy of crispiness. If your baking dish is too small, the potatoes will steam rather than roast. Try using a larger pan or reducing the amount of broth slightly. For potatoes that are crispy but not cooked through, you may have cut them too large—aim for consistent 1.5-inch pieces. If they’re browning too quickly, lower your oven temperature by 25 degrees and extend the cooking time. Remember that different ovens can vary significantly in temperature.

    Frequently Asked Questions

    Can I make Crispy Greek Potatoes ahead of time?

    Yes! Par-boil and season the potatoes up to 2 days ahead, then complete the final roasting step just before serving. For best results, bring refrigerated potatoes to room temperature before roasting.

    What’s the best potato variety for Crispy Greek Potatoes?

    Yukon Golds are ideal for their buttery flavor and perfect starch content, but russets work well too. Avoid waxy potatoes like red or new potatoes as they won’t develop the same fluffy interior.

    Can I make these potatoes without broth?

    Absolutely. You can substitute water for the broth, though you’ll want to increase the salt slightly to compensate for the lost flavor.

    How do I know when the potatoes are done?

    They should be golden brown and crispy on the outside, and a fork should easily pierce through to the center. The liquid should be completely evaporated.

    Can I use dried herbs instead of fresh?

    Yes! Dried oregano actually works beautifully in this recipe. If substituting other dried herbs for fresh, remember to use about 1/3 the amount as dried herbs are more potent.

    Final Thoughts

    These Crispy Greek Potatoes have become my signature side dish for good reason—they’re consistently delicious, impressively simple, and universally loved. The contrast between the crispy, flavor-packed exterior and the fluffy interior creates a potato experience that’s truly special. Whether served alongside your favorite protein or enjoyed on their own (I’ve definitely made a meal of just these potatoes before!), they bring a taste of Mediterranean sunshine to any table. Don’t forget to check out more Mediterranean-inspired recipes on our Pinterest for perfect pairing ideas!

  • Slow Cooker Salisbury Steak Meatballs: Comfort Food Magic!

    Slow Cooker Salisbury Steak Meatballs: Comfort Food Magic!

    Slow Cooker Salisbury Steak Meatballs: Comfort Food Magic!

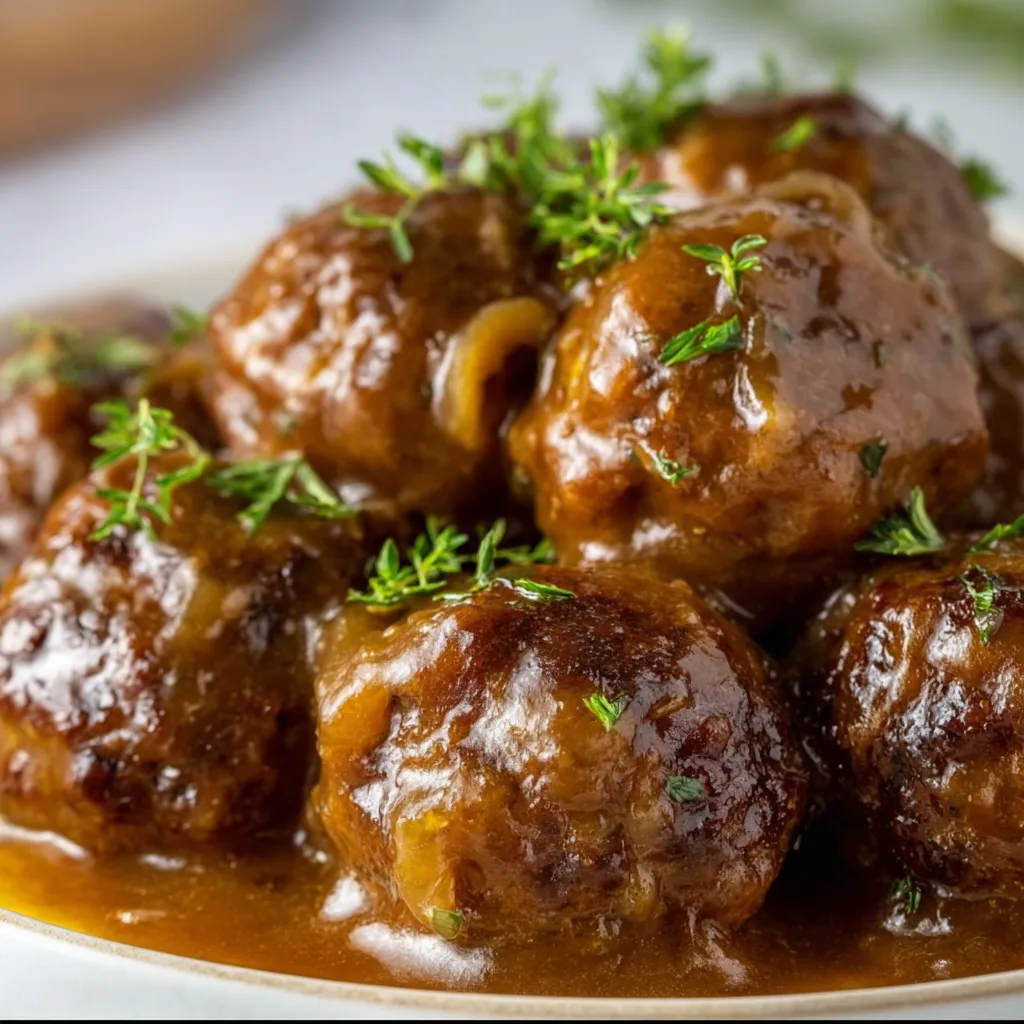
    Slow Cooker Salisbury Steak Meatballs have become my absolute go-to for those evenings when I want something hearty that practically makes itself. There’s something magical about walking through the door after a long day to the rich, savory aroma of these tender meatballs simmering in that velvety mushroom gravy. The first time I made these for my family, my kitchen filled with the kind of comforting scent that makes everyone gravitate toward the slow cooker, lifting the lid for a sneaky taste. If you love classic comfort food with minimal effort, this recipe deserves a permanent spot in your dinner rotation.

    Recipe

    Why You’ll Love This Slow Cooker Salisbury Steak Meatballs

    Perfect Comfort Food with Modern Convenience

    These Slow Cooker Salisbury Steak Meatballs transform a classic diner favorite into something even more delicious and convenient. The beauty lies in how the slow cooking process allows the flavors to meld together, creating incredibly tender meatballs that practically melt in your mouth. I love how the gravy develops this rich, silky texture that clings to each bite. Plus, the hands-off cooking method means you can prep everything in the morning, set your slow cooker, and return to a dinner that tastes like you’ve been tending to it all day. It’s the perfect marriage of nostalgic flavor and modern convenience.

    Budget-Friendly Yet Impressive

    What I adore about this recipe is how it turns affordable ingredients into something that feels special enough for company. Ground beef becomes extraordinary when seasoned just right and slow-cooked to perfection. The mushroom gravy develops such complex flavors that nobody would guess how simple it was to prepare. Last month when my in-laws dropped by unexpectedly, I served these meatballs over mashed potatoes, and they raved about the meal for days. It’s one of those recipes that stretches your grocery budget while still delivering a dinner that feels like a warm hug on a plate.

    Essential Tips & Tricks

    Perfecting Your Meatball Texture

    The secret to irresistible Salisbury steak meatballs lies in the perfect texture. I’ve learned that using a mixture of 85% lean ground beef gives you that ideal balance of flavor and juiciness. Don’t overwork the meat mixture—gentle mixing with your fingertips keeps the meatballs tender rather than tough. My game-changing tip? Add 1-2 tablespoons of plain breadcrumbs soaked in a splash of milk before mixing into your meat. This creates the most delicate, melt-in-your-mouth texture that elevates these meatballs from good to absolutely crave-worthy. Trust me, this small step makes all the difference!

    Creating That Signature Gravy

    The soul of this dish is undoubtedly the rich mushroom gravy that transforms as it simmers. For maximum flavor, take the extra five minutes to brown your mushrooms separately before adding them to the slow cooker. This develops those deep, umami notes that make the sauce irresistible. I discovered that adding a splash of Worcestershire sauce and a tablespoon of tomato paste creates that signature Salisbury steak flavor that reminds me of my grandmother’s cooking. For a silky-smooth finish, similar to my Cheesy Mushroom Swiss Burger Casserole, whisk a cornstarch slurry into the gravy during the final 30 minutes.

    Serving Ideas & Creative Variations

    Classic Comfort Pairings

    These Slow Cooker Salisbury Steak Meatballs shine brightest when served with sides that complement their rich, savory profile. Creamy mashed potatoes create the perfect base to catch every drop of that luscious gravy. On chilly evenings, I love pairing them with buttered egg noodles for a nostalgic dinner that transports me back to childhood. For a lighter option that still satisfies, try serving over cauliflower mash or alongside roasted green beans. The versatility is what makes this recipe a true keeper—it works beautifully with whatever sides you have on hand, making it perfect for busy weeknights when you’re working with what’s in your pantry.

    Global-Inspired Twists

    Don’t be afraid to put your own spin on these meatballs! For a Swedish-inspired variation, add a touch of nutmeg to the meat mixture and stir some sour cream into the gravy during the final cooking stage. I recently tried an Italian twist by incorporating basil, oregano, and a sprinkle of parmesan into the meatballs, then serving them with a side of garlic bread—it was a huge hit! For something completely different, check out my Mississippi Little Smokies for another slow cooker favorite that uses similar techniques but creates an entirely different flavor profile.

    Storage & Troubleshooting Guide

    Making Ahead and Freezing

    These Slow Cooker Salisbury Steak Meatballs are perfect for meal prep and actually taste even better the next day as the flavors continue to develop. Store leftovers in an airtight container in the refrigerator for up to 4 days. For longer storage, these meatballs freeze beautifully for up to 3 months. My time-saving tip is to freeze them in individual portions for quick lunches. When reheating, add a splash of beef broth to revive the gravy’s silky texture. I often make a double batch specifically to freeze half—it’s such a relief to have a homemade dinner ready to go on those hectic days when cooking feels impossible.

    Troubleshooting Common Issues

    If your gravy turns out too thin, don’t worry! Simply mix 1 tablespoon of cornstarch with 2 tablespoons of cold water and stir this slurry into the slow cooker during the last 30 minutes of cooking with the lid off. For gravy that’s too thick, gently whisk in additional beef broth until you reach your desired consistency. If your meatballs seem dry, they may have cooked too long—next time, check for doneness earlier or add a bit more fat to your meat mixture. Remember that slow cookers vary in temperature, so you might need to adjust cooking times slightly for your particular model.

    Frequently Asked Questions

    Can I use frozen meatballs for this Slow Cooker Salisbury Steak Meatballs recipe?

    Yes, you can use frozen meatballs as a time-saver. Add them directly to the slow cooker without thawing, but you may need to extend cooking time by 30-45 minutes to ensure they’re heated through completely.

    Can I make this recipe dairy-free?

    Absolutely! Simply omit the butter and use olive oil instead. Replace any milk in the meatballs with beef broth, and you’ll still get delicious results without compromising on flavor.

    What’s the difference between Salisbury steak and regular meatballs?

    Salisbury steak meatballs contain ingredients like Worcestershire sauce, mustard, and often breadcrumbs soaked in milk. They’re specifically served with a mushroom-onion gravy that gives them their distinctive flavor profile.

    Can I cook this on high instead of low?

    Yes, you can cook on high for 3-4 hours instead of low for 6-8 hours. However, cooking on low produces more tender meatballs and allows flavors to develop more fully.

    Can I add vegetables to the slow cooker?

    Definitely! Bell peppers, carrots, or peas work wonderfully. Add hearty vegetables at the beginning and quick-cooking ones like peas during the last 30 minutes to prevent overcooking.

    Final Thoughts

    These Slow Cooker Salisbury Steak Meatballs have become a cornerstone recipe in my home for good reason. They deliver that perfect balance of convenience and comfort that we all crave in our busy lives. The rich gravy, tender meatballs, and versatile serving options make this dish something I return to season after season. I’d love to see how you serve yours—snap a photo and share it on Pinterest! Whether you stick to the classic version or put your own creative spin on it, these meatballs are sure to become a family favorite in your home too.