Category: Dinner

Easy, tasty dinner ideas for busy nights. Simple recipes, quick prep, and family-friendly meals you’ll make again and again.

  • Maui Wowie Chicken Sandwich: Burst of Flavor You Can’t Resist!

    Maui Wowie Chicken Sandwich: Burst of Flavor You Can’t Resist!

    Maui Wowie Chicken Sandwich: Burst of Flavor You Can’t Resist!

    The Maui Wowie Chicken Sandwich brings tropical paradise straight to your plate with its vibrant flavors and juicy textures. I discovered this recipe during a beachside vacation and immediately knew I had to recreate it at home. The combination of sweet pineapple, tangy teriyaki, and perfectly grilled chicken creates a taste explosion that transports you straight to the Hawaiian islands. Whether you’re looking for a quick weeknight dinner or something special for weekend entertaining, this sandwich delivers island vibes with every bite. It pairs beautifully with my Crack Chicken Noodle Soup for a complete meal.

    Recipe

    Why You’ll Love This Maui Wowie Chicken Sandwich

    A Flavor Explosion in Every Bite

    This sandwich is a sensory adventure from the first bite to the last. The sweet-savory balance of teriyaki-glazed chicken against caramelized pineapple creates magic in your mouth. I love how the crispy grilled chicken absorbs all those tropical flavors while maintaining its juicy interior. The slight char from grilling adds a smoky dimension that perfectly complements the sweetness. My husband, who typically shies away from “fruit on sandwiches,” couldn’t stop raving about how the pineapple transformed the entire experience. The textures play together beautifully – tender chicken, soft bun, crisp lettuce, and that perfect pineapple bite.

    Quick and Crowd-Pleasing

    What I adore about this Maui Wowie Chicken Sandwich is how effortlessly impressive it feels despite being ready in under 30 minutes. It’s become my go-to when friends drop by unexpectedly or when I need to brighten a mundane Tuesday dinner. The ingredients are simple pantry staples with a tropical twist, making it accessible even when you haven’t planned ahead. Last summer, I served these at our backyard gathering, and everyone thought I’d spent hours preparing them! The vibrant colors make for a beautiful presentation, and the tropical flavors instantly create a vacation vibe that elevates any meal from ordinary to extraordinary.

    Essential Tips & Tricks

    Perfecting Your Chicken

    The foundation of this sandwich is perfectly cooked chicken. I recommend pounding your chicken breasts to an even thickness (about ½-inch) before marinating. This ensures they cook evenly and absorb maximum flavor. Let the chicken marinate for at least 30 minutes, though overnight works wonders if you’re planning ahead. When grilling, resist the urge to constantly flip – give each side 5-6 minutes of uninterrupted heat to develop those beautiful grill marks and caramelization. Use a meat thermometer to hit that perfect 165°F internal temperature without overcooking. The chicken should be juicy with a slight char on the edges for the authentic Maui experience.

    Elevating Your Sauce and Toppings

    The teriyaki sauce deserves special attention – I prefer making my own with soy sauce, brown sugar, ginger, and pineapple juice for an authentic flavor that store-bought varieties can’t match. If using store-bought, look for one with real pineapple listed in the ingredients. For the pineapple itself, grilling transforms it from good to magnificent – just 2 minutes per side caramelizes the natural sugars and adds smoky depth. When assembling, don’t forget the importance of proper layering – spread a thin layer of mayo on the bottom bun to prevent sogginess, then lettuce, chicken, pineapple, and additional sauce on top. This structure maintains the perfect texture contrast throughout your eating experience.

    Serving Ideas & Creative Variations

    Perfect Pairings

    This Maui Wowie Chicken Sandwich shines brightest with the right complementary sides. I love serving it with sweet potato fries tossed in a light cinnamon-sugar mix to enhance the tropical theme. A simple slaw with mango and cabbage provides refreshing crunch and balances the sandwich’s richness. For drinks, nothing beats a cold pineapple-coconut smoothie or a citrusy iced tea to complete the island experience. When I’m feeling particularly festive, I’ll add little paper umbrellas to everything! For a complete meal experience, consider pairing with my Creamy Tortellini Soup for a surprising but delightful contrast of flavors. The temperature contrast between the hot sandwich and cool sides creates a more dynamic eating experience.

    Exciting Flavor Twists

    The versatility of this sandwich makes it perfect for creative adaptations. Try swapping the teriyaki for a coconut curry sauce and adding thinly sliced mango for a Thai-inspired version. For spice lovers, incorporate jalapeños or a pineapple-habanero salsa to kick up the heat. A vegetarian version works beautifully with grilled portobello mushrooms marinated in the same teriyaki blend. I’ve even made a breakfast variation using the same flavors but adding a fried egg and serving on Hawaiian sweet rolls! For a party, consider making mini slider versions on King’s Hawaiian rolls – they disappear in seconds at gatherings. Each variation maintains the tropical essence while offering a new flavor adventure.

    Storage & Troubleshooting Guide

    Keeping It Fresh

    For maximum freshness, store components separately when possible. The grilled chicken stays good for 3-4 days in an airtight container in the refrigerator, while the grilled pineapple maintains its flavor for about 2 days. If you need to store assembled sandwiches, wrap them tightly in parchment paper then aluminum foil, which helps maintain the bread’s texture better than plastic wrap. For meal prep, I recommend storing the sauce separately in a small container and assembling just before eating. When reheating the chicken, add a teaspoon of water before microwaving to help retain moisture, or better yet, reheat briefly on a skillet to maintain that delightful outer texture while warming through.

    Solving Common Issues

    The most common challenge with this sandwich is preventing sogginess. If your bread gets soggy too quickly, try toasting both sides of the bun before assembly or creating a barrier with lettuce between the bread and wetter ingredients. If your pineapple releases too much juice, pat it dry with paper towels after grilling. For chicken that’s turned out too dry, slice it thinner and add extra sauce to compensate. If your teriyaki sauce is too thin, simmer it for a few extra minutes to reduce to a glaze consistency. And if the flavors seem one-dimensional, a squeeze of fresh lime juice just before serving adds brightness that makes all the other flavors pop beautifully.

    Frequently Asked Questions

    Can I make this Maui Wowie Chicken Sandwich ahead of time?

    Yes! Grill the chicken and pineapple up to 2 days ahead. Store components separately in the refrigerator and assemble just before serving for the best texture and flavor experience.

    What’s the best bread to use for this sandwich?

    Brioche buns provide the perfect sweetness and softness, but Hawaiian sweet rolls, ciabatta, or even whole grain buns work beautifully depending on your preference.

    Can I use canned pineapple instead of fresh?

    Yes, though fresh gives the best flavor. If using canned, choose pineapple rings in juice (not syrup), drain well, and pat dry before grilling to prevent excessive moisture.

    How can I make this sandwich gluten-free?

    Use gluten-free buns and ensure your teriyaki sauce is gluten-free (or make your own with tamari instead of soy sauce). The rest of the ingredients are naturally gluten-free.

    What makes a Maui Wowie Chicken Sandwich different from other chicken sandwiches?

    The Maui Wowie Chicken Sandwich features the distinctive combination of teriyaki-glazed chicken with grilled pineapple, creating that signature Hawaiian-inspired flavor profile that sets it apart.

    Final Thoughts

    The Maui Wowie Chicken Sandwich isn’t just a meal – it’s a mini vacation on a plate. I love how this recipe brings together simple ingredients to create something truly special that transports you straight to the shores of Maui. The balance of sweet, savory, and tangy flavors makes this sandwich an absolute crowd-pleaser that works for casual weeknights or special gatherings. Whether you follow the recipe exactly or make it your own with creative twists, the tropical essence shines through. Find more inspiration for your next culinary adventure on my Pinterest page!

  • Creamy Chipotle Chicken Pasta Salad: Irresistibly Tangy & Easy!

    Creamy Chipotle Chicken Pasta Salad: Irresistibly Tangy & Easy!

    Creamy Chipotle Chicken Pasta Salad: Irresistibly Tangy & Easy!

    This Creamy Chipotle Chicken Pasta Salad is my absolute summer salvation. The first time I made it for my sister’s backyard gathering, I watched as guests kept returning to the buffet table with sheepish smiles. That smoky chipotle heat balanced with cool, creamy dressing creates a flavor symphony that dances across your taste buds. The tender chicken and al dente pasta provide the perfect backdrop for crisp veggies and that irresistible sauce that clings to every bite. I’ve since made this for countless gatherings, and it never fails to disappear quickly. For more crowd-pleasing pasta ideas, check out my Slow Cooker Mac & Cheese Classic.

    Recipe

    Why You’ll Love This Creamy Chipotle Chicken Pasta Salad

    Perfect Balance of Flavors and Textures

    What makes this pasta salad truly special is the harmonious balance between smoky heat and cooling creaminess. The chipotle peppers bring a complex smokiness that warms rather than burns, while the mayo-based dressing cools everything down to the perfect temperature. I love how the pasta shells capture little pockets of that addictive sauce. The tender chicken provides satisfying protein, while crisp bell peppers and corn add refreshing pops of sweetness and crunch. It’s like each forkful tells a different story – sometimes creamy, sometimes spicy, but always delicious.

    Make-Ahead Convenience

    This pasta salad is a meal prep dream! I often make it on Sunday afternoons, and the flavors actually deepen and meld beautifully overnight in the refrigerator. The convenience factor cannot be overstated – having this ready-to-go meal waiting in the fridge has saved many hectic weeknight dinners at my house. Plus, it travels exceptionally well for potlucks, picnics, and beach days. I’ve packed it in mason jars for work lunches and in larger containers for family gatherings. The pasta stays perfectly al dente without getting mushy, and the flavors remain vibrant for days.

    Essential Tips & Tricks

    Pasta Selection and Preparation

    Choosing the right pasta shape makes a significant difference in this recipe. I prefer medium shells or rotini because they capture the sauce in their crevices, ensuring flavor in every bite. Cook your pasta just until al dente (about 1 minute less than package directions), then immediately rinse under cold water to stop the cooking process. This prevents the pasta from becoming mushy as it sits in the dressing. For an extra flavor boost, cook your pasta in chicken broth instead of water. If you’re looking for gluten-free options, check out my Gluten-Free Hamburger Helper for pasta alternatives that work beautifully here too.

    Chipotle Handling and Heat Control

    Chipotles in adobo pack serious heat, so handle with care! I recommend starting with one minced chipotle plus a tablespoon of the adobo sauce, then adjusting to your preference. For a milder version that still maintains that signature smokiness, scrape the seeds out before mincing. Store leftover chipotles in a small container in the freezer – they freeze beautifully and can be easily chopped while still frozen for future recipes. For extra creaminess that balances the heat, add a dollop of sour cream or Greek yogurt to the dressing. Remember: you can always add more heat, but you can’t take it away!

    Serving Ideas & Creative Variations

    Complementary Side Dishes

    This pasta salad shines as both a main dish and a side. For a complete meal, I love serving it alongside grilled corn on the cob or a simple cucumber tomato salad dressed with lime and olive oil. The cool, fresh vegetables provide a lovely contrast to the rich pasta salad. For a heartier spread, pair it with my Slow Cooker Mongolian Beef for an unexpected but delicious fusion meal. On hot summer evenings, I serve this pasta salad with chilled watermelon slices and iced hibiscus tea – the sweet fruit and tart beverage cut through the creaminess beautifully.

    Customization Options

    The beauty of this recipe lies in its adaptability. For a vegetarian version, simply omit the chicken and add black beans and extra vegetables like zucchini or cherry tomatoes. Avocado makes a wonderful addition, adding buttery richness – just fold it in right before serving to prevent browning. For a Mediterranean twist, swap the chipotle for sun-dried tomatoes and add feta cheese and olives. Looking to boost the protein? Add hard-boiled eggs or crispy bacon bits. For a lighter version, replace half the mayonnaise with Greek yogurt and add more fresh herbs like cilantro and chives.

    Storage & Troubleshooting Guide

    Proper Storage Techniques

    To maintain optimal freshness, store this pasta salad in an airtight container in the refrigerator for up to 4 days. I find glass containers work best as they don’t absorb flavors or stain from the chipotle. If making ahead for a party, consider keeping the dressing separate until about 2 hours before serving – this prevents the pasta from absorbing all the liquid. For meal prep purposes, portion into individual containers for grab-and-go lunches. If you notice the salad drying out after a day or two, simply stir in a tablespoon of mayo or lime juice to refresh the creaminess.

    Common Issues and Solutions

    If your pasta salad seems dry after refrigeration, don’t worry! This is normal as the pasta absorbs moisture over time. Simply stir in a little extra mayonnaise, sour cream, or even a splash of lime juice to restore creaminess. If the chipotle flavor intensifies too much overnight (which can happen!), add more corn, bell pepper, or even diced mango to balance the heat. For pasta that’s become too soft, add fresh, crunchy elements like diced jicama or water chestnuts just before serving. And if you accidentally over-spiced, fold in more mayo, a dollop of honey, or even some cubed avocado to tame the heat.

    Frequently Asked Questions

    Can I make Creamy Chipotle Chicken Pasta Salad ahead of time?

    Absolutely! It actually tastes better after the flavors have had time to meld. Make it up to 2 days ahead, but reserve a little extra dressing to refresh it before serving.

    How spicy is this pasta salad?

    The spice level is customizable. Start with one chipotle pepper for mild heat, or use two to three peppers plus extra adobo sauce for a more intense kick.

    Can I use rotisserie chicken for this recipe?

    Yes! Rotisserie chicken is a fantastic time-saver. Simply shred or dice the meat – both white and dark meat work beautifully in this recipe.

    What pasta shapes work best?

    Medium shells, rotini, farfalle, or penne are ideal as they capture the creamy sauce in their nooks and crannies.

    How can I make this recipe gluten-free?

    Simply substitute your favorite gluten-free pasta. Just be sure to cook it al dente, as gluten-free varieties can become mushy if overcooked.

    Final Thoughts

    This Creamy Chipotle Chicken Pasta Salad has become my signature dish for good reason – it strikes that perfect balance between comforting and exciting, familiar yet surprising. The smoky heat from chipotles paired with cooling creaminess creates a dish that’s greater than the sum of its parts. I love how versatile it is, working equally well as a quick weeknight dinner or the star of a potluck spread. Don’t forget to check out more of my recipes on Pinterest for endless inspiration. Once you try this pasta salad, I guarantee it will earn a permanent spot in your recipe collection!

  • Cajun Chicken Mac and Cheese – Irresistibly Cheesy & Spicy Bliss!

    Cajun Chicken Mac and Cheese – Irresistibly Cheesy & Spicy Bliss!

    Cajun Chicken Mac and Cheese - Irresistibly Cheesy & Spicy Bliss!

    Cajun Chicken Mac and Cheese has been my go-to comfort food recipe for those evenings when I need something that delivers a warm hug in a bowl with just enough spice to make things interesting. The first time I made this dish, my kitchen filled with the aromatic blend of Cajun spices and melting cheese that had my neighbor knocking to ask what smelled so heavenly! This creamy, spicy fusion combines tender chicken chunks with al dente pasta and a velvety cheese sauce that’s elevated with classic Cajun seasonings. Perfect for family dinners or potlucks, this hearty dish always disappears quickly from the table.

    Recipe

    Why You’ll Love This Cajun Chicken Mac and Cheese

    A Perfect Balance of Comfort and Kick

    There’s something magical about the marriage of creamy mac and cheese with the bold flavors of Cajun seasoning. The rich cheese sauce coats every piece of pasta, while tender chicken adds protein and substance. I love how the Cajun spices bring warmth without overwhelming heat—just enough to wake up your taste buds! The first time I served this at a family gathering, my spice-cautious aunt went back for seconds, which tells you everything about that perfect balance. The dish manages to be simultaneously familiar and exciting, making it appealing to both adventurous eaters and comfort food enthusiasts.

    Quick and Versatile One-Pot Wonder

    On busy weeknights, the last thing I want is a sink full of dishes. That’s why I adore this one-pot recipe that delivers maximum flavor with minimal cleanup. You can have this on the table in about 30 minutes, making it faster than delivery and infinitely more satisfying. The versatility is another bonus—swap chicken for shrimp for a seafood twist, or use leftover rotisserie chicken to save even more time. I’ve made this on camping trips using a Dutch oven over the fire, and it’s just as delicious as my kitchen version. It’s truly a recipe that adapts to your needs!

    Essential Tips & Tricks

    Mastering the Cheese Sauce

    The heart of any mac and cheese is that gloriously creamy sauce. For the smoothest results, always grate your cheese fresh rather than using pre-shredded varieties which contain anti-caking agents. I learned this the hard way after one grainy disaster! Start with a roux (equal parts butter and flour), add milk slowly while whisking constantly, then incorporate cheese off the heat. For extra creaminess, mix in a spoonful of cream cheese or sour cream. The sauce should coat the back of a spoon but still flow—if it’s too thick, add a splash of milk. Too thin? Let it simmer a bit longer or add a touch more cheese.

    Perfecting the Cajun Flavor Profile

    The authentic Cajun flavor comes from the perfect blend of spices. While store-bought Cajun seasoning works well, I love making my own with paprika, garlic powder, onion powder, cayenne, oregano, and thyme. Like my Slow Cooker Mac & Cheese Classic, the key is layering flavors throughout cooking. Season the chicken before cooking, then add more seasoning to the sauce. For deeper flavor, sauté the aromatics (onion, bell pepper, celery—the “holy trinity” of Cajun cooking) until they’re soft and fragrant. Taste as you go—Cajun seasoning can vary in salt content, so adjust accordingly. Remember, you can always add more spice, but you can’t take it away!

    Serving Ideas & Creative Variations

    Complementary Side Dishes

    This hearty main dish pairs beautifully with lighter sides that balance its richness. I love serving it with a crisp green salad dressed simply with lemon vinaigrette to cut through the creaminess. Roasted vegetables like broccoli or Brussels sprouts also make excellent companions—the slight char complements the Cajun spices wonderfully. For a true Southern-inspired meal, add a side of buttery cornbread or garlic bread for sopping up that delicious sauce. When I’m hosting, I arrange everything on a buffet with small bowls of extra toppings like chopped green onions, crispy bacon bits, or additional hot sauce for guests to customize their plates.

    Exciting Flavor Twists

    While the classic version is divine, this recipe welcomes creative adaptations. For a seafood variation, substitute the chicken with plump shrimp or crawfish for an authentic Louisiana touch. Vegetarians can swap in roasted vegetables like zucchini, bell peppers, and mushrooms. For a smoky dimension, add chopped andouille sausage or crispy bacon. My Crockpot Chicken Broccoli Alfredo fans often add broccoli to this recipe too! I’ve experimented with different cheese combinations—smoked gouda adds depth, while pepper jack increases the heat factor. For a lighter version, use whole wheat pasta and reduce the cheese slightly, adding pureed cauliflower to maintain creaminess while boosting nutrition.

    Storage & Troubleshooting Guide

    Proper Storage and Reheating

    This Cajun Chicken Mac and Cheese stores beautifully, making it perfect for meal prep. Refrigerate leftovers in an airtight container for up to 3-4 days. When reheating, add a splash of milk to revive the creamy texture—the pasta tends to absorb sauce as it sits. Microwave in 30-second intervals, stirring between each, or gently reheat on the stovetop over medium-low heat. For freezing, portion into individual containers before the pasta is fully cooked (slightly al dente), as it will soften during reheating. Frozen portions can last up to 2 months. I like to make a double batch on Sunday and freeze individual portions for quick lunches throughout the week.

    Fixing Common Issues

    Even experienced cooks encounter hiccups! If your sauce breaks or becomes grainy, try whisking in a tablespoon of warm milk over low heat until smooth again. Too spicy? Add more cheese or a dollop of sour cream to mellow the heat. Not spicy enough? A few dashes of hot sauce or extra cayenne will kick it up. If your mac and cheese seems dry after baking, drizzle with warm milk or cream before serving. For a sauce that’s too thin, simmer uncovered for a few extra minutes or sprinkle in a bit more cheese. I once rescued an overly liquid sauce by mixing a teaspoon of cornstarch with cold water and stirring it in—worked like magic!

    Frequently Asked Questions

    Can I make Cajun Chicken Mac and Cheese ahead of time?

    Yes! Prepare it up to a day ahead, but slightly undercook the pasta. Refrigerate, then add a splash of milk when reheating. For best results, warm it covered at 350°F for 20-25 minutes until bubbly.

    What pasta shapes work best for this recipe?

    Medium shapes that trap sauce work wonderfully. Try cavatappi, shells, or rotini. I avoid long pasta like spaghetti as it doesn’t hold the creamy Cajun sauce as effectively.

    How can I make this recipe gluten-free?

    Simply substitute your favorite gluten-free pasta and use a 1:1 gluten-free flour blend for the roux. The cheese and Cajun seasonings are naturally gluten-free, but always check store-bought seasoning labels.

    Can I reduce the spiciness while keeping the Cajun flavor?

    Absolutely! Reduce or omit the cayenne pepper in your Cajun seasoning. The paprika, herbs, and garlic will still provide that authentic Cajun profile without the heat.

    How do I know when my Cajun Chicken Mac and Cheese is done baking?

    Look for bubbling around the edges and a golden-brown top. The internal temperature should reach 165°F to ensure the chicken is fully cooked if you’re baking raw chicken within the dish.

    Final Thoughts

    This Cajun Chicken Mac and Cheese has become more than just a recipe in my kitchen—it’s my secret weapon for turning ordinary dinners into memorable meals. The way it balances creamy comfort with bold Cajun flavors makes it uniquely satisfying in a way that keeps everyone coming back for more. I’ve shared this dish during celebrations, casual gatherings, and quiet family dinners, always with the same enthusiastic response. Don’t forget to check out more comfort food inspirations on Pinterest and make this spicy, cheesy masterpiece your own!

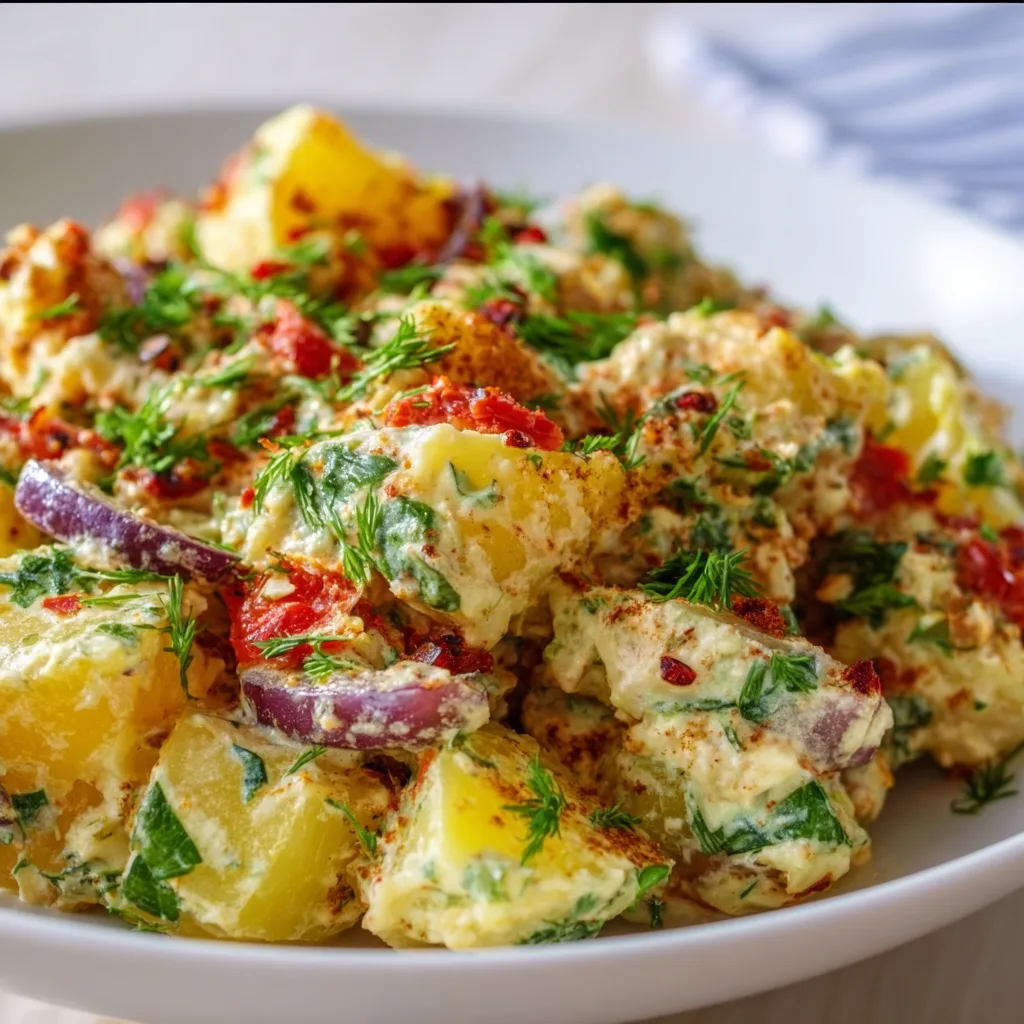
  • Turkish Potato Salad Recipe That’ll Wow Your Taste Buds Instantly

    Turkish Potato Salad Recipe That’ll Wow Your Taste Buds Instantly

    Turkish Potato Salad Recipe That'll Wow Your Taste Buds Instantly

    Turkish Potato Salad brings the vibrant flavors of Mediterranean cuisine right to your table with minimal effort. This isn’t your ordinary potato salad – it’s a symphony of tender potatoes, bright lemon, fragrant herbs, and the perfect balance of olive oil and spices. I first discovered this recipe during a cooking class while visiting Istanbul, and I’ve been obsessed ever since. The way the warm potatoes absorb all those incredible flavors creates something truly magical that transforms even the simplest meal into something special. If you enjoy hearty side dishes with bold flavors, you’ll want to add this to your regular rotation.

    Recipe

    Why You’ll Love This Turkish Potato Salad

    A Perfect Make-Ahead Side Dish

    This Turkish Potato Salad actually tastes better the next day when all those beautiful flavors have had time to mingle and develop. I love making a big batch on Sunday afternoons while the kitchen is filled with golden afternoon light and the windows are cracked open. The bright, lemony dressing seeps into every bite of potato, creating this incredible depth of flavor that only improves with time. Unlike mayo-based potato salads, this one travels beautifully to potlucks and picnics since there’s no risk of spoilage in warm weather.

    Simple Ingredients, Extraordinary Flavor

    What makes this recipe so special is how it transforms everyday ingredients into something extraordinary. You likely already have most of these items in your pantry – potatoes, olive oil, lemon, and a handful of herbs. The magic happens in how they come together. I adore how the peppery bite of fresh parsley plays against the earthy potatoes, while the red onion adds just enough sharpness to wake up your taste buds. It’s the kind of dish that makes people ask for the recipe after just one bite.

    Essential Tips & Tricks

    Choosing and Cooking Your Potatoes

    The foundation of any great potato salad is perfectly cooked potatoes, and this Turkish version is no exception. I recommend using waxy potatoes like Yukon Golds or red potatoes since they hold their shape beautifully after cooking. The key is to start them in cold, generously salted water (it should taste like the sea!) and simmer until just fork-tender. Overcooking is the enemy here – you want them firm enough to hold up when tossed with the dressing. For the best texture, dress the potatoes while they’re still warm so they absorb all those incredible flavors, just like in my Creamy Cheese and Potato Pie.

    Balancing the Dressing Perfectly

    The dressing is where this Turkish Potato Salad truly shines, with its perfect balance of bright acidity and rich olive oil. Use the best quality extra virgin olive oil you can afford – you’ll really taste the difference. When mixing the dressing, I like to whisk it separately before adding to ensure everything is emulsified properly. Don’t be shy with the lemon juice and zest; that citrusy punch is what makes this salad sing. Taste as you go and adjust – if it’s too tart, add a touch more oil; if it needs brightness, another squeeze of lemon works wonders.

    Serving Ideas & Creative Variations

    Perfect Pairings for Any Occasion

    This versatile Turkish Potato Salad pairs beautifully with so many main courses. I love serving it alongside grilled lamb or chicken skewers for an authentic Mediterranean meal. The bright, lemony flavors cut through rich meats perfectly. It’s also wonderful with simple roasted fish or as part of a vegetarian mezze spread with hummus and flatbreads. For a complete meal solution, try serving it with my Slow Cooker Mongolian Beef for a fusion dinner that always impresses guests. The contrast between the bright potato salad and rich beef creates a perfectly balanced plate.

    Creative Twists on the Classic

    While the traditional recipe is perfect as-is, I love playing with different variations depending on what’s in season. Try adding roasted red peppers for a sweet, smoky element, or fold in some crumbled feta cheese for a creamy, salty punch. For a heartier version, mix in chopped hard-boiled eggs or canned tuna. During summer months, I often toss in whatever herbs are thriving in my garden – mint adds an unexpected freshness, while dill brings a lovely anise note. Sometimes I’ll add a pinch of sumac or Aleppo pepper for an authentic Turkish touch.

    Storage & Troubleshooting Guide

    Keeping Your Salad Fresh

    This Turkish Potato Salad stores beautifully in the refrigerator for up to four days, and many would argue it actually improves with time! Store it in an airtight container to prevent it from absorbing other flavors from your fridge. Before serving leftovers, I recommend taking it out about 30 minutes beforehand to take the chill off – the flavors really shine at room temperature rather than cold from the fridge. If the salad seems a bit dry after storing, simply drizzle with a little extra olive oil and a fresh squeeze of lemon to revive it.

    Fixing Common Issues

    If your Turkish Potato Salad isn’t turning out quite right, there are easy fixes! If the potatoes seem too firm, they needed a bit more cooking time – next time, test a few pieces before draining. Too mushy? You likely overcooked them – try reducing the cooking time and checking frequently with a fork. If the salad tastes bland, it probably needs more salt or acid – add a generous pinch of flaky sea salt and an extra squeeze of lemon. And if the dressing seems to have disappeared, the potatoes have likely absorbed it all – simply whisk together a small amount of extra dressing to refresh the salad.

    Frequently Asked Questions

    Can I make Turkish Potato Salad ahead of time?

    Absolutely! It actually improves with time as the flavors meld together. Make it up to two days ahead and store in the refrigerator until ready to serve.

    What makes Turkish Potato Salad different from American versions?

    Turkish Potato Salad uses olive oil and lemon instead of mayonnaise, and features Mediterranean herbs like parsley and mint rather than the typical American additions of celery and eggs.

    Can I use sweet potatoes instead of regular potatoes?

    While not traditional, sweet potatoes can work! They’ll create a sweeter salad with a different texture, but the Mediterranean flavors still complement them beautifully.

    Is this recipe vegan?

    Yes! This authentic Turkish Potato Salad is naturally vegan, making it perfect for everyone at your table regardless of dietary preferences.

    How can I add more protein to make this a complete meal?

    Try adding chickpeas, white beans, or even some grilled chicken on top. You could also serve it alongside grilled fish or lamb for a traditional Mediterranean meal.

    Final Thoughts

    This Turkish Potato Salad has become my go-to side dish for everything from casual weeknight dinners to special gatherings. There’s something truly special about how a few simple ingredients transform into something so flavorful and satisfying. I love watching friends take their first bite and seeing their eyes light up with surprise at the bright, zesty flavors. If you’re looking to expand your potato salad repertoire beyond the usual mayo-based versions, this Turkish-inspired recipe deserves a permanent spot in your collection. For more Mediterranean-inspired recipes, check out our Pinterest board.

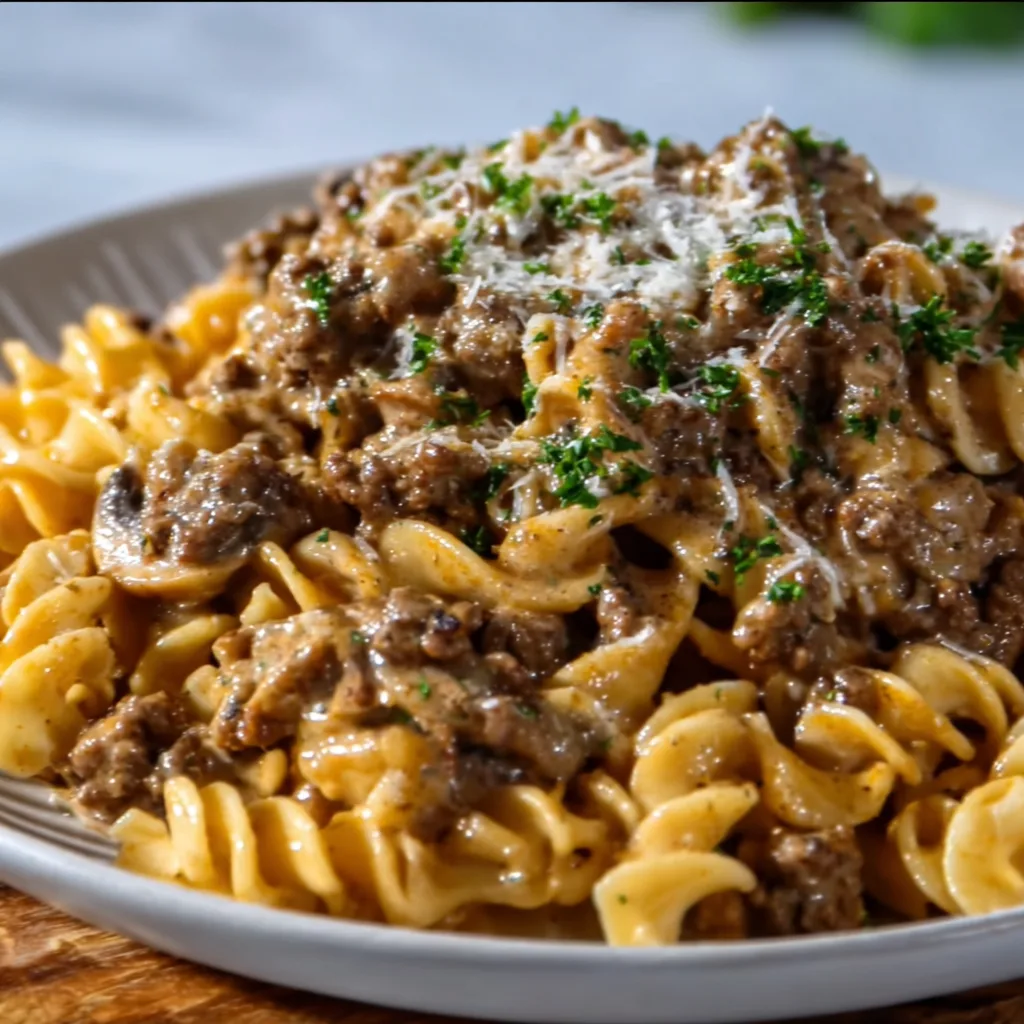
  • Creamy One-Pot Ground Beef Stroganoff: Easy, Comfort Food Bliss!

    Creamy One-Pot Ground Beef Stroganoff: Easy, Comfort Food Bliss!

    Creamy One-Pot Ground Beef Stroganoff: Easy, Comfort Food Bliss!

    Creamy One-Pot Ground Beef Stroganoff has been my secret weapon on those nights when everyone’s hungry, time is short, and I still want to serve something that feels like a warm hug in a bowl. The rich, velvety sauce coating tender beef and noodles creates pure comfort food magic that my family requests at least twice a month. There’s something so satisfying about watching simple ingredients transform into a restaurant-worthy dish while only dirtying one pot. I first discovered this recipe during a particularly chaotic week, and it’s been my reliable go-to ever since. If you love dishes that combine ease with incredible flavor, this stroganoff recipe deserves a permanent spot in your rotation.

    Recipe

    Why You’ll Love This Creamy One-Pot Ground Beef Stroganoff

    Perfect Weeknight Time-Saver

    When life gets hectic, this creamy one-pot ground beef stroganoff becomes your dinnertime hero. The entire meal comes together in under 30 minutes, making it perfect for busy weeknights when you’re juggling homework help, after-school activities, and your own exhaustion. I love that everything cooks in a single pot—the beef browns, the mushrooms sauté, the noodles simmer, and the sauce develops all in the same place. This means minimal cleanup afterward, which might be my favorite part! The hands-on time is surprisingly short, yet the flavors develop as though you’ve been cooking all day.

    Rich, Comforting Flavors

    There’s something magical about the combination of savory beef, earthy mushrooms, and that silky sour cream sauce that makes this dish irresistible. The first time I served this stroganoff, my youngest asked if we could have it every night for a week! The umami richness from the beef and mushrooms gets balanced perfectly by the tangy sour cream, while subtle notes of garlic and thyme add complexity without overwhelming. What I appreciate most is how this dish manages to feel indulgent while still being made from simple, wholesome ingredients. It’s the kind of meal that has everyone scraping their plates clean.

    Essential Tips & Tricks

    Perfecting the Beef & Mushroom Base

    The foundation of an exceptional stroganoff starts with properly browning the ground beef and mushrooms. I always make sure my pan is hot before adding the beef to develop those flavorful caramelized bits that will later infuse the sauce. Breaking the meat into smaller crumbles as it cooks gives better texture throughout the dish. For mushrooms, don’t overcrowd the pan—they need space to release moisture and brown rather than steam. This step takes patience but makes all the difference in flavor development. I’ve found that baby bella mushrooms offer more depth than white button varieties, but either works beautifully in this creamy tortellini soup or stroganoff.

    Creating the Silkiest Sauce

    The signature creamy sauce is what transforms this dish from ordinary to extraordinary. The key is tempering the sour cream before adding it to the hot mixture—this prevents curdling and ensures that silky-smooth texture we’re after. I do this by mixing a few tablespoons of the hot cooking liquid with the sour cream before incorporating it into the pot. Another game-changer is adding the flour before the broth, allowing it to coat the beef and vegetables to create a natural thickening agent. For extra richness, I sometimes stir in a tablespoon of Dijon mustard, which adds a subtle tang that complements the earthiness of the mushrooms beautifully.

    Serving Ideas & Creative Variations

    Perfect Pairings & Sides

    While this creamy one-pot ground beef stroganoff is certainly satisfying on its own, pairing it with the right sides elevates the entire meal. A simple green salad with vinaigrette provides a refreshing contrast to the rich, creamy main dish. For a more substantial dinner, I love serving it with roasted asparagus or steamed broccoli that can catch extra sauce. Warm, crusty bread is non-negotiable at our house—it’s perfect for sopping up every last bit of that delicious sauce! For a special touch, try a side of quick-pickled cucumbers; the acidity cuts through the richness beautifully, similar to how they complement my slow cooker mac and cheese.

    Exciting Twists on the Classic

    This versatile recipe welcomes creative adaptations to suit your preferences or pantry inventory. For a lighter version, swap the sour cream for Greek yogurt and use lean ground turkey instead of beef. Vegetarians can substitute mushroom varieties like portobello and shiitake for the meat, creating an equally satisfying meal. Add color and nutrition by stirring in frozen peas or spinach during the last few minutes of cooking. For a gourmet upgrade, deglaze the pan with a splash of red wine before adding the broth, or finish the dish with fresh herbs like dill or chives. My family loves when I add a sprinkle of smoked paprika for a subtle smoky dimension.

    Storage & Troubleshooting Guide

    Proper Storage & Reheating

    One of the best features of this creamy one-pot ground beef stroganoff is how well it keeps for leftovers. Store any remaining stroganoff in airtight containers in the refrigerator for up to 3 days. The flavors actually continue to develop overnight, making day-two stroganoff sometimes even better than the first serving! When reheating, add a splash of milk or broth to maintain creaminess, as the noodles tend to absorb sauce during storage. For best results, reheat gently on the stovetop over medium-low heat rather than using the microwave, which can make the sauce separate. If freezing, I recommend doing so before adding the noodles, as they can become mushy when thawed.

    Troubleshooting Common Issues

    Even experienced cooks occasionally encounter challenges with creamy sauces. If your sauce appears too thin, create a quick slurry with equal parts cornstarch and cold water, then stir it into the simmering sauce until it reaches your desired thickness. Conversely, if the sauce becomes too thick (especially after refrigeration), simply thin it with additional broth or milk. Should your sauce curdle—which can happen if sour cream is added too quickly to hot liquid—don’t panic! Lower the heat immediately and whisk vigorously until smooth. In the future, prevent this by tempering the sour cream with a few tablespoons of the hot cooking liquid before adding it to the pot.

    Frequently Asked Questions

    Can I make creamy one-pot ground beef stroganoff ahead of time?

    Yes! Prepare everything except the noodles and sour cream. Store the beef mixture refrigerated for up to 2 days, then reheat, cook the noodles directly in the sauce, and stir in sour cream just before serving.

    What can I substitute for sour cream?

    Greek yogurt makes an excellent substitute for a lighter version. Full-fat coconut milk (for dairy-free) or cream cheese thinned with a bit of milk also work well in a pinch.

    How can I make this recipe gluten-free?

    Simply swap regular egg noodles for gluten-free pasta and use cornstarch instead of flour as your thickener. Ensure your beef broth is also certified gluten-free.

    Why did my sauce curdle?

    This typically happens when adding cold sour cream to hot liquid too quickly. Always temper sour cream by mixing it with a little of the warm sauce first, then incorporate gradually.

    Can I use something other than ground beef?

    Absolutely! Ground turkey, chicken, or even plant-based meat alternatives work beautifully. For a more traditional approach, try thinly sliced beef sirloin.

    Final Thoughts

    This creamy one-pot ground beef stroganoff has saved countless dinners at my house, combining convenience with the kind of flavor that makes everyone think you spent hours in the kitchen. There’s something magical about transforming simple ingredients into such a satisfying meal with minimal effort and cleanup. I’d love to see how you make this recipe your own—share your creations on Pinterest or tag me in your photos! Whether you’re cooking for a busy weeknight or wanting to impress weekend guests, this stroganoff delivers comfort in every bite.

  • Slow Cooker French Dip Sandwiches | Gooey Melted Provolone Bliss

    Slow Cooker French Dip Sandwiches | Gooey Melted Provolone Bliss

    Slow Cooker French Dip Sandwiches | Gooey Melted Provolone Bliss

    Slow Cooker French Dip Sandwiches with Melted Provolone are the ultimate comfort food that practically makes itself. I discovered this recipe during a particularly hectic week when I needed something that would welcome us home with minimal effort. The rich aroma of beef slowly simmering in savory broth filled our kitchen, and that first bite—tender meat on crusty bread with gooey cheese and warm au jus for dipping—instantly became a family favorite. These sandwiches strike that perfect balance between effortless preparation and impressive results, making them ideal for both busy weeknights and casual entertaining.

    Recipe

    Why You’ll Love This Slow Cooker French Dip Sandwiches with Melted Provolone

    Perfect Make-Ahead Meal for Busy Days

    There’s something magical about walking through the door after a long day to the savory aroma of beef that’s been slowly cooking for hours. These French dip sandwiches require just 15 minutes of morning prep, then your slow cooker handles the rest. The fork-tender beef practically shreds itself after 8 hours of gentle cooking, absorbing all those incredible flavors from the broth, onions, and seasonings. I love how the meat develops that melt-in-your-mouth quality that you’d expect from a high-end restaurant, yet it’s so simple to achieve at home with minimal effort.

    Restaurant-Quality Results with Simple Ingredients

    The beauty of these sandwiches lies in their simplicity—basic ingredients that transform into something extraordinary. The chuck roast becomes incredibly tender, while the umami-rich au jus develops complex flavors that taste like they’ve been carefully crafted by a chef. When you layer that perfectly seasoned beef onto crusty rolls, add provolone that melts into all the nooks and crannies, and serve with a side of warm dipping broth, you’ve got a restaurant-worthy meal that costs a fraction of dining out. My family actually prefers these to any French dip we’ve had at restaurants!

    Essential Tips & Tricks

    Selecting and Preparing the Perfect Cut of Beef

    Choose a well-marbled chuck roast for the most flavorful results—those streaks of fat will render down during cooking, creating incredibly tender meat. Before adding it to your slow cooker, take five minutes to sear the roast on all sides in a hot skillet. This extra step creates a beautiful crust and locks in juices while developing deeper flavor compounds that will infuse the entire dish. I learned this trick years ago and it makes a noticeable difference! For even more flavor development, try my Slow Cooker Mac & Cheese Classic technique of adding aromatics first to create a flavor base.

    Perfecting the Au Jus and Assembly Process

    The magical element that elevates these sandwiches is the rich au jus that develops during cooking. For the best flavor, use beef broth rather than water as your cooking liquid, and add Worcestershire sauce for depth. Strain the finished broth through a fine-mesh sieve to remove any solids for a silky-smooth dipping experience. When assembling, lightly toast your rolls first to prevent sogginess, then add the beef and broil with provolone just until bubbly and golden—about 2-3 minutes. Serve immediately with warm au jus in individual ramekins for the perfect dipping experience.

    Serving Ideas & Creative Variations

    Complementary Side Dishes That Enhance the Meal

    These hearty sandwiches pair beautifully with sides that balance their richness. I love serving them with a crisp green salad dressed simply with vinaigrette to cut through the savory flavors. Crispy french fries or sweet potato fries make excellent dippers for extra au jus, while pickled vegetables add a tangy contrast. For a complete meal that will impress guests, consider adding a side of Creamy Tortellini Soup for a cozy restaurant-inspired experience. The combination of the warm sandwich with something fresh and crunchy creates the perfect balance on your plate.

    Creative Twists on the Classic Recipe

    While the traditional version is perfection, don’t be afraid to make it your own! For a flavor boost, try adding sliced mushrooms to the slow cooker during the last hour of cooking. They’ll absorb the rich broth and add earthy depth. Experiment with different cheeses—smoked provolone, Swiss, or pepper jack all work beautifully. For a spicy kick, add pepperoncini peppers to the slow cooker and include a few on each sandwich. You can even transform leftovers into a breakfast hash by chopping the meat and potatoes, crisping them in a skillet, and topping with a fried egg.

    Storage & Troubleshooting Guide

    Proper Storage and Reheating Methods

    These sandwiches are perfect for meal prep because the components store beautifully. Keep the shredded beef and au jus separately in airtight containers in the refrigerator for up to 4 days. For longer storage, freeze portions in freezer-safe bags for up to 3 months. The key to reheating is keeping everything moist—warm the beef gently in a saucepan with a splash of the au jus to prevent drying out. Heat the au jus separately until steaming. Assemble fresh sandwiches with the reheated components and broil just until the cheese melts for that fresh-made experience.

    Solving Common Problems for Perfect Results

    If your beef isn’t as tender as expected after cooking, it likely needs more time—tough meat is simply undercooked when using the slow method. Return it to the slow cooker for another 30-60 minutes until it shreds effortlessly with two forks. For au jus that’s too thin, reduce it on the stovetop until it reaches your desired consistency. If it’s too salty, add a peeled, quartered potato to the liquid and simmer for 15 minutes—the potato will absorb excess salt. For soggy bread, try toasting both sides of your rolls before adding toppings, or serve the au jus strictly on the side.

    Frequently Asked Questions

    Can I use a different cut of beef for Slow Cooker French Dip Sandwiches with Melted Provolone?

    Yes! While chuck roast is ideal, you can substitute brisket, round roast, or rump roast. Cooking times may vary slightly, but the slow cooker will tenderize any of these cuts beautifully.

    How can I make this recipe gluten-free?

    Simply use gluten-free rolls and ensure your beef broth and Worcestershire sauce are certified gluten-free. The rest of the ingredients are naturally gluten-free.

    Can I make this in an Instant Pot instead?

    Absolutely! Use the sauté function to sear the meat, then pressure cook on high for 60 minutes with natural release. You’ll achieve similar tender results in much less time.

    What’s the best way to slice the meat?

    For the most tender result, let the meat cool slightly, then shred it using two forks rather than slicing. This creates more surface area to absorb the flavorful juices.

    How do I prevent the bread from getting too soggy?

    Toast your rolls before adding the beef and cheese, and serve the au jus on the side in individual dipping bowls rather than pouring it over the sandwiches.

    Final Thoughts

    These Slow Cooker French Dip Sandwiches with Melted Provolone have become a staple in my kitchen for good reason—they deliver maximum flavor with minimal effort. There’s something deeply satisfying about transforming simple ingredients into a meal that brings everyone to the table with anticipation. Whether you’re feeding a hungry family or entertaining friends, these sandwiches never disappoint. I’d love to see your creations on Pinterest if you give them a try! The combination of tender beef, melty cheese, and that incredible dipping broth creates a memorable meal experience that will have everyone asking for seconds.

  • Mango Slaw Recipe: Refreshing, Tangy, & Perfectly Crunchy!

    Mango Slaw Recipe: Refreshing, Tangy, & Perfectly Crunchy!

    Mango Slaw Recipe: Refreshing, Tangy, & Perfectly Crunchy!

    Mango Slaw brings a tropical twist to traditional coleslaw with its vibrant colors and refreshing flavors. The sweet, juicy mangoes blend perfectly with crisp cabbage and tangy dressing, creating a sensory explosion in every bite. I first discovered this delightful dish during a beachside cookout where it completely stole the show from the main course! It’s become my go-to side for everything from backyard barbecues to cozy winter comfort meals. The beauty of this recipe lies in its versatility and how it brightens up even the simplest meal with its sunshine-in-a-bowl vibe.

    Recipe

    Why You’ll Love This Mango Slaw

    Perfect Balance of Flavors and Textures

    The magic of Mango Slaw lies in its harmonious blend of sweet, tangy, and savory notes that dance on your palate. Ripe mangoes provide natural sweetness that pairs beautifully with the crisp crunch of fresh cabbage. I love how the creamy dressing with just a hint of lime brings everything together, while the occasional bite of red onion adds a welcome sharpness. My neighbor once described it as “summer in a bowl,” and I couldn’t agree more! The contrasting textures make each forkful interesting – soft mango chunks against crunchy vegetables create that perfect mouthfeel that keeps you coming back for more.

    Quick and Make-Ahead Friendly

    One of my favorite things about this Mango Slaw is how it fits into my busy life without sacrificing flavor. It comes together in just 15 minutes of active time, making it perfect for last-minute gatherings. The ingredients are straightforward pantry and produce staples, nothing fancy required! I often prep all the components the night before, storing them separately, then toss everything together just before serving. This actually works in your favor – the flavors have time to meld and develop, making the slaw even more delicious. For busy weeknights, this time-saving strategy has been my secret weapon.

    Essential Tips & Tricks

    Selecting and Preparing the Perfect Mangoes

    The heart and soul of any great Mango Slaw is, unsurprisingly, the mangoes themselves. Look for fruits that yield slightly to gentle pressure – they should feel soft but firm, not mushy. I’ve found that Ataulfo (also called champagne or honey) mangoes work beautifully with their smooth, fiber-free flesh, but Kent or Tommy Atkins varieties are excellent too. To prep, stand the mango on its end and slice down along both sides of the flat pit. Score the flesh in a grid pattern without cutting through the skin, then invert and slice off the cubes. For the perfect texture in your slaw, aim for 1/2-inch pieces that hold their shape but are easy to eat.

    Dressing Secrets for Maximum Flavor

    The dressing is what transforms simple ingredients into an unforgettable Mango Slaw. I always start with a base of good quality mayonnaise lightened with yogurt for the perfect creamy-tangy balance. A splash of lime juice brightens everything while a touch of honey enhances the mango’s natural sweetness. My secret ingredient? A pinch of toasted cumin that adds warmth without overwhelming. Whisk all dressing ingredients together before adding to the vegetables and fruit – this ensures even distribution. For the best flavor marriage, toss the slaw gently but thoroughly, then let it rest for at least 15 minutes before serving. It pairs beautifully with Slow Cooker Mongolian Beef for a complete meal.

    Serving Ideas & Creative Variations

    Perfect Pairings for Every Occasion

    Mango Slaw shines as both a side dish and a creative topping for various mains. Serve it alongside grilled fish tacos where the tropical flavors complement the smoky char perfectly. It’s also divine with jerk chicken, adding a cooling counterpoint to the spice. For summer potlucks, I place it next to traditional potato salad for a refreshing alternative that always disappears first! The vibrant colors make it a standout on any buffet table. For an elegant dinner, serve small portions in lettuce cups as a starter. The versatility extends to casual lunches too – try it piled high on a Dill Pickle Parmesan Chicken sandwich for a gourmet touch.

    Exciting Flavor Variations to Try

    The classic Mango Slaw is just the beginning – this recipe welcomes creative adaptations! For a Thai-inspired version, add chopped peanuts, fresh cilantro, and a splash of fish sauce to the dressing. Craving something spicier? Incorporate finely diced jalapeño or a drizzle of sriracha into the mix. When stone fruits are in season, try swapping half the mango for ripe peaches or nectarines for a delightful twist. For added protein and staying power, toss in some black beans or edamame. I recently made a tropical variation with shredded coconut and pineapple chunks that transported my family straight to vacation mode – even on a regular Tuesday dinner!

    Storage & Troubleshooting Guide

    Keeping Your Slaw Fresh and Crisp

    To maintain the perfect texture of your Mango Slaw, proper storage is key. Always keep it refrigerated in an airtight container to preserve freshness and prevent it from absorbing other food odors. The slaw will stay crisp for up to 2 days, though the vegetables may soften slightly over time. If you’re planning ahead, consider storing the dressing separately from the vegetables and fruit, combining them just before serving. For maximum crispness, I sometimes sprinkle a little extra lime juice over leftover slaw before serving it again – the acidity helps revive the flavors and texture. Remember that mangoes continue to ripen after cutting, so the slaw might become sweeter on day two.

    Solving Common Mango Slaw Challenges

    Even the simplest recipes can sometimes present challenges, but they’re easily overcome. If your slaw becomes too watery after sitting, simply drain off the excess liquid or add more fresh cabbage to absorb it. Finding mangoes that aren’t quite ripe? Place them in a paper bag with a banana overnight to speed ripening, or substitute with frozen mango chunks in a pinch – just thaw and pat dry before adding. If the dressing seems too thick, thin it with a splash of lime juice or a teaspoon of water.

    For a slaw that’s too sweet, balance it with an extra pinch of salt or a bit more lime juice. Remember that flavors meld and develop over time, so what seems unbalanced at first might be perfect after resting.

    Frequently Asked Questions

    Can I make Mango Slaw ahead of time?

    Yes! You can prepare all components 1-2 days ahead and store separately. Combine them 15-30 minutes before serving for the best texture and flavor balance. The slight resting time actually improves the taste as flavors meld.

    What’s the best cabbage to use for Mango Slaw?

    I recommend a mix of green and purple cabbage for color and texture variation. Pre-shredded coleslaw mix works perfectly for convenience, or you can finely shred your own for a fresher crunch.

    How can I make this Mango Slaw dairy-free?

    Simply substitute the yogurt with dairy-free yogurt or additional mayonnaise. For a completely vegan version, use plant-based mayo and sweeten with maple syrup instead of honey.

    Are there any protein options to make Mango Slaw a complete meal?

    Absolutely! Add grilled chicken, shrimp, or tofu for a protein boost. Black beans, chickpeas, or quinoa work wonderfully for vegetarian options, making the slaw hearty enough for a main dish.

    How long does Mango Slaw stay fresh in the refrigerator?

    Mango Slaw remains at its best for up to 2 days when stored in an airtight container in the refrigerator. The texture may soften slightly, but the flavors often improve after the first day.

    Final Thoughts

    Mango Slaw brings a bright, tropical energy to any meal with its perfect balance of sweet, tangy and crunchy elements. It’s one of those versatile recipes that feels special enough for company yet simple enough for everyday enjoyment. I love how it transforms ordinary meals into something memorable with minimal effort. Whether you’re serving it alongside grilled meats, tucking it into tacos, or enjoying it as a refreshing lunch, this colorful dish never disappoints. The next time you’re looking to add a little sunshine to your table, give this Mango Slaw a try – your taste buds will thank you! Find more colorful inspiration on our Pinterest board.

  • Moroccan Chicken & Rice Recipe That Will Wow Your Taste Buds!

    Moroccan Chicken & Rice Recipe That Will Wow Your Taste Buds!

    Moroccan Chicken & Rice Recipe That Will Wow Your Taste Buds!

    Moroccan Chicken & Rice brings a symphony of warm spices, tender meat, and fluffy rice together in one unforgettable dish. The first time I made this recipe, the aroma of cinnamon, cumin, and ginger transformed my kitchen into a Marrakech marketplace. There’s something magical about how these fragrant spices bloom in the pan, wrapping around tender chicken pieces and infusing every grain of rice with their essence. Whether you’re looking to expand your weeknight dinner rotation or impress guests with something special, this dish delivers both comfort and excitement in every bite.

    Recipe

    Why You’ll Love This Moroccan Chicken & Rice

    A Perfect Balance of Flavors and Textures

    The beauty of Moroccan Chicken & Rice lies in its harmonious blend of sweet and savory notes. Cinnamon and dried fruit provide gentle sweetness that balances perfectly against the earthy cumin and paprika. The chicken thighs become incredibly tender, practically melting into the rice, while toasted almonds add a delightful crunch. I love how the rice soaks up all those amazing flavors, becoming infused with the essence of the spices and the rich chicken broth. Each forkful delivers a complex yet comforting taste that feels both exotic and familiar.

    A One-Pot Wonder for Busy Weeknights

    As much as I adore complex cooking projects, there’s something deeply satisfying about a complete meal in one pot. This Moroccan Chicken & Rice recipe has saved me countless times when I’m craving something special but don’t have the energy for multiple dishes. The active prep time is minimal—just some chopping and measuring—while the cooking process builds layers of flavor without requiring constant attention. I can start this dish, help my daughter with homework, and return to a kitchen filled with mouthwatering aromas and a dinner that feels like it took much more effort than it actually did.

    Essential Tips & Tricks

    Choosing the Right Ingredients

    The quality of your spices makes all the difference in this dish. I recommend using freshly ground spices whenever possible, as they contain more aromatic oils and deliver a more vibrant flavor. For the chicken, thighs are preferable to breasts as they remain juicy and tender throughout the cooking process. When selecting rice, basmati or jasmine varieties work beautifully, their natural fragrance complementing the Moroccan spices. If you’re looking for another flavorful rice-based dish, my Slow Cooker Chicken Burrito Bowls offer a completely different but equally delicious flavor profile.

    Mastering the Cooking Technique

    The key to perfect Moroccan Chicken & Rice is layering the flavors methodically. Begin by toasting the spices in oil until they become fragrant—this blooms their essential oils and deepens their flavor. Next, brown the chicken properly; don’t rush this step as it develops a rich foundation. When adding liquid, scrape the bottom of the pan to incorporate all those caramelized bits—they’re pure gold for flavor development. Allow the rice to rest for 5-10 minutes after cooking; this final step lets the moisture distribute evenly, resulting in perfectly fluffy grains rather than mushy rice.

    Serving Ideas & Creative Variations

    Complementary Side Dishes

    Moroccan Chicken & Rice can stand alone as a complete meal, but I love serving it with a few simple accompaniments to enhance the experience. A cooling cucumber-yogurt salad provides a refreshing contrast to the warm spices. For something green, try a simple arugula salad dressed with lemon and olive oil—its peppery bite complements the dish beautifully. Warm flatbread is perfect for scooping up every last morsel. If you’re looking for another comforting dish to pair with this, my Creamy Tortellini Soup Crockpot recipe makes a wonderful starter for a more elaborate meal.

    Regional Variations to Explore

    The beauty of Moroccan cuisine lies in its regional diversity and adaptability. For a coastal variation, add preserved lemon and green olives during the last 15 minutes of cooking for a tangy brightness. If you prefer a spicier dish, incorporate harissa paste or a pinch of cayenne. For a vegetarian version, substitute chickpeas and roasted butternut squash for the chicken, using vegetable broth as the cooking liquid. During summer months, I sometimes add fresh herbs like mint and cilantro just before serving, which brings a wonderful freshness to the warm spices.

    Storage & Troubleshooting Guide

    Proper Storage and Reheating

    Moroccan Chicken & Rice actually improves with time as the flavors continue to meld, making it perfect for meal prep. Store leftovers in airtight containers in the refrigerator for up to 4 days. When reheating, add a splash of chicken broth or water to prevent the rice from drying out. For the best texture, reheat gently on the stovetop over medium-low heat, stirring occasionally. This dish also freezes beautifully—portion it into freezer-safe containers and store for up to 3 months. Thaw overnight in the refrigerator before reheating for the best results.

    Troubleshooting Common Issues

    If your rice turns out too mushy, it’s likely that there was too much liquid or the heat was too high. The perfect rice-to-liquid ratio is essential—generally 1:1.5 for basmati rice. If your dish lacks flavor, don’t be afraid to adjust the seasoning at the end. A squeeze of lemon juice can brighten all the flavors, while a drizzle of honey balances any overwhelming spices. For undercooked rice with fully cooked chicken, remove the chicken pieces, add a small amount of hot broth to the rice, cover, and continue cooking on low heat until the rice reaches your desired tenderness.

    Frequently Asked Questions

    Can I use chicken breasts instead of thighs for Moroccan Chicken & Rice?

    Yes, though they cook faster and can dry out. If using breasts, reduce cooking time by about 5-7 minutes and consider brining them first for added moisture and flavor.

    What can I substitute for dried apricots?

    Golden raisins, dried cranberries, or chopped dates work beautifully. Each brings a different sweetness profile that pairs wonderfully with the Moroccan spices.

    Is Moroccan Chicken & Rice gluten-free?

    Yes, traditional Moroccan Chicken & Rice is naturally gluten-free, assuming you use pure spices without additives and a certified gluten-free broth.

    How can I make this dish vegetarian?

    Replace chicken with chickpeas and roasted vegetables like butternut squash, eggplant, or cauliflower. Use vegetable broth and increase the olive oil slightly for richness.

    Can I prepare Moroccan Chicken & Rice in advance for a dinner party?

    Absolutely! Make it up to a day ahead, refrigerate, then reheat gently with a splash of broth. Garnish with fresh herbs and toasted nuts just before serving for optimal presentation.

    Final Thoughts

    Moroccan Chicken & Rice has become one of my most treasured recipes, not just for its incredible flavors but for how it transforms an ordinary evening into something special. The way the kitchen fills with those aromatic spices creates an instant sense of warmth and anticipation. I hope this dish brings the same joy to your table that it has to mine. Remember that cooking is about exploration and making each recipe your own. For more inspiration and delicious recipes, visit our Pinterest page where you’ll find endless culinary adventures waiting.