Category: Desserts

Sweet and easy dessert recipes for every craving. Simple treats, rich flavors, and quick ideas that make any moment feel special.

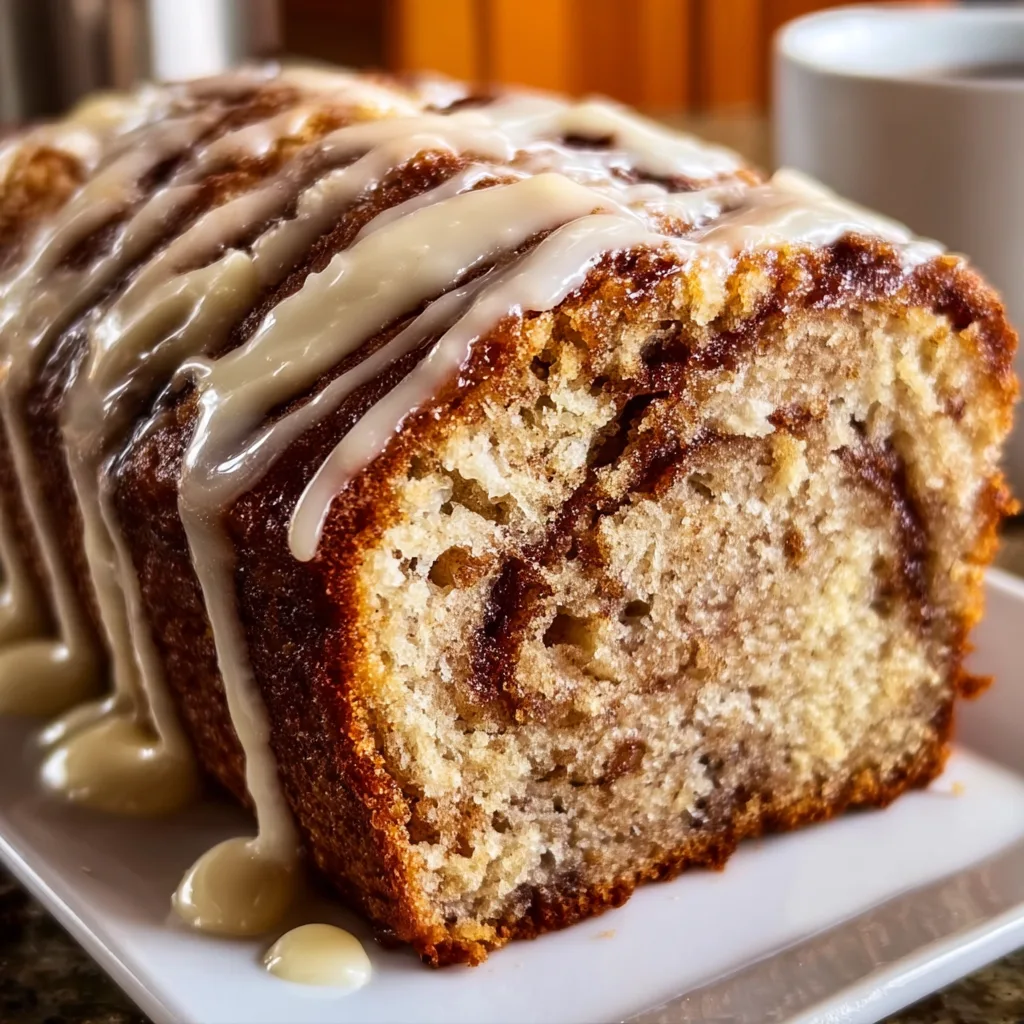
  • Cinnamon Roll Banana Bread: Irresistibly Soft & Heavenly Sweet!

    Cinnamon Roll Banana Bread: Irresistibly Soft & Heavenly Sweet!

    Cinnamon Roll Banana Bread: Irresistibly Soft & Heavenly Sweet!

    The aroma of cinnamon swirls through my kitchen, mingling with the sweet scent of ripe bananas as my Cinnamon Roll Banana Bread bakes to golden perfection. This hybrid treat combines two comfort classics into one irresistible loaf that’s moist, tender, and swirled with cinnamon-sugar ribbons. I created this recipe after finding myself torn between making banana bread or cinnamon rolls one rainy Sunday morning. Why choose when you can have both? The result is a breakfast delight that’s perfect with coffee and guaranteed to make your kitchen the coziest spot in the house. If you love creative baking projects, you’ll also enjoy my Chocolate Chip Vanilla Custard Brioche for another sweet treat.

    Recipe

    Why You’ll Love This Cinnamon Roll Banana Bread

    Perfect Texture & Flavor Balance

    The magic happens when ripe, mashed bananas meet a buttery, cinnamon-sugar swirl. Each slice delivers that classic banana bread moistness with pockets of melty cinnamon goodness reminiscent of your favorite cinnamon roll. I’ve tested this recipe countless times to ensure the perfect balance—not too sweet, not too dense. The banana flavor shines through while the cinnamon swirl adds complexity that regular banana bread just doesn’t have. My neighbor literally gasped when she took her first bite, then immediately asked for the recipe. That’s when I knew this one was special.

    Simple Ingredients, Impressive Results

    You won’t need to hunt down specialty items for this recipe—everything comes straight from your pantry. Overripe bananas (those spotty ones you were about to toss), flour, butter, eggs, sugar, and cinnamon are the stars here. The wow factor comes from the technique, not fancy ingredients. I love recipes that transform humble components into something spectacular. The cinnamon-sugar mixture creates beautiful swirls throughout the loaf that look impressive but require minimal effort. It’s the perfect recipe for bakers of all skill levels who want maximum flavor with minimum fuss.

    Essential Tips & Tricks

    Mastering the Swirl Technique

    Getting those perfect cinnamon swirls is easier than you might think! After pouring half the banana bread batter into your loaf pan, sprinkle the cinnamon-sugar mixture evenly, leaving a small border around the edges. Then add the remaining batter and use a butter knife to create figure-eight motions through the entire loaf. The key is not to over-swirl—about 5-6 passes through the batter is perfect. I once made the mistake of excessive swirling and ended up with a uniform brown loaf instead of those beautiful ribbons. Remember, we want distinct swirls, not complete mixing!

    Banana Selection & Preparation

    The ripeness of your bananas makes all the difference in this recipe. Look for bananas with dark spots covering at least 50% of the peel—they should feel soft but not mushy. For the most intense flavor, let them ripen until they’re nearly black. I keep a “banana bread bag” in my freezer where I toss overripe bananas for future baking. When you’re ready to bake, thaw them completely and drain off any excess liquid before mashing. This prevents your batter from becoming too wet. For the best texture in your Cinnamon Roll Banana Bread, mash with a fork rather than a blender for some small banana chunks.

    Serving Ideas & Creative Variations

    Warm Serving Suggestions

    Serve this bread slightly warm with a smear of cream cheese or a drizzle of maple glaze for an elevated experience. I love cutting thick slices and giving them a quick toast before adding a pat of salted butter that melts into all the cinnamon crevices. For weekend brunches, try making French toast with day-old slices—the cinnamon swirl creates caramelized edges that are absolutely divine. My family’s favorite way to enjoy it is warm from the oven with a scoop of vanilla ice cream for an indulgent dessert. The contrast between warm bread and cold ice cream creates a sensory experience you won’t forget.

    Seasonal & Dietary Adaptations

    This versatile recipe welcomes creative twists throughout the year. In fall, add a handful of chopped walnuts or pecans for crunch. During summer, fold in fresh blueberries or strawberries for bursts of fruity brightness. For a tropical variation, substitute coconut oil for butter and add shredded coconut to the batter. Need a gluten-free version? Simply swap in your favorite cup-for-cup gluten-free flour blend. You can also make this vegan by using flax eggs and plant-based butter. For more seasonal inspiration, check out my Raspberry Cream Cheese Coffee Cake that uses similar swirling techniques with different flavors.

    Storage & Troubleshooting Guide

    Keeping It Fresh

    To maintain maximum moisture and flavor, store your cooled Cinnamon Roll Banana Bread in an airtight container at room temperature for up to 3 days. For longer storage, wrap individual slices in plastic wrap, then aluminum foil, and freeze for up to 3 months. When you’re ready to enjoy a slice, thaw at room temperature or microwave for 20-30 seconds. I’ve found that adding a paper towel to the storage container helps absorb excess moisture, keeping the bread from getting soggy. If you notice the bread drying out after a day, warm it slightly before serving to revive that fresh-baked texture.

    Common Issues & Solutions

    If your bread sinks in the middle, you likely used bananas that were too wet or underbaked the loaf. Ensure you’re testing for doneness by inserting a toothpick into the center—it should come out with a few moist crumbs but no wet batter. For cracking on top, your oven might be too hot—try reducing the temperature by 25°F and baking slightly longer. If your cinnamon swirl sinks to the bottom, your batter may be too thin. Try adding an extra tablespoon of flour to the base recipe. I once had all my cinnamon sink, creating a delicious but unexpected caramelized bottom layer—happy accidents sometimes lead to delightful discoveries!

    Frequently Asked Questions

    Can I make Cinnamon Roll Banana Bread without eggs?

    Yes! Replace each egg with ¼ cup unsweetened applesauce or a flax egg (1 tablespoon ground flaxseed mixed with 3 tablespoons water, let sit for 5 minutes). The texture will be slightly denser but still delicious.

    How ripe should bananas be for the best flavor?

    Very ripe! Look for bananas with dark spots covering most of the peel. They should be soft but not completely mushy. The riper they are, the sweeter and more flavorful your bread will be.

    Can I add nuts or chocolate chips?

    Absolutely! Fold in ½ cup of chopped walnuts, pecans, or chocolate chips to the base batter before adding the cinnamon swirl layer for extra texture and flavor.

    Why did my cinnamon swirl disappear?

    If your swirl disappeared, you likely over-mixed the batter after adding the cinnamon mixture. Use a light hand when creating swirls—just 5-6 passes with a knife is sufficient.

    Can this recipe be made as muffins instead of a loaf?

    Yes! Pour the batter into a lined muffin tin, add cinnamon swirl, and bake at 350°F for 18-22 minutes. This makes about 12 muffins with the perfect portion size for grab-and-go breakfasts.

    Final Thoughts

    This Cinnamon Roll Banana Bread has become my signature bake—the one friends request when they visit and family members hint at during holidays. There’s something magical about the marriage of these two classic comfort foods that creates something greater than the sum of its parts. The ribbons of cinnamon weaving through moist banana bread create a sensory experience that’s both familiar and exciting. I hope this recipe finds a permanent place in your baking rotation, filling your home with warmth and creating memories around your table. Don’t forget to share your creations on Pinterest for baking inspiration!

  • Lemon Cream Roll Cake with Lemon Glaze – Irresistibly Zesty & Creamy!

    Lemon Cream Roll Cake with Lemon Glaze – Irresistibly Zesty & Creamy!

    Lemon Cream Roll Cake with Lemon Glaze - Irresistibly Zesty & Creamy!

    There’s something magical about the bright, zingy flavor of a Lemon Cream Roll Cake with Lemon Glaze that instantly lifts your spirits. The delicate sponge wrapped around velvety lemon cream filling, all drizzled with a tangy glaze that adds the perfect finishing touch. I discovered this recipe during a rainy weekend when I needed something to brighten the mood, and it’s become my go-to dessert for everything from casual family gatherings to elegant dinner parties. The balance of sweet and tart flavors creates an irresistible combination that’ll have everyone asking for seconds. If you love citrus desserts like my lemon cobbler, this roll cake will absolutely steal your heart.

    Recipe

    Why You’ll Love This Lemon Cream Roll Cake with Lemon Glaze

    Perfect Balance of Flavors

    The magic of this lemon roll cake lies in its perfect balance of sweet and tangy notes. The cake itself has a delicate lemon flavor that comes from fresh zest folded into the batter, creating tiny pockets of bright citrus oil that perfume each bite. When paired with the silky cream filling—which has just enough lemon to complement without overwhelming—you get a dessert that feels sophisticated yet comforting. I love watching people’s faces light up with that first bite, when the zingy glaze hits their taste buds and the creamy filling melts in their mouth. It’s that perfect dessert that satisfies without being too heavy.

    Impressive Yet Achievable

    Don’t let the spiral design intimidate you—this cake is surprisingly doable for bakers of all levels! The sponge bakes in just 12 minutes, and the rolling technique is more forgiving than you might think. I remember being terrified the first time I attempted a roll cake, hovering nervously as I peeled back the towel. But the warm cake is wonderfully pliable, and even if you get a small crack, the filling and glaze hide minor imperfections beautifully. Plus, there’s something so satisfying about creating those perfect spirals that look like they came from a professional bakery. Your friends will be genuinely impressed when you bring this to the table!

    Essential Tips & Tricks

    Mastering the Perfect Sponge

    The foundation of an exceptional lemon roll cake is a light, springy sponge that rolls without cracking. The secret? Don’t overmix your batter after adding the flour—fold it in gently until just combined to preserve those air bubbles. Another game-changer is properly preparing your baking sheet: line it with parchment paper and leave a little overhang for easy removal. When the cake comes out of the oven, immediately roll it in a clean kitchen towel dusted with powdered sugar while it’s still hot. This trains the cake to hold its shape as it cools, preventing those heartbreaking cracks that can happen with cold cake.

    Creating the Silkiest Filling and Glaze

    For a filling that’s both stable and lusciously creamy, start with cream cheese at room temperature—cold cream cheese will leave lumps no matter how long you beat it. I learned this the hard way after rushing through a cake for my sister’s birthday! The filling should be thick enough to spread easily but firm enough to hold its shape when rolled. For the glaze, fresh lemon juice makes all the difference—it brings a brightness that bottled juice simply can’t match. If you want to explore more citrusy treats, my raspberry cheesecake brownies offer another delightful flavor combination that’s equally impressive.

    Serving Ideas & Creative Variations

    Seasonal Pairings and Garnishes

    Elevate your lemon roll cake with seasonal garnishes that complement its bright flavor. In summer, I love adding fresh berries—particularly raspberries or blueberries—which provide beautiful color contrast and a juicy pop against the smooth cream. For a more elegant presentation, try candied lemon slices arranged along the top, their translucent sweetness catching the light beautifully. A light dusting of powdered sugar just before serving adds a touch of sweetness and visual appeal. For special occasions, edible flowers like violets or pansies create a stunning presentation that’s perfect for spring gatherings, especially when paired with a scoop of vanilla bean ice cream.

    Flavor Twists and Adaptations

    While the classic lemon version is divine, this versatile cake welcomes creative adaptations. Try adding a layer of lemon curd between the cake and cream filling for an extra punch of citrus flavor. For a sophisticated twist, incorporate a tablespoon of limoncello into the filling—the subtle boozy note adds wonderful complexity. White chocolate shavings folded into the cream filling create delightful little pockets of sweetness. If you’re feeling adventurous, consider a berry cheesecake inspired variation by adding fresh berries to the filling and a berry coulis drizzled over the glaze—the combination of tangy lemon and sweet berries is absolutely heavenly.

    Storage & Troubleshooting Guide

    Keeping Your Roll Cake Fresh

    Store your lemon roll cake properly to maintain its delicious texture and flavor for days. After serving, place any leftovers in an airtight container in the refrigerator, where it will stay fresh for up to 4 days. The cream filling requires refrigeration, but I recommend bringing slices to room temperature for about 20 minutes before serving to allow the flavors to fully bloom. If you need to make it ahead for an event, you can prepare the entire cake up to 2 days in advance—in fact, I find the flavors meld beautifully after a day in the fridge. Just wait to add the final glaze until a few hours before serving for the most attractive presentation.

    Solving Common Roll Cake Problems

    Even experienced bakers encounter challenges with roll cakes, but most issues have simple solutions. If your cake cracks during rolling, don’t panic—small cracks will be hidden by the filling, and larger ones can be covered with extra glaze or a strategic dusting of powdered sugar. If your filling seems too runny, chill it for 15-20 minutes before spreading. For a cake that’s too dry, lightly brush the unrolled sponge with a simple syrup (equal parts sugar and water with a splash of lemon juice) before adding filling.

    And if your glaze is too thick, add lemon juice a teaspoon at a time until you reach the perfect drizzling consistency—it should coat the back of a spoon but still flow freely.

    Frequently Asked Questions

    Can I make this Lemon Cream Roll Cake with Lemon Glaze in advance?

    Yes! You can make it up to 2 days ahead. Store in the refrigerator and add the final glaze 2-3 hours before serving for the best presentation and flavor.

    Why did my roll cake crack?

    Cracking usually happens if the cake cools too much before rolling or if it’s overbaked. Always roll while hot, and watch your baking time carefully—a slightly underbaked cake rolls better than an overbaked one.

    Can I freeze this roll cake?

    Absolutely! Freeze the filled but unglazed cake tightly wrapped for up to 1 month. Thaw overnight in the refrigerator, then add fresh glaze before serving.

    What can I substitute for cream cheese in the filling?

    Mascarpone makes an excellent substitute, offering a similar tanginess with an even creamier texture. For a lighter option, try stabilized whipped cream with 1 tablespoon of instant vanilla pudding mix.

    How do I prevent the towel from sticking to my cake?

    Generously dust your kitchen towel with powdered sugar before placing the hot cake on it. Don’t be shy—a liberal coating is key to preventing sticking during the rolling process.

    Final Thoughts

    This Lemon Cream Roll Cake with Lemon Glaze brings sunshine to any table with its bright flavors and beautiful presentation. What I love most is how it balances impressive looks with approachable technique—proving that stunning desserts don’t require professional training. The contrast between the light sponge, creamy filling, and tangy glaze creates a dessert that feels special but never fussy. Whether you’re celebrating something momentous or simply craving a slice of citrus happiness, this cake delivers pure joy with every bite. For more delicious inspiration, follow me on Pinterest where I share my favorite seasonal recipes and baking tips.

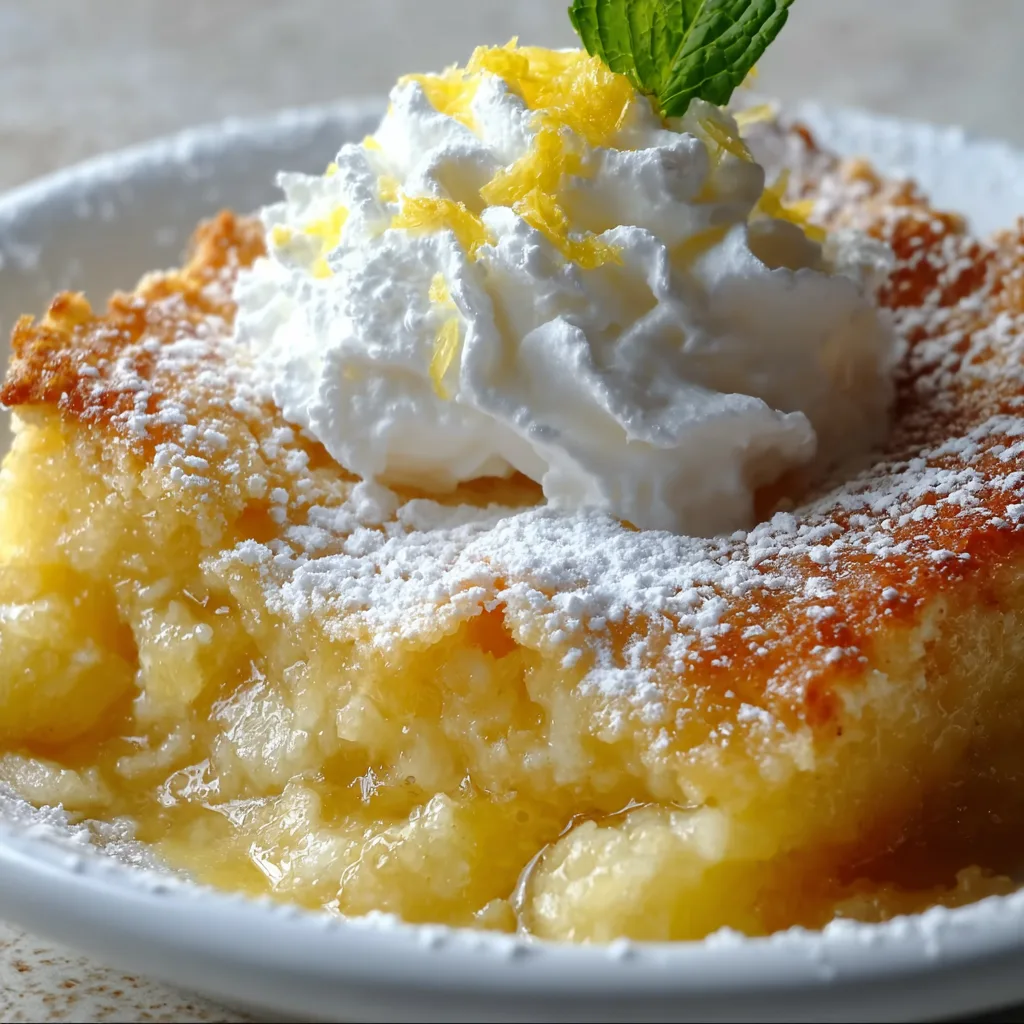
  • Lemon Cobbler Dessert: Irresistibly Tangy Treat You’ll Crave!

    Lemon Cobbler Dessert: Irresistibly Tangy Treat You’ll Crave!

    Lemon Cobbler Dessert: Irresistibly Tangy Treat You’ll Crave!

    This Lemon Cobbler Dessert has completely stolen my heart with its perfect balance of tart lemon and sweet, buttery crust. Every time I make it, the kitchen fills with that bright citrus aroma that instantly lifts my mood. I first discovered this recipe during a rainy spring weekend when I needed something sunny to brighten the day. The contrast between the gooey lemon filling and the crisp, golden topping creates a texture paradise that’s impossible to resist. If you love desserts that combine simplicity with big flavor, this lemon cobbler will quickly become your new favorite.

    Recipe

    Why You’ll Love This Lemon Cobbler Dessert

    Perfect Balance of Sweet and Tart

    This lemon cobbler dessert strikes that magical balance that makes your taste buds dance. The filling has just enough tartness to wake up your senses without making you pucker, while the cobbler topping provides the perfect sweet counterpoint. I’ve found that using fresh lemon juice makes all the difference here – it creates a bright, authentic flavor that bottled juice simply can’t match. My neighbor actually knocked on my door the first time I made this, drawn by the irresistible aroma wafting through our shared wall. The vibrant yellow color alone is enough to lift your spirits!

    Simple Ingredients, Spectacular Results

    What I adore about this lemon cobbler dessert is how it transforms basic pantry staples into something extraordinary. You’ll need lemons, sugar, flour, butter, and a few other basics – nothing fancy or hard to find. Yet somehow, these humble ingredients come together to create something that tastes like it came from a high-end bakery. The caramelized edges where the butter meets the sugar create these delightful crispy bits that everyone fights over. I’ve made this for last-minute dinner guests and they always ask for the recipe, amazed that something so delicious could be so straightforward.

    Essential Tips & Tricks

    Getting the Perfect Consistency

    The secret to an amazing lemon cobbler dessert lies in achieving that perfect consistency where the filling is thick enough to coat a spoon but not so thick it becomes gummy. I recommend whisking constantly while preparing the lemon mixture to prevent any lumps from forming. Temperature matters too – don’t rush the process by cranking up the heat, as this can cause curdling. My first attempt resulted in a grainy texture because I got impatient! For the cobbler topping, avoid overmixing once you add the flour. A few gentle folds until just combined will give you that tender, biscuit-like texture that makes cobbler so special.

    Lemon Selection and Preparation

    Choose lemons that feel heavy for their size and have a bright, vibrant skin – these will yield the most juice and flavor. Before zesting, give them a good wash with warm water and dry thoroughly. I like to roll each lemon firmly against the counter with my palm before cutting, which helps release more juice. When zesting, only take the yellow outer layer, avoiding the bitter white pith beneath. A microplane zester works beautifully for this task. For maximum flavor impact, don’t prepare the lemon juice too far in advance as it can lose some of its brightness. I learned this the hard way after prepping everything the night before – fresh is definitely best!

    Serving Ideas & Creative Variations

    Perfect Pairings for Every Season

    This lemon cobbler dessert shines in any season with the right accompaniments. In summer, I love serving it slightly warm with a scoop of vanilla bean ice cream that slowly melts into the crevices. For fall gatherings, try adding a sprinkle of cinnamon to the topping and serving with spiced whipped cream. Winter calls for a side of warm custard sauce, while spring feels perfect with fresh berries scattered on top. The versatility is what makes this cobbler so special. Last Easter, I served it with edible flowers pressed into the whipped cream topping, and my family still talks about how beautiful it looked on our holiday table.

    Creative Flavor Twists

    While the classic lemon version is divine, this cobbler welcomes creative variations. Try adding fresh blueberries to the filling for a beautiful color contrast and complementary flavor. For a sophisticated twist, mix in a tablespoon of lavender buds or rosemary into the sugar before making the topping. Coconut lovers can substitute some of the regular flour with coconut flour and add toasted coconut flakes on top. My personal favorite variation includes a splash of limoncello in the filling and thinly sliced candied lemon rounds as garnish. Each variation maintains the dessert’s bright character while offering something new to discover.

    Storage & Troubleshooting Guide

    Keeping It Fresh

    This lemon cobbler dessert stays delicious for up to 3 days when stored properly. Allow it to cool completely before covering with plastic wrap or transferring to an airtight container. I recommend refrigerating leftovers rather than leaving them at room temperature, especially in warmer months. The cobbler topping may lose some crispness in the refrigerator, but a quick 10-minute stint in a 300°F oven will revive it beautifully. For longer storage, you can freeze individual portions for up to 2 months. I like to use small foil containers so I can easily reheat a single serving whenever a lemon craving strikes!

    Fixing Common Issues

    If your lemon filling seems too runny, a simple fix is mixing 1 tablespoon of cornstarch with 1 tablespoon cold water and stirring this slurry into the warm filling. For filling that’s too thick, add a splash of water or lemon juice. Should your topping come out dense rather than fluffy, you likely overmixed the batter – remember to fold gently just until ingredients are combined. If the top browns too quickly before the filling bubbles, simply place a piece of foil loosely over the cobbler. My first attempt had a slightly bitter aftertaste because I included too much lemon pith – stick to just the yellow zest for perfect results.

    Frequently Asked Questions

    Can I make this lemon cobbler dessert ahead of time?

    Yes! Prepare it up to 24 hours ahead and refrigerate unbaked. Allow it to come to room temperature for 30 minutes before baking for best results. The fresh lemon flavor is most vibrant when baked the same day.

    Is it possible to make this cobbler gluten-free?

    Absolutely. Substitute the all-purpose flour with a 1:1 gluten-free flour blend. I’ve tested this with both Bob’s Red Mill and King Arthur’s versions with excellent results.

    How do I know when the cobbler is done baking?

    Look for a golden brown topping and bubbling around the edges. Insert a toothpick into the cake portion – it should come out clean, while the filling remains slightly gooey.

    Can I use Meyer lemons instead of regular lemons?

    Meyer lemons work beautifully, creating a sweeter, more floral flavor profile. Reduce the sugar by 2 tablespoons since Meyer lemons are naturally less tart than regular lemons.

    Why did my cobbler topping sink into the filling?

    This happens when the filling is too hot when the topping is added. Let your lemon mixture cool for 5-10 minutes before adding the topping to prevent sinking.

    Final Thoughts

    This lemon cobbler dessert has become my go-to recipe whenever I need something that feels special yet comes together with minimal fuss. There’s something magical about how it fills your home with sunshine, regardless of the weather outside. I find myself making it not just for guests but as a treat for myself on ordinary Tuesdays when life needs a little brightening. The way the tangy lemon filling plays against the sweet, tender topping creates a dessert experience that’s both comforting and exciting. Don’t forget to share your creations on Pinterest – I’d love to see your take on this citrus delight!

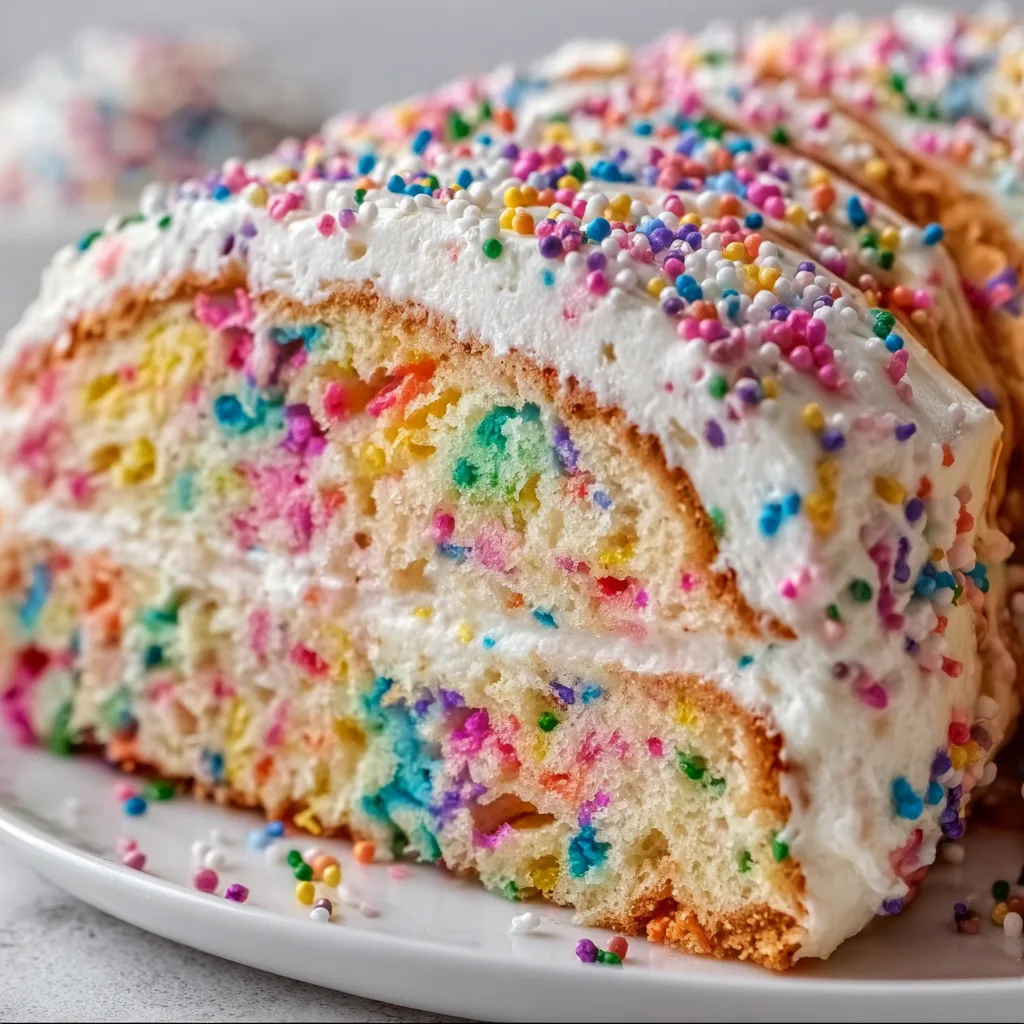
  • Chaos Style Confetti Birthday Cake: Irresistibly Fun & Flavorful!

    Chaos Style Confetti Birthday Cake: Irresistibly Fun & Flavorful!

    Chaos Style Confetti Birthday Cake: Irresistibly Fun & Flavorful!

    The Chaos Style Confetti Birthday Cake brings pure joy to any celebration with its vibrant colors and deliciously messy aesthetic. Unlike perfectly polished bakery cakes, this homemade treasure embraces beautiful imperfection with rainbow sprinkles, colorful cake layers, and creamy frosting that doesn’t need to be Instagram-perfect. I created this recipe after my daughter requested something “super colorful and fun” for her 8th birthday. The beauty is in its approachable nature – anyone can make this showstopper, even if you’ve never decorated a cake before! Let’s dive into this celebration in cake form.

    Recipe

    Why You’ll Love This Chaos Style Confetti Birthday Cake

    A Stress-Free Celebration Centerpiece

    This cake is the ultimate stress-reliever for home bakers. The “chaos style” approach means imperfections aren’t just accepted—they’re celebrated! Those uneven frosting swirls? Intentional artistic expression. Sprinkles cascading down the sides? That’s the signature look we’re going for! I’ve watched even my most anxious friends relax while decorating because there’s no pressure to achieve perfection. The vibrant colors and playful decoration style instantly create a festive atmosphere that screams “let’s celebrate!” without requiring professional decorating skills.

    Customizable for Any Celebration

    While it’s called a birthday cake, this Chaos Style Confetti creation adapts beautifully to any occasion. Change the color palette to match your theme—pastels for baby showers, team colors for graduations, or metallic sprinkles for New Year’s celebrations. The base recipe remains the same, but the personality shifts with your color choices. I’ve made a Halloween version with orange, purple, and black, and a Christmas edition with red, green, and gold that were both massive hits. The joy is in making it your own!

    Essential Tips & Tricks

    Mastering the Colorful Cake Layers

    The secret to perfect confetti cake layers lies in the color distribution. Rather than just adding sprinkles to vanilla batter, divide your batter into 3-4 portions and color each differently. Fold in complementary sprinkles to each colored batter for maximum visual impact. Be careful not to overmix once you’ve added food coloring—just 10-15 gentle folds will do. I learned this the hard way when I once overbeat the batter and ended up with a dense, tough cake. For the brightest colors, use gel food coloring instead of liquid drops for vibrant hues that won’t affect the batter consistency.

    Frosting Success Strategies

    The signature look of this Chaos Style Confetti Birthday Cake comes from its gloriously imperfect frosting application. Start with a thin crumb coat and chill for 20 minutes before adding the final layer. This prevents those pesky cake crumbs from showing through your colorful frosting. For the chaotic-yet-controlled look, use different colored frostings in various sections of the cake—no need to blend them perfectly! I recommend the Italian herbs and cheese bread as a savory palate cleanser to serve alongside this sweet treat at your party.

    Serving Ideas & Creative Variations

    Interactive Serving Suggestions

    Make your Chaos Style Confetti Birthday Cake the centerpiece of an interactive dessert station! Serve slices alongside mix-and-match toppings like extra sprinkles, chocolate sauce, fresh berries, and whipped cream. This creates a personalized experience where guests can add their own chaotic finishing touches. I’ve found that setting up a “sprinkle station” with different colored sprinkles in small bowls lets everyone add their own flair. This approach works beautifully for kids’ parties but is equally popular with adults who secretly love playing with their food too!

    Unexpected Flavor Combinations

    While the classic vanilla confetti cake brings nostalgic joy, don’t be afraid to experiment with flavor twists! Try a chocolate-confetti marble base, lemon-infused layers, or even a subtle almond extract addition to elevate the flavor profile. My personal favorite variation includes layers of strawberry freezer jam between the cake layers for a fruity surprise that cuts through the sweetness. The beauty of the chaos style is that it welcomes experimentation—both visually and in flavor combinations.

    Storage & Troubleshooting Guide

    Keeping Your Cake Fresh

    Store your Chaos Style Confetti Birthday Cake properly to maintain its moist texture and vibrant appearance. For short-term storage (1-2 days), keep it at room temperature under a cake dome or inverted bowl to prevent it from drying out. For longer storage, wrap individual slices in plastic wrap and refrigerate for up to 5 days. The cold fridge can slightly firm up the texture, so I always recommend letting refrigerated slices sit at room temperature for 20 minutes before serving to restore that perfect cake consistency.

    Rescuing Common Cake Emergencies

    Even the most chaotic cake can sometimes need a little rescue! If your cake layers crack, embrace it as part of the chaos or use extra frosting as “glue” to hold pieces together. For frosting fixes, keep a cup of hot water nearby—dipping your spatula in hot water helps smooth stubborn frosting areas. If your sprinkles are bleeding color into white frosting, don’t panic! Simply call it a “watercolor effect” and pretend it was intentional. I once dropped an entire corner of my cake and rebuilt it with frosting—no one ever knew!

    Frequently Asked Questions

    What makes a Chaos Style Confetti Birthday Cake different from regular confetti cake?

    The Chaos Style embraces imperfection with deliberately uneven frosting, abundant sprinkles, and multiple colors. It’s about fun over precision, making it perfect for beginners and experienced bakers who want to relax and enjoy the process.

    Can I make this cake in advance?

    Absolutely! Bake layers up to 3 days ahead and store wrapped in plastic at room temperature. Frost 1 day before serving for best results. The completed cake stays fresh at room temperature for 2 days.

    Are there any shortcuts for busy bakers?

    Yes! Use quality boxed cake mix as your base, then add extra vanilla and fold in premium sprinkles. Store-bought frosting can be divided and colored for the same chaotic effect.

    What sprinkles work best for this recipe?

    Jimmies (the long thin sprinkles) work best as they don’t bleed much into batter. Avoid nonpareils (tiny balls) in the batter as they tend to dissolve and bleed color.

    How do I transport my Chaos Style Confetti Birthday Cake safely?

    Chill the frosted cake for 1 hour before transport to firm up the frosting. Use a cake carrier with a locking lid, and place a non-slip mat underneath to prevent sliding.

    Final Thoughts

    The Chaos Style Confetti Birthday Cake represents everything I love about home baking—it’s joyful, approachable, and celebrates imperfection. There’s something magical about watching people’s faces light up when they see those vibrant colors and playful decorations. The best compliment I’ve received wasn’t about how professional it looked, but how much fun it was to eat! I hope this cake brings the same chaotic happiness to your celebrations. Don’t forget to share your creations on Pinterest to inspire others with your unique take on this festive masterpiece!

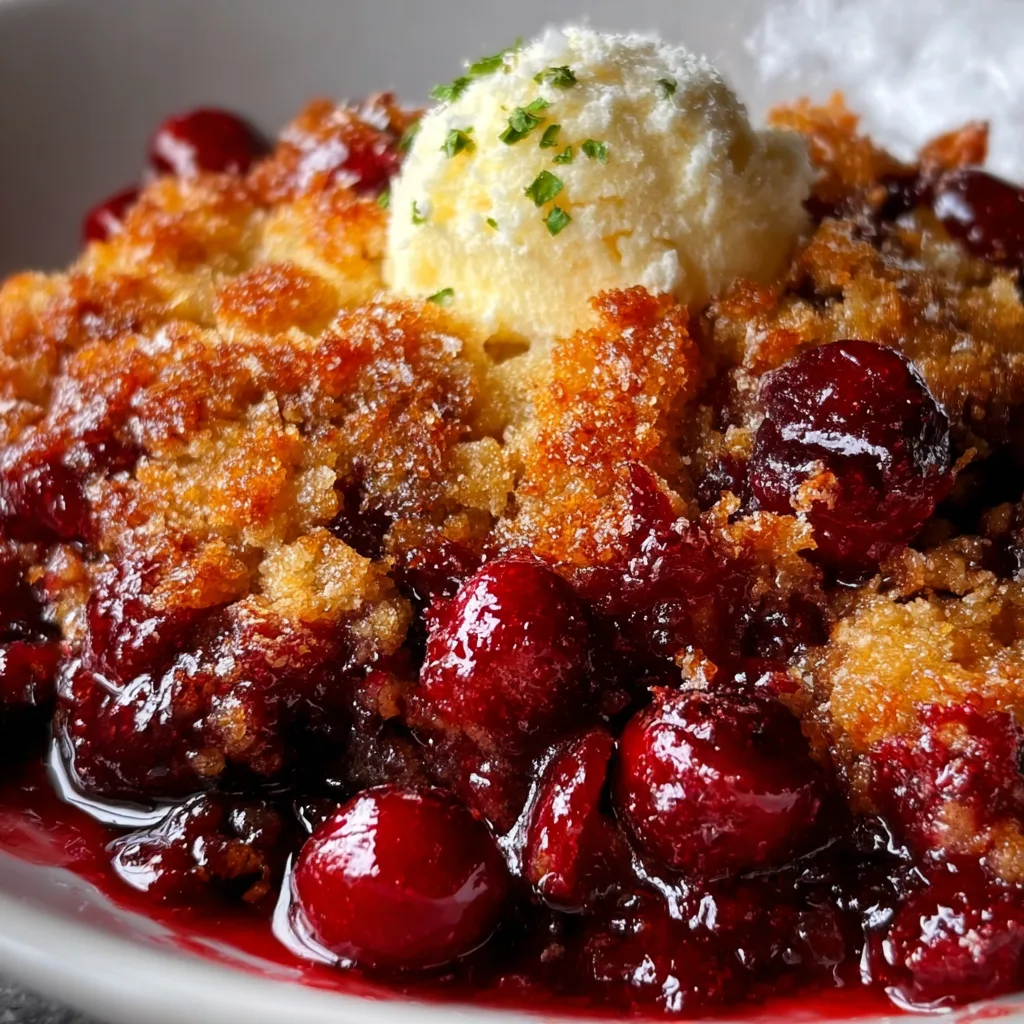
  • Crispy Cranberry Cobbler: Irresistibly Sweet & Perfectly Crunchy!

    Crispy Cranberry Cobbler: Irresistibly Sweet & Perfectly Crunchy!

    Crispy Cranberry Cobbler: Irresistibly Sweet & Perfectly Crunchy!

    Crispy Cranberry Cobbler has become my ultimate holiday comfort dessert. The contrast between the tart cranberries and sweet, buttery topping creates pure magic in every bite. I discovered this recipe during a snowy weekend at my grandmother’s cabin, where we baked it in her cast-iron skillet while sharing stories by the fireplace. The bubbling crimson filling and golden-brown crust made the entire cabin smell like heaven. If you love desserts that balance sweet and tart perfectly, you’ll adore this cobbler that’s both rustic and elegant enough for any gathering. Check out my strawberry dump cake for another fruity treat!

    Recipe

    Why You’ll Love This Crispy Cranberry Cobbler

    Perfect Balance of Flavors

    The magic of this Crispy Cranberry Cobbler lies in its perfect flavor harmony. Fresh cranberries bring a bright, tangy punch that cuts through the sweetness of the buttery topping. I’ve carefully balanced the sugar to let the cranberries’ natural tartness shine without overwhelming your taste buds. The hints of orange zest and vanilla extract add warmth and complexity that make this dessert truly special. When the juices bubble up through the crispy topping, they create these incredible pockets of jammy goodness that will have everyone scraping their plates for the last bite.

    Simple Yet Impressive

    Don’t let its gorgeous appearance fool you—this Crispy Cranberry Cobbler is surprisingly easy to prepare. The filling requires just a handful of ingredients that you simply toss together. The topping comes together in minutes with pantry staples like flour, sugar, and butter. I love how this dessert looks rustic yet elegant when it emerges from the oven with that golden, crackly crust. It’s my go-to when I need to impress guests but don’t have hours to spend in the kitchen. The hands-on time is minimal, but the “oohs” and “aahs” when you serve it are guaranteed!

    Essential Tips & Tricks

    Perfecting the Filling

    For the absolute best Crispy Cranberry Cobbler, use fresh cranberries whenever possible. They maintain their shape better and provide that signature pop of tartness. In a pinch, frozen works too—just don’t thaw them first! Add them straight from the freezer to prevent excess moisture. I like to mix in a handful of diced apples or pears for textural contrast and natural sweetness. The secret to balancing the tartness is a touch of orange zest and a splash of vanilla. These aromatic additions transform the filling from simply tart to wonderfully complex without masking the cranberry’s natural brightness.

    Creating That Perfect Crispy Top

    The key to achieving that irresistible crispy topping is cold butter and proper baking technique. Cut your butter into small cubes and keep it refrigerated until the last possible moment. Work it into the dry ingredients using your fingertips until you have pea-sized crumbles—don’t overmix! For extra crunch, try adding a handful of chopped pecans or a sprinkle of turbinado sugar before baking. I’ve found that baking at a slightly higher temperature (375°F) for the first 15 minutes creates that beautiful golden crust, then reducing to 350°F allows the filling to bubble without burning the top. Check out my blueberry bread pudding for another dessert with perfect texture contrast!

    Serving Ideas & Creative Variations

    Perfect Pairings

    Serve your Crispy Cranberry Cobbler warm from the oven for the ultimate comfort experience. A scoop of vanilla ice cream melting into the hot cobbler creates a heavenly temperature contrast that’s simply irresistible. For a more sophisticated touch, try serving it with a dollop of lightly sweetened mascarpone or crème fraîche. During holiday gatherings, I love to pair this with a mug of spiced cider or a glass of dessert wine. The cobbler also makes a delightful breakfast treat when topped with a spoonful of Greek yogurt—I won’t tell if you don’t!

    Seasonal Adaptations

    While classic Crispy Cranberry Cobbler shines during fall and winter, you can adapt this recipe year-round with seasonal fruits. In summer, try substituting half the cranberries with fresh raspberries or blackberries for a brighter flavor profile. For a cozy autumn variation, mix in diced pears and a sprinkle of crystallized ginger. Winter calls for adding warming spices like cinnamon, nutmeg, and cloves to the filling. You can even transform it into a spring dessert by combining cranberries with strawberries and a hint of lemon zest. Check out my cherry cranberry energy bites for another versatile cranberry treat!

    Storage & Troubleshooting Guide

    Keeping It Fresh

    Your Crispy Cranberry Cobbler will stay delicious for 3-4 days when properly stored. Once completely cooled, cover it loosely with foil rather than plastic wrap to preserve the topping’s crispness. If refrigerating, bring it to room temperature before serving, or warm individual portions in the microwave for 20-30 seconds. For longer storage, this cobbler freezes beautifully—portion it into airtight containers and freeze for up to 3 months. The texture of the topping may change slightly after freezing, but a few minutes in a 350°F oven will restore its crispness.

    Troubleshooting Common Issues

    If your Crispy Cranberry Cobbler filling is too runny, try adding an extra tablespoon of cornstarch to the fruit mixture next time. For overly tart results, increase the sugar by 2-3 tablespoons or add a tablespoon of honey to mellow the acidity. If your topping isn’t crisping up, check your oven temperature with an oven thermometer—it might be running cool. Alternatively, try moving the cobbler to a higher rack for the last 10 minutes of baking. For a soggy bottom crust, pre-bake the fruit filling for 10 minutes before adding the topping, which gives excess moisture a chance to evaporate.

    Frequently Asked Questions

    Can I make Crispy Cranberry Cobbler ahead of time?

    Yes! Prepare the filling and topping separately up to 2 days ahead. Store them in the refrigerator, then assemble and bake just before serving for the crispiest results.

    How do I know when my cobbler is done baking?

    Look for a golden-brown topping and bubbling fruit around the edges. The filling should be thick and jammy, not watery, which typically takes 45-50 minutes.

    Can I use dried cranberries instead of fresh?

    While fresh cranberries are ideal for Crispy Cranberry Cobbler, you can use dried in a pinch. Rehydrate them by simmering in water or juice for 15 minutes, then drain before using.

    What’s the difference between a cobbler and a crisp?

    Cobblers have a biscuit-like or cake-like topping, while crisps feature a streusel topping with oats. This recipe creates a hybrid with the best qualities of both!

    Is this recipe gluten-free?

    The standard Crispy Cranberry Cobbler contains wheat flour, but you can easily substitute a 1:1 gluten-free flour blend in the topping for a gluten-free version.

    Final Thoughts

    This Crispy Cranberry Cobbler has become more than just a dessert in my kitchen—it’s a tradition that marks the changing seasons and brings comfort to any table. The contrast between the tart cranberries and sweet, buttery topping creates a dessert that feels both nostalgic and exciting. I hope you’ll make this recipe your own, perhaps adding your family’s favorite spices or serving it in a way that becomes your signature. The beauty of this cobbler is in its simplicity and adaptability. Find more inspiration for seasonal treats on my Pinterest!

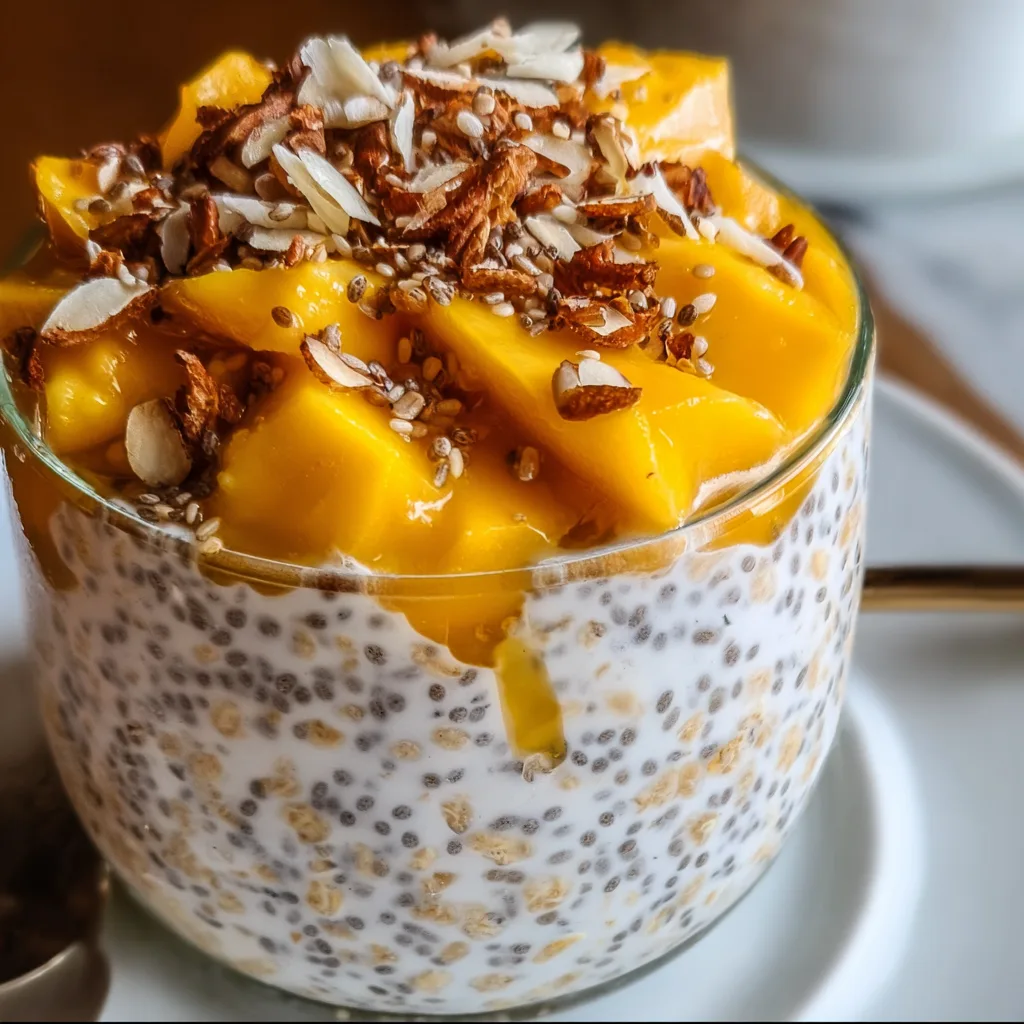
  • Mango Chia Overnight Oats: Easy, Delicious & Energizing Breakfast!

    Mango Chia Overnight Oats: Easy, Delicious & Energizing Breakfast!

    Mango Chia Overnight Oats: Easy, Delicious & Energizing Breakfast!

    Mango Chia Overnight Oats have become my morning salvation during busy weeks when hitting snooze feels more appealing than making breakfast. There’s something magical about opening the fridge to find these creamy, tropical jars waiting – sweet mango chunks nestled between layers of vanilla-scented oats and chia pudding. The first time I made these, I was rushing to catch an early flight and nearly wept with joy the next morning when breakfast was already handled. Trust me, these make-ahead breakfasts deliver both convenience and a burst of sunshine flavor that’ll make you actually look forward to mornings.

    Recipe

    Why You’ll Love This Mango Chia Overnight Oats

    Perfect Balance of Nutrition and Flavor

    These Mango Chia Overnight Oats aren’t just delicious – they’re practically a nutritional powerhouse in a jar. The chia seeds expand overnight, creating that pudding-like consistency while delivering omega-3s and fiber that keep you satisfied until lunch. The natural sweetness from ripe mangoes eliminates the need for added sugars, making this a breakfast that both satisfies your sweet tooth and nourishes your body. I’ve found that the combination of protein from Greek yogurt, complex carbs from oats, and healthy fats from chia creates the perfect morning energy balance.

    Customizable for Every Preference

    What I adore most about Mango Chia Overnight Oats is how endlessly adaptable they are to your personal taste. The base recipe works beautifully as written, but feel free to adjust the sweetness, creaminess, or texture to your liking. Prefer a thicker consistency? Add more chia. Want it creamier? Increase the yogurt ratio. You can use fresh or frozen mango depending on the season, and even substitute with other tropical fruits like pineapple or papaya. I’ve made these with coconut milk for a dairy-free version that tastes like a tropical vacation in a jar!

    Essential Tips & Tricks

    Getting the Perfect Texture

    The secret to silky-smooth Mango Chia Overnight Oats lies in the ratio of liquid to dry ingredients. I’ve found that 1:1 works perfectly – for every half cup of oats, use half a cup of milk. Let the mixture rest for about 10 minutes after initial stirring, then give it another quick stir before refrigerating to prevent clumping. For the creamiest texture, use rolled oats rather than steel-cut or instant. If you prefer a pudding-like consistency, increase the chia seeds slightly. I once accidentally added too much milk and ended up with breakfast soup – still tasty, but definitely not the texture I was aiming for!

    Selecting and Preparing the Mango

    The ripeness of your mango makes all the difference in these overnight oats. Look for mangoes that yield slightly to gentle pressure and smell sweet at the stem end. To prep, stand the mango on its end and slice down along each side of the flat pit. Score the flesh in a grid pattern without cutting through the skin, then invert and slice off the cubes. For convenience, frozen mango chunks work beautifully too – just thaw them slightly before adding. I like to reserve some fresh mango cubes for topping just before serving for that perfect contrast of textures.

    Serving Ideas & Creative Variations

    Tropical Paradise Toppings

    Elevate your Mango Chia Overnight Oats with tropical toppings that transform a simple breakfast into something special. Toasted coconut flakes add wonderful crunch, while a sprinkle of macadamia nuts brings richness. For extra tropical vibes, add fresh pineapple chunks or kiwi slices alongside your mango. A drizzle of honey or maple syrup works beautifully if you prefer additional sweetness. My personal favorite is adding a dollop of coconut whipped cream on special mornings – it makes breakfast feel like dessert while still being nutritious!

    Seasonal Adaptations

    While mango is the star of this breakfast, don’t hesitate to create seasonal variations throughout the year. In summer, fresh berries or peaches make wonderful alternatives or additions to the mango. Fall calls for diced apples with cinnamon and a touch of maple syrup. Winter? Try adding blood orange segments and a hint of cardamom. Spring brings strawberries and rhubarb compote possibilities. The base of oats and chia remains consistent while the fruits and spices can change with what’s available. This flexibility means you’ll never tire of your overnight oats routine!

    Storage & Troubleshooting Guide

    Meal Prep and Storage Solutions

    Mango Chia Overnight Oats are the ultimate meal prep champion, easily lasting 3-4 days in the refrigerator. I prefer storing them in individual mason jars or glass containers with tight-fitting lids to maintain freshness. For the best texture, layer the ingredients rather than mixing everything together – oat mixture on the bottom, chia pudding in the middle, and fresh mango on top. If meal prepping for several days, consider adding the fresh mango the night before eating rather than all at once. This prevents the fruit from becoming soggy while ensuring your breakfast remains vibrant and fresh-tasting.

    Fixing Common Issues

    Even the most experienced overnight oats makers encounter occasional texture problems. If your oats turn out too thick, simply stir in a splash of milk before eating. Too runny? Add a teaspoon of additional chia seeds, stir, and let sit for 10 minutes. If your mangoes weren’t sweet enough, a drizzle of honey or maple syrup easily fixes the flavor. For grainy chia texture, try soaking the chia seeds separately in milk for 10 minutes before adding to the oat mixture. And if you forget to make your oats overnight, a quick 30-minute refrigeration will give you a decent result in a pinch!

    Frequently Asked Questions

    Can I make Mango Chia Overnight Oats without dairy?

    Absolutely! Substitute the milk with almond, coconut, or oat milk, and use dairy-free yogurt. Coconut milk creates an especially tropical flavor that complements the mango beautifully.

    How long do Mango Chia Overnight Oats stay fresh?

    They’ll keep well in the refrigerator for 3-4 days in airtight containers. The texture may thicken slightly over time, so you might want to add a splash of milk before eating.

    Can I warm up my overnight oats?

    Yes! While traditionally served cold, Mango Chia Overnight Oats can be gently warmed in the microwave for 30-45 seconds. Just add the fresh mango after heating.

    Is there a way to make these higher in protein?

    Easily boost protein by stirring in a scoop of vanilla protein powder, increasing the Greek yogurt portion, or topping with a tablespoon of hemp seeds.

    Can I use frozen mango in my overnight oats?

    Frozen mango works perfectly in Mango Chia Overnight Oats! Either thaw completely and drain excess liquid, or add frozen chunks directly – they’ll thaw overnight and release juices into the oats.

    Final Thoughts

    Mango Chia Overnight Oats have transformed my mornings from rushed and stressful to peaceful and nourishing. There’s something deeply satisfying about opening the fridge to find breakfast already prepared – especially one this delicious and nutritious. The tropical sweetness of mango paired with the creamy, pudding-like texture creates a breakfast worth getting out of bed for. Whether you’re a busy parent, working professional, or simply someone who appreciates good food with minimal effort, these overnight oats deserve a permanent spot in your breakfast rotation. Find more breakfast inspiration on Pinterest!

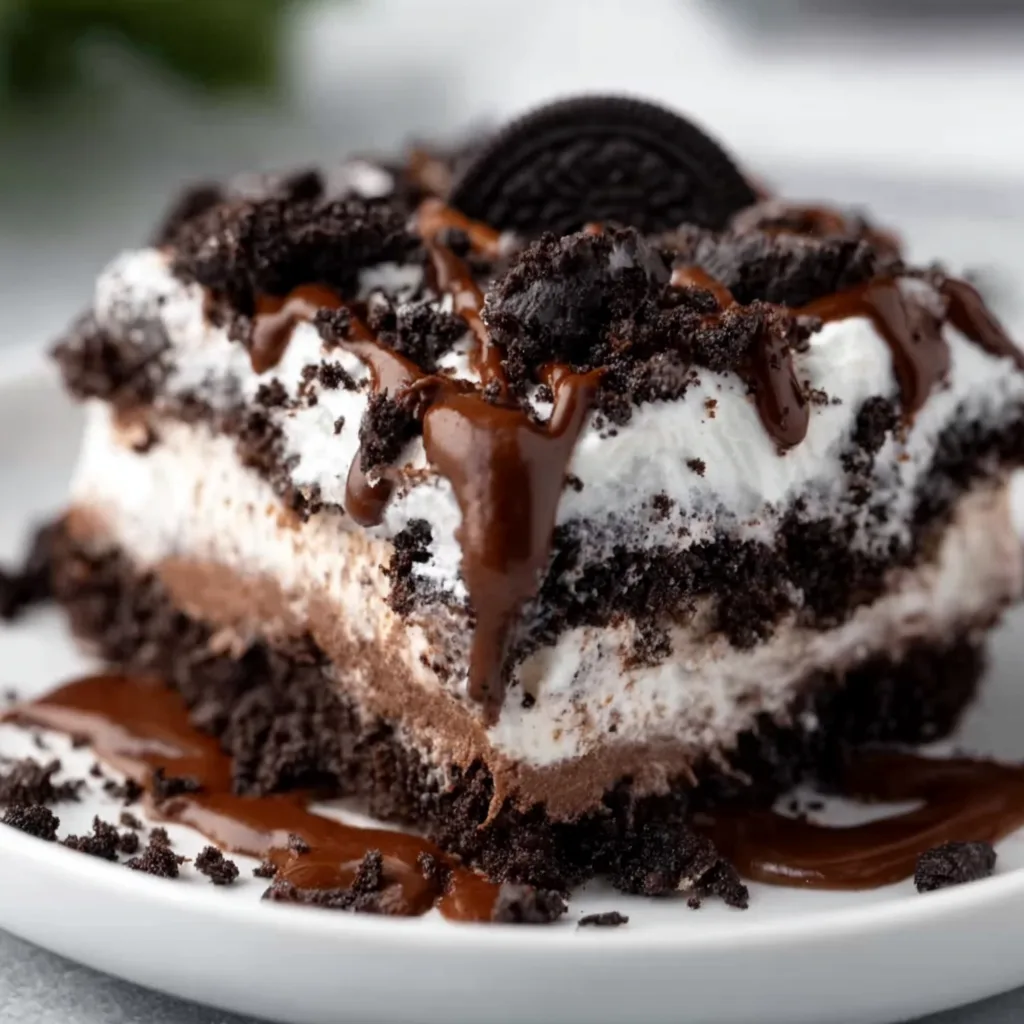
  • No Bake Oreo Chocolate Lasagna – Irresistibly Easy & Delicious!

    No Bake Oreo Chocolate Lasagna – Irresistibly Easy & Delicious!

    No Bake Oreo Chocolate Lasagna – Irresistibly Easy & Delicious!

    No Bake Oreo Chocolate Lasagna is the dreamy, creamy dessert that’s been stealing hearts at my family gatherings for years. The first time I served this layered masterpiece, my nephew’s eyes grew wide as saucers when he spotted those distinct cookie layers peeking through the velvety cream cheese filling. There’s something magical about the contrast between the crunchy Oreo base and the silky chocolate pudding that makes this dessert irresistible. Perfect for potlucks or special occasions, this no-bake wonder comes together in minutes but disappears even faster!

    Recipe

    Why You’ll Love This No Bake Oreo Chocolate Lasagna

    A Crowd-Pleasing Dessert That’s Actually Simple

    The beauty of this No Bake Oreo Chocolate Lasagna lies in its impressive appearance despite requiring minimal effort. I once prepared this for a last-minute dinner party, and guests assumed I’d spent hours in the kitchen! The layered presentation creates that wow factor while the familiar Oreo flavor appeals to everyone from picky toddlers to discerning dessert connoisseurs. The no-bake aspect means your kitchen stays cool in summer, and you avoid the stress of precise baking times. Just layer, chill, and prepare for the compliments to roll in when you slice into those beautiful strata of cookies and cream goodness.

    Perfect Make-Ahead Dessert for Any Occasion

    This dessert actually improves with time as the flavors meld together in the refrigerator. I often prepare my No Bake Oreo Chocolate Lasagna the evening before a gathering, which not only saves precious day-of preparation time but results in a more developed flavor profile. The cookies soften slightly, absorbing the creamy elements while still maintaining enough texture to create that satisfying contrast. This make-ahead quality makes it perfect for busy holidays, summer picnics, or anytime you need a reliable dessert that won’t have you scrambling at the last minute. Trust me—this is the stress-free showstopper you’ve been looking for!

    Essential Tips & Tricks

    Mastering the Perfect Oreo Base

    Creating the ideal foundation for your No Bake Oreo Chocolate Lasagna starts with properly crushed cookies. I learned the hard way that hand-crushing leads to inconsistent pieces! Use a food processor for uniform crumbs that will hold together beautifully when mixed with melted butter. The butter should be completely melted but not hot—this ensures even distribution without melting the chocolate bits in the cookies. Press the mixture firmly into your pan using the bottom of a measuring cup for a compact base that won’t crumble when sliced. This attention to detail makes the difference between a messy dessert and picture-perfect slices that hold their shape.

    Achieving Silky-Smooth Layers Without Lumps

    Nothing ruins a beautiful No Bake Oreo Chocolate Lasagna faster than lumpy cream cheese layers! Always start with room temperature cream cheese—I take mine out at least an hour before mixing. Beat it alone first until completely smooth before adding other ingredients. For the pudding layer, whisk the milk and pudding mix vigorously for a full two minutes (I actually time this!) before it starts to thicken. If you’re adding whipped topping, fold it in gently rather than stirring to maintain the air bubbles that create that light, mousse-like texture. These simple techniques ensure each layer maintains its distinct character while blending harmoniously in the finished dessert.

    Serving Ideas & Creative Variations

    Seasonal Twists on the Classic Recipe

    The versatility of No Bake Oreo Chocolate Lasagna makes it perfect for customizing throughout the year. During winter holidays, I add a drop of peppermint extract and crushed candy canes on top for a festive touch. Summer gatherings call for fresh berries scattered between layers—the tartness cuts through the richness beautifully. Fall? Try pumpkin pudding instead of chocolate and cinnamon Oreos for the crust. Spring celebrations shine with pastel-colored white chocolate drizzles and edible flower decorations. Each variation maintains the beloved texture contrast while offering seasonal flavors that keep this dessert feeling fresh and exciting no matter how many times you serve it.

    Elegant Presentation Techniques for Special Occasions

    Transform your No Bake Oreo Chocolate Lasagna from casual treat to elegant finale with thoughtful presentation. For dinner parties, I portion individual servings in clear glass trifle cups to showcase the beautiful layers—this always earns gasps of delight! Garnish with chocolate curls made by dragging a vegetable peeler across a chocolate bar for an upscale touch. For a more dramatic presentation, prepare the dessert in a springform pan, then release and dust with cocoa powder through a doily for an intricate pattern. Add gold leaf for truly special occasions, or create a chocolate collar around the edges using acetate sheets and melted chocolate. These simple techniques elevate this beloved dessert to restaurant-quality status.

    Storage & Troubleshooting Guide

    Keeping Your Dessert Fresh and Beautiful

    Proper storage is crucial for maintaining the texture and flavor of your No Bake Oreo Chocolate Lasagna. Always cover tightly with plastic wrap, pressing it gently against the surface to prevent a skin from forming on the top layer. This dessert stays perfectly fresh for up to 3 days in the refrigerator—though I’ve rarely seen it last that long in my house! For the best presentation, wait to add any decorative toppings like chocolate shavings or fresh fruit until just before serving. If you notice the whipped topping starting to weep slightly after day two, a quick dusting of cocoa powder or crushed Oreos refreshes the appearance instantly without affecting the delicious taste.

    Solving Common Assembly Challenges

    Even experienced cooks occasionally encounter issues with layered desserts. If your crust crumbles when serving, it likely needs more butter or firmer packing—next time, use a flat-bottomed glass to really compress the base. Runny pudding layers usually indicate insufficient chilling time between steps; I always allow 30 minutes minimum refrigeration after each layer. If cream cheese clumps appear, your ingredients weren’t at room temperature—a quick fix is to warm the mixture in 5-second microwave bursts, beating between each until smooth. For clean slices that showcase every beautiful layer, dip your knife in hot water and wipe clean between cuts. These simple solutions ensure picture-perfect results every time.

    Frequently Asked Questions

    Can I make No Bake Oreo Chocolate Lasagna ahead of time?

    Absolutely! This dessert actually improves when made 12-24 hours ahead. The flavors meld beautifully and the textures soften slightly while still maintaining their distinct layers. Just cover tightly and refrigerate.

    What can I substitute for whipped topping?

    Freshly whipped heavy cream works perfectly. Beat 2 cups of cold heavy cream with 3 tablespoons of powdered sugar and 1 teaspoon vanilla until stiff peaks form. Fold gently into your layers as directed.

    Can I freeze No Bake Oreo Chocolate Lasagna?

    Yes, but with caution. Freeze for up to 2 weeks, tightly wrapped. Thaw overnight in the refrigerator. The texture may change slightly, with the cream layers becoming a bit less fluffy.

    How do I prevent my crust from getting soggy?

    Create a barrier by brushing melted chocolate over your pressed Oreo crust. Let it harden completely in the refrigerator before adding the cream cheese layer. This seals the crust beautifully.

    Can I use different flavors of Oreos?

    Definitely! Golden Oreos create a lovely vanilla base, while mint or peanut butter varieties add exciting flavor twists. Just keep the total amount of cookies consistent with the original recipe.

    Final Thoughts

    This No Bake Oreo Chocolate Lasagna has become my signature dessert for good reason—it strikes that perfect balance between impressive and achievable. The joy on people’s faces when they take that first bite of creamy, chocolatey goodness makes every simple step worthwhile. I love how it brings together classic flavors in a modern, layered presentation that feels special without being fussy. Whether you’re a seasoned baker or kitchen novice, this dessert delivers reliable wow-factor every time. Find more of my favorite dessert creations on Pinterest and keep creating sweet memories!

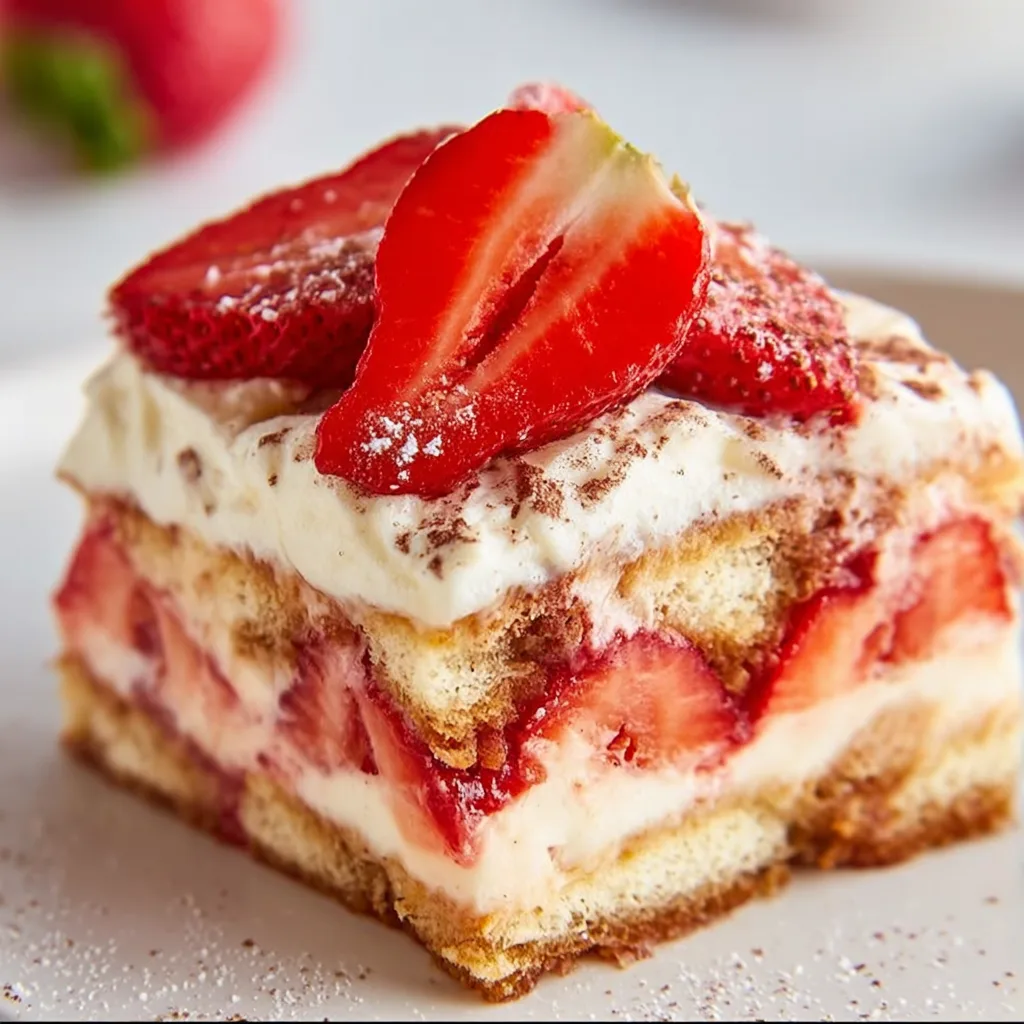
  • No-Bake Layered Strawberry Tiramisu That Will Steal Hearts!

    No-Bake Layered Strawberry Tiramisu That Will Steal Hearts!

    No-Bake Layered Strawberry Tiramisu That Will Steal Hearts!

    This No-Bake Layered Strawberry Tiramisu is a dream come true for anyone who loves the classic Italian dessert but craves a fruity twist! The first time I made this for my family, the layers of juicy strawberries, mascarpone cream, and delicate ladyfingers disappeared before I could even snap a photo. There’s something magical about the way the bright berry flavor mingles with the rich creaminess – it’s like summer and comfort had a beautiful dessert baby. Trust me, this no-fuss recipe will become your go-to impressive dessert that nobody will believe took you just minutes to assemble!

    Recipe

    Why You’ll Love This No-Bake Layered Strawberry Tiramisu

    Perfect for Any Occasion

    This No-Bake Layered Strawberry Tiramisu is the ultimate crowd-pleaser that works for literally everything. I’ve served it at baby showers, summer dinner parties, and even as a “just because it’s Tuesday” treat! The pretty pink layers create an impressive presentation without any complicated techniques. What I adore most is how it bridges seasons – it’s refreshing enough for summer gatherings but comforting enough for holiday tables. Plus, since there’s no baking involved, you won’t heat up your kitchen when temperatures soar.

    Quick and Simple Preparation

    One of the biggest selling points of this strawberry tiramisu is how ridiculously easy it is to put together. The entire dessert comes together in about 20 minutes of active prep time, and then your refrigerator does the rest of the work! The make-ahead nature means it’s perfect for busy hosts who want to prepare dessert the day before. I’ve found myself making this on hectic weeknights when I need something special but don’t have hours to spend in the kitchen. Just layer, chill, and serve – it’s practically foolproof!

    Essential Tips & Tricks

    Mastering the Perfect Texture

    The secret to an exceptional No-Bake Layered Strawberry Tiramisu lies in getting the texture just right. When dipping your ladyfingers, aim for a quick dunk rather than a prolonged soak – about 2-3 seconds per side is perfect. This ensures they’ll soften without turning to mush. For the creamiest mascarpone filling, make sure all your dairy ingredients are room temperature before mixing. This prevents those annoying lumps that can ruin the smooth texture. If you’re short on time, check out my strawberry dump cake for another quick dessert option!

    Selecting and Preparing Strawberries

    Not all strawberries are created equal when it comes to this tiramisu! Look for berries that are vibrantly red throughout with no white shoulders – these will have the sweetest flavor. I like to hull and slice most berries, but save a few perfect specimens for decorating the top. For maximum juiciness, macerate half your sliced strawberries with a tablespoon of sugar for 15-20 minutes before layering. This creates a gorgeous natural syrup that will infuse throughout the dessert as it chills, adding incredible depth of flavor.

    Serving Ideas & Creative Variations

    Elegant Presentation Options

    Elevate your No-Bake Layered Strawberry Tiramisu with thoughtful presentation touches that make it truly memorable. I love serving individual portions in clear glass trifle cups to showcase the beautiful layers. For a dinner party wow-factor, try assembling in a springform pan, then garnish with fresh strawberry roses, mint leaves, and a light dusting of freeze-dried strawberry powder. The contrast between the vibrant red berries and creamy layers creates a stunning visual that’s perfect for special occasions. Don’t forget a drizzle of strawberry coulis around each plate for restaurant-worthy presentation!

    Exciting Flavor Twists

    While the classic version is divine, experimenting with flavor variations keeps this dessert exciting all year round. Try adding a tablespoon of orange liqueur to your dipping liquid for a sophisticated citrus note. For chocolate lovers, fold mini chocolate chips into the mascarpone mixture or layer in some chocolate shavings. My family goes wild for the white chocolate version where I incorporate melted and cooled white chocolate into the cream layer. During summer, I’ll sometimes swap half the strawberries for fresh peaches – the combination is absolutely heavenly!

    Storage & Troubleshooting Guide

    Proper Storage Methods

    To maintain the perfect texture of your No-Bake Layered Strawberry Tiramisu, proper storage is essential. Always keep it refrigerated in an airtight container to prevent it from absorbing other flavors from your fridge. The dessert actually improves after 4-6 hours of chilling as the flavors meld together beautifully. While it’s best enjoyed within 2 days, I’ve stretched it to 3 days with minimal texture changes. For individual portions, cover each serving with plastic wrap pressed directly onto the surface to prevent a skin from forming on the creamy layers.

    Troubleshooting Common Issues

    Even experienced bakers encounter challenges! If your tiramisu seems too runny, the most likely culprit is over-soaked ladyfingers. The fix is simple – next time, aim for a quicker dip or use slightly stale cookies that absorb less liquid. If your mascarpone mixture becomes grainy, it’s usually because the cheese was too cold when mixed. Salvage it by gently warming the bowl over simmering water while whisking continuously until smooth. For soggy bottom issues, try creating a protective first layer of ladyfingers that are barely moistened to act as a sturdy base.

    Frequently Asked Questions

    Can I make No-Bake Layered Strawberry Tiramisu ahead of time?

    Absolutely! This dessert actually improves with 8-24 hours of refrigeration, making it perfect for advance preparation. The flavors meld beautifully and the textures soften to perfection.

    What can I substitute for mascarpone cheese?

    In a pinch, use 8 oz cream cheese mixed with 2 tablespoons each of heavy cream and sour cream. The flavor profile will be slightly different but still delicious.

    Can I use frozen strawberries in this recipe?

    Fresh strawberries work best for texture and appearance. If using frozen, thaw completely, drain excess liquid, and pat dry before using to prevent a watery tiramisu.

    Is there a non-alcoholic version of this recipe?

    Yes! Simply replace the liqueur with strawberry juice, strawberry syrup, or even a splash of vanilla extract mixed with fruit juice for a family-friendly version.

    How do I prevent my No-Bake Layered Strawberry Tiramisu from becoming soggy?

    Dip ladyfingers quickly (1-2 seconds per side), use room temperature mascarpone for a thicker cream, and avoid over-macerating strawberries to maintain the perfect texture.

    Final Thoughts

    This No-Bake Layered Strawberry Tiramisu has become my signature dessert for good reason – it strikes that perfect balance between impressive and achievable that we all crave in our recipes. The bright strawberry flavor transforms the traditional dessert into something fresh and unexpected, while still honoring what makes tiramisu so beloved. Whether you’re a seasoned baker or just starting your culinary journey, this recipe proves that sometimes the most memorable treats are the ones that don’t require turning on the oven. For more delicious inspiration, follow me on Pinterest!