Author: Darleen Vance

  • Cranberry Jalapeno Cream Cheese Dip – Irresistible, Creamy

    Cranberry Jalapeno Cream Cheese Dip – Irresistible, Creamy

    Cranberry Jalapeno Cream Cheese Dip was born in my kitchen the night the mixer quit, the doorbell rang early, and I realized I’d hidden the crackers in the “safe spot.” Cranberry Jalapeno Cream Cheese Dip saved the party anyway. I simmered cranberries, folded in jalapeño for a happy kick, then poured the ruby goodness over a cloud of whipped cream cheese. Guests hovered, I exhaled, and the platter emptied in minutes. It’s holiday sparkle without the stress—my kind of kitchen chaos turned crowd-pleaser.
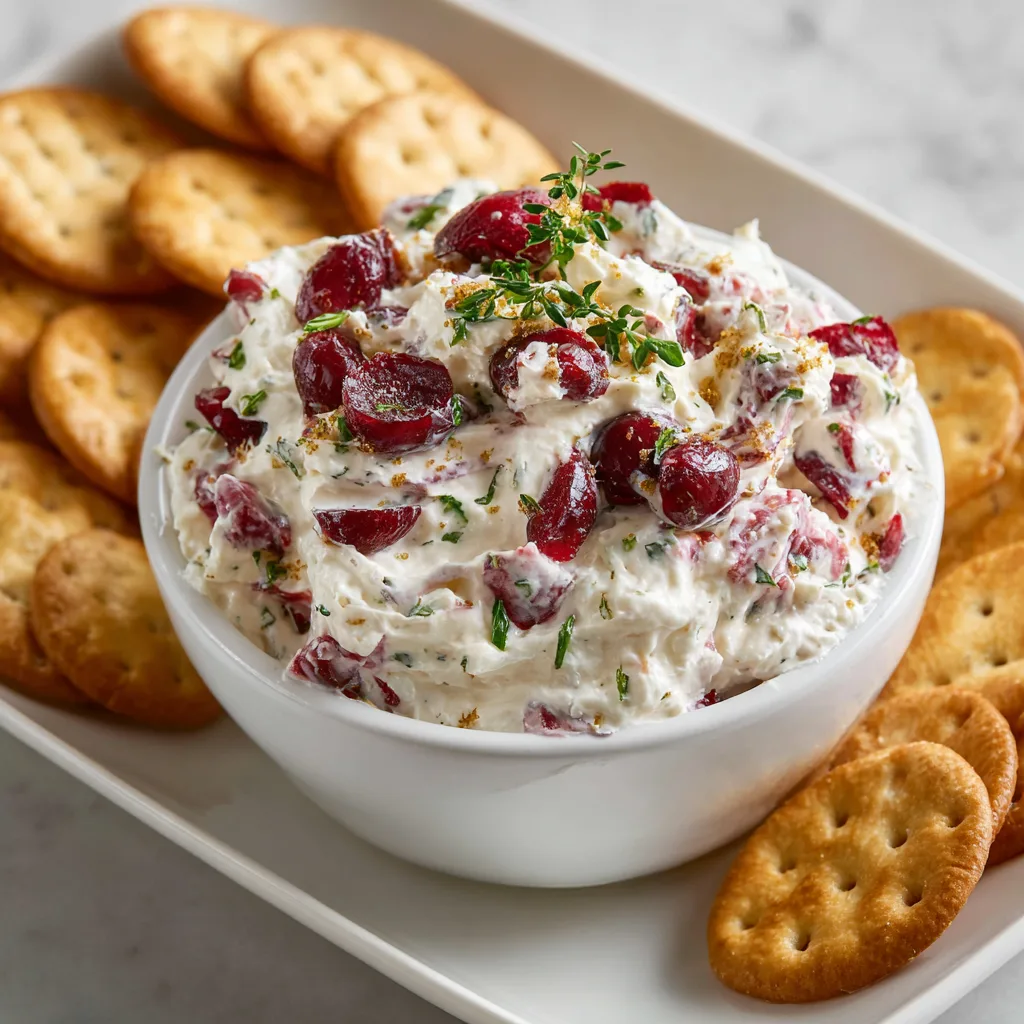
    Cranberry Jalapeno Cream Cheese Dip

    Recipe

    WHY YOU’LL LOVE THIS RECIPE

    What Makes This Cranberry Jalapeno Cream Cheese Dip So Irresistible

    I was balancing a toddler on one hip and a whisk in the other when my sister asked, “Is the app ready?” This Cranberry Jalapeno Cream Cheese Dip had my back. The sweet-tart cranberries, fresh lime, and jalapeño heat meet cool, whipped cream cheese for instant comfort food energy. When I say it’s the homemade shortcut every host needs, I mean it. Cranberry Jalapeno Cream Cheese Dip tastes like you planned all week—yet it’s an easy recipe you can pull off in minutes.

    • Fast prep: Simmer the cranberry topping while you whip the cream cheese—your quick fix appetizer is ready in a flash.
    • Balanced flavor: Sweet, spicy, creamy, and bright with citrus—each bite pops.
    • Simple, accessible ingredients: Fresh cranberries, jalapeño, cream cheese—no specialty store needed.
    • Make-ahead friendly: Chill the topping, then assemble right before serving for a homemade version that feels fancy.
    • Holiday-ready or weeknight-easy: Perfect for parties, potlucks, or a cozy snack night.

    It’s the kind of easy appetizer that turns a table into an occasion. Grab your platter—we’re diving into the recipe card next.

    Two words: effortless wow. On social feeds, everyone’s pouring jewel-toned cranberry salsa over a velvety bed of cream cheese and calling it dinner. This easy dinner-adjacent snack hits all the cozy notes—homemade, one-bowl assembly, and a gorgeous finish. It’s a shareable, scoopable comfort food that looks like a chef secret without the stress.

    TIPS, TRICKS & EXPERT SECRETS

    Chef Tips for Perfect Cranberry Jalapeno Cream Cheese Dip Every Time

    I once taught a mini-class in my living room after a potluck, when three friends asked, “How did you get it so silky?” My answer: tiny tweaks. Here’s the cooking tip playbook that keeps this easy recipe flawless:

    • Whip it good: Beat cream cheese with 1–2 tablespoons sour cream or Greek yogurt for a cloud-like, spreadable base.
    • Cook to burst: Simmer cranberries just until most pop—about 5–7 minutes—for a saucy, not jammy, texture.
    • Cool before topping: Let the cranberry-jalapeño mix cool to room temp so it doesn’t melt the cream cheese.
    • Balance the heat: Remove jalapeño seeds for mild spice; leave some in for a bold kick. Taste and adjust lime, salt, and sweetness at the end.

    Smart Ingredient Swaps & Practical Cooking Advice

    • Vegan option: Swap dairy cream cheese for a plant-based cream cheese and use maple syrup instead of honey for a fully vegan, homemade version.
    • Lighter option: Use Neufchâtel (1/3 less fat) and Greek yogurt to keep the base creamy with fewer calories.
    • What not to do: Don’t overcook the cranberries. If they reduce too long, the topping turns sticky and loses that fresh zing.
    • Quick fix: If your topping is too tart, add a teaspoon of honey; if too sweet, stir in a splash more lime juice.

    With these simple techniques, your Cranberry Jalapeno Cream Cheese Dip will hit that perfect sweet-spicy-creamy balance every time.

    SERVING IDEAS & CREATIVE VARIATIONS

    How to Serve Cranberry Jalapeno Cream Cheese Dip for Maximum Enjoyment

    When friends pop by, I spread the whipped base onto a big platter, spoon the ruby topping over, and add a rain of cilantro. Instant showstopper. For serving ideas, lean into texture and color with thoughtful plating suggestions:

    • Pair with crisp crackers, toasted baguette slices, pita chips, or cucumber rounds for a fresh crunch.
    • Add a cheese board element: almonds, cheddar cubes, and orange wedges complement the seasonal twist.
    • Beverage match: Dry sparkling wine or a citrusy mocktail balances the sweet heat.

    Hosting a bigger spread? Try it alongside my Thanksgiving Appetizer Deviled Eggs or these party-loved Turkey Cranberry Sliders for a cohesive, cranberry-forward menu.

    Flavor Twists and Seasonal Variations

    • Candied pecan crunch: Sprinkle chopped candied pecans over the top for a sweet-savory finish and extra texture.
    • Herb-forward: Swap cilantro for mint and add orange zest for a bright, seasonal twist.
    • Smoky chipotle: Stir a teaspoon of minced chipotle in adobo into the cranberry topping for a warm, smoky flavor variation.

    Photographers and food bloggers: style with a wide, white platter, a messy spoon trail, and a side bowl of jalapeño slices—Pinterest-ready in minutes. For a main-course twist, explore my elegant Cranberry Brie Stuffed Chicken—another beautiful way to celebrate these flavors.

    STORAGE & TROUBLESHOOTING GUIDE

    How to Store and Reheat Cranberry Jalapeno Cream Cheese Dip

    Leftovers rarely survive at my house, but when they do, I treat them like gold. Here’s how to store and keep this Cranberry Jalapeno Cream Cheese Dip fresh:

    • Room temperature: Keep out no longer than 2 hours for food safety.
    • Refrigerator: Store the cranberry topping and cream cheese base separately in airtight containers for 3–4 days.
    • Freezer: Freeze the cranberry topping (not the whipped cream cheese) up to 2 months. Thaw overnight in the fridge and stir before serving.
    • Reheating: If chilled and you prefer it slightly warmer, gently warm the cranberry topping in a saucepan over low heat just until loosened—do not heat the cream cheese.

    Troubleshooting Common Cranberry Jalapeno Cream Cheese Dip Issues

    • Too watery: Simmer the cranberry mixture 1–2 extra minutes to reduce, or stir in 1–2 teaspoons chia seeds and rest 10 minutes to thicken.
    • Too thick: Add a splash of orange or lime juice to loosen and brighten.
    • Not spicy enough: Fold in extra minced jalapeño or a pinch of red pepper flakes.
    • Too spicy: Add a teaspoon of honey and a pinch of salt to balance the heat.
    • Texture off: If your cream cheese base is stiff, beat in another tablespoon of sour cream for a silkier spread.

    With a few smart storage tips and quick fixes, your Cranberry Jalapeno Cream Cheese Dip will stay party-ready, scoopable, and delicious. You’ve got this—and I’m cheering you on.

    FAQs

    Can I make Cranberry Jalapeno Cream Cheese Dip ahead of time?

    Yes. Make the cranberry topping up to 3 days ahead and chill. Whip the cream cheese base the day of serving, then assemble just before guests arrive.

    How spicy is this dip?

    Mild to medium. Seed the jalapeño for gentle heat; leave some seeds for a bolder kick. Always taste and adjust before topping the cream cheese.

    What should I serve with Cranberry Jalapeno Cream Cheese Dip?

    Sturdy crackers, pita chips, toasted baguette slices, or veggie dippers. It pairs well with sparkling wine or a citrus mocktail.

    Can I use frozen cranberries?

    Absolutely. Use them straight from the freezer and cook 1–2 minutes longer until most berries burst and the sauce thickens slightly.

    Conclusion

    Cranberry Jalapeno Cream Cheese Dip is my go-to for fast flavor and festive color. The sweet-tart cranberries, lively jalapeño, and silky cream cheese make an easy recipe that feels restaurant-special, yet totally homemade. Whether you’re planning a comfort food snack night or a full holiday spread, this appetizer delivers dependable wow with minimal effort. Keep a bag of cranberries in your freezer, a lime on the counter, and cream cheese in the fridge—then you’re minutes from party-ready. Make this Cranberry Jalapeno Cream Cheese Dip, share it with your favorite people, and tell me how you serve it. Try it at home and tag me!

  • Thanksgiving Pizza – The Gunny Sack – Irresistible and Cozy

    Thanksgiving Pizza – The Gunny Sack – Irresistible and Cozy

    Thanksgiving Pizza – The Gunny Sack was born the night I realized the fridge was 80% leftovers and 20% hope. In true Darleen Vance fashion, I slid on mismatched oven mitts, spread gravy on pizza dough, and let the turkey, stuffing, and cranberry sauce do their delicious thing. The kids called it “holiday magic,” and I called it dinner. If you love an easy, homemade one-pan meal that tastes like a hug, this Thanksgiving Pizza – The Gunny Sack recipe is your new weeknight hero.

    Thanksgiving Pizza - The Gunny Sack

    Recipe

    Why You’ll Love This Thanksgiving Pizza – The Gunny Sack

    What Makes This Thanksgiving Pizza – The Gunny Sack So Irresistible

    I first made this Thanksgiving Pizza – The Gunny Sack on a day when my to-do list was laughing at me and the dishwasher gave up. But one-pan magic saves the day: gravy as sauce, turkey as topping, and a cranberry pop for sparkle. This Thanksgiving Pizza – The Gunny Sack tastes like the best parts of the holiday—comforting, homemade, and ridiculously easy—without a sink full of dishes. It hits that cozy sweet spot of an easy dinner and a satisfying one-pan meal. If you love quick fix comfort food, this is it.

    • Comfort in a slice: Golden crust, savory gravy, tender turkey, and creamy potatoes.
    • Simple, homemade feel: Uses what you already have—leftovers become a fresh, flavorful dinner.
    • One-pan meal: Minimal cleanup, maximum cozy payoff.
    • Family-friendly: Balanced flavors that please picky eaters and foodies alike.
    • Flexible: Works with store-bought dough or your favorite homemade version.

    Ready to turn leftovers into the easiest comfort food? Let’s get into the recipe card and bake up pure joy.

    Because it’s a smart, homemade solution for the holiday marathon. This is the Thanksgiving Pizza – The Gunny Sack that tastes like a cozy hug, looks Instagram-pretty, and keeps dinner easy. One bite and you’ll understand why it’s topping feeds and weeknight menus everywhere.

    Tips, Tricks & Expert Secrets for Thanksgiving Pizza – The Gunny Sack

    Chef Tips for Perfect Thanksgiving Pizza – The Gunny Sack Every Time

    I once taught a quick class at a neighborhood potluck and learned two things: someone will always bring extra gravy, and a hot baking surface is your best friend. Here’s how to make this easy recipe sing every time.

    • Heat the surface: Preheat a stone or inverted sheet pan. A hot base gives you a crisp, bakery-style bottom.
    • Room-temp dough: Cold dough fights you. Let it rest 30 minutes for an easy stretch and tender chew.
    • Layer smart: Gravy first, then dollops of mashed potatoes. Finish with cheese on top for bubbling, golden goodness.
    • Finish fresh: Add cranberry and parsley after baking. It keeps flavors bright and balanced.

    Smart Ingredient Swaps & Practical Cooking Advice

    • Gluten-free: Use a gluten-free crust and confirm your gravy is GF. Everything else is naturally adaptable.
    • Dairy-light: Swap part-skim mozzarella and skip the butter brush; still cheesy and delightful.
    • No stuffing? Use toasted breadcrumbs mixed with herbs for crunch.
    • Quick fix: No gravy left? Stir a spoon of turkey drippings into jarred gravy—instant homemade version.

    What not to do: Don’t overload with watery ingredients (thin gravy or wet veggies). It can sog the crust and underbake the center. Keep toppings balanced and the crust will stay crisp, cozy, and just right.

    Serving Ideas & Creative Variations for Thanksgiving Pizza – The Gunny Sack

    How to Serve Thanksgiving Pizza – The Gunny Sack for Maximum Enjoyment

    When I served this to friends, I sliced it on a wooden board, added a tiny ramekin of warm gravy, and it vanished like a magic trick. For relaxed hosting with delicious plating suggestions, this easy dinner shines as comfort food with a twist.

    • Serve with a light green salad dressed in lemon vinaigrette to balance the rich flavors.
    • Offer warm gravy and cranberry sauce on the side for dipping and drizzling.
    • Pair with sparkling water, cider, or a buttery chardonnay to complement the savory-sweet notes.

    Planning a full spread? Try it alongside Southern Maple Sweet Potato Casserole or send guests home with Turkey Cranberry Sliders. For classic gravy inspiration, you’ll love my Turkey with Gravy Sauce.

    Flavor Twists and Seasonal Variations

    • Crispy onion crunch: Sprinkle French-fried onions during the last 2 minutes of baking.
    • Brussels and bacon: Add shredded roasted Brussels sprouts and crumbled bacon for a fall-forward twist.
    • Herbed white pie: Swap gravy for a garlic-herb ricotta base; finish with cranberry honey drizzle.

    Sharing on socials? Plate on a dark board, drizzle warm gravy in zigzags, and add a few bright cranberry dots for an eye-catching seasonal twist. That’s a Pinterest-ready moment.

    Thanksgiving Pizza - The Gunny Sack – Irresistible and Cozy

    Storage & Troubleshooting Guide for Thanksgiving Pizza – The Gunny Sack

    How to Store and Reheat Thanksgiving Pizza – The Gunny Sack

    Leftovers of leftovers—now that’s my kind of efficiency. I’ve been known to stash an extra slice behind the salsa. To store and reheat this Thanksgiving Pizza – The Gunny Sack so it stays tasty and keeps fresh, follow these simple storage tips.

    • Room temperature: Keep no longer than 2 hours.
    • Refrigerator: Store slices in an airtight container with parchment between layers for 3–4 days.
    • Freezer: Wrap individual slices tightly in plastic, then foil, or use freezer bags for up to 2 months.
    • Reheat: Oven or air fryer at 375°F until hot and crisp (6–10 minutes). Skillet on medium also works; cover for 2 minutes to melt, uncover to crisp.

    Troubleshooting Common Thanksgiving Pizza – The Gunny Sack Issues

    • Too soggy: Your gravy was thin or toppings too wet. Fix by reducing gravy briefly on the stove and patting veggies dry next time.
    • Dry texture: Add a warm gravy drizzle after baking or increase cheese slightly for moisture.
    • Uneven bake: Preheat the stone/sheet fully and keep toppings evenly distributed.
    • Pale crust: Brush the rim with oil and bake on a hotter surface; extend bake 1–2 minutes as needed.

    You’ve got this. With a few small tweaks, your Thanksgiving Pizza – The Gunny Sack will come out bubbly, crisp, and ready for seconds.

    FAQs

    Can I make the dough ahead?

    Yes. Store-bought dough works great. If using homemade, refrigerate up to 48 hours; bring to room temp before stretching.

    What if I don’t have cranberry sauce?

    Use a quick mix of dried cranberries softened in warm water and honey, or a drizzle of balsamic glaze for sweet-tart contrast.

    How do I keep the crust from getting soggy?

    Preheat a stone or sheet pan, use thicker gravy, and avoid overloading with wet toppings. Bake hot for a crisp bottom.

    Can I make this vegetarian?

    Absolutely. Skip turkey, add roasted mushrooms and caramelized onions, and use veggie gravy for the base.

    Conclusion

    The heart of this recipe is simple: turn leftovers into comfort with an easy, homemade one-pan meal. Thanksgiving Pizza – The Gunny Sack celebrates everything we love about cozy, crowd-pleasing comfort food—savory gravy, tender turkey, creamy potatoes, and that bright cranberry sparkle. It’s weeknight-friendly, company-ready, and endlessly adaptable with seasonal twists and serving ideas. If you’ve been craving an easy dinner that feels special without any stress, this is your new tradition. Try it at home, share a slice, and tag me so I can see your gorgeous bakes—let’s make delicious memories together!

  • Thanksgiving Appetizer Deviled Eggs – Creamy, Irresistible

    Thanksgiving Appetizer Deviled Eggs – Creamy, Irresistible

    Thanksgiving Appetizer Deviled Eggs are my go-to when the house is buzzing and timers are beeping like a game show. Once, I tried whipping yolks by hand with a baby on my hip—fluffy filling, slightly lopsided piping, and lots of laughs. That’s the charm. These Thanksgiving Appetizer Deviled Eggs come together fast, taste luxurious, and win over every generation at the table. I’m Darleen Vance, and this is one holiday classic I never skip.

    Thanksgiving Appetizer Deviled Eggs are my go-to when the house is buzzing and timers are beeping like a game show.

    Recipe

    Why You’ll Love Thanksgiving Appetizer Deviled Eggs

    What Makes This Thanksgiving Appetizer Deviled Eggs So Irresistible

    True Darleen story: once I forgot paprika until guests were already at the door. I sprinkled it like fairy dust en route to the table, and someone actually asked, “What’s that magical finish?” The secret is balance—silky filling, bright tang, and just enough warmth. Thanksgiving Appetizer Deviled Eggs deliver all of that without hogging oven space or your sanity. Make them ahead, garnish last minute, and let the platter disappear like a holiday miracle. These are the comfort food bite that earns you applause before the turkey even hits the carving board. If you love an easy appetizer with homemade flair, Thanksgiving Appetizer Deviled Eggs are your new tradition.

    • Quick prep: Hard-boil, mix, and pipe—done. Perfect for a busy holiday kitchen.
    • Comforting taste: Creamy yolks, tangy mustard, and a paprika finish.
    • Simple ingredients: Pantry staples, nothing fussy, all flavor.
    • Make-ahead friendly: Prep components early; assemble right before serving.
    • Family-friendly: Classic, crowd-pleasing, and easy to customize.

    They’re the effortless, homemade holiday appetizer that still feels special. With a few smart twists, Thanksgiving Appetizer Deviled Eggs turn into a one-bite flavor bomb—think smoked paprika, chives, or even a hint of relish for a sweet-savory pop. Plus, they don’t require a one-pan meal or stovetop real estate at crunch time. Ready to make a platter that vanishes? Let’s head straight into the recipe card and get cracking.

    Thanksgiving Appetizer Deviled Eggs Tips, Tricks & Expert Secrets

    Chef Tips for Perfect Thanksgiving Appetizer Deviled Eggs Every Time

    During a cooking class, I learned the quiet power of an ice bath. I’d been rushing my eggs for years—little did I know the “chill” is how you get shells that slide off like a dream. For Thanksgiving Appetizer Deviled Eggs, tiny technique tweaks mean restaurant-smooth texture in a truly easy recipe.

    • Shock in ice water: After cooking, plunge eggs into an ice bath for at least 10 minutes for easy peeling and tender whites.
    • Use a fine mesh for yolks: Press yolks through a sieve before mixing to achieve ultra-smooth, homemade version luxury.
    • Balance the tang: A splash of apple cider vinegar or pickle juice wakes up the filling without overpowering it.
    • Pipe for polish: A zip-top bag with a star tip makes Thanksgiving Appetizer Deviled Eggs look bakery-beautiful in seconds.

    Smart Ingredient Swaps & Practical Cooking Advice

    • Lighter swap: Replace half the mayo with Greek yogurt for a creamy, tangy, lower-fat quick fix.
    • Dairy-free: Use an avocado-oil mayo to keep the filling rich and easy.
    • Flavor switch: Try Dijon plus a touch of yellow mustard for classic depth.
    • What not to do: Don’t overmix the filling. Too much whipping traps air and makes it fluffy but loose—Thanksgiving Appetizer Deviled Eggs should be silky, not airy.

    With these cooking tips, your Thanksgiving Appetizer Deviled Eggs will be reliably smooth, balanced, and beautiful—every time.

    Thanksgiving Appetizer Deviled Eggs – Creamy, Irresistible

    Serving Ideas & Creative Variations for Thanksgiving Appetizer Deviled Eggs

    How to Serve Thanksgiving Appetizer Deviled Eggs for Maximum Enjoyment

    We eat with our eyes first. The year I arranged Thanksgiving Appetizer Deviled Eggs on a wooden board with fresh herbs, they vanished before the first toast. For presentation, think layers of color and a confident garnish. For food bloggers or Instagram lovers, angle your platter near a window and add a sprinkle of smoked paprika at the last second for a soft, dramatic touch.

    • Pair with a cozy main like Cranberry Brie Stuffed Chicken—the richness of the eggs complements the melty, festive flavors.
    • Offer a rustic spread with warm rolls, olives, and a hearty dish such as Slow Cooker Tuscan Chicken.
    • Sip suggestions: Sparkling apple cider, a crisp sauvignon blanc, or herbal iced tea to balance the creamy filling.

    Flavor Twists and Seasonal Variations

    • Smoky Maple Bacon: Fold in crisp bacon crumbles and a drizzle of maple syrup for a savory-sweet holiday twist.
    • Herbed Dijon & Chive: Extra Dijon with fresh chives and a pinch of tarragon for a fragrant, classic feel.
    • Cranberry Spark: Top with a tiny dot of cranberry relish and a slice of candied jalapeño for tart heat and color.

    More hosting ideas? Browse the latest on my site for mains, sides, and sweets, like Brownie Protein Bites for a gluten-free nibble. Build the spread around Thanksgiving Appetizer Deviled Eggs and watch the compliments roll in.

    Storage & Troubleshooting Guide for Thanksgiving Appetizer Deviled Eggs

    How to Store and Reheat Thanksgiving Appetizer Deviled Eggs

    The day after Thanksgiving, I found two halves tucked behind the cranberry sauce—like they were hiding. Good news: Thanksgiving Appetizer Deviled Eggs store beautifully with a little care and the right containers.

    • Room temperature: Keep out for no more than 2 hours for food safety.
    • Refrigerator: Store assembled eggs in a covered container (a deviled egg tray is best) for up to 2 days. For maximum freshness, refrigerate whites and filling separately up to 3 days; pipe before serving.
    • Freezer: Not recommended. Freezing alters the texture of the whites and the creamy filling.
    • Reheating: Deviled eggs are served chilled or cool—no reheating needed. To refresh, pipe just before serving and garnish with fresh herbs.

    Troubleshooting Common Thanksgiving Appetizer Deviled Eggs Issues

    • Too dry: Add 1–2 teaspoons mayo or a splash of pickle juice to loosen and restore creaminess.
    • Too watery: Fold in a bit more mashed yolk or a small spoon of instant mashed potato flakes as a quick fix.
    • Rubbery whites: Reduce cook time next batch; 12 minutes off-heat after boiling plus an ice bath keeps whites tender.
    • Lumpy filling: Push yolks through a fine mesh sieve and mix again until smooth.
    • Flat flavor: Pinch of salt, extra Dijon, or a tiny dash of hot sauce brightens Thanksgiving Appetizer Deviled Eggs instantly.

    Follow these storage advice tips and you’ll keep Thanksgiving Appetizer Deviled Eggs fresh, flavorful, and party-ready. You’ve got this—holiday calm, achieved.

    FAQs

    Can I make Thanksgiving Appetizer Deviled Eggs a day ahead?

    Yes. For best texture, store whites and filling separately and pipe just before serving. Assembled eggs keep up to 2 days in the fridge.

    How do I peel eggs easily for deviled eggs?

    Use an ice bath for at least 10 minutes after cooking. Gently crack and peel under running water starting at the wider end where the air pocket is.

    What can I use instead of mayonnaise?

    Try Greek yogurt for a lighter option or an avocado-oil mayo for a dairy-free, creamy finish that still tastes classic.

    Are Thanksgiving Appetizer Deviled Eggs gluten-free?

    Yes, they’re naturally gluten-free. Always check labels on mustard, relish, and any seasoning blends to be sure.

    Conclusion

    Thanksgiving Appetizer Deviled Eggs bring cozy flavor, easy prep, and holiday polish to your table. This homemade classic is creamy, tangy, and irresistibly smooth—perfect as a holiday appetizer or potluck favorite. With smart techniques, simple ingredients, and creative toppings, you can tailor the platter to any crowd. Prep components ahead, pipe before serving, and watch your Thanksgiving Appetizer Deviled Eggs disappear. I’m cheering you on from my busy, flour-dusted kitchen—try it at home and tag me so I can celebrate your beautiful plates!

  • Butternut Squash Ravioli with Brown Butter and Pecans – Cozy

    Butternut Squash Ravioli with Brown Butter and Pecans – Cozy

    Butternut Squash Ravioli with Brown Butter and Pecans is my go-to rescue when the dinner hour sneaks up on me, the dog steals a sage leaf, and someone yells, “What’s for dinner?” This Butternut Squash Ravioli with Brown Butter and Pecans recipe turns everyday pasta into a silky, nutty, comforting bowl that tastes like a fancy fall dinner with weeknight ease. I once browned the butter a heartbeat too long, and my kids still asked for seconds—proof that a little kitchen chaos can still deliver pure cozy comfort.

    Butternut Squash Ravioli with Brown Butter and Pecans

    Recipe

    WHY YOU’LL LOVE THIS RECIPE

    What Makes This Butternut Squash Ravioli with Brown Butter and Pecans So Irresistible

    Here’s the real story: I made Butternut Squash Ravioli with Brown Butter and Pecans on a Tuesday when I had exactly four minutes to look like I had my life together. The butter browned beautifully, the sage crackled like applause, and I remembered to reserve pasta water only because I stuck a measuring cup in the colander in advance. This Butternut Squash Ravioli with Brown Butter and Pecans has everything—cozy flavors, a homemade vibe, and an easy dinner pace that feels achievable even when the kitchen timer is judging you.

    • Comfort food meets weeknight ease: dinner on the table in about 30 minutes.
    • Silky, nutty brown butter and toasted pecans make a rich, restaurant-level sauce.
    • Simple, homemade touches (crispy sage, lemon zest) brighten every bite.
    • Family-friendly and elegant enough for guests—hello, weekend dinner party.
    • One-pan finish means fewer dishes and more cozy couch time.

    With a handful of ingredients and a quick, homemade sauce, this easy dinner brings bold flavor without fuss. Ready to cook? Let’s slide into the recipe card.

    Beyond its creamy texture and buttery aroma, this dish taps into everything we love about fall comfort food—nutty, caramel notes, a touch of lemon for balance, and just enough crunch to keep things interesting. It’s the kind of homemade, one-pan meal that feels like a warm blanket and a candlelit evening all at once. And because it’s fast, it’s rapidly becoming everyone’s favorite “I cooked!” brag. If you love cozy mains like my Slow Cooker Tuscan Chicken or easy, shareable bites like Gluten-Free Pizza Rolls, you’ll adore this bowl of golden goodness.

    TIPS, TRICKS & EXPERT SECRETS

    Chef Tips for Perfect Butternut Squash Ravioli with Brown Butter and Pecans Every Time

    During a quick kitchen lesson with a chef friend, I learned the “quiet swirl” trick: when the butter stops crackling and smells nutty, you’re seconds from perfect. That discovery turned my Butternut Squash Ravioli with Brown Butter and Pecans into a reliable, easy recipe that tastes like a homemade version of your favorite trattoria dish.

    • Watch the color, not the clock: butter should be golden with brown specks and smell nutty—pull it early if it darkens quickly.
    • Crispy sage 101: fry leaves right in the butter, then remove to keep them shatter-crisp for serving.
    • Reserve pasta water before draining: a splash turns brown butter into a glossy, emulsified sauce.
    • Finish off the heat: add lemon juice and cheese off heat to prevent splitting and keep the texture silky.

    Smart Ingredient Swaps & Practical Cooking Advice

    • Vegan-friendly: use plant-based ravioli, dairy-free butter, and toasted hazelnuts or walnuts instead of Parmesan.
    • Gluten-free: choose gluten-free ravioli and confirm your cheese is GF-friendly. The rest of the recipe is naturally gluten-free.
    • Low-fat tweak: cut butter to 4 tbsp and add a teaspoon of olive oil for easier browning and a lighter finish.

    What not to do: don’t walk away from the pan while browning butter. Over-browning turns it bitter. Keep it at a steady medium heat, swirl often, and yank it off the heat at peak nuttiness. With these cooking tips and quick fixes in your pocket, your Butternut Squash Ravioli with Brown Butter and Pecans will be flawless every time.

    SERVING IDEAS & CREATIVE VARIATIONS

    How to Serve Butternut Squash Ravioli with Brown Butter and Pecans for Maximum Enjoyment

    The first time I plated this for guests, I scattered extra sage like confetti and let the steam do the styling. No one knew I was barefoot and still whisking sauce at the last minute. To serve Butternut Squash Ravioli with Brown Butter and Pecans, think simple, warm, and inviting.

    • Pairings: a peppery arugula salad with shaved fennel, and a crisp white wine like Pinot Grigio or a dry cider.
    • Side ideas: roasted Brussels sprouts or garlic green beans for freshness and crunch.
    • Plating suggestion: wide, warm bowls; twirl ravioli into the center; finish with Parmesan, cracked pepper, and a drizzle of brown butter for a glossy look.

    Flavor Twists and Seasonal Variations

    • Maple-sage finish: whisk 1 tsp pure maple syrup into the brown butter for a sweet-and-savory fall twist.
    • Crispy prosciutto: crumble over the top for salty crunch (skip for vegetarian).
    • Pepita crunch: swap pecans for toasted pepitas; add a pinch of smoked paprika for depth.

    Sharing your plate on social media? Capture it near a window, angle the bowl at 45 degrees, and sprinkle Parmesan right before the shot for those ultra-fluffy cheese strands. For more cozy mains to round out your menu, try my crowd-pleasing Braised Beef Barbacoa.

    Butternut Squash Ravioli with Brown Butter and Pecans – Cozy

    STORAGE & TROUBLESHOOTING GUIDE

    How to Store and Reheat Butternut Squash Ravioli with Brown Butter and Pecans

    Leftovers are the best part—especially when I find a hidden container behind the yogurt and feel like I won the fridge lottery. To keep Butternut Squash Ravioli with Brown Butter and Pecans fresh, follow these storage tips.

    • Room temperature: keep no longer than 2 hours.
    • Fridge: store in an airtight container 3–4 days. Place parchment between layers to prevent sticking.
    • Freezer: best to freeze the sauce and cooked pecans separately (up to 2 months). Cook ravioli fresh for best texture.

    Reheat:

    • Skillet: warm gently over low heat with a splash of water or broth, then swirl in a pat of butter to revive gloss.
    • Microwave: 50–60% power in short bursts, stirring lightly; add a teaspoon of water if dry.
    • Air fryer: not ideal for sauced pasta; use skillet for best texture.

    Troubleshooting Common Butternut Squash Ravioli with Brown Butter and Pecans Issues

    • Too dry: add reserved pasta water 1 tbsp at a time, then finish with a small knob of butter.
    • Too oily: whisk in a tablespoon of pasta water to emulsify; toss off heat until glossy.
    • Butter burned: start a new batch at medium heat and keep swirling; look for golden, not black, specks.
    • Ravioli burst: reduce boil to a gentle simmer and avoid overcrowding; lift gently with a spider.

    With these storage tips and quick fixes, your leftovers will taste fresh, and your sauce will stay silky. You’ve got this—your next bowl of Butternut Squash Ravioli with Brown Butter and Pecans will be even better.

    FAQs

    Can I use frozen butternut squash ravioli?

    Yes! Add a minute or two to the cook time and simmer gently. Taste for doneness and reserve pasta water as usual.

    What if I don’t have sage?

    Use thyme or a pinch of dried sage. For a different vibe, try rosemary—use sparingly and remove the sprig before serving.

    How do I keep the butter from burning?

    Use medium heat, swirl constantly, and watch for golden color and a nutty aroma. Pull the pan off heat the moment you see brown specks.

    Can I make this ahead?

    Toast pecans and prep sage in advance. Brown the butter just before serving for the best aroma and texture.

    Conclusion

    When you need a cozy, homemade dinner that feels special without keeping you at the stove, Butternut Squash Ravioli with Brown Butter and Pecans delivers every time. It’s comfort food with finesse: a quick sauce, one-pan finish, and that nutty-sage aroma that makes everyone wander into the kitchen. With easy serving ideas, flavor variations, and reliable storage advice, you’re set for weeknights and dinner parties alike. Try this easy dinner at home, make it your own with a seasonal twist, and tag me so I can cheer you on. For more approachable comfort favorites, explore all my recipes—your next bowl of golden goodness is waiting.

  • Cranberry Brie Stuffed Chicken – Irresistible, Cozy Dinner

    Cranberry Brie Stuffed Chicken – Irresistible, Cozy Dinner

    Cranberry Brie Stuffed Chicken is my weeknight secret when guests are “just popping by” and the sink is full of mixing bowls. Last Tuesday, I butterflied chicken with one hand while shooing my dog away from a rogue cranberry with the other. Cranberry Brie Stuffed Chicken still made it to the table glossy, golden, and so creamy that the chaos felt charming. I’m Darleen, and this recipe is for anyone who loves big flavors without fussy steps. If you adore easy dinners with a little holiday sparkle, this is your new go-to.

    Cranberry Brie Stuffed Chicken

    Recipe

    Why You’ll Love This Cranberry Brie Stuffed Chicken

    What Makes This Cranberry Brie Stuffed Chicken So Irresistible

    I first made Cranberry Brie Stuffed Chicken on a chilly night when the heat kicked on and my grocery list was short. Cranberry Brie Stuffed Chicken sounds fancy, but it’s as friendly as your favorite one-pan meal. The creamy Brie melts into a tart cranberry jam, and the chicken stays juicy with a quick sear and finish in the oven. By the time I plated it, everyone leaned in like it was an event. It’s that kind of comfort food—homemade, simple, and full of personality. And yes, Cranberry Brie Stuffed Chicken uses easy pantry ingredients, plus a little rosemary and orange zest to lift the whole dish.

    • Quick prep: Butterfly, stuff, sear, bake—dinner in under an hour.
    • Comforting taste: Creamy Brie meets tangy cranberry for a balanced bite.
    • Simple ingredients: Chicken breasts, Brie, cranberry sauce, and herbs.
    • Family-friendly: Mild, cozy flavors with a festive twist.
    • One-pan option: Sear in an oven-safe skillet and finish in the same pan.

    Whether it’s a holiday table or a Tuesday, Cranberry Brie Stuffed Chicken makes the evening feel special without fuss. Ready to cook?

    Between easy dinner nights and special occasions, Cranberry Brie Stuffed Chicken bridges the gap. It’s a homemade recipe that looks restaurant-level, files neatly under comfort food, and plays beautifully with simple sides. The cranberry-Brie combo is having a moment—creamy, tart, and totally cozy—so your plate and your feed will love it.

    Tips, Tricks & Expert Secrets for Cranberry Brie Stuffed Chicken

    Chef Tips for Perfect Cranberry Brie Stuffed Chicken Every Time

    The first time I taught a friend to make Cranberry Brie Stuffed Chicken, we learned that a calm, steady knife and a pinch of salt go a long way. This easy recipe rewards small details—little cooking tips that guarantee juicy results and a glossy finish.

    • Pat dry thoroughly: Dry chicken sears better, keeping Cranberry Brie Stuffed Chicken juicy.
    • Secure the pocket: Use toothpicks to keep the Brie and cranberry snug inside.
    • Sear, then bake: A quick stovetop sear builds flavor; finishing in the oven cooks evenly.
    • Rest before slicing: Five to seven minutes helps Cranberry Brie Stuffed Chicken stay moist.

    Smart Ingredient Swaps & Practical Cooking Advice

    • Swap Brie: Use Camembert or creamy goat cheese for a tangier homemade version.
    • Cranberry options: Whole-berry sauce is classic; low-sugar jam works as a quick fix.
    • Gluten-free: This Cranberry Brie Stuffed Chicken is naturally gluten-free—just confirm labels.
    • Lighter take: Use light Brie or reduce the cheese per breast for a leaner, easy recipe.

    What not to do: Don’t overstuff. Overfilling Cranberry Brie Stuffed Chicken can cause leaks and uneven cooking. Keep the filling modest and the pocket secure for best results.

    Serving Ideas & Creative Variations

    How to Serve Cranberry Brie Stuffed Chicken for Maximum Enjoyment

    When I served Cranberry Brie Stuffed Chicken to friends, I sliced it on the bias so the creamy center peeked out. It turned a simple, easy dinner into a gorgeous plate with minimal effort. For plating suggestions, a sprinkle of chopped rosemary and a drizzle of pan juices makes this homemade beauty shine.

    • Pair with sides: Garlicky green beans, roasted Brussels sprouts, or mashed potatoes.
    • Saucy upgrade: Whisk the pan juices with a splash of chicken broth and a dab of butter.
    • Beverages: Off-dry Riesling, Pinot Noir, or sparkling water with orange slices.

    Flavor Twists and Seasonal Variations

    • Autumn walnut crunch: Add chopped toasted walnuts or pecans inside for texture.
    • Herb-forward: Swap rosemary for thyme and add a touch of Dijon in the cranberry filling.
    • Citrus glow: Grate extra orange zest over sliced Cranberry Brie Stuffed Chicken for brightness.

    For content creators, photograph slices slightly fanned with a spoonful of cranberry on the side. Natural light and a neutral plate let Cranberry Brie Stuffed Chicken be the star. These serving ideas and flavor variations keep the recipe fresh, pin-worthy, and delicious across seasons.

    Storage & Troubleshooting Guide

    How to Store and Reheat Cranberry Brie Stuffed Chicken

    I once made a double batch of Cranberry Brie Stuffed Chicken and hid leftovers behind the yogurt—rookie mistake. Good news: storing this dish is easy with a few smart steps.

    • Room temperature: Keep out no longer than 2 hours.
    • Fridge: Store Cranberry Brie Stuffed Chicken in an airtight container for 3–4 days.
    • Freezer: Wrap tightly in plastic, then foil; freeze up to 2 months. Thaw in the fridge overnight.
    • Reheat: Oven at 325°F, 12–15 minutes covered; air fryer at 320°F, 6–8 minutes; or skillet over medium-low with a splash of broth to keep it moist.

    Troubleshooting Common Cranberry Brie Stuffed Chicken Issues

    • Too dry: You likely overbaked. Next time, pull Cranberry Brie Stuffed Chicken at 165°F and rest.
    • Watery filling: Use whole-berry cranberry sauce or reduce jam briefly to thicken.
    • Leaking cheese: Don’t overstuff; secure with toothpicks and sear seam-side up first.
    • Uneven cooking: Sear both sides and bake on the center rack; choose even-sized breasts.

    With these storage tips and fixes, your Cranberry Brie Stuffed Chicken will stay fresh, reheat beautifully, and taste just as comforting on day two. You’ve got this—one delicious, cozy bite at a time.

    FAQs

    Can I use chicken thighs instead of breasts?

    Yes. Butterfly larger boneless thighs, stuff lightly, and reduce bake time since thighs cook faster when thin.

    Do I need fresh cranberries?

    No. Whole-berry cranberry sauce or cranberry jam works perfectly for Cranberry Brie Stuffed Chicken.

    What’s the best internal temperature?

    Cook until a thermometer inserted in the thickest part reads 165°F for safe, juicy results.

    Can I prep Cranberry Brie Stuffed Chicken ahead?

    Yes. Assemble up to 24 hours ahead, cover, and refrigerate. Bring to room temp while the oven preheats, then sear and bake.

    Conclusion

    Cranberry Brie Stuffed Chicken brings creamy comfort and festive flavor to any table, whether it’s a busy weeknight or date-night at home. With simple techniques and pantry-friendly ingredients, this easy dinner tastes like a special occasion while staying wonderfully approachable. Between the tangy cranberry, melty Brie, and juicy chicken, you’ve got a homemade classic that pairs with everything from roasted veggies to mashed potatoes. If you love cozy, quick recipes that still feel elevated, Cranberry Brie Stuffed Chicken is your new staple. Try it at home and tag me—I can’t wait to see your spins and seasonal twists!

    Craving more cozy mains? Visit my home base at RecipesDarleen, or try a reader favorite like Crock-Pot Marry Me Chicken or creamy, dreamy Slow Cooker Tuscan Chicken.

  • Slow Cooker Cajun Red Beans and Rice – Deliciously Cozy

    Slow Cooker Cajun Red Beans and Rice – Deliciously Cozy

    Slow Cooker Cajun Red Beans and Rice is my weeknight peace treaty with chaos. Last Tuesday, my son hid the rice scoop in the toy bin and the dog sat guard over the slow cooker like it was a ball game. Slow Cooker Cajun Red Beans and Rice still came out thick, smoky, and so comforting that everyone forgot the rice scoop drama by the first bite. I stirred, they cheered, and the kitchen finally exhaled.

    Slow Cooker Cajun Red Beans and Rice is a hearty, comforting Louisiana-style classic made easy in the crockpot.

    Recipe

    Why You’ll Love Slow Cooker Cajun Red Beans and Rice

    What Makes This Slow Cooker Cajun Red Beans and Rice So Irresistible

    I learned early that Slow Cooker Cajun Red Beans and Rice is the dinner that saves the day when schedules unravel. The first time I made Slow Cooker Cajun Red Beans and Rice for my neighbors, I forgot to set out bowls and we ate from mugs with big spoons. Nobody noticed. The pot delivered creamy, smoky comfort food that felt homemade and special. That’s the magic of this easy dinner—set it, forget it, and come home to a simmering reward. One bite, and you’ll know why the classic crockpot red beans and rice belongs in your rotation.

    • Hands-off ease: Minimal prep, slow cooker convenience, and consistently tender results.
    • Deep, bold flavor: Andouille, Cajun seasoning, and the trinity build a rich, homemade base.
    • Budget-friendly comfort: Pantry beans plus simple add-ins = a satisfying, affordable meal.
    • Family-friendly: Mild heat as written, with easy ways to spice it up at the table.
    • Meal-prep ready: Even better on day two; reheats like a dream for quick lunches.

    This is the kind of weeknight one-pot meal that hugs back—perfect for fall game nights or any cozy evening when you need a flavorful, homemade win. Ready to stir up the pot? Let’s dive into the recipe below.

    Across social feeds, Slow Cooker Cajun Red Beans and Rice is trending because it delivers that slow-simmered Creole flavor without hovering over a stove. With options for gluten-free and dairy-free diets, plus easy swaps for vegan versions, this easy recipe fits many tables. It’s the definition of comfort food, and the crockpot version means a homemade dinner awaits you after work or errands—no stress, just spoon and smile.

    Tips, Tricks & Expert Secrets for Slow Cooker Cajun Red Beans and Rice

    Chef Tips for Perfect Slow Cooker Cajun Red Beans and Rice Every Time

    My culinary wake-up call came from a chef who said, “Brown equals flavor.” After burning my first batch of sausage (yes, I cranked the heat and walked away), I learned the sweet spot—deep sear, not char. These expert cooking tips will keep your Slow Cooker Cajun Red Beans and Rice richly flavored and perfectly creamy.

    • Sear smart: Brown the andouille just until the edges crisp. Fond in the pan? Splash broth to deglaze and pour that flavor into the slow cooker.
    • Safety first with beans: If using dried kidney beans, boil them for 10 minutes before slow cooking. This is a critical cooking tip for safe, homemade results.
    • Season in layers: Add part of the Cajun seasoning up front, then finish with a final sprinkle to brighten the cooked flavors.
    • Texture control: For creamier Slow Cooker Cajun Red Beans and Rice, mash a cup or two of beans right in the pot and stir back in.

    Smart Ingredient Swaps & Practical Cooking Advice

    • Vegan quick fix: Skip the sausage and ham hock, use vegetable broth, and add liquid smoke for depth. Vegan sausage works beautifully too.
    • Gluten-free assurance: Most ingredients are naturally gluten-free; just choose certified GF sausage and Worcestershire if needed.
    • Low-fat option: Use turkey sausage or skip sausage entirely and lean on smoked paprika and thyme for a lighter homemade version.
    • What not to do: Don’t add canned beans at the start; they’ll overcook and turn mushy. Stir them in during the last 1–2 hours.

    With these easy recipe strategies and practical swaps, your Slow Cooker Cajun Red Beans and Rice will taste like an all-day stovetop simmer—without babysitting the pot.

    Serving Ideas & Creative Variations

    How to Serve Slow Cooker Cajun Red Beans and Rice for Maximum Enjoyment

    When I served Slow Cooker Cajun Red Beans and Rice at our last porch dinner, I set out bowls of hot sauce, lemon wedges, and sliced green onions like a DIY garnish bar. It turned a simple, easy dinner into a cozy, build-your-bowl party. For plating suggestions, scoop beans over fluffy rice, add a flourish of parsley, and finish with a squeeze of lemon for brightness. A quick cornbread, iced tea, or a crisp lager is all you need.

    • Pairings: Skillet cornbread, collard greens, or a crunchy slaw for fresh contrast.
    • Beverage buddies: Sweet tea, a hoppy IPA, or a citrusy seltzer to balance the smoky heat.
    • Garnish game: Parsley, green onions, and a few shakes of your favorite hot sauce.

    Flavor Twists and Seasonal Variations

    • Extra smoky: Add a splash of liquid smoke or use smoked turkey instead of ham hock for Slow Cooker Cajun Red Beans and Rice that tastes pit-smoked.
    • Spice-forward: Stir in diced jalapeño with the trinity or finish with cayenne for a bold, cozy kick.
    • Harvest bowl: Top with roasted fall veggies (butternut squash or sweet potato) for a seasonal twist and gorgeous color.

    If you love slow cooker comfort, try my Slow Cooker Tuscan Chicken or the hearty Slow Cooker Italian Beef Ragu next. They’re crowd-pleasers right alongside Slow Cooker Cajun Red Beans and Rice.

    Slow Cooker Cajun Red Beans and Rice is a hearty, comforting Louisiana-style classic made easy in the crockpot.
    Slow Cooker Cajun Red Beans and Rice is a hearty, comforting Louisiana-style classic made easy in the crockpot.

    Storage & Troubleshooting Guide

    How to Store and Reheat Slow Cooker Cajun Red Beans and Rice

    Leftovers of Slow Cooker Cajun Red Beans and Rice are my favorite kind of meal prep. The flavors deepen overnight and make weekday lunches feel like a treat.

    • Room temperature: Keep out no longer than 2 hours.
    • Fridge: Store beans and rice separately in airtight containers for 4–5 days to keep texture fresh.
    • Freezer: Freeze beans (without rice) up to 3 months in freezer-safe bags laid flat. Thaw overnight in the fridge.
    • Reheat: Warm beans gently on the stovetop with a splash of broth or water. Microwave in 60–90 second bursts, stirring between. Reheat rice separately to avoid sogginess.

    Troubleshooting Common Slow Cooker Cajun Red Beans and Rice Issues

    • Too watery: Remove the lid and cook on HIGH for 30 minutes to reduce, or mash more beans to thicken.
    • Too thick: Stir in warm broth, 2–4 tablespoons at a time, until silky.
    • Beans not tender: Keep cooking on LOW and check every 30 minutes; hard water or old beans can slow cooking. Next time, soak and pre-boil.
    • Too salty: Add unsalted broth and a squeeze of lemon; serve with extra rice to balance.
    • Flat flavor: Finish with fresh green onions, parsley, hot sauce, and a final pinch of Cajun seasoning.

    With this storage advice, you’ll keep Slow Cooker Cajun Red Beans and Rice tasting bright and cozy for days. You’ve got this—your pot of comfort food will come back to life beautifully.

    FAQs

    Can I make Slow Cooker Cajun Red Beans and Rice with canned beans?

    Yes. Add drained canned beans during the last 1–2 hours on LOW so they warm and absorb flavor without breaking apart.

    Do I have to soak beans for Slow Cooker Cajun Red Beans and Rice?

    Soaking reduces cook time. If using kidney beans, always boil 10 minutes after soaking before slow cooking for safety.

    How spicy is Slow Cooker Cajun Red Beans and Rice?

    As written, it’s mild to medium. Adjust with cayenne, jalapeño, or hot sauce at the table to suit your heat preference.

    What rice works best with Slow Cooker Cajun Red Beans and Rice?

    Long-grain white rice is classic. For heartier texture, try brown rice and cook it separately so it stays fluffy.

    Conclusion

    Slow Cooker Cajun Red Beans and Rice takes humble ingredients and turns them into a rich, homemade hug in a bowl. The slow cooker does the heavy lifting, coaxing creamy beans, smoky andouille, and that beloved trinity into serious comfort food. Whether you meal prep or feed a crowd, Slow Cooker Cajun Red Beans and Rice delivers bold flavor with easy steps and pantry-friendly ingredients. If you love this cozy, one-pot style, don’t miss my Slow Cooker Chicken Burrito Bowls next. Try it at home and tag me—I can’t wait to see your bowls and hear your favorite twists.

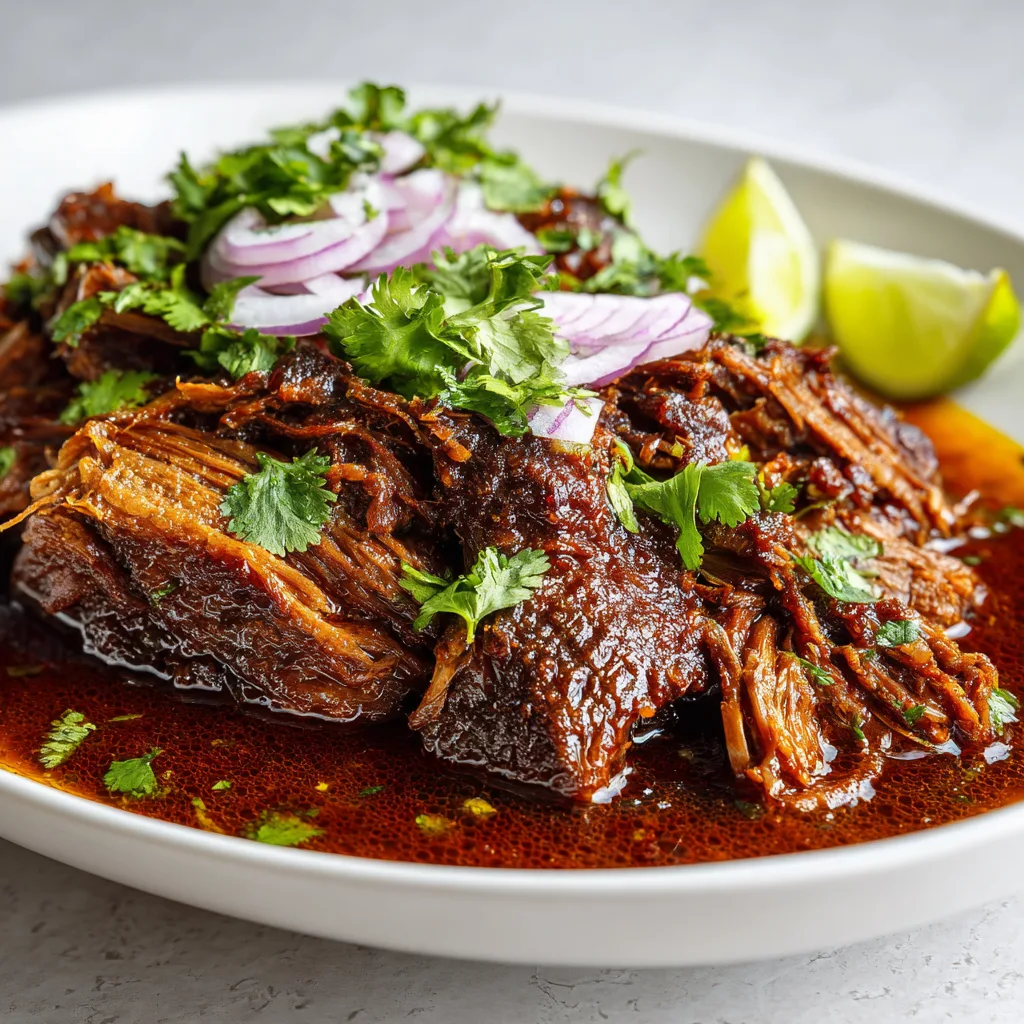
  • braised Beef Barbacoa – Cozy, Bold, and Irresistible

    braised Beef Barbacoa – Cozy, Bold, and Irresistible

    braised Beef Barbacoa is my weeknight hero disguised as a weekend feast. Last Tuesday, the smoke alarm and I had words when I seared the beef with a bit too much enthusiasm. But that same braised Beef Barbacoa came out meltingly tender, perfumed with warm spices, and so forgiving that my kids asked for seconds before I could find the oven mitts. I’m Darleen Vance, and this is the kind of cozy, big-flavor comfort food that turns chaos into cheers. When you want an easy dinner that tastes like you borrowed a restaurant kitchen, this is it.

    braised Beef Barbacoa is my weeknight hero disguised as a weekend feast. Last Tuesday, the smoke alarm and I had words when I seared the beef with a bit too much enthusiasm.

    Recipe

    WHY YOU’LL LOVE THIS RECIPE

    What Makes This braised Beef Barbacoa So Irresistible

    Here’s a Darleen Vance confession: the first time I made braised Beef Barbacoa, I set a timer, sat down to “answer one email,” and woke up to the kind of aroma that should come with a soundtrack. braised Beef Barbacoa is the dinner that makes your home smell like you’ve been cooking for hours—because you have, but it’s mostly hands-off. It’s the kind of homemade comfort food that delivers big, bold flavor with simple, pantry-friendly ingredients.

    • Effortless prep: a quick sear, a one-pot braise, and you’re done—hello, easy dinner.
    • Restaurant-level flavor: chipotle, citrus, and warm spices infuse the beef with deep, cozy richness.
    • Family-friendly: tender, shredded beef works for tacos, bowls, salads, and burritos.
    • One-pan meal: less mess, more flavor, truly a homemade win.
    • Make-ahead magic: flavor improves overnight; perfect for meal prep.

    With braised Beef Barbacoa, you get a juicy, shreddable texture and a customizable heat level, which makes it ideal for picky eaters and hot-sauce lovers alike. If you enjoy hearty mains like my Slow Cooker Italian Beef Sandwiches or crave weeknight wins like these Slow Cooker Chicken Burrito Bowls, this will fit right into your rotation. Ready to cook? Let’s step into the recipe card.

    From food bloggers to weeknight cooks, braised Beef Barbacoa is trending because it’s both cozy and bold. The slow, gentle braise locks in moisture and creates that signature spoon-tender texture everyone loves. Plus, it’s a homemade, one-pot wonder that transforms into tacos, nachos, bowls, and beyond—exactly the kind of easy recipe that earns rave reviews and repeat requests.

    TIPS, TRICKS & EXPERT SECRETS

    Chef Tips for Perfect braised Beef Barbacoa Every Time

    During a kitchen lesson I gave my neighbor, I learned the fastest way to win over a skeptic: let them shred a piece of braised Beef Barbacoa right in the pot. It practically falls apart, and the look on their face says it all. Here are the cooking tips that make this easy recipe sing every time:

    • Brown deeply: Sear the beef until a dark crust forms. Brown equals flavor—don’t rush it.
    • Deglaze like a pro: Splash in broth or water to lift those caramelized bits. That’s your homemade flavor booster.
    • Low and slow: Keep the braise gentle. A steady 300°F oven or a low simmer ensures fork-tender results.
    • Shred, then re-simmer: Toss the shredded beef back into the reduced sauce for maximum sauciness.

    Smart Ingredient Swaps & Practical Cooking Advice

    • Beef options: Chuck roast is classic for braised Beef Barbacoa, but brisket or boneless short ribs are excellent swaps.
    • Heat control: For mild, use 1 chipotle; for bold heat, use 3. You can also add adobo sauce by the spoonful.
    • Dietary tweaks: To keep it gluten-free, use certified gluten-free chipotles/adobo. For a plant-based homemade version, braise a mix of jackfruit and meaty mushrooms in the same sauce.
    • Quick fix: Short on time? Cut beef into large chunks to reduce braising time by 30–45 minutes.
    • What not to do: Don’t boil the braise. A hard boil toughens the meat and evaporates flavor.

    Love cozy mains? Try my Slow Cooker Italian Beef Ragu for another slow-cooked classic with big payoff.

    SERVING IDEAS & CREATIVE VARIATIONS

    How to Serve braised Beef Barbacoa for Maximum Enjoyment

    When I plated braised Beef Barbacoa for a casual taco night, I set out warm tortillas, a shower of cilantro, and quick-pickled onions—and watched the room go quiet except for happy murmurs. For serving ideas that deliver, keep it simple, saucy, and colorful:

    • Taco bar: Corn tortillas, chopped white onion, cilantro, lime wedges, and crumbled queso fresco.
    • Burrito bowls: Cilantro-lime rice, black beans, grilled corn, avocado, and a spoon of the braising jus.
    • Loaded nachos: Tortilla chips, melted Oaxaca or Monterey Jack, barbacoa, pico de gallo, and jalapeños.

    Pair with elote, a crisp salad, or a refreshing agua fresca. For plating suggestions, pile high in a shallow bowl, spoon extra sauce over the top, and finish with lime zest. Content creators: angle your shot at 45° and capture steam for irresistible, share-worthy photos.

    Flavor Twists and Seasonal Variations

    • Smoky ancho-cocoa: Add 1 tsp unsweetened cocoa and 1 tsp ancho chili powder for a rich, Oaxacan-inspired twist.
    • Citrus-bright: Double the lime and add orange zest for a fresher, lighter seasonal twist.
    • Beer-braised: Swap 1 cup broth for a dark Mexican beer to deepen the roastiness.

    For a crowd-pleasing dinner plan, pair this with weeknight favorites like my Cashew Cream Cajun Chicken Pasta for a creamy counterpoint or keep it all-Mex with a big salad and warm tortillas.

    braised Beef Barbacoa – Cozy, Bold, and Irresistible

    STORAGE & TROUBLESHOOTING GUIDE

    How to Store and Reheat braised Beef Barbacoa

    True story: I once hid a container of braised Beef Barbacoa behind the yogurt so my teenagers wouldn’t inhale it before taco night. Here’s how to store and reheat so every bite stays juicy:

    • Room temperature: Keep out for no more than 2 hours.
    • Refrigerator: Store in airtight containers with some braising liquid for 3–4 days.
    • Freezer: Portion into freezer-safe bags or containers (with sauce) for up to 3 months; remove as much air as possible.
    • Reheating: Warm gently in a covered skillet with a splash of broth or sauce, or in a 300°F oven until heated through. For crispy edges, finish uncovered under the broiler for 2–3 minutes.

    Troubleshooting Common braised Beef Barbacoa Issues

    • Too dry: Add reserved cooking liquid or a splash of broth and re-simmer gently to rehydrate.
    • Too watery: Reduce the sauce on the stovetop, medium heat, until glossy and slightly thick.
    • Bland flavor: Season with extra salt, a squeeze of lime, or a spoon of adobo sauce for lift.
    • Too spicy: Stir in a little tomato paste and extra broth, or serve with crema and avocado to cool it down.
    • Overcooked or stringy: It likely boiled at some point. Next time, lower the heat and keep the braise at a gentle simmer.

    Follow this storage advice and you’ll keep braised Beef Barbacoa fresh, tender, and weeknight-ready. You’ve got this—leftovers just became your new best friend.

    FAQs

    Can I make braised Beef Barbacoa in a slow cooker?

    Yes. Sear the beef, then cook on Low for 8–9 hours or High for 4–5 hours with the same sauce. Shred and toss back in the liquid to serve.

    What cut of beef works best for braised Beef Barbacoa?

    Beef chuck roast is classic. Brisket or boneless short ribs are great alternatives for rich, tender results.

    Is braised Beef Barbacoa spicy? How do I control heat?

    It’s mildly spicy by default. Use fewer chipotles for a gentler sauce, or add more adobo for extra kick.

    Can I make braised Beef Barbacoa ahead and freeze it?

    Absolutely. It freezes beautifully for up to 3 months. Thaw overnight in the fridge and reheat gently with a splash of broth.

    Conclusion

    braised Beef Barbacoa is the kind of cozy comfort food that turns every night into a celebration. With deep, bold, homemade flavor, it’s an easy dinner that feels restaurant-worthy but stays beautifully simple. From tacos and bowls to nachos and salads, braised Beef Barbacoa is endlessly versatile, meal-prep friendly, and crowd-pleasing. If you love one-pot meals and slow-cooked satisfaction, you’ll fall hard for this tender, saucy classic. Try it at home, make it your own, and tag me so I can cheer you on. For more weeknight wins, peek at my recipe archive and grab a few ideas for your next cozy dinner.

  • Slow Cooker Tuscan Chicken with a delicious sun-dried tomato and spinach cream sauce – Cozy, Irresistibly Creamy

    Slow Cooker Tuscan Chicken with a delicious sun-dried tomato and spinach cream sauce – Cozy, Irresistibly Creamy

    Slow Cooker Tuscan Chicken with a delicious sun-dried tomato and spinach cream sauce rescued me on a Tuesday when my kids decided the spatula was a lightsaber. I tossed chicken, garlic, and sun-dried tomatoes into the slow cooker and let dinner make itself. By evening, Slow Cooker Tuscan Chicken with a delicious sun-dried tomato and spinach cream sauce filled the kitchen with rich, cozy aromas while I found the “lost” spinach in a lunchbox. The creamy sauce hugged every bite, and the plates came back clean. This is the homemade comfort food that turns kitchen chaos into a win—no fancy steps, just effortless, easy dinner magic.

    Slow Cooker Tuscan Chicken with a delicious sun-dried tomato and spinach cream sauce

    Recipe

    Why You’ll Love Slow Cooker Tuscan Chicken

    What Makes This Slow Cooker Tuscan Chicken

    I first made Slow Cooker Tuscan Chicken with a delicious sun-dried tomato and spinach cream sauce on a day when my timer, my patience, and my phone all died at once. I needed an easy dinner that cooked itself. Into the pot went chicken, broth, and those ruby sun-dried tomatoes—no searing, no stress. Hours later, a creamy, homemade sauce with spinach wrapped every tender bite. Slow Cooker Tuscan Chicken with a delicious sun-dried tomato and spinach cream sauce tastes like a cozy trattoria meal without babysitting a skillet.

    • Comfort food made simple: a creamy, garlic-Parmesan sauce with bright sun-dried tomato tang.
    • Minimal prep, maximum flavor: toss, set, and let the slow cooker do the work.
    • Family-friendly and weeknight-ready: a reliable easy dinner that reheats beautifully.
    • Versatile serving ideas: pile over pasta, rice, mashed potatoes, or zucchini noodles.
    • Pantry-friendly ingredients: sun-dried tomatoes, broth, spices, and spinach.

    If you love hearty one-pan meal energy without the dishes, Slow Cooker Tuscan Chicken with a delicious sun-dried tomato and spinach cream sauce will be your new creamy classic. Ready to cook?

    This recipe checks every box: quick prep, big flavor, and that dreamy restaurant-style sauce. The sun-dried tomatoes concentrate savory-sweet depth, the spinach adds freshness, and the slow cooker turns chicken silky-tender. It’s the homemade version of a date-night favorite—an easy recipe built for busy schedules and cozy cravings.

    Tips, Tricks & Expert Secrets

    Chef Tips for Perfect Slow Cooker Tuscan Chicken with a delicious sun-dried tomato and spinach cream sauce Every Time

    During a quick cooking class, I learned that dairy added too early can split. That little discovery saved my Slow Cooker Tuscan Chicken with a delicious sun-dried tomato and spinach cream sauce from a few near-miss dinners.

    • Season in layers: salt the chicken, then taste again after the cream and Parmesan go in.
    • Add dairy late: stir in cream and cream cheese during the last 15–20 minutes to keep the sauce silky.
    • Use sun-dried tomato oil: a spoonful adds bold, homemade flavor and glossy texture.
    • Shred gently: large chunks keep the chicken juicy and the sauce rich.

    Smart Ingredient Swaps & Practical Cooking Advice

    • Gluten-free: serve with gluten-free pasta or creamy polenta. Try Homemade Gluten-Free Naan for sopping up sauce.
    • Lighter option: use half-and-half instead of heavy cream and skip the cornstarch.
    • Dairy-free: swap in cashew cream and a dairy-free Parmesan; see my Cashew Cream Cajun Chicken Pasta for a creamy blueprint.
    • What not to do: don’t overcook on High for hours—chicken can get dry. If you’re short on time, High for 2–3 hours is fine, but check at 2 hours.

    This cooking tip list keeps your easy recipe on track and your sauce lush every time—Slow Cooker Tuscan Chicken with a delicious sun-dried tomato and spinach cream sauce deserves that flawless finish.

    Serving Ideas & Creative Variations

    How to Serve Slow Cooker Tuscan Chicken

    When friends drop by, I ladle Slow Cooker Tuscan Chicken with a delicious sun-dried tomato and spinach cream sauce into shallow bowls and let the silky sauce shine. A little torn basil, a grind of pepper, and it looks like trattoria comfort food in minutes.

    • Plating suggestion: serve over al dente pappardelle or creamy polenta with extra Parmesan.
    • Simple sides: crisp arugula salad with lemon vinaigrette; warm garlic bread or Garlic Gluten-Free Pizza Bread.
    • Beverage pairing: a buttery Chardonnay or a light Chianti complements the creamy sauce and tomato brightness.

    Flavor Twists and Seasonal Variations

    • Spring twist: add peas and lemon zest with the spinach for a bright, fresh pop.
    • Smoky version: stir in chopped roasted red peppers and a pinch of smoked paprika.
    • Mushroom umami: sauté cremini mushrooms and add in the final 30 minutes for an earthy layer.

    For creators, shoot overhead to capture that glossy cream sauce; save a few sun-dried tomato slivers and spinach leaves for styling. And if you love set-it-and-forget-it dinners, try my Slow Cooker Italian Beef Ragu or Slow Cooker Honey Mustard Chicken next.

    Storage & Troubleshooting Guide

    How to Store and Reheat Slow Cooker Tuscan Chicken

    I’m a big believer in next-day comfort. When we have leftovers of Slow Cooker Tuscan Chicken with a delicious sun-dried tomato and spinach cream sauce, I stash them for busy lunches and quick fixes.

    • Room temperature: 2 hours max. Refrigerate promptly.
    • Fridge: store in airtight containers 3–4 days to keep fresh.
    • Freezer: up to 2–3 months. Cool completely; freeze in sauce to preserve texture.
    • Reheat: warm gently on the stovetop over low heat, adding a splash of broth or cream to loosen; or microwave in short bursts, stirring between. Avoid boiling to prevent sauce separation.

    Troubleshooting Common Slow Cooker Tuscan Chicken

    • Too watery: simmer uncovered for 10 minutes on High or stir in a cornstarch slurry (1 teaspoon cornstarch + 1 teaspoon water).
    • Too thick: whisk in warm broth or milk a few tablespoons at a time.
    • Overcooked chicken: shred and fold into sauce with extra cream; serve over pasta to balance.
    • Split sauce: take off heat, whisk in a tablespoon of room-temp cream cheese, then a splash of warm cream.
    • Not enough flavor: add salt gradually, a squeeze of lemon, and extra Parmesan to brighten.

    With these storage advice tips and quick fixes, your Slow Cooker Tuscan Chicken with a delicious sun-dried tomato and spinach cream sauce will taste restaurant-worthy even on day three. We’ve got this!

    FAQs

    Can I use chicken thighs instead of breasts?

    Yes. Boneless, skinless thighs stay ultra-juicy and are perfect for slow cooking; cook times are similar.

    When should I add the spinach?

    Stir in baby spinach just before serving so it stays vibrant and tender, wilting in 1–2 minutes.

    How do I prevent the cream sauce from curdling?

    Add cream and cream cheese at the end on Low heat, and avoid boiling. Whisk until smooth before adding.

    What can I serve it with besides pasta?

    Try rice, mashed potatoes, cauliflower mash, or crusty bread. For a slow cooker duo night, pair with Slow Cooker Chicken Burrito Bowls.

    Conclusion

    Slow Cooker Tuscan Chicken with a delicious sun-dried tomato and spinach cream sauce is the kind of creamy comfort food that turns an ordinary weeknight into something special. Tender chicken, a rich garlic-Parmesan sauce, and bright sun-dried tomatoes meet handfuls of spinach for balance. It’s an easy dinner that tastes homemade and cozy, with simple ingredients and set-it-and-forget-it ease. If you’re craving a fuss-free, family-friendly classic, Slow Cooker Tuscan Chicken with a delicious sun-dried tomato and spinach cream sauce delivers every time. Try it at home and tag me—let’s see your creamy creations!