Author: Darleen Vance

  • Spinach Artichoke Dip Recipe: Irresistibly Creamy & Crowd-Pleasing!

    Spinach Artichoke Dip Recipe: Irresistibly Creamy & Crowd-Pleasing!

    Spinach artichoke dip is the ultimate crowd-pleaser that never fails to disappear at gatherings. There’s something magical about that first scoop—the creamy, cheesy goodness with tender spinach and artichoke hearts that makes everyone hover around the appetizer table. I discovered my love for this dip years ago at my sister’s holiday party when I couldn’t stop going back for “just one more bite.” The warm, bubbling cheese pulling into perfect strings as you dip… it’s simply irresistible! This recipe strikes the perfect balance of creaminess and flavor that’ll have your guests begging for the recipe. If you enjoy this, you might also love my Creamy Tuscan Tortellini Soup for another creamy delight.

    Spinach Artichoke Dip Recipe: Irresistibly Creamy & Crowd-Pleasing!

    Recipe

    Why You’ll Love This Spinach Artichoke Dip

    Perfect Balance of Flavors and Textures

    This isn’t just any spinach artichoke dip—it’s a flavor explosion that hits all the right notes. The tanginess from cream cheese, the richness from sour cream, and the savory punch from Parmesan create the perfect backdrop for tender spinach and artichoke hearts. I’ve tested countless versions over the years, and this one consistently earns rave reviews. The texture is spot-on too—not too runny, not too thick—just perfect for scooping. Each bite delivers that satisfying mouthfeel that makes you close your eyes and savor the moment.

    Make-Ahead Convenience

    One of the best things about this dip? It’s a time-saver that actually tastes better when made ahead! Prepare it up to two days before your event, store it in the refrigerator, and the flavors will meld together beautifully. When guests arrive, simply pop it in the oven for that hot, bubbly finish that makes everyone gather around. I’ve relied on this recipe countless times when hosting, and it’s my secret weapon for stress-free entertaining. The convenience factor alone makes this recipe worth keeping in your regular rotation.

    Essential Tips & Tricks

    Ingredient Selection Matters

    The quality of ingredients makes all the difference in this dip. Always use fresh spinach if possible—frozen works in a pinch, but be sure to thoroughly drain it to avoid a watery dip. For artichokes, choose ones packed in water rather than marinated varieties which can overpower the other flavors. When it comes to cheese, freshly grated Parmesan will melt more smoothly than pre-packaged options. I learned this the hard way after a grainy disaster at a dinner party! Remember that cream cheese should be at room temperature for the smoothest incorporation.

    Perfecting the Texture

    Achieving that ideal consistency is crucial for dip success. If your mixture seems too thick during preparation, add a tablespoon of milk or cream at a time until it reaches your desired texture. Conversely, if it’s too thin, incorporate a bit more Parmesan or a sprinkle of breadcrumbs. For a golden, slightly crispy top that adds wonderful textural contrast, broil the dip for the final 1-2 minutes of baking. Just like in my Gluten-Free Taco Casserole, watching that final browning stage is key to perfection!

    Serving Ideas & Creative Variations

    Beyond the Basic Bread Bowl

    While a bread bowl is classic, there are so many creative vessels for serving this dip! Hollow out a sourdough loaf and bake the dip right inside for a showstopping presentation. For a lighter option, arrange colorful veggie sticks—bell peppers, cucumber, and jicama provide wonderful crunch and color contrast. Toasted pita triangles, pretzel crisps, or even homemade tortilla chips are fantastic for scooping. I once served this in individual ramekins at a dinner party, and guests loved having their own personal portion without fighting over the serving dish!

    Flavor Twists and Add-Ins

    The beauty of this spinach artichoke dip lies in its adaptability. Add a kick with diced jalapeños or a few dashes of hot sauce. For a smoky twist, mix in crispy bacon bits or smoked gouda in place of some of the Parmesan. Mediterranean lovers can add sun-dried tomatoes, olives, and a sprinkle of feta. For seafood enthusiasts, fold in some lump crab meat or chopped shrimp—similar to the delicious combination in my Cozy Crockpot Coconut Fish Curry. Each variation creates a whole new experience while maintaining that creamy, comforting base.

    Storage & Troubleshooting Guide

    Proper Storage for Leftovers

    If you’re lucky enough to have leftover dip (which rarely happens in my house!), proper storage ensures it remains just as delicious for days after. Transfer cooled dip to an airtight container and refrigerate for up to 4 days. When reheating, add a splash of milk or cream and stir well to restore the creamy texture. For individual portions, microwave for 30-second intervals, stirring between each. For larger amounts, cover with foil and bake at 350°F until hot throughout—usually about 15-20 minutes. The flavors often deepen after a day in the refrigerator!

    Fixing Common Issues

    Even experienced cooks occasionally encounter dip dilemmas. If your dip separates or looks oily after baking, simply stir it well while hot to re-emulsify the ingredients. For a dip that’s too watery, stir in more grated Parmesan or a sprinkle of cornstarch mixed with cold water, then briefly return to the oven. If your dip lacks flavor, brighten it with a squeeze of lemon juice, extra garlic, or a dash of hot sauce. Remember that seasoning is key—always taste before serving and adjust salt and pepper as needed.

    Frequently Asked Questions

    Can I make spinach artichoke dip in a slow cooker?

    Absolutely! Combine all ingredients in your slow cooker, stir well, and cook on low for 2-3 hours. Stir occasionally to ensure even heating and prevent burning around the edges.

    Is spinach artichoke dip gluten-free?

    The base recipe is naturally gluten-free, but always check your cheese labels as some processed varieties contain additives. Serve with gluten-free crackers or vegetables for a completely gluten-free option.

    Can I use fresh spinach instead of frozen?

    Yes! Sauté about 10 ounces of fresh spinach until wilted, cool slightly, then squeeze out excess moisture before chopping and adding to your dip mixture.

    How do I prevent my dip from being watery?

    Thoroughly drain both spinach and artichokes before adding to your mixture. For extra insurance, pat them dry with paper towels to remove excess moisture.

    Can I freeze leftover spinach artichoke dip?

    Yes, but the texture may change slightly. Freeze in an airtight container for up to 3 months and thaw overnight in the refrigerator before reheating slowly with added cream.

    Final Thoughts

    This spinach artichoke dip has been my go-to recipe for years, earning its place as the most requested appetizer among my friends and family. There’s something wonderfully comforting about watching people gather around a bubbling dish, sharing stories and laughter while enjoying something made with care. The best recipes create moments of connection, and this one never disappoints. Whether it’s for game day, holiday celebrations, or just because it’s Tuesday, this dip brings people together. I hope it becomes a beloved favorite in your home too! For more delicious recipes, check out my collection on Pinterest.

  • Slow Cooker Peanut Butter Chocolate Cookie Bars: Irresistibly Gooey!

    Slow Cooker Peanut Butter Chocolate Cookie Bars: Irresistibly Gooey!

    Slow Cooker Peanut Butter Chocolate Cookie Bars are my absolute favorite indulgence when I want something decadently sweet without the fuss of traditional baking. The first time I made these, my kitchen filled with that irresistible aroma of melting chocolate and peanut butter that made even my teenager abandon his video game to investigate. There’s something magical about letting your slow cooker do all the work while you’re off handling life’s demands. These gooey, rich bars deliver all the comfort of homemade cookies with barely any effort—perfect for busy weeknights or weekend treats. Let me show you how to create this simple yet impressive dessert that’ll have everyone asking for seconds!

    Slow Cooker Peanut Butter Chocolate Cookie Bars: Irresistibly Gooey!

    Recipe

    Perfect for Busy Days

    These slow cooker peanut butter chocolate cookie bars have become my secret weapon for those chaotic days when I’m juggling work deadlines and family commitments. Unlike traditional baking that demands constant attention, these bars practically make themselves while you tackle your to-do list. The hands-off approach means you can simply layer the ingredients, set the timer, and walk away. I love how the slow, gentle heat creates that perfect chewy-yet-gooey texture that’s nearly impossible to achieve in a conventional oven. Plus, they’re ready exactly when you need them—whether for after-school snacks or last-minute guests.

    Foolproof Even for Beginners

    Don’t let baking intimidate you! These slow cooker peanut butter chocolate cookie bars are virtually impossible to mess up, which makes them perfect for novice bakers or cooking with kids. The forgiving nature of slow cooking means you don’t need precise measurements or perfect timing. I remember my first attempt—I was convinced I’d added too much peanut butter, but they turned out absolutely divine! The slow cooker’s consistent temperature eliminates common baking issues like burnt edges or undercooked centers. You’ll achieve that professional bakery-quality result without the stress, and the recipe’s flexibility means you can customize flavors while still getting perfect results every time.

    Essential Tips & Tricks

    Perfecting the Texture

    Getting the ideal consistency for your slow cooker peanut butter chocolate cookie bars depends on a few simple techniques. Line your slow cooker with parchment paper, leaving overhang on all sides—this prevents sticking and makes removal effortless. For chewier bars, cook on low for 2-3 hours; for more cake-like texture, add an extra egg. I’ve found that gently lifting the lid and checking the edges at the 2-hour mark gives me the perfect indicator—when they’re slightly pulling away from the sides, they’re nearly done. Remember that carryover cooking continues after you turn off the heat, so it’s better to undercook slightly than overdo it. Your bars will continue firming up as they cool.

    Ingredient Swaps & Substitutions

    Don’t worry if you’re missing an ingredient or catering to dietary restrictions—these slow cooker peanut butter chocolate cookie bars are incredibly adaptable. For gluten-free options, simply swap regular flour with a 1:1 gluten-free blend. No peanut butter? Almond or sunflower seed butter works beautifully. I once made these when I realized I was out of brown sugar—white sugar with a tablespoon of molasses saved the day! For a dairy-free version, use coconut oil instead of butter and dairy-free chocolate chips. You can even reduce the sugar by 1/4 cup and add mashed banana for natural sweetness. Just remember that liquid substitutions might require adjusting the cooking time slightly.

    Serving Ideas & Creative Variations

    Elevated Dessert Presentations

    Transform these humble slow cooker peanut butter chocolate cookie bars into showstopping desserts with minimal effort. For dinner parties, cut into neat squares and serve warm with a scoop of vanilla bean ice cream and a drizzle of warm caramel sauce. Create a dessert bar by offering toppings like crushed pretzels, toasted coconut, or chocolate ganache for guests to customize their portions. I love serving these at book club with coffee—I cut them into bite-sized pieces and arrange them on a tiered stand with fresh berries and mint leaves. For special occasions, stack alternating layers of bars and whipped cream in clear glasses for an impressive trifle-inspired dessert that looks like you spent hours in the kitchen.

    Seasonal & Holiday Adaptations

    These versatile slow cooker peanut butter chocolate cookie bars can be easily customized for any holiday or season. For Christmas, fold in crushed candy canes and white chocolate chips, then dust with powdered sugar “snow” before serving. Summer gatherings call for a s’mores version—add graham cracker pieces and mini marshmallows during the last 30 minutes of cooking. Halloween? Mix in orange-colored chocolate candies and top with spooky sprinkles. I made these for my daughter’s fall birthday by adding cinnamon, nutmeg, and chopped pecans—the warm spices perfectly complemented the chocolate and peanut butter. For Valentine’s Day, press heart-shaped candies into the top during the final cooking minutes for a festive touch.

    Storage & Troubleshooting Guide

    Keeping Them Fresh

    Preserving the perfect texture of your slow cooker peanut butter chocolate cookie bars is simple with proper storage. Once completely cooled, cut them into portions and store in an airtight container at room temperature for up to 3 days. Place parchment paper between layers to prevent sticking. For longer storage, refrigerate for up to a week—just bring to room temperature before serving to restore their gooey goodness. These bars also freeze beautifully for up to 3 months; wrap individual pieces in plastic wrap, then foil, and place in a freezer bag. I often make a double batch specifically to freeze, giving me instant dessert options for unexpected guests or late-night cravings.

    Fixing Common Issues

    Even the most experienced bakers encounter issues, but most problems with slow cooker peanut butter chocolate cookie bars have simple solutions. If your bars turn out too dry, you likely cooked them too long—next time, check earlier or add 2 tablespoons more butter to the recipe. Too gooey in the center? They need more time, or your slow cooker runs cool—continue cooking in 15-minute increments.

    Uneven cooking is common in older slow cookers; rotate the insert halfway through or invest in a newer model with better heat distribution. If the edges burn but the center is underdone, your cooker might run hot—use the LOW setting exclusively and consider adding a thin layer of water to the space between the insert and heating element.

    Frequently Asked Questions

    Yes, but use a 6-quart or larger slow cooker and increase cooking time by 30-45 minutes. Check frequently after the original cooking time as doubling can affect how evenly they cook.

    How do I know when they’re done cooking?

    Look for set edges that start pulling away from the sides while the center remains slightly soft. A toothpick inserted 1-inch from the edge should come out with a few moist crumbs.

    Can I make these dairy-free?

    Absolutely! Substitute the butter with coconut oil and use dairy-free chocolate chips. The peanut butter already adds richness, so you won’t miss the dairy.

    My slow cooker runs hot. Any suggestions?

    Use only the LOW setting and check 30 minutes earlier than the recipe suggests. Alternatively, place a kitchen towel between the lid and cooker to absorb excess moisture.

    How can I make these bars healthier?

    Reduce sugar by 25%, substitute half the flour with oat flour, use natural peanut butter, and add chopped nuts for protein. Dark chocolate chips contain less sugar than milk chocolate.

    Final Thoughts

    These Slow Cooker Peanut Butter Chocolate Cookie Bars have become my go-to recipe when I need something delicious with minimal effort. There’s something deeply satisfying about creating a dessert that feels special while being incredibly simple. I encourage you to make this recipe your own—experiment with mix-ins, try different nut butters, or adjust the sweetness to your preference. The slow cooker method truly transforms ordinary ingredients into an extraordinary treat that brings people together. Whether for family movie nights or elegant gatherings, these bars never disappoint. Find more inspiration for your next baking adventure on our Pinterest page!

  • Minestrone e Fagioli Soup: Cozy, Hearty Flavor Explosion!

    Minestrone e Fagioli Soup: Cozy, Hearty Flavor Explosion!

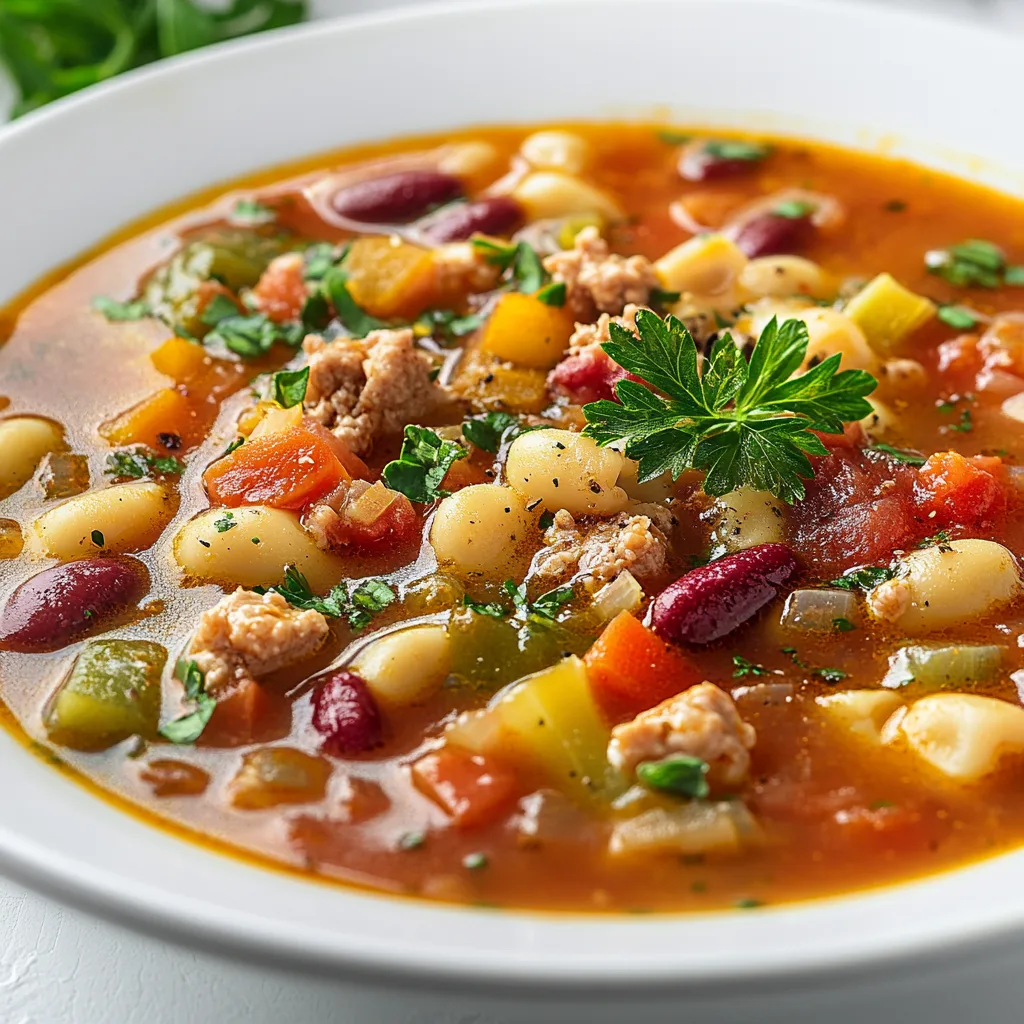
    Minestrone e Fagioli Soup has been my winter salvation for years. There’s something magical about the way those tender beans melt into the rich tomato broth, creating a symphony of textures that dance on your tongue with each spoonful. When the temperatures plummet and my windows fog with condensation, I find myself reaching for my biggest pot to create this Italian classic. The combination of hearty vegetables, robust beans, and delicate pasta creates a meal that’s both nourishing and comforting in equal measure. If you’re looking for a soup that feels like a warm hug, you’ve found it at Recipes Darleen.

    Minestrone e Fagioli Soup: Cozy, Hearty Flavor Explosion!

    Why You’ll Love This Minestrone e Fagioli Soup

    A Complete One-Pot Meal

    This isn’t just soup—it’s a complete nutritional powerhouse in a bowl. The combination of protein-rich cannellini beans, fiber-packed vegetables, and satisfying pasta creates a perfectly balanced meal that keeps you full for hours. I remember making this during a particularly brutal snowstorm last winter, and it sustained my family for days. The beauty lies in its versatility—you can adjust the vegetables based on what’s in your crisper drawer, making it an ideal recipe for reducing food waste. Plus, the flavors deepen overnight, making leftovers even more delicious.

    Budget-Friendly Comfort Food

    In these days of rising grocery prices, Minestrone e Fagioli Soup is a budget hero. Dried beans cost pennies compared to meat, and they create a wonderfully hearty texture that satisfies even dedicated carnivores. The base ingredients—carrots, celery, onions, and canned tomatoes—are pantry staples that won’t break the bank. My grandmother used to say this soup “stretches like elastic,” meaning you can always add another cup of broth and a handful of pasta to feed unexpected guests. It’s the kind of economical cooking that feels luxurious despite its humble ingredients, perfect for feeding a crowd without emptying your wallet.

    Essential Tips & Tricks

    Building Flavor Foundations

    The secret to exceptional Minestrone e Fagioli Soup lies in the flavor foundation. Always start by sautéing your aromatic vegetables—onions, carrots, celery—until they’re soft and fragrant. This crucial step develops a depth that canned soups simply can’t match. Don’t rush this process; those 8-10 minutes of gentle cooking release natural sugars that transform your soup. I learned this the hard way after once trying to shortcut this step—the difference was immediately noticeable. Add a parmesan rind while simmering for an umami boost that elevates the entire pot. This simple addition creates a richness that will have everyone asking for your secret.

    Texture Management Techniques

    Achieving the perfect texture in Minestrone e Fagioli Soup requires attention to timing. Cook pasta separately and add it to individual bowls rather than the pot—this prevents the pasta from absorbing too much broth and becoming mushy. For beans, I prefer using half pre-cooked beans and half mashed beans, creating a naturally thickened broth without flour or cornstarch. My Italian neighbor taught me to reserve some of the bean cooking liquid (if using dried beans) to add back to the soup for extra creaminess. This approach creates a silky mouthfeel that balances perfectly with the chunky vegetables and creates that authentic Tuscan soup experience.

    Serving Ideas & Creative Variations

    Perfect Pairings and Garnishes

    Minestrone e Fagioli Soup deserves thoughtful accompaniments that elevate its rustic charm. A crusty artisan bread for dipping is non-negotiable—I prefer a sourdough or ciabatta with a chewy interior and crackling crust. For garnishes, fresh-grated Parmigiano-Reggiano and a drizzle of high-quality olive oil create a restaurant-worthy presentation. Fresh herbs add brightness—basil in summer, rosemary in winter. My family’s favorite weekend tradition involves serving this soup with a simple antipasto platter of olives, roasted peppers, and thin-sliced prosciutto. The contrast between the warm soup and cool appetizers creates a memorable dining experience that turns a simple meal into an occasion.

    Regional and Seasonal Adaptations

    The beauty of Minestrone e Fagioli Soup lies in its adaptability to seasonal produce and regional preferences. In summer, I lighten it with fresh tomatoes, zucchini, and basil for a garden-fresh version. Winter calls for heartier additions like butternut squash, kale, and rosemary. For a Tuscan twist, add cavolo nero (Tuscan kale) and a splash of red wine. My Sicilian friend adds a pinch of red pepper flakes and fennel seeds for subtle heat and complexity. You can even create fusion versions—try adding curry spices for an Indian-Italian hybrid that works surprisingly well. The soup also pairs beautifully with hearty beef dishes for a complete feast.

    Storage & Troubleshooting Guide

    Optimal Storage Solutions

    Minestrone e Fagioli Soup actually improves with time, making it perfect for meal prep. Store it in airtight containers in the refrigerator for up to 5 days—the flavors will continue to meld and deepen. For freezing, slightly undercook the vegetables and omit the pasta entirely (add fresh when reheating). I portion mine into silicone muffin trays before transferring to freezer bags, creating perfect single-serving portions that thaw quickly. When reheating, add a splash of fresh stock or water to loosen the consistency, as the soup tends to thicken considerably when stored. A fresh grating of parmesan and drizzle of olive oil revives the flavors beautifully.

    Fixing Common Issues

    Even experienced cooks encounter soup challenges, but most are easily remedied. If your Minestrone e Fagioli Soup tastes flat or bland, add acid—a splash of balsamic vinegar or lemon juice instantly brightens flavors. Too thin? Simmer uncovered to reduce, or mash some beans against the side of the pot. Too thick? Add more broth gradually until you reach desired consistency. If vegetables are undercooked but pasta is getting mushy, remove some soup, cook vegetables separately, then recombine. For overly salty soup (often from canned beans or stock), add a raw potato chunk while simmering—it will absorb excess salt before being removed.

    Frequently Asked Questions

    Can I make Minestrone e Fagioli Soup in a slow cooker?

    Absolutely! Add all ingredients except pasta and fresh herbs to your slow cooker. Cook on low for 6-8 hours or high for 3-4 hours. Add pasta during the final 30 minutes, or cook separately and add when serving for best texture.

    What’s the difference between Minestrone and Minestrone e Fagioli Soup?

    Traditional minestrone contains various vegetables and sometimes pasta. Minestrone e Fagioli specifically highlights beans (“fagioli” in Italian) as a primary ingredient, creating a heartier, more protein-rich variation of the classic soup.

    Can I use canned beans instead of dried?

    Yes! Canned beans work perfectly and save significant time. Rinse them thoroughly to remove excess sodium and starch. Add them during the last 15-20 minutes of cooking to prevent them from becoming mushy.

    Is this soup naturally vegetarian?

    The base recipe is vegetarian if you use vegetable broth. For vegan Minestrone e Fagioli, simply omit the parmesan or substitute with nutritional yeast for a similar umami quality.

    How can I make this soup more protein-rich?

    Add Italian sausage, pancetta, or shredded rotisserie chicken for extra protein. For vegetarian options, try adding a parmesan rind while cooking or stirring in nutritional yeast before serving.

    Final Thoughts

    Minestrone e Fagioli Soup represents everything I love about home cooking—simple ingredients transformed into something greater than their parts through time, technique, and love. It’s the kind of recipe that becomes a cornerstone in your culinary repertoire, adapting to seasons and circumstances while always delivering comfort. I hope this soup brings the same warmth to your kitchen that it has to mine over the years. There’s something profoundly satisfying about carrying on this Italian tradition, ladling steaming bowls for loved ones on cold evenings. Don’t forget to check out more cozy recipes on Pinterest!

  • Easy Slow Cooker Salmon with Garlic Lemon Creamy Herb Sauce

    Easy Slow Cooker Salmon with Garlic Lemon Creamy Herb Sauce

    The Easy Slow Cooker Salmon with Garlic, Lemon and Creamy Herb Sauce has completely transformed my weeknight dinner routine. There’s something magical about walking through the door after a long day and being greeted by those aromatic garlic and herb scents wafting from the kitchen. I discovered this recipe last winter when I was craving something that felt special but required minimal effort. The slow cooker gently poaches the salmon to perfect tenderness while infusing it with bright lemon and rich garlic flavors that meld into a velvety herb sauce. Trust me, this dish will make you rethink what’s possible in your slow cooker.

    Easy Slow Cooker Salmon with Garlic Lemon Creamy Herb Sauce

    Recipe

    Why You’ll Love This Easy Slow Cooker Salmon with Garlic, Lemon and Creamy Herb Sauce

    Foolproof Method for Perfect Salmon Every Time

    Even if you’ve had disappointing fish experiences before, this method is nearly impossible to mess up. The gentle, moist heat of the slow cooker creates the perfect environment for salmon, preventing that dreaded dry, overcooked texture. I used to avoid cooking fish at home because the timing felt so precarious—one minute too long and dinner was ruined. But this recipe changed everything. The slow cooker maintains a consistent temperature that slowly brings the salmon to the perfect doneness while allowing all those gorgeous flavors to penetrate deep into the flesh.

    A Flavor Symphony with Minimal Effort

    The flavor complexity in this dish belies how simple it is to prepare. The combination of fresh lemon, minced garlic, and herbs creates a sophisticated profile that tastes like you spent hours in the kitchen. I love how the bright citrus notes cut through the richness of the salmon while the garlic adds depth without overpowering. The slow cooking process allows these flavors to meld together beautifully, creating a harmonious sauce that’s both light and indulgent. It’s the perfect balance of refreshing and comforting.

    Essential Tips & Tricks

    Selecting and Preparing Your Salmon

    Always start with high-quality salmon fillets of even thickness to ensure they cook at the same rate. I prefer wild-caught salmon for its robust flavor, but farm-raised works beautifully too. Before cooking, check for any pin bones by running your fingers along the flesh and removing them with tweezers. Pat the salmon dry with paper towels to remove excess moisture—this helps the seasonings adhere better. A light brush of olive oil before adding your seasonings creates a protective barrier that helps lock in moisture during the slow cooking process.

    Creating the Perfect Garlic Lemon Herb Base

    The foundation of this dish is the aromatic base that infuses the salmon with flavor. Slice lemons thinly and arrange them in a single layer at the bottom of your slow cooker—this prevents the salmon from sticking while adding bright citrus notes. Mince garlic fresh rather than using pre-packaged versions for the most vibrant flavor. When selecting herbs, a combination of dill, parsley, and chives offers wonderful complexity, similar to the herb blend in my creamy Tuscan tortellini soup. Remember to reserve some fresh herbs for garnishing at the end.

    Serving Ideas & Creative Variations

    Elegant Plating Suggestions

    For a restaurant-worthy presentation, serve the salmon on a bed of wilted spinach or creamy mashed potatoes to soak up the delicious sauce. I love to drizzle extra sauce over the top and garnish with fresh herb sprigs and lemon wedges for a pop of color. For dinner parties, try individual portions on warmed plates with a small side of roasted asparagus arranged at an angle. The vibrant colors create a beautiful contrast that makes this simple dish look truly special. A sprinkle of capers adds both visual interest and a tangy flavor burst.

    Seasonal Adaptations and Flavor Twists

    This versatile recipe welcomes creative adaptations based on the seasons. In summer, try adding fresh corn kernels and cherry tomatoes to the sauce for sweetness and color. Fall calls for a heartier version with mushrooms and a splash of white wine. Winter is perfect for incorporating root vegetables like parsnips into the base. For an Asian-inspired twist, swap the herbs for ginger, scallions, and a touch of soy sauce, similar to the flavors in my cozy crockpot coconut fish curry. The possibilities are endless!

    Storage & Troubleshooting Guide

    Proper Storage and Reheating Methods

    Leftover salmon should be refrigerated within two hours of cooking in airtight containers to maintain freshness. It will keep well for up to three days. When reheating, use gentle methods to prevent drying out the fish. My preferred approach is low heat in the microwave (about 30 seconds at 50% power), checking frequently. Alternatively, place in a covered skillet with a tablespoon of water over low heat until just warmed through. The creamy herb sauce helps keep the salmon moist during reheating, which is a wonderful bonus.

    Common Issues and Simple Solutions

    If your sauce appears too thin, there’s an easy fix: remove the salmon and whisk in 1-2 teaspoons of cornstarch dissolved in cold water, then simmer the sauce until thickened. For salmon that seems undercooked, return it to the slow cooker for 10-15 more minutes on high. If you’re concerned about overcooking, use a digital thermometer—perfectly cooked salmon registers at 145°F. Should your herbs darken during cooking (which can happen with certain varieties), simply discard them and garnish with fresh ones before serving for that vibrant color and flavor.

    Frequently Asked Questions

    Can I use frozen salmon for this recipe?

    Yes, but thaw it completely first. Pat dry thoroughly before cooking to remove excess moisture that could dilute your flavors and affect cooking time.

    How do I know when the salmon is perfectly cooked?

    The salmon should flake easily with a fork but still maintain a moist texture. For precision, use a thermometer to reach 145°F internal temperature.

    Can I make this Easy Slow Cooker Salmon with Garlic, Lemon and Creamy Herb Sauce ahead of time?

    While best enjoyed fresh, you can prepare the herb sauce mixture up to 24 hours ahead and refrigerate. Cook the salmon just before serving.

    What slow cooker setting works best for salmon?

    Low setting for 1-2 hours is ideal. High heat can cook too quickly and result in dry fish. Cooking times vary by slow cooker model.

    Can I substitute other fish in this recipe?

    Absolutely! Firm white fish like halibut or cod work beautifully. Adjust cooking time slightly—these may cook faster than salmon.

    Final Thoughts

    This Easy Slow Cooker Salmon with Garlic, Lemon and Creamy Herb Sauce has become my secret weapon for impressive yet effortless meals. What I love most is how it transforms ordinary weeknights into special occasions without demanding hours in the kitchen. The combination of tender salmon, bright lemon, aromatic garlic, and fresh herbs creates a dish that feels both nourishing and indulgent. I hope this recipe brings as much joy to your table as it has to mine. For more delicious slow cooker inspiration, follow me on Pinterest!

  • Cozy Crockpot Coconut Fish Curry: 5 Tender Cod & Veggie Tips

    Cozy Crockpot Coconut Fish Curry: 5 Tender Cod & Veggie Tips

    Cozy Crockpot Coconut Fish Curry with Tender Cod and Vegetables is my ultimate comfort food hack for those evenings when I want something warming but don’t have the energy to stand over the stove. There’s something magical about walking through your front door after a long day and being greeted by those aromatic curry spices mingling with creamy coconut milk. I discovered this recipe last winter when the temperatures dipped below freezing, and I’ve been perfecting it ever since.

    The slow cooker does all the heavy lifting while you get on with your day, and the result is a silky, flavor-packed curry that feels like a warm hug in a bowl. Perfect for weeknights or weekend gatherings when you want to impress without stress!

    Cozy Crockpot Coconut Fish Curry: 5 Tender Cod & Veggie Tips

    Recipe

    Why You’ll Love This Cozy Crockpot Coconut Fish Curry with Tender Cod and Vegetables

    Perfect Balance of Flavors and Textures

    What makes this curry truly special is the perfect harmony of flavors that develop during the slow cooking process. The coconut milk gradually infuses with aromatic spices, creating a velvety base that’s neither too rich nor too light. I love how the cod remains incredibly tender, flaking beautifully with just the touch of a fork. The vegetables maintain their integrity without turning mushy, giving you those delightful texture contrasts in every bite. Last month, my neighbor stopped by just as I was serving this curry, and the look of bliss on her face after the first spoonful told me everything I needed to know!

    Effortless Preparation That Fits Your Schedule

    One of the biggest advantages of this Cozy Crockpot Coconut Fish Curry is how it adapts to your life, not the other way around. The hands-off cooking approach means you’ll spend just 15 minutes on prep work, then let your slow cooker transform simple ingredients into something extraordinary. I often prepare everything the night before, storing the vegetable mixture in the fridge, then simply add it with the coconut milk to the crockpot in the morning. This flexibility has saved countless dinners during hectic weeks when cooking feels impossible but takeout isn’t the answer I’m looking for.

    Essential Tips & Tricks

    Selecting and Preparing the Perfect Fish

    Choosing the right fish makes all the difference in this curry. Firm white fish like cod works beautifully because it holds its shape during slow cooking while absorbing the curry flavors. I recommend cutting larger fillets into 2-inch chunks before adding them to the crockpot. For the freshest results, add the fish during the final 30-45 minutes of cooking time rather than at the beginning. This prevents that unfortunate overcooked texture that can happen with seafood. When I’m feeling fancy, I sometimes use a combination of cod and shrimp for delightful textural variety, similar to my Slow Cooker Mediterranean Fish Stew.

    Building Layers of Flavor

    The secret to depth in this curry lies in how you layer the ingredients. Start by sautéing your aromatics (onions, garlic, ginger) before adding them to the crockpot – this quick step makes a world of difference! Toast your curry paste or powder in the same pan for 30 seconds until fragrant to wake up those essential oils. Another game-changer is adding a tablespoon of fish sauce for umami richness and a squeeze of lime juice at the end to brighten everything. These small touches transform a good curry into an exceptional one that will have everyone asking for your recipe.

    Serving Ideas & Creative Variations

    Perfect Accompaniments for Your Curry

    This coconut fish curry deserves thoughtful accompaniments that complement its creamy texture and complex flavors. Fluffy jasmine rice is my go-to base, perfect for soaking up every last drop of that precious sauce. For a lighter option, cauliflower rice works beautifully. I love serving this curry with warm naan bread or roti on the side for scooping. Fresh garnishes make all the difference – try a handful of cilantro, thinly sliced red chilies, and lime wedges arranged on top. For a complete meal experience that will transport your taste buds, check out my Sweet Potato Almond Curry as an inspiring side dish.

    Exciting Twists on the Classic Recipe

    Don’t be afraid to make this curry your own with some creative adaptations! For a Thai-inspired version, add a tablespoon of Thai red curry paste and finish with fresh basil instead of cilantro. Seafood lovers can transform this into a mixed seafood curry by using half cod and half shrimp, scallops, or mussels (adding shellfish in the last 20 minutes). Vegetarians can skip the fish entirely and double up on vegetables like bell peppers, zucchini, and eggplant for a hearty plant-based alternative. My favorite twist is adding a can of chickpeas for extra protein and texture that makes the curry even more satisfying.

    Storage & Troubleshooting Guide

    Proper Storage and Reheating Methods

    Fish curry requires thoughtful storage to maintain both safety and flavor. Once cooled, transfer leftovers to airtight containers and refrigerate for up to 2 days – any longer isn’t recommended with seafood. When reheating, do so gently on the stovetop over medium-low heat until just warmed through. Avoid microwaving if possible, as it can give fish an unpleasant texture and aroma. If you know you’ll have leftovers, consider removing the portion you’ll save before adding fish to the curry base. This way, you can refrigerate the sauce separately and add fresh fish when reheating for the best quality experience.

    Solving Common Curry Challenges

    Even experienced cooks encounter occasional issues with slow cooker curries. If your sauce is too thin, try this simple fix: remove the lid for the last 30 minutes of cooking to allow excess liquid to evaporate. Alternatively, create a quick slurry by mixing 1 tablespoon of cornstarch with 2 tablespoons of cold water, then stir it into the hot curry. For curry that lacks depth, a teaspoon of garam masala added in the final 10 minutes works wonders. If you accidentally oversalt, don’t panic – add a squeeze of lime juice and an extra splash of coconut milk to balance the flavors and bring everything back into harmony.

    Frequently Asked Questions

    Can I use frozen fish in this Cozy Crockpot Coconut Fish Curry with Tender Cod and Vegetables?

    Yes, but thaw it first! Add frozen fish directly to the slow cooker and you’ll end up with excess water diluting your curry. Always thaw completely, pat dry with paper towels, then add during the final 30-45 minutes of cooking.

    Which vegetables work best in this curry?

    Hardy vegetables like bell peppers, carrots, cauliflower, and potatoes hold up beautifully during slow cooking. More delicate vegetables like spinach, peas, or zucchini should be added during the final 30 minutes to prevent them from becoming mushy.

    Can I make this curry dairy-free?

    Absolutely! This recipe is naturally dairy-free as it uses coconut milk instead of dairy cream. Just ensure your curry paste doesn’t contain hidden dairy ingredients, which is rare but worth checking if you have allergies.

    How spicy is this curry, and can I adjust the heat level?

    The base recipe is mild-to-medium. Easily adjust by adding more or less curry paste/powder. For extra heat, add fresh chilies or cayenne pepper. For a milder version, increase the coconut milk or add a spoonful of sugar.

    Can I cook this on high instead of low in my slow cooker?

    Yes, but reduce total cooking time to 2-3 hours. Still add fish only during the final 20-30 minutes. High settings can make coconut milk separate slightly, so stir occasionally if possible.

    Final Thoughts

    This Cozy Crockpot Coconut Fish Curry with Tender Cod and Vegetables has become my reliable comfort food hero – perfect for those days when you want something that feels special without demanding your constant attention. What I love most is how it fills my home with warming aromas that instantly create a sense of calm and coziness. The combination of creamy coconut, tender fish, and perfectly cooked vegetables makes this dish feel indulgent while actually being quite nourishing. Whether you’re cooking for yourself, your family, or guests, this curry promises to deliver both comfort and flavor in every spoonful. Find more inspiration for your next cozy meal on my Pinterest board!

  • Creamy Tuscan Tortellini Soup: 5 Reasons You’ll Love It!

    Creamy Tuscan Tortellini Soup: 5 Reasons You’ll Love It!

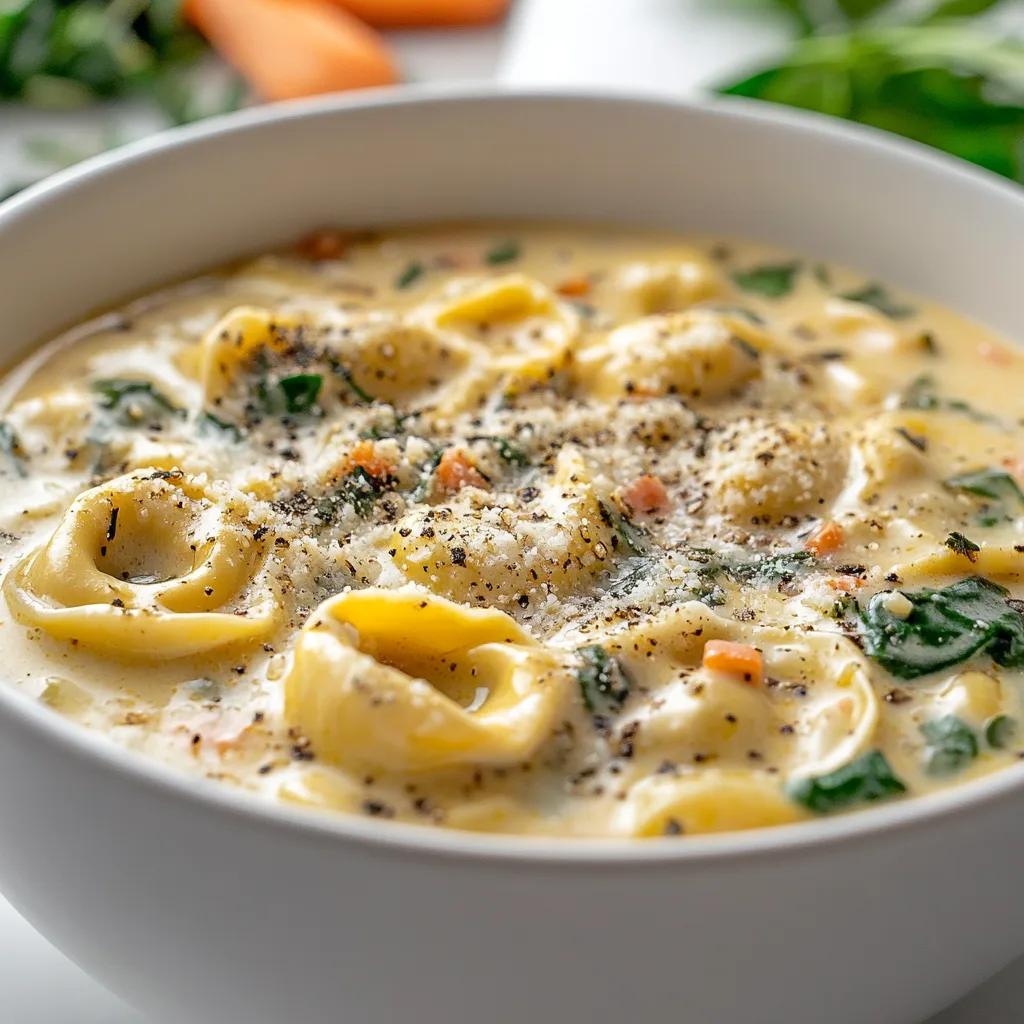
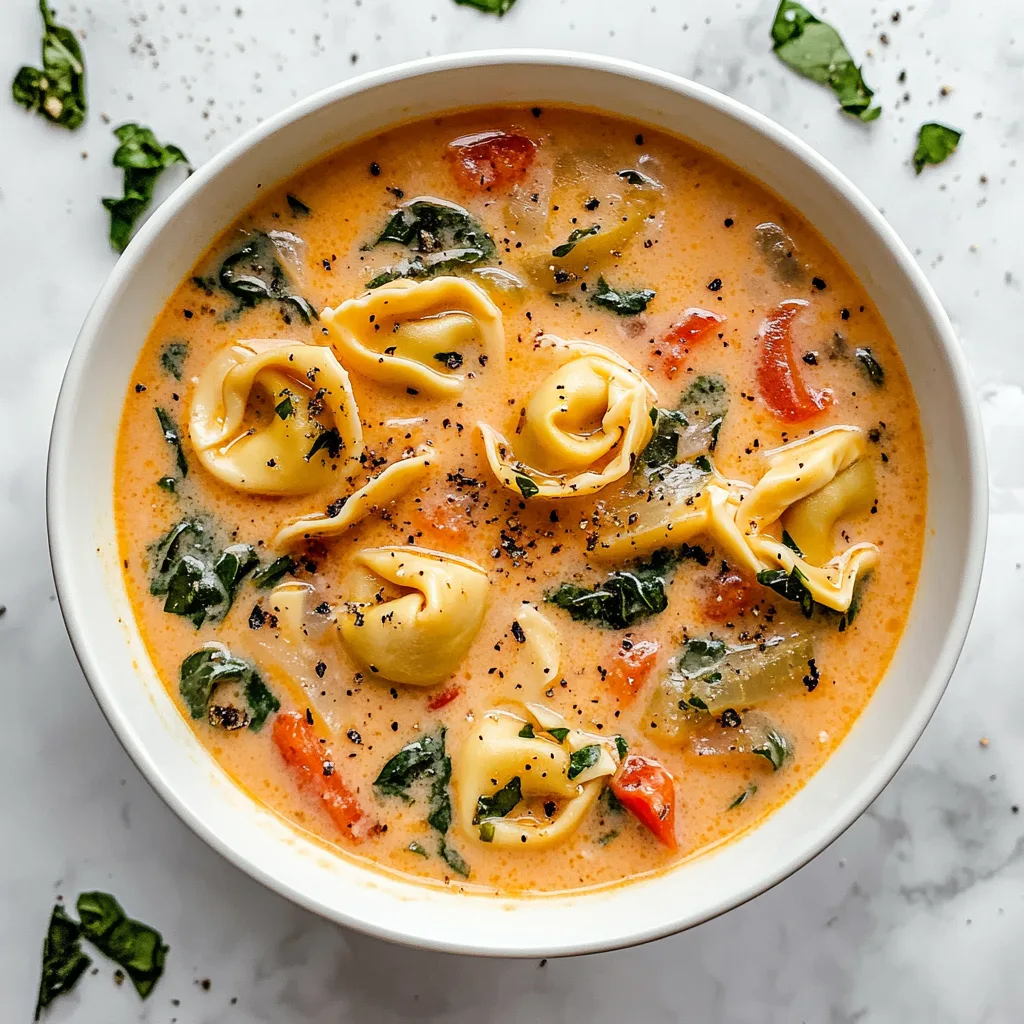
    Creamy Tuscan Tortellini Soup is my ultimate comfort in a bowl when autumn leaves start falling and the air turns crisp. There’s something magical about the way the cheese-filled tortellini pillows float in that rich, velvety broth alongside sun-dried tomatoes and wilted spinach. I discovered this recipe during a particularly rainy weekend last fall, and it’s become my go-to when friends drop by unexpectedly. The Italian-inspired flavors transport me straight to a cozy Tuscan villa, even when I’m just curled up on my sofa with my favorite hearty soup.

    Creamy Tuscan Tortellini Soup: 5 Reasons You’ll Love It!

    Recipe

    Why You’ll Love This Creamy Tuscan Tortellini Soup

    A Complete Meal in One Pot

    This soup is the definition of effortless elegance. The cheese-filled tortellini provides satisfying protein and carbs, while the spinach adds necessary greens. I love how it comes together in just one pot, saving me from a sink full of dishes. On busy weeknights when I’m tempted to order takeout, I remember how quickly this soup comes together—usually faster than delivery! The combination of rich cream, garlic, and Italian herbs creates a restaurant-quality meal that feels indulgent but requires minimal effort.

    Perfect Balance of Flavors and Textures

    The contrasting textures in this soup create a sensory experience that keeps every spoonful interesting. Tender tortellini provides a satisfying chew against the silky broth. The sun-dried tomatoes add chewy, sweet-tart bursts, while the spinach brings a fresh element. I particularly love how the cream mellows the acidity of the tomatoes without making the soup too heavy. My neighbor once described it as “a warm hug in food form,” which perfectly captures how it feels when those Italian seasonings hit your palate.

    Essential Tips & Tricks

    Selecting the Best Ingredients

    Starting with quality ingredients makes all the difference in this Creamy Tuscan Tortellini Soup. I prefer refrigerated tortellini over frozen for its superior texture, though both work in a pinch. For sun-dried tomatoes, look for ones packed in oil—they bring extra flavor to the broth. When it comes to the cream element, I’ve found that heavy cream creates the most luxurious texture, but half-and-half works beautifully if you’re looking for something lighter. Don’t skip the fresh garlic; pre-minced simply doesn’t deliver the same aromatic punch that elevates simple recipes to memorable ones.

    Mastering the Cooking Process

    The secret to perfection lies in the timing. Add the tortellini too early, and it’ll become mushy; too late, and it’ll be undercooked. I always taste-test a tortellini before serving—it should be tender but still have a slight bite. Another game-changer is deglazing the pot after sautéing the aromatics. Those browned bits contain concentrated flavor that enriches the entire soup. If your soup seems too thick, gradually add chicken broth until you reach your desired consistency. Remember that the soup will continue thickening as it cools.

    Serving Ideas & Creative Variations

    Complementary Side Dishes

    This Creamy Tuscan Tortellini Soup pairs beautifully with crusty bread for dipping—I love a rustic Italian loaf or garlic bread to complete the meal. For a lighter accompaniment, a simple arugula salad with lemon vinaigrette provides a peppery contrast to the creamy soup. When I’m hosting, I serve the soup in wide, shallow bowls to showcase all the beautiful components and make it easier to capture both broth and solids in each spoonful. For special occasions, I’ll garnish with a drizzle of good olive oil and a sprinkle of fresh herbs like those in my Mediterranean dishes.

    Creamy Tuscan Tortellini Soup: 5 Reasons You’ll Love It!

    Customization Options

    The beauty of this soup lies in its adaptability. For a protein boost, add shredded rotisserie chicken or Italian sausage. Vegetarians can use vegetable broth and cheese tortellini. I’ve experimented with adding different vegetables—roasted red peppers, zucchini, and mushrooms all work wonderfully. For a dairy-free version, coconut cream creates a surprisingly delicious alternative to heavy cream. My personal favorite variation includes a pinch of red pepper flakes for heat and a splash of white wine that adds complexity to the broth.

    Storage & Troubleshooting Guide

    Proper Storage Techniques

    To maintain the optimal texture, store this Creamy Tuscan Tortellini Soup properly. Refrigerate in an airtight container for up to 3 days. The soup will thicken considerably when chilled, so I always add a splash of broth when reheating. For longer storage, freeze the base soup without tortellini and spinach, then add fresh ones when reheating. I learned this the hard way after freezing a batch with tortellini—they turned to mush upon thawing! When reheating, use gentle heat and stir occasionally to prevent the cream from separating.

    Common Issues and Solutions

    If your soup seems too thin, simmer it uncovered for a few extra minutes to reduce, or create a slurry with a tablespoon each of cornstarch and cold water. For soup that’s too thick, gradually whisk in additional broth or milk. If the cream starts to separate (usually from boiling too vigorously), lower the heat immediately and whisk in a tablespoon of cold cream to re-emulsify. Bland soup can be revived with a squeeze of lemon juice, extra Italian seasoning, or a sprinkle of Parmesan cheese—acid and salt are often the missing elements.

    Frequently Asked Questions

    Can I make Creamy Tuscan Tortellini Soup ahead of time?

    Yes! Prepare the soup base without tortellini and spinach up to 2 days ahead. When ready to serve, reheat the base, add tortellini, and cook until tender, then stir in spinach just before serving.

    What’s the best tortellini to use?

    Cheese tortellini is traditional, but any variety works beautifully. Refrigerated tortellini maintains better texture than frozen, though both are acceptable options depending on availability.

    Is this soup freezer-friendly?

    Freeze only the soup base without tortellini and spinach. When reheating, bring to a simmer and add fresh tortellini and spinach to maintain proper texture and flavor.

    How can I make this soup vegetarian?

    Simply substitute vegetable broth for chicken broth and ensure your tortellini is vegetarian (many cheese varieties are). The flavor profile remains delicious with these simple swaps.

    Can I make Creamy Tuscan Tortellini Soup in a slow cooker?

    Absolutely! Cook the base on low for 4-6 hours, then add tortellini and cook 15-20 minutes more until tender. Stir in spinach and cream during the final 5 minutes.

    Final Thoughts

    Creamy Tuscan Tortellini Soup has become my signature dish when comfort is needed. There’s something magical about watching friends’ faces light up with that first spoonful—the moment the creamy broth, tender tortellini, and bright flavors come together. Whether you’re cooking for a crowd or treating yourself to a special meal, this soup delivers warmth and satisfaction beyond its simple ingredients. I hope it brings as much joy to your table as it has to mine! For more cozy recipes, visit my Pinterest collection.

  • Slow Cooker Mediterranean Fish Stew: 5 Irresistible Tomato & Olive Flavors

    Slow Cooker Mediterranean Fish Stew: 5 Irresistible Tomato & Olive Flavors

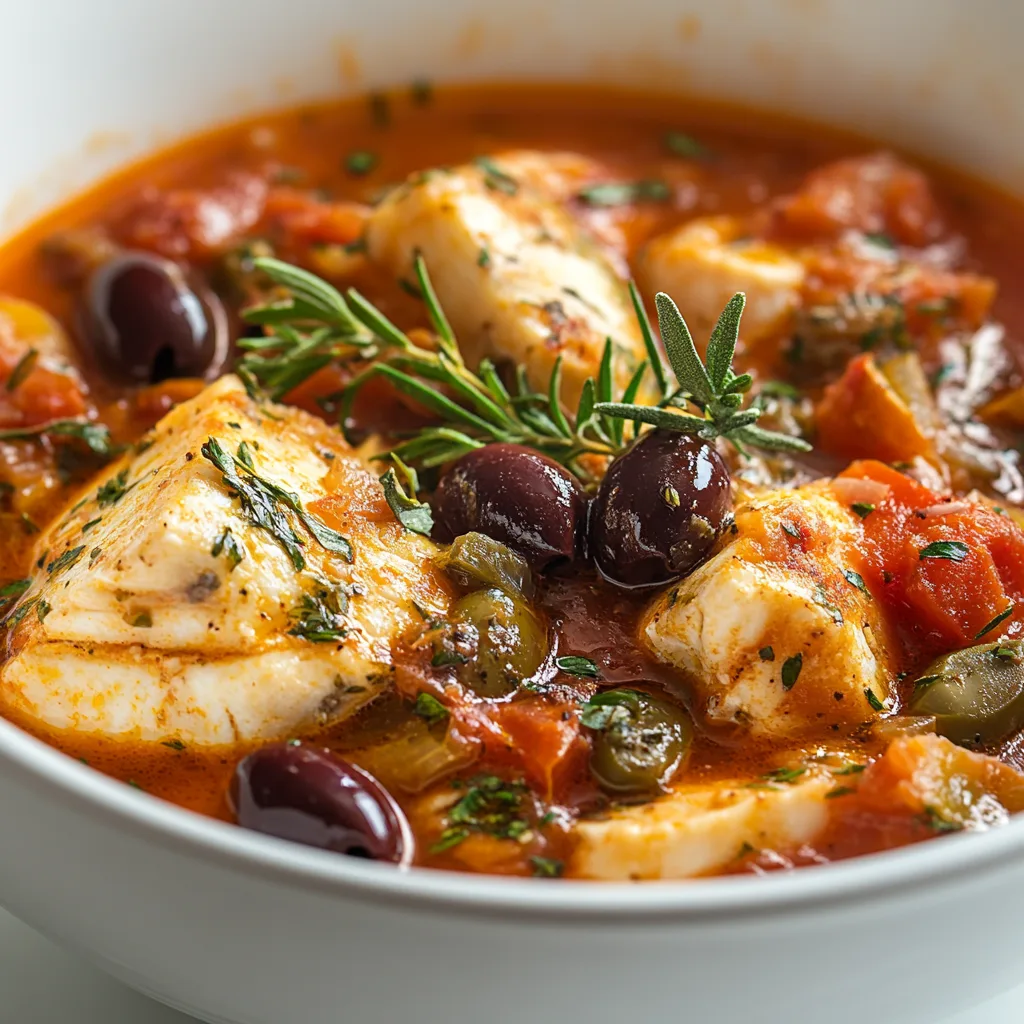
    Slow Cooker Mediterranean Fish Stew with Tomatoes, Olives and Herbs transforms ordinary seafood into a coastal masterpiece that tastes like it simmered all day on a Greek island. The magic happens when robust tomatoes mingle with briny olives and fragrant herbs in your trusty crockpot. I discovered this recipe during a rainy weekend when I craved something that would transport me to sunnier shores. The aroma filled my kitchen with promises of Mediterranean breezes, and that first spoonful—tender fish swimming in a rich, herb-infused broth—was pure comfort. This hearty stew might just become your new cold-weather favorite.

    Slow Cooker Mediterranean Fish Stew: 5 Irresistible Tomato & Olive Flavors

    Recipe

    Why You’ll Love This Slow Cooker Mediterranean Fish Stew with Tomatoes, Olives and Herbs

    A Hands-Off Coastal Escape

    This stew brings Mediterranean magic to your table with minimal effort. While you’re off handling life’s demands, your slow cooker transforms simple ingredients into something extraordinary. The gentle, consistent heat allows the tomatoes to release their sweetness, the herbs to infuse the broth, and the olives to contribute their distinctive brininess. I love how the kitchen fills with an aroma that reminds me of seaside cafés. The best part? You’ll return home to a meal that tastes like you’ve been lovingly tending it all day, when really, your slow cooker did all the work.

    Layers of Flavor That Develop Over Time

    What makes this stew special is how the flavors deepen throughout the cooking process. The acidic tomatoes soften and sweeten, while the herbs release their essential oils into the broth. The olives contribute a salty complexity that balances the sweetness of the fish. I’m always amazed at how the garlic mellows from sharp to nutty as it cooks. Each ingredient maintains its integrity while contributing to the whole—creating a symphony of Mediterranean flavors that couldn’t be achieved with quick cooking methods. It’s like the difference between a hasty conversation and a deep, meaningful connection.

    Essential Tips & Tricks

    Selecting and Preparing the Perfect Fish

    Choosing the right fish makes all the difference in this stew. Firm white fish like cod, halibut, or sea bass holds its shape beautifully during slow cooking. I’ve learned (the hard way!) to add the fish during the last 30-45 minutes of cooking—any earlier and it becomes too flaky. Before adding, check for pin bones by running your fingertips along the fillets. For extra flavor, season the fish with salt, pepper, and a squeeze of lemon before nestling it into the tomato mixture. If using frozen fish, thaw it completely and pat dry to prevent excess water from diluting those gorgeous Mediterranean flavors.

    Balancing Herbs and Acidity

    The herb blend is crucial to achieving authentic Mediterranean flavor. Fresh herbs like oregano, thyme, and bay leaves work wonderfully, but dried herbs can be equally effective—just use about one-third the amount. I always keep a classic tomato basil soup recipe nearby for inspiration on balancing acidity. If your tomatoes are particularly acidic, a pinch of sugar can work wonders. A splash of white wine adds complexity, while a final drizzle of good olive oil just before serving brings everything together. Remember that olives vary in saltiness, so taste before adding additional salt at the end.

    Serving Ideas & Creative Variations

    Mediterranean-Inspired Accompaniments

    Serve this coastal masterpiece with crusty bread for soaking up the flavorful broth—there’s something deeply satisfying about capturing every last drop. A simple green salad dressed with lemon and olive oil provides a fresh counterpoint to the rich stew. For a more substantial meal, consider a side of quinoa power salad or couscous to soak up the savory juices. I love setting the table with lemon wedges, extra fresh herbs, and a small dish of good olive oil for drizzling. These thoughtful touches transform a simple meal into a Mediterranean feast that encourages lingering conversation.

    Exciting Flavor Twists

    Don’t be afraid to make this recipe your own with creative flavor variations. Add a pinch of saffron for a Spanish twist, or incorporate fennel bulb for a subtle anise note. Seafood lovers can transform this into a mixed seafood stew by adding shrimp, mussels, or clams during the last 15 minutes of cooking. For a North African influence, stir in a spoonful of harissa paste or a sprinkle of warm spices like cumin and coriander. I once added roasted red peppers and a dollop of romesco sauce, which created a delightful Catalan-inspired version that my friends still talk about.

    Storage & Troubleshooting Guide

    Proper Storage for Optimal Flavor

    This stew actually improves overnight as the flavors continue to meld in the refrigerator. Store leftovers in airtight containers for up to 3 days—any longer and the fish texture begins to suffer. When reheating, do so gently over low heat to prevent the fish from becoming tough. I prefer using the stovetop rather than the microwave for more even warming. If you’re planning to freeze portions, consider removing the fish first and adding fresh fish when reheating, as frozen and reheated fish can become mealy. The tomato-olive base freezes beautifully for up to 3 months in freezer-safe containers.

    Fixing Common Issues

    If your stew seems too watery, remove the lid during the last 30 minutes of cooking to allow some liquid to evaporate. Alternatively, create a slurry with a teaspoon of cornstarch mixed with cold water and stir it in. For a stew that’s too thick, add a splash of fish stock or clam juice. If the fish has overcooked and broken apart, don’t panic—simply stir gently and embrace it as a rustic, homestyle version. Too acidic? A drizzle of honey or a pinch of sugar can balance the flavors. Remember that Mediterranean cooking is forgiving and adaptable—minor adjustments can easily bring your stew back into perfect harmony.

    Frequently Asked Questions

    Can I use frozen fish in this Mediterranean stew?

    Yes, but thaw it completely first and pat dry with paper towels. Add it during the last 30-45 minutes of cooking to prevent it from becoming mushy or falling apart.

    How can I make this Slow Cooker Mediterranean Fish Stew with Tomatoes, Olives and Herbs spicier?

    Add red pepper flakes at the beginning of cooking or stir in some harissa paste. For a milder heat, try a sprinkle of Aleppo pepper just before serving.

    Can I make this stew ahead of time?

    Prepare the tomato-olive base a day ahead, refrigerate, then reheat and add the fish 30-45 minutes before serving. This actually enhances the flavor complexity.

    What’s the best type of olives to use?

    Kalamata olives provide authentic Mediterranean flavor, but any combination of black and green olives works well. Just ensure they’re pitted to avoid surprise encounters!

    Is this recipe gluten-free?

    Yes, this stew is naturally gluten-free. Just be cautious with store-bought broths and tomato products, which occasionally contain hidden gluten ingredients.

    Final Thoughts

    This Slow Cooker Mediterranean Fish Stew with Tomatoes, Olives and Herbs brings the sunny flavors of coastal villages right to your dinner table with remarkable ease. I find myself returning to this recipe whenever I need comfort food that doesn’t weigh me down. There’s something magical about how a few simple ingredients transform into something so nourishing and satisfying. Don’t forget to check out our Pinterest board for more Mediterranean-inspired recipes that might complement this stew perfectly. Your slow cooker truly becomes a passport to distant shores with this adaptable, flavor-packed dish.

  • Slow-Braised Beef Roast Recipe: 5 Reasons You’ll Love It!

    Slow-Braised Beef Roast Recipe: 5 Reasons You’ll Love It!

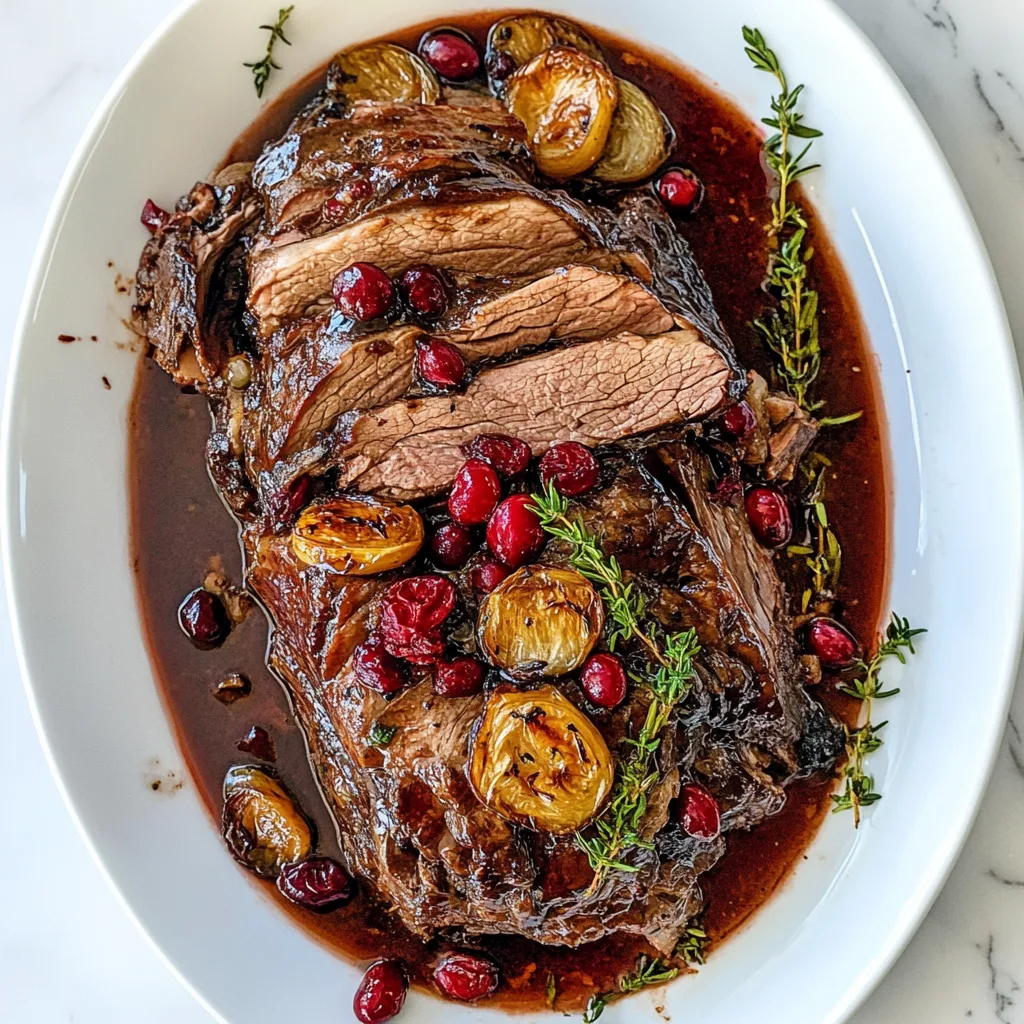
    Slow-Braised Beef Roast with Cranberry Balsamic Glaze is the kind of dish that transforms an ordinary Sunday dinner into a memorable feast. I stumbled upon this recipe years ago during a particularly chilly autumn weekend when I was craving something that would fill my kitchen with mouthwatering aromas. The combination of tender beef that falls apart at the touch of a fork and that sweet-tart cranberry balsamic glaze creates pure magic on your plate. Trust me when I say this dish has become my go-to for impressing guests or simply treating myself to something special after a long week. If you love hearty beef dishes, this one deserves a permanent spot in your recipe collection.

    Slow-Braised Beef Roast Recipe: 5 Reasons You’ll Love It!

    Recipe

    Why You’ll Love This Slow-Braised Beef Roast with Cranberry Balsamic Glaze

    Perfect Balance of Flavors

    There’s something almost magical about the way the tangy cranberries complement the rich, savory beef in this recipe. The balsamic vinegar adds depth while bringing out the natural sweetness of the cranberries, creating a glaze that’s perfectly balanced—not too sweet, not too tart. I love how the aromatics (onions, garlic, and fresh herbs) infuse into the meat during the long, slow braise. My kitchen always smells absolutely divine about halfway through cooking, and that first taste never disappoints. The flavors develop and meld together in a way that simply can’t be rushed.

    Foolproof Method for Tender Results

    Even if you’re new to braising, this recipe is remarkably forgiving and approachable. The slow cooking process breaks down the tough connective tissues in the beef, resulting in meat so tender you barely need a knife. I remember the first time I made this for my in-laws—I was nervous about serving something new, but the low-and-slow method meant I could relax knowing the beef would turn out perfectly tender. The hands-off cooking time gives you freedom to prepare sides or simply enjoy your day while your dinner essentially cooks itself. It’s nearly impossible to overcook!

    Essential Tips & Tricks

    Selecting and Preparing Your Beef

    Choosing the right cut of beef makes all the difference in this recipe. Look for chuck roast, brisket, or bottom round—cuts with good marbling that benefit from long cooking. I once tried making this with a leaner cut and while still good, it wasn’t nearly as succulent. Before cooking, bring your meat to room temperature (about 30 minutes on the counter) and pat it thoroughly dry with paper towels. This step is crucial for achieving that beautiful initial sear that locks in flavor. Season generously with salt and pepper all over, including the sides. Don’t rush the browning stage—those caramelized bits are flavor gold!

    Perfecting Your Cranberry Balsamic Glaze

    The glaze is the star of this dish, so don’t rush it! Start with fresh cranberries when possible (frozen work too, but don’t thaw them first). For the balsamic, use a decent quality vinegar—nothing super expensive, but not the cheapest either. I like to add a small splash of port or red wine for depth, though this is optional. Let the glaze reduce until it coats the back of a spoon before adding it to the beef. If you prefer a smoother texture, you can strain or blend the glaze, but I love the rustic texture with whole cranberry bits. For more hearty meal ideas, check out these gluten-free beef stew recipes.

    Serving Ideas & Creative Variations

    Classic Pairings That Never Fail

    This roast practically begs for creamy mashed potatoes to soak up that glorious glaze. The contrast between the silky potatoes and the rich beef is simply heavenly. I also love serving it with roasted root vegetables—carrots, parsnips, and turnips take on a wonderful caramelized sweetness that complements the tangy glaze. For a green element, consider steamed green beans with a touch of butter and lemon, or a simple arugula salad dressed with olive oil and shaved parmesan. If you’re feeling indulgent, try it alongside garlic butter prime rib for a truly spectacular feast.

    Exciting Twists on the Traditional Recipe

    Don’t be afraid to make this recipe your own! For a holiday spin, add a cinnamon stick and star anise to the braising liquid. For something more savory, incorporate mushrooms during the last hour of cooking. I’ve experimented with adding orange zest and a splash of Grand Marnier to the glaze for a citrusy twist that works beautifully. You can also transform leftovers into amazing sandwiches on crusty bread with a layer of horseradish cream, or shred the beef and use it to fill ravioli with a drizzle of the reduced glaze. For a lighter meal, serve the beef over a bed of peppery arugula.

    Storage & Troubleshooting Guide

    Making Ahead and Storing Leftovers

    This roast actually improves with time, making it perfect for meal prep or entertaining. You can prepare it up to three days ahead—just reheat gently in a 300°F oven with a splash of beef broth. For storage, let the roast cool completely before refrigerating in an airtight container with some of its braising liquid to keep it moist. It will keep beautifully for 3-4 days. To freeze, portion the sliced or shredded beef with some sauce, wrap tightly, and freeze for up to 3 months. Thaw overnight in the refrigerator before reheating slowly with a little extra broth to maintain moisture.

    Solving Common Cooking Challenges

    If your beef isn’t as tender as expected after the recommended cooking time, don’t panic—some cuts simply need longer. Continue cooking in 30-minute increments until it reaches that perfect fork-tender stage. For a glaze that’s too thin, remove the meat and reduce the sauce over medium-high heat until it reaches your desired consistency. If it’s too thick, add a splash of beef broth or water. If you find the flavor needs brightening, a teaspoon of balsamic vinegar or a squeeze of fresh orange juice can work wonders. Remember that salt is your friend—it enhances all the flavors.

    Frequently Asked Questions

    Can I make Slow-Braised Beef Roast with Cranberry Balsamic Glaze in a slow cooker?

    Absolutely! Brown the meat first, then cook on low for 8-10 hours. Add the cranberry glaze during the last hour of cooking for best results. The slow cooker method works beautifully for busy days.

    What’s the best cut of beef to use?

    Chuck roast is my top recommendation for its marbling and flavor. Brisket and bottom round are excellent alternatives. Look for cuts with good fat distribution for the most tender results.

    Can I use dried cranberries instead of fresh?

    Yes, but rehydrate them first in hot water for 15 minutes. You’ll need to adjust the sweetness as dried cranberries contain more sugar than fresh ones. The flavor profile will be slightly different but still delicious.

    How do I know when the beef is done?

    The beef is ready when it easily shreds with a fork and has reached an internal temperature of about 195°F. At this point, the collagen has broken down, resulting in that melt-in-your-mouth texture.

    Can I prepare this dish in advance for a dinner party?

    This is an ideal make-ahead dish! Prepare it 1-2 days before, refrigerate, then reheat slowly in the oven at 300°F with a splash of broth. The flavors actually improve with time.

    Final Thoughts

    This Slow-Braised Beef Roast with Cranberry Balsamic Glaze has become my signature dish for good reason. It strikes that perfect balance between impressive and approachable—something that looks and tastes like you spent all day in the kitchen (even though much of the cooking time is hands-off). I love watching guests’ eyes light up with that first bite, as the tender beef and complex glaze create a truly memorable dining experience. Whether for a special occasion or a cozy weekend meal, this recipe delivers comfort and elegance in equal measure. Don’t forget to check out more recipe inspiration on Pinterest!