Author: Darleen Vance

  • Spaghetti with Spicy Scallop: Irresistible Heat That Sizzles!

    Spaghetti with Spicy Scallop: Irresistible Heat That Sizzles!

    Spaghetti with Spicy Scallop: Irresistible Heat That Sizzles!

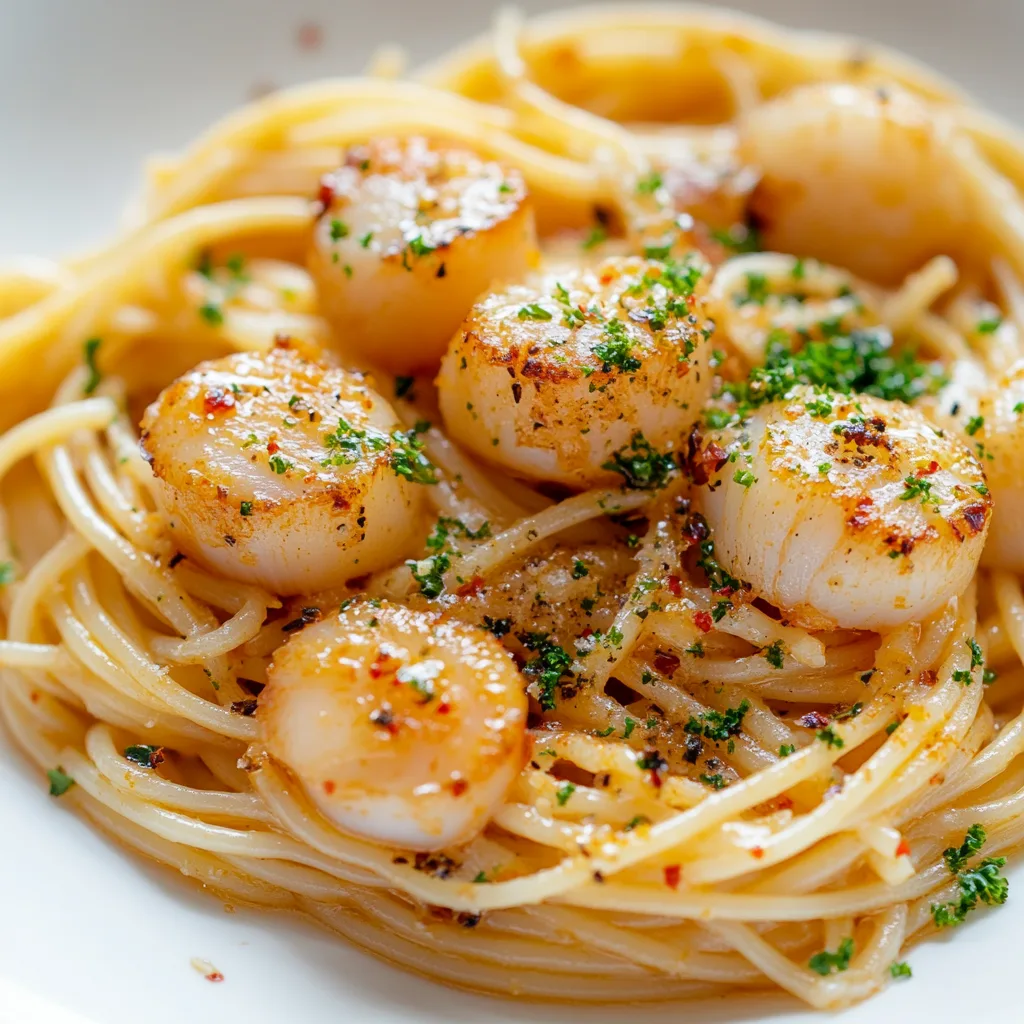
    Spaghetti with Spicy Scallop is one of those dishes that transforms an ordinary weeknight into something special. The first time I made this, my kitchen filled with the intoxicating aroma of garlic and chili-kissed scallops searing in butter, and I knew this would become a staple in my recipe collection. There’s something magical about the way plump scallops nestle among al dente pasta strands, creating the perfect bite every time. Whether you’re cooking for someone special or treating yourself, this elevated yet simple dish delivers restaurant-quality flavor with surprisingly little effort.

    Recipe

    Why You’ll Love This Spaghetti with Spicy Scallop

    Perfect Balance of Flavors and Textures

    What makes this Spaghetti with Spicy Scallop truly special is how each element complements the others. The tender, sweet scallops develop a gorgeous caramelized crust when properly seared, creating a beautiful contrast against the slight heat from red pepper flakes. I love how the silky pasta provides the perfect backdrop for these flavors to shine. The dish hits all the right notes: spicy, savory, slightly sweet from the scallops, and rich from the butter and olive oil base. It’s complex enough to impress but relies on the natural flavors of quality ingredients.

    Quick Yet Impressive Dinner Option

    One night when unexpected guests announced they were “just dropping by,” this Spaghetti with Spicy Scallop recipe saved me. It comes together in under 30 minutes but tastes like something that simmered all day. The scallops cook in mere minutes, and while your pasta boils, you can prepare everything else. I keep frozen scallops on hand specifically for these occasions – they thaw quickly and transform into a meal that makes people think you’ve been planning for days. The elegant presentation belies how simple it actually is to prepare.

    Essential Tips & Tricks

    Selecting and Preparing Perfect Scallops

    The foundation of exceptional Spaghetti with Spicy Scallop begins with choosing the right scallops. Look for dry-packed sea scallops rather than wet-packed ones, which have been treated with chemicals and release too much liquid when cooking. Before cooking, always pat them completely dry with paper towels – this is non-negotiable if you want that beautiful golden crust. Remove the small side muscle if it’s still attached (it looks like a little rectangular tag). For the best flavor experience, try to find scallops that are roughly the same size so they cook evenly, similar to how I prepare seafood for my Crispy Crab and Shrimp Queso Taquitos.

    Mastering the Perfect Sear

    The difference between good and great Spicy Scallop pasta comes down to the sear. Heat your pan until it’s screaming hot before adding oil – it should shimmer but not smoke. Place scallops in with space between each one (overcrowding causes steaming instead of searing). The secret that took me years to learn: don’t touch them for at least 1-2 minutes. Resist the urge to peek or move them until they release naturally from the pan. This patience creates that coveted golden crust that adds tremendous flavor to the entire dish.

    Serving Ideas & Creative Variations

    Complementary Side Dishes

    While Spaghetti with Spicy Scallop shines as a standalone meal, pairing it with the right sides elevates the experience. A simple arugula salad with lemon vinaigrette provides a peppery, fresh counterpoint to the rich pasta. Crusty garlic bread is perfect for soaking up every last drop of the sauce – I’ve been known to fight for these last morsels! For a more substantial meal, roasted asparagus or broccolini adds color and nutrition. These sides follow the same philosophy as my Spicy Cajun Chicken Pasta – complementary flavors that don’t compete with the star of the show.

    Exciting Flavor Variations

    The beauty of Spaghetti with Spicy Scallop lies in its adaptability. For a Mediterranean twist, add halved cherry tomatoes, capers, and a splash of white wine to the sauce. Craving something creamier? Stir in 2-3 tablespoons of mascarpone or heavy cream at the end. My personal favorite variation incorporates lemon zest and fresh herbs like basil or tarragon, which brighten the entire dish. For seafood lovers, mix in a handful of shrimp or lump crab meat alongside the scallops for an indulgent seafood pasta that never fails to impress dinner guests.

    Storage & Troubleshooting Guide

    Proper Storage Solutions

    While Spaghetti with Spicy Scallop is best enjoyed fresh, sometimes leftovers are inevitable. Store in an airtight container in the refrigerator for up to 2 days. The trick to reheating without rubbery scallops is gentle heat – I recommend warming on the stovetop over medium-low, adding a splash of water or broth to revive the sauce. Avoid microwaving if possible, as it tends to overcook the scallops. If you know in advance you’ll have leftovers, consider slightly undercooking the scallops initially so they don’t become tough upon reheating.

    Troubleshooting Common Issues

    The most frequent challenge with Spicy Scallop pasta is preventing scallops from releasing too much water, which dilutes the sauce. The solution is twofold: thoroughly pat dry scallops before cooking and ensure your pan is properly heated. If your scallops aren’t developing that golden crust, your pan likely wasn’t hot enough. For pasta that clumps together, remember to reserve some pasta water before draining – adding a splash while tossing everything together creates a silky sauce that coats each strand perfectly. If your dish lacks flavor, finish with flaky sea salt and freshly ground black pepper right before serving.

    Frequently Asked Questions

    How do I know when scallops are perfectly cooked?

    Perfectly cooked scallops have a golden-brown crust on each side but remain slightly translucent in the center. They should feel firm but still have a slight give when pressed. Total cooking time is typically 2-3 minutes per side, depending on size.

    Can I substitute the spicy elements if I can’t handle heat?

    Absolutely! Replace red pepper flakes with sweet paprika for color without heat. You’ll still get a flavorful Spaghetti with Spicy Scallop dish with a milder profile that everyone can enjoy.

    What’s the best pasta shape to use with scallops?

    Long pasta shapes like spaghetti, linguine, or bucatini work best as they twirl beautifully with the sauce. For something different, try fettuccine or even angel hair, which cooks even more quickly.

    Can I make this dish ahead for a dinner party?

    I don’t recommend making the entire dish ahead. Instead, prep ingredients and have everything ready to cook. Scallops take minutes to sear, and assembling last-minute ensures the best texture and flavor.

    What wine pairs best with Spaghetti with Spicy Scallop?

    A crisp, dry white wine like Pinot Grigio, Sauvignon Blanc, or unoaked Chardonnay complements the delicate scallops while standing up to the spicy elements in the dish.

    Final Thoughts

    This Spaghetti with Spicy Scallop recipe has become my go-to for those nights when I crave something special without hours in the kitchen. The magic happens in the balance – tender scallops, perfectly cooked pasta, and just enough heat to make things interesting. I’ve served this to first dates, longtime friends, and picky family members, always with the same result: empty plates and requests for seconds. For more seafood inspiration, follow my Pinterest boards where I’m constantly adding new ideas for elevating everyday ingredients into memorable meals.
  • Crockpot Kung Pao Chicken Recipe That Will Wow Your Taste Buds!

    Crockpot Kung Pao Chicken Recipe That Will Wow Your Taste Buds!

    Crockpot Kung Pao Chicken Recipe That Will Wow Your Taste Buds!

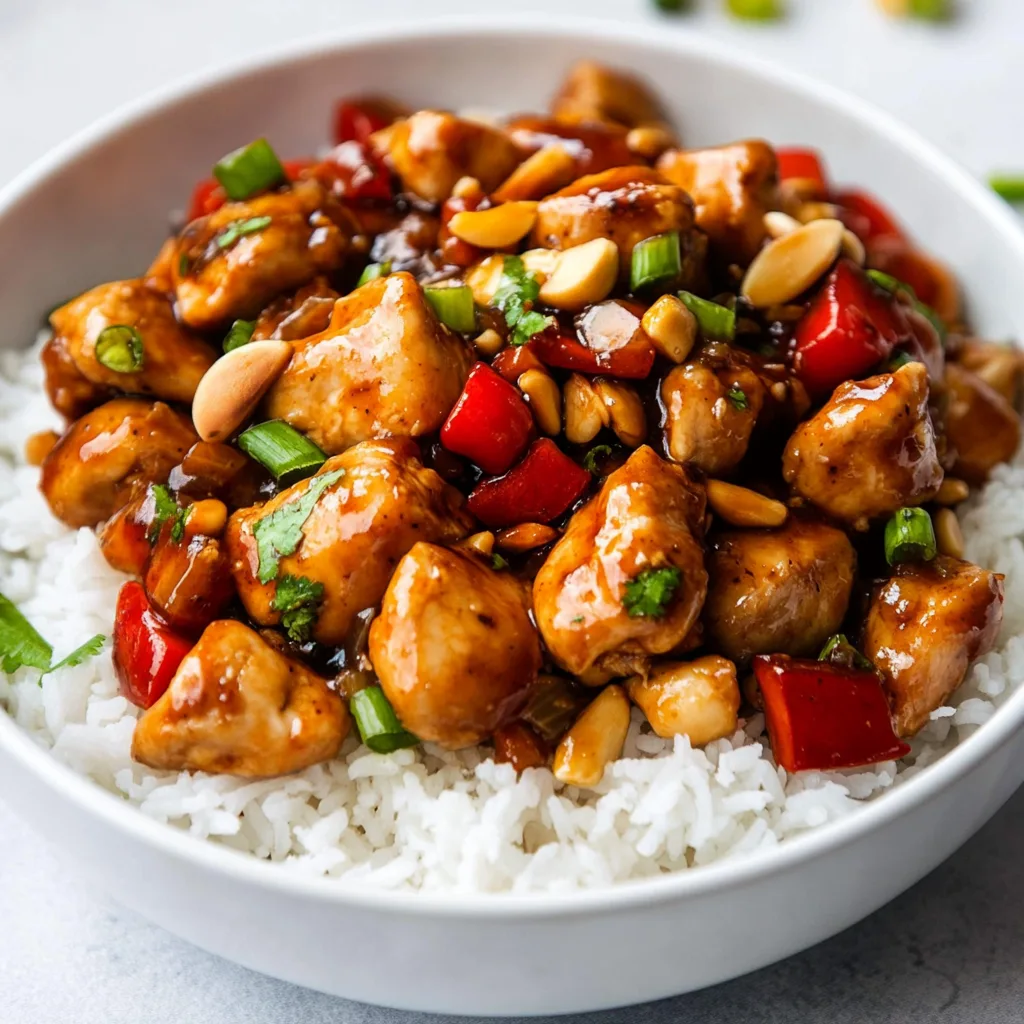
    Crockpot Kung Pao Chicken is the answer to those evenings when you crave something bold and satisfying but don’t have the energy for complex cooking. I discovered this recipe during a particularly hectic week when takeout was becoming a dangerous habit. The magic happens when tender chicken mingles with sweet bell peppers, crunchy peanuts, and that signature spicy-sweet sauce—all while your crockpot does the heavy lifting. It’s become my secret weapon for busy weeknights, offering that perfect balance of convenience and flavor that makes dinner feel special even when time is tight.

    Recipe

    Why You’ll Love This Crockpot Kung Pao Chicken

    Perfect Balance of Flavors

    There’s something utterly captivating about the harmony of flavors in Crockpot Kung Pao Chicken. The sauce achieves that elusive sweet-spicy balance that makes your taste buds dance—honey and brown sugar mellowing the heat from dried chilies and sriracha. What I adore most is how the slow cooking allows the chicken to absorb every nuance of flavor, becoming tender and succulent while soaking up that complex sauce. The contrast between the soft chicken and the crunch of bell peppers and peanuts creates a textural playground that makes each bite interesting and satisfying.

    Effortless Preparation

    The beauty of this Crockpot Kung Pao Chicken lies in its simplicity. You’ll spend just 15 minutes of hands-on time before your slow cooker transforms basic ingredients into something extraordinary. I love that I can toss everything together in the morning (chicken, sauce ingredients, and vegetables), set the timer, and return hours later to a kitchen filled with mouthwatering aromas. The final touch—adding bell peppers for the last 30 minutes—ensures they maintain that perfect crisp-tender bite rather than becoming mushy. It’s practically foolproof, even on my most scattered days.

    Essential Tips & Tricks

    Perfecting the Sauce

    The heart of any great Crockpot Kung Pao Chicken is its velvety sauce. For maximum flavor depth, I recommend toasting your dried chilies in a dry pan for 30 seconds before adding them to the crockpot—this small step awakens their oils and intensifies their flavor. Another game-changer is adding a tablespoon of hoisin sauce, which brings a complex sweetness that balances the heat perfectly. If you’re serving both spice-lovers and spice-cautious folks, prepare the base recipe milder and offer sriracha or red pepper flakes on the side. Like my Cajun Potato Soup, the key is finding that perfect balance between bold and approachable.

    Choosing the Right Chicken

    The chicken thighs versus breasts debate is real! After multiple tests, I’ve found that boneless, skinless chicken thighs create the most tender, flavorful Crockpot Kung Pao Chicken. Their higher fat content prevents them from drying out during the long cooking process, and they absorb the sauce more effectively. If you must use breasts, reduce the cooking time by about an hour and check frequently to prevent overcooking. Whichever cut you choose, make sure to cut the pieces into uniform 1-inch cubes so they cook evenly and remain juicy throughout the slow-cooking process.

    Serving Ideas & Creative Variations

    Perfect Pairings

    Crockpot Kung Pao Chicken deserves worthy companions on your plate. Fluffy jasmine rice is my go-to base—its subtle floral notes and perfect texture capture every drop of that precious sauce. For a lower-carb option, cauliflower rice works beautifully, or try serving it over rice noodles for a different textural experience. To balance the meal, I like to add a simple side of steamed broccoli or a crisp Asian slaw with rice vinegar dressing. The combination reminds me of my Creamy Coconut Milk Chicken—satisfying but not heavy, with complementary flavors that enhance the main dish.

    Exciting Variations

    Don’t be afraid to make this Crockpot Kung Pao Chicken recipe your own! For a seafood twist, substitute shrimp for chicken (adding them during the last 30 minutes of cooking). Vegetarians can use firm tofu or tempeh—just press it well before adding to absorb maximum flavor. My favorite variation includes adding snow peas, water chestnuts, or bamboo shoots for extra texture and nutrients. For a fusion approach, try serving it in lettuce cups topped with crispy wonton strips and cilantro. The versatility of this dish means you’ll never grow tired of it, even in regular rotation.

    Storage & Troubleshooting Guide

    Proper Storage Techniques

    Your Crockpot Kung Pao Chicken makes excellent leftovers when stored properly. Allow it to cool completely before transferring to airtight containers—this prevents condensation that can make the sauce watery. In the refrigerator, it stays delicious for up to 4 days, with the flavors often deepening over time. For freezing, I recommend portioning into meal-sized containers without the garnishes (save those fresh peanuts and green onions for after reheating). Frozen portions remain good for about 3 months. When reheating, add a splash of chicken broth if the sauce has thickened too much.

    Fixing Common Issues

    Even experienced cooks encounter challenges with Crockpot Kung Pao Chicken. If your sauce is too thin, try this quick fix: remove the chicken and vegetables, then transfer the liquid to a saucepan. Create a cornstarch slurry (1 tablespoon cornstarch mixed with 2 tablespoons cold water) and whisk it into the simmering sauce until it reaches your desired thickness. For sauce that’s too spicy, add a tablespoon of honey or a splash of coconut milk to mellow the heat. If your chicken turned out dry, next time consider using thighs instead of breasts or reducing your cooking time by 30-60 minutes.

    Frequently Asked Questions

    Can I make Crockpot Kung Pao Chicken ahead of time?

    Absolutely! Prepare it up to 2 days ahead, refrigerate, and reheat gently on the stovetop or microwave. The flavors actually deepen overnight, making it even more delicious the next day.

    How spicy is traditional Kung Pao Chicken?

    Authentic Kung Pao Chicken is moderately spicy with Sichuan peppercorns creating a numbing sensation. My crockpot version is customizable—adjust the dried chilies and sriracha to your preference.

    What vegetables work best in this recipe?

    Bell peppers are traditional, but zucchini, mushrooms, water chestnuts, and snow peas all work beautifully. Add firmer vegetables during the last hour of cooking to maintain their texture.

    Can I make this recipe gluten-free?

    Yes! Use tamari instead of soy sauce and check your hoisin sauce label for gluten. The rest of the ingredients in Crockpot Kung Pao Chicken are naturally gluten-free.

    How do I prevent the chicken from drying out?

    Use chicken thighs instead of breasts, cut pieces uniformly, don’t overcook, and ensure there’s enough liquid in your crockpot. The sauce should partially cover the chicken while cooking.

    Final Thoughts

    This Crockpot Kung Pao Chicken has become a cornerstone in my meal rotation for good reason—it delivers restaurant-quality flavor with minimal effort. What I love most is how it brings a sense of adventure to weeknight dinners without requiring culinary acrobatics. The combination of tender chicken, vibrant vegetables, and that addictive sauce creates something truly special. I hope this recipe brings as much joy to your table as it has to mine! Don’t forget to check out more delicious ideas on our Pinterest page for your next culinary inspiration.

  • Hissy Fit Dip: Irresistibly Creamy Snack That Sparks Joy Instantly!

    Hissy Fit Dip: Irresistibly Creamy Snack That Sparks Joy Instantly!

    Hissy Fit Dip: Irresistibly Creamy Snack That Sparks Joy Instantly!

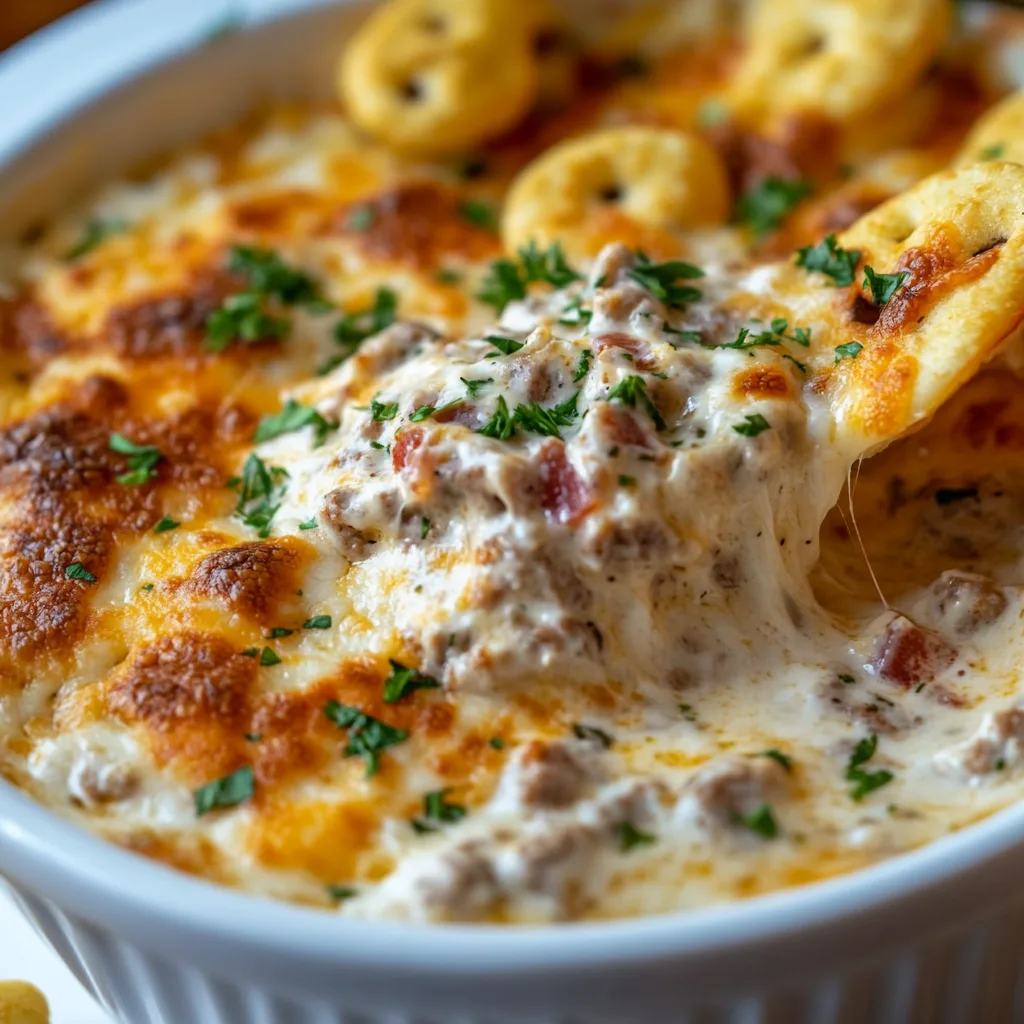
    Hissy Fit Dip is the ultimate crowd-pleaser that never fails to spark joy at gatherings. The first time I brought this creamy, cheesy concoction to my sister’s holiday party, people literally hovered around it all night! There’s something magical about the combination of sausage, cream cheese, and sour cream that creates this irresistible dip that causes people to throw a little “hissy fit” when it’s gone. Whether you’re hosting game day or need a guaranteed hit for your next potluck, this dip delivers that perfect balance of savory richness and addictive texture that keeps everyone coming back for more. Check out my Cajun Potato Soup for another crowd favorite!

    Recipe

    Why You’ll Love This Hissy Fit Dip

    Perfect Party Pleaser

    This Hissy Fit Dip has earned its dramatic name for good reason – it causes quite the stir when the bowl empties! The creamy base combines velvety cream cheese, tangy sour cream, and sharp cheddar that melts into pure decadence. What makes this dip truly special is how the Italian sausage adds a savory punch while the green onions provide a fresh contrast. I’ve watched guests literally scrape the bottom of the dish with their chips! The best part? It’s incredibly simple to make despite tasting like you spent hours in the kitchen. That’s my kind of entertaining recipe.

    Make-Ahead Magic

    One of my favorite things about Hissy Fit Dip is its time-saving potential. You can prepare it entirely the day before, refrigerate overnight, and simply pop it in the oven before guests arrive. The flavors actually develop and deepen as it sits, making it even more delicious the next day. I’ve found this particularly helpful when hosting holiday gatherings – one less thing to prepare while you’re juggling multiple dishes. The dip reheats beautifully without separating, maintaining that perfect creamy consistency that makes it so craveable. Your future self will thank you!

    Essential Tips & Tricks

    Perfect Texture Secrets

    The key to achieving that perfectly creamy consistency in your Hissy Fit Dip lies in a few simple techniques. First, make sure your cream cheese is fully softened before mixing – I leave mine out for at least an hour. When cooking the sausage, break it into small, even crumbles for better distribution throughout the dip. Another game-changer? Grating your own cheese rather than using pre-shredded, which contains anti-caking agents that can affect melting. For extra flavor depth, try adding a splash of Worcestershire sauce – it’s my secret ingredient that adds that “what is that amazing flavor?” element that keeps everyone guessing.

    Temperature Matters

    The temperature journey of your Hissy Fit Dip is crucial for achieving that perfect, dippable texture similar to my Spinach Artichoke Dip. Start by ensuring all refrigerated ingredients reach room temperature before mixing – this prevents those dreaded cold lumps in your dip. When baking, patience is key! The slow melt in a 350°F oven allows the flavors to meld without separating the dairy components. I’ve learned the hard way that rushing this process can result in an oily separation. For serving, a small slow cooker on the warm setting works wonders for keeping your dip at that perfect consistency throughout your gathering.

    Serving Ideas & Creative Variations

    Best Dippers & Pairings

    Hissy Fit Dip deserves the perfect vessel to transport it from bowl to mouth! While sturdy tortilla chips are the classic choice, don’t stop there. Try serving with pretzel crisps, bagel chips, or even fresh vegetable crudités for a textural contrast. For an elevated appetizer spread, I love placing this dip alongside my Crab Crunchies for a hot-and-cold combo that guests adore. The rich, savory flavors in the dip also pair beautifully with a crisp white wine or a light beer. For special occasions, serve in a hollowed-out bread bowl – not only does it look impressive, but the bread becomes an edible dipper!

    Flavor Twists & Add-Ins

    The beauty of Hissy Fit Dip lies in its adaptability to different flavor profiles. My favorite seasonal variation incorporates roasted green chiles and pepper jack cheese for a southwestern kick. For a Mediterranean twist, try adding chopped artichoke hearts, sun-dried tomatoes, and a sprinkle of oregano. Bacon lovers can add crumbled, crispy bacon on top for an extra layer of smoky goodness. Vegetarians needn’t miss out – simply substitute the sausage with a plant-based alternative or sautéed mushrooms for an earthy depth. The possibilities are endless, allowing you to customize this dip for any occasion.

    Storage & Troubleshooting Guide

    Proper Storage Methods

    Storing your Hissy Fit Dip properly ensures you can enjoy every last bite. For leftovers (though I rarely have any!), transfer to an airtight container and refrigerate for up to 4 days. The dip will solidify when cold, so plan to reheat it gently – either in the microwave at 50% power in 30-second intervals, stirring between each, or in the oven at 300°F until just warmed through. If you want to prepare further in advance, the unbaked dip freezes beautifully for up to 3 months. Simply thaw overnight in the refrigerator before baking as directed. I often make a double batch specifically to freeze half for unexpected guests.

    Fixing Common Issues

    Even experienced cooks occasionally encounter issues with Hissy Fit Dip, but they’re easily fixed! If your dip seems too thick after mixing, simply add a tablespoon or two of milk to reach your desired consistency. For a dip that’s separated or appears oily on top, lower your oven temperature and stir well – this usually happens when heat is too high. If your dip lacks flavor, don’t be afraid to amp it up with extra seasonings – a pinch of cayenne or smoked paprika works wonders. And for a dip that’s too runny, adding a handful of extra shredded cheese or letting it bake uncovered for a few extra minutes will help it set beautifully.

    Frequently Asked Questions

    What exactly is Hissy Fit Dip and why is it called that?

    Hissy Fit Dip is a creamy, cheesy sausage dip that gets its name because people supposedly throw a “hissy fit” when it’s gone! The irresistible combination of cream cheese, sour cream, and savory sausage makes it disappear quickly at parties.

    Can I make Hissy Fit Dip vegetarian?

    Absolutely! Substitute the sausage with a plant-based alternative, sautéed mushrooms, or even roasted vegetables like eggplant. The creamy base works beautifully with many vegetarian protein options.

    How far in advance can I prepare this dip?

    You can prepare Hissy Fit Dip up to 2 days in advance and store it unbaked in the refrigerator. The flavors actually improve as it sits, making it perfect for planning ahead.

    Can I make this dip in a slow cooker instead of baking it?

    Yes! Cook the sausage first, then combine all ingredients in your slow cooker on low for 2-3 hours, stirring occasionally until everything is melted and well combined.

    Is Hissy Fit Dip gluten-free?

    The base recipe can be gluten-free if you use certified gluten-free sausage and seasonings. Always check individual ingredient labels, especially seasoning packets, which sometimes contain hidden gluten.

    Final Thoughts

    Hissy Fit Dip has earned its place in my permanent recipe collection for good reason – it never disappoints and always sparks joy around the table. There’s something special about watching friends and family gather around a bubbling dish of this creamy, savory goodness that makes all the cooking worthwhile. The versatility of this dip means it can adapt to any season or occasion, making it truly timeless. Whether it’s your first time making it or your fiftieth, I hope this Hissy Fit Dip brings as much happiness to your gatherings as it has to mine. Don’t forget to check out more delicious recipes on Pinterest!

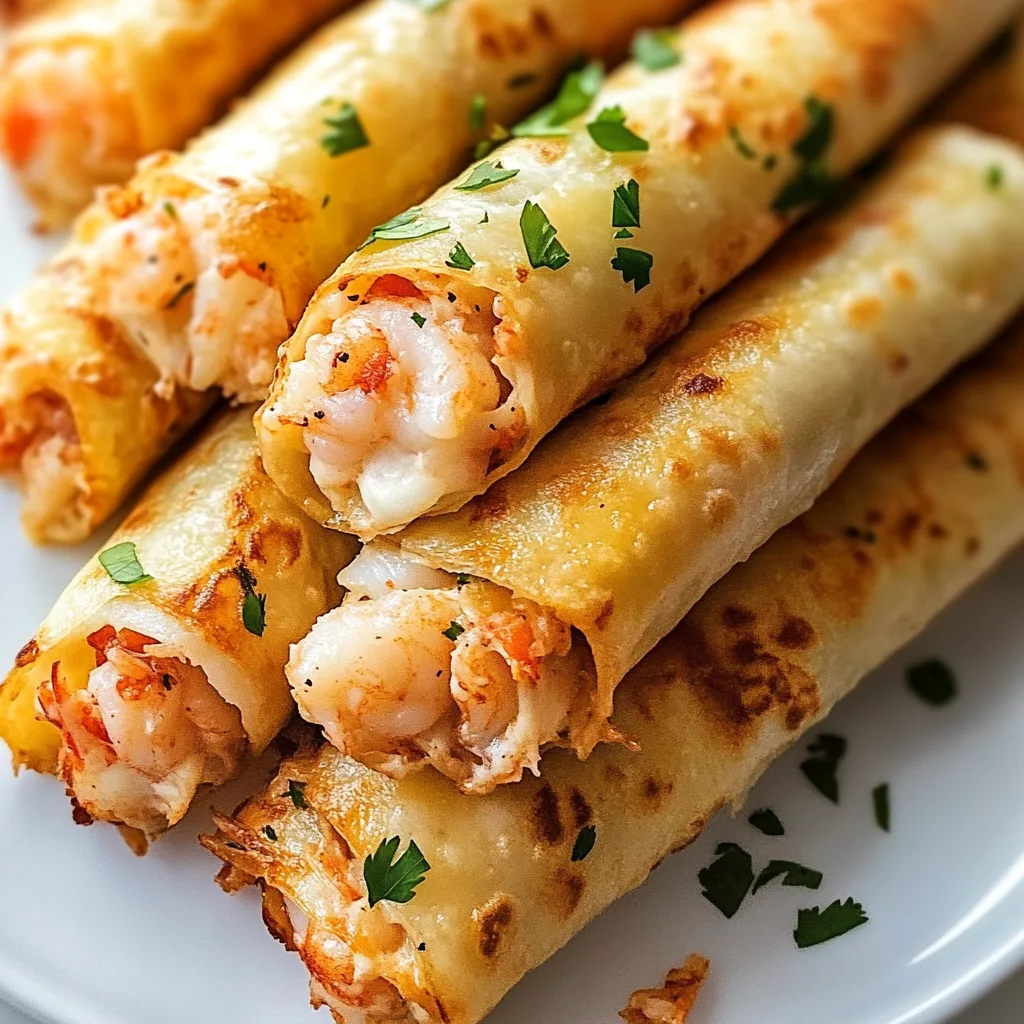
  • Crispy Crab & Shrimp Queso Taquitos That’ll Blow Your Mind!

    Crispy Crab & Shrimp Queso Taquitos That’ll Blow Your Mind!

    Crispy Crab & Shrimp Queso Taquitos That'll Blow Your Mind!

    Crispy Crab And Shrimp Queso Taquitos have become my absolute obsession lately! There’s something magical about that first bite—when the tortilla shatters between your teeth and gives way to that creamy, seafood-filled center. I first made these for a beach house gathering last summer, and my friends literally hovered around the platter until every last one disappeared. The combination of sweet crab meat, tender shrimp, and melty cheese wrapped in a crispy shell creates an irresistible appetizer that’s both elegant and fun. If you’re looking to elevate your taco night, these taquitos are your answer!

    Recipe

    Why You’ll Love These Crispy Crab And Shrimp Queso Taquitos

    Perfect Texture Contrast

    The textural magic of these taquitos is what makes them so addictive. The outside gets wonderfully crisp when fried or baked to golden perfection, while the inside remains luxuriously creamy. I love how the delicate sweetness of the crab meat plays against the slight chew of the shrimp, all enveloped in that gooey queso blend. The corn tortillas add that authentic flavor foundation that flour tortillas just can’t match. When I serve these at gatherings, I always notice people closing their eyes with that first crunchy bite—it’s a sensory experience that combines the best textures food has to offer.

    Quick Assembly, Big Impression

    Despite their impressive appearance, these Crispy Crab And Shrimp Queso Taquitos come together surprisingly quickly. The filling takes just minutes to prepare, and the rolling process becomes meditative once you get into a rhythm. I’ve found that even kitchen novices can master these in their first attempt. The wow factor is completely disproportionate to the effort required—exactly the kind of recipe I treasure for entertaining. These taquitos remind me of my favorite Shrimp Crab Lasagna in terms of impressive presentation but require significantly less preparation time.

    Essential Tips & Tricks

    Perfecting Your Filling

    Getting the filling right is crucial for exceptional Crispy Crab And Shrimp Queso Taquitos. Always use lump crab meat rather than imitation—the flavor difference is substantial. For the shrimp, I recommend chopping them into small, even pieces so they distribute well throughout the filling. A touch of lime zest brightens everything, while a hint of cayenne adds depth without overwhelming the delicate seafood. Drain your seafood thoroughly before mixing; excess moisture is the enemy of crispiness. I learned this lesson the hard way after once serving soggy taquitos that leaked filling everywhere—trust me, taking that extra minute to pat everything dry makes all the difference.

    Rolling and Sealing Techniques

    The secret to perfectly sealed taquitos lies in how you prepare your tortillas. Warming them properly is non-negotiable—cold corn tortillas will crack when rolled. I microwave a stack between damp paper towels for 30 seconds, then keep them covered as I work. Place your filling in a line slightly off-center, leaving borders at the top and bottom. Roll tightly but gently, securing with a toothpick if needed. For extra insurance against unraveling, brush the final edge with a bit of beaten egg before completing the roll. This technique pairs beautifully with the methods I use for my Oven Baked Cheesy Tacos as well.

    Serving Ideas & Creative Variations

    Dipping Sauces and Garnishes

    The right accompaniments elevate Crispy Crab And Shrimp Queso Taquitos from delicious to memorable. I always serve mine with at least two contrasting dips—a cool avocado crema and something with heat like chipotle mayo. Freshly chopped cilantro, thinly sliced radishes, and lime wedges make the perfect garnish trio, adding color and freshness. For an extra touch of elegance, a light dusting of tajin or smoked paprika across the platter creates visual appeal and a flavor boost. When I’m feeling particularly fancy, I’ll add a small bowl of pickled red onions—their bright pink color and tangy flavor perfectly complement the rich taquitos.

    Exciting Flavor Variations

    While the classic version is divine, don’t be afraid to experiment with your Crispy Crab And Shrimp Queso Taquitos. Try adding chopped mango and habanero for a tropical twist that balances sweet, spicy and savory. For a New Orleans-inspired variation, incorporate a bit of cajun seasoning and bell peppers—reminiscent of my Cajun Potato Soup but in handheld form. Asian-fusion taquitos with ginger, scallions and a touch of sesame oil create an unexpected but delicious cross-cultural appetizer. I once made a Mediterranean version with feta instead of queso, plus dill and lemon zest, which disappeared even faster than the original!

    Storage & Troubleshooting Guide

    Make-Ahead and Freezing Options

    These Crispy Crab And Shrimp Queso Taquitos are perfect for make-ahead preparation. You can assemble them completely, then freeze uncooked in a single layer before transferring to a freezer bag. They’ll keep for up to three months! Cook directly from frozen, adding just a few extra minutes to the cooking time. For shorter storage, assemble up to 24 hours ahead and refrigerate, tightly covered. Already cooked taquitos can be refrigerated for 2-3 days, though the texture is best when reheated in an oven or air fryer rather than microwave. I often make a double batch specifically to freeze half—nothing beats having homemade taquitos ready for impromptu gatherings.

    Solving Common Challenges

    Even experienced cooks encounter issues with taquitos occasionally. If your tortillas are cracking, they’re likely not warm enough or are poor quality—try a different brand or warm them longer. For filling that leaks during cooking, the mixture may be too wet or overfilled—drain ingredients thoroughly and use slightly less filling per taquito. If they’re unraveling during cooking, secure with toothpicks (just remember to remove before serving!). For taquitos that aren’t getting crispy enough, your oil temperature may be too low or your oven not hot enough. I once saved undercooked taquitos by finishing them under the broiler for a minute—a quick fix that restored their perfect crunch.

    Frequently Asked Questions

    Can I use imitation crab for Crispy Crab And Shrimp Queso Taquitos?

    While possible, real lump crab meat provides superior flavor and texture. If budget is a concern, use half real crab and half imitation rather than eliminating the real crab completely.

    What’s the best cheese to use in the filling?

    A combination works best—Monterey Jack for meltability, sharp cheddar for flavor, and a touch of cream cheese for richness. Avoid pre-shredded cheese as it contains anti-caking agents.

    Can these be made gluten-free?

    Absolutely! Corn tortillas are naturally gluten-free. Just verify your other ingredients, especially pre-packaged seasonings and cheese, don’t contain hidden gluten.

    How do I keep the taquitos from opening while cooking?

    Secure them with toothpicks before cooking, or place them seam-side down first when frying or baking to help seal the edge.

    Can I make these in an air fryer?

    Yes! Spray lightly with oil and air fry at 375°F for 6-8 minutes until crispy. Work in batches to avoid overcrowding for best results.

    Final Thoughts

    Crispy Crab And Shrimp Queso Taquitos have become my signature appetizer for good reason—they consistently delight guests while being surprisingly manageable to prepare. There’s something special about offering homemade taquitos filled with premium seafood that feels both indulgent and approachable. Whether you’re hosting a dinner party or contributing to a potluck, these taquitos strike the perfect balance between impressive and accessible. I hope you’ll explore more delicious recipes on Pinterest for inspiration and share your own taquito creations!

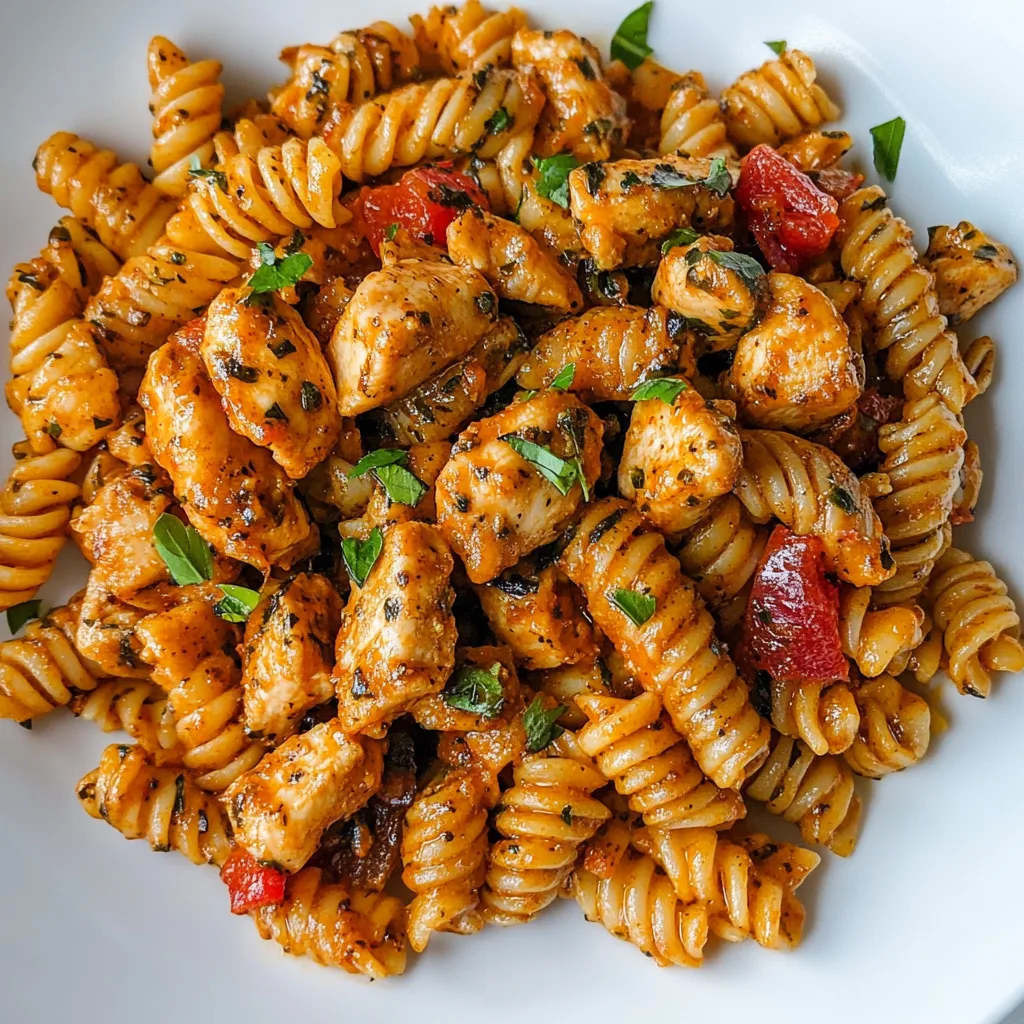
  • Spicy Cajun Chicken Pasta: Irresistible Heat & Creamy Bliss!

    Spicy Cajun Chicken Pasta: Irresistible Heat & Creamy Bliss!

    Spicy Cajun Chicken Pasta: Irresistible Heat & Creamy Bliss!

    Spicy Cajun Chicken Pasta brings the bold, fiery flavors of Louisiana right to your dinner table in less than 30 minutes! This creamy, zesty pasta dish combines tender chicken, colorful bell peppers, and al dente pasta tossed in a decadent sauce that strikes the perfect balance between spicy and creamy. I first created this recipe during a rainy Sunday when I was craving comfort food with a kick, and it’s been a family favorite ever since. The aroma of sautéing peppers and Cajun spices will transform your kitchen into a cozy New Orleans bistro. If you love the combination of creamy and spicy, this Cajun Sausage Pasta has a similar flavor profile you might enjoy!

    Recipe

    Why You’ll Love This Spicy Cajun Chicken Pasta

    Perfect Weeknight Dinner Solution

    This Spicy Cajun Chicken Pasta is a time-saving miracle when you need dinner on the table quickly but don’t want to sacrifice flavor. The entire dish comes together in about 25 minutes, making it perfect for busy weeknights when you’re juggling work, kids, and life’s endless to-do lists. I’ve made this countless times when I’m exhausted but still want something that tastes like I spent hours in the kitchen. The beauty lies in its simplicity – you’ll only need one pot for the pasta and one pan for everything else, minimizing cleanup while maximizing flavor.

    Customizable Heat Level

    One of my favorite things about this Spicy Cajun Chicken Pasta is how easily you can adjust the heat level to suit everyone at your table. The recipe as written provides a pleasant medium spice that builds gradually with each bite. For those who prefer milder flavors, simply reduce the amount of Cajun seasoning and omit the red pepper flakes. If you’re a heat-seeker like me, add an extra teaspoon of Cajun seasoning or a dash of hot sauce to really make your taste buds dance! I’ve served this to both spice-lovers and spice-cautious friends, and everyone finds their perfect balance.

    Essential Tips & Tricks

    Perfecting Your Pasta

    The key to outstanding Spicy Cajun Chicken Pasta lies in cooking your pasta to al dente perfection. Check the package directions and subtract one minute from the recommended cooking time – the pasta will continue cooking slightly when combined with the hot sauce. Reserve about ½ cup of starchy pasta water before draining; this magical liquid helps the sauce cling beautifully to each strand of pasta. I once skipped this step and ended up with sauce that wouldn’t properly coat the pasta. For a delicious twist, try using penne, bowties, or even gluten-free pasta if needed.

    Creating Restaurant-Quality Sauce

    The creamy sauce is what transforms this Spicy Cajun Chicken Pasta from good to absolutely crave-worthy. Start by deglazing the pan with a splash of chicken broth after sautéing your vegetables and chicken – this captures all those flavorful browned bits from the bottom of the pan. When adding cream, reduce your heat to medium-low to prevent curdling. For the silkiest texture, add the parmesan cheese in small handfuls, stirring continuously until fully melted before adding more. This gradual approach prevents clumping and creates that velvety restaurant-quality finish that will have everyone asking for your secret.

    Serving Ideas & Creative Variations

    Perfect Pairings

    Spicy Cajun Chicken Pasta stands beautifully on its own, but a few simple sides can transform it into a feast. A crisp garden salad with a light vinaigrette provides refreshing contrast to the rich, creamy pasta. For bread lovers, garlic bread or warm crusty sourdough is perfect for sopping up every last drop of that heavenly sauce. When I serve this for dinner parties, I often start with my Spinach Artichoke Dip as an appetizer – the creamy flavors complement each other wonderfully while the spice level of the pasta provides a delightful contrast.

    Exciting Variations

    Don’t be afraid to put your own spin on this Spicy Cajun Chicken Pasta! For a seafood twist, substitute the chicken with shrimp or crawfish for authentic New Orleans flair. Vegetarians can swap the chicken for mushrooms, which provide wonderful meaty texture and absorb all those amazing Cajun spices. Add extra vegetables like zucchini, spinach, or cherry tomatoes to boost nutrition. For a lighter version, substitute half the heavy cream with unsweetened almond milk or chicken broth. My personal favorite variation includes a handful of chopped andouille sausage alongside the chicken for extra smoky depth.

    Storage & Troubleshooting Guide

    Proper Storage Methods

    This Spicy Cajun Chicken Pasta makes fantastic leftovers if stored correctly. Allow the pasta to cool completely before transferring to an airtight container and refrigerating for up to 3 days. When reheating, add a splash of milk or chicken broth to revive the creamy texture, as the pasta will have absorbed some of the sauce overnight. For meal prep, you can prepare the sauce separately and refrigerate for up to 4 days, then cook fresh pasta when ready to serve. I don’t recommend freezing this dish as the cream sauce can separate and the pasta texture suffers.

    Common Issues & Solutions

    If your Spicy Cajun Chicken Pasta sauce breaks or appears curdled, don’t panic! Lower the heat immediately and slowly whisk in 1-2 tablespoons of cold heavy cream to re-emulsify the sauce. For sauce that’s too thin, simmer gently for a few extra minutes to reduce, or add a little more freshly grated parmesan. If your sauce is too thick, gradually add reserved pasta water until you reach your desired consistency. Should your pasta turn out spicier than intended, balance the heat with an extra splash of cream or a dollop of sour cream stirred in just before serving.

    Frequently Asked Questions

    Can I make Spicy Cajun Chicken Pasta ahead of time?

    Yes! Prepare the sauce and chicken mixture up to 2 days ahead, then reheat gently and toss with freshly cooked pasta when ready to serve. This saves time while maintaining the best texture.

    What’s the best pasta shape for Spicy Cajun Chicken Pasta?

    Fettuccine is traditional, but penne, rigatoni, or cavatappi work beautifully too. These shapes have crevices that capture the creamy sauce perfectly.

    How can I make this recipe healthier?

    Use whole wheat pasta, substitute half the cream with chicken broth, and increase the vegetables. You can also use boneless skinless chicken thighs for more flavor with less fat.

    Can I use pre-cooked chicken?

    Absolutely! Rotisserie chicken works wonderfully – just add it toward the end of cooking to warm through without overcooking.

    Is there a dairy-free version of this recipe?

    Yes! Replace heavy cream with full-fat coconut milk and use nutritional yeast instead of parmesan cheese for a dairy-free Spicy Cajun Chicken Pasta that’s still creamy and delicious.

    Final Thoughts

    This Spicy Cajun Chicken Pasta has become my go-to recipe when I want to impress without spending hours in the kitchen. The combination of creamy sauce, tender chicken, and bold Cajun spices creates a meal that feels special enough for company yet simple enough for weeknights. I love watching people’s expressions when they take that first bite – the moment when the creaminess gives way to the gentle heat of the Cajun seasoning. Don’t forget to check out more delicious pasta recipes on Pinterest for endless inspiration!

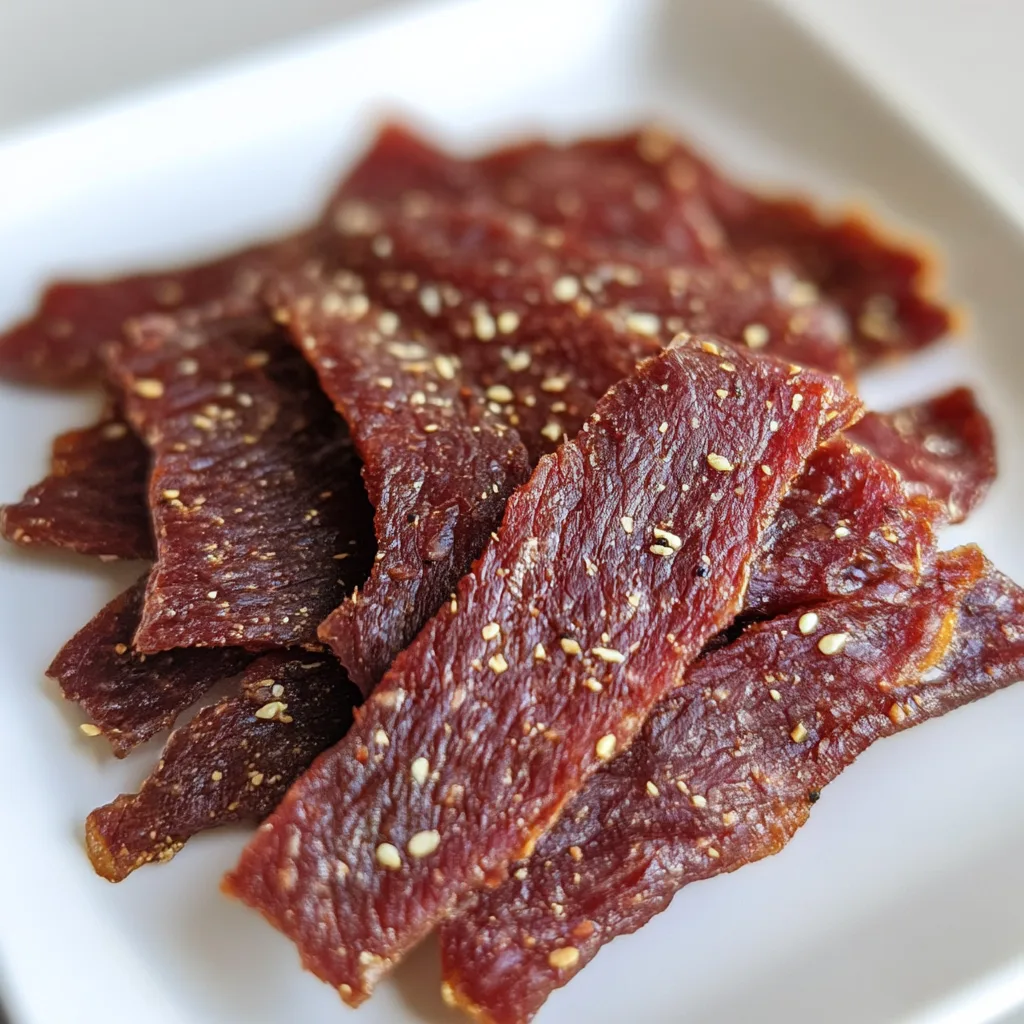
  • Beef Jerky Bliss: Irresistible Snack That Boosts Your Energy Fast!

    Beef Jerky Bliss: Irresistible Snack That Boosts Your Energy Fast!

    Beef Jerky Bliss: Irresistible Snack That Boosts Your Energy Fast!

    Beef jerky has been my go-to snack for years, offering that perfect combination of protein-packed satisfaction and bold flavor that keeps me coming back for more. There’s something almost magical about transforming fresh meat into chewy, savory strips that last for weeks. I still remember making my first batch in college—the intoxicating aroma of spices filling my tiny apartment as strips of marinated beef slowly dried. Whether you’re a seasoned jerky enthusiast or a curious first-timer, this homemade beef jerky recipe will revolutionize your snack game with flavors that put store-bought varieties to shame. Let’s dive into creating the ultimate beef jerky.

    Recipe

    Why You’ll Love This Beef Jerky

    Perfect Protein-Packed Snack

    Homemade beef jerky delivers an incredible protein punch without the preservatives found in commercial versions. Each chewy bite provides sustained energy that keeps hunger at bay during long hikes, road trips, or those marathon work sessions. I’ve found it particularly lifesaving during busy weekdays when a proper lunch seems impossible. The beauty of making your own is controlling exactly what goes into it—pure beef with spices you select, making it ideal for anyone following keto, paleo, or low-carb eating plans. Plus, the satisfaction of crafting something this delicious with your own hands? Absolutely priceless.

    Customizable Flavor Profiles

    The flavor possibilities for beef jerky are virtually endless. From classic black pepper and smoky mesquite to exotic teriyaki or fiery sriracha, you can tailor each batch to your exact taste preferences. My personal favorite combines soy sauce, Worcestershire, maple syrup, and a generous dash of smoked paprika for a sweet-savory balance that’s utterly addictive. Experimenting with different marinades becomes an adventure in itself—I’ve surprised myself with unexpected combinations like coffee-infused or bourbon-glazed variations that have become family favorites. The joy of beef jerky making is that each batch can be a completely new experience.

    Essential Tips & Tricks

    Selecting and Preparing the Meat

    Starting with the right cut makes all the difference in crafting exceptional beef jerky. Lean cuts like eye of round, top round, or flank steak work best because excess fat can cause spoilage. When shopping, I always ask my butcher to slice the meat against the grain into 1/8-inch strips—this creates that perfect chewy texture rather than tough, stringy pieces. If cutting yourself, partially freezing the meat for about 2 hours makes slicing dramatically easier. Before marinating, trim away any visible fat and silver skin. This preparation might seem fussy, but trust me, it’s the foundation of jerky that melts in your mouth rather than giving your jaw a workout.

    Mastering the Drying Process

    The secret to perfect beef jerky lies in low, slow drying that removes moisture without cooking the meat. Whether using a dehydrator (my preferred method) or your oven set to its lowest temperature, patience is key. For oven drying, prop the door slightly open with a wooden spoon to allow moisture to escape. I learned the hard way that rushing this process results in either dangerously undercooked jerky or brittle, over-dried pieces. The sweet spot is 4-6 hours at 160°F, checking occasionally until pieces bend without breaking. For food safety, I always start with a quick 10-minute pre-heat at 275°F to kill any potential bacteria before lowering to drying temperature, a tip I picked up from making other dried snacks.

    Serving Ideas & Creative Variations

    Beyond Basic Snacking

    While beef jerky shines as a standalone snack, thinking outside the bag opens up delicious possibilities. I love chopping it into small pieces to add smoky depth to scrambled eggs or sprinkle over salads for a protein boost. It makes an unexpected star ingredient on charcuterie boards, especially paired with sharp cheeses that complement its savory intensity. For hiking trips, I create custom trail mix combining beef jerky with nuts, dried fruit, and dark chocolate chunks—energizing and utterly satisfying. During movie nights, we set out a jerky board with different flavors and dipping sauces like honey mustard or spicy mayo for an elevated snacking experience that beats popcorn any day.

    Global Flavor Inspirations

    Drawing inspiration from world cuisines elevates homemade beef jerky to gourmet status. Korean-inspired jerky with gochujang, sesame oil, and a touch of brown sugar creates a sweet-spicy profile that’s impossible to resist. For Mediterranean flair, try oregano, lemon zest, and olive oil—surprisingly delicious! I became obsessed with Chinese five-spice jerky after sampling something similar at a farmer’s market; the warm, complex notes of star anise and cinnamon transform the beef completely. For something truly special, try incorporating influences from hearty stews with herbs like rosemary and thyme in your marinade. Each cultural twist creates a unique tasting experience that expands your jerky repertoire.

    Storage & Troubleshooting Guide

    Maximizing Freshness and Shelf Life

    Proper storage is crucial for maintaining your beef jerky’s quality and extending its shelf life. Once completely cooled, store in airtight containers away from direct light and heat. Glass jars with tight seals work beautifully, though vacuum-sealed bags offer the longest preservation. If you notice any moisture inside the container within the first day, the jerky needs additional drying time—return it to the dehydrator immediately. For everyday snacking, keep a week’s worth at room temperature and freeze the rest for up to six months. I’ve found adding oxygen absorber packets (available online) to storage containers dramatically increases freshness duration, keeping that just-made texture and flavor intact.

    Solving Common Jerky Problems

    Even experienced jerky makers encounter occasional challenges. If your beef jerky turns out too tough, it likely dried too long or at too high a temperature. Next time, reduce drying time by 30 minutes or lower temperature slightly. Overly salty jerky usually results from marinating too long—eight hours is typically sufficient for thin strips. For jerky that’s too moist or pliable, simply return it to the dehydrator for additional time. White spots that appear during storage are usually salt or sugar crystals from the marinade, not mold (which would be fuzzy and green/blue). When in doubt about safety, remember the golden rule: if it smells off or shows any signs of mold, discard it immediately.

    Frequently Asked Questions

    How long does homemade beef jerky last?

    Properly dried and stored beef jerky typically lasts 1-2 months at room temperature in airtight containers. Refrigerated, it extends to 3-4 months, while freezing preserves it for up to 6 months. Always check for signs of spoilage before consuming.

    What’s the best cut of meat for beef jerky?

    Eye of round, top round, bottom round, and flank steak make excellent beef jerky. These cuts offer the perfect balance of leanness and flavor while remaining economical enough for batch preparation.

    Can I make beef jerky without a dehydrator?

    Absolutely! Use your oven set to its lowest temperature (ideally 160-170°F) with the door slightly propped open. Place meat on wire racks over baking sheets to allow air circulation and check frequently for doneness.

    How do I know when my beef jerky is done?

    Properly finished beef jerky should bend without breaking and not feel moist to the touch. When torn, it should have visible fibers but not snap like a cracker. It shouldn’t feel sticky or overly soft.

    Why is my beef jerky too salty?

    Over-salted beef jerky usually results from too much salt in the marinade or marinating too long. Balance with brown sugar or honey in your next batch, and limit marination to 8-12 hours maximum.

    Final Thoughts

    Creating homemade beef jerky transforms ordinary meat into extraordinary snacking that connects us to age-old preservation traditions while satisfying modern cravings for protein-rich, portable food. The process might seem involved at first, but the rhythm of slicing, marinating, and drying quickly becomes a rewarding ritual. I find myself making beef jerky monthly now, experimenting with new flavors each time while perfecting old favorites. There’s something deeply satisfying about opening your pantry to find jars of handcrafted jerky ready for whatever adventures await. I’d love to see your creations on Pinterest—tag me in your beef jerky masterpieces!

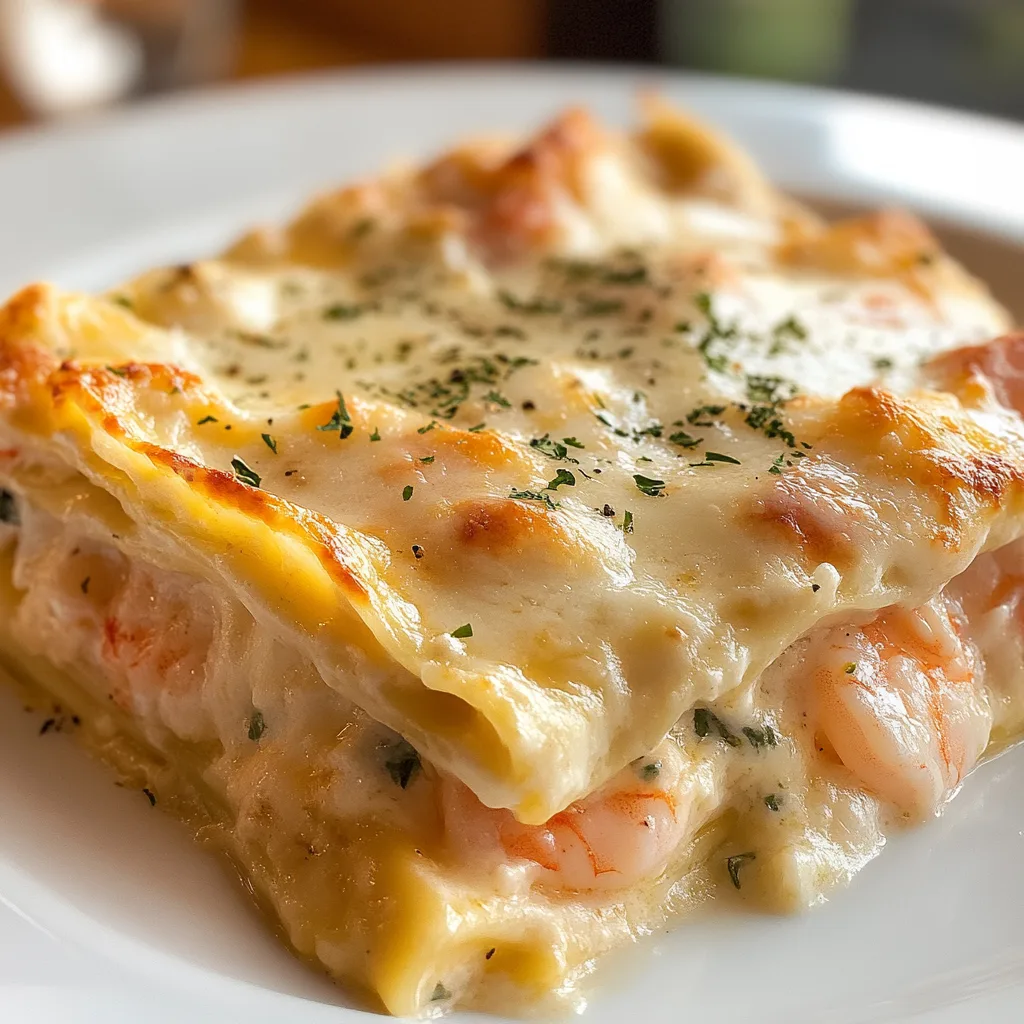
  • Shrimp Crab Lasagna Recipe: Irresistibly Creamy & Delicious!

    Shrimp Crab Lasagna Recipe: Irresistibly Creamy & Delicious!

    Shrimp Crab Lasagna Recipe: Irresistibly Creamy & Delicious!

    Shrimp Crab Lasagna is my ultimate comfort food indulgence that never fails to impress dinner guests. The first time I made this seafood masterpiece, my kitchen filled with the most intoxicating aroma of garlic, herbs, and ocean-fresh seafood. There’s something magical about the way tender shrimp and sweet lump crabmeat nestle between layers of pasta and creamy sauce. This dish has become my go-to for special occasions, though honestly, I’ve been known to whip it up on random Tuesdays just because. If you’re looking for a show-stopping pasta dish that tastes like it came from a seaside Italian restaurant, you’re in for a treat with this Shrimp Crab Lasagna.

    Recipe

    Why You’ll Love This Shrimp Crab Lasagna

    Perfect Balance of Flavors and Textures

    The beauty of Shrimp Crab Lasagna lies in its harmonious blend of delicate seafood and rich, creamy elements. The sweet crabmeat provides a buttery richness that pairs perfectly with the tender bite of shrimp. I love how the seafood maintains its distinct flavor without being overwhelmed by the sauce. The pasta sheets provide the perfect canvas, while the velvety béchamel brings everything together with its silky texture. Each bite delivers that perfect balance—creamy cheese, tender pasta, and the gentle pop of seafood that makes your taste buds dance with joy.

    Impressive Yet Approachable

    Don’t let the elegant appearance fool you—this Shrimp Crab Lasagna is surprisingly approachable to make. While it looks like something from a high-end restaurant, the preparation is quite straightforward. The make-ahead potential makes it perfect for entertaining, as you can assemble it earlier in the day and simply bake when guests arrive. I still remember serving this at my sister’s birthday dinner—everyone thought I’d spent hours slaving away, but the actual hands-on time was minimal! The oohs and aahs as I brought it to the table were worth every minute.

    Essential Tips & Tricks

    Seafood Selection and Preparation

    Choosing the right seafood is crucial for an exceptional Shrimp Crab Lasagna. Always opt for fresh or high-quality frozen seafood—I prefer wild-caught shrimp and lump crabmeat when available. If using frozen shrimp, thaw completely and pat dry before adding to prevent excess moisture. For the crab, lump meat provides the best texture and flavor, though claw meat works in a pinch. I’ve learned that a quick sauté of the shrimp with garlic and a splash of white wine adds incredible depth, while folding in the crab at the last minute preserves its delicate texture. Similar to my Crab Crunchies, handling the seafood gently is key.

    Perfecting the Sauce

    The sauce is the soul of your Shrimp Crab Lasagna, binding everything together with creamy goodness. Start with a classic béchamel base, whisking constantly to avoid lumps. I add a pinch of nutmeg for warmth and depth. For extra flavor, infuse your milk with bay leaves and onion before making the sauce. When incorporating cheese, remove the pan from heat first to prevent separation. My personal touch is adding a splash of seafood stock and a tablespoon of tomato paste for a subtle blush sauce that complements the seafood beautifully. The sauce should coat the back of a spoon but still flow—not too thick, not too thin.

    Serving Ideas & Creative Variations

    Perfect Pairings

    Shrimp Crab Lasagna shines as the centerpiece of any meal, but thoughtful accompaniments elevate the experience. A bright, acidic salad with lemon vinaigrette cuts through the richness beautifully—I love arugula with shaved fennel and orange segments. For bread, skip heavy garlic bread and opt for a light, crusty Italian loaf to sop up that precious sauce. Wine pairing is crucial: a crisp Pinot Grigio or unoaked Chardonnay complements without overpowering. For a complete seafood feast, consider starting with a light soup like my Creamy Tomato Basil Soup and ending with lemon sorbet for a palate-cleansing finale.

    Delicious Twists on the Classic

    While traditional Shrimp Crab Lasagna is divine, creative variations keep this dish exciting. For a Mediterranean twist, add artichoke hearts, sun-dried tomatoes, and a sprinkle of feta between layers. Spice-lovers might appreciate Cajun-inspired seasonings with bell peppers and a dash of hot sauce. I’ve experimented with a “lighter” version using zucchini ribbons in place of some pasta layers—surprisingly delicious! For special dietary needs, gluten-free lasagna noodles work beautifully, and the sauce can be made with lactose-free milk. One summer evening, I added fresh corn kernels and tarragon—the sweet pop of corn complemented the seafood magnificently.

    Storage & Troubleshooting Guide

    Proper Storage and Reheating

    Seafood lasagna requires careful storage to maintain quality and safety. Refrigerate leftovers within two hours in an airtight container for up to three days. When reheating, avoid microwaving which can make the seafood rubbery. Instead, cover with foil and warm in a 325°F oven until just heated through (about 20 minutes). For freezing, I recommend assembling but not baking—freeze immediately and use within one month. Thaw completely in the refrigerator before baking. If you must freeze leftovers, be aware the texture may change slightly, though the flavor will still be delicious. Individual portions freeze and reheat better than large sections.

    Common Issues and Solutions

    Even experienced cooks encounter challenges with Shrimp Crab Lasagna. If your sauce seems too watery after baking, the likely culprit is excess moisture from the seafood. Always thoroughly drain and pat dry seafood before adding. For a too-dry result, cover with foil for most of the baking time, removing only for the final browning. Curdled sauce typically happens when dairy is heated too quickly—gentle, low heat is key. If your lasagna layers slide apart when serving, let it rest longer (15-20 minutes minimum) before cutting. And remember, if the seafood flavor seems mild, a finish of fresh lemon zest and chopped herbs just before serving works wonders to brighten all the flavors.

    Frequently Asked Questions

    Can I make Shrimp Crab Lasagna ahead of time?

    Yes! Assemble up to 24 hours ahead, cover tightly with plastic wrap, and refrigerate. Add 10-15 minutes to the baking time if coming straight from the refrigerator. Let it sit at room temperature for 30 minutes before baking for best results.

    What’s the best cheese for Shrimp Crab Lasagna?

    A combination works best: mozzarella for stretch, Parmesan for depth, and a touch of fontina for creaminess. Avoid strong cheeses like sharp cheddar or blue cheese that might overpower the delicate seafood flavors.

    Can I substitute other seafood in this recipe?

    Absolutely! Scallops, lobster, or even flaked white fish work beautifully. Just ensure any substitutions are similar in cooking time and moisture content to maintain the lasagna’s structure.

    How do I prevent my Shrimp Crab Lasagna from being watery?

    Pat seafood dry before adding, pre-cook vegetables to release moisture, and let the lasagna rest 15-20 minutes before serving. Using no-boil noodles can also help absorb excess liquid during baking.

    Is it safe to use previously frozen seafood for Shrimp Crab Lasagna?

    Yes, high-quality frozen seafood works perfectly. Thaw completely in the refrigerator overnight, drain well, and pat dry before incorporating into your lasagna for the best texture and flavor.

    Final Thoughts

    This Shrimp Crab Lasagna has become more than just a recipe in my kitchen—it’s a celebration on a plate. The delicate balance of sweet seafood, creamy sauce, and tender pasta creates something truly magical that’s worth every minute of preparation. Whether you’re cooking for a special occasion or simply craving something extraordinary, this dish delivers both comfort and elegance in equal measure. I hope you’ll create your own memories around this seafood masterpiece. For more delicious inspiration, visit our Pinterest page where we share new recipes regularly!

  • Cajun Sausage Pasta Explosion: Irresistible Flavor Fiesta!

    Cajun Sausage Pasta Explosion: Irresistible Flavor Fiesta!

    Cajun Sausage Pasta Explosion: Irresistible Flavor Fiesta!

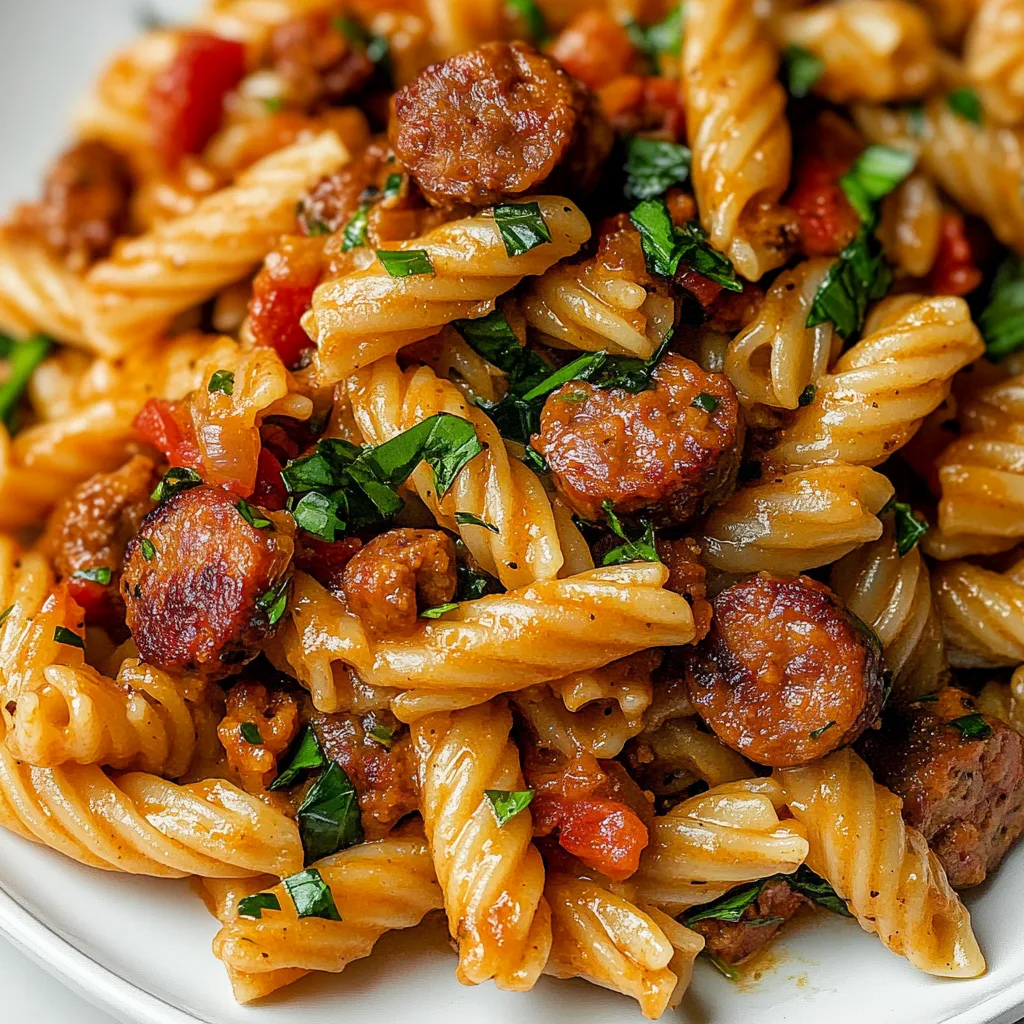
    Cajun Sausage Pasta brings together the bold, spicy flavors of Louisiana in one irresistible dish that’s ready in under 30 minutes. The first time I made this recipe, my kitchen filled with the most intoxicating aroma of sizzling andouille sausage, bell peppers, and that signature Cajun seasoning that makes your taste buds dance. It’s become my go-to for busy weeknights when I want something that feels special without hours of effort. The creamy sauce coats every pasta strand with just the right amount of heat, making it impossible not to go back for seconds. Trust me, this Cajun Sausage Pasta will become your new comfort food obsession.

    Recipe

    Why You’ll Love This Cajun Sausage Pasta

    Perfect Balance of Flavor and Heat

    There’s something magical about the way the smoky andouille sausage plays with the creamy sauce in this dish. The Cajun seasoning brings just enough heat to wake up your palate without overwhelming it. I remember serving this to my brother who claims to hate spicy food, and even he couldn’t stop eating it! The trick is layering flavors—sautéing the trinity of bell peppers, onions, and celery until they’re caramelized creates a sweet foundation that balances the spice perfectly. The cream mellows everything into a silky sauce that clings to every bite of pasta, creating that perfect balance between comfort and excitement.

    Quick and Impressive One-Pot Wonder

    This Cajun Sausage Pasta is my secret weapon for those nights when friends drop by unexpectedly. It’s a one-pot miracle that looks and tastes like you spent hours in the kitchen. The entire dish comes together in about 25 minutes, making it faster than delivery but infinitely more satisfying. I love watching people’s faces when they take that first bite—eyes widening as the flavors unfold. The best part? While it tastes complex, the ingredient list is surprisingly simple. Most items are pantry staples, which means I can whip this up without a special trip to the store. It’s become my most-requested recipe for good reason!

    Essential Tips & Tricks

    Selecting and Preparing Your Ingredients

    Choosing the right andouille sausage makes all the difference in this Cajun Sausage Pasta. Look for one with visible spices and a firm texture—the authentic stuff will elevate your dish immensely. If you can’t find andouille, smoked kielbasa works in a pinch, though you’ll want to add extra Cajun seasoning. When prepping your vegetables, aim for uniform sizes so everything cooks evenly. I like to slice my bell peppers into thin strips rather than chunks; they meld into the sauce beautifully this way. For the pasta, penne or rigatoni are my go-to choices—their tubular shape captures pockets of that creamy sauce in every bite.

    Mastering the Perfect Sauce Consistency

    The secret to a luxurious Cajun Sausage Pasta is all in how you build that velvety sauce. Start by creating a light roux with butter and flour before adding your liquid ingredients—this prevents any graininess. When adding cream, lower your heat to prevent curdling, and stir constantly. If your sauce seems too thick, add pasta water a tablespoon at a time until you reach that perfect silky consistency. For an extra flavor boost, deglaze the pan with a splash of white wine after sautéing the sausage. This technique reminds me of the Creamy Tuscan Sausage Pasta with Spinach, where the same principles create an equally delicious result.

    Serving Ideas & Creative Variations

    Pairing Suggestions for a Complete Meal

    Cajun Sausage Pasta deserves thoughtful accompaniments that complement its bold flavors without competing. A simple arugula salad with lemon vinaigrette cuts through the richness perfectly. For bread, skip the garlic and opt for plain crusty French bread that can soak up that incredible sauce—trust me, you won’t want to waste a drop! A chilled glass of Sauvignon Blanc or a light beer like Abita (straight from Louisiana) makes the perfect beverage pairing. For a full Southern-inspired spread, consider starting with my Crab Crunchies as an appetizer—the seafood flavors create a delightful prelude to the main event.

    Customizing Your Cajun Sausage Pasta

    The beauty of this Cajun Sausage Pasta lies in its adaptability. For a seafood twist, add shrimp during the last few minutes of cooking—they’ll absorb all those amazing flavors while staying tender. Vegetarians can swap the andouille for plant-based sausage and use vegetable broth; the Cajun seasoning ensures it’s still packed with flavor. For an extra-indulgent version, stir in 1/4 cup of cream cheese along with the heavy cream for an even silkier sauce. When fresh corn is in season, I love cutting kernels from the cob and adding them for sweet pops of texture. Don’t be afraid to make this recipe your own!

    Storage & Troubleshooting Guide

    Proper Storage and Reheating Methods

    Cajun Sausage Pasta stores beautifully, actually developing deeper flavors overnight. Store leftovers in an airtight container in the refrigerator for up to 3 days. When reheating, add a splash of cream or milk to revive the sauce, as the pasta tends to absorb liquid while storing. For best results, warm it gently on the stovetop rather than microwaving—this prevents the sauce from separating. If you’re meal prepping, consider keeping the pasta and sauce separate until serving time. I’ve found that this dish doesn’t freeze well due to the cream-based sauce, which can break when thawed, resulting in a grainy texture that doesn’t do justice to this amazing meal.

    Fixing Common Issues

    Even experienced cooks occasionally encounter challenges with Cajun Sausage Pasta. If your sauce breaks or curdles, don’t panic! Lower the heat immediately and whisk in a tablespoon of cold cream. Too spicy? Add more cream or a dollop of sour cream to mellow the heat. If your sauce is too thin, let it simmer uncovered for a few extra minutes, or create a slurry with 1 teaspoon cornstarch mixed with 1 tablespoon cold water. Conversely, if it’s too thick, pasta water is your best friend—add it gradually until you reach the perfect consistency. Remember that the sauce will thicken slightly as it cools, so it’s better to err on the side of too thin.

    Frequently Asked Questions

    Can I make Cajun Sausage Pasta ahead of time?

    Yes! Prepare it up to a day ahead, but undercook the pasta slightly. Store sauce and pasta separately, then combine and reheat gently on the stove with a splash of cream to refresh the sauce.

    What’s the best pasta shape for Cajun Sausage Pasta?

    Penne, rigatoni, or farfalle work best as they catch pockets of the creamy sauce. Avoid long pasta like spaghetti, which doesn’t hold the chunky elements of the dish as effectively.

    How can I make this dish less spicy?

    Reduce the Cajun seasoning by half and remove the seeds from any fresh peppers. Add a little more cream to mellow the heat, and serve with a dollop of sour cream on top.

    Can I use chicken instead of sausage?

    Absolutely! Boneless chicken thighs work wonderfully. Season them generously with Cajun spice before cooking to compensate for the flavor that andouille sausage would provide.

    Is there a dairy-free version of this recipe?

    Yes! Substitute the heavy cream with full-fat coconut milk and use olive oil instead of butter. The coconut adds a subtle sweetness that complements the Cajun spices beautifully.

    Final Thoughts

    This Cajun Sausage Pasta has become more than just a recipe in my kitchen—it’s my reliable crowd-pleaser that never disappoints. There’s something deeply satisfying about creating such bold, complex flavors in so little time. Whether you’re cooking for a quiet dinner at home or entertaining friends, this dish strikes that perfect balance between impressive and accessible. I hope you’ll make it your own, perhaps adding your personal touches along the way. Don’t forget to check out more comfort food inspirations on my Pinterest for your next cooking adventure!