Author: Darleen Vance

  • Pesto Tortellini with Sundried Tomatoes: Irresistible Flavor Boost!

    Pesto Tortellini with Sundried Tomatoes: Irresistible Flavor Boost!

    Pesto Tortellini with Sundried Tomatoes: Irresistible Flavor Boost!

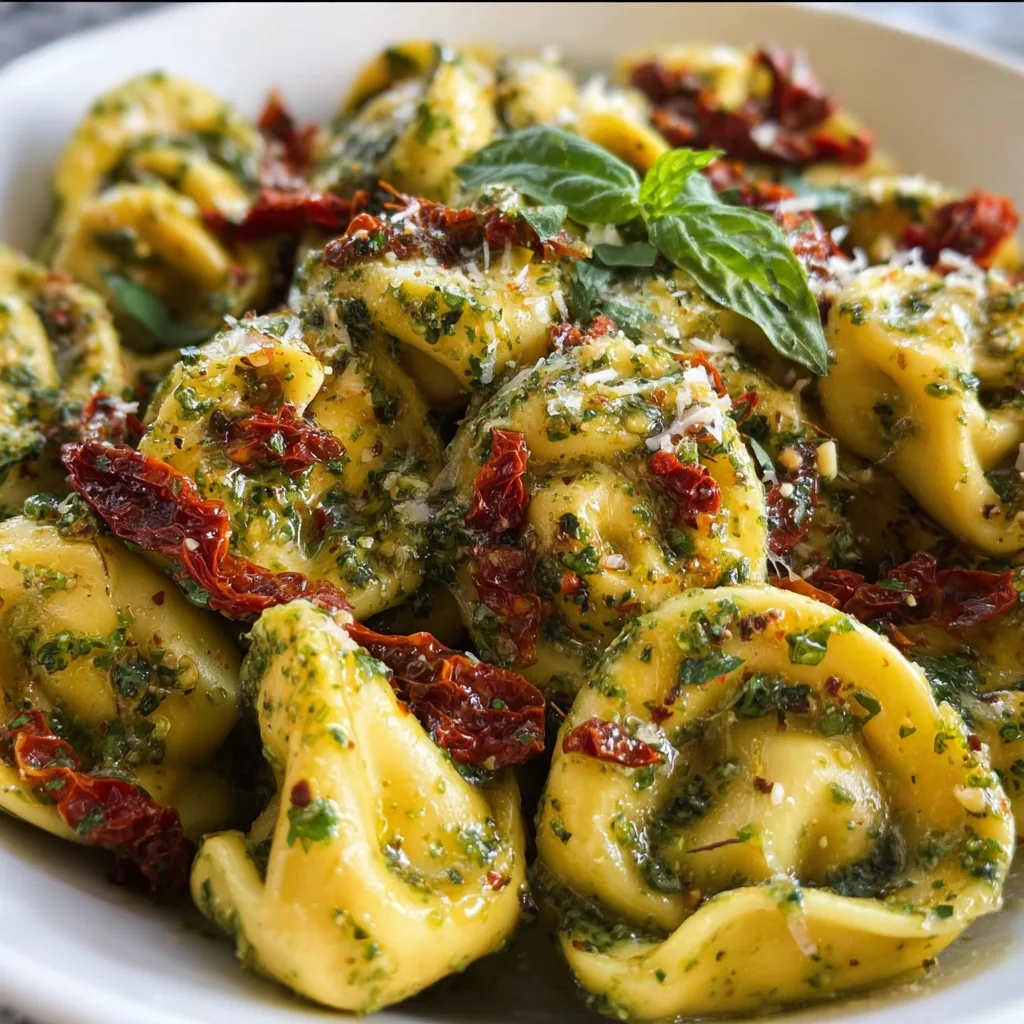
    Pesto Tortellini with Sundried Tomatoes is one of those magical 30-minute meals that tastes like you spent hours in the kitchen. The first time I made this dish, my kitchen filled with the most intoxicating aroma of basil and garlic that had my partner wandering in from the living room asking, “What smells so incredible?” I love how the creamy pesto coats each pillowy tortellini, while the sundried tomatoes add little bursts of sweet-tangy flavor that cuts through the richness. It’s become my go-to for those evenings when I want something that feels special but doesn’t demand too much from my already-depleted energy reserves.

    Recipe

    Why You’ll Love This Pesto Tortellini with Sundried Tomatoes

    A Perfect Balance of Flavors and Textures

    This dish delivers a symphony of complementary tastes that dance together beautifully. The herbaceous pesto with its garlicky punch creates a velvety sauce that clings to each tortellini pocket. Meanwhile, the sundried tomatoes provide concentrated bursts of sweet-tart flavor that perfectly balance the richness. I adore how the tender pasta gives way to the cheese filling, creating multiple texture experiences in each bite. And when you get that occasional crunch from toasted pine nuts? Pure magic! It’s a dish that feels sophisticated yet comes together with minimal effort.

    Quick Enough for Weeknights, Special Enough for Company

    I first made this Pesto Tortellini with Sundried Tomatoes on a Tuesday when I had exactly zero energy to cook, but it was so delicious that I’ve since served it at dinner parties! The vibrant colors make for a stunning presentation, especially when finished with a sprinkle of fresh basil and a dusting of Parmesan. What I appreciate most is how it comes together in about 20 minutes of actual hands-on time, yet looks like something that would take much longer. It’s my secret weapon for those “oops, I forgot we had dinner guests” moments.

    Essential Tips & Tricks

    Selecting the Perfect Ingredients

    The quality of your ingredients makes all the difference in this simple dish. For the tortellini, I prefer refrigerated over frozen for a more authentic texture, though both work well. When it comes to pesto, homemade is divine if you have fresh basil on hand, but a good-quality store-bought version (look for one with real Parmesan and olive oil listed early in the ingredients) works beautifully too. For sundried tomatoes, the oil-packed variety adds extra richness, but if using dry-packed, soak them in hot water for 10 minutes before adding to your dish.

    Perfecting Your Cooking Technique

    The secret to exceptional Pesto Tortellini with Sundried Tomatoes lies in the timing and temperature. Cook your tortellini just until they float to the surface—usually 2-3 minutes for fresh, 7-8 for frozen—then drain immediately but save some pasta water! This starchy liquid is liquid gold for creating a silky sauce. When mixing your pesto with the pasta, do it off the heat to preserve the bright basil flavor and add a splash of that reserved pasta water to help the sauce coat every piece. For an extra touch of luxury, try adding a tablespoon of butter like in my Parmesan Garlic Rice for incredible richness.

    Serving Ideas & Creative Variations

    Complementary Side Dishes

    Pesto Tortellini with Sundried Tomatoes pairs beautifully with lighter sides that balance its richness. I love serving it with a peppery arugula salad dressed simply with lemon juice and olive oil—the brightness cuts through the creamy pasta perfectly. For a more substantial meal, my Crispy Baked Chicken Wings make an unexpectedly delightful companion. If you’re looking for a vegetable side, roasted asparagus or broccolini with a squeeze of lemon adds a wonderful textural contrast while keeping the meal feeling fresh and vibrant.

    Exciting Flavor Twists

    While the classic version is divine, this dish welcomes creative adaptations. For a protein boost, add grilled chicken or sautéed shrimp—both take on the pesto flavors beautifully. Craving more vegetables? Toss in some roasted red peppers, wilted spinach, or sautéed zucchini. For a creamier version, stir in a splash of heavy cream or a dollop of ricotta. My personal favorite variation is adding a handful of kalamata olives and crumbled feta for a Mediterranean twist. The briny olives and tangy cheese create an entirely new flavor profile that’s absolutely crave-worthy.

    Storage & Troubleshooting Guide

    Keeping It Fresh

    Pesto Tortellini with Sundried Tomatoes can be stored in an airtight container in the refrigerator for up to 3 days, though it’s at its absolute best when freshly made. When reheating, add a splash of water or chicken broth to revive the sauce, as pesto tends to thicken when chilled. I recommend gentle reheating in a skillet over medium-low heat rather than the microwave to maintain the texture. If you’re meal prepping, consider keeping the components separate—cooked tortellini tossed with a bit of olive oil, pesto, and sundried tomatoes—and combining them when ready to serve.

    Solving Common Pesto Problems

    If your pesto sauce looks separated or oily, don’t panic! This is easily fixed by whisking vigorously while adding a tablespoon of the reserved pasta water. Sometimes pesto can turn a dull green color—this is oxidation and while harmless, it’s not as appealing. Adding a squeeze of lemon juice helps maintain that vibrant green. If your dish seems too dry, pasta water is your friend again—add a tablespoon at a time until you reach your desired consistency. Too bland? A pinch of red pepper flakes and an extra grating of Parmesan can quickly elevate the flavors.

    Frequently Asked Questions

    Can I make Pesto Tortellini with Sundried Tomatoes ahead of time?

    Yes, but it’s best enjoyed fresh. If preparing ahead, slightly undercook the tortellini, toss with a little olive oil, and store separately from the pesto. Combine and warm gently just before serving for the best texture and flavor.

    What type of tortellini works best for this recipe?

    Cheese tortellini is traditional, but any variety works wonderfully. I particularly enjoy spinach or mushroom tortellini for added complexity, though meat-filled options like prosciutto can create a heartier dish.

    Can I freeze leftover Pesto Tortellini with Sundried Tomatoes?

    While possible, I don’t recommend freezing this dish as the texture suffers significantly. The tortellini becomes mushy and the pesto may separate upon thawing. Better to enjoy it fresh or refrigerated for up to 3 days.

    How can I make this dish more substantial?

    Add protein like grilled chicken, shrimp, or white beans. You can also incorporate more vegetables such as sautéed mushrooms, roasted cherry tomatoes, or wilted spinach for a more complete meal.

    What’s the best way to prevent the pesto from turning brown?

    Keep the pesto vibrant by mixing it with the pasta off the heat. A thin layer of olive oil on top when storing and a squeeze of lemon juice helps prevent oxidation that causes browning.

    Final Thoughts

    Pesto Tortellini with Sundried Tomatoes has become one of my most treasured recipes for those nights when I want something that feels special without the fuss. There’s something almost magical about how these simple ingredients transform into such a satisfying meal. The way the rich pesto clings to each tortellini pocket, complemented by those sweet-tart bursts of sundried tomato, creates a dish that’s greater than the sum of its parts. I hope this recipe brings as much joy to your table as it has to mine! For more pasta inspiration, check out my other recipes at Pinterest.
  • Honey Sriracha Meatballs That’ll Blow Your Taste Buds Away!

    Honey Sriracha Meatballs That’ll Blow Your Taste Buds Away!

    Honey Sriracha Meatballs That’ll Blow Your Taste Buds Away!

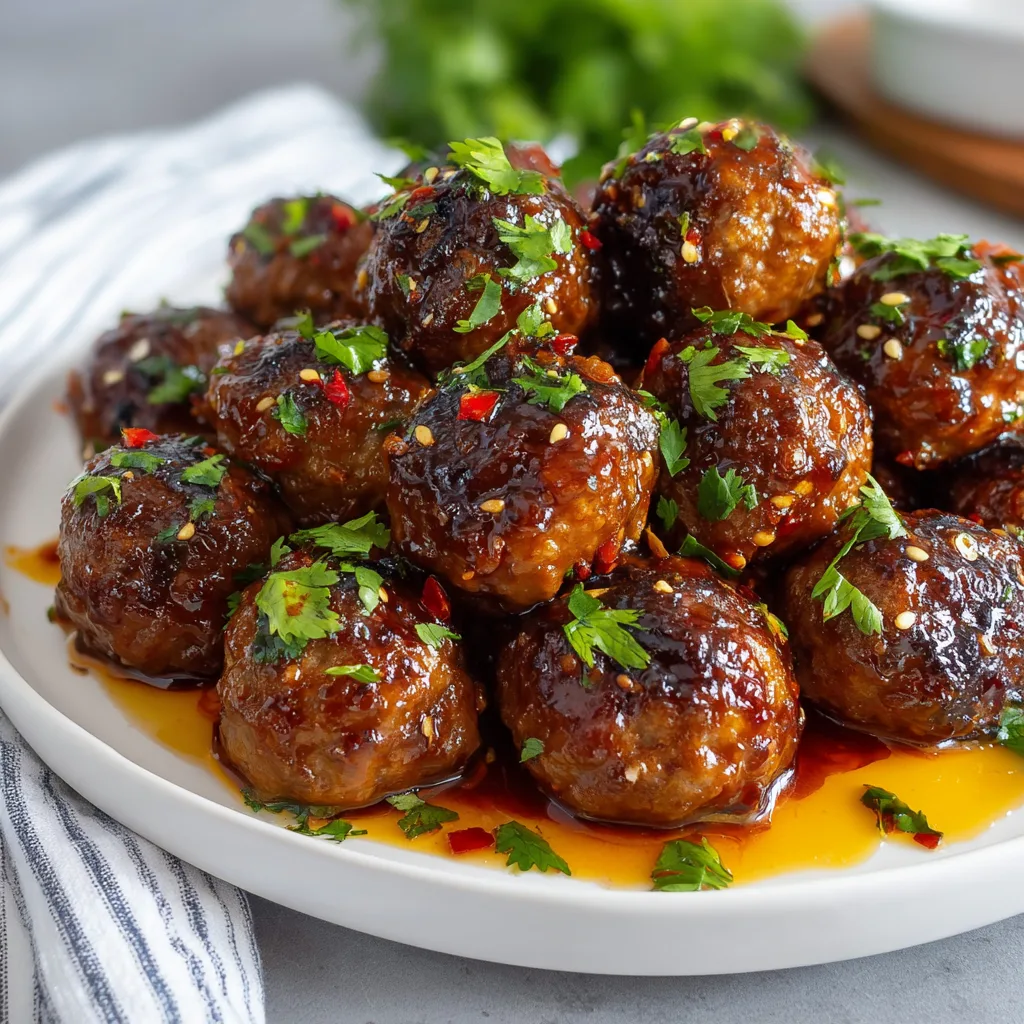
    Honey Sriracha Meatballs are the perfect balance of sweet, spicy, and savory that will make your taste buds dance with joy! These irresistible little bites have become my go-to appetizer when I need to impress guests without spending hours in the kitchen. The sticky glaze creates a beautiful sheen that makes them look as good as they taste. I first made these for a game night with friends, and the empty platter told me everything I needed to know – these meatballs are absolutely addictive!

    Recipe

    Why You’ll Love These Honey Sriracha Meatballs

    Perfect Balance of Flavors

    The magic of these Honey Sriracha Meatballs lies in their perfect flavor balance. The natural sweetness from the honey mellows out the fiery kick of sriracha, creating a harmonious blend that’s neither too sweet nor too spicy. I love how the garlic and ginger add depth, while a splash of soy sauce brings that umami richness. The first time I made these, my kitchen filled with the most intoxicating aroma – sweet, spicy, and savory all at once. It’s that crave-worthy combination that makes you reach for “just one more” until the plate is mysteriously empty!

    Quick and Versatile

    These meatballs are incredibly versatile and convenient. You can prepare them ahead of time and simply reheat when guests arrive. The basic recipe works beautifully with ground chicken, turkey, pork, or beef – whatever you have on hand! I’ve served these as appetizers with toothpicks, as a main dish over fluffy rice, and even stuffed into slider buns for game day. The sauce comes together in minutes with pantry staples, making this recipe perfect for last-minute entertaining. When life gets hectic, having this recipe in my back pocket has saved dinner more times than I can count!

    Essential Tips & Tricks

    Perfecting Your Meatballs

    The key to tender, juicy meatballs is not overmixing the meat mixture. I gently fold the ingredients together just until combined – overworking makes them tough! Adding a tablespoon of breadcrumbs per pound of meat helps maintain moisture, while a splash of milk creates an incredibly tender texture. For uniform cooking, I use a small cookie scoop to portion them evenly. A light coating of cooking spray before baking helps them brown beautifully in the oven. This simple step creates that delicious outer crust while keeping the inside perfectly moist, similar to my Crispy Baked Chicken Wings.

    Sauce Secrets

    The glaze is everything in this recipe! For the perfect consistency, simmer the sauce until it coats the back of a spoon – about 5-7 minutes. This concentrates the flavors and creates that sticky-sweet coating that makes these meatballs irresistible. I’ve found that adding the sriracha gradually allows you to control the heat level perfectly. For an extra layer of flavor, whisk in a teaspoon of sesame oil right at the end. The fragrant nuttiness it adds is subtle but makes all the difference. Remember to reserve some sauce for serving – that extra drizzle takes these meatballs to the next level!

    Serving Ideas & Creative Variations

    Party-Perfect Presentations

    These Honey Sriracha Meatballs make a show-stopping appetizer when presented thoughtfully. Serve them in a warm chafing dish with decorative toothpicks for easy grabbing at parties. For an elegant touch, arrange them on a white platter sprinkled with thinly sliced green onions and sesame seeds. I love serving them alongside a cooling cucumber yogurt dip that balances the heat perfectly. For a beautiful color contrast, nestle the meatballs among fresh herbs like cilantro or mint. When I hosted a birthday gathering last summer, I served these alongside my Hot Honey Salmon Bites, and guests raved about the combination!

    Exciting Flavor Twists

    Don’t be afraid to experiment with flavors! For a Thai-inspired version, add a tablespoon of peanut butter and lime juice to the sauce. Creating a Korean twist is as simple as mixing in gochujang instead of sriracha and adding a tablespoon of brown sugar. For a tropical variation, fold in pineapple chunks and red bell pepper to the sauce during the last few minutes of simmering. My family loves when I add orange zest and a splash of orange juice for a citrusy brightness. The versatility of this recipe means you can adapt it to complement whatever other dishes you’re serving.

    Storage & Troubleshooting Guide

    Proper Storage Methods

    These meatballs are perfect for meal prep because they store beautifully. Refrigerate leftovers in an airtight container for up to 4 days – they actually taste even better the next day as the flavors meld together! For longer storage, freeze the cooked meatballs (without sauce) on a baking sheet until solid, then transfer to freezer bags for up to 3 months. The sauce can be frozen separately in small portions. When ready to enjoy, thaw overnight in the refrigerator and gently reheat in a saucepan, adding a splash of water if needed to thin the sauce. I often make a double batch specifically to freeze for busy weeknights.

    Fixing Common Issues

    If your meatballs are turning out too dry or dense, try adding an extra tablespoon of milk or an egg to the mixture next time. For meatballs that fall apart during cooking, refrigerate the formed balls for 30 minutes before cooking to help them set. If your sauce is too thin, simmer it longer or add a cornstarch slurry (1 teaspoon cornstarch mixed with 1 tablespoon cold water). For sauce that’s too thick, whisk in a tablespoon of water or chicken broth. If the heat level isn’t right, remember you can always add more sriracha for extra spice or more honey to tame the fire!

    Frequently Asked Questions

    Can I make Honey Sriracha Meatballs in advance?

    Absolutely! Prepare the meatballs up to 2 days ahead and store in the refrigerator. Make the sauce separately, then combine and reheat when ready to serve. The flavors actually develop beautifully with time.

    What’s the best meat to use for these meatballs?

    Ground pork or chicken creates the juiciest results, but beef works wonderfully too. For extra flavor, try a 50/50 blend of pork and beef. The fat content helps keep the meatballs tender.

    Can I make these in a slow cooker?

    Yes! Brown the meatballs first, then transfer to a slow cooker. Pour the sauce ingredients over them and cook on low for 3-4 hours. The sauce will thicken beautifully.

    How spicy are these meatballs?

    With the standard recipe, they have a medium heat that builds gradually. Adjust the sriracha amount to your preference – start with half for milder meatballs or double it for serious heat lovers.

    Can I use frozen meatballs instead of homemade?

    Store-bought frozen meatballs work great for a shortcut! Simply warm them according to package directions, then toss in the honey sriracha sauce until coated and heated through.

    Final Thoughts

    These Honey Sriracha Meatballs have become my signature dish for good reason – they’re incredibly flavorful, versatile, and always disappear quickly! The beautiful balance of sweet honey and spicy sriracha creates something truly special that keeps everyone coming back for more. Whether you’re hosting a gathering, meal prepping for the week, or simply craving something delicious for dinner, these meatballs deliver every time. Don’t forget to check out more delicious appetizer ideas on Pinterest for your next gathering!

  • Creamy Pesto Chicken Gnocchi Recipe That Everyone Will Love!

    Creamy Pesto Chicken Gnocchi Recipe That Everyone Will Love!

    Creamy Pesto Chicken Gnocchi Recipe That Everyone Will Love!

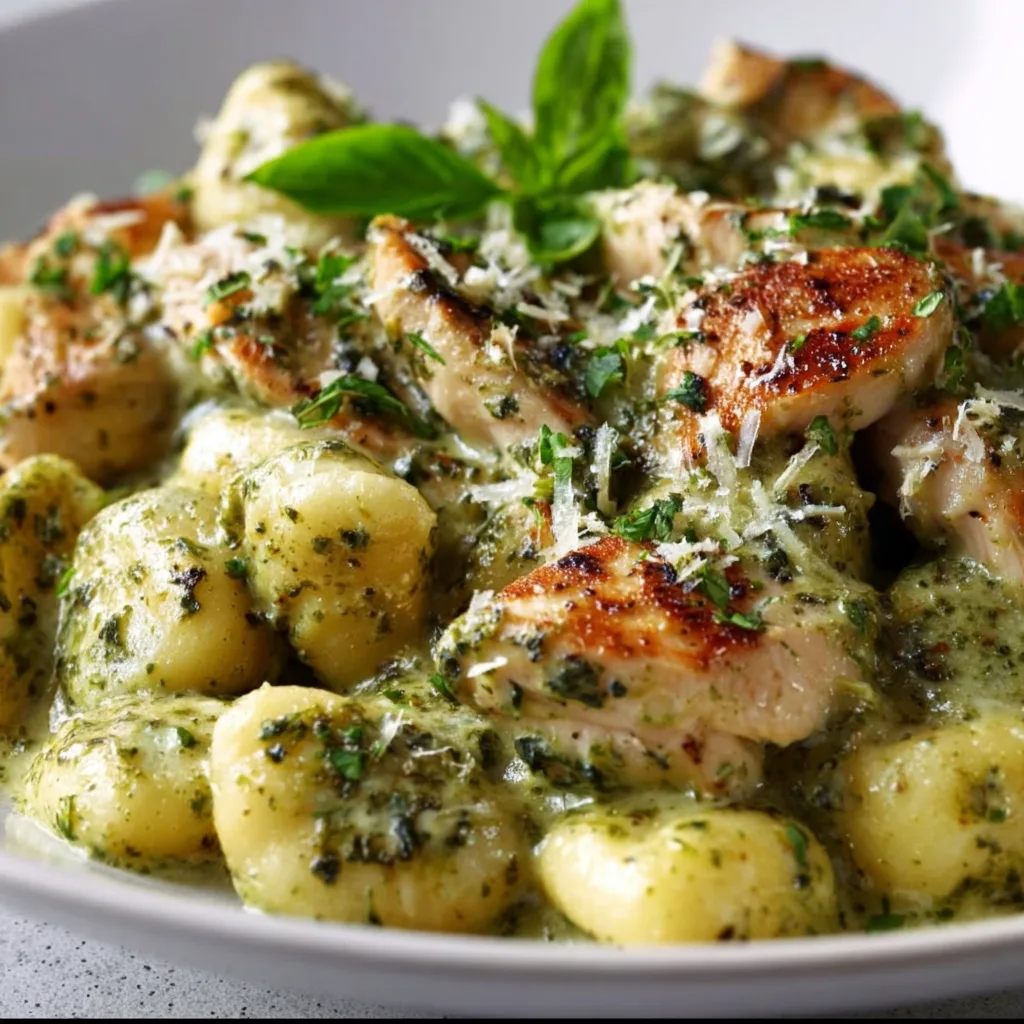
    Creamy Pesto Chicken Gnocchi combines pillowy potato dumplings with tender chicken and a silky basil pesto cream sauce that will make your taste buds dance with joy. I first created this dish on a rainy Sunday when I needed something cozy but didn’t want to spend hours in the kitchen. The way the rich pesto sauce clings to each gnocchi pillow creates a comfort food experience that’s both elegant and approachable. It’s become my go-to when I want to impress dinner guests without breaking a sweat in the kitchen. Ready in just 30 minutes, this creamy pasta alternative satisfies like nothing else.

    Recipe

    Why You’ll Love This Creamy Pesto Chicken Gnocchi

    Perfect Balance of Flavors

    The magic of this dish lies in its perfect harmony of flavors. The herbaceous basil pesto adds brightness while the cream creates a luxurious texture that coats every bite. I love how the garlic and Parmesan in the pesto infuse the entire sauce, creating layers of flavor that develop with each bite. The tender chicken adds protein and substance, making this a complete meal in one pot. When you take that first forkful, you’ll experience the velvety sauce, pillowy gnocchi, and savory chicken coming together in perfect balance.

    Quick Weeknight Wonder

    On busy weeknights when cooking feels like a chore, this dish is my saving grace. It requires minimal prep work—just dice the chicken and gather your ingredients. The entire meal comes together in about 25 minutes, making it faster than delivery! I’ve made this on evenings when I’m exhausted after work, and the simplicity of the process is genuinely refreshing. The one-pot approach means fewer dishes to wash, which is always a win in my book. You’ll be amazed how something this delicious can be so effortless.

    Essential Tips & Tricks

    Perfecting Your Pesto Sauce

    Creating the perfect pesto cream sauce requires a delicate touch. Start by reducing your cream slightly before adding the pesto—this creates a thicker base that helps the sauce cling to the gnocchi. I learned this the hard way after making a too-thin sauce that pooled at the bottom of the plate! Add the pesto off-heat to preserve its vibrant color and fresh flavor. For an extra layer of richness, grate fresh Parmesan directly into the hot sauce where it will melt beautifully. This approach ensures your sauce has the perfect consistency every time.

    Gnocchi Selection & Cooking

    The gnocchi you choose makes all the difference in this dish. I prefer using fresh refrigerated gnocchi when available, as they have a lighter texture than shelf-stable varieties. When cooking, remember that gnocchi needs minimal time—they’re done when they float to the surface! Overcooking leads to gummy dumplings that lose their delightful pillowy quality. For a delicious twist, try pan-frying the gnocchi in a bit of butter before adding them to the sauce—this creates a wonderful crispy exterior while maintaining that soft center.

    Serving Ideas & Creative Variations

    Complementary Side Dishes

    This creamy pesto chicken gnocchi pairs beautifully with light, acidic sides that balance its richness. I love serving it with a simple arugula salad dressed with lemon and olive oil—the peppery greens and bright citrus cut through the creamy sauce perfectly. A side of roasted cherry tomatoes adds beautiful color and a sweet-tart pop of flavor. For a more substantial meal, garlic bread makes an excellent companion for soaking up every last bit of that luscious sauce. During summer months, I’ve found that grilled vegetables like zucchini or bell peppers offer a smoky contrast to the dish.

    Exciting Recipe Variations

    Don’t be afraid to make this recipe your own! Swap chicken for crispy bacon bits or Italian sausage for a different protein profile. For a seafood twist, try adding sautéed shrimp or scallops instead—they cook quickly and pair wonderfully with the pesto flavors. Make it vegetarian by replacing the chicken with roasted mushrooms and cherry tomatoes. For a nutrition boost, stir in baby spinach or kale during the last minute of cooking. I’ve even made a spicy version by adding red pepper flakes and sun-dried tomatoes that was an absolute hit at my last dinner party.

    Storage & Troubleshooting Guide

    Proper Storage & Reheating

    This dish can be stored in an airtight container in the refrigerator for up to 3 days. The sauce will thicken considerably when chilled, so when reheating, add a splash of chicken broth or cream to restore its silky consistency. Gentle reheating is key—use medium-low heat on the stovetop and stir frequently to prevent the sauce from separating. I find that microwave reheating works in a pinch, but use 50% power and stir halfway through for best results. If you’re meal prepping, consider slightly undercooking the gnocchi initially so they don’t become mushy when reheated.

    Common Issues & Solutions

    If your sauce breaks or appears curdled, don’t panic! Lower the heat immediately and whisk in a tablespoon of cold cream to help it re-emulsify. For sauce that’s too thick, gradually add warm chicken broth until you reach your desired consistency. Too thin? Simmer gently to reduce, or create a slurry with a teaspoon of cornstarch mixed with cold water. If your gnocchi turned out gummy, it was likely overcooked—next time, remove them from the water the moment they float. Remember that pesto can darken when exposed to heat, so adding a fresh dollop on top just before serving preserves that vibrant green color.

    Frequently Asked Questions

    Can I use store-bought pesto for this Creamy Pesto Chicken Gnocchi?

    Absolutely! While homemade pesto offers fresher flavor, a good-quality jarred pesto works perfectly for weeknight cooking. Look for refrigerated options when possible as they typically have better flavor and color.

    Is it possible to make this dish ahead of time?

    Yes, but for best results, store the sauce separately from the gnocchi and combine when reheating. This prevents the gnocchi from absorbing too much liquid and becoming soggy.

    Can I freeze leftover creamy pesto chicken gnocchi?

    Cream-based sauces can sometimes separate when frozen and thawed. If freezing, do so in individual portions and reheat gently, stirring frequently to help recombine the sauce.

    What can I substitute for heavy cream to make this lighter?

    Half-and-half or evaporated milk can work as lighter alternatives. For a dairy-free option, try full-fat coconut milk, though it will add a subtle coconut flavor to the dish.

    How do I know when the gnocchi is perfectly cooked?

    Gnocchi is done when it floats to the surface of the boiling water, typically in 2-3 minutes. Taste one piece to confirm—it should be tender but still have a slight chew.

    Final Thoughts

    This Creamy Pesto Chicken Gnocchi has become one of my signature dishes for good reason. It strikes that perfect balance between impressive and accessible—something anyone can master regardless of cooking experience. The combination of tender chicken, pillowy gnocchi, and velvety pesto cream sauce creates a restaurant-quality meal right in your kitchen. I hope this recipe brings as much joy to your table as it has to mine! Don’t forget to check out more delicious recipes on our Pinterest page for endless culinary inspiration.

  • Spinach Feta Egg Muffins: Irresistibly Easy & Protein-Packed Recipe!

    Spinach Feta Egg Muffins: Irresistibly Easy & Protein-Packed Recipe!

    Spinach Feta Egg Muffins: Irresistibly Easy & Protein-Packed Recipe!

    Spinach Feta Egg Muffins are the perfect make-ahead breakfast solution for busy mornings when you need something nutritious and satisfying. I discovered these protein-packed gems during a particularly hectic week when I was racing between deadlines and desperately needed a grab-and-go option that wouldn’t leave me hungry an hour later. The combination of vibrant spinach, tangy feta, and fluffy eggs creates a flavor explosion that makes these muffins irresistible. Plus, they’re incredibly versatile – similar to my White Cheddar Spinach Chicken Burgers but in convenient breakfast form!

    Recipe

    Why You’ll Love These Spinach Feta Egg Muffins

    Perfect Meal Prep Solution

    These egg muffins have completely transformed my morning routine. I whip up a batch on Sunday evenings, and voilà – breakfast is sorted for the entire week! The beauty lies in their perfect portability – just grab a couple from the fridge, microwave for 30 seconds, and you’re good to go. On particularly rushed mornings, I’ll even eat them cold while commuting. They’re packed with protein (about 10g per muffin) and vegetables, keeping you satisfied until lunchtime without the mid-morning energy crash that comes from sugary breakfast options.

    Customizable for Every Taste

    What I adore about these Spinach Feta Egg Muffins is their incredible flexibility. While the classic combination of spinach and feta creates a Mediterranean-inspired flavor profile that’s hard to beat, you can easily switch things up based on what’s in your fridge. Bell peppers, mushrooms, cherry tomatoes, different cheeses – they all work beautifully! My niece doesn’t like feta (the horror!), so when she visits, I make a separate batch with cheddar. The egg base provides the perfect canvas for whatever flavor combinations your heart desires.

    Essential Tips & Tricks

    Preventing Soggy Muffins

    The secret to perfect Spinach Feta Egg Muffins lies in properly preparing your vegetables. Always thoroughly drain your spinach – I squeeze it in a clean kitchen towel until barely any moisture remains. Wet spinach is the number one culprit behind soggy egg muffins! For extra insurance against sogginess, lightly sauté your vegetables before adding them to the egg mixture. This pre-cooking step removes excess moisture and intensifies the flavors. I learned this the hard way after a batch turned out waterlogged despite looking perfect in the oven.

    Muffin Tin Mastery

    Don’t skip lining your muffin tin with silicone liners or thoroughly greasing each cup – egg muffins are notorious for sticking! I prefer silicone liners because they’re reusable and nothing ever sticks to them. Fill each cup about 3/4 full to allow room for expansion without overflow. For even baking, let your egg mixture rest for 5 minutes before baking to allow air bubbles to escape. This technique, similar to what I use in my Easy Mac and Cheese Bites, ensures perfectly textured muffins every time.

    Serving Ideas & Creative Variations

    Breakfast Pairings

    These Spinach Feta Egg Muffins shine as a standalone breakfast, but pairing them with complementary sides elevates the meal to weekend-brunch status. I love serving them with avocado toast – the creamy avocado against the savory egg muffins creates a delightful texture contrast. For a heartier option, add a side of roasted sweet potatoes or fresh fruit. When hosting brunch, I arrange them on a platter with yogurt parfaits and my Garlic Butter Parmesan Knots for an impressive spread that always gets compliments.

    Beyond Breakfast

    Don’t limit these versatile muffins to mornings! They make excellent protein-rich snacks for afternoon energy slumps or light dinners paired with a simple salad. Cut them into quarters for appetizers at your next gathering – they’re delicious at room temperature. I’ve even crumbled them over salads as a flavorful protein addition. For lunch boxes, wrap individual muffins in parchment paper for easy transport. My colleague was so impressed when I brought these to a potluck that she immediately requested the recipe!

    Storage & Troubleshooting Guide

    Proper Storage Methods

    To maintain freshness, allow your Spinach Feta Egg Muffins to cool completely before storing. Refrigerate them in an airtight container lined with paper towels to absorb any excess moisture – this prevents them from becoming soggy. They’ll keep perfectly for 4-5 days in the refrigerator. For longer storage, freeze individually wrapped muffins in a freezer-safe bag for up to 2 months. The individual wrapping prevents freezer burn and allows you to thaw only what you need. I always make a double batch specifically for freezing.

    Reheating for Best Results

    The key to reheating these egg muffins is to avoid overcooking, which makes them tough and rubbery. From refrigerated, microwave for 20-30 seconds on medium power. If frozen, either thaw overnight in the refrigerator before reheating or microwave for 60-90 seconds at 50% power. For a crisper exterior, split them in half and toast them briefly in a toaster oven. I discovered this method accidentally when my microwave broke, and now I sometimes prefer it for the slightly crispy edges it creates!

    Frequently Asked Questions

    Can I make Spinach Feta Egg Muffins without dairy?

    Absolutely! Substitute the feta with nutritional yeast for cheesy flavor without dairy, and use plant-based milk instead of regular milk. The texture remains fluffy and delicious.

    How do I prevent my egg muffins from deflating?

    Allow them to cool gradually in the oven with the door slightly open for 5 minutes before removing. This prevents the sudden temperature change that causes deflation.

    Can I use frozen spinach in these Spinach Feta Egg Muffins?

    Yes! Thaw completely and squeeze out all excess moisture using a clean kitchen towel. One 10oz package of frozen spinach equals about 1½ cups fresh spinach.

    What’s the best way to prevent sticking?

    Use silicone muffin liners or thoroughly grease the tin with cooking spray. Paper liners tend to stick, so they’re not recommended.

    How can I add more protein?

    Mix in cooked, diced chicken, turkey bacon, or chopped ham. For vegetarian options, add black beans or chickpeas for extra protein without changing the texture.

    Final Thoughts

    These Spinach Feta Egg Muffins have become a non-negotiable part of my weekly meal prep routine. They’ve saved me countless mornings when time was tight but I didn’t want to sacrifice nutrition. The combination of convenience, nutrition, and incredible flavor makes them a true kitchen hero. I love seeing the creative variations friends make after I share this recipe – it’s become something of a signature dish among my circle! For more breakfast inspiration, check out my other recipes on Pinterest where I’m always adding new ideas.

  • Creamy Chicken Bacon Ranch Pasta That Will Blow Your Mind!

    Creamy Chicken Bacon Ranch Pasta That Will Blow Your Mind!

    Creamy Chicken Bacon Ranch Pasta That Will Blow Your Mind!

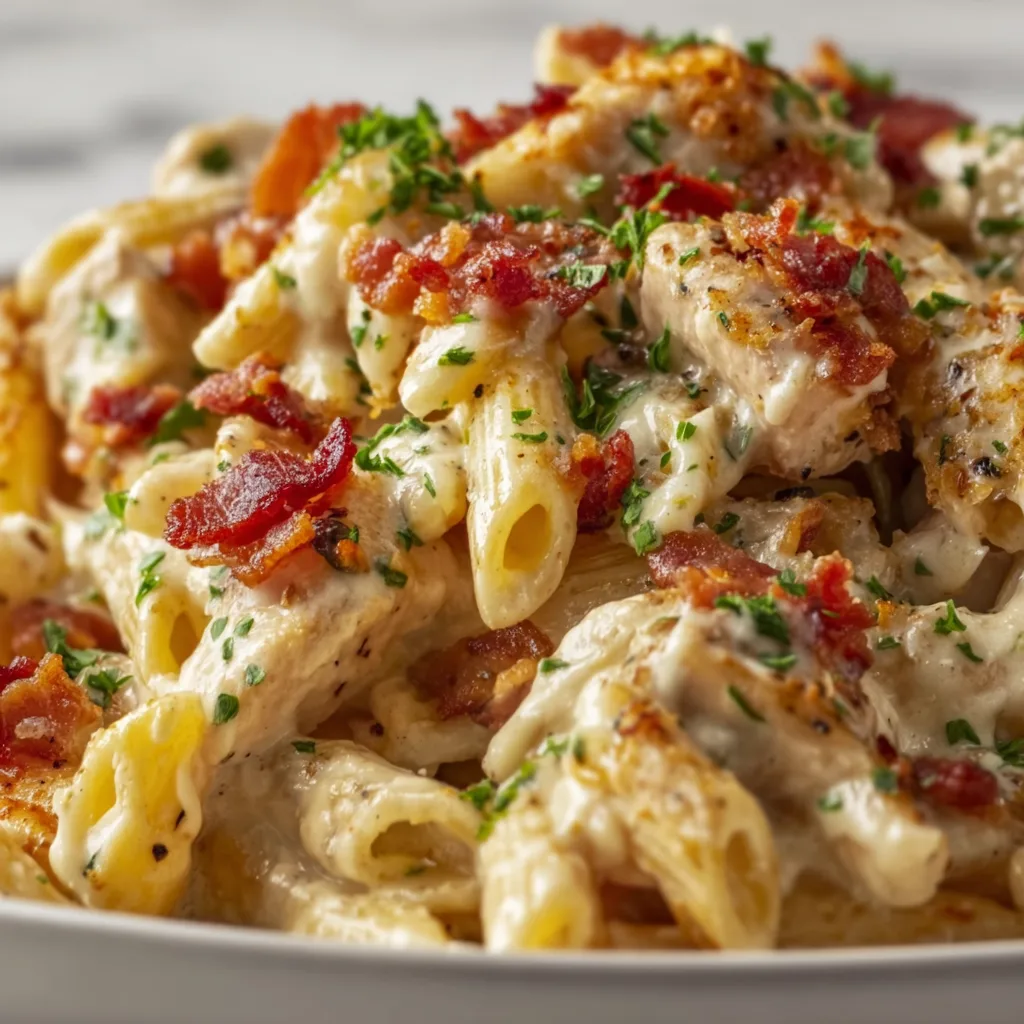
    Creamy Chicken Bacon Ranch Pasta combines everything I crave in a comfort food dish – tender chicken, crispy bacon, and al dente pasta swimming in a velvety ranch-infused sauce that hugs every bite. This one-pot wonder has saved my weeknight dinner routine more times than I can count! The first time I made it, my kitchen filled with that irresistible bacon aroma, and my family appeared like magic, hovering around the stove with eager forks. If you’re looking for a crowd-pleasing dinner that delivers maximum flavor with minimal effort, this creamy pasta dish will quickly become your new go-to recipe.

    Recipe

    Why You’ll Love This Creamy Chicken Bacon Ranch Pasta

    Perfect Weeknight Solution

    This creamy chicken bacon ranch pasta is the ultimate time-saving miracle when you’re racing against the clock. I developed this recipe during those chaotic weeks when soccer practice and work deadlines collided, and it’s been my secret weapon ever since. The entire dish comes together in about 30 minutes, requiring just one pot (hello, fewer dishes!). The ingredients are likely already in your pantry and refrigerator, making it perfect for those evenings when you forgot to plan dinner but still want something that tastes like you spent hours in the kitchen.

    Flavor Explosion in Every Bite

    The flavor combination in this dish hits all the right notes – savory bacon, tender chicken, and that unmistakable ranch seasoning that ties everything together. I love how the cream cheese melts into the pasta, creating pockets of richness that make each forkful absolutely dreamy. The garlic adds depth while the fresh herbs brighten everything up. What makes this dish special is how the pasta absorbs the flavors as it finishes cooking in the sauce. My neighbor actually requested this recipe after catching just a whiff from across the yard – it’s that enticing!

    Essential Tips & Tricks

    Perfecting Your Pasta

    The secret to success with this creamy chicken bacon ranch pasta lies in slightly undercooking your pasta initially. Cook it about 2 minutes less than the package directions indicate, as it will continue cooking in the sauce. This prevents that dreaded mushy pasta situation we all want to avoid! I learned this the hard way after one particularly distracted cooking session. For maximum flavor absorption, reserve about 1/2 cup of pasta water before draining – the starchy liquid helps the sauce cling to every piece of pasta and creates that restaurant-quality silkiness that makes pasta dishes irresistible.

    Sauce Mastery

    Creating the perfect creamy texture requires a bit of patience and heat management. Keep your burner on medium-low when adding the cream cheese to prevent separation. I whisk continuously for about 2 minutes until completely smooth before adding other liquid ingredients. For the richest flavor, use full-fat cream cheese and don’t rush this step! If your sauce seems too thick, gradually add small amounts of the reserved pasta water until you reach your desired consistency. Remember that the sauce will thicken slightly as it cools, so aim for a consistency just slightly thinner than you want in the final dish.

    Serving Ideas & Creative Variations

    Complementary Side Dishes

    This creamy chicken bacon ranch pasta pairs beautifully with bright, acidic sides that balance its richness. My family’s favorite combination includes a simple arugula salad with lemon vinaigrette and crusty garlic bread for sopping up extra sauce. For a more substantial meal, try adding roasted vegetables like asparagus or Brussels sprouts. The slight bitterness of these veggies creates a perfect counterpoint to the creamy pasta. When hosting dinner parties, I serve this pasta in individual gratin dishes with a small side salad for an elevated presentation that still feels comforting.

    Exciting Flavor Twists

    Don’t be afraid to make this recipe your own with creative additions! For a spicy kick, add red pepper flakes or diced jalapeños to the sauce. Swap the chicken for smoked sausage or shrimp for a different protein experience. My daughter’s favorite variation includes sun-dried tomatoes and spinach folded in just before serving, adding beautiful color and nutritional value. For a more indulgent version, try mixing in different cheeses like smoked gouda or pepper jack. Each variation creates a completely new dish while maintaining that comforting creamy chicken bacon ranch pasta foundation.

    Storage & Troubleshooting Guide

    Proper Storage Methods

    This creamy chicken bacon ranch pasta makes excellent leftovers when stored properly. Transfer cooled pasta to an airtight container and refrigerate for up to 3 days. The flavors actually deepen overnight, making day-two pasta sometimes even better than fresh! For longer storage, you can freeze individual portions in freezer-safe containers for up to 2 months. I like to slightly undercook the pasta if I know I’ll be freezing it, as this prevents it from becoming too soft when reheated. Label containers with the date and contents to avoid mystery freezer discoveries later.

    Reheating Without Drying Out

    The biggest challenge with leftover creamy pasta is maintaining that silky texture when reheating. For stovetop reheating, add a splash of milk or cream to the cold pasta before warming over medium-low heat, stirring frequently. Microwave reheating works too – cover the pasta with a damp paper towel and heat in 30-second intervals, stirring between each. If your sauce has separated or seems too thick, whisk in a tablespoon of warm water or milk until the creamy consistency returns. I’ve found that a gentle approach to reheating preserves both the texture and flavor of this delicious pasta dish.

    Frequently Asked Questions

    Can I make Creamy Chicken Bacon Ranch Pasta ahead of time?

    Yes! Prepare the dish up to a day ahead, but slightly undercook the pasta. Store in the refrigerator and reheat gently with a splash of milk to restore the creamy texture.

    What pasta shapes work best for this recipe?

    Medium shapes that trap sauce work wonderfully – penne, rotini, farfalle, or cavatappi are my top choices. Their ridges and crevices hold the creamy sauce perfectly.

    Can I use a pre-cooked rotisserie chicken?

    Absolutely! Shred about 2-3 cups of rotisserie chicken and add it when the recipe calls for returning the cooked chicken to the pan. This saves even more time!

    Is there a lighter version of this recipe?

    Try using light cream cheese, turkey bacon, and whole wheat pasta. You can also replace some cream with chicken broth and add extra vegetables for more nutrition.

    How can I make this dish gluten-free?

    Simply substitute your favorite gluten-free pasta and ensure your ranch seasoning is gluten-free. The cooking process remains the same, though gluten-free pasta may need slightly different cooking times.

    Final Thoughts

    This creamy chicken bacon ranch pasta has become more than just a recipe in my household – it’s our comfort food cornerstone. There’s something magical about the way these simple ingredients transform into something so satisfying. Whether you’re cooking for picky eaters, preparing for a potluck, or simply treating yourself after a long day, this dish delivers every time. I hope it brings the same joy and deliciousness to your table that it has to mine! Don’t forget to check out more comforting pasta recipes on Pinterest for endless inspiration.

  • Potsticker Stir Fry: Irresistibly Crispy & Flavor-Packed Delight!

    Potsticker Stir Fry: Irresistibly Crispy & Flavor-Packed Delight!

    Potsticker Stir Fry: Irresistibly Crispy & Flavor-Packed Delight!

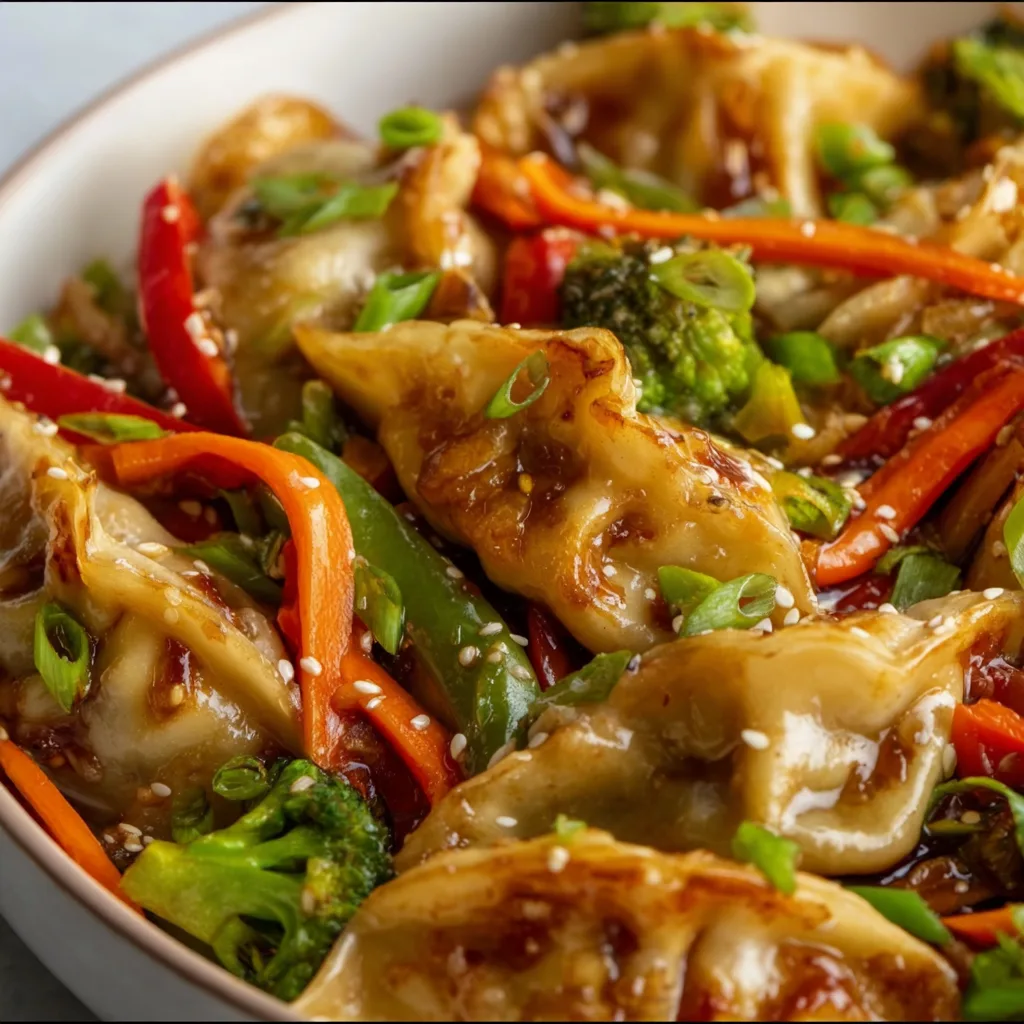
    Potsticker Stir Fry transforms frozen dumplings into a quick, crave-worthy meal that’s become my weeknight lifesaver. The first time I made this, I was standing in my kitchen at 7 PM, staring at a bag of frozen potstickers and wondering how to make them feel like a complete dinner. That’s when inspiration struck! By adding colorful veggies and a sweet-savory sauce, these humble dumplings become the star of a restaurant-worthy stir fry that comes together in just 20 minutes. If you love quick Asian-inspired meals like my Chicken Lo Mein, you’ll adore this shortcut sensation.

    Recipe

    Why You’ll Love This Potsticker Stir Fry

    A Time-Saving Miracle for Busy Weeknights

    When life gets hectic, this potsticker stir fry becomes your new best friend. Using pre-made frozen dumplings cuts your prep time in half while still delivering incredible flavor. I’ve made this on nights when I’m absolutely exhausted, and it never fails to impress. The crispy-bottomed potstickers develop beautiful caramelization in the pan, while the vegetables cook quickly alongside them. The entire meal comes together in a single skillet, meaning fewer dishes and more time to relax. Plus, it’s endlessly customizable based on whatever vegetables are lurking in your crisper drawer!

    The Perfect Balance of Flavors and Textures

    What makes this potsticker stir fry truly special is the interplay of textures and tastes. The dumplings themselves offer that perfect contrast between tender filling and crispy exterior. When combined with the vibrant vegetables and glossy sauce, each bite delivers a symphony of flavors. The sauce – a simple blend of soy sauce, honey, garlic, and ginger – creates a silky coating that’s simultaneously sweet, salty, and umami-rich. I love how the sauce caramelizes slightly on the potstickers, creating little pockets of intensified flavor that make each bite more exciting than the last.

    Essential Tips & Tricks

    Mastering the Perfect Potsticker Technique

    The secret to exceptional potsticker stir fry lies in how you cook the dumplings themselves. Start with a hot pan and a bit of oil to create that coveted crispy bottom. Once golden, add just enough water to steam them through, then let it evaporate completely. This two-step cooking method ensures perfectly cooked filling with that signature crispy-meets-tender texture. Don’t overcrowd your pan – work in batches if needed to ensure each potsticker gets proper contact with the hot surface. And resist the urge to flip them constantly! Let them develop that golden crust before disturbing them.

    Vegetable Prep for Maximum Flavor

    Cutting your vegetables to the right size is crucial for a harmonious stir fry. Slice everything into similar-sized pieces to ensure even cooking. I prefer to cut carrots into thin matchsticks, bell peppers into strips, and snow peas simply trimmed. When adding vegetables to the pan, consider their cooking times – start with denser veggies like carrots and broccoli, adding quick-cooking items like spinach or bean sprouts at the very end. For extra flavor, try blanching broccoli before adding it to the stir fry, similar to my approach in Fried Green Beans for that perfect tender-crisp texture.

    Serving Ideas & Creative Variations

    Complementary Side Dishes

    While potsticker stir fry works beautifully as a standalone meal, pairing it with simple sides elevates the experience. A small bowl of steamed jasmine rice soaks up the delicious sauce, while a side of quick-pickled cucumbers adds refreshing crunch and acidity. For a lighter option, serve with a simple miso soup or a small side salad dressed with sesame oil and rice vinegar. When I’m hosting friends, I love to present this family-style with chopsticks and small dipping bowls of extra sauce. For a complete Asian-inspired feast, consider adding Korean BBQ Steak Rice Bowls to your menu rotation.

    Exciting Flavor Variations to Try

    The beauty of this potsticker stir fry lies in its adaptability. For a spicy kick, add a tablespoon of chili garlic sauce or gochujang to the sauce mixture. Craving something tangy? Try incorporating a splash of rice vinegar and some orange zest. Vegetarian potstickers work beautifully with a teriyaki-inspired sauce, while pork or chicken varieties shine with a hint of five-spice powder added to the base sauce. My personal favorite variation includes a tablespoon of peanut butter whisked into the sauce for a creamy, nutty finish, topped with crushed peanuts and fresh cilantro.

    Storage & Troubleshooting Guide

    Proper Storage for Leftovers

    Potsticker stir fry makes excellent leftovers when stored properly. Allow the dish to cool completely before transferring to an airtight container. Refrigerated leftovers will maintain their quality for 2-3 days, though the potstickers will soften over time. For best results when reheating, use a skillet rather than a microwave to help restore some of the crispy texture. If you know you’ll have leftovers, consider slightly undercooking the vegetables initially so they don’t become mushy when reheated. I sometimes deliberately make extra just to enjoy the flavors the next day when they’ve had time to meld.

    Troubleshooting Common Issues

    If your potstickers are sticking excessively to the pan, you likely need more oil or a better-seasoned pan. For a quick fix, add a tiny splash of water and cover briefly to steam them loose. If your sauce becomes too thick, simply thin it with a tablespoon of water or chicken broth. Too thin? Create a cornstarch slurry (1 teaspoon cornstarch mixed with 1 tablespoon cold water) and stir it in. If your vegetables are cooking unevenly, remember to add them in stages based on density. And if your potstickers remain doughy in the center, they need more steaming time – add another tablespoon of water and cover for 1-2 minutes.

    Frequently Asked Questions

    Can I use homemade potstickers instead of frozen ones?

    Absolutely! Homemade potstickers work beautifully in this stir fry. They may cook slightly faster than frozen, so adjust your timing accordingly and watch them carefully to prevent burning.

    What’s the best way to prevent my Potsticker Stir Fry sauce from becoming too thick?

    Start with less cornstarch than you think you need (about 1 teaspoon) and add your sauce ingredients to the hot pan gradually. You can always thicken it more at the end if needed.

    Can I make this recipe vegetarian?

    Yes! Use vegetable-filled dumplings and substitute vegetable broth for chicken broth in the sauce. Add extra mushrooms for a savory umami boost that complements the vegetarian potstickers perfectly.

    How do I know when my potstickers are fully cooked?

    Properly cooked potstickers have golden-brown, crispy bottoms and fully steamed, tender tops. The filling should reach 165°F, and there should be no doughy texture when bitten.

    What vegetables work best in this stir fry?

    Quick-cooking, colorful vegetables like bell peppers, snow peas, carrots, broccoli florets, and baby corn complement potstickers beautifully. Leafy greens like spinach or bok choy should be added in the last minute.

    Final Thoughts

    This Potsticker Stir Fry has become my reliable rescue recipe – transforming a package of frozen dumplings into a vibrant, satisfying meal that feels intentional rather than last-minute. The combination of crispy-tender potstickers with fresh vegetables and that irresistible sauce creates something far greater than the sum of its parts. Whether you’re cooking for yourself after a long day or impressing unexpected dinner guests, this versatile dish delivers maximum flavor with minimum effort. For more delicious recipe inspiration, follow me on Pinterest!

  • Bang Bang Chicken Sliders: Irresistible Flavor Explosion You Can’t Miss!

    Bang Bang Chicken Sliders: Irresistible Flavor Explosion You Can’t Miss!

    Bang Bang Chicken Sliders: Irresistible Flavor Explosion You Can’t Miss!

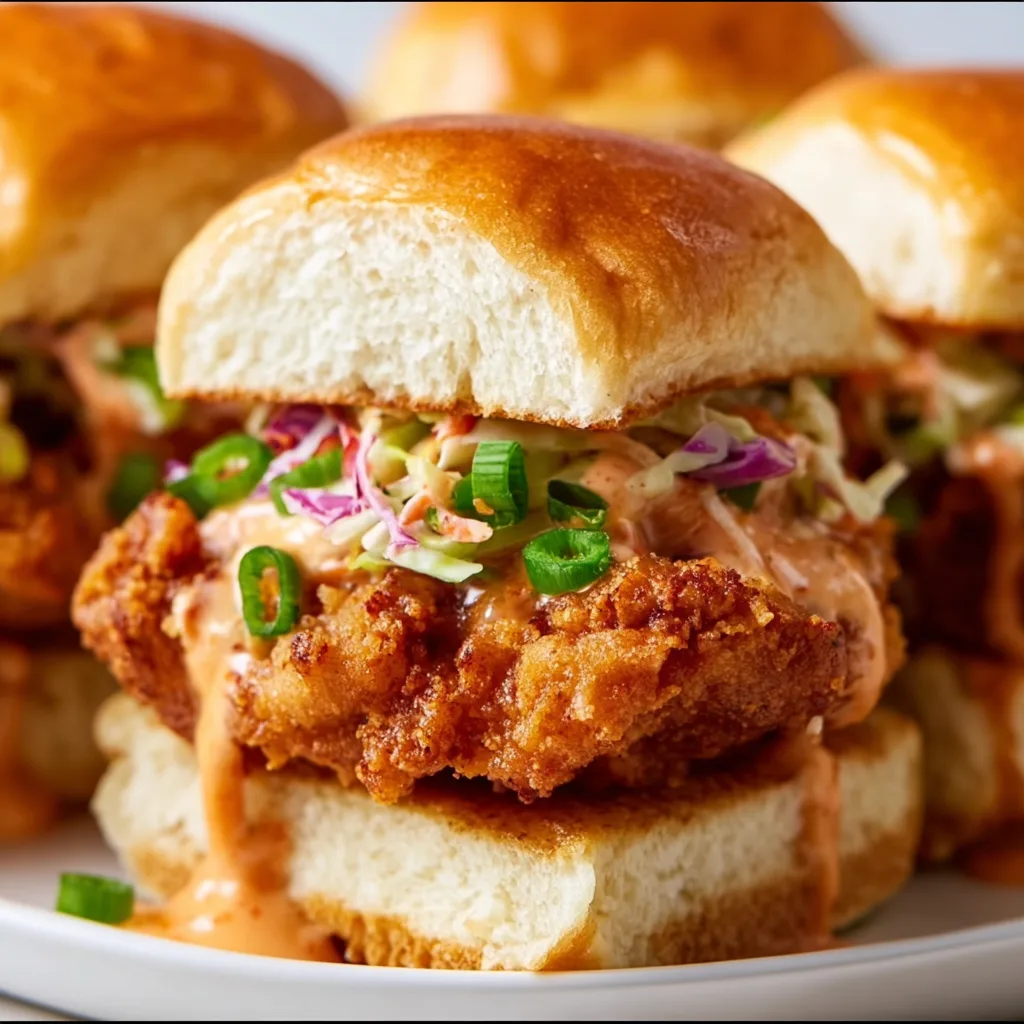
    Bang Bang Chicken Sliders have completely stolen my heart (and my dinner rotation)! These adorable mini sandwiches pack a serious flavor punch with their crispy chicken, creamy spicy sauce, and perfectly toasted buns. The first time I made these for my family game night, they disappeared faster than I could say “who wants seconds?” That sweet-spicy bang bang sauce creates the most incredible flavor explosion that’ll have everyone reaching for more. Trust me, these sliders are about to become your new go-to for everything from casual weeknight dinners to party appetizers that’ll have guests begging for the recipe.

    Recipe

    Why You’ll Love These Bang Bang Chicken Sliders

    Perfect Balance of Flavors and Textures

    The magic of these sliders lies in their irresistible contrast of textures and flavors. The crispy chicken provides that satisfying crunch, while the creamy bang bang sauce delivers a perfect sweet-spicy kick that dances on your taste buds. I love how the cool, crisp slaw cuts through the richness, creating a balanced bite that feels both indulgent and refreshing. The slightly toasted slider buns add that final touch of texture that makes each bite absolutely perfect. These little handheld delights manage to hit every flavor note – savory, sweet, spicy, and tangy – in one compact package.

    Quick and Crowd-Pleasing

    There’s something undeniably magical about food that brings people together, and these sliders do exactly that! Whether I’m hosting a casual get-together or feeding my hungry family on a weeknight, these Bang Bang Chicken Sliders never disappoint. They come together in about 30 minutes, making them perfect for those evenings when you want something special without spending hours in the kitchen. Plus, they’re customizable enough that even picky eaters can find a version they love. I’ve watched the most hesitant guests take one bite and immediately reach for a second slider – that’s the kind of food victory that makes cooking so rewarding!

    Essential Tips & Tricks

    Perfecting Your Bang Bang Sauce

    The heart and soul of these sliders is that creamy, spicy sauce that gives them their name. For the best flavor, use a high-quality mayonnaise as your base – trust me, it makes a difference! I like to add a touch of honey to balance the heat from the sriracha or sweet chili sauce. Let the sauce rest for at least 15 minutes before using to allow the flavors to meld together. If you’re serving guests with varying spice preferences, consider making two batches – one milder and one with an extra kick. For another delicious sauce experience, check out my Hot Honey Salmon Bites which uses a similar sweet-heat approach.

    Chicken Preparation Secrets

    For the absolute best texture, I recommend using chicken thighs instead of breasts – they stay juicier and have more flavor. Cut them into slider-sized pieces before cooking for even cooking and perfect fit on the buns. The key to getting that crispy exterior is patting the chicken completely dry before seasoning and cooking. For a quick weeknight version, you can use pre-cooked chicken strips, but taking the time to bread and fry (or air fry) your own chicken pieces takes these sliders to restaurant quality. A light dusting of cornstarch in your breading mixture creates an extra crispy coating that stands up to the sauce.

    Serving Ideas & Creative Variations

    Perfect Pairings

    These Bang Bang Chicken Sliders shine as the star of your meal, but the right sides can elevate the entire experience. I love serving them with crispy sweet potato fries or a light Asian-inspired slaw for a complete meal that feels both indulgent and balanced. For a fun party spread, pair them with Crispy Baked Chicken Wings and some veggie platters for a crowd-pleasing finger food feast. During summer gatherings, these sliders alongside a chilled cucumber salad create a refreshing yet satisfying meal. The contrast between the warm, spicy sliders and cool, crisp sides creates a dining experience that feels thoughtfully curated.

    Tasty Twists on the Classic

    Don’t be afraid to put your own spin on these sliders! For a tropical twist, add a slice of grilled pineapple – the sweetness pairs beautifully with the spicy sauce. Swap the traditional slaw for a mango slaw with cilantro for a fresh take. For a fusion version, add a kimchi topping that brings tangy crunch and probiotic benefits. Vegetarian guests? Try using crispy tofu or cauliflower instead of chicken – the bang bang sauce works beautifully with both. I’ve even made a breakfast version with a fried egg on top that makes an unexpectedly delicious weekend brunch option!

    Storage & Troubleshooting Guide

    Keeping Components Fresh

    For make-ahead convenience, store the components separately until serving time. The bang bang sauce stays fresh in an airtight container in the refrigerator for up to 5 days, and actually tastes better after the flavors have had time to meld. If you’re prepping chicken in advance, store it uncovered in the refrigerator to maintain crispiness, then reheat in an oven or air fryer at 350°F for 5-7 minutes. Assembled sliders will get soggy after about 2 hours, so I recommend keeping everything separate for potlucks or parties where food might sit out. The slaw should be dressed just before serving to maintain its crisp texture.

    Solving Common Issues

    If your bang bang sauce is too thin, add a little more mayonnaise or a touch of Greek yogurt to thicken it up. Too spicy? A squeeze of honey or a spoonful of sugar can help tame the heat while enhancing the flavor balance. If your chicken loses its crispiness, avoid microwaving it – instead, place it on a wire rack in a 375°F oven for 5-7 minutes to restore that crunch. Slider buns getting too soft? Toast them lightly before assembling, or serve the sauce on the side for dipping. For meal prep, consider keeping the chicken separate from the sauce until just before eating to preserve the perfect texture.

    Frequently Asked Questions

    Can I make Bang Bang Chicken Sliders ahead of time?

    Yes! Prepare the sauce and chicken separately up to 2 days ahead. Store in airtight containers in the refrigerator. Reheat the chicken in an oven or air fryer at 350°F for 5-7 minutes before assembling.

    What’s the best way to keep the chicken crispy?

    Pat chicken completely dry before breading, and don’t overcrowd your pan when cooking. For maximum crispiness, place cooked chicken on a wire rack instead of paper towels to prevent steaming.

    Can I make these sliders less spicy?

    Absolutely! Reduce the sriracha or sweet chili sauce in your bang bang sauce, and add a bit more honey or sugar to balance the flavors. You can also serve the sauce on the side.

    What’s the best bread for Bang Bang Chicken Sliders?

    Traditional slider buns work perfectly, but Hawaiian rolls add a delightful sweetness. Brioche slider buns offer a buttery richness that complements the spicy chicken beautifully.

    Can I use an air fryer for the chicken?

    Definitely! Spray breaded chicken pieces with cooking oil and air fry at 400°F for 8-10 minutes, flipping halfway through. This creates crispy chicken with less oil.

    Final Thoughts

    These Bang Bang Chicken Sliders have become my secret weapon for everything from quick family dinners to impressive party appetizers. There’s something magical about that perfect balance of crispy, spicy, sweet, and creamy that keeps everyone coming back for “just one more.” I love seeing the look of surprise and delight when someone takes their first bite! Don’t forget to check out more delicious recipes on Pinterest for more inspiration. Whether you follow my recipe exactly or add your own creative twist, these sliders are guaranteed to bring some excitement to your table!

  • Korean BBQ Steak Rice Bowls That Will Blow Your Mind!

    Korean BBQ Steak Rice Bowls That Will Blow Your Mind!

    Korean BBQ Steak Rice Bowls That Will Blow Your Mind!

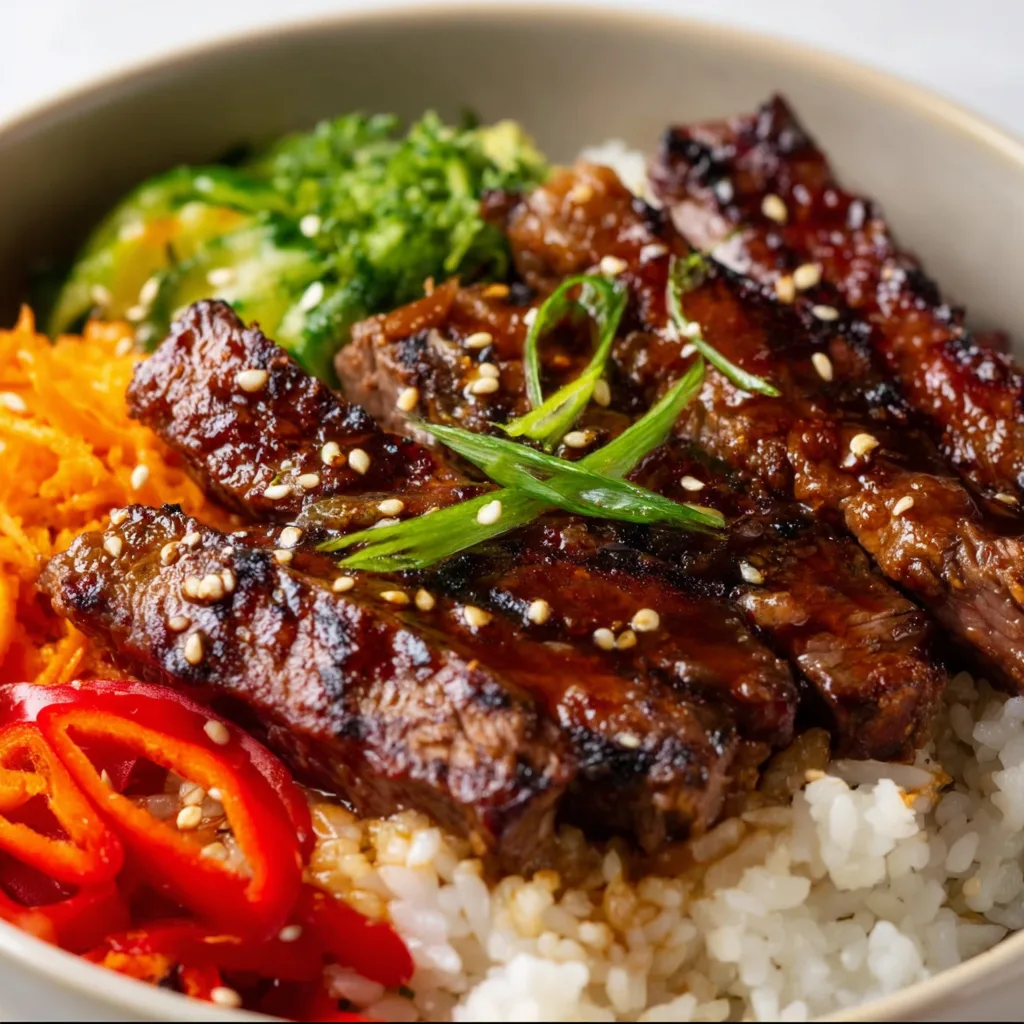
    The sizzle of marinated beef hitting a hot pan, the sweet-savory aroma of Korean BBQ sauce caramelizing, and the colorful array of vegetables coming together in perfect harmony—these Korean BBQ Steak Rice Bowls have become my absolute weekend obsession. I first discovered this dish during a rainy Sunday when I craved something comforting yet exciting. The combination of tender steak strips, fluffy rice, and that irresistible sauce transported me straight to flavor heaven. If you’re looking for a meal that delivers big on taste while being surprisingly simple to prepare, you’re in for a treat with this recipe.

    Recipe

    Why You’ll Love These Korean BBQ Steak Rice Bowls

    Perfect Balance of Flavors and Textures

    There’s something magical about the flavor profile in Korean BBQ—that perfect balance of sweet, savory, and umami that keeps you coming back for more. The marinade infuses the steak with incredible depth, while the quick cooking method ensures each bite remains tender. I love how the slightly charred edges of the beef contrast with the soft rice beneath. The crunch of fresh vegetables adds textural interest, creating a bowl that satisfies all your senses at once. My husband claims these bowls have “ruined” takeout for him—they’re that good!

    Weeknight-Friendly Yet Impressive

    Don’t let the incredible flavor fool you—these bowls are surprisingly weeknight-friendly. The marinade works its magic in just 30 minutes (though longer is better if you have time). While the steak marinates, you can prep your vegetables and cook the rice, making efficient use of your time. I’ve served these bowls for impromptu dinner guests who assumed I’d spent hours in the kitchen. The vibrant colors and enticing aromas create a restaurant-quality presentation that belies the minimal effort involved. It’s my secret weapon for those “I want something special but don’t have much time” evenings.

    Essential Tips & Tricks

    Perfecting the Steak

    The star of these bowls is undoubtedly the perfectly cooked steak. I recommend using ribeye or flank steak for the best balance of flavor and tenderness. Slice against the grain and aim for pieces about ¼-inch thick—this ensures quick, even cooking and maximum marinade absorption. Don’t overcrowd your pan! Cook in batches if necessary to get that beautiful caramelization on each piece. A cast-iron skillet works wonders here, creating a gorgeous sear that locks in juices and flavor. Remember, high heat is your friend for developing those delicious charred edges.

    Balancing Your Bowl Components

    Creating a balanced bowl is key to elevating this dish from good to spectacular. Start with a base of warm rice—I prefer short-grain for its slightly sticky texture that catches all the delicious sauce. Arrange your steak and vegetables in sections rather than mixing everything together; this preserves the individual flavors and creates a visually appealing presentation. For authentic flavor, don’t skip the kimchi! If you’re new to it, try my homemade kimchi recipe or start with a small amount from your local Asian market.

    Serving Ideas & Creative Variations

    Family-Style Presentation Options

    Transform dinner into an interactive experience with a DIY bowl bar. I love setting out all components separately and letting everyone build their own perfect bowl. This approach is especially wonderful for families with picky eaters or when entertaining guests with different preferences. Warm the rice, arrange the beef on a platter, and offer an array of toppings in colorful bowls. Don’t forget the sauce options! A drizzle of sriracha mayo or extra Korean BBQ sauce lets everyone customize their heat level. This presentation style creates a communal dining experience that’s both casual and special.

    Seasonal Adaptations and Substitutions

    The beauty of these bowls lies in their flexibility across seasons. In summer, I add fresh cucumber, radish, and herbs for brightness. Fall calls for roasted sweet potatoes and mushrooms, while winter versions might include quick-pickled red cabbage for color and crunch. For protein variations, try quick-flavorful pepper steak or substitute chicken thighs, tofu, or even salmon. The marinade works beautifully with all of them! For a lower-carb option, replace half (or all) of the rice with cauliflower rice or spiralized vegetables. The marinade is so flavorful that it elevates even the simplest ingredients.

    Storage & Troubleshooting Guide

    Meal Prep and Leftovers

    These bowls are meal prep champions! I often double the recipe on Sunday to enjoy throughout the week. Store components separately for best results—rice in one container, meat in another, and fresh vegetables separate until serving time. The cooked beef keeps well for 3-4 days in the refrigerator. To reheat, I recommend a quick 30-second microwave zap for the rice, followed by adding the room-temperature beef on top. This prevents overcooking the meat. The sauce actually develops deeper flavor overnight, making day-two bowls sometimes even better than the original!

    Fixing Common Issues

    Even experienced cooks encounter challenges! If your beef turns out tough or chewy, it’s likely either sliced with (instead of against) the grain or overcooked. Next time, ensure you’re cutting perpendicular to the muscle fibers and reduce cooking time. For sauce that’s too thin, simmer it separately for a few extra minutes to reduce and thicken. If you accidentally over-salt the marinade, add a squeeze of fresh lime juice to balance it out. And if your rice clumps too much, rinse it thoroughly before cooking and fluff with a fork while still hot.

    Frequently Asked Questions

    What cut of beef works best for Korean BBQ Steak Rice Bowls?

    Ribeye and flank steak are my top choices for their marbling and flavor. Sirloin also works well if you prefer leaner meat. Just remember to slice thinly against the grain for maximum tenderness.

    Can I make this dish vegetarian?

    Absolutely! Substitute the beef with firm tofu, tempeh, or portobello mushrooms. Marinate them just as you would the steak for fantastic flavor absorption.

    How spicy are Korean BBQ Steak Rice Bowls?

    The traditional recipe has mild-to-medium heat. Adjust the gochujang (Korean chili paste) amount to control spiciness—start with less if you’re heat-sensitive or add more for spice lovers.

    Can I make the sauce ahead of time?

    Yes! The sauce actually improves with time. Make it up to a week ahead and store in an airtight container in the refrigerator.

    What sides complement these bowls?

    Kimchi, pickled vegetables, or a simple cucumber salad make perfect accompaniments. For a complete Korean-inspired meal, add some vegetable pajeon (pancakes) or mandu (dumplings).

    Final Thoughts

    These Korean BBQ Steak Rice Bowls have become more than just a recipe in my household—they’re a celebration of bold flavors and simple cooking that brings everyone to the table with excitement. The beauty lies in their adaptability; make them exactly as written or use the formula as a template for endless variations. Either way, you’ll create a crave-worthy meal that delivers restaurant quality with home-cooked love. Don’t forget to share your creations on Pinterest and tag us in your Korean BBQ bowl masterpieces!