Author: Darleen Vance

  • Tropical Mango Key Lime Cheesecake: Irresistible Summer Bliss!

    Tropical Mango Key Lime Cheesecake: Irresistible Summer Bliss!

    Tropical Mango Key Lime Cheesecake: Irresistible Summer Bliss!

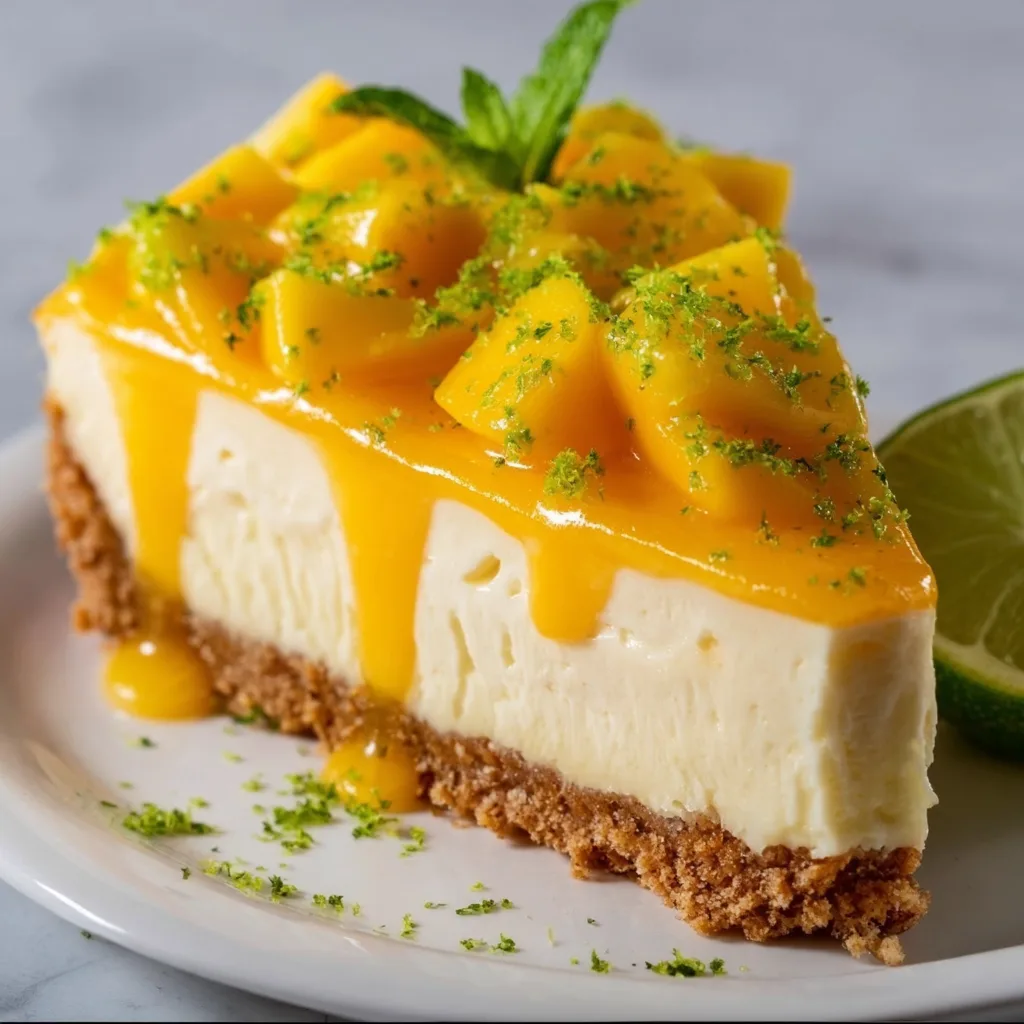
    This Tropical Mango Key Lime Cheesecake brings together two of my favorite flavors in one irresistible dessert. The tangy key lime filling nestled against sweet, juicy mango creates a vacation-worthy indulgence that transports me straight to a beachside cabana with every bite. I first created this recipe during a particularly dreary winter weekend when I needed something bright to lift my spirits. The vibrant colors and tropical flavors were exactly the mood-booster I needed! If you’re craving a taste of paradise, this creamy, dreamy cheesecake delivers all the sunshine vibes, no plane ticket required. It’s like summer in dessert form.

    Recipe

    Why You’ll Love This Tropical Mango Key Lime Cheesecake

    Perfect Balance of Flavors

    The magic of this Tropical Mango Key Lime Cheesecake lies in its perfect flavor harmony. The zippy key lime provides that mouth-puckering tang that cuts through the richness of the cream cheese, while the sweet mango adds tropical sweetness that balances everything beautifully. I’ve tested this recipe countless times to get that ideal sweet-tart ratio just right. The graham cracker crust adds a hint of honey-like sweetness and wonderful texture contrast against the silky filling. Every bite delivers that delicious tension between tangy and sweet that keeps your taste buds dancing.

    Make-Ahead Convenience

    One thing I absolutely adore about this Tropical Mango Key Lime Cheesecake is its make-ahead friendly nature. You can prepare it up to three days before your gathering, which is perfect when you’re hosting and want to minimize day-of stress. I often make mine the night before, letting those tropical flavors deepen and meld together overnight in the refrigerator. The cheesecake actually tastes better after it’s had time to chill completely, making it an ideal dessert for entertaining. Plus, the vibrant colors and tropical presentation never fail to impress guests!

    Essential Tips & Tricks

    Perfect Cheesecake Texture

    Achieving that silky-smooth texture is easier than you might think! Always start with room temperature ingredients—especially the cream cheese—to prevent lumps in your batter. I learned this the hard way after once trying to rush the process with cold cream cheese (never again!). Beat the cream cheese alone first until completely smooth before adding other ingredients. For the signature tropical mango key lime flavor, use fresh key lime juice if possible, though bottled works in a pinch. The gentle water bath method prevents cracks by maintaining even, gentle heat during baking. Just like with my No-Bake Peanut Butter Marshmallow Squares, patience is key to perfection.

    Mango Selection and Preparation

    The ripeness of your mangoes makes all the difference in this Tropical Mango Key Lime Cheesecake. Look for mangoes that yield slightly to gentle pressure and give off a sweet fragrance at the stem end. My favorite varieties for this recipe are Ataulfo (honey) or Kent mangoes for their smooth, fiber-free texture and intense sweetness. To prepare them, slice along either side of the flat pit, score the flesh in a grid pattern, then invert the skin to create perfect cubes. For the puree, blend until silky smooth and strain to remove any fibers. This extra step takes just minutes but ensures your cheesecake has that luxurious, velvety finish.

    Serving Ideas & Creative Variations

    Presentation Wow-Factors

    Transform your Tropical Mango Key Lime Cheesecake into a showstopping centerpiece with a few simple techniques. I love creating a decorative border of thinly sliced mango roses around the edge—they look complicated but only take minutes to arrange. A light dusting of lime zest adds beautiful color contrast against the yellow mango. For special occasions, I’ll add edible flowers like pansies or hibiscus for a tropical touch. Serve each slice with a small dollop of coconut whipped cream and a fresh mint sprig. The vibrant colors make this dessert perfect for summer gatherings, baby showers, or anytime you want to bring a taste of the tropics to your table.

    Flavor Twists

    Don’t be afraid to put your own spin on this Tropical Mango Key Lime Cheesecake with some creative variations. Try swapping the graham cracker crust for crushed coconut cookies or adding a tablespoon of finely minced crystallized ginger to the crust mixture for a warming zing. For a boozy adult version, fold 2 tablespoons of coconut rum into the filling or create a rum-spiked mango glaze. Passion fruit makes an incredible alternative to mango if you’re looking for even more tropical flair. I’ve even made a dairy-free version using coconut cream and vegan cream cheese that was surprisingly delicious. The tropical flavor profile is versatile enough to play with!

    Storage & Troubleshooting Guide

    Proper Storage Methods

    Keeping your Tropical Mango Key Lime Cheesecake fresh is all about proper refrigeration. Store it covered in the refrigerator for up to 5 days, though the crust may soften slightly after day 3. I recommend using a cake dome rather than plastic wrap, which can stick to the top and damage your beautiful presentation. If you need to freeze it, wrap individual slices tightly in plastic wrap, then aluminum foil, and freeze for up to 2 months. Thaw overnight in the refrigerator before serving. The mango topping is best added fresh after thawing if you’re freezing the base cheesecake, as the texture of frozen mango can become slightly watery upon thawing.

    Fixing Common Issues

    Even experienced bakers encounter challenges! If your cheesecake develops cracks on top, don’t worry—this is purely cosmetic and will be covered by your gorgeous mango topping anyway. To prevent this next time, ensure you’re using a proper water bath and cooling gradually. If your filling seems too runny, place it in the refrigerator for 15-20 minutes to firm up before pouring into the crust. For a weeping or watery mango topping, drain the puree through a fine-mesh sieve and cook it briefly with a teaspoon of cornstarch to thicken. Remember that cheesecake textures improve after proper chilling, so always plan for at least 6 hours of refrigeration.

    Frequently Asked Questions

    Can I use regular limes instead of key limes for my Tropical Mango Key Lime Cheesecake?

    Yes! Regular Persian limes work well, though they’re slightly less tart. Use the same amount of juice but reduce the zest by about 25% as Persian limes have a stronger zest flavor than key limes.

    How do I know when my cheesecake is properly baked?

    The edges should be set but the center should still have a slight jiggle—like firm Jell-O. It will continue to set as it cools. Overbaking causes cracks and a dry texture.

    Can this cheesecake be made without a springform pan?

    While a springform pan is ideal, you can use a deep pie dish lined with parchment. You won’t be able to remove it completely, but it will still taste delicious served directly from the dish.

    Is there a shortcut version of this recipe?

    For a quick version, make a no-bake cheesecake with cream cheese, condensed milk, and key lime juice, then top with store-bought mango puree or nectar mixed with gelatin.

    How far in advance can I make this for a party?

    This cheesecake is perfect for planning ahead! You can make it up to 3 days before your event. The flavors actually improve after 24 hours of chilling.

    Final Thoughts

    This Tropical Mango Key Lime Cheesecake has become my go-to dessert whenever I want to bring a little sunshine to the table. The bright citrus tang balanced with sweet, tropical mango creates a flavor vacation in every bite. I’ve shared this recipe at countless summer gatherings, and it never fails to transport everyone to a mental beach vacation. Don’t forget to check out more of my tropical-inspired desserts on Pinterest for additional ideas! Whether you’re celebrating something special or simply treating yourself, this cheesecake delivers a perfect slice of paradise.
  • Strawberry Crunch Cheesecake: Irresistible Delight You Must Try Today!

    Strawberry Crunch Cheesecake: Irresistible Delight You Must Try Today!

    Strawberry Crunch Cheesecake: Irresistible Delight You Must Try Today!

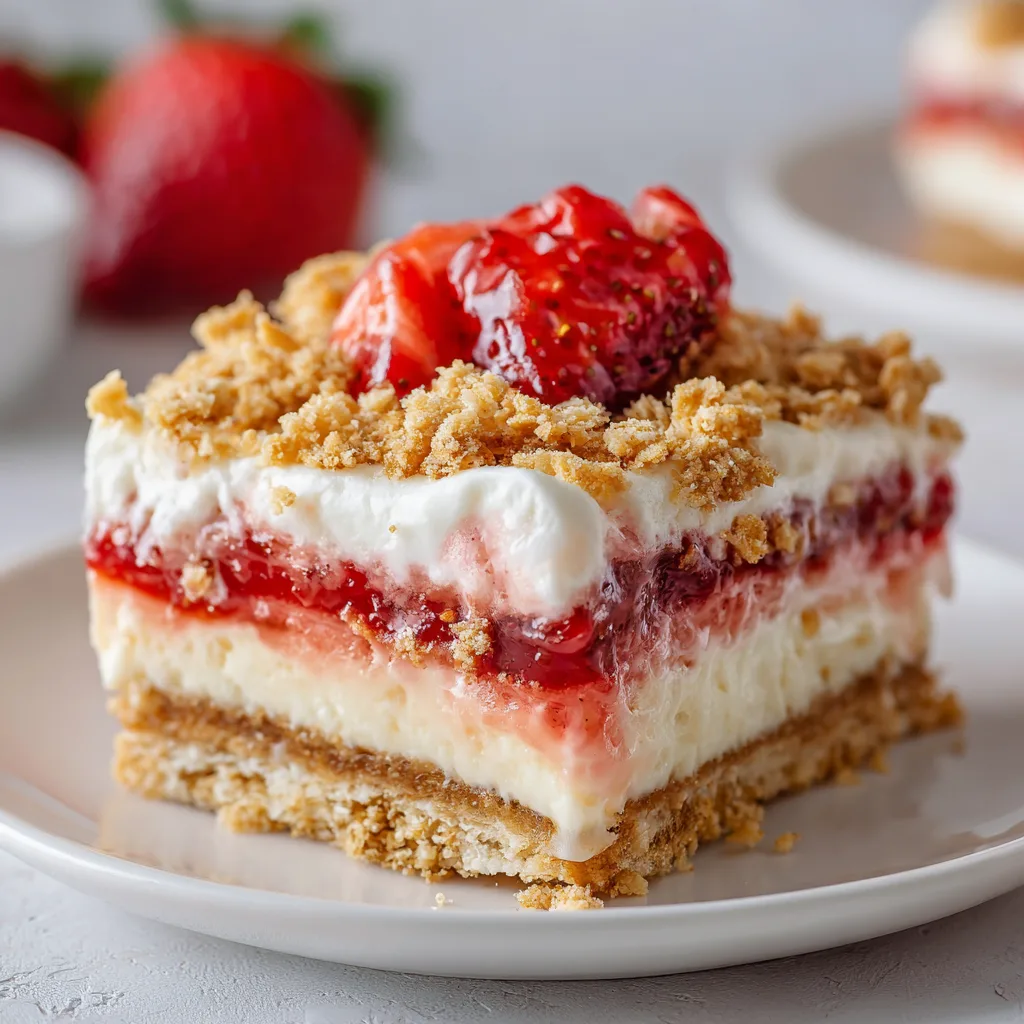
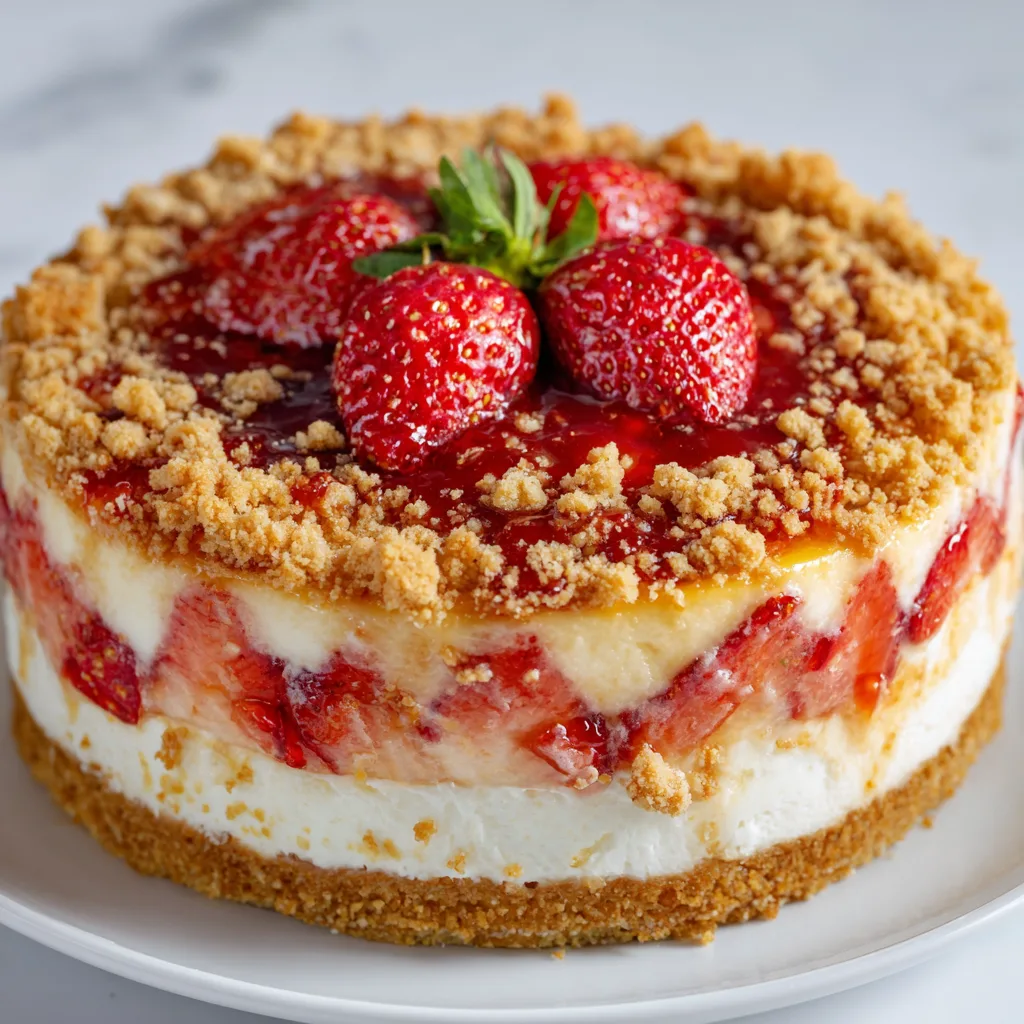
    Strawberry Crunch Cheesecake brings together the nostalgic flavors of those beloved Good Humor strawberry shortcake ice cream bars and transforms them into a decadent dessert masterpiece. The first time I made this for my family, the kitchen filled with that unmistakable sweet strawberry aroma, and I knew I had created something special. The contrast between the silky cream cheese filling and that iconic crunchy topping creates a texture symphony that’s simply irresistible. If you love the combination of creamy and crunchy like I do, you’ll also adore these Salted Caramel Pretzel Cheesecake Balls for a similar textural experience.

    Recipe

    Why You’ll Love This Strawberry Crunch Cheesecake

    Perfect Balance of Flavors and Textures

    There’s something magical about the way the tangy cream cheese filling complements the sweet strawberry elements in this cheesecake. Every bite delivers a perfect balance of rich creaminess against that signature crunchy topping that shatters delightfully with each forkful. I’ve found that letting the cheesecake chill overnight intensifies the strawberry flavor, allowing it to fully permeate the filling. The buttery graham cracker crust provides a sturdy foundation, while the strawberry shortcake crumbles on top create that nostalgic ice cream bar experience we all remember from childhood summers.

    Make-Ahead Convenience

    One of my favorite things about this Strawberry Crunch Cheesecake is how beautifully it fits into a busy schedule. You can prepare it up to three days in advance, making it perfect for entertaining without day-of stress. The flavors actually improve with time as they meld together in the refrigerator. I often make this on Friday afternoon for Sunday gatherings, which gives me one less thing to worry about on the day of the event. The stunning presentation belies how simple it is to prepare—your guests will think you spent hours in the kitchen when the refrigerator did most of the work!

    Essential Tips & Tricks

    Achieving the Perfect Cheesecake Texture

    The secret to a crack-free, velvety Strawberry Crunch Cheesecake lies in a few critical techniques. Always ensure your ingredients are at room temperature before mixing—cold cream cheese will create lumps that never fully incorporate. I learned this the hard way during my first attempt! Use a water bath to maintain gentle, even heat during baking; simply wrap your springform pan in foil and place it in a larger pan with hot water. Finally, resist the urge to open the oven door while baking, and always allow the cheesecake to cool gradually to prevent cracks and sinking.

    Creating That Signature Crunch Topping

    The iconic crunch topping is what transforms this from an ordinary cheesecake into a nostalgic dessert experience. To achieve that perfect strawberry shortcake texture, crush Golden Oreos or vanilla sandwich cookies until coarsely ground—not too fine! Mix with freeze-dried strawberries (never fresh, as they’ll make the topping soggy) and melted butter until just combined. The color should be a beautiful marbled pink and golden hue. Apply the topping only after the cheesecake has completely chilled, pressing gently to adhere without crushing the creamy surface. This ensures maximum crunch that stays crisp even after refrigeration.

    Serving Ideas & Creative Variations

    Presentation Techniques

    Elevate your Strawberry Crunch Cheesecake with thoughtful presentation touches that make it even more irresistible. Add a fresh strawberry fan to each slice just before serving—the juicy berries provide a beautiful color contrast and fresh flavor pop. For special occasions, I love piping small rosettes of whipped cream around the perimeter and dusting them with extra crunch topping. Serve on chilled plates to maintain the perfect texture, and consider a light drizzle of strawberry sauce in a decorative pattern on the plate. The vibrant red against the white cheesecake creates a stunning visual impact that guests can’t resist.

    Flavor Twists and Adaptations

    While the classic Strawberry Crunch Cheesecake is perfect as is, I’ve experimented with several delicious variations over the years. Try swirling strawberry preserves through the filling before baking for a marbled effect that’s both beautiful and flavorful. For chocolate lovers, add a thin layer of ganache between the crust and filling, reminiscent of those chocolate-dipped ice cream bars. You could also explore different fruit combinations—blueberry crunch or raspberry brownie variations work beautifully with the same technique. For a holiday twist, incorporate crushed peppermint candies into the topping during winter months.

    Storage & Troubleshooting Guide

    Proper Storage Methods

    To maintain the perfect texture contrast in your Strawberry Crunch Cheesecake, proper storage is essential. Always refrigerate the cheesecake uncovered until completely chilled (about 4 hours), then cover with plastic wrap or place in an airtight container. This prevents condensation from making the topping soggy. The cheesecake will stay fresh for up to 5 days in the refrigerator. For longer storage, you can freeze individual slices—wrap each piece tightly in plastic wrap, then foil, and freeze for up to 2 months. Allow frozen slices to thaw in the refrigerator overnight for the best texture restoration.

    Fixing Common Issues

    Even experienced bakers encounter challenges with cheesecakes, but most problems have simple solutions. If your cheesecake develops cracks, don’t panic! Simply cover with the strawberry crunch topping, which will hide imperfections beautifully. For a sunken center, which typically happens from overmixing or rapid temperature changes, create a slight well in the middle and fill with fresh strawberry compote. If your crust becomes soggy, try blind-baking it for 10 minutes at 350°F before adding the filling next time. And if your topping loses its crunch after storage, simply make a small batch of fresh crumble to sprinkle on just before serving.

    Frequently Asked Questions

    Can I use fresh strawberries in the crunch topping?

    No, fresh strawberries will make the topping soggy. Always use freeze-dried strawberries, which provide intense flavor and maintain that signature crunch even after refrigeration.

    How do I prevent my Strawberry Crunch Cheesecake from cracking?

    Bake in a water bath, avoid overmixing the filling, and allow the cheesecake to cool gradually in the turned-off oven with the door slightly ajar before refrigerating.

    Can I make this cheesecake without a springform pan?

    Yes, though a springform pan is ideal. Alternatively, line a regular cake pan with parchment paper with overhanging edges to help lift the chilled cheesecake out carefully.

    Is this recipe suitable for beginners?

    Absolutely! While cheesecakes have a reputation for being tricky, this Strawberry Crunch Cheesecake is forgiving, and the crumb topping hides any imperfections beautifully.

    Can I make a mini version of this recipe?

    Yes! Use a muffin tin lined with paper liners and reduce the baking time to about 20-25 minutes. The mini versions make adorable individual servings.

    Final Thoughts

    This Strawberry Crunch Cheesecake has become my signature dessert for good reason—it combines nostalgic flavors with elegant presentation in a way that makes everyone feel special. The contrast between the silky filling and that irresistible crunchy topping creates something truly magical that transcends a simple dessert. I hope you’ll try this recipe and create your own sweet memories around the table. For more dessert inspiration, be sure to follow us on Pinterest where we share new creations weekly!

  • Salted Caramel Apple Pie Cheesecake with Crumble – Irresistibly Delicious!

    Salted Caramel Apple Pie Cheesecake with Crumble – Irresistibly Delicious!

    Salted Caramel Apple Pie Cheesecake with Crumble – Irresistibly Delicious!

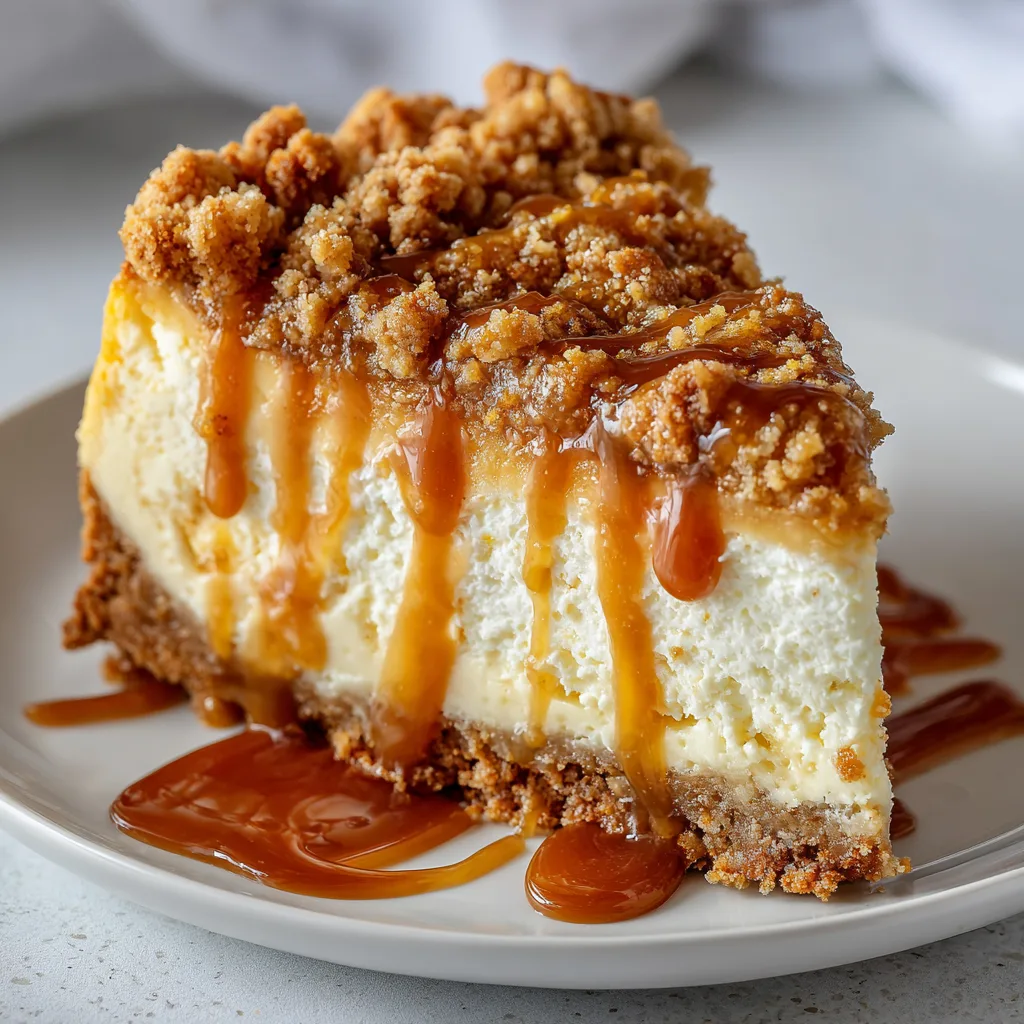
    The moment I pulled my Salted Caramel Apple Pie Cheesecake with crumble from the oven, my kitchen filled with an irresistible aroma that took me straight back to my grandmother’s autumn baking marathons. This decadent dessert marries the creamy richness of cheesecake with the warm spices of apple pie, all crowned with a buttery crumble and drizzled with homemade salted caramel. It’s the dessert I turn to when I need something that will genuinely impress guests or simply comfort my soul on a chilly evening. Trust me, this showstopper is worth every minute spent creating it! If you love apple-cinnamon combinations, this recipe takes that classic pairing to heavenly new heights.

    Recipe

    Why You’ll Love This Salted Caramel Apple Pie Cheesecake with crumble

    The Perfect Texture Combination

    There’s something magical about the contrasting textures in this dessert that makes each bite an adventure. The velvety smooth cheesecake layer provides a rich creaminess that melts in your mouth, while the tender cinnamon-spiced apples add juicy pockets of fruit throughout. What truly elevates this creation is the buttery crumble topping that brings a satisfying crunch against the silky filling. I’ve had friends literally close their eyes while taking their first bite, savoring how these textures play together. The final drizzle of warm salted caramel sauce creates glossy rivers of sweetness that balance the slight tanginess of the cream cheese perfectly.

    A Seasonal Showstopper for Any Occasion

    This Salted Caramel Apple Pie Cheesecake with crumble isn’t just delicious—it’s a conversation starter. I’ve brought this to Thanksgiving gatherings, holiday parties, and even summer barbecues (because why limit apple desserts to fall?), and it always disappears faster than anything else on the dessert table. The beautiful layers visible in each slice make it instantly Instagram-worthy, while the familiar flavors with an elevated twist appeal to both traditional dessert lovers and adventurous eaters. The combination of classic comfort and sophisticated presentation makes this the perfect dessert when you want to impress without straying too far from beloved flavors.

    Essential Tips & Tricks

    Perfecting Your Cheesecake Base

    The foundation of an exceptional Salted Caramel Apple Pie Cheesecake starts with properly handling your ingredients. Always bring cream cheese to room temperature before mixing to prevent lumps—I let mine sit out for at least 2 hours. Mix on low speed to avoid incorporating excess air, which can cause cracks during baking. For the crust, press the graham cracker mixture firmly into your springform pan using the bottom of a measuring cup for even compression. The water bath is non-negotiable! It regulates temperature and creates steam that prevents the surface from drying out. I wrap my pan in three layers of heavy-duty foil to ensure no water seeps in during baking.

    Apple Preparation Secrets

    The apple layer requires specific attention for the perfect Salted Caramel Apple Pie Cheesecake with crumble. I recommend using a combination of apple varieties for complex flavor—Granny Smith for tartness and Honeycrisp for sweetness creates the perfect balance. Cut your apples into uniform, small pieces (about 1/4 inch) so they cook evenly and don’t create air pockets in your cheesecake. Pre-cooking the apples with butter, cinnamon, and a touch of brown sugar helps release excess moisture that could otherwise make your cheesecake soggy. Allow the apple mixture to cool completely before layering it into your cheesecake to prevent melting the cream cheese filling prematurely.

    This attention to detail makes all the difference! Check out more dessert inspiration for your next baking adventure.

    Serving Ideas & Creative Variations

    Seasonal Twists on the Classic

    While this Salted Caramel Apple Pie Cheesecake with crumble is already spectacular, you can easily adapt it throughout the year with seasonal variations. In summer, add fresh berries between the apple and cheesecake layers for a fruity twist. For winter holidays, incorporate a teaspoon of orange zest into the filling and garnish with sugared cranberries for a festive appearance. Fall calls for adding 1/4 cup of pumpkin puree and pumpkin pie spice to the filling for an autumn harvest flavor. Spring celebrations benefit from a light lemon infusion in the cheesecake base with a touch of fresh thyme in the apple mixture. These simple adjustments keep the recipe exciting year-round without losing its signature charm.

    Elegant Presentation Techniques

    Elevate your Salted Caramel Apple Pie Cheesecake with thoughtful presentation details that make it restaurant-worthy. For special occasions, I serve individual slices on chilled plates with a swoosh of caramel sauce beneath and a quenelle of cinnamon whipped cream alongside. Create a dramatic tableside moment by warming the salted caramel sauce and pouring it over each slice just before serving. For a modern touch, place thin apple chips standing upright in each slice, or garnish with delicate caramel shards for height and visual interest. These presentation techniques work equally well for casual gatherings or sophisticated dinner parties, making every serving memorable.

    Storage & Troubleshooting Guide

    Proper Storage Methods

    Storing your Salted Caramel Apple Pie Cheesecake properly ensures it maintains its perfect texture for days. After the cheesecake has completely cooled, refrigerate it uncovered for 1 hour to set the surface, then cover it loosely with plastic wrap. Avoid pressing the wrap against the surface to prevent sticking to your beautiful creation. The cheesecake will keep in the refrigerator for up to 5 days, though the crumble topping may soften slightly over time. For longer storage, freeze individual slices on a baking sheet until solid, then wrap each in plastic followed by foil. Frozen slices will maintain quality for up to 2 months—just thaw in the refrigerator overnight before serving.

    Fixing Common Issues

    Even experienced bakers encounter challenges, but most Salted Caramel Apple Pie Cheesecake issues have simple solutions. If your cheesecake develops cracks, don’t panic—the crumble topping and caramel drizzle will beautifully disguise them. For a soggy bottom crust, try pre-baking it for 10 minutes before adding filling. If your caramel crystallizes, add a tablespoon of hot water and gently rewarm it while stirring. When the cheesecake doesn’t set properly, it likely needs more chilling time—give it at least 6 hours, preferably overnight. For a crumble that’s too soft, pop the finished cheesecake under the broiler for 30 seconds to crisp it up. Remember, perfection comes with practice!

    Frequently Asked Questions

    Can I make this Salted Caramel Apple Pie Cheesecake with crumble ahead of time?

    Absolutely! This dessert actually benefits from being made 1-2 days ahead. The flavors meld beautifully during refrigeration, and having it ready in advance reduces day-of stress when entertaining.

    What’s the best way to slice this cheesecake cleanly?

    Dip a sharp knife in hot water and wipe it dry between each cut. The warm blade glides through the different layers without dragging the filling or crumbling the topping.

    Can I use store-bought caramel sauce instead of making my own?

    Yes, but homemade delivers superior flavor. If using store-bought, choose a high-quality salted caramel sauce and warm it slightly before drizzling for the best consistency.

    How do I prevent my cheesecake from cracking?

    Avoid overmixing your batter, always use a water bath, and cool gradually—turn off the oven, prop the door open slightly, and let it cool for an hour before removing.

    Can this recipe be made gluten-free?

    Definitely! Substitute graham crackers with gluten-free cookies for the crust and use a gluten-free flour blend in the crumble topping. The cheesecake filling is naturally gluten-free.

    Final Thoughts

    This Salted Caramel Apple Pie Cheesecake with crumble has become my signature dessert for good reason—it captures the essence of comfort food while delivering an elevated experience that feels special. The harmonious blend of creamy, crunchy, tangy, and sweet creates a symphony of flavors that makes this more than just dessert; it’s an experience to be savored. Whether you’re baking for a holiday gathering or simply treating yourself, this recipe bridges the gap between homey tradition and impressive indulgence. Share your creations with me on Pinterest and discover why this dessert continues to earn rave reviews from everyone who tries it!

  • Mini Andes Mint Chocolate Cheesecake That Will Melt Your Heart Instantly

    Mini Andes Mint Chocolate Cheesecake That Will Melt Your Heart Instantly

    Mini Andes Mint Chocolate Cheesecake That Will Melt Your Heart Instantly

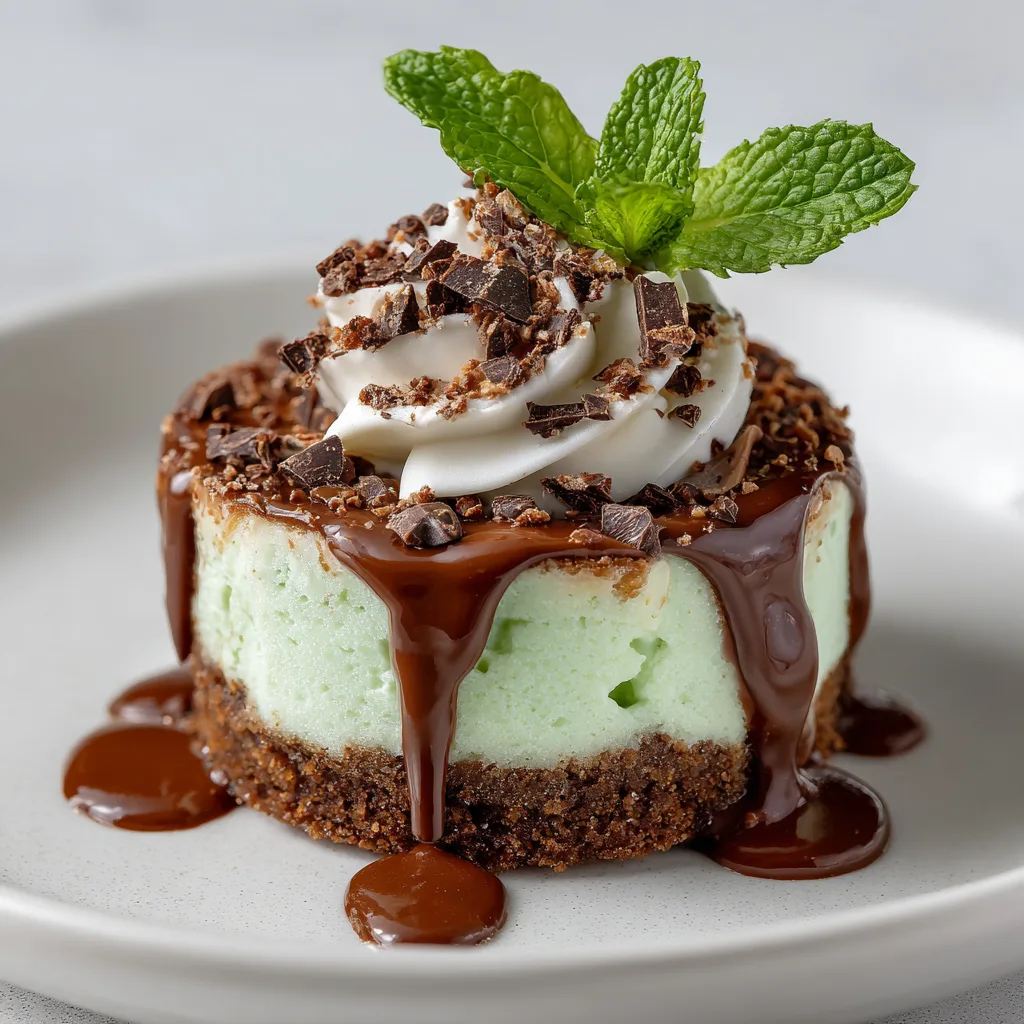
    Mini Andes Mint Chocolate Cheesecake has become my absolute obsession this season! There’s something magical about that first bite—where the velvety chocolate meets cool mint in the creamiest cheesecake imaginable. I discovered this recipe during a holiday baking marathon with my sister, and we literally fought over the last mini cheesecake (she won, but only because I let her). These bite-sized treasures strike the perfect balance between rich chocolate intensity and refreshing mint, making them ideal for both elegant gatherings and midnight snacking sessions. Trust me, you’ll want to bookmark this page immediately!

    Recipe

    Why You’ll Love This Mini Andes Mint Chocolate Cheesecake

    Perfect Portion Control with Maximum Flavor

    These mini cheesecakes deliver all the indulgence of a full-sized dessert but in perfect, guilt-free portions. Each bite offers that satisfying contrast between the crunchy chocolate cookie base and the silky mint-infused filling. I love how the individual servings eliminate the messiness of cutting a traditional cheesecake—plus they’re absolutely adorable on a dessert platter! The Andes mints create these gorgeous swirls throughout that not only look stunning but deliver the most incredible chocolate-mint flavor that lingers pleasantly. These little treasures will have your guests thinking you spent hours in the kitchen (our little secret that they’re surprisingly simple).

    Make-Ahead Convenience for Stress-Free Entertaining

    One of my favorite aspects of these Mini Andes Mint Chocolate Cheesecakes is how beautifully they freeze and thaw. I’ve made them up to two weeks before a dinner party, and they taste just as fresh as the day I baked them! The texture remains perfectly creamy, and that mint flavor actually seems to develop more complexity over time. This make-ahead magic has saved me countless hours of last-minute party prep stress. Plus, there’s something incredibly satisfying about knowing you have a stash of these little treasures waiting in your freezer for unexpected guests or those emergency chocolate cravings that strike at 10 PM (we’ve all been there!).

    Essential Tips & Tricks

    Achieving the Perfect Texture

    The secret to silky-smooth cheesecake is all in the room temperature ingredients. Cold cream cheese is the enemy of lump-free batter! I learned this the hard way after rushing through my first batch and ending up with tiny white specks throughout. Take the extra 30 minutes to let your cream cheese, eggs, and sour cream come to room temperature naturally. Another game-changer is using a water bath—even for minis! Simply place your muffin tin inside a larger baking pan with about an inch of hot water. This gentle, moist heat prevents cracking and creates that dreamy texture that melts in your mouth.

    Perfecting the Mint-Chocolate Balance

    Finding that ideal balance between mint and chocolate can be tricky—too much mint and you’re eating toothpaste, too little and you miss the point! I’ve discovered that finely chopped Andes mints work better than roughly broken pieces, creating an even distribution of flavor. For an extra mint boost without overwhelming the delicate cheesecake, add just ¼ teaspoon of mint extract to your batter. The chocolate cookie crust needs a pinch of salt to enhance the sweetness and complexity. My favorite hack: reserve some Andes pieces for garnishing right after baking while the cheesecakes are still warm—they’ll melt slightly on top, creating a beautiful marbled effect that’s both visually stunning and delicious.

    Serving Ideas & Creative Variations

    Elegant Presentation Techniques

    Transform these mini treats into showstoppers with a few simple presentation tricks. My go-to method is placing each mini cheesecake on a small square of parchment paper with a tiny dollop of whipped cream and a fresh mint leaf. For special occasions, I dust the plates with cocoa powder using a small decorative stencil—it takes seconds but looks incredibly professional! Creating a dessert board with these minis as the centerpiece surrounded by chocolate-dipped strawberries and cinnamon sugar tortilla chips adds impressive variety. For holiday gatherings, arrange them on a tiered stand with fairy lights woven through—the soft glow makes the Andes mint pieces sparkle beautifully.

    Seasonal and Dietary Adaptations

    These versatile little cheesecakes can be easily customized for different occasions and dietary needs. For Christmas, I add crushed candy canes to the topping; for summer, fresh raspberries complement the mint perfectly. To create a gluten-free version, simply substitute the chocolate cookie crust with crushed gluten-free chocolate cookies or a mixture of almond flour, cocoa, and butter. For a lighter option, Greek yogurt can replace up to half the cream cheese without sacrificing that creamy texture. My lactose-intolerant friend adores the version I make with dairy-free cream cheese and coconut cream—she says it’s even better than the original! The recipe works beautifully with sugar substitutes like monk fruit for those watching their sugar intake.

    Storage & Troubleshooting Guide

    Optimal Storage Methods

    Proper storage is essential for maintaining that perfect creamy texture we all crave in cheesecake. After cooling completely at room temperature, refrigerate uncovered for about an hour until the surface is no longer tacky. Then wrap each mini cheesecake individually in plastic wrap before placing them in an airtight container. This prevents them from absorbing other flavors in your refrigerator. They’ll keep beautifully for up to 5 days refrigerated, though I doubt they’ll last that long! For longer storage, freeze the wrapped cheesecakes for up to 2 months. The key to thawing is patience—transfer from freezer to refrigerator for 3-4 hours, then allow 20 minutes at room temperature for the perfect texture.

    Troubleshooting Common Issues

    Even experienced bakers encounter occasional challenges with cheesecakes. If your minis develop cracks, it’s likely due to overmixing (which incorporates too much air) or sudden temperature changes. Mix on low speed just until ingredients are combined, and always cool gradually in the oven with the door slightly ajar. For sunken centers, the culprit is usually underbaking—mini cheesecakes should still have a slight jiggle in the center when removed from the oven. If your crust turns out soggy, try pre-baking it for 5 minutes before adding the filling. And if the mint flavor seems too subtle, don’t add more extract (which can taste artificial); instead, fold in extra finely chopped Andes mints right before pouring the batter.

    Frequently Asked Questions

    Can I make Mini Andes Mint Chocolate Cheesecake without a muffin tin?

    Absolutely! Silicone molds work beautifully, or use 4-ounce ramekins for slightly larger individual servings. Just adjust baking time accordingly—ramekins may need an extra 5-7 minutes in the oven.

    How do I prevent my mini cheesecakes from sticking to the pan?

    Line muffin tins with paper liners or use silicone molds. For best results, lightly mist with cooking spray before adding the crust mixture, ensuring easy removal every time.

    Can I substitute the Andes mints with another chocolate-mint candy?

    Yes! Junior Mints, mint chocolate chips, or even crushed peppermint patties work well. Each creates a slightly different flavor profile, but all deliver that delicious chocolate-mint combination.

    Why did my cheesecake filling curdle?

    Overmixing or using cold ingredients often causes curdling. Ensure all ingredients are at room temperature and mix on low speed just until combined for a perfectly smooth texture.

    How can I tell when my Mini Andes Mint Chocolate Cheesecakes are done baking?

    The edges should be set but the centers should still have a slight jiggle—similar to Jell-O. They’ll continue cooking from residual heat and firm up as they cool.

    Final Thoughts

    These Mini Andes Mint Chocolate Cheesecakes have become my signature dessert for good reason—they’re the perfect balance of sophisticated flavor and nostalgic comfort. There’s something magical about watching people’s faces light up with that first bite, as the creamy chocolate and cool mint create a moment of pure joy. I hope you’ll give these little treasures a try and perhaps start your own tradition with them. Don’t forget to share your creations on Pinterest and tag me—I absolutely love seeing your versions of this beloved recipe!

  • Chocolate Orange Layer Cake with Ganache: Irresistible & Decadent Delight

    Chocolate Orange Layer Cake with Ganache: Irresistible & Decadent Delight

    Chocolate Orange Layer Cake with Ganache: Irresistible & Decadent Delight

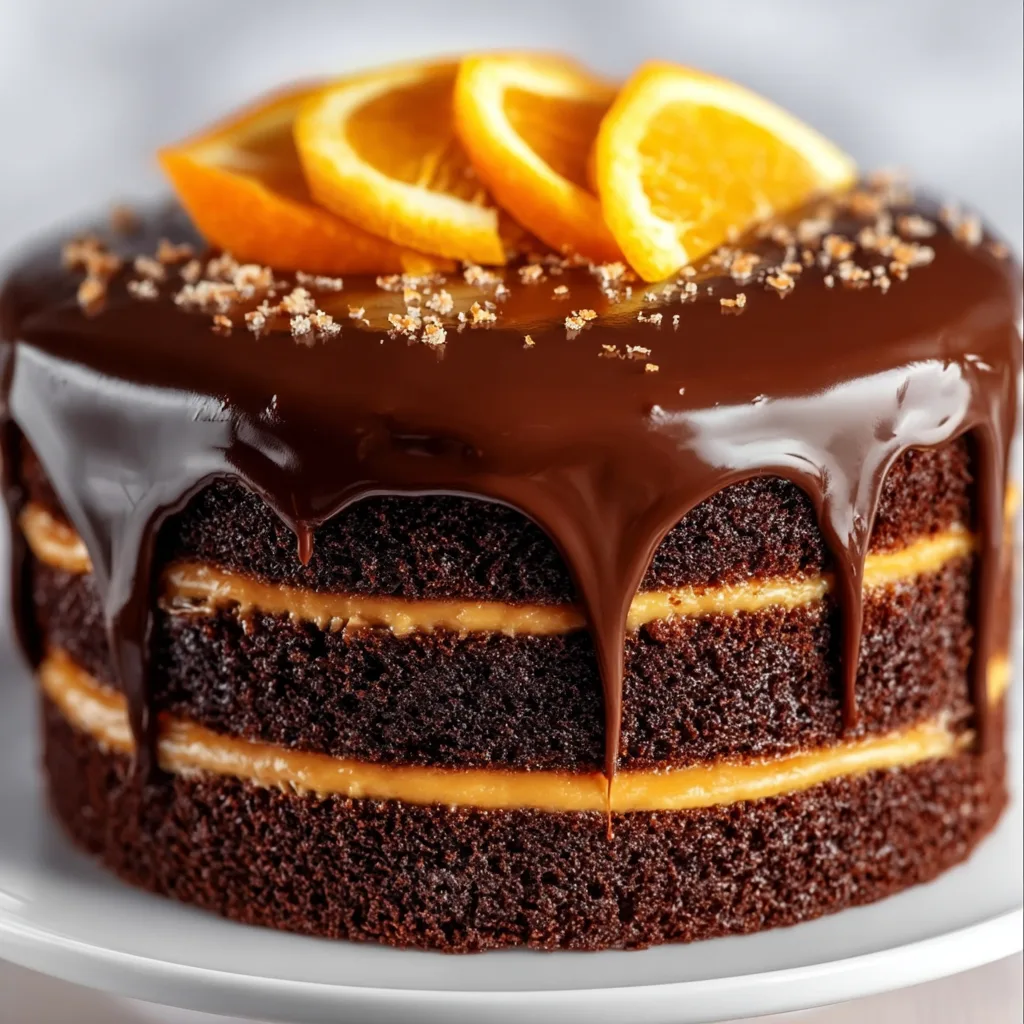
    The moment I pull this Chocolate Orange Layer Cake with Ganache from the oven, my kitchen fills with that intoxicating citrus-chocolate aroma that instantly transports me back to Christmas mornings. There’s something magical about the way dark chocolate and bright orange zest play together – one rich and indulgent, the other fresh and zingy. This showstopper cake combines moist chocolate layers infused with orange essence, filled with velvety orange-scented buttercream, and draped in glossy chocolate ganache that cascades down the sides like a decadent waterfall. Perfect for special occasions or whenever you need a slice of pure joy.

    Recipe

    Why You’ll Love This Chocolate Orange Layer Cake with Ganache

    A Perfect Balance of Flavors

    The chocolate-orange pairing creates this incredible taste harmony that feels both sophisticated and comforting. The deep, slightly bitter notes of good cocoa powder balance beautifully against the bright, aromatic orange essence. I’ve carefully calibrated the sweetness so neither flavor overwhelms – they dance together in perfect rhythm. The tender crumb of the cake layers practically melts on your tongue while the silky ganache adds that luxurious mouthfeel that makes you close your eyes with each bite. It’s the cake I make when I want everyone at the table to fall silent with that first forkful.

    Impressive Yet Achievable

    Don’t let the elegant appearance fool you – this cake is totally doable for home bakers. I’ve broken down each component into manageable steps that don’t require professional equipment or techniques. The ganache, which looks so dramatic and polished, is actually just two ingredients and takes minutes to prepare. I remember the first time I made this for my sister’s birthday – I was so nervous about the drip effect, but it turned out beautifully on the first try! The cake components can be made ahead, making assembly stress-free even for special occasions when you want to impress.

    Essential Tips & Tricks

    Perfecting the Cake Layers

    Room temperature ingredients are absolutely non-negotiable here – cold eggs and butter will give you a dense, uneven crumb. I learned this the hard way! When incorporating the orange flavor, use both zest and extract for depth. The zest goes into the dry ingredients where the oils will infuse beautifully. Sift your cocoa powder to avoid lumps that can create dry pockets in your cake. For the moistest texture, don’t overmix once the flour goes in – stop when just combined. These same principles apply to many layer cakes, making this technique incredibly versatile once mastered.

    Ganache Troubleshooting

    The secret to perfect ganache is all about temperature and timing. Use chocolate you’d enjoy eating on its own – the flavor comes through powerfully. Chop it finely so it melts evenly when the hot cream hits it. Let the ganache cool until it reaches that magical consistency – thick enough to cling to the cake but still fluid enough to create those beautiful drips. If it’s too runny, refrigerate for 5-10 minutes, stirring occasionally. Too thick? Add a teaspoon of warm cream. I always test a drip on the inside of my bowl first to check the flow before committing to the cake surface.

    Serving Ideas & Creative Variations

    Seasonal Adaptations

    This cake shines differently with each season’s accompaniments. In summer, I love serving it with fresh berries – particularly raspberries whose tartness cuts through the richness beautifully. For fall gatherings, try candied orange slices and a sprinkle of cinnamon in the ganache. Winter celebrations call for a splash of Grand Marnier in both the cake and ganache for grown-up sophistication. Spring brunches? Add edible flowers and a side of whipped mascarpone. The versatility makes this my go-to cake base that I can customize endlessly, keeping it fresh and exciting no matter when I’m serving it.

    Dietary Modifications

    This recipe welcomes adaptations for various dietary needs without sacrificing that wow factor. For gluten-free guests, substitute a quality cup-for-cup gluten-free flour blend – I’ve tested this multiple times with excellent results. Dairy-free? Use coconut cream for the ganache and plant-based butter in the frosting. The orange flavor actually shines even brighter with these substitutions. For reduced sugar versions, the orange intensity lets you cut back by up to a third without losing depth. I’ve served this to friends with various dietary restrictions, and everyone feels included when they can enjoy the same spectacular dessert.

    Storage & Troubleshooting Guide

    Proper Storage Methods

    Freshness preservation is key to enjoying this cake over several days. Once assembled, it keeps beautifully at room temperature under a cake dome for up to 24 hours. For longer storage, refrigerate but always bring slices to room temperature before serving – cold dulls the orange flavor. The unfrosted layers can be wrapped tightly and frozen for up to a month, making advance preparation simple. The ganache can be refrigerated separately for up to a week and gently rewarmed. I often make the components ahead when hosting, which leaves me calm and collected when guests arrive instead of frantically frosting at the last minute.

    Rescuing Common Issues

    Even experienced bakers encounter cake emergencies, but most are easily fixed! If your layers dome too much, simply trim them level – those scraps make delicious trifle. Crumbly cake making frosting difficult? Apply a thin crumb coat, chill for 20 minutes, then finish frosting. Ganache too thin and running everywhere? Chill the frosted cake first, then apply the cooled ganache in controlled amounts. Cake layers sticking to pans? Line with parchment circles next time, but for now, run a thin knife around the edge and gently tap to release. Remember, even “imperfect” chocolate orange cake tastes divine!

    Frequently Asked Questions

    Can I make this Chocolate Orange Layer Cake with Ganache in advance?

    Yes! Bake layers up to 3 days ahead and store wrapped at room temperature. You can fully assemble the cake 1 day before serving, keeping it refrigerated but bringing to room temperature before serving.

    How do I get the strongest orange flavor?

    Use fresh orange zest, high-quality orange extract, and consider adding 1-2 tablespoons of orange liqueur to both the batter and ganache for maximum impact.

    Can I use milk chocolate instead of dark for the ganache?

    Absolutely! Milk chocolate creates a sweeter, more mellow ganache. Reduce the cream slightly as milk chocolate requires less liquid to reach proper consistency.

    What’s the best way to create even cake layers?

    Use a digital kitchen scale to divide batter equally between pans. For perfectly flat tops, use cake strips around the pans or reduce oven temperature by 25°F and bake slightly longer.

    Why did my ganache separate or become grainy?

    This happens when chocolate overheats or liquid gets incorporated too quickly. Fix it by gently warming and whisking in a few teaspoons of warm cream until smooth again.

    Final Thoughts

    This Chocolate Orange Layer Cake with Ganache has become my signature dessert for good reason – it delivers that perfect balance of impressive presentation and unforgettable flavor that keeps everyone asking for the recipe. The contrast between rich chocolate and bright citrus creates something truly magical on the palate. Don’t be intimidated by its elegant appearance; the steps are straightforward and the results are consistently spectacular. I’d love to see your creations on Pinterest – tag me when you make your own version of this beloved cake!

  • Vanilla Bean Crème Brûlée Cheesecake Cupcakes – Irresistibly Decadent!

    Vanilla Bean Crème Brûlée Cheesecake Cupcakes – Irresistibly Decadent!

    Vanilla Bean Crème Brûlée Cheesecake Cupcakes – Irresistibly Decadent!

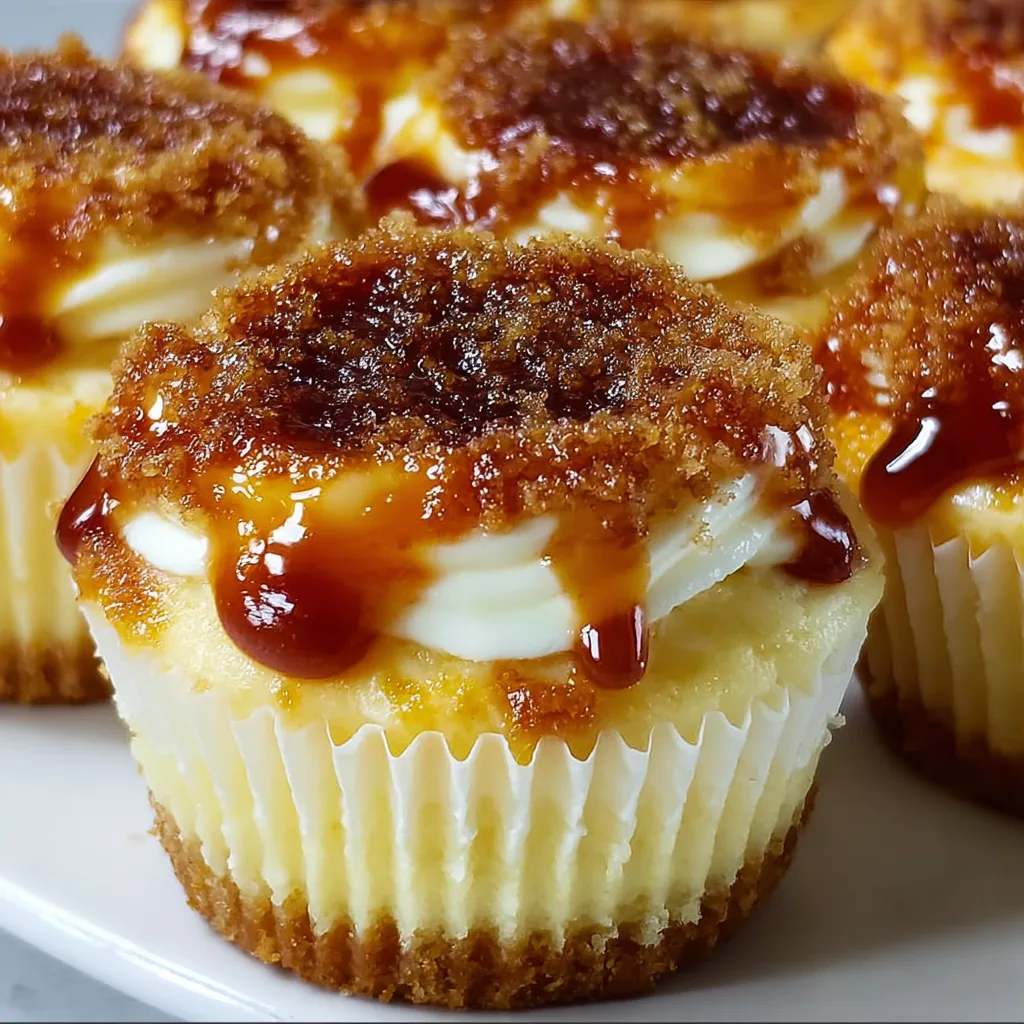
    Vanilla Bean Crème Brûlée Cheesecake Cupcakes combine two of my favorite desserts into one irresistible bite-sized treat. The first time I made these for my sister’s birthday gathering, the room fell silent as everyone took their first taste—that magical moment when the crackling caramelized sugar gives way to creamy vanilla-speckled cheesecake. I’ve been perfecting this recipe for years, and I’m thrilled to share my secrets for achieving that perfect balance of creamy richness and delicate crunch that makes these cupcakes absolutely unforgettable. Trust me, these little delights are worth every minute of preparation!

    Recipe

    Why You’ll Love This Vanilla Bean Crème Brûlée Cheesecake Cupcakes

    Perfect Blend of Two Classic Desserts

    These cupcakes capture everything wonderful about both cheesecake and crème brûlée in one perfect package. The velvety texture of the cheesecake base is infused with real vanilla bean seeds that create those beautiful specks throughout. What makes these truly special is the contrasting textures—the creamy filling against the buttery graham cracker crust, all topped with that signature caramelized sugar crust that shatters delightfully with each bite. I love watching friends’ faces light up when they crack through that golden top layer!

    Make-Ahead Convenience with Wow Factor

    One of my favorite things about these Vanilla Bean Crème Brûlée Cheesecake Cupcakes is how perfect they are for entertaining. You can prepare the cheesecakes up to two days in advance and simply add the sugar topping right before serving—ideal for those dinner parties when you want to impress without the last-minute stress! The individual portions eliminate the need for cutting and serving, making them perfect for buffets or passed desserts. Plus, they’re substantial enough to feel indulgent but portioned to prevent overindulgence.

    Essential Tips & Tricks

    Achieving the Perfect Cheesecake Texture

    The secret to silky-smooth cheesecake is all in the room temperature ingredients. Cold cream cheese will leave lumps no matter how long you beat it! I learned this lesson the hard way after rushing through a batch for my neighbor’s housewarming. Allow your cream cheese, eggs, and sour cream to sit out for at least 1-2 hours before mixing. Another game-changer is the water bath—place your cupcake pan in a larger baking dish with hot water to create gentle, even heat that prevents cracks and creates that dreamy texture similar to what you’ll find in our Fluffy Japanese Cotton Cheesecake.

    Mastering the Brûlée Topping

    Creating that perfect caramelized sugar crust requires finesse and the right technique. Use superfine sugar for the most even caramelization—regular granulated sugar can heat unevenly and create bitter spots. Sprinkle a thin, even layer over each chilled cheesecake cupcake, then shake off any excess. When torching, keep the flame moving in small circles about 2 inches from the surface. Don’t have a kitchen torch? Your oven broiler works too—just watch them like a hawk! They’ll go from perfect to burnt in seconds.

    Serving Ideas & Creative Variations

    Seasonal Fruit Pairings

    These Vanilla Bean Crème Brûlée Cheesecake Cupcakes shine even brighter with thoughtful accompaniments. In summer, I love adding a fresh berry medley with raspberries, blueberries and blackberries tossed in a touch of honey and lemon zest. For fall gatherings, try thin slices of poached pears or cinnamon-spiced apple compote. The fruit’s natural acidity cuts through the richness perfectly. A light dusting of powdered sugar or a small dollop of lightly sweetened whipped cream can add visual appeal without overwhelming the delicate flavors, similar to how we balance flavors in our Apple Cinnamon Kringle with Vanilla Glaze.

    Flavor Twists Worth Trying

    While the classic vanilla bean version is divine, don’t be afraid to experiment with flavor variations! Add citrus zest (orange or lemon) to the cheesecake batter for a bright twist. For chocolate lovers, fold in 2 tablespoons of cocoa powder or mini chocolate chips. My personal favorite variation is adding a tablespoon of espresso powder for a tiramisu-inspired version. You could also infuse the cream with lavender, cardamom, or cinnamon before mixing—just strain out any solids before incorporating into your batter.

    Storage & Troubleshooting Guide

    Proper Storage for Maximum Freshness

    To maintain the perfect texture of your Vanilla Bean Crème Brûlée Cheesecake Cupcakes, proper storage is crucial. Store un-torched cheesecakes in an airtight container in the refrigerator for up to 4 days. The caramelized sugar topping is best added just before serving, as it will begin to soften and lose its crack after several hours in the refrigerator. If you need to make them further ahead, you can freeze the plain cheesecakes (without the brûlée topping) for up to 1 month—just thaw overnight in the refrigerator and torch before serving.

    Fixing Common Problems

    If your cheesecakes develop cracks, don’t panic! This is usually caused by overmixing (which incorporates too much air) or sudden temperature changes. Beat ingredients just until combined and always cool gradually. For sunken centers, your cheesecakes likely needed a few more minutes in the oven. The centers should still be slightly jiggly but not liquid when you remove them. If your sugar isn’t caramelizing evenly, try using a finer sugar and make sure your cheesecakes are thoroughly chilled—room temperature cheesecake will start to melt under the torch.

    Frequently Asked Questions

    Can I make Vanilla Bean Crème Brûlée Cheesecake Cupcakes without a kitchen torch?

    Yes! Use your oven’s broiler setting. Place the sugar-topped cheesecakes on the top rack, 3-4 inches from the heat source, and watch carefully for 1-2 minutes until the sugar caramelizes. Rotate if needed for even browning.

    Can I use vanilla extract instead of vanilla beans?

    Absolutely. While vanilla beans provide those gorgeous specks and more intense flavor, you can substitute 1 tablespoon of high-quality pure vanilla extract for each vanilla bean in the recipe.

    Why did my cheesecakes sink in the middle?

    Underbaking is the most common cause. Cheesecakes should be slightly jiggly in the center but not liquid when removed from the oven. Also, avoid opening the oven door during baking.

    How far in advance can I make these cupcakes?

    The cheesecakes can be made up to 3 days ahead and stored in the refrigerator. Add the sugar topping and brûlée it just before serving for the best texture contrast.

    Can these be made in a regular muffin tin with liners?

    Yes! Use foil liners or double up paper liners to prevent leaking. Reduce baking time by about 5 minutes and check for doneness early.

    Final Thoughts

    These Vanilla Bean Crème Brûlée Cheesecake Cupcakes have become my signature dessert for good reason—they combine elegant sophistication with approachable portion sizes and make-ahead convenience. The contrast between the silky cheesecake and that crackling caramelized top creates a sensory experience that’s truly memorable. Whether you’re hosting a dinner party or simply treating yourself to something special, these cupcakes deliver restaurant-quality indulgence right at home. Don’t forget to share your creations on Pinterest and tag me—I’d love to see your brûlée masterpieces!

  • Easy Strawberry Cheesecake Crunch Bars: Irresistibly Delicious & Simple!

    Easy Strawberry Cheesecake Crunch Bars: Irresistibly Delicious & Simple!

    Easy Strawberry Cheesecake Crunch Bars: Irresistibly Delicious & Simple!

    Easy Strawberry Cheesecake Crunch bars have completely stolen my heart this summer! There’s something magical about the combination of buttery graham cracker crust, creamy cheesecake filling, and those fresh strawberry swirls that make these bars utterly irresistible. I first made these for my sister’s backyard gathering last weekend, and they disappeared faster than I could snap a photo! The best part? They’re deceptively simple to make but look like you spent hours in the kitchen. If you love no-fuss desserts that still make everyone ask for the recipe, these crunch bars are about to become your new signature treat.

    Recipe

    Why You’ll Love These Easy Strawberry Cheesecake Crunch Bars

    Perfect Balance of Textures and Flavors

    The contrasting textures in these bars create a dessert experience that’s simply divine. The graham cracker base provides that satisfying crunch that gives way to the silky-smooth cheesecake layer. I love how the fresh strawberry swirl adds just the right amount of fruity tang to balance the richness. The first time I bit into one, I closed my eyes and just savored the moment—that perfect harmony of sweet, tangy, crunchy, and creamy. It’s like a full-sized cheesecake transformed into a convenient, hand-held treat that doesn’t sacrifice an ounce of flavor.

    Quick Prep with Maximum Impact

    These bars require just 20 minutes of active preparation time, making them perfect for last-minute gatherings or satisfying sudden sweet cravings. I’ve made these on busy weeknights when I needed something impressive for the next day’s office potluck. The beauty lies in their simplicity—mix, layer, bake, and chill. No water baths or complicated techniques required! Yet when you present these gorgeous pink-swirled squares, everyone assumes you’ve channeled your inner pastry chef. They’re the ultimate low-effort, high-reward dessert that’s guaranteed to earn you compliments.

    Essential Tips & Tricks

    Mastering the Perfect Crust

    The foundation of these bars is all about that perfectly textured crust. I’ve found that pulsing the graham crackers until they’re fine but not powdery gives the best structure. When mixing with melted butter, aim for the consistency of wet sand that holds together when pressed. The secret? Press firmly into your pan using the bottom of a measuring cup for even compression. This creates that satisfying crunch that contrasts beautifully with the creamy filling. I once rushed this step and ended up with a crumbly mess—trust me, those extra 30 seconds of pressing make all the difference in achieving bakery-quality results.

    Creating the Perfect Strawberry Swirl

    For that gorgeous ruby swirl, use fresh strawberries whenever possible. The natural pectin helps create a thicker puree that won’t bleed into your cheesecake layer. I like to strain half the puree for a smoother texture while leaving some with tiny strawberry bits for visual interest and texture. When swirling, less is more—use a toothpick or skewer and make figure-eight motions without overworking the surface. My favorite technique is to drop small dollops of puree across the top, then swirl gently. The heat of the oven will create a beautiful marbled effect that’s never the same twice.

    Serving Ideas & Creative Variations

    Elegant Presentation Options

    Transform these simple bars into showstopping desserts with thoughtful presentation. For dinner parties, I cut them into perfect squares, dust with powdered sugar, and top each with a tiny fresh strawberry and mint leaf. For casual gatherings, try cutting them into triangles and arranging them on a wooden board with fresh berries scattered around. My favorite summer hack? Freeze them for 20 minutes before serving on hot days—they maintain their structure better and the slight chill enhances the refreshing quality. These bars pair beautifully with coffee or prosecco for brunch, making them versatile for any occasion.

    Seasonal and Dietary Adaptations

    These bars welcome creative substitutions based on seasonal availability or dietary needs. In fall, swap strawberries for cinnamon-spiced apple puree; winter calls for cranberry-orange swirls. For gluten-free guests, almond flour crust with a touch of cinnamon works beautifully. Need a dairy-free option? Plant-based cream cheese yields surprisingly authentic results—just add an extra tablespoon of cornstarch to help with setting. I’ve even made a lower-sugar version using monk fruit sweetener that my diabetic aunt raved about. The basic recipe is incredibly forgiving, allowing you to customize while maintaining that perfect cheesecake texture.

    Storage & Troubleshooting Guide

    Keeping Them Fresh and Delicious

    These bars maintain their optimal texture when stored properly. Refrigerate them in an airtight container with parchment between layers to prevent sticking. They’ll keep beautifully for up to 5 days, though the crust gradually softens slightly. For longer storage, freeze individual portions wrapped in plastic and foil for up to 3 months. I like to thaw them in the refrigerator overnight for the best texture, or at room temperature for about 30 minutes if I’m impatient. The strawberry swirl may release a tiny bit of moisture after freezing, but a quick blot with a paper towel before serving solves this minor issue.

    Fixing Common Problems

    Even experienced bakers encounter occasional challenges with cheesecake bars. If your filling cracks, it’s usually from overmixing (which incorporates too much air) or sudden temperature changes. Mix on low speed just until ingredients are combined, and always cool gradually. For a too-soft center, an extra 5-10 minutes in the oven usually does the trick—the center should jiggle slightly but not look wet. If your crust crumbles when cutting, try chilling the bars completely before slicing with a knife dipped in hot water and wiped clean between cuts. I’ve rescued many imperfect batches by turning them into trifles or parfaits!

    Frequently Asked Questions

    Can I make these Easy Strawberry Cheesecake Crunch Bars ahead of time?

    Absolutely! They actually taste better when made 1-2 days ahead. The flavors meld beautifully and the texture settles perfectly. Just keep them refrigerated until about 15 minutes before serving.

    Can I use frozen strawberries instead of fresh?

    Yes, but thaw and drain them thoroughly first. Pat them dry with paper towels before pureeing to prevent excess moisture from making your bars soggy.

    How do I know when the bars are fully baked?

    The edges should be set but the center should still have a slight jiggle—like Jell-O. They’ll continue firming up as they cool. Overbaking leads to cracks and a dry texture.

    Can I make these without a food processor?

    Definitely! Crush graham crackers in a zip-top bag with a rolling pin for the crust. For the filling, ensure your cream cheese is very soft and use a whisk for a smooth texture.

    What’s the best way to cut clean squares?

    Refrigerate bars until completely cold. Use a sharp knife dipped in hot water, wiped clean between each cut. Straight down movements (not sawing) create the cleanest edges.

    Final Thoughts

    These Easy Strawberry Cheesecake Crunch Bars have become my go-to dessert for practically every occasion. There’s something so satisfying about creating a dessert that balances simplicity with that “wow” factor. The contrast between the crunchy base, creamy filling, and fruity swirls creates a perfect harmony that keeps everyone reaching for seconds. I’ve watched these bars disappear at family gatherings, office parties, and quiet nights in—they truly have universal appeal. I’d love to see your creations if you try them! Share your photos on Pinterest and tag me so I can admire your swirl technique!

  • Strawberry Cheesecake Truffle Balls: Irresistibly Creamy & Viral!

    Strawberry Cheesecake Truffle Balls: Irresistibly Creamy & Viral!

    Strawberry Cheesecake Truffle Balls: Irresistibly Creamy & Viral!

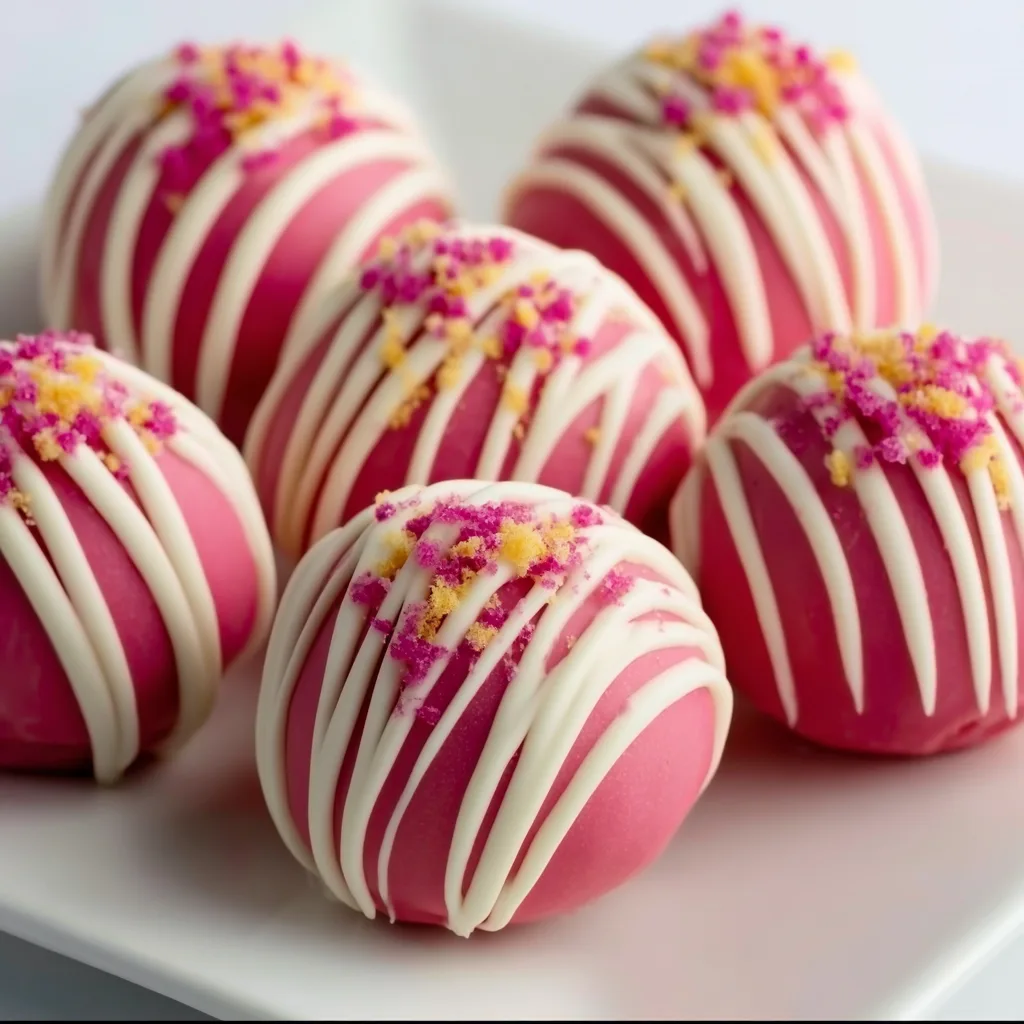
    Strawberry Cheesecake Truffle Balls are the perfect little bites of heaven that combine the creamy richness of cheesecake with the sweet-tart punch of fresh strawberries. I discovered this recipe during a summer gathering at my sister’s house, where these pink-speckled treats disappeared faster than anything else on the dessert table! There’s something magical about the way the graham cracker crumbs blend with cream cheese and fresh berries, creating a no-bake wonder that tastes like summer in every bite. If you love easy desserts that impress, these truffles will become your new secret weapon for potlucks and parties.

    Recipe

    Why You’ll Love These Strawberry Cheesecake Truffle Balls

    Perfect Balance of Flavors and Textures

    These truffle balls hit all the right notes with their creamy-meets-crunchy texture that simply melts in your mouth. The tanginess of cream cheese perfectly balances the sweet strawberries, while the graham cracker coating adds that authentic cheesecake crust experience. I love how the white chocolate coating creates a delicate shell that gives way to the luscious filling inside. The first time I made these for my book club, everyone kept asking, “How did you get them so smooth?” It’s that perfect balance that makes them irresistible—not too sweet, not too tart, just perfectly indulgent.

    Quick and Stress-Free Preparation

    What I adore most about these Strawberry Cheesecake Truffle Balls is how deceptively simple they are to make. There’s no baking involved, which means no worrying about water baths or cracked cheesecakes. The hands-on time is minimal—just mix, roll, dip, and chill. Even my teenage daughter, who typically avoids kitchen duties, enjoys helping roll these little gems. The most challenging part is waiting for them to chill! I often prep these a day ahead when hosting, which means one less thing to worry about when guests are arriving.

    Essential Tips & Tricks

    Ingredient Selection Matters

    When making Strawberry Cheesecake Truffle Balls, using quality ingredients makes all the difference. Opt for full-fat cream cheese for the richest flavor and creamiest texture—trust me, this isn’t the place to cut calories! For strawberries, fresh is best during summer, but good-quality freeze-dried strawberries work wonderfully year-round and add intense flavor without excess moisture. The graham crackers should be finely crushed to a sand-like consistency. I learned this the hard way when I rushed the process once and ended up with chunky truffles that fell apart when dipped. A food processor makes quick work of this step!

    Mastering the Dipping Technique

    The trickiest part of making these truffle balls is achieving that perfect chocolate coating. The secret to success is temperature control. Freeze the rolled balls for at least 20 minutes before dipping—this prevents them from melting into the warm chocolate. When melting white chocolate, use short bursts in the microwave and stir frequently to prevent scorching. A touch of coconut oil (about 1 teaspoon per cup of chocolate) helps create a smoother consistency for dipping. If you’re looking for another impressive no-bake treat, these Salted Caramel Pretzel Cheesecake Balls use similar techniques with equally delicious results!

    Serving Ideas & Creative Variations

    Presentation That Wows

    These Strawberry Cheesecake Truffle Balls deserve to be showcased beautifully! I love arranging them on a white ceramic platter with fresh strawberry slices and mint leaves for a pop of color. For special occasions, place each truffle in a mini cupcake liner and stack them on a tiered stand for an elegant display. At my daughter’s graduation party, I created a dessert table with these truffles as the centerpiece, and they photographed so beautifully that several guests asked for the recipe before even tasting them! A light dusting of freeze-dried strawberry powder on top adds a professional touch that makes them look like they came from a fancy patisserie.

    Flavor Twists to Try

    While the classic strawberry version is divine, these truffle balls are incredibly versatile for customization. Try blueberry cheesecake truffles with lemon zest for a bright summer variation, or add mini chocolate chips to the mixture for a chocolate-covered strawberry vibe. During the holidays, I love making a cranberry-orange version with white chocolate and pistachios. For a sophisticated twist, infuse the cream cheese with a splash of Chambord or strawberry liqueur—just for the adults, of course! If you enjoy experimenting with creative desserts, these Crunchy Angel Cake Churro Bites offer another canvas for flavor innovation.

    Storage & Troubleshooting Guide

    Keeping Your Truffles Fresh

    The beauty of Strawberry Cheesecake Truffle Balls is that they can be made ahead and stored perfectly for days. Keep them in an airtight container in the refrigerator for up to one week—though they rarely last that long in my house! Place parchment paper between layers to prevent sticking. These truffles also freeze beautifully for up to three months. When ready to enjoy, thaw them in the refrigerator overnight rather than at room temperature to maintain their texture. I’ve found that the flavor actually deepens after a day in the fridge, making them perfect for advance preparation before parties.

    Fixing Common Issues

    Even experienced bakers encounter challenges with truffle making. If your mixture is too soft for rolling, refrigerate it for 30 minutes before trying again. Too crumbly? Add a tablespoon of cream cheese at a time until it holds together. If your white chocolate seizes or becomes too thick for dipping, stir in a teaspoon of neutral oil to smooth it out. Dark spots on the coating usually mean the truffles were too cold when dipped—let them warm slightly at room temperature for 5 minutes before proceeding. Remember that homemade truffles don’t need to look factory-perfect; those little imperfections are proof they’re lovingly handmade!

    Frequently Asked Questions

    Can I use frozen strawberries for Strawberry Cheesecake Truffle Balls?

    Yes, but thaw and drain them thoroughly first. Pat dry with paper towels to remove excess moisture, or your mixture may become too wet. Freeze-dried strawberries are an excellent alternative that adds concentrated flavor.

    How far in advance can I make these truffles?

    You can prepare these up to three days before serving if refrigerated in an airtight container. For longer storage, freeze them for up to three months and thaw overnight in the refrigerator.

    Can I substitute the graham crackers?

    Absolutely! Try digestive biscuits, vanilla wafers, or even gingersnaps for different flavor profiles. Just ensure they’re crushed to a fine, sandy texture for the best results.

    Why did my white chocolate coating crack?

    Temperature shock is usually the culprit. If truffles are too cold when dipped in warm chocolate, the coating contracts as it sets. Let truffles warm slightly before dipping.

    What’s the best way to add color to these truffles?

    For natural color, mix freeze-dried strawberry powder into the white chocolate. For vibrant colors, use oil-based candy coloring (not water-based food coloring) to prevent seizing.

    Final Thoughts

    These Strawberry Cheesecake Truffle Balls have become my signature dessert for good reason—they’re impressive yet achievable, elegant yet playful, and always met with delight. There’s something special about offering a hand-rolled treat that captures the essence of a favorite dessert in bite-sized form. I love watching people’s eyes light up with that first creamy, berry-filled bite! Whether you’re a seasoned baker or just starting out, these little pink jewels deliver big on flavor and presentation. Find more inspiration for your sweet creations on Pinterest and give these truffle balls a try—they might just become your signature dessert too!