Author: Darleen Vance

  • Blueberry Cream Cheese Croissant Casserole That Will Wow Everyone!

    Blueberry Cream Cheese Croissant Casserole That Will Wow Everyone!

    Blueberry Cream Cheese Croissant Casserole That Will Wow Everyone!

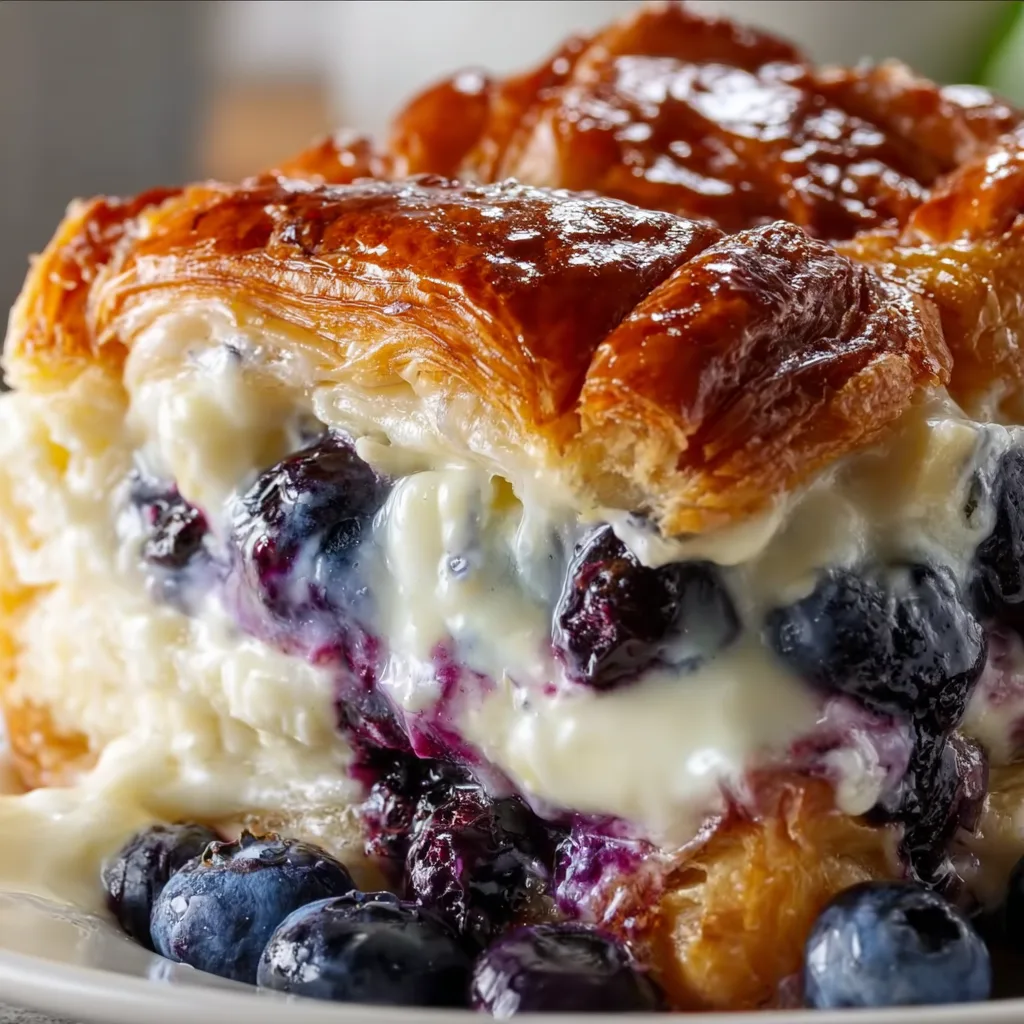
    Blueberry Cream Cheese Croissant Casserole has been my weekend salvation more times than I can count. There’s something magical about the way those buttery croissants soak up the cream cheese mixture, creating pockets of tangy sweetness that perfectly complement the burst of fresh blueberries. I discovered this recipe during a particularly chaotic Sunday when my in-laws announced a surprise visit. With just an hour to prepare, I tossed together these simple ingredients and created what has now become our most-requested family breakfast. The best part? It looks impressive while being delightfully simple to make. Check out my other breakfast favorites for more morning inspiration!

    Recipe

    Why You’ll Love This Blueberry Cream Cheese Croissant Casserole

    Perfect Balance of Flavors and Textures

    The contrasting textures in this Blueberry Cream Cheese Croissant Casserole create an irresistible eating experience. The outside develops a delicate golden crust while the interior remains pillowy and tender. Each bite delivers the perfect balance of buttery croissants, tangy cream cheese, and sweet-tart blueberries that burst in your mouth. I love how the cream cheese mixture seeps into every nook of the torn croissants, ensuring flavor in every bite. The slight caramelization around the edges adds a subtle complexity that elevates this from simple breakfast to memorable indulgence.

    Quick Prep, Impressive Results

    This make-ahead marvel requires just 15 minutes of active preparation, making it perfect for busy mornings or when entertaining guests. I often assemble it the night before, letting the croissants soak up all that creamy goodness overnight. The next morning, I simply pop it in the oven while I brew coffee. The aroma that fills your kitchen as it bakes is absolutely intoxicating – sweet, buttery, and comforting. Your family will think you’ve been slaving away for hours when in reality, this Blueberry Cream Cheese Croissant Casserole practically makes itself!

    Essential Tips & Tricks

    Ingredient Selection Matters

    Using day-old croissants creates the perfect foundation for this casserole. Fresh ones work too, but slightly stale croissants absorb the custard mixture better without becoming soggy. For the cream cheese component, always bring it to room temperature before mixing to ensure a silky-smooth consistency without lumps. When it comes to blueberries, fresh is wonderful when in season, but frozen works beautifully year-round – just don’t thaw them first! The cold berries will hold their shape better during baking and release their juices slowly, creating beautiful purple swirls throughout your Blueberry Cream Cheese Croissant Casserole.

    Perfecting the Technique

    The soaking time is crucial for developing deep flavor. Allow at least 30 minutes for the croissants to absorb the custard mixture, though overnight in the refrigerator yields the best results. When layering your casserole, don’t pack the croissant pieces too tightly – those little air pockets allow the custard to circulate. For an extra touch of decadence, drizzle melted butter over the top before baking. This creates a golden, slightly crisp top that contrasts beautifully with the creamy interior. Always let the casserole rest for 10 minutes after baking to set properly.

    Serving Ideas & Creative Variations

    Complementary Sides and Toppings

    Serve your Blueberry Cream Cheese Croissant Casserole with a light dusting of powdered sugar and a drizzle of warm maple syrup for traditional appeal. For brunch gatherings, I like to create a toppings bar with whipped cream, lemon curd, additional fresh berries, and toasted nuts. The tanginess of the casserole pairs beautifully with savory sides like crispy bacon or breakfast sausage to create a balanced meal. For a special touch, warm some blueberry preserves and thin with a splash of water to create a quick sauce. This casserole also pairs wonderfully with my Crispy Garlic Air Fryer Broccoli for a complete brunch spread.

    Seasonal and Dietary Adaptations

    This versatile casserole welcomes creative substitutions based on dietary needs or seasonal availability. Swap blueberries for strawberries, raspberries, or a mixture of summer berries when they’re at peak freshness. For a fall version, try diced apples with cinnamon and a touch of caramel. To make it more decadent, fold in white chocolate chips or a swirl of Nutella before baking. For those watching sugar intake, use a natural sweetener and sugar-free preserves. Dairy-free? Quality plant-based cream cheese and non-dairy milk work surprisingly well, maintaining that creamy texture everyone loves.

    Storage & Troubleshooting Guide

    Proper Storage for Leftovers

    Store any leftover Blueberry Cream Cheese Croissant Casserole covered in the refrigerator for up to 3 days. The flavors actually continue to develop, making day-two servings sometimes even better than the first! To reheat individual portions, microwave for 30-45 seconds or until just warmed through. For larger portions, cover with foil and warm in a 300°F oven for 15 minutes. This prevents the top from over-browning while allowing the center to heat evenly. If you want to freeze portions, wrap tightly in plastic and foil, then freeze for up to one month.

    Fixing Common Issues

    If your casserole turns out too soggy in the middle, it likely needs more baking time. Cover with foil to prevent the top from burning and continue baking until set. Conversely, if it’s too dry, your ratio of liquid to croissants might be off. Next time, increase the egg mixture by about 25% or reduce the amount of croissants. For uneven blueberry distribution, try tossing your berries in a tablespoon of flour before adding them to the mixture – this helps them stay suspended rather than sinking to the bottom. If your cream cheese appears curdled, it was likely too cold when mixed.

    Frequently Asked Questions

    Can I make Blueberry Cream Cheese Croissant Casserole without cream cheese?

    Yes! Mascarpone makes a luxurious substitute, or try ricotta mixed with a little yogurt for tanginess. For dairy-free options, silken tofu blended with a bit of lemon juice works surprisingly well.

    How do I know when the casserole is done baking?

    The casserole is done when the center is set but still slightly jiggly, the top is golden brown, and a knife inserted in the center comes out clean. This usually takes 45-50 minutes.

    Can I use other fruits instead of blueberries?

    Absolutely! Strawberries, raspberries, peaches, or even caramelized bananas work beautifully. Just ensure fruits with high water content are patted dry first.

    Is this casserole suitable for freezing before baking?

    I don’t recommend freezing unbaked casserole as the texture can become compromised. However, you can freeze it after baking once completely cooled.

    How many croissants do I need for this recipe?

    You’ll need about 6-8 medium-sized croissants, depending on size. Aim for approximately 8 cups of torn croissant pieces for the perfect texture.

    Final Thoughts

    This Blueberry Cream Cheese Croissant Casserole has become my signature dish for good reason. It strikes that perfect balance between impressive and approachable, making ordinary mornings feel special without requiring professional baking skills. The way the tanginess of cream cheese plays against sweet blueberries and buttery croissants creates a symphony of flavors that’s greater than the sum of its parts. I hope this becomes a beloved recipe in your home too! For more delicious ideas, follow me on Pinterest.

  • Moist White German Chocolate Cake That Will Melt Your Heart!

    Moist White German Chocolate Cake That Will Melt Your Heart!

    Moist White German Chocolate Cake That Will Melt Your Heart!

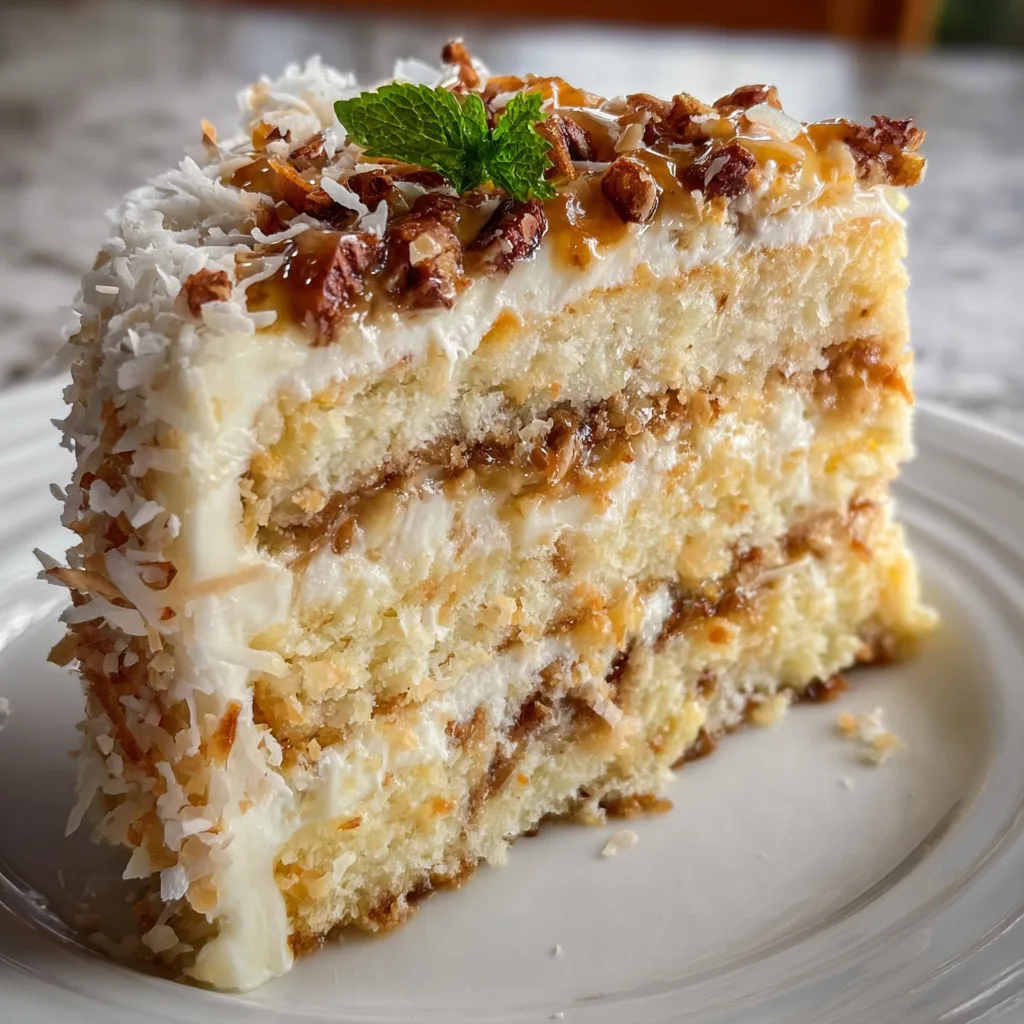
    This Moist White German Chocolate Cake combines the best of both worlds – the tender, cloud-like texture of white cake with the rich, caramel-coconut goodness of traditional German chocolate frosting. I discovered this twist on the classic years ago when searching for something special for my sister’s birthday. The contrast between the delicate white crumb and that decadent topping creates pure magic on your taste buds! Unlike standard German chocolate cakes that use chocolate batter, this version lets the topping truly shine while maintaining that incredible moisture that keeps you coming back for just one more slice. Ready to create a showstopper that’ll have everyone begging for your secret recipe?

    Recipe

    Why You’ll Love This Moist White German Chocolate Cake

    Perfect Texture Every Time

    The secret to moisture in this cake lies in its carefully balanced ingredients. I’ve tested dozens of versions to achieve that melt-in-your-mouth tenderness that stays fresh for days. Using cake flour instead of all-purpose creates a finer crumb, while the combination of butter and oil gives you the best of both worlds – rich flavor and lasting moisture. My favorite part? The slight tang from buttermilk that balances the sweetness perfectly. When you slice into this cake, you’ll notice how it holds together beautifully without being dense or crumbly – the hallmark of a truly exceptional white cake.

    Irresistible Flavor Combinations

    The traditional topping features toasted pecans, shredded coconut, and a caramel-like base that creates the signature German chocolate experience. What makes this version special is how the subtle vanilla notes in the white cake create the perfect canvas for these bold flavors to shine. I’ve added a touch of almond extract to the batter – just enough to enhance the coconut without overwhelming it. The slight saltiness in the frosting creates that addictive sweet-salty balance that keeps forks returning for “just one more bite.” Trust me, the flavor complexity will impress even your most discerning guests!

    Essential Tips & Tricks

    Mastering the Batter

    Achieving the perfect white cake texture requires attention to detail. Start with room temperature ingredients – this isn’t just baking folklore, it truly affects how they emulsify! Beat the butter and sugar until genuinely fluffy (about 3-4 minutes), and don’t rush this step. When adding egg whites, incorporate them gradually to maintain the air you’ve worked to create. My game-changing tip? Alternate adding dry ingredients and buttermilk, ending with dry. This prevents overmixing while ensuring everything combines properly. For ultimate tenderness, fold the final portion of flour with a spatula rather than your mixer for a beautifully delicate crumb.

    Perfecting the Frosting

    The signature coconut-pecan topping requires patience but rewards you generously. Toast the pecans first – this simple step amplifies their flavor exponentially. When cooking the egg mixture, maintain medium-low heat and stir constantly to prevent curdling or burning. The mixture should coat the back of a spoon before you add the coconut and pecans. My personal trick? Add a pinch of salt and a splash of bourbon for depth without making it boozy. Allow the frosting to cool completely before spreading, as it thickens considerably and becomes easier to work with. This patience results in those perfect ridges and valleys of frosting that make this cake instantly recognizable.

    Serving Ideas & Creative Variations

    Elegant Presentation Options

    Transform this classic into a showstopping centerpiece by playing with presentation. Instead of the traditional layer cake, try baking in a bundt pan and drizzling the topping artfully over the ridges. For special occasions, I love creating a naked-style cake with frosting between layers but minimal coverage on the sides, allowing the beautiful white cake to peek through. Add fresh berries around the base for a pop of color, or dust the edges with toasted coconut for texture. Consider individual mini cakes for gatherings – they create that “made just for you” feeling that guests adore.

    Seasonal Adaptations

    This versatile cake welcomes creative twists throughout the year. For summer, fold lemon zest into the batter and add fresh berries between layers. Fall calls for warming spices like cinnamon and nutmeg in the frosting, perhaps with a drizzle of maple syrup. During winter holidays, incorporate crushed peppermint into the white cake batter and garnish with chocolate curls. Spring celebrations shine with a hint of lavender in the cake and fresh edible flowers as garnish. My favorite variation might be adding espresso powder to the frosting for a mocha-inspired version that coffee lovers can’t resist!

    Storage & Troubleshooting Guide

    Keeping Your Cake Fresh

    The beauty of this moist white German chocolate cake is how well it holds up over time. Store it under a cake dome at room temperature for 3-4 days without losing that perfect texture. For longer storage, wrap individual slices in plastic wrap, then foil, and freeze for up to three months. The high fat content in the frosting actually helps preserve moisture! When ready to enjoy frozen cake, unwrap and let it sit at room temperature for about an hour. My pro tip? Microwave a slice for just 10 seconds to revive that fresh-baked taste and aroma. The frosting will soften slightly, creating an almost pudding-like quality that’s utterly divine.

    Fixing Common Issues

    Even experienced bakers encounter challenges! If your cake layers sink in the middle, your oven temperature might be off (invest in an oven thermometer) or you may have opened the oven door too early. For a dry cake, try reducing baking time by 2-3 minutes next round – white cakes can overbake quickly. If your frosting separates or looks curdled, whisk vigorously over low heat to re-emulsify. Too runny? Let it cool longer before spreading. Too thick? Add a tablespoon of warm cream. Remember that baking perfection comes with practice, and even “mistakes” usually taste delicious!

    Frequently Asked Questions

    Can I make this Moist White German Chocolate Cake in advance?

    Absolutely! This cake actually improves with 1-2 days of rest as flavors meld. Make it up to 3 days ahead, store covered at room temperature, or freeze unfrosted layers for up to a month.

    What’s the difference between regular and white German chocolate cake?

    Traditional German chocolate cake uses chocolate batter, while this moist white German chocolate cake features a vanilla-based white cake that creates a beautiful contrast with the coconut-pecan frosting.

    Can I substitute the buttermilk?

    Yes! Mix 1 tablespoon white vinegar or lemon juice with enough regular milk to make 1 cup. Let stand 5 minutes before using. The slight acidity is essential for tenderness.

    Why did my cake turn out dry?

    Overbaking is usually the culprit. Check your cake 5 minutes before the recipe suggests. Also, measure flour by spooning into measuring cups rather than scooping directly.

    Is there a shortcut version for busy days?

    You can use quality white cake mix as your base (add 1 teaspoon vanilla extract and substitute milk with buttermilk), then focus on making the homemade coconut-pecan frosting for authentic flavor.

    Final Thoughts

    This moist white German chocolate cake represents the perfect balance between sophisticated flavor and comforting familiarity. The contrast between the delicate white layers and rich coconut-pecan frosting creates a dessert that’s both visually stunning and incredibly satisfying. I’ve brought this cake to countless gatherings, and it never fails to inspire that moment of appreciative silence when everyone takes their first bite. Whether you’re celebrating something special or simply craving a slice of something extraordinary, this cake delivers pure joy with every forkful. Find more inspiration for your baking adventures on Pinterest!

  • Slow Cooker Chicken Stew That Warms Your Soul Instantly!

    Slow Cooker Chicken Stew That Warms Your Soul Instantly!

    Slow Cooker Chicken Stew That Warms Your Soul Instantly!

    Slow cooker chicken stew has become my ultimate winter comfort food ritual. There’s something magical about coming home to the rich aroma of tender chicken, hearty vegetables, and savory herbs that have been simmering together all day. I discovered this recipe during a particularly brutal Chicago winter when my tiny apartment’s heating decided to quit. That evening, this soul-warming stew became my salvation. The beauty of this dish lies in its simplicity—just prep your ingredients, set your slow cooker, and return hours later to a complete meal that tastes like you’ve been lovingly tending to it all day. If you’re looking for more slow-cooked comfort, my slow cooker chicken posole recipe offers another delicious option.

    Recipe

    Why You’ll Love This Slow Cooker Chicken Stew

    Perfect for Busy Weeknights

    This slow cooker chicken stew has rescued countless hectic weeknights in my household. There’s nothing quite like the peace of mind that comes from knowing dinner is quietly cooking while you tackle your day. I love prepping everything the night before—chopping vegetables, measuring spices, and trimming chicken—then storing it in the refrigerator. In the morning, I simply transfer everything to the slow cooker, add broth, and set the timer. When evening chaos hits with homework, activities, and exhaustion, having this rich, hearty meal ready feels like a gift from your morning self.

    Incredible Depth of Flavor

    The slow cooking process creates a flavor transformation that’s impossible to achieve with quick-cooking methods. As the chicken simmers for hours, it releases its natural juices that blend with herbs, vegetables, and broth to create a rich, complex sauce. I’ve found that adding ingredients in stages enhances this effect—aromatics and chicken first, then hardier vegetables, with quick-cooking items like peas added in the final hour. The low, steady heat allows flavors to meld without scorching, creating that homey, developed taste that makes you close your eyes with the first spoonful.

    Essential Tips & Tricks

    Ingredient Preparation Matters

    The way you prepare your ingredients significantly impacts your final slow cooker chicken stew. I always brown the chicken first—just a quick sear in a hot pan with a touch of oil. This extra five-minute step creates a caramelized exterior that adds incredible depth. For vegetables, maintain uniform sizing (about 1-inch pieces) to ensure even cooking. Carrots, celery, and onions form the flavor foundation, but don’t overlook potatoes—red or Yukon gold varieties hold their shape beautifully without disintegrating. Fresh herbs added at different stages create layers of flavor: woody herbs like rosemary and thyme go in early, while parsley brightens at the end.

    Mastering Slow Cooker Settings

    Understanding your specific slow cooker is crucial for perfect chicken stew. Most recipes call for the low setting (6-8 hours), which produces the most tender meat and developed flavors. However, the high setting (3-4 hours) works when you’re short on time. I’ve learned through many experiments that filling your slow cooker between half and three-quarters full yields the best results—too full and it won’t heat properly, too empty and it might overcook. For thicker stew, try removing the lid during the final 30 minutes to allow some liquid to evaporate, or stir in a cornstarch slurry (1 tablespoon cornstarch mixed with 2 tablespoons cold water). Check out these crispy zucchini rings for a perfect side dish.

    Serving Ideas & Creative Variations

    Perfect Pairings for Your Stew

    Serving slow cooker chicken stew with the right accompaniments elevates the entire meal. My family’s favorite is a chunk of crusty sourdough bread for sopping up every last drop of the rich broth. For a complete comfort experience, try ladling the stew over mashed potatoes, polenta, or even buttered egg noodles. A simple green salad with a bright vinaigrette provides welcome contrast to the rich stew. For presentation, I sprinkle fresh herbs like parsley or thyme on top, along with a drizzle of good olive oil. This not only adds visual appeal but brings a fresh flavor dimension to each bowl.

    Delicious Flavor Variations

    One reason I return to slow cooker chicken stew repeatedly is its incredible adaptability. For a Mediterranean twist, add olives, roasted red peppers, and finish with lemon zest and crumbled feta. My autumn version incorporates diced butternut squash, apple chunks, and a pinch of cinnamon. When I’m craving something spicy, I stir in chipotle peppers, black beans, and corn, serving with lime wedges and avocado. For a creamy variation, stir in coconut milk or heavy cream during the last 30 minutes. You might also enjoy pairing this with one-pan garlic potatoes and asparagus for a complete meal.

    Storage & Troubleshooting Guide

    Proper Storage Techniques

    This slow cooker chicken stew actually improves with time, making it perfect for meal prepping. Allow leftover stew to cool completely before transferring to airtight containers. In the refrigerator, it stays delicious for 3-4 days, with flavors continuing to develop. For longer storage, freeze in portion-sized containers for up to 3 months. I label each container with the date and contents using freezer tape. When reheating, thaw overnight in the refrigerator if frozen, then warm gently on the stovetop or microwave. Add a splash of broth if needed, as the stew thickens considerably when stored.

    Fixing Common Problems

    Even experienced cooks encounter issues with slow cooker chicken stew occasionally. If your stew seems too watery, remove the lid for the last 30-45 minutes of cooking to reduce liquid, or stir in a cornstarch slurry. Conversely, if it’s too thick, add warm broth or water in small increments. Bland stew can be revived with a splash of acid (vinegar or lemon juice), additional salt, or fresh herbs. For tough chicken, it’s likely undercooked—return to the slow cooker for another 30-60 minutes. If vegetables are still firm but chicken is done, remove the chicken, continue cooking the vegetables, then recombine before serving.

    Frequently Asked Questions

    Can I use frozen chicken in my slow cooker chicken stew?

    For food safety reasons, I don’t recommend using frozen chicken. Thaw completely before adding to ensure proper cooking temperature is reached quickly. This prevents bacterial growth in the “danger zone.”

    How can I make my slow cooker chicken stew thicker?

    Remove the lid for the final 30 minutes of cooking to reduce liquid naturally, or stir in a cornstarch slurry (1 tablespoon cornstarch mixed with 2 tablespoons cold water) during the last hour.

    Can I prep slow cooker chicken stew the night before?

    Absolutely! Chop all vegetables and trim chicken, storing them separately in the refrigerator. In the morning, combine everything in your slow cooker and start cooking for a stress-free dinner.

    What’s the best chicken to use for stew?

    Bone-in, skin-on chicken thighs provide the richest flavor and stay moist during long cooking. Remove the skin before serving if desired. Boneless thighs work well too for easier eating.

    Can I cook slow cooker chicken stew on high instead of low?

    Yes, cook on high for 3-4 hours instead of 6-8 hours on low. However, low temperature yields more tender meat and deeper flavor development, so use high setting only when time-constrained.

    Final Thoughts

    This slow cooker chicken stew has become more than just a recipe in my kitchen—it’s a reliable comfort that adapts to every season and situation. There’s something deeply satisfying about creating such a nourishing meal with minimal active time, letting the slow cooker work its magic while you live your life. I find myself returning to this recipe whenever I need something dependable yet impressive, simple yet sophisticated. Whether you’re cooking for a family dinner, meal prepping for the week, or looking to warm up a chilly evening, this stew delivers every time. Find more inspiration for your kitchen adventures on Pinterest.

  • Biscuits & Sausage Gravy Breakfast Pizza That’ll Blow Your Mind!

    Biscuits & Sausage Gravy Breakfast Pizza That’ll Blow Your Mind!

    Biscuits & Sausage Gravy Breakfast Pizza That’ll Blow Your Mind!

    Biscuits & Sausage Gravy Breakfast Pizza combines two beloved morning classics into one irresistible dish that’ll make you rethink breakfast forever. The first time I made this for my family’s Sunday brunch, my kitchen filled with the aroma of peppery sausage gravy bubbling over buttery biscuit crust. Everyone gathered around before I even called them! There’s something magical about transforming traditional biscuits and gravy into a shareable pizza format that brings people together. It’s comfort food reimagined – familiar flavors in a fun new package that’ll become your new weekend tradition.

    Recipe

    Why You’ll Love This Biscuits & Sausage Gravy Breakfast Pizza

    Perfect Fusion of Breakfast Favorites

    This breakfast pizza brilliantly marries the comforting richness of homemade sausage gravy with the convenience of a pizza format. The biscuit base provides that perfect balance of crispy exterior and fluffy interior that soaks up just enough gravy without becoming soggy. I love how the flavors meld together – savory sausage, creamy gravy with hints of black pepper, and that buttery biscuit foundation. Plus, the customizable toppings let everyone add their personal touch with scrambled eggs, cheese, or even crispy bacon crumbles on top.

    Easy Weekend Crowd-Pleaser

    Nothing brings people to the table faster than this Biscuits & Sausage Gravy Breakfast Pizza. It’s become my go-to when hosting morning gatherings because it feeds a crowd while feeling special enough for celebrations. The beauty lies in its simplicity – you can prepare components ahead of time and assemble just before baking. I’ve found it’s particularly perfect for those lazy Sunday mornings when everyone wakes up at different times. The pizza stays delicious at room temperature, allowing family members to grab a slice whenever they wander into the kitchen.

    Essential Tips & Tricks

    Perfecting Your Biscuit Base

    Creating the ideal foundation for your Biscuits & Sausage Gravy Breakfast Pizza starts with the right biscuit dough. I recommend using cold butter and handling the dough minimally to ensure maximum flakiness. Pre-baking the biscuit base for 5-7 minutes before adding toppings prevents sogginess – a game-changing step! For extra flavor, brush the edges with melted butter mixed with garlic powder before that initial bake. If you’re short on time, refrigerated biscuit dough works beautifully, just press it into an even layer on your pizza pan.

    Mastering Sausage Gravy Consistency

    The secret to perfect sausage gravy lies in achieving that ideal velvety texture – not too thick, not too runny. Start by cooking your breakfast sausage until deeply browned, creating those flavorful bits that become the foundation of your gravy. When adding flour, cook it with the sausage fat for at least one minute to eliminate any raw flour taste. Stream in the milk slowly while whisking constantly to prevent lumps. For the breakfast pizza application, make your gravy slightly thicker than normal since it will spread during baking and continue to set as it cools.

    Serving Ideas & Creative Variations

    Complementary Side Dishes

    Pair your Biscuits & Sausage Gravy Breakfast Pizza with light, fresh accompaniments to balance its richness. I love serving it alongside a bright citrus salad with segments of grapefruit and orange over arugula with a light vinaigrette. For a more substantial spread, add a bowl of fresh berries or sliced melon to provide a sweet counterpoint. Coffee is non-negotiable, but consider offering a spiced apple cider for non-coffee drinkers. For special occasions, mimosas or a Bloody Mary bar let guests customize their beverages while enjoying this comforting breakfast centerpiece.

    Regional and Seasonal Adaptations

    Transform your Biscuits & Sausage Gravy Breakfast Pizza with regional inspirations that showcase local flavors. For a Southwestern twist, incorporate chorizo instead of breakfast sausage and add diced green chilies to your gravy. In autumn, try a harvest version with sage-infused sausage gravy and thinly sliced apples on top. During summer months, finish with garden-fresh cherry tomatoes and basil chiffonade. For a Southern-inspired variation, add crumbled fried chicken and a drizzle of hot honey. Each adaptation maintains the soul of the original while offering exciting new flavor profiles.

    Storage & Troubleshooting Guide

    Proper Storage and Reheating

    Store leftover Biscuits & Sausage Gravy Breakfast Pizza properly to maintain its delicious texture. Refrigerate individual slices in airtight containers for up to 3 days, keeping the pieces separated with parchment paper to prevent sticking. For best reheating results, use a 325°F oven for 8-10 minutes rather than the microwave, which can make the biscuit base soggy. If freezing, wrap individual portions tightly in plastic wrap then foil and freeze for up to one month. Thaw overnight in the refrigerator before reheating for that fresh-baked taste.

    Fixing Common Issues

    Even experienced cooks encounter challenges with Biscuits & Sausage Gravy Breakfast Pizza. If your biscuit base turns out too soggy, try creating a barrier by brushing the pre-baked crust with a thin layer of beaten egg before adding gravy. For gravy that’s too thick, whisk in additional warm milk one tablespoon at a time. If it’s too thin, simmer a bit longer or add a cornstarch slurry. Dealing with gravy that separates during baking? Lower your oven temperature and consider adding a tablespoon of cream cheese to stabilize the mixture.

    Frequently Asked Questions

    Can I make Biscuits & Sausage Gravy Breakfast Pizza ahead of time?

    Yes! Prepare the components separately up to 24 hours ahead. Pre-bake the biscuit base and refrigerate, then reheat briefly before adding room-temperature gravy and toppings. Bake just before serving for best results.

    What cheese works best on this breakfast pizza?

    Sharp cheddar provides the perfect flavor contrast to the creamy gravy, while mozzarella offers that stretchy pull. My favorite is a combination of both, with a sprinkle of Parmesan around the edges for extra crispiness.

    Can I use plant-based alternatives?

    Absolutely! Plant-based sausage crumbles work beautifully, and unsweetened oat or almond milk makes excellent gravy. Just ensure your plant-based milk is unflavored and adjust seasonings accordingly.

    How do I prevent the biscuit base from being undercooked?

    Pre-bake your biscuit base for 5-7 minutes before adding toppings. Use a lower oven rack position and consider investing in a pizza stone, which helps conduct heat evenly.

    What’s the best pan to use for Biscuits & Sausage Gravy Breakfast Pizza?

    A cast-iron skillet creates a wonderfully crisp edge, while a regular pizza pan works great too. If using a sheet pan, choose one with edges to contain any gravy that might bubble over.

    Final Thoughts

    This Biscuits & Sausage Gravy Breakfast Pizza represents everything I love about comfort food – familiar flavors reimagined in creative ways that bring people together. There’s something magical about watching someone take their first bite and seeing their eyes light up with surprise and delight. The beauty of this recipe lies in its adaptability and crowd-pleasing nature. Whether for a lazy weekend breakfast or holiday brunch, it never fails to impress. I hope you’ll make this biscuits & sausage gravy creation your own and start a new tradition around your table.

    Don’t forget to check out more breakfast inspirations on Pinterest!

  • Lemon Lava Cake Dessert That Melts Hearts Instantly!

    Lemon Lava Cake Dessert That Melts Hearts Instantly!

    Lemon Lava Cake Dessert That Melts Hearts Instantly!

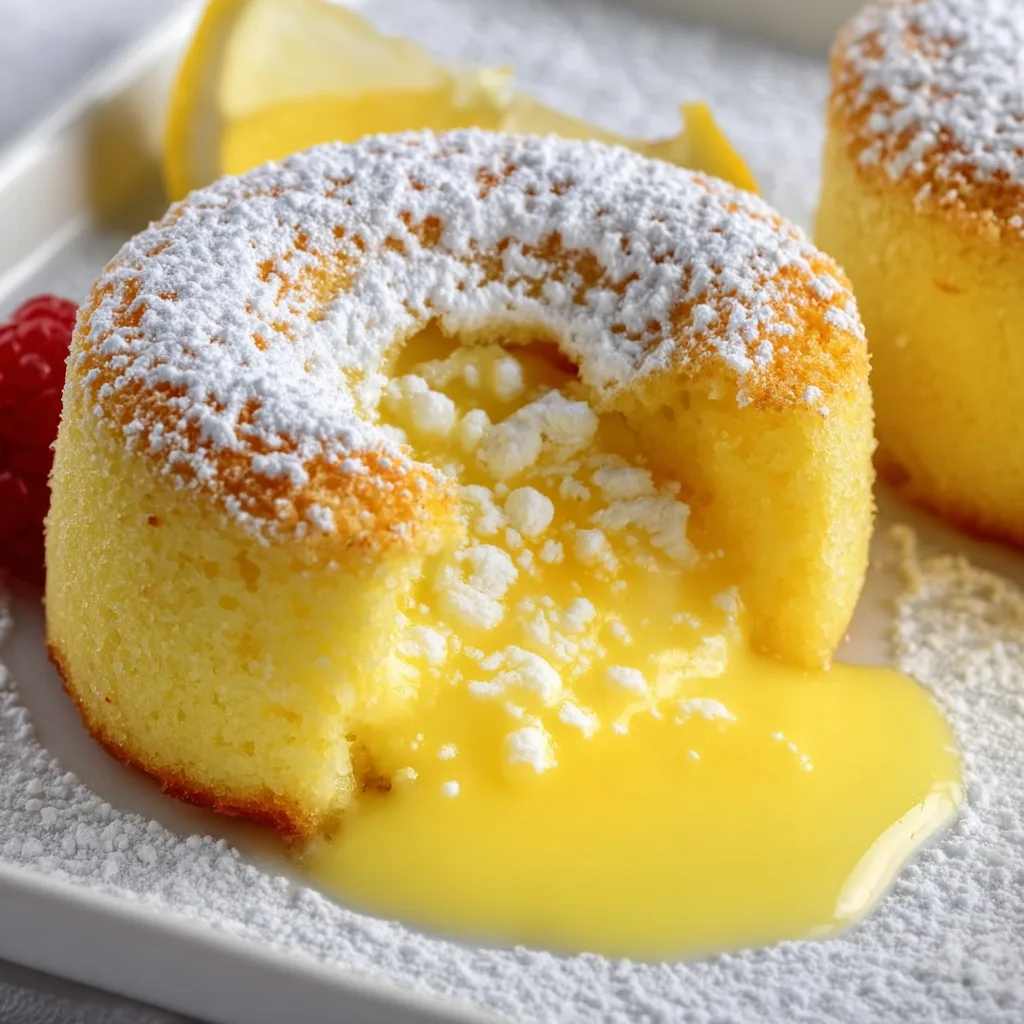
    This Lemon Lava Cake Dessert has completely transformed my dessert game. The first time I pulled these golden cakes from the oven and watched that bright, tangy lemon curd cascade like sunshine onto the plate, I actually gasped. There’s something magical about the contrast between the tender cake exterior and that warm, molten lemon center that makes this dessert irresistible. Perfect for brightening winter evenings or adding a refreshing finish to summer meals, these little cakes deliver big on both presentation and flavor. If you love the zingy brightness of lemon desserts like I do, these luscious lava cakes will become your new obsession.

    Recipe

    Why You’ll Love This Lemon Lava Cake Dessert

    Perfect Balance of Flavors

    The magic of this Lemon Lava Cake Dessert lies in its perfect sweet-tart balance. Unlike traditional chocolate versions, these cakes offer a refreshing twist with their vibrant citrus notes. The exterior cake has a delicate sweetness that complements rather than competes with the tangy lemon curd center. I’ve carefully calibrated the sugar-to-lemon ratio to create that perfect pucker that makes your taste buds dance without overwhelming them. The subtle vanilla notes in the cake batter round everything out, creating a dessert that feels both sophisticated and comforting at the same time.

    Impressive Yet Simple

    Don’t let the stunning presentation fool you—these Lemon Lava Cake Desserts are surprisingly straightforward to make. The batter comes together in just one bowl, and the technique is more forgiving than you might expect. Even when I’m short on time, I can whip these up in under 30 minutes. The wow factor is built right into the recipe, as that magical molten center creates itself during baking—no complicated steps required. I’ve served these at last-minute dinner parties and watched guests’ eyes widen, assuming I’d spent hours in the kitchen.

    Essential Tips & Tricks

    Mastering the Perfect Texture

    The secret to the perfect Lemon Lava Cake Dessert lies in the timing. Underbake slightly and you’ll have too much liquid center; overbake and you’ll lose that glorious molten effect. I’ve found that visual cues work better than strict timing—look for edges that are set but centers that still jiggle slightly when gently shaken. Room temperature ingredients are non-negotiable here, especially the eggs, which help create that tender crumb. For extra insurance, I always butter and flour my ramekins generously, ensuring each cake releases perfectly onto the plate with zero sticking.

    Lemon Curd Secrets

    The heart of any Lemon Lava Cake Dessert is its molten center, and quality ingredients make all the difference. Always use fresh lemons for both juice and zest—the bottled stuff simply won’t deliver that bright, complex flavor. When preparing your lemon curd, cook it just until it coats the back of a spoon but remains pourable. For an extra-special touch, I like to add a tiny pinch of cardamom to my curd, which adds a subtle complexity that guests can never quite identify but always love. Remember to chill your curd completely before assembling the cakes.

    Serving Ideas & Creative Variations

    Perfect Pairings

    Elevate your Lemon Lava Cake Dessert with thoughtful accompaniments that complement its bright flavor profile. A dollop of lightly sweetened whipped cream provides the perfect creamy counterpoint to the tangy lemon. For a more dramatic presentation, I love adding a scoop of vanilla bean ice cream, which melts slightly against the warm cake. Fresh berries—particularly raspberries or blueberries—add beautiful color and their own sweet-tart notes. For special occasions, a light dusting of powdered sugar and a sprig of fresh mint creates a restaurant-worthy plate that will impress even your most discerning guests.

    Seasonal Adaptations

    The versatility of this Lemon Lava Cake Dessert makes it perfect for year-round enjoyment with simple seasonal tweaks. In summer, fold some fresh blueberries into the batter for bursts of juicy sweetness. Fall calls for warming spices—try adding a hint of ginger or cinnamon to the cake batter. Winter holidays? A cranberry compote served alongside adds festive color and complementary tartness. For spring celebrations, I love incorporating a touch of lavender into the whipped cream topping. The bright lemon flavor provides the perfect canvas for these seasonal inspirations while maintaining the dessert’s signature molten magic.

    Storage & Troubleshooting Guide

    Make-Ahead Options

    While Lemon Lava Cake Dessert is best enjoyed fresh from the oven, there are smart ways to prep ahead. The cake batter can be prepared up to 24 hours in advance and refrigerated in the ramekins, covered tightly with plastic wrap. Simply bring to room temperature for 30 minutes before baking. The lemon curd can be made up to five days ahead and stored in an airtight container in the refrigerator. In a pinch, I’ve frozen the unbaked cakes for up to two weeks—just add an extra minute or two to the baking time when cooking from frozen.

    Fixing Common Issues

    Even experienced bakers occasionally encounter challenges with Lemon Lava Cake Dessert. If your cakes don’t develop that signature molten center, your oven may be running hot—try reducing the temperature by 25°F next time. Cakes sticking to the ramekins? Make sure you’re using a generous amount of butter and flour, getting into all the crevices. If your lemon curd separates or becomes lumpy, simply strain it through a fine mesh sieve before using. And remember that deflated cakes usually indicate overmixing—use a gentle hand when incorporating the flour to maintain that perfect light texture.

    Frequently Asked Questions

    Can I make Lemon Lava Cake Dessert without ramekins?

    Yes! A muffin tin works perfectly as an alternative. Adjust baking time down by 1-2 minutes and be sure to generously butter and flour each cup for easy removal.

    How do I know when my lemon lava cakes are done?

    Look for set edges with a slight jiggle in the center when gently shaken. A toothpick inserted 1/2 inch from the edge should come out clean, while the center remains soft.

    Can I use store-bought lemon curd?

    Absolutely! While homemade provides the best flavor, a good-quality store-bought curd works in a pinch. Choose one with real lemon as the primary ingredient.

    What’s the best way to store leftover lava cakes?

    Refrigerate in an airtight container for up to 2 days. Reheat gently in the microwave for 15-20 seconds. Note that reheated cakes won’t have the same molten center.

    Why did my Lemon Lava Cake Dessert collapse after baking?

    Some settling is normal! Excessive collapse usually indicates underbaking. Next time, add 1-2 minutes to your baking time while still preserving the molten center.

    Final Thoughts

    This Lemon Lava Cake Dessert has become my secret weapon for turning ordinary meals into memorable occasions. There’s something almost magical about breaking through that tender cake exterior to reveal the sunshine-bright lemon filling inside. The beauty of these little cakes lies in their versatility—dressed up with berries and cream for special celebrations or enjoyed simply on a quiet evening when you need a bright moment of sweetness. I hope they bring as much joy to your table as they have to mine. For more delicious dessert inspirations, visit our Pinterest collection.

  • Creamy Pepper Jack Chicken & Sausage Pasta That Will Wow You!

    Creamy Pepper Jack Chicken & Sausage Pasta That Will Wow You!

    Creamy Pepper Jack Chicken & Sausage Pasta That Will Wow You!

    Creamy Pepper Jack Chicken & Sausage Pasta is the ultimate comfort food that combines two protein powerhouses with a velvety, spicy cheese sauce that will make your taste buds dance. I discovered this recipe during a particularly hectic week when I needed something satisfying that would please my entire family. The first time I made it, my kitchen filled with the most intoxicating aroma of sautéed garlic, smoky sausage, and melting cheese. It’s become our go-to for those evenings when we need a little extra comfort on the plate. You’ll find this dish strikes the perfect balance between creamy indulgence and satisfying heartiness.

    Recipe

    Why You’ll Love This Creamy Pepper Jack Chicken & Sausage Pasta

    Perfect Balance of Flavors and Textures

    This pasta dish is a masterful symphony of bold flavors and contrasting textures. The spicy kick from the pepper jack cheese creates a delightful warmth that’s balanced by the creamy sauce. I love how the tender chicken pieces absorb all those incredible flavors while the slightly smoky sausage adds another dimension entirely. The al dente pasta provides the perfect canvas, and when you get that perfect bite with all elements together? Pure magic. My husband, who typically reaches for seconds only with his absolute favorites, went back for thirds the first time I served this!

    Quick and Satisfying One-Pot Wonder

    On busy weeknights, the last thing any of us wants is a sink full of dishes. This one-pot meal comes together in under 40 minutes, making it perfect for those evenings when you’re craving something homemade but short on time. The beauty lies in how the pasta cooks right in the same pot, absorbing all those incredible flavors from the chicken, sausage, and aromatics. I’ve found this dish particularly perfect for those Wednesday nights when weekend energy has faded but we’re not quite to the finish line. The leftovers (if there are any!) taste even better the next day.

    Essential Tips & Tricks

    Choosing the Right Ingredients

    The quality of cheese makes all the difference in this recipe. Look for a good pepper jack that melts smoothly—I prefer one with visible flecks of peppers for extra flavor and visual appeal. For the sausage, Italian or smoked Andouille both work beautifully, adding different but equally delicious flavor profiles. When it comes to chicken, thighs provide more flavor and stay juicier, but breasts work well too if that’s your preference. I once made this with leftover rotisserie chicken, and it was a game-changer for cutting down prep time even further! For pasta shapes, penne or rigatoni capture the sauce perfectly.

    Perfecting the Creamy Sauce

    The secret to an irresistibly smooth sauce lies in how you incorporate the cheese. Always remove the pot from heat before adding your pepper jack, then stir constantly to prevent separation. If your sauce seems too thick, add pasta water a tablespoon at a time—the starch helps maintain that silky texture. For extra depth, deglaze the pan with a splash of white wine after cooking the meat. I learned this trick after a happy accident when cooking with a glass in hand! For a lighter version that doesn’t sacrifice creaminess, substitute half the heavy cream with chicken broth. The sauce will still cling beautifully to each piece of pasta while cutting some calories.

    Serving Ideas & Creative Variations

    Complementary Side Dishes

    This hearty pasta pairs beautifully with bright, acidic sides that cut through the richness. A simple arugula salad with lemon vinaigrette creates the perfect balance, while roasted asparagus or broccoli adds a welcome veggie component. For a complete meal that will impress dinner guests, serve with crispy garlic bread and a light citrus dessert to cleanse the palate. When I’m feeling extra indulgent, I’ll add a side of garlic butter mushrooms that complement the creamy pasta perfectly. The earthiness of the mushrooms against the spicy creaminess of the main dish creates a restaurant-worthy experience right at your dining table.

    Exciting Flavor Twists

    The beauty of this recipe is how easily it adapts to different flavor profiles. For a Southwestern spin, add black beans, corn, and top with fresh cilantro and a squeeze of lime. Craving something Mediterranean? Incorporate sun-dried tomatoes, artichoke hearts, and finish with fresh basil and a drizzle of good olive oil. To add more vegetables without changing the core flavors, stir in baby spinach during the last minute of cooking—it wilts perfectly into the sauce. My personal favorite variation came from a fridge-clearing experiment: adding roasted red peppers and a pinch of smoked paprika transformed the dish into something entirely new but equally delicious.

    Storage & Troubleshooting Guide

    Proper Storage Methods

    This creamy pasta keeps beautifully when stored properly, making it perfect for meal prep. Transfer leftovers to airtight containers and refrigerate for up to 3 days. The flavors actually develop overnight, making day-two pasta sometimes even better than fresh! If freezing, slightly undercook the pasta and cool completely before transferring to freezer-safe containers. Freeze for up to 2 months, though the texture of the sauce may change slightly upon thawing. I always portion individual servings when freezing—perfect for those solo lunches or when family members are on different schedules.

    Fixing Common Issues

    If your sauce breaks or appears curdled, don’t panic! The most common cause is too much heat when adding cheese. To rescue separated sauce, remove from heat immediately, add a splash of warm cream while whisking constantly. For pasta that’s absorbed too much sauce and seems dry when reheating, add a tablespoon of cream or milk while gently warming. If your dish lacks flavor, brighten it with a squeeze of lemon juice or a dash of hot sauce. Once, when I accidentally oversalted the dish, I added a peeled, quartered potato to the pot while simmering for 10 minutes—it absorbed the excess salt beautifully!

    Frequently Asked Questions

    Can I make Creamy Pepper Jack Chicken & Sausage Pasta ahead of time?

    Yes! Prepare it up to 24 hours ahead, slightly undercooking the pasta. Refrigerate, then reheat gently on the stove with a splash of cream or milk to refresh the sauce.

    What pasta shapes work best for this recipe?

    Medium shapes like penne, rigatoni, or fusilli work best as they capture the creamy sauce in their ridges and hollows. Avoid long pasta like spaghetti.

    Can I use pre-cooked chicken and sausage?

    Absolutely! Rotisserie chicken and pre-cooked sausage work wonderfully. Add them toward the end of cooking, just long enough to heat through.

    Is there a way to make this recipe lighter?

    Replace half the heavy cream with chicken broth and use part-skim mozzarella mixed with a smaller amount of pepper jack for the same creamy texture with fewer calories.

    Can I make this dish vegetarian?

    Yes! Substitute the meats with sautéed mushrooms, bell peppers, and zucchini. The pepper jack still provides that wonderful flavor kick.

    Final Thoughts

    This Creamy Pepper Jack Chicken & Sausage Pasta has become more than just a recipe in my household—it’s a solution for busy nights, a crowd-pleaser for unexpected guests, and a comfort food that never disappoints. The beauty lies in its adaptability and the way it brings everyone to the table with eager anticipation. I hope this dish brings the same joy to your kitchen as it has to mine! For more delicious pasta inspirations, check out my collection on Pinterest where I’m always adding new comfort food ideas.

  • Pepperoni Pizza Fries: Irresistibly Crispy & Cheesy Snack Craze!

    Pepperoni Pizza Fries: Irresistibly Crispy & Cheesy Snack Craze!

    Pepperoni Pizza Fries: Irresistibly Crispy & Cheesy Snack Craze!

    Pepperoni Pizza Fries combine two ultimate comfort foods into one irresistible dish that’ll have everyone reaching for seconds. The first time I made these for my family game night, they disappeared faster than I could say “dig in!” Crispy golden fries topped with bubbling cheese, zesty tomato sauce, and those perfect little cups of pepperoni that get slightly crisp at the edges – pure magic! The beauty lies in their simplicity and crowd-pleasing nature. Whether you’re hosting friends or craving something indulgent, these loaded fries deliver big flavor with minimal effort.

    Recipe

    Why You’ll Love This Pepperoni Pizza Fries

    Perfect Fusion of Flavors

    There’s something magical about the combination of crispy fries and pizza toppings that just works. The contrast of textures – from the crunchy potato exterior to the melty cheese and slightly chewy pepperoni – creates a sensory experience that’s utterly satisfying. I love how the tomato sauce seeps slightly into the fries, infusing them with tangy flavor without making them soggy. The first time I served these at a potluck, my friend’s teenage son declared them “life-changing” – and honestly, I couldn’t disagree! They strike that perfect balance between familiar comfort food and exciting flavor twist.

    Quick Weeknight Wonder

    On those evenings when cooking feels like a chore, Pepperoni Pizza Fries come to the rescue! They require minimal prep work – just arrange your fries, add toppings, and bake until bubbly perfection. I’ve made these countless times after long workdays when my energy was low but cravings were high. The entire dish comes together in about 25 minutes, most of which is hands-off baking time. You can even use frozen fries as your base to make it even simpler! The payoff of cheesy, pepperoni-topped goodness far outweighs the minimal effort required.

    Essential Tips & Tricks

    Achieving the Perfect Crisp

    The secret to exceptional pizza fries lies in avoiding sogginess. Always bake your fries until they’re golden and crispy before adding toppings – this creates a sturdy base that can support the sauce and cheese. I learned this the hard way after once adding toppings to undercooked fries (soggy disaster!). For homemade fries, soak them in cold water for 30 minutes, then thoroughly pat dry before tossing with oil and baking. If using frozen fries, arrange them in a single layer with space between each piece. This extra attention to the base ensures your pizza fries maintain that satisfying crunch.

    Layering Like a Pro

    The order of toppings makes a significant difference in the final result! Start with a light layer of sauce – too much will make the fries soggy. Next, sprinkle on half your cheese, add the pepperoni, then finish with the remaining cheese. This “pepperoni sandwich” technique ensures some pepperoni pieces get slightly crispy while others remain tender. For an extra flavor boost, try sprinkling garlic powder or Italian seasoning between layers. I always save a few pepperoni slices to place on top during the last few minutes of baking for that Instagram-worthy finish!

    Serving Ideas & Creative Variations

    Perfect Pairings

    These loaded fries are substantial enough to be a meal, but they also work beautifully as a shareable appetizer or side dish. I love serving them with small ramekins of additional pizza sauce and ranch dressing for dipping – the cool creaminess of ranch against the warm, spicy pepperoni is heavenly. For a casual gathering, pair with a simple green salad to balance the richness. When I serve these for family movie nights, I arrange them on a large wooden board surrounded by colorful veggie sticks and dips, creating an interactive grazing experience everyone loves.

    Exciting Flavor Twists

    While classic pepperoni pizza fries are incredible, don’t be afraid to experiment with variations! Try a “supreme” version with bell peppers, olives, and mushrooms, or go for a Hawaiian twist with ham and pineapple pieces. My husband’s favorite is a buffalo chicken version with shredded rotisserie chicken, buffalo sauce instead of pizza sauce, and blue cheese crumbles. For a vegetarian option, load up with roasted veggies and fresh basil. The possibilities are endless! I keep a note in my phone with successful combinations – my current obsession is a white pizza variation with ricotta, mozzarella, and garlic oil instead of tomato sauce.

    Storage & Troubleshooting Guide

    Keeping Leftovers Fresh

    Let’s be honest – leftover pizza fries are rarely as good as fresh, but with proper handling, they can still be delicious. Allow any leftovers to cool completely before storing in an airtight container in the refrigerator for up to 2 days. To reheat, use an air fryer or conventional oven at 375°F for 5-7 minutes rather than the microwave, which will make them soggy. I sometimes intentionally make extra so I can transform the leftovers – chop them up and use as a topping for frittatas or fold into scrambled eggs for a pizza-inspired breakfast!

    Troubleshooting Common Issues

    The most frequent problem with pizza fries is sogginess, which usually happens when the fries aren’t crispy enough before adding toppings or when too much sauce is used. If your fries are turning out soggy, try baking them longer before adding toppings and using less sauce. Another issue might be uneven melting of cheese – to fix this, make sure your cheese is evenly distributed and at room temperature before baking. If the pepperoni is getting too crispy or burnt, try placing it under the cheese rather than on top, or add it halfway through the baking process.

    Frequently Asked Questions

    Can I make Pepperoni Pizza Fries ahead of time?

    I recommend preparing components separately – bake the fries and store toppings separately. Assemble and bake just before serving for the best texture and flavor experience.

    What’s the best cheese to use for Pepperoni Pizza Fries?

    Low-moisture mozzarella works best as it melts beautifully without releasing too much liquid. For extra flavor, mix in some shredded provolone or a sprinkle of parmesan.

    Can I make these in an air fryer?

    Absolutely! Cook your fries in the air fryer first, then add toppings and return to the air fryer for 2-3 minutes until cheese melts. Work in batches if needed.

    Are Pepperoni Pizza Fries gluten-free?

    They can be! Use gluten-free frozen fries and check your pepperoni and sauce labels, as some brands contain gluten ingredients or cross-contamination.

    How do I prevent my Pepperoni Pizza Fries from getting soggy?

    Bake fries until extra crispy before adding toppings, use a light hand with sauce, and serve immediately after baking for the perfect crispy-cheesy balance.

    Final Thoughts

    Pepperoni Pizza Fries represent comfort food at its finest – familiar flavors reimagined into something even more crave-worthy. They’ve become my go-to solution for casual entertaining and family dinners when I want maximum impact with minimal fuss. The joy on people’s faces when that tray of golden, cheesy, pepperoni-topped goodness hits the table is truly priceless! Whether you follow the classic recipe or create your own signature variation, these loaded fries are bound to become a regular request in your household. Find more delicious inspiration on Pinterest.

  • Red Velvet Oreo Cheesecake: Irresistibly Creamy Dessert Bliss!

    Red Velvet Oreo Cheesecake: Irresistibly Creamy Dessert Bliss!

    Red Velvet Oreo Cheesecake: Irresistibly Creamy Dessert Bliss!

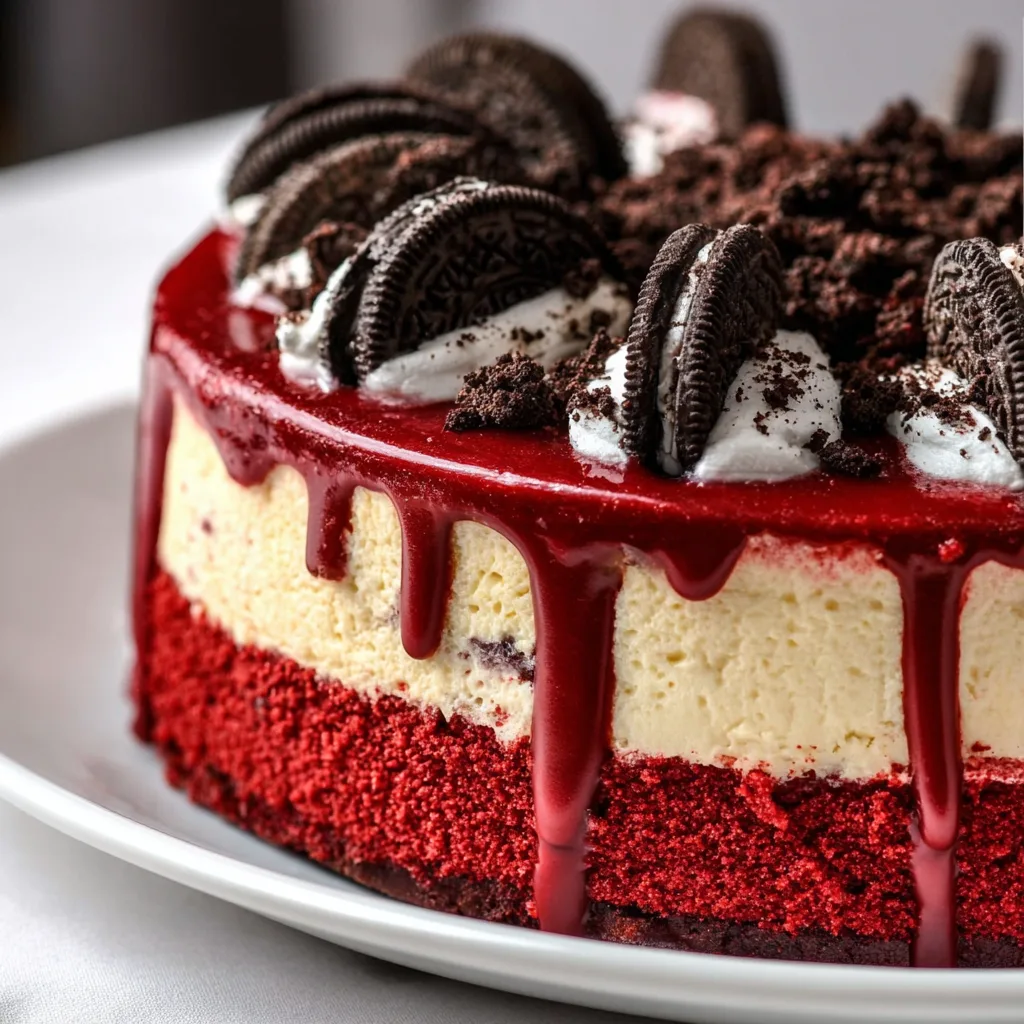
    Red Velvet Oreo Cheesecake combines two beloved desserts into one show-stopping treat that never fails to impress. The first time I made this luscious creation for my sister’s birthday gathering, the room fell silent as everyone took their first bite—then erupted into a chorus of “Oh my goodness!” The rich crimson layers paired with chunks of Oreo cookies create a dessert that’s both visually stunning and irresistibly delicious. The contrast between the tangy cream cheese, chocolate cookie crunch, and that distinctive cocoa-vanilla flavor of red velvet creates something truly magical that’ll have everyone requesting the recipe. If you love indulgent desserts like my fluffy Japanese cotton cheesecake, this one will surely become your new favorite.

    Recipe

    Why You’ll Love This Red Velvet Oreo Cheesecake

    A Perfect Balance of Flavors and Textures

    There’s something almost hypnotic about the way the flavors in this cheesecake play together. The subtle cocoa notes in the red velvet base provide the perfect foundation for the rich creaminess of the cheesecake layer. Then come those delightful Oreo chunks—little pockets of chocolate intensity that add both textural contrast and flavor depth. I love watching people’s expressions as they discover each component with every bite. The slight tanginess from the cream cheese balances the sweetness perfectly, ensuring this dessert never becomes cloying despite its decadence. It’s that rare dessert that feels both familiar and exciting at the same time.

    An Impressive Yet Achievable Showstopper

    Don’t let the stunning appearance fool you—this Red Velvet Oreo Cheesecake is completely doable for home bakers of all skill levels. The dramatic color contrast between the ruby-red cake layers and white cheesecake swirled with Oreo pieces creates a dessert that looks like it came from a high-end bakery. I still remember my neighbor asking which bakery I’d visited when I brought this to our block party! The beauty of this recipe is that while it looks elaborate, the techniques are straightforward. The “wow factor” comes from the natural beauty of the ingredients rather than complicated decorating techniques that require special skills.

    Essential Tips & Tricks

    Mastering the Perfect Cheesecake Consistency

    The secret to a silky-smooth cheesecake layer starts with room temperature ingredients—especially your cream cheese. I learned this the hard way after battling lumpy batter for years! Allow your cream cheese to sit out for at least 2 hours before mixing. When incorporating the eggs, mix just until combined; overmixing introduces air that can cause cracks. For that perfect Red Velvet Oreo Cheesecake texture, consider using a water bath during baking. Simply wrap your springform pan in foil and place it in a larger pan with an inch of hot water. This gentle, moist heat helps prevent cracks and ensures even baking throughout.

    The Art of the Perfect Oreo Integration

    Oreos deserve special attention in this recipe—they’re not just a topping but an essential flavor component. For the optimal cookie distribution, I recommend using three different Oreo textures: finely crushed for the crust, roughly chopped for the filling, and halved cookies for decoration. When folding Oreos into your cheesecake batter, use a gentle hand to maintain those beautiful chunks rather than pulverizing them into dust. For an extra-special touch, try drizzling some melted white chocolate over your crushed Oreos before incorporating them—it adds a subtle sweetness that complements the tanginess of the cheesecake beautifully.

    Serving Ideas & Creative Variations

    Complementary Pairings That Enhance Every Bite

    The rich complexity of Red Velvet Oreo Cheesecake pairs wonderfully with simple accompaniments that highlight rather than compete with its flavors. A dollop of lightly whipped cream adds a cloud-like softness that melts beautifully against the dense cheesecake. For a temperature contrast that elevates the experience, serve with a scoop of vanilla bean ice cream—the warmth of real vanilla against the chocolatey notes is divine. I love serving this with fresh berries; the bright acidity of raspberries or strawberries cuts through the richness perfectly. For beverage pairings, consider a strong coffee, dessert wine, or even a warming apple cider float for a cozy fall gathering.

    Seasonal and Dietary Adaptations

    This versatile dessert can be customized for any occasion or dietary need without sacrificing its wow factor. For a festive holiday version, incorporate crushed peppermint Oreos and garnish with candy cane pieces. Summer celebrations call for Golden Oreos with lemon zest in the cheesecake layer. For gluten-sensitive guests, gluten-free Oreo alternatives work beautifully—just ensure your red food coloring is gluten-free too. Reducing sugar is possible by choosing a less-sweet cream cheese base and dark chocolate Oreos. For smaller gatherings, transform this into individual mini cheesecakes using a muffin tin—they bake faster and create perfect individual portions that are ideal for socially distanced celebrations.

    Storage & Troubleshooting Guide

    Maintaining Freshness and Quality

    Proper storage ensures your Red Velvet Oreo Cheesecake stays perfectly delicious for days after baking. Always cool your cheesecake completely before refrigerating—I leave mine on the counter for an hour, then refrigerate uncovered for another hour before covering. This prevents condensation from making the top soggy. Once fully chilled, cover with plastic wrap or store in an airtight container for up to 5 days in the refrigerator. For longer storage, this cheesecake freezes beautifully! Slice it first, then wrap individual pieces in plastic wrap and foil. Frozen slices keep for up to 3 months and can be thawed in the refrigerator overnight for an instant dessert whenever cravings strike.

    Solving Common Cheesecake Challenges

    Even experienced bakers encounter occasional issues with cheesecakes, but most problems have simple solutions. If your cheesecake develops surface cracks, don’t panic—this is purely cosmetic and can be easily disguised with whipped cream, chocolate ganache, or additional Oreo crumbles. For a sunken center, your cheesecake likely needed more baking time; next time, look for a slight jiggle only in the center when you gently shake the pan. If your crust becomes soggy, try pre-baking it for 10 minutes before adding the filling. And remember that patience is crucial—rushing the cooling process often leads to texture issues, so allow your Red Velvet Oreo Cheesecake to cool gradually for that perfect silky consistency.

    Frequently Asked Questions

    Can I make Red Velvet Oreo Cheesecake without food coloring?

    Yes! Beetroot powder is an excellent natural alternative that provides the signature red color. Start with 2-3 tablespoons in your batter, adjusting until you achieve your desired shade of red. The taste is neutral when baked.

    How do I prevent my cheesecake from cracking?

    Avoid overmixing your batter, bake in a water bath, and cool gradually. Turn off the oven when done, open the door slightly, and let the cheesecake cool slowly for an hour before removing it completely.

    Can I make this Red Velvet Oreo Cheesecake ahead of time for an event?

    Absolutely! This cheesecake actually improves with 24-48 hours of refrigeration as the flavors meld together. Make it up to three days ahead, keeping it covered in the refrigerator until serving time.

    What’s the best way to cut clean slices?

    Dip a sharp knife in hot water, wipe dry, and cut. Repeat this process for each slice. The heat helps the knife glide through the cheesecake smoothly without dragging or creating messy edges.

    Can I use low-fat cream cheese?

    While possible, full-fat cream cheese provides the best texture and flavor. If using low-fat, add an extra egg yolk to maintain richness and consider reducing the sugar slightly to balance flavors.

    Final Thoughts

    This Red Velvet Oreo Cheesecake has become my signature dessert for good reason—it consistently delivers that perfect balance of impressive presentation and unforgettable flavor. The contrasting layers of velvety cream cheese and chocolate cookie crunch create a textural symphony that makes each bite an experience to savor. What I love most is how versatile it is for any celebration, from casual family gatherings to milestone celebrations. Don’t be surprised if this becomes your most requested recipe! For more delicious dessert inspirations, check out my collections on Pinterest where I’m always sharing new flavor combinations and presentation ideas.