Author: Darleen Vance

  • Slow Cooker Shredded Beef Sandwiches That Melt Hearts Fast!

    Slow Cooker Shredded Beef Sandwiches That Melt Hearts Fast!

    Slow Cooker Shredded Beef Sandwiches That Melt Hearts Fast!

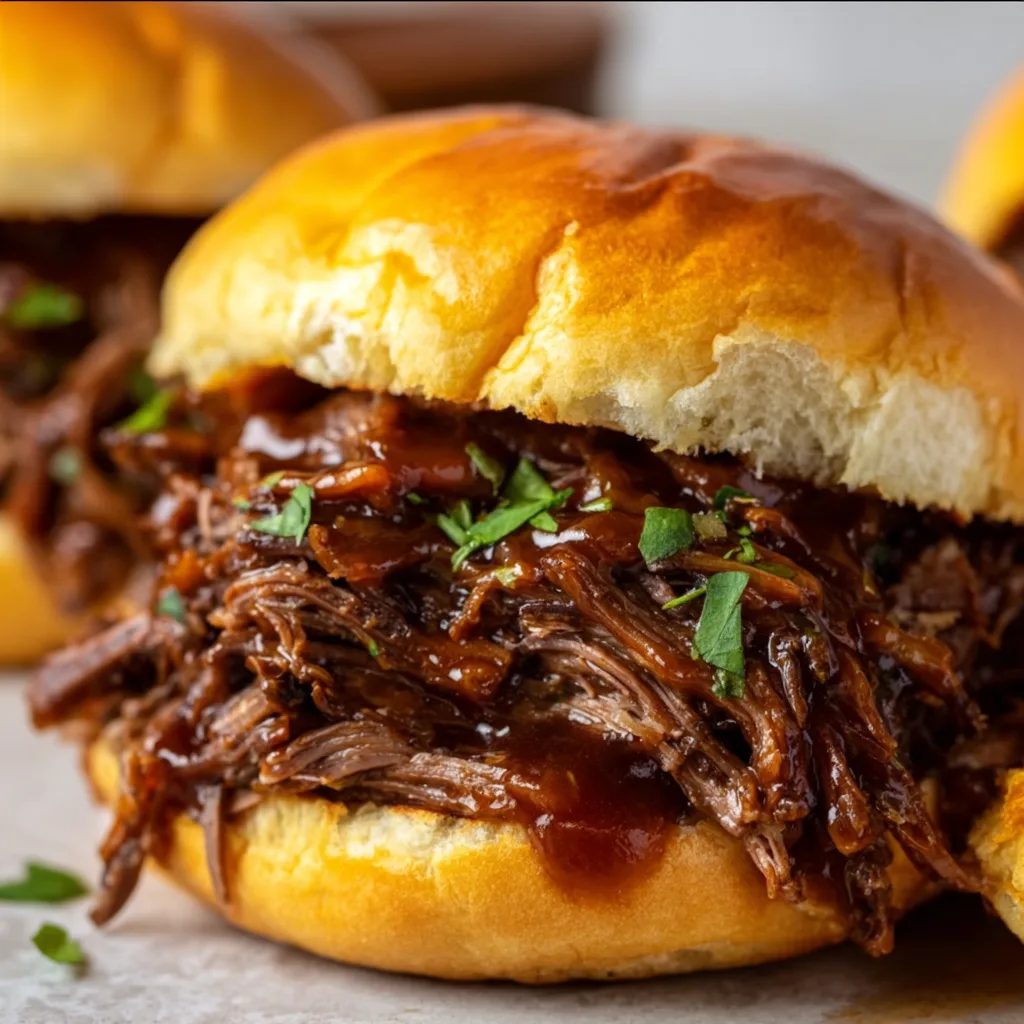
    Slow Cooker Shredded Beef Sandwiches have completely transformed my weeknight dinner game. There’s something magical about walking through the door after a long day and being greeted by the rich, savory aroma of beef that’s been simmering away for hours. The first time I made these for my family, my kitchen filled with that cozy, homey scent that just says “comfort food is coming.” These fork-tender sandwiches deliver maximum flavor with minimal effort – exactly what we all need on busy days when cooking feels like one more thing on an endless to-do list. Trust me, this recipe will quickly become your new go-to for both family dinners and casual entertaining.

    Recipe

    Why You’ll Love These Slow Cooker Shredded Beef Sandwiches

    Perfect Make-Ahead Meal Solution

    These shredded beef sandwiches are a true lifesaver when life gets chaotic. I remember throwing this together one morning before a particularly hectic workday, and coming home to dinner practically ready to serve was nothing short of miraculous. The slow cooker does all the heavy lifting, transforming an inexpensive cut of beef into something extraordinarily tender and flavorful. Plus, the beef actually tastes even better the next day, making it perfect for meal prep. You can easily double the recipe and enjoy various meals throughout the week – from sandwiches to tacos to loaded baked potatoes.

    Crowd-Pleasing Flavor Profile

    The beauty of these sandwiches lies in their rich depth of flavor that develops during the slow cooking process. The beef absorbs all the savory goodness from the broth, onions, and seasonings, creating a mouthwatering combination that pleases even picky eaters. What I love most is how the meat develops those delicious crispy edges when you sear it beforehand, while the inside stays incredibly juicy. The slight tanginess from the added vinegar balances the richness perfectly, creating that craveable flavor that has my family asking for these sandwiches again and again. It’s comfort food elevated.

    Essential Tips & Tricks

    Choosing and Preparing the Right Cut

    Selecting the perfect cut of beef makes all the difference in this recipe. Chuck roast is my go-to because it has beautiful marbling that melts into the meat as it cooks, creating that melt-in-your-mouth texture we’re after. Before it goes into the slow cooker, don’t skip the browning step! Those few extra minutes create a beautiful crust that adds incredible flavor dimension. I learned this the hard way after making a bland version without searing first. Cut your roast into large chunks rather than one whole piece – this increases the surface area for browning and helps it cook more evenly, resulting in that perfect shreddable texture every time.

    Mastering the Liquid Ratio

    The liquid balance in your slow cooker is crucial for perfect shredded beef. Too much and you’ll end up with soggy meat; too little and it might dry out. I aim for the liquid to come about 1/3 of the way up the sides of the meat – never fully submerged. For extra flavor, I replace half the beef broth with a good quality dark beer or red wine (like I do in my Potsticker Noodle Bowl with Beef Cabbage Slaw). Adding aromatics like bay leaves, garlic, and fresh herbs creates layers of flavor that make these sandwiches truly special. Remember to taste and adjust seasonings after shredding but before returning the meat to the juices.

    Serving Ideas & Creative Variations

    Building the Ultimate Sandwich

    Creating sandwich perfection starts with the right bread – I prefer sturdy brioche buns or pretzel rolls that can stand up to the juicy meat without falling apart. Before assembling, toast your buns with a light brush of butter for that extra touch that makes all the difference. For toppings, I love the classic combination of melted provolone, caramelized onions, and a horseradish mayo that adds a pleasant kick. Crisp pickles provide the perfect contrasting crunch against the tender beef. For a restaurant-quality finish, serve with a small cup of the strained cooking liquid on the side for dipping, similar to how I serve my Cajun Chicken Sandwiches with Garlic Aioli.

    Global-Inspired Flavor Twists

    The beauty of this slow cooker beef is its versatility as a blank canvas for different flavor profiles. For a Mexican-inspired meal, I add chipotle peppers, cumin, and oregano to the cooking liquid, then serve the shredded beef in warm tortillas with avocado and lime. Asian flavors work beautifully too – try adding soy sauce, ginger, and a touch of five-spice powder, then pile the meat onto steamed buns with quick-pickled vegetables. For an Italian twist, incorporate balsamic vinegar, rosemary, and garlic into the cooking process, then serve on crusty ciabatta with melted fontina cheese and roasted red peppers. Each variation feels like an entirely new meal!

    Storage & Troubleshooting Guide

    Proper Storage for Maximum Freshness

    Keeping your shredded beef at peak deliciousness is simple with the right storage approach. Always cool the meat in its juices before refrigerating – this prevents it from drying out and actually enhances the flavor as it sits. Store in airtight containers for up to 4 days in the refrigerator, or freeze flat in ziplock bags for up to 3 months. The flat freezing method allows for quick thawing and saves freezer space. For meal prep, portion the meat into individual servings before freezing. When reheating, adding a splash of beef broth helps restore moisture, and a quick trip under the broiler creates those delicious crispy edges that make the leftovers taste fresh.

    Solving Common Problems

    Even experienced cooks occasionally encounter troubleshooting moments with slow cooker recipes. If your beef isn’t tender enough after the cooking time, it likely needs more time – tough connective tissue breaks down slowly, so add another hour and check again. For beef that seems dry, the solution is simple: return it to the strained cooking liquid after shredding and let it absorb the moisture. If your cooking liquid is too watery, remove the meat, then simmer the liquid on the stovetop to reduce and concentrate the flavors before returning the shredded beef. Remember that different slow cookers can vary in temperature, so you may need to adjust cooking times based on your specific model.

    Frequently Asked Questions

    What’s the best cut of beef for slow cooker shredded beef sandwiches?

    Chuck roast is ideal due to its marbling and connective tissue that breaks down during slow cooking, creating tender, flavorful meat. Brisket and bottom round also work well if you prefer alternatives.

    How long should I cook the beef?

    For a 3-pound roast, cook on low for 8-10 hours or high for 5-6 hours. The meat should easily shred with two forks when properly cooked. Larger cuts may require additional time.

    Can I make this recipe ahead of time?

    Absolutely! The flavor actually improves after a day in the refrigerator. Make it up to 3 days ahead, then reheat gently with a splash of beef broth to maintain moisture.

    Is this recipe freezer-friendly?

    Yes! Freeze the cooled shredded beef in its juices in airtight containers for up to 3 months. Thaw overnight in the refrigerator and reheat slowly for best results.

    Can I use this slow cooker shredded beef for other dishes besides sandwiches?

    Definitely! Use it in tacos, quesadillas, nachos, stuffed potatoes, rice bowls, or even as a pizza topping. The versatility makes it perfect for multiple meals from one cooking session.

    Final Thoughts

    These Slow Cooker Shredded Beef Sandwiches represent what I love most about cooking – creating something truly spectacular with minimal effort. There’s a special kind of satisfaction that comes from transforming simple ingredients into a meal that brings everyone to the table with eager anticipation. The slow cooker magic happens while you’re off living your life, and that’s a beautiful thing. I hope this recipe brings as much comfort and joy to your kitchen as it has to mine. For more delicious recipes that make mealtime special, visit us at Pinterest for endless inspiration.

  • Cheesy Meatball Subs That’ll Melt Your Heart & Crave More!

    Cheesy Meatball Subs That’ll Melt Your Heart & Crave More!

    Cheesy Meatball Subs That'll Melt Your Heart & Crave More!

    Cheesy Meatball Subs have become my ultimate comfort food obsession this winter. There’s something magical about biting into a warm, toasted roll filled with tender, juicy meatballs smothered in marinara and blanketed with melty cheese. I discovered this recipe during a snowstorm last year when I was craving something hearty that would fill our home with delicious aromas. The way the cheese bubbles and browns under the broiler creates the most satisfying stretch when you take that first bite. If you love Italian-inspired comfort food like my Buffalo Chicken Mozzarella Sticks, these subs will absolutely steal your heart.

    Recipe

    Why You’ll Love These Cheesy Meatball Subs

    Perfect Comfort Food Balance

    These cheesy meatball subs strike that perfect balance between indulgent and satisfying without being overly complicated. The combination of savory meatballs, tangy marinara, and gooey cheese creates layers of flavor that make your taste buds dance. I love how the edges of the bread get slightly crispy while the inside stays soft and absorbs just enough sauce. There’s something deeply nostalgic about this meal – it reminds me of Sunday family dinners at my grandmother’s house, where the aroma of simmering sauce would greet us at the door.

    Versatile for Any Occasion

    What makes these meatball subs truly special is how adaptable they are for different scenarios. They’re perfect for casual weeknight dinners when you need something hearty but don’t want to spend hours in the kitchen. But they also shine as crowd-pleasers for game day gatherings or casual entertaining. I’ve served these at my son’s birthday party, cutting them into smaller portions, and they disappeared within minutes! The combination of familiar flavors with that impressive cheese pull makes them irresistible to both kids and adults alike.

    Essential Tips & Tricks

    Mastering the Perfect Meatball

    The heart of any great meatball sub is, of course, the meatballs themselves. For the juiciest results, use a mixture of ground beef and Italian sausage (about 70/30 ratio). Don’t overwork the meat mixture – gentle mixing preserves tenderness. My secret ingredient? A tablespoon of ricotta cheese mixed into the meat adds incredible moisture. Bake the meatballs instead of pan-frying to maintain their round shape and allow excess fat to drain away. This method gives you perfectly cooked meatballs that won’t fall apart in your Creamy Parmesan Baked Caesar Chicken or these delicious subs.

    The Cheese Strategy

    When it comes to creating that perfect cheese pull, strategy matters! I recommend using a combination of mozzarella for stretch and provolone for flavor. Shred the mozzarella yourself rather than using pre-shredded – it melts much more smoothly without those anti-caking agents. Layer some cheese on the bottom of your split roll before adding meatballs, then top with more cheese. This sandwich architecture ensures cheese in every bite. For the ultimate golden brown finish, broil for just 1-2 minutes at the end, watching carefully to prevent burning.

    Serving Ideas & Creative Variations

    Perfect Pairings

    These cheesy meatball subs shine brightest with thoughtfully chosen sides. A simple arugula salad with lemon vinaigrette provides a perfect peppery contrast to cut through the richness. Crispy baked zucchini fries offer a lighter alternative to traditional potato sides while still providing that satisfying crunch factor. For a complete Italian-inspired spread, serve alongside a small bowl of additional warm marinara for dipping those inevitable cheese-covered bites that fall out of your sandwich. During cooler months, I love pairing these subs with a cup of Creamy Tuscan Marry Me Butter Beans for a truly cozy meal.

    Exciting Flavor Twists

    While the classic version is undeniably delicious, these meatball subs welcome creative variations. Try a Mexican-inspired version with chipotle-spiced meatballs, pepper jack cheese, and avocado slices. For a Greek twist, use lamb meatballs seasoned with oregano and mint, topped with feta cheese and tzatziki sauce. My family’s current favorite is a buffalo-style sub with chicken meatballs tossed in buffalo sauce, blue cheese crumbles, and a drizzle of ranch. Don’t be afraid to experiment with different breads too – ciabatta rolls offer a rustic texture while pretzel rolls add a delightful chewiness.

    Storage & Troubleshooting Guide

    Make-Ahead and Storage Solutions

    These cheesy meatball subs can be partially prepped ahead to make weeknight meals a breeze. The meatballs freeze beautifully – I often make a double batch and freeze half for future meals. Cool completely before storing in airtight containers or freezer bags for up to 3 months. For leftover assembled subs (though we rarely have any!), wrap tightly in foil and refrigerate for up to 2 days. To reheat, remove the foil and warm in a 350°F oven until the cheese melts again. The microwave works in a pinch but will make the bread softer rather than maintaining that desirable crisp exterior.

    Solving Common Challenges

    The most frequent issue with meatball subs is the dreaded “soggy bread syndrome.” Combat this by lightly toasting your sub rolls before adding any ingredients. Another trick is creating a cheese barrier – lay provolone slices on the bottom half of your roll to create a protective layer between the bread and sauce. If your meatballs are crumbling, they might be too lean or overworked. Adding an extra egg or breadcrumbs can help bind them together. For sauce that’s too watery, simmer it uncovered for 10-15 minutes to reduce and thicken before assembling your subs.

    Frequently Asked Questions

    Can I make these Cheesy Meatball Subs ahead of time?

    Yes! Prepare the meatballs and sauce up to 3 days ahead. Store separately in the refrigerator. Assemble and broil just before serving for the freshest results.

    What’s the best bread for meatball subs?

    Hoagie or sub rolls with a slightly crusty exterior and soft interior work best. They should be sturdy enough to hold the meatballs without falling apart when sauce is added.

    Can I use frozen meatballs instead of homemade?

    Absolutely! Quality frozen meatballs can be a great time-saver. Thaw completely and warm in the marinara sauce before assembling your subs.

    How do I prevent my subs from getting soggy?

    Toast the bread lightly before assembly and create a cheese barrier on the bottom half. Serve immediately after preparing for best results.

    What cheese alternatives work well for dairy-sensitive guests?

    Plant-based mozzarella alternatives melt reasonably well. Nutritional yeast mixed into the sauce can add a cheesy flavor without actual cheese.

    Final Thoughts

    These Cheesy Meatball Subs have become a staple in my recipe rotation because they deliver maximum comfort with minimal fuss. There’s something almost magical about the way the melty cheese pulls, the meatballs remain tender, and the sauce brings everything together in perfect harmony. I love watching faces light up when I set these on the table – food that creates joy is always worth making. For more delicious comfort food inspiration, check out my other recipes on Pinterest where I’m constantly sharing new favorites!

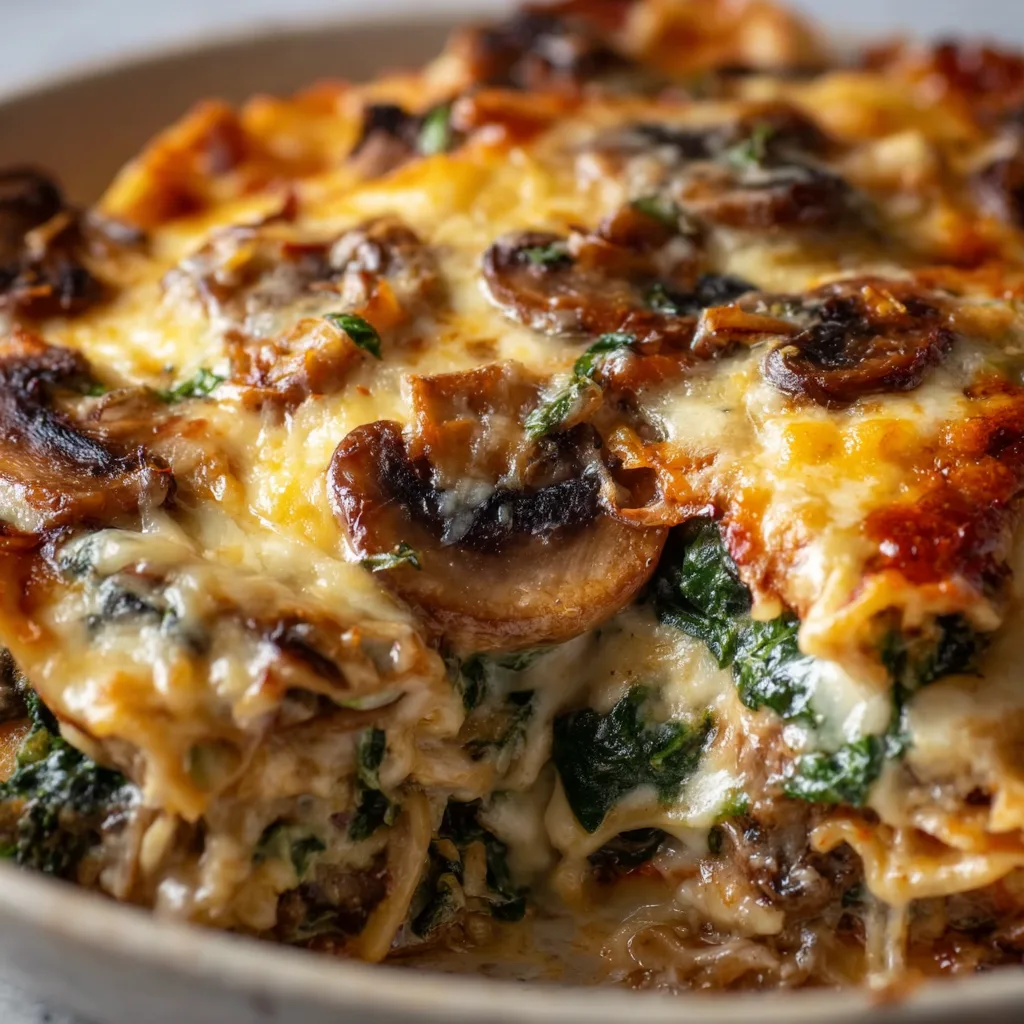
  • Mushroom and Spinach Lasagna That Will Melt Your Heart Instantly

    Mushroom and Spinach Lasagna That Will Melt Your Heart Instantly

    Mushroom and Spinach Lasagna That Will Melt Your Heart Instantly

    Mushroom and Spinach Lasagna is the ultimate comfort food that transforms ordinary ingredients into something extraordinary. The magical combination of earthy mushrooms, vibrant spinach, and creamy cheese creates layers of flavor that will make your taste buds dance. I discovered this recipe during a rainy weekend when I was craving something both nourishing and indulgent. The rich aroma that filled my kitchen as it baked instantly transported me to my grandmother’s Italian kitchen. This vegetarian wonder is perfect for family dinners, special occasions, or when you simply need a hug in food form. Trust me, this lasagna recipe will become your new go-to comfort meal.

    Recipe

    Why You’ll Love This Mushroom and Spinach Lasagna

    A Perfect Balance of Flavors and Textures

    The beauty of this Mushroom and Spinach Lasagna lies in its perfect harmony of flavors. The earthy mushrooms provide a meaty texture and umami depth that satisfies even dedicated carnivores. When I first served this to my brother (a confirmed meat-lover), he didn’t miss the meat at all! The spinach adds a fresh, slightly sweet note while the creamy ricotta and sharp Parmesan create that irresistible cheese pull we all crave. Each bite delivers a different sensation – from the tender pasta to the silky sauce and the slight chew of the mushrooms. It’s a textural symphony that keeps you coming back for more.

    Make-Ahead Friendly for Busy Weeknights

    As someone who juggles work deadlines and family commitments, I adore recipes that work with my schedule. This Mushroom and Spinach Lasagna is wonderfully make-ahead friendly. You can assemble it the night before, refrigerate, and simply pop it in the oven when you’re ready to eat. The flavors actually develop beautifully as it rests overnight! I often make a double batch on Sunday and freeze one for those inevitable crazy weeks. The components can also be prepped separately – sauté the mushrooms and spinach during weekend meal prep, and assembly becomes a breeze on busy weeknights. It’s versatile cooking at its finest.

    Essential Tips & Tricks

    Mastering the Mushroom Mixture

    The secret to exceptional Mushroom and Spinach Lasagna is getting the mushroom mixture just right. Start by thoroughly drying your mushrooms after washing – excess moisture is the enemy of rich flavor and proper texture. I learned this the hard way after one soggy batch! Sauté them in batches rather than crowding the pan, which allows them to brown properly instead of steaming. Add a splash of white wine or sherry to deglaze the pan, scraping up those flavorful brown bits. For depth, I mix varieties – cremini for earthiness, shiitake for meatiness, and a few dried porcini (rehydrated) for intense umami. This multi-layered approach creates a complex flavor profile.

    Perfecting Your Pasta Layers

    The foundation of great lasagna lies in properly prepared pasta sheets. Whether using dried or fresh, the pasta texture makes all the difference. For dried lasagna noodles, cook them about 2 minutes less than the package instructions – they’ll continue cooking in the oven. If using no-boil noodles, I recommend soaking them in hot water for just 3-4 minutes to start the softening process. This prevents them from absorbing too much sauce during baking. When layering, slightly overlap the noodles and ensure each sheet is completely covered with sauce to prevent dry edges. Always finish with a generous layer of sauce and cheese on top to create that irresistible golden, bubbly crust that makes everyone fight for the corner piece.

    Serving Ideas & Creative Variations

    Perfect Pairings for a Complete Meal

    Serve this Mushroom and Spinach Lasagna with thoughtfully chosen sides to create a memorable dining experience. A crisp arugula salad with lemon vinaigrette provides the perfect acidic contrast to the rich lasagna. For bread, nothing beats garlic-rubbed ciabatta or focaccia to soak up the delicious sauce. When I’m hosting dinner parties, I often pair this lasagna with roasted asparagus or broccolini tossed with olive oil, garlic, and red pepper flakes. For wine, reach for a medium-bodied red like Chianti or Sangiovese that complements the earthiness of the mushrooms without overwhelming the delicate spinach. These pairings elevate the meal from simple comfort food to an impressive dinner worthy of special occasions.

    Exciting Twists on the Classic Recipe

    Don’t be afraid to put your personal stamp on this Mushroom and Spinach Lasagna with creative variations. For a protein boost, add crumbled tempeh or plant-based Italian sausage to the mushroom mixture. Dairy-free? Replace traditional cheeses with cashew ricotta and nutritional yeast for a surprisingly authentic flavor. I love swapping in seasonal vegetables – spring peas and asparagus in warmer months or butternut squash and kale in fall. For a Mediterranean twist, add olives, sun-dried tomatoes, and a sprinkle of za’atar between layers. Feeling indulgent? Drizzle truffle oil over the finished lasagna for an elegant touch. These variations keep this recipe exciting year-round while maintaining its comforting essence.

    Storage & Troubleshooting Guide

    Proper Storage for Maximum Freshness

    Proper storage ensures your Mushroom and Spinach Lasagna remains delicious for days. Once cooled completely, cover leftovers tightly with plastic wrap or transfer to airtight containers and refrigerate for up to 4 days. For longer storage, freeze individual portions wrapped in parchment paper, then aluminum foil – this prevents freezer burn while making it easy to grab single servings. Label with the date and use within 3 months. When reheating refrigerated portions, add a tablespoon of water before covering with foil and heating at 350°F until the center reaches 165°F. For frozen portions, thaw overnight in the refrigerator before reheating, or use the microwave’s defrost function followed by regular heating for quick meals.

    Solving Common Lasagna Problems

    Even experienced cooks occasionally encounter lasagna challenges, but these simple fixes ensure perfect results every time. If your lasagna turns out watery, the culprit is likely excess moisture in the vegetables. Next time, cook mushrooms and spinach until all liquid evaporates and drain spinach thoroughly. Too dry? Cover with foil for most of the baking time, removing only for the final 15 minutes to brown the top. If noodles are crunchy at the edges, ensure they’re completely covered with sauce and consider adding more liquid to your recipe. For uneven cooking, rotate the dish halfway through baking. And if cheese isn’t browning properly, a quick 2-minute broil (watching carefully!) creates that perfect golden finish we all crave.

    Frequently Asked Questions

    Can I make Mushroom and Spinach Lasagna ahead of time?

    Absolutely! Assemble up to 24 hours in advance, cover tightly with plastic wrap, and refrigerate. Add 10-15 minutes to the baking time when cooking from cold. The flavors actually improve with a little rest time.

    What’s the best cheese combination for this lasagna?

    I recommend a mixture of whole milk ricotta, mozzarella, and Parmesan. The ricotta provides creaminess, mozzarella delivers that essential cheese pull, and Parmesan adds sharp, salty depth to balance the earthy mushrooms.

    How can I make this lasagna vegan?

    Replace dairy cheeses with cashew ricotta (soaked cashews blended with nutritional yeast, lemon juice, and garlic) and vegan mozzarella shreds. Use plant milk in your béchamel sauce and ensure your pasta is egg-free.

    Why is my Mushroom and Spinach Lasagna soggy?

    Excess moisture is likely the culprit. Be sure to thoroughly cook mushrooms until all liquid evaporates, squeeze spinach completely dry, and don’t oversauce your layers. Let the lasagna rest 15-20 minutes before serving.

    Can I use no-boil noodles in this recipe?

    Yes! No-boil noodles work perfectly in this mushroom and spinach lasagna. Just ensure your sauce is slightly thinner, as these noodles absorb more liquid during baking. Cover tightly with foil for the first 25 minutes of baking.

    Final Thoughts

    This Mushroom and Spinach Lasagna has become my go-to recipe when I want to impress without stress. There’s something magical about pulling a bubbling, golden-topped dish from the oven that brings everyone to the table with anticipation. The layers of flavor create a memorable experience that satisfies on multiple levels – comforting yet sophisticated, hearty yet not heavy. I hope you’ll make this recipe your own, perhaps starting a new tradition in your home as it has in mine. Don’t forget to check out more vegetarian comfort food ideas on our Pinterest for endless inspiration. Happy cooking!
  • Spinach Artichoke Pizza: Irresistibly Creamy & Delicious!

    Spinach Artichoke Pizza: Irresistibly Creamy & Delicious!

    Spinach Artichoke Pizza: Irresistibly Creamy & Delicious!

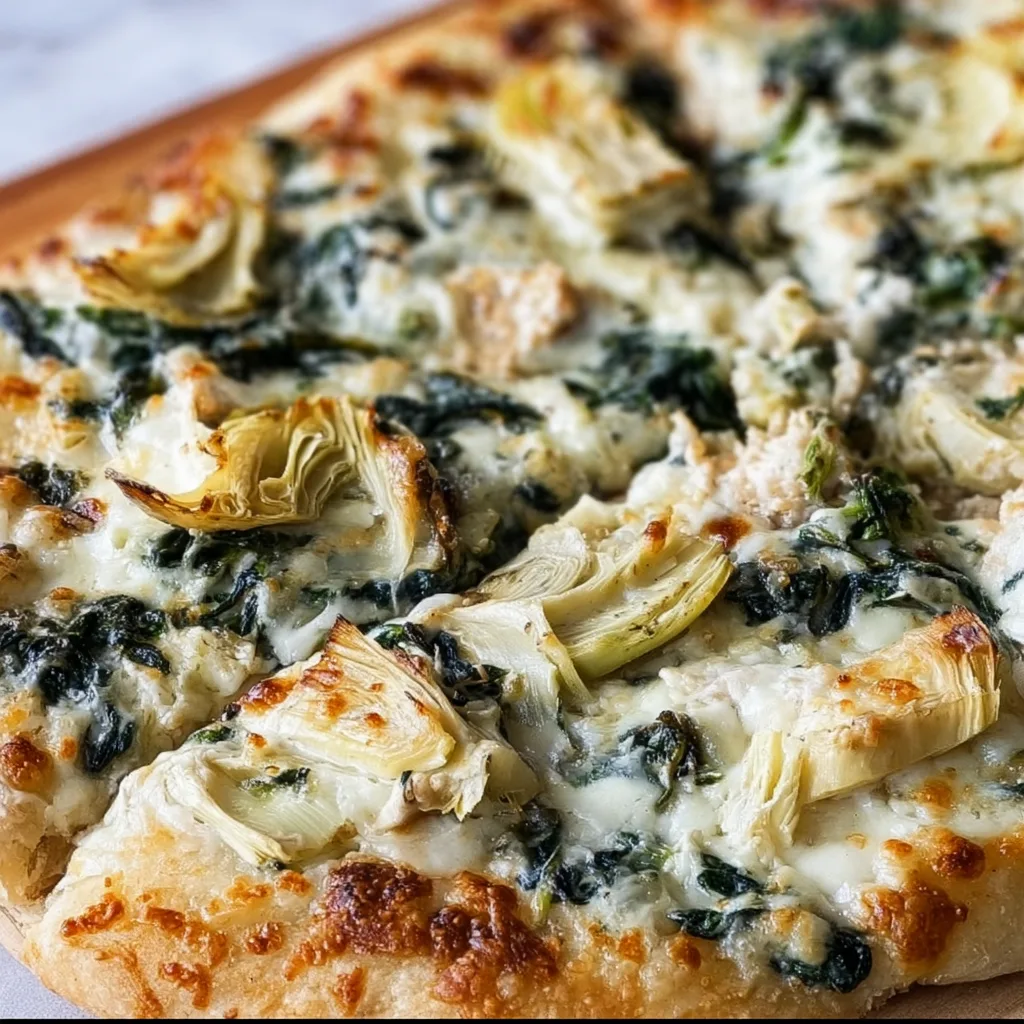
    This Spinach Artichoke Pizza transforms everyone’s favorite creamy dip into an irresistible pizza that’ll have you reaching for seconds before you’ve finished your first slice! The combination of gooey cheese, tender spinach, and tangy artichoke hearts creates a symphony of flavors that dance across your taste buds with each bite. I first created this recipe during a rainy Sunday when I was craving both comfort food and something a bit more sophisticated than my usual pepperoni standby. The moment that first slice hit my plate, with cheese stretching in perfect strings, I knew I’d stumbled onto something magical that I just had to share with you all.

    Recipe

    Why You’ll Love This Spinach Artichoke Pizza

    A Perfect Balance of Flavors and Textures

    There’s something almost magical about the way the creamy white sauce creates the perfect canvas for the slightly bitter spinach and briny artichoke hearts. Each bite delivers a beautiful contrast between the crispy crust and the velvety toppings. I love how the garlic infuses the entire pizza with its aromatic essence, while the combination of mozzarella and parmesan creates that perfect cheese pull we all secretly judge a good pizza by. The first time my neighbor tried this, she declared it “restaurant quality” – which might be the highest compliment a home cook can receive!

    Quick Weeknight Dinner Solution

    This spinach artichoke pizza comes together in just about 30 minutes, making it perfect for those evenings when you want something homemade but hassle-free. Most of the ingredients are pantry and freezer staples in my house – I always keep frozen spinach and a jar of artichoke hearts on hand specifically for this recipe. The dough can be store-bought to save time or made ahead on the weekend. I’ve served this on busy Thursdays after work and for impromptu gatherings when friends drop by unexpectedly, and it’s always met with delight and requests for the recipe.

    Essential Tips & Tricks

    Perfecting Your Pizza Dough

    The foundation of any great pizza is its crust, and this spinach artichoke version deserves the best base possible. For a crispy bottom with a chewy interior, preheat your pizza stone or sheet pan in the oven before adding the dough. I learned this trick from my Italian neighbor, and it makes all the difference! Make sure to thoroughly drain and squeeze dry your spinach – excess moisture is the enemy of crispy pizza. If you’re using fresh spinach instead of frozen, sauté it briefly with a touch of olive oil and garlic before adding it to your pizza for the best flavor development.

    Creating the Ideal Creamy Base

    The white sauce for this spinach artichoke pizza needs to be thick enough to stay put but still spreadable. I recommend making it slightly thicker than you might think necessary, as it will thin out slightly during baking. For the richest flavor, use a combination of cream cheese and sour cream as your base, then enhance it with freshly grated parmesan – never the pre-grated stuff! Adding a pinch of red pepper flakes creates a subtle heat that balances the richness perfectly. For an extra layer of flavor, try roasting your garlic before adding it to the sauce.

    Serving Ideas & Creative Variations

    Perfect Pairings for Your Pizza Night

    This spinach artichoke pizza pairs beautifully with a simple arugula salad dressed with lemon and olive oil – the peppery greens and bright acidity cut through the richness perfectly. For drinks, a crisp Pinot Grigio or a light lager complements without overwhelming the delicate flavors. If you’re hosting a pizza night, consider setting up a DIY pizza station with this as the star, alongside a simpler option like a classic margherita. I love to finish the meal with something light and fruity, like a sorbet or fresh berries, to cleanse the palate after all that delicious creaminess.

    Exciting Twists on the Classic Recipe

    Don’t be afraid to make this recipe your own! Try adding caramelized onions for sweetness, sun-dried tomatoes for tanginess, or even some crumbled bacon for a smoky element. For a seafood twist, top with some cooked shrimp or crabmeat just before serving – it’s reminiscent of my popular crab rangoon pizza but with a different flavor profile. You can also play with different cheeses – smoked gouda adds depth, while a sprinkle of feta brings a salty punch. For a vegan version, use plant-based cream cheese and mozzarella – you’ll be surprised how delicious it still is!

    Storage & Troubleshooting Guide

    Keeping Your Pizza Fresh

    Like most pizzas, spinach artichoke pizza is best enjoyed fresh from the oven when the cheese is perfectly melty and bubbly. However, leftovers can be stored in an airtight container in the refrigerator for up to 3 days. To reheat, avoid the microwave which will make the crust soggy. Instead, place slices on a baking sheet in a 350°F oven for 5-7 minutes, or use a skillet over medium-low heat with a lid to create steam that will remelt the cheese while keeping the crust crispy. If you want to prep ahead, you can make the white sauce up to 2 days in advance.

    Solving Common Pizza Problems

    If your crust turns out soggy, the most likely culprit is excess moisture from the spinach or artichokes. Make sure to thoroughly drain both before adding them to your pizza. Another tip is to par-bake your crust for 3-4 minutes before adding toppings. If your cheese is browning too quickly before the crust is done, try positioning your rack lower in the oven or covering the top loosely with foil for part of the baking time. For those who find their crust too pale, brush the edges with olive oil mixed with a touch of honey for that perfect golden-brown color.

    Frequently Asked Questions

    Can I use fresh spinach instead of frozen for spinach artichoke pizza?

    Absolutely! Just sauté about 6 cups of fresh spinach until wilted, then drain well and chop. Fresh spinach adds a vibrant color and slightly different texture that many people prefer.

    How do I prevent my pizza from getting soggy?

    Ensure all toppings are well-drained and pat dry with paper towels. Pre-baking the crust for 3-4 minutes before adding toppings also creates a barrier against moisture.

    What cheese works best for this recipe?

    A combination of mozzarella for stretch, parmesan for flavor, and cream cheese in the base creates the perfect balance. For extra indulgence, add a sprinkle of fontina or gruyère.

    Can I make this pizza ahead of time?

    Yes! Prepare the components separately and assemble just before baking. Alternatively, par-bake the crust, add toppings, refrigerate, and finish baking when ready to serve.

    Is there a gluten-free option for spinach artichoke pizza?

    Definitely! Use your favorite gluten-free pizza crust or try a cauliflower crust for a lower-carb option. The toppings work beautifully with alternative crusts.

    Final Thoughts

    This spinach artichoke pizza has become my go-to recipe when I want to impress without spending hours in the kitchen. The combination of creamy sauce, tender vegetables, and melty cheese creates something far greater than the sum of its parts. I love seeing friends’ faces light up with that first bite – it’s the ultimate satisfaction for any home cook. Don’t forget to check out more of my pizza creations on Pinterest for endless inspiration. Whether you’re cooking for a crowd or treating yourself to a special dinner, this spinach artichoke pizza delivers comfort and elegance in every slice.

  • Hot Sausage Feta Honey Pizza: Irresistibly Bold Flavor Explosion!

    Hot Sausage Feta Honey Pizza: Irresistibly Bold Flavor Explosion!

    Hot Sausage Feta Honey Pizza: Irresistibly Bold Flavor Explosion!

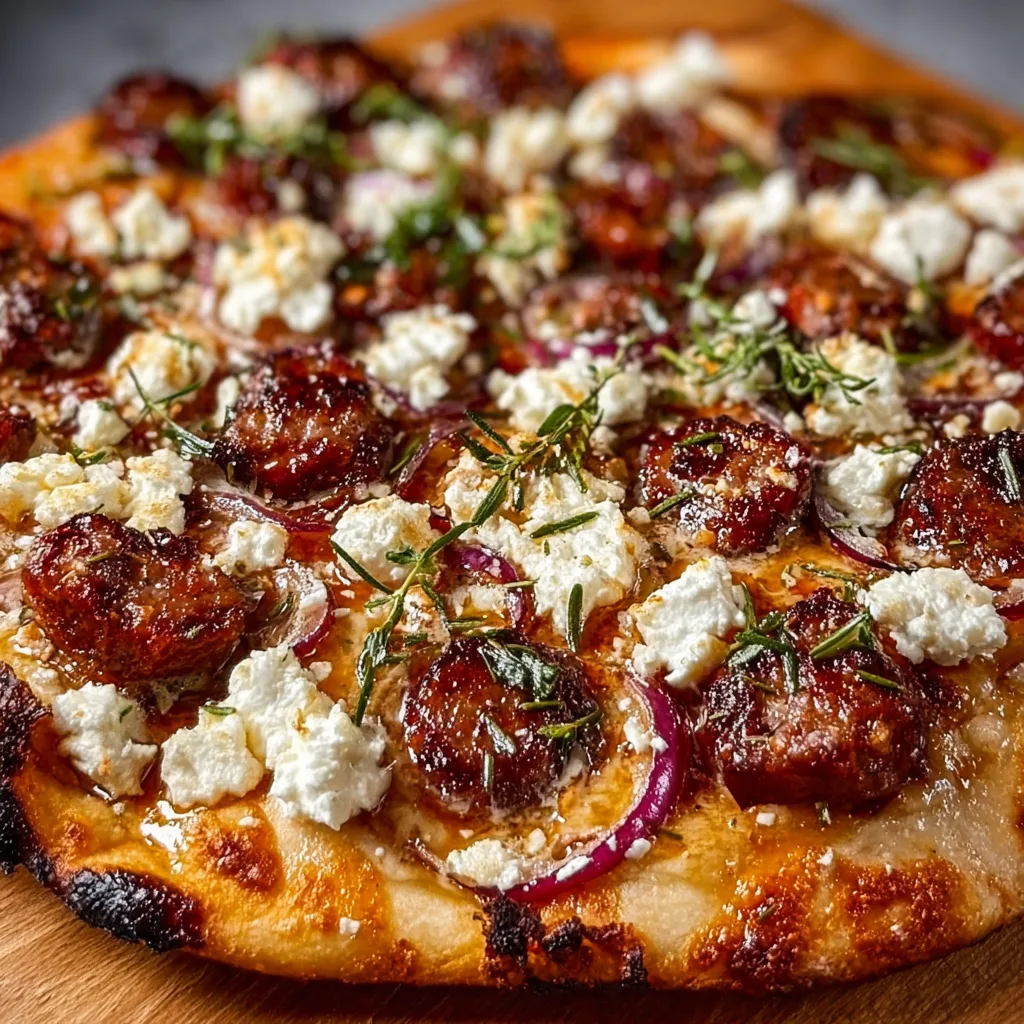
    Hot Sausage Feta Honey Pizza combines all my favorite flavor dimensions in one irresistible bite—spicy Italian sausage, creamy feta, and that drizzle of honey that transforms everything it touches. The first time I made this for my Friday night gathering, my friend Mia actually gasped when she took her first bite. “Sweet, spicy, salty—how is this so perfect?” she whispered. That’s the magic of this pizza! The contrast between the heat of the sausage and the sweet honey creates an experience that’s both comforting and exciting. If you’re looking to elevate your homemade pizza game, this recipe is about to become your new obsession.

    Recipe

    Why You’ll Love This Hot Sausage Feta Honey Pizza

    A Symphony of Contrasting Flavors

    The beauty of this Hot Sausage Feta Honey Pizza lies in its perfect balance of opposing flavors. The spicy kick from the hot Italian sausage wakes up your taste buds while the creamy, tangy feta cools things down just enough. Then comes that golden drizzle of honey—transforming each bite into something magical. I love watching people’s expressions when they taste these flavors together for the first time. It’s like witnessing someone discover a new favorite song! The subtle sweetness cuts through the richness, creating a pizza experience that feels both familiar and entirely new at the same time.

    Quick and Impressive for Any Occasion

    This pizza might taste like it came from a fancy wood-fired restaurant, but it’s surprisingly simple to pull together. The prep time is minimal, especially if you use store-bought dough (I keep some in my freezer for pizza emergencies). You can have this ready in about 30 minutes, making it perfect for impromptu gatherings or those nights when you want something special without the fuss. I’ve made this for casual movie nights and more formal dinner parties alike—it always earns rave reviews. The combination looks stunning with minimal effort, which is my favorite kind of recipe!

    Essential Tips & Tricks

    Perfecting Your Pizza Dough

    Getting your dough right makes all the difference with this Hot Sausage Feta Honey Pizza. I recommend letting store-bought dough come to room temperature for at least 30 minutes before stretching—cold dough fights back! For the best texture, pre-bake your crust for 3-4 minutes before adding toppings. This prevents the dreaded soggy middle that can happen with juicy toppings like sausage. If you’re feeling adventurous, try a garlic-infused crust by brushing the edges with olive oil and minced garlic before baking. That extra step creates an aromatic experience that elevates the entire pizza.

    Balancing Your Toppings

    The key to this pizza’s success is restraint—resist the urge to pile on too many toppings! A light touch works best, especially with strong flavors like hot sausage and feta. I pre-cook my sausage until it’s just done, draining excess fat to prevent a greasy pizza. Crumble the feta rather than using thick chunks for better distribution of flavor. For the honey drizzle, wait until the pizza comes out of the oven—drizzling before baking will just burn the honey. I keep a special hot honey infused with chili flakes for this recipe, adding another dimension to the flavor profile.

    Serving Ideas & Creative Variations

    Perfect Pairings for Your Pizza Night

    This Hot Sausage Feta Honey Pizza deserves accompaniments that complement without overwhelming its complex flavors. A simple arugula salad with lemon vinaigrette makes the perfect counterpoint—the peppery greens and bright acidity balance the richness of the pizza. For drinks, try a crisp Pinot Grigio or a light IPA that won’t compete with the spice. I love serving this pizza as part of a casual spread with Mediterranean Spinach Feta Crisps for a themed night. For dessert, something light and refreshing works best—think berry sorbet or a simple affogato to cleanse the palate.

    Exciting Twists on the Classic Recipe

    Don’t be afraid to play with this versatile recipe! Swap the hot Italian sausage for nduja (spreadable spicy pork) for an even more intense flavor experience. For a Mediterranean twist, add thinly sliced preserved lemons and a sprinkle of za’atar after baking. Vegetarians can substitute spicy roasted mushrooms or plant-based sausage—the honey and feta still create that magical flavor combination. My friend with a fig tree inspired my favorite variation: adding thinly sliced fresh figs alongside the feta for a seasonal treat that elevates the honey notes. The beauty of this pizza is its adaptability while maintaining that sweet-spicy-salty balance.

    Storage & Troubleshooting Guide

    Keeping Your Pizza Fresh

    While this Hot Sausage Feta Honey Pizza is best enjoyed fresh from the oven, leftovers can still be delicious with proper storage. Allow pizza to cool completely before refrigerating to prevent condensation that leads to sogginess. Store slices in an airtight container with parchment paper between layers for up to 3 days. For reheating, skip the microwave! Instead, use a skillet over medium-low heat with a lid until the cheese melts, or a 350°F oven for 5-7 minutes. The crust crisps back up beautifully this way. If you’re meal prepping, consider baking the crust and storing toppings separately, then assembling just before serving.

    Solving Common Pizza Problems

    Even experienced home cooks encounter pizza challenges! If your crust is sticking to the pan, try a generous dusting of cornmeal or semolina flour before placing the dough. For overly soggy pizza, pre-cooking wet ingredients like sausage is crucial. If your edges are burning while the center remains undercooked, create a foil shield for the perimeter during the final minutes of baking. Finding your honey burning? Add it after baking, while the pizza is still hot but out of the oven. And if your feta isn’t melting as expected—that’s actually normal! Feta retains its shape when heated, which provides that delightful textural contrast against the melty mozzarella base.

    Frequently Asked Questions

    Can I make Hot Sausage Feta Honey Pizza ahead of time?

    Yes! Pre-bake the crust for 5 minutes, cool completely, then add toppings except honey. Refrigerate for up to 24 hours, then bake and add honey just before serving.

    What’s the best cheese combination for this pizza?

    I recommend a base of low-moisture mozzarella for meltability, topped with crumbled feta. The mozzarella provides stretch while feta adds tangy flavor contrast.

    Can I freeze leftover pizza?

    Absolutely! Wrap individual slices in plastic wrap, then foil, and freeze for up to 2 months. Reheat from frozen in a 375°F oven until hot.

    Is there a vegetarian alternative for the sausage?

    Try spicy roasted chickpeas or plant-based Italian sausage. The key is maintaining that spicy element to balance the sweet honey.

    How do I prevent my Hot Sausage Feta Honey Pizza from getting soggy?

    Pre-cook and drain the sausage thoroughly, use low-moisture mozzarella, and consider pre-baking your crust for 3-4 minutes before adding toppings.

    Final Thoughts

    This Hot Sausage Feta Honey Pizza has become my go-to recipe whenever I want to impress without spending hours in the kitchen. There’s something magical about the combination of spicy sausage, tangy feta, and sweet honey that keeps everyone coming back for another slice. I’ve watched this pizza turn skeptics into believers with just one bite—that moment when the flavors all come together is pure culinary joy. Whether you’re cooking for a crowd or treating yourself to something special, this pizza delivers an experience that feels both indulgent and accessible. Find more inspiration for your next cooking adventure on Pinterest!

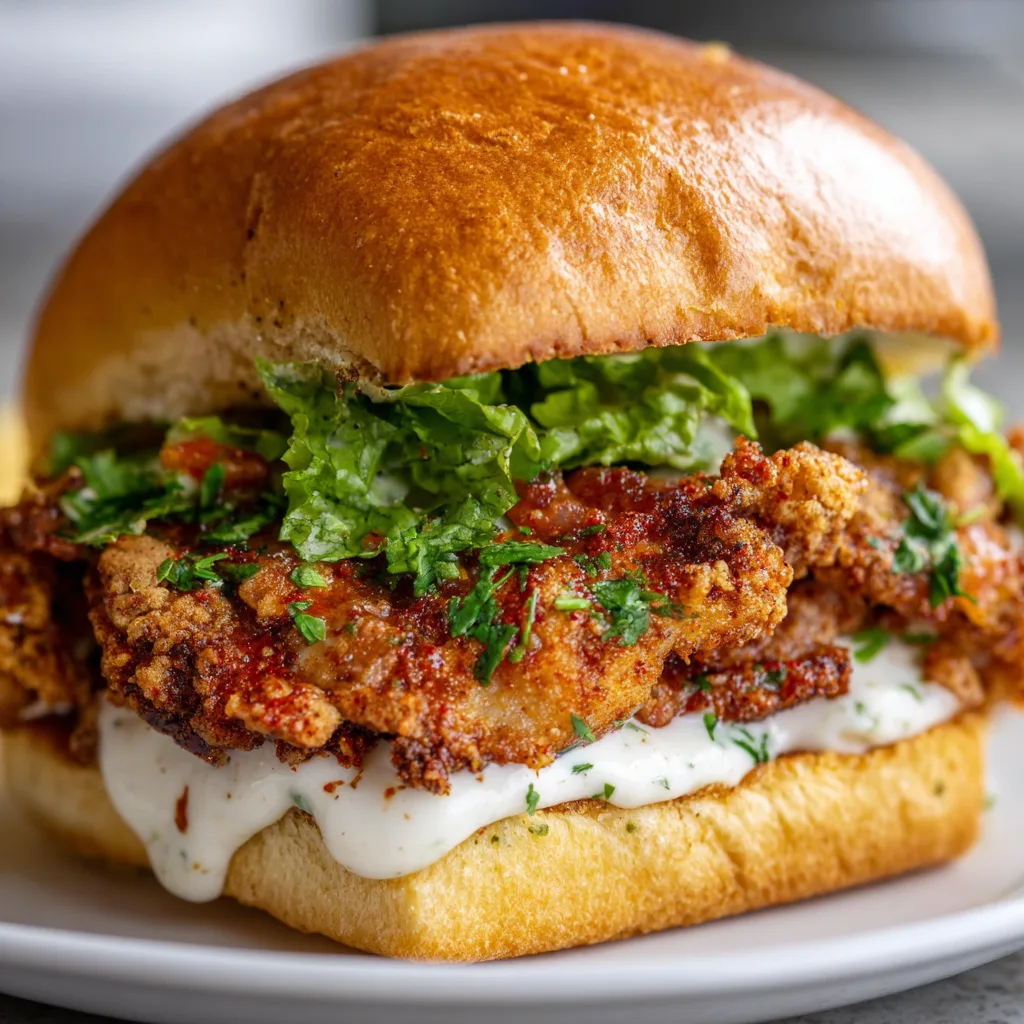
  • Cajun Crispy Chicken Sandwich with Garlic Aioli – Irresistibly Crispy!

    Cajun Crispy Chicken Sandwich with Garlic Aioli – Irresistibly Crispy!

    Cajun Crispy Chicken Sandwich with Garlic Aioli – Irresistibly Crispy!

    There’s something magical about that first bite into a Cajun Crispy Chicken Sandwich with Garlic Aioli – the perfect crunch, the warm kick of spices, and that creamy garlic spread that ties everything together. I still remember making these for my sister’s backyard gathering last summer; the sandwiches disappeared faster than I could snap a picture! This Southern-inspired sandwich brings together bold Cajun spices with a cooling aioli that creates a flavor explosion worthy of your favorite restaurant, but made right in your kitchen. Trust me, once you master this recipe, it’ll become your new go-to for impressing friends or treating yourself after a long day.

    Recipe

    Why You’ll Love This Cajun Crispy Chicken Sandwich with Garlic Aioli

    Perfect Balance of Flavors and Textures

    The magic of this sandwich lies in its perfect harmony of contrasts. The chicken breast is marinated in a zesty Cajun blend that infuses every bite with warmth without overwhelming heat. I love how the crispy, craggy exterior gives way to juicy, tender meat inside – it’s that textural contrast that makes you close your eyes with each bite. The buttery brioche bun adds a touch of sweetness while the cool, creamy garlic aioli cuts through the spice with its rich, velvety texture. Add some crisp lettuce and juicy tomato, and you’ve got a sandwich that hits every note on your palate.

    Quick Enough for Weeknights, Special Enough for Gatherings

    What I adore about this sandwich is its versatility. Despite its impressive flavor profile, it comes together in under 30 minutes, making it weeknight-friendly yet special enough for gatherings. The chicken can be prepped ahead and the aioli made in advance, so assembly is a breeze when hunger strikes. I’ve made these for casual Friday dinners and for impromptu get-togethers, and they never fail to impress. There’s something about serving a perfectly golden, crispy chicken sandwich that makes everyone feel like they’re getting restaurant-quality food without the wait or the price tag.

    Essential Tips & Tricks

    Mastering the Cajun Coating

    The key to that perfect crispy coating starts with proper preparation. I always pat my chicken breasts completely dry before dredging – moisture is the enemy of crispiness! For the ultimate crunch, I use a double-dredging technique: flour mixture, then buttermilk, then back into the flour mixture. Press the coating firmly onto the chicken to create those delicious craggy bits that get extra crispy. For authentic Cajun flavor, toast your spices in a dry pan for 30 seconds before mixing them into your flour – this simple step awakens the essential oils in the spices and makes a noticeable difference in the final flavor profile.

    Perfecting the Garlic Aioli

    The garlic aioli isn’t just a condiment – it’s the crowning glory of this sandwich! For the most flavorful aioli, roast whole garlic cloves until they’re soft and caramelized instead of using raw garlic. This mellows the sharpness while intensifying the savory notes. Let your mayo come to room temperature before mixing for the smoothest texture. A splash of lemon juice brightens everything up, while a pinch of cayenne creates a subtle warmth that complements the Cajun chicken beautifully. If you love garlic-forward flavors, try my Garlic Parmesan Cheeseburger Bombs for another crowd-pleasing option.

    Serving Ideas & Creative Variations

    Perfect Pairings for Your Sandwich

    This Cajun Crispy Chicken Sandwich deserves equally exciting sides! My go-to pairing is sweet potato fries tossed with a pinch of the same Cajun seasoning – the sweetness balances the sandwich’s spice beautifully. For a lighter option, a crisp coleslaw with apple cider vinegar dressing cuts through the richness. On hot summer days, nothing beats serving these with watermelon slices sprinkled with tajin for a sweet-spicy contrast. For drinks, a cold sweet tea or a citrusy lemonade complements the flavors perfectly. These sandwiches also pair wonderfully with my Cajun Chicken Alfredo for a full Southern-inspired feast.

    Exciting Twists on the Classic

    Don’t be afraid to make this sandwich your own! For a Nashville-inspired version, add honey and extra cayenne to your Cajun mix for a sweet-heat combo. Seafood lovers can substitute the chicken with firm white fish or shrimp for an incredible po’boy variation. Vegetarians aren’t left out – cauliflower steaks work beautifully with the same coating and cooking method. For an extra layer of flavor, add smoked gouda or pepper jack cheese. My personal favorite twist is adding pickled jalapeños and a thin layer of blackberry jam – the sweet-spicy-tangy combination is absolutely mind-blowing!

    Storage & Troubleshooting Guide

    Keeping Components Fresh

    For make-ahead convenience, store your components separately. The garlic aioli keeps beautifully in an airtight container in the refrigerator for up to 5 days, developing even deeper flavor overnight. If you have leftover fried chicken, store it uncovered in the refrigerator for up to 2 days – covering it creates condensation that softens the coating. To reheat, avoid the microwave! Instead, place the chicken in a 325°F oven for 10-15 minutes until heated through, which helps restore some crispiness. Store assembled sandwiches wrapped in parchment rather than plastic to prevent sogginess.

    Solving Common Challenges

    If your chicken coating isn’t crisping properly, your oil likely isn’t hot enough. Maintain a steady temperature between 350-375°F – use a thermometer for precision. If the outside browns too quickly while the inside remains undercooked, your heat is too high. For thick chicken breasts, butterfly or pound them to even thickness before cooking. If your aioli breaks or becomes too thin, whisk in an additional egg yolk at room temperature. For a coating that won’t stick, ensure you’re pressing it firmly onto the chicken and letting it rest for 5 minutes before frying to help the coating adhere.

    Frequently Asked Questions

    Can I make this Cajun Crispy Chicken Sandwich with Garlic Aioli ahead of time?

    Yes! Prepare the garlic aioli up to 5 days ahead and store refrigerated. You can also bread the chicken and keep it uncovered in the refrigerator for up to 4 hours before frying for maximum crispiness.

    What’s the best oil for frying the chicken?

    Vegetable, canola, or peanut oil work best due to their high smoke points. I prefer peanut oil for its subtle flavor that complements the Cajun spices without overpowering them.

    Can I bake or air-fry the chicken instead?

    Absolutely! Spray the breaded chicken with cooking oil and bake at 425°F for 20-25 minutes or air-fry at 390°F for 12-15 minutes, flipping halfway through either method.

    How spicy is this sandwich?

    The heat level is customizable. As written, it has a medium kick that most people enjoy. Reduce the cayenne for milder flavor or add extra hot sauce to the aioli for more heat.

    What can I substitute for buttermilk?

    Mix 1 cup milk with 1 tablespoon lemon juice or vinegar and let stand for 5 minutes. Greek yogurt thinned with a little milk also works beautifully as a buttermilk alternative.

    Final Thoughts

    This Cajun Crispy Chicken Sandwich with Garlic Aioli has become my signature dish for good reason – it strikes that perfect balance between comfort food and culinary adventure. There’s something deeply satisfying about creating a sandwich that rivals any restaurant version, with layers of flavor and texture that keep you coming back for another bite. Whether you’re cooking for family, friends, or just treating yourself, this recipe delivers that special something that turns an ordinary meal into a memorable experience. For more delicious recipes and inspiration, follow me on Pinterest where I’m always sharing new favorites!

  • Oven-Fried Feta Rolls with Spicy Chili Honey – Irresistibly Crispy!

    Oven-Fried Feta Rolls with Spicy Chili Honey – Irresistibly Crispy!

    Oven-Fried Feta Rolls with Spicy Chili Honey – Irresistibly Crispy!

    These Oven-Fried Feta Rolls with Spicy Chili Honey might be my new obsession. The first time I made them, the kitchen filled with the most intoxicating aroma – that perfect blend of crispy, golden pastry and melting feta cheese. I watched my dinner guests’ eyes widen as they bit through the crunchy exterior into that creamy, tangy center, then dipped into the sweet-spicy honey that leaves a gentle tingle on your lips. These little bundles of joy strike that perfect balance between impressive and approachable – exactly the kind of recipe I love sharing with you at Recipes Darleen.

    Recipe

    Why You’ll Love These Oven-Fried Feta Rolls with Spicy Chili Honey

    Perfect Texture Contrast

    The magical crunch of these feta rolls is what makes them utterly irresistible. Unlike traditional fried appetizers, these beauties get their golden exterior from the oven, meaning less mess and healthier results. I love how the phyllo pastry creates those delicate, shatteringly crisp layers while protecting the creamy feta inside. The cheese softens without completely melting, maintaining that perfect bite and tanginess. It’s like getting the best of both worlds – the satisfaction of something fried with the convenience of baking.

    Sweet Heat Balance

    The spicy chili honey takes these rolls from delicious to unforgettable. There’s something almost addictive about that first hit of sweetness followed by the gentle warmth of chili that builds with each bite. I’ve found the perfect balance where the honey complements the salty feta without overwhelming it. The drizzle also adds a beautiful visual element, making these rolls look as good as they taste. My friends always ask for extra dipping sauce – it’s that good! The contrast between the cool, tangy feta and warm, spicy honey creates flavor magic.

    Essential Tips & Tricks

    Mastering the Phyllo

    Working with phyllo dough intimidated me until I discovered a few game-changing tricks. First, thaw it completely in the refrigerator overnight – never on the counter. When you’re ready to use it, cover the sheets with a slightly damp kitchen towel to prevent drying. Work quickly but don’t panic if a sheet tears – simply patch it with another piece. The secret to that perfect crispiness? A light brush of olive oil between layers, not butter. This creates a lighter finish that complements the feta perfectly, similar to what I do with my Spinach Feta Puff Pastry.

    Perfecting the Chili Honey

    The honey-chili balance is crucial – too much heat overwhelms the delicate feta, too little and it’s forgettable. I start with good-quality honey (local if possible) and warm it gently with red pepper flakes. Let them infuse for at least 10 minutes before straining if you prefer a smoother drizzle. For extra dimension, add a tiny splash of apple cider vinegar and a pinch of flaky salt. Make this ahead of time – the flavors deepen beautifully after a day or two. Store any leftover honey in a glass jar; it’s fantastic on everything from cheese boards to roasted vegetables.

    Serving Ideas & Creative Variations

    Perfect Pairings

    These feta rolls shine as part of a Mediterranean spread alongside olives, hummus, and fresh vegetables. For a stunning appetizer board, I arrange them with Roasted Red Pepper Hummus and cucumber slices. They’re substantial enough to serve as a light lunch paired with a lemony arugula salad. For dinner parties, I present them standing upright in a shallow bowl of extra chili honey for dramatic effect. The rolls are surprisingly versatile – equally at home at casual gatherings or elegant dinner parties. They’re best served warm but remain delicious at room temperature.

    Exciting Flavor Twists

    While the classic version is divine, these rolls welcome creative adaptations. Try mixing herbs like dill, mint, or oregano into the feta for a fresh dimension. For a sweeter variation, add a thin slice of fig or date before rolling. Adventurous eaters might enjoy a version with crumbled blue cheese and a drizzle of hot honey. My personal favorite twist includes a sprinkle of za’atar and lemon zest mixed into the cheese. The basic technique remains the same, making this a wonderfully adaptable recipe that keeps guests guessing what delicious surprise awaits inside.

    Storage & Troubleshooting Guide

    Make-Ahead Options

    These rolls offer excellent meal prep potential without sacrificing quality. You can assemble them up to 24 hours ahead, cover tightly with plastic wrap, and refrigerate unbaked. When ready to serve, simply brush with olive oil and bake. Already baked rolls reheat beautifully in a 350°F oven for 5-7 minutes – avoid the microwave which makes them soggy. The chili honey keeps for up to two weeks in an airtight container at room temperature, making it perfect for advance preparation. I often double the honey recipe to have extra on hand for other dishes.

    Common Challenges Solved

    The biggest challenge with these rolls is preventing phyllo frustration. If your phyllo tears excessively, it’s likely too dry – work more quickly and ensure your damp towel is covering the sheets. If the rolls unfurl during baking, you may have overfilled them or not sealed the edges properly with olive oil. For soggy bottoms, try preheating your baking sheet before adding the rolls. If your honey crystallizes, gently warm it in a water bath. Remember that imperfect-looking rolls still taste amazing – I’ve never had guests complain about a less-than-perfect shape!

    Frequently Asked Questions

    Can I use a different cheese instead of feta?

    Absolutely! Goat cheese works beautifully, as does ricotta mixed with parmesan for tang. Just ensure whatever cheese you choose isn’t too wet, or your phyllo will become soggy.

    How spicy are these Oven-Fried Feta Rolls with Spicy Chili Honey?

    The spice level is customizable. Start with ½ teaspoon red pepper flakes in your honey for mild heat, increasing to 1-2 teaspoons for more intense warmth.

    Can I make these gluten-free?

    Traditional phyllo contains gluten, but you can experiment with gluten-free puff pastry as an alternative. The texture will differ slightly but still delivers that delicious crispy exterior.

    How far in advance can I make the chili honey?

    The honey actually improves with time! Make it up to two weeks ahead and store in an airtight container at room temperature for the flavors to develop.

    Can these be frozen?

    Yes! Freeze unbaked rolls on a baking sheet, then transfer to a freezer bag for up to 1 month. Bake from frozen, adding 5-7 minutes to the cooking time.

    Final Thoughts

    These Oven-Fried Feta Rolls with Spicy Chili Honey represent everything I love about cooking – simple ingredients transformed into something extraordinary. They’re the perfect balance of crispy and creamy, sweet and spicy, familiar and surprising. Every time I serve them, they disappear within minutes, leaving nothing but crumbs and requests for the recipe. I hope they bring the same joy to your table as they have to mine! For more delicious appetizer ideas, visit my Pinterest where I’m always sharing new inspiration.

  • Southern Banana Cobbler: Irresistible Comfort Dessert You’ll Crave!

    Southern Banana Cobbler: Irresistible Comfort Dessert You’ll Crave!

    Southern Banana Cobbler: Irresistible Comfort Dessert You’ll Crave!

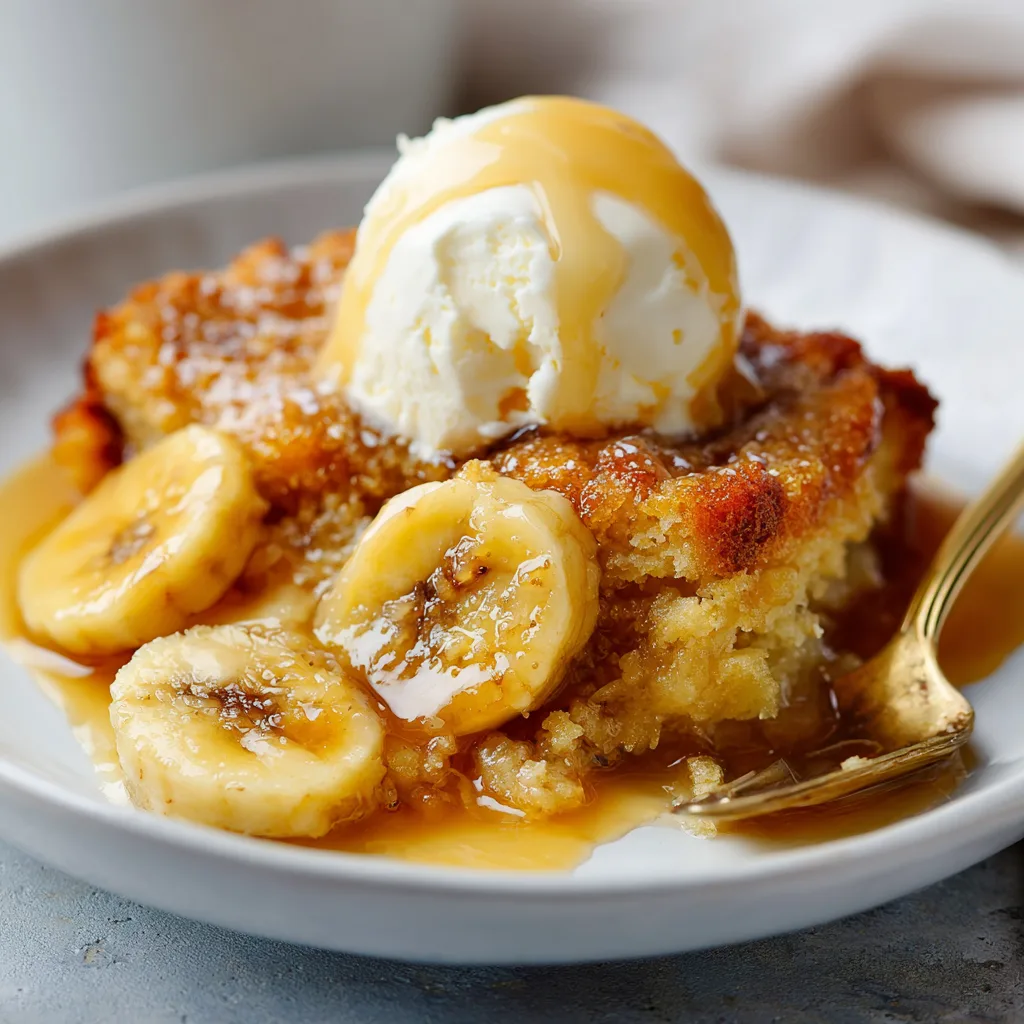
    Southern Banana Cobbler brings together the sweet comfort of caramelized bananas with a buttery, golden crust that’s pure Southern heaven in every bite. Growing up in my grandmother’s kitchen, this dessert was our Sunday afternoon tradition – warm, fragrant, and absolutely irresistible. The magic happens when ripe bananas melt into a brown sugar syrup, creating that perfect balance of gooey sweetness and crisp topping. If you love desserts that feel like a warm hug, this classic banana bread cinnamon rolls recipe has similar cozy vibes, but today’s cobbler truly celebrates banana in its most glorious form.

    Recipe

    Why You’ll Love This Southern Banana Cobbler

    The Perfect Balance of Textures

    This cobbler delivers an incredible textural experience that keeps you coming back for “just one more bite.” The caramelized banana layer transforms into a luscious, almost pudding-like consistency that melts in your mouth. Meanwhile, the buttery cobbler topping bakes to golden perfection – slightly crisp on the outside while remaining tender inside. I still remember my first attempt at making this for my in-laws; the moment everyone fell silent at the table, focusing only on scraping every last bit from their bowls, I knew I had a winner.

    Simple Ingredients, Extraordinary Flavor

    What makes this Southern Banana Cobbler truly special is how it transforms everyday pantry staples into something magical. Ripe bananas develop a deep, honeyed sweetness when baked with brown sugar and vanilla. The touch of cinnamon and nutmeg adds that signature Southern warmth without overwhelming the fruit’s natural flavor. Last summer, when my banana bunch ripened faster than expected during a heatwave, this recipe saved the day – turning potential waste into the dessert everyone requested for weeks afterward.

    Essential Tips & Tricks

    Banana Selection & Preparation

    The secret to an exceptional Southern Banana Cobbler lies in choosing the right bananas. Look for fruits with plenty of brown spots – they’re sweeter and will create that rich, caramel-like base we’re after. When slicing, keep them about ¼-inch thick for the perfect texture. I’ve found that lightly tossing the banana slices in lemon juice prevents browning while adding a subtle brightness that balances the dessert’s sweetness. My grandmother taught me this trick, and it’s made all the difference in preserving that beautiful golden color.

    Perfecting Your Cobbler Topping

    The crowning glory of any Southern Banana Cobbler is its buttery topping. For the best results, keep your butter cold until the very last minute, then cut it into small cubes before incorporating it into your dry ingredients. Use a pastry cutter or two forks to create a coarse, pea-sized mixture – this creates those delightful pockets of buttery goodness. Resist the urge to overmix! When I’m feeling indulgent, I sprinkle the top with a little turbinado sugar for an extra crispy, sparkly finish that makes everyone’s eyes light up.

    Serving Ideas & Creative Variations

    Elevate With Perfect Pairings

    Southern Banana Cobbler reaches new heights when served with the right accompaniments. My personal favorite is a scoop of vanilla bean ice cream melting slowly over the warm cobbler – that hot-cold contrast is simply divine. For a more traditional approach, try a dollop of lightly sweetened whipped cream or a drizzle of caramel sauce. During holiday gatherings, I like to serve this alongside my pecan pie bread pudding for a dessert table that has everyone coming back for seconds.

    Seasonal & Dietary Adaptations

    This versatile dessert welcomes creative twists to suit any season or dietary need. In summer, add fresh berries or peaches to the banana layer for a fruity medley. Fall calls for chopped apples and extra cinnamon. For a tropical variation, mix in pineapple chunks and coconut flakes. Easily make this gluten-free by substituting a quality all-purpose gluten-free flour blend. Vegan guests? Use coconut oil instead of butter and serve with non-dairy ice cream. The possibilities are endless while keeping that Southern comfort intact.

    Storage & Troubleshooting Guide

    Keeping It Fresh

    Southern Banana Cobbler is best enjoyed warm from the oven, but leftovers (if you’re lucky enough to have any!) store beautifully. Cover the cooled cobbler with plastic wrap or transfer to an airtight container and refrigerate for up to 3 days. To reheat, warm individual portions in the microwave for 30-45 seconds or place the entire cobbler (in an oven-safe dish) in a 300°F oven until heated through. The topping may lose some crispness when stored, but a quick trip under the broiler for 1-2 minutes will restore that golden crunch.

    Solving Common Issues

    If your cobbler turns out too soupy, the culprit is likely extra-ripe bananas releasing excess moisture. Next time, add an extra tablespoon of cornstarch to the fruit mixture. For a topping that’s too dry or crumbly, you probably need a touch more butter or liquid. Remember that baking is affected by humidity and altitude – don’t hesitate to adjust slightly. My first cobbler in our new mountain home needed an extra 10 minutes in the oven and a bit more liquid in the topping. Trust your instincts and learn from each bake!

    Frequently Asked Questions

    Can I make Southern Banana Cobbler ahead of time?

    Yes! Prepare the fruit filling and topping separately up to a day ahead. Store refrigerated, then assemble and bake when ready to serve for that fresh-from-the-oven experience.

    How ripe should bananas be for the best cobbler?

    Very ripe bananas with plenty of brown spots work best – they’re sweeter and create a more luscious texture when baked.

    Can I freeze Southern Banana Cobbler?

    Absolutely. Cool completely, wrap tightly, and freeze for up to 3 months. Thaw overnight in the refrigerator and reheat in a 325°F oven until warmed through.

    What’s the difference between a cobbler and a crisp?

    Cobblers have a biscuit-like topping, while crisps feature an oat-based streusel. Both are delicious, but cobblers offer that classic Southern-style comfort.

    Is Southern Banana Cobbler served hot or cold?

    It’s traditionally served warm with cold ice cream for contrast, but room temperature is lovely too, especially for breakfast the next day!

    Final Thoughts

    This Southern Banana Cobbler has been my go-to recipe for transforming simple ingredients into something truly special. There’s something magical about the way those caramelized bananas bubble up around the golden crust, filling your home with an irresistible aroma. Whether it’s a casual family dinner or a special gathering, this dessert brings people together around the table with smiles and empty plates. I’d love to see your creations – tag me on Pinterest when you make your own version of this Southern classic!