Author: Darleen Vance

  • Cowboy Butter Steak & Broccoli Linguine That Will Blow Your Mind!

    Cowboy Butter Steak & Broccoli Linguine That Will Blow Your Mind!

    Cowboy Butter Steak & Broccoli Linguine That Will Blow Your Mind!

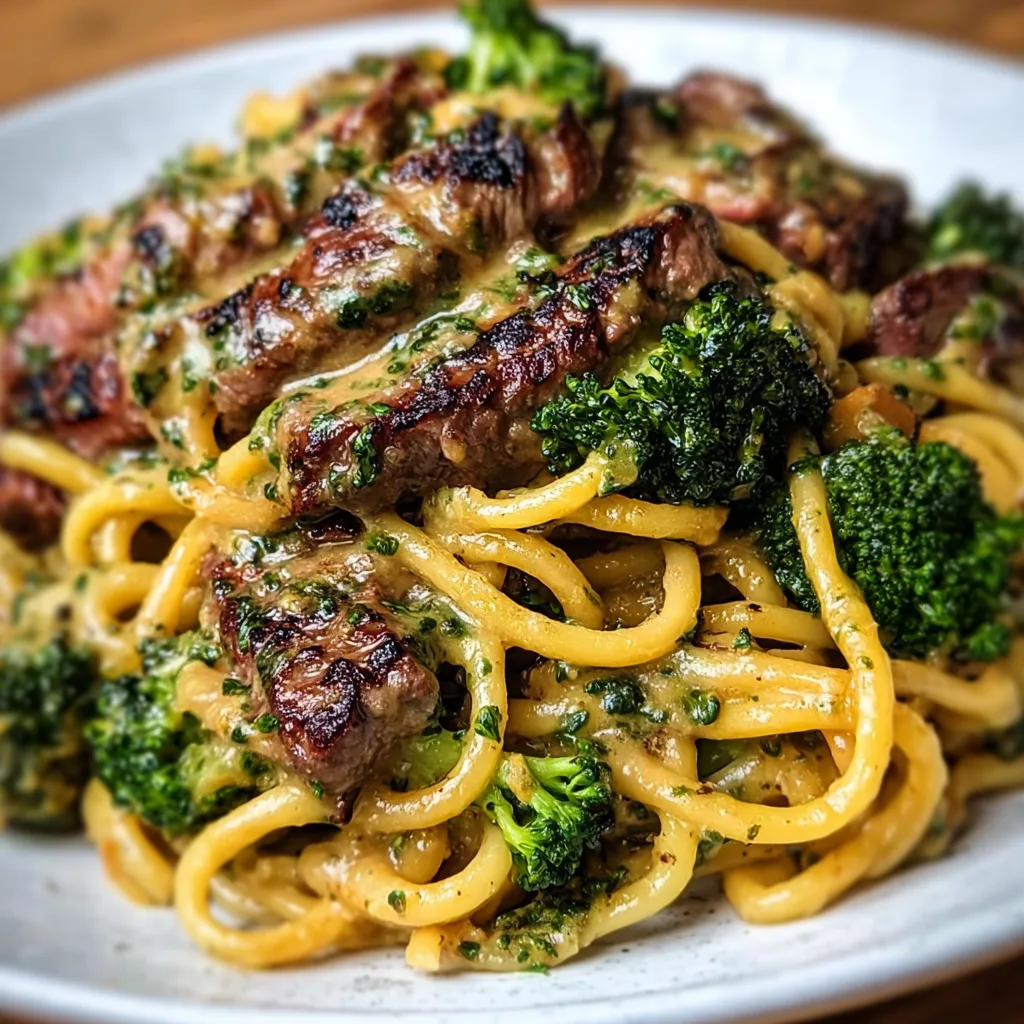
    Cowboy Butter Steak & Broccoli Linguine is my absolute go-to when I’m craving something that balances indulgence with actual nutrition. The first time I made this, my kitchen filled with the intoxicating aroma of garlic and herbs melting into butter, and I knew I’d struck culinary gold. This dish combines perfectly seared steak strips with al dente linguine and crisp-tender broccoli, all enveloped in a rich, herb-infused cowboy butter sauce that will make your taste buds do a little happy dance. Trust me, this is the kind of meal that turns regular weeknights into something special, without hours of effort. Ready to dive into this flavor-packed pasta creation?

    Recipe

    Why You’ll Love This Cowboy Butter Steak & Broccoli Linguine

    A Perfect Balance of Flavors and Textures

    There’s something magical about the combination of tender steak, perfectly cooked pasta, and fresh broccoli all coated in that signature cowboy butter. Each bite delivers a harmonious blend of savory, herbaceous notes with just a hint of heat from red pepper flakes. The steak provides satisfying protein while the broccoli adds a fresh crunch that balances the richness of the sauce. I love how the linguine’s flat shape captures little pools of the butter sauce, ensuring flavor in every forkful. When my sister first tried this dish, she immediately demanded the recipe, claiming it was “restaurant quality” but so much more affordable to make at home.

    Quick and Impressive for Any Occasion

    This dish has become my secret weapon for effortless entertaining. It takes just 30 minutes from start to finish, yet looks and tastes like you spent hours in the kitchen. I’ve served it for casual family dinners and impromptu gatherings with equal success. The vibrant colors of the dish—the pink-centered steak, bright green broccoli, and golden butter sauce—create a presentation that’s as appealing to the eyes as it is to the palate. Last month when my in-laws dropped by unexpectedly, I whipped this up and they’re still talking about it. The best part? It’s sophisticated enough for special occasions but simple enough for a Tuesday night.

    Essential Tips & Tricks

    Perfecting Your Steak Technique

    The key to this dish is getting your steak just right. I recommend using sirloin or ribeye for the perfect balance of tenderness and flavor. Always bring your steak to room temperature before cooking—this ensures even cooking throughout. Season generously with salt and pepper just before it hits the pan. For medium-rare perfection, sear the steak in a screaming hot cast iron skillet for about 3-4 minutes per side, then let it rest for at least 5 minutes before slicing against the grain into thin strips. This resting period is non-negotiable! It allows the juices to redistribute, resulting in moist, flavorful meat rather than a sad puddle on your cutting board.

    Creating the Ultimate Cowboy Butter

    The heart and soul of this dish is the cowboy butter, and it deserves your full attention. Start with high-quality unsalted butter—this gives you control over the salt level. Melt it slowly over medium-low heat to prevent burning, then add minced garlic and let it become fragrant but not brown. The herb blend is crucial: fresh parsley, chives, and a touch of thyme create that signature flavor profile. Don’t skip the lemon zest and juice; they add brightness that cuts through the richness. For an extra flavor boost, try adding a splash of white wine when you’re melting the butter—it elevates the sauce to new heights.

    Serving Ideas & Creative Variations

    Perfect Pairings for a Complete Meal

    This Cowboy Butter Steak & Broccoli Linguine stands beautifully on its own, but a few thoughtful sides can transform it into a feast. A simple arugula salad with lemon vinaigrette provides a peppery, fresh contrast to the rich pasta. Crusty garlic bread is perfect for soaking up extra sauce—I’ve seen guests practically licking their plates otherwise! For wine pairing, a medium-bodied Merlot or Pinot Noir complements the steak without overpowering the delicate butter sauce. If you’re serving this for a special occasion, start with these delicious Crispy Potato Cheese Bombs as an appetizer—the flavors complement each other perfectly.

    Exciting Twists on the Classic Recipe

    While the original recipe is divine, don’t be afraid to make it your own! Swap the steak for grilled chicken or plump shrimp for equally delicious results. Vegetarians can substitute portobello mushrooms, which provide a satisfying meaty texture. Beyond broccoli, asparagus, snap peas, or broccolini all work beautifully. For a lighter version, use zucchini noodles in place of linguine. My personal favorite variation includes adding sun-dried tomatoes and a sprinkle of toasted pine nuts for texture. For a decadent twist, stir in a tablespoon of cream cheese at the end—it creates an even silkier sauce that clings to every strand of pasta.

    Storage & Troubleshooting Guide

    Keeping Leftovers Fresh and Delicious

    Properly stored leftovers of this Cowboy Butter Steak & Broccoli Linguine can be almost as good as the fresh version. Allow everything to cool completely before transferring to airtight containers. Refrigerate for up to three days—any longer and the broccoli starts to get sad and mushy. When reheating, add a splash of chicken broth or a small pat of butter to revive the sauce. For best results, reheat gently on the stovetop rather than in the microwave; this prevents the steak from overcooking and turning tough. I like to store the components separately when possible—pasta in one container, steak and broccoli in another—then combine during reheating.

    Solving Common Recipe Challenges

    Even experienced cooks encounter hiccups! If your sauce breaks or looks greasy, whisk in a teaspoon of cold water to help it re-emulsify. Pasta sticking together? You likely didn’t use enough cooking water or oil after draining. Always reserve some pasta water before draining—this starchy liquid is liquid gold for fixing too-thick sauces. If your steak turns out tougher than desired, slice it even thinner and let it gently warm in the sauce. Broccoli too crunchy? Cover the pan for the last minute of cooking to steam it slightly. Too soft? Plunge it into ice water immediately after blanching to stop the cooking process.

    Frequently Asked Questions

    Can I make Cowboy Butter Steak & Broccoli Linguine ahead of time?

    I recommend preparing components separately up to 24 hours ahead. Make the cowboy butter and refrigerate, cook and slice the steak, and blanch the broccoli. Cook pasta fresh, then combine everything just before serving.

    What’s the best cut of steak for this recipe?

    Ribeye or sirloin offer the best flavor and tenderness. Flank steak works well too if sliced thinly against the grain. Whatever cut you choose, make sure it’s at least 1-inch thick for optimal cooking.

    Can I substitute the linguine with another pasta?

    Absolutely! Fettuccine works beautifully, and spaghetti is great too. For a heartier dish, try pappardelle. The key is choosing a pasta that can hold up to the robust cowboy butter sauce.

    How spicy is Cowboy Butter Steak & Broccoli Linguine?

    The traditional recipe has a mild kick from red pepper flakes. Adjust to your preference—omit them completely for no heat, or double the amount for a more pronounced spice level.

    What if I don’t have fresh herbs for the cowboy butter?

    While fresh herbs provide the brightest flavor, dried herbs work in a pinch. Use one-third the amount called for in the recipe, as dried herbs are more concentrated than fresh.

    Final Thoughts

    This Cowboy Butter Steak & Broccoli Linguine has become more than just a recipe in my household—it’s a reliable friend that never disappoints. There’s something deeply satisfying about creating a dish that balances indulgence with nourishment, all while being completely doable on a busy weeknight. The way the herb-infused butter coats each strand of pasta, the juicy steak, and the vibrant broccoli creates a symphony of flavors that feels like a warm hug on a plate. I hope this becomes a beloved staple in your recipe collection too! Don’t forget to check out more pasta inspirations on Pinterest.
  • Southern-Style BBQ Egg Rolls: Crispy, Irresistible Flavor Bombs!

    Southern-Style BBQ Egg Rolls: Crispy, Irresistible Flavor Bombs!

    Southern-Style BBQ Egg Rolls: Crispy, Irresistible Flavor Bombs!

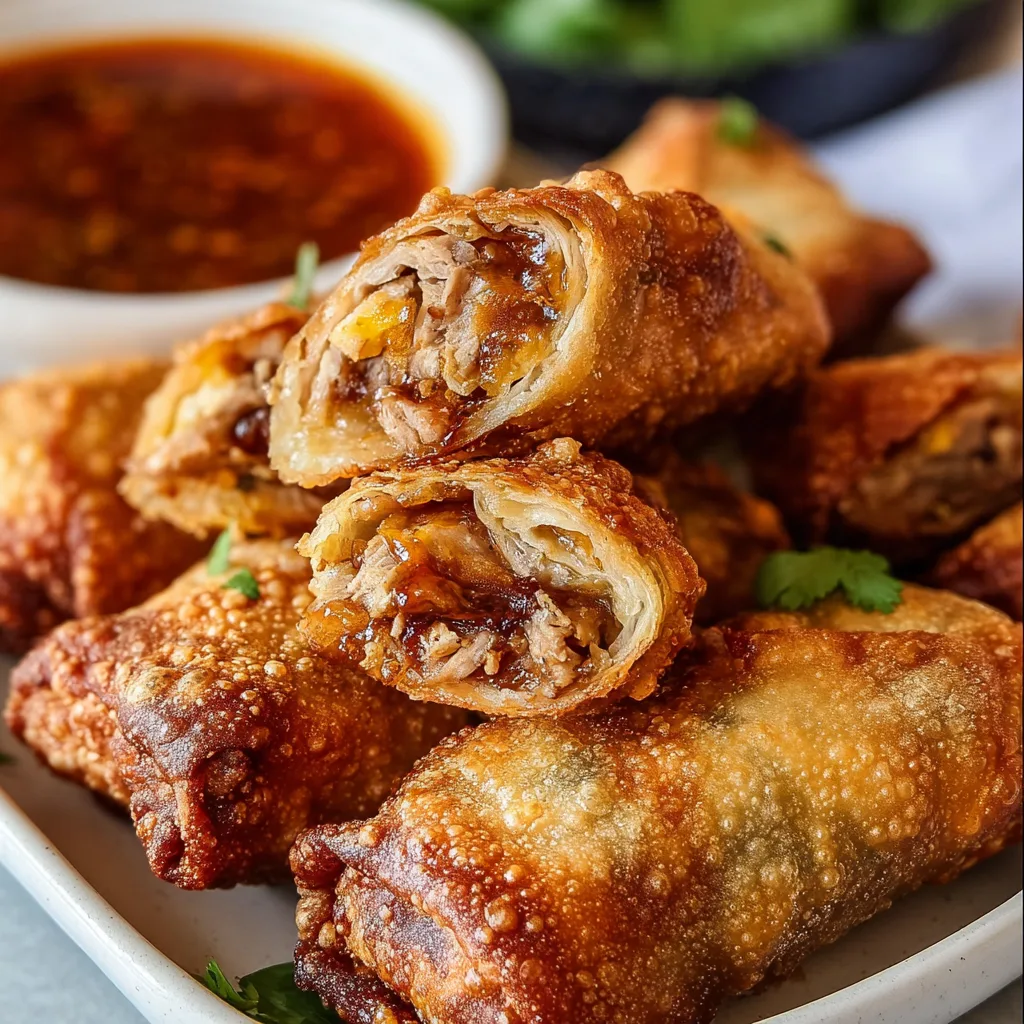
    The moment I first tasted Southern-Style BBQ Egg Rolls, I knew I’d discovered something magical. These crispy, golden parcels combine the smoky-sweet flavors of classic Southern barbecue with the satisfying crunch of egg roll wrappers. Picture tender pulled pork, tangy coleslaw, and just enough cheese to make everything melt together in perfect harmony. They’re the ultimate fusion food—bringing together Asian technique with down-home Southern comfort. When my neighbor brought these to our block party last summer, I immediately begged for the recipe, and now they’re my go-to for any gathering where I want to impress without spending hours in the kitchen.

    Recipe

    Why You’ll Love These Southern-Style BBQ Egg Rolls

    Perfect Party Food That Disappears Fast

    These egg rolls are the definition of crowd-pleasing. I’ve never seen appetizers vanish so quickly! The combination of textures—crispy exterior giving way to tender, saucy meat—creates an irresistible bite that guests can’t stop talking about. They’re substantial enough to satisfy hungry friends but still handheld and portable, making them perfect for everything from game day gatherings to casual dinner parties. Plus, they’re unexpected enough to earn you serious hosting points. I love watching people’s faces light up with that “Why didn’t I think of that?” expression after their first bite.

    Make-Ahead Friendly for Stress-Free Entertaining

    One of my favorite things about these Southern-Style BBQ Egg Rolls is how prep-friendly they are. You can assemble them hours before your guests arrive and simply fry or bake when you’re ready to serve. The filling actually benefits from a little time for the flavors to meld together. This make-ahead magic has saved me countless times, like when my in-laws announced they were “just dropping by” with friends. I pulled my pre-rolled egg rolls from the fridge, fried them up in minutes, and somehow looked like I’d planned an elaborate spread all along. Talk about a hostess victory!

    Essential Tips & Tricks

    Perfecting Your Filling Consistency

    Getting the moisture balance right is crucial for perfect egg rolls. Too wet, and you’ll end up with soggy wrappers that tear; too dry, and they’ll lack that luscious, saucy quality that makes BBQ so crave-worthy. I drain my pulled pork well before mixing with sauce, and if using coleslaw, I let it sit in a strainer for about 10 minutes. Pat ingredients with paper towels if needed. For extra insurance against sogginess, try mixing a tablespoon of cornstarch into your BBQ sauce—it helps absorb excess moisture while thickening the sauce beautifully, similar to what makes those Crispy Teriyaki Chicken Wonton Tacos so perfect.

    Rolling Technique for Leak-Proof Results

    The tight seal is your secret weapon for professional-looking egg rolls. Place your filling slightly off-center in the lower third of the wrapper, then fold the bottom up over the filling. Next, fold in both sides like you’re making an envelope, and roll upward. The key moment? That final edge needs to be sealed properly—I brush it with a beaten egg or water slurry and press firmly. Don’t overfill! About 2-3 tablespoons of filling per roll is perfect. I learned this the hard way after a spectacular blowout during frying that left my kitchen (and my favorite shirt) splattered with BBQ sauce.

    Serving Ideas & Creative Variations

    Dipping Sauces That Elevate Every Bite

    The right dipping sauce transforms these egg rolls from delicious to unforgettable. My go-to is a simple Alabama white BBQ sauce—mayonnaise-based with a hint of vinegar and horseradish that cuts through the richness perfectly. For something sweeter, try a peach-bourbon sauce with a kick of cayenne. For a tangy option, mix ranch dressing with buffalo sauce. Set up a sauce bar and let guests customize their experience. This approach works beautifully alongside Loaded BBQ Chicken Sweet Fries for a themed spread that showcases different BBQ styles from across the South.

    Regional BBQ Twists Worth Trying

    Each Southern region brings its own BBQ personality to these egg rolls. For a Carolina-style version, use vinegar-based pulled pork with a mustard slaw. Memphis-style? Go heavy on the dry rub and lighter on sauce. Texas-inspired rolls call for brisket instead of pork, with a spicier kick and no coleslaw. My personal favorite is a Kansas City approach with sweet, molasses-rich sauce and smoked gouda cheese. Don’t be afraid to experiment with different meats too—chicken, turkey, or even jackfruit for vegetarian guests. The egg roll wrapper is just your canvas for BBQ artistry.

    Storage & Troubleshooting Guide

    Freezing and Reheating for Later Enjoyment

    These Southern-Style BBQ Egg Rolls are freezer-friendly champions. To freeze uncooked rolls, arrange them in a single layer on a parchment-lined baking sheet until solid, then transfer to a freezer bag. They’ll keep for up to three months! For cooked leftovers (if you’re lucky enough to have any), refrigerate for 3-4 days or freeze for up to a month. The best reheating method is a 375°F oven for 10-15 minutes from refrigerated, or 15-20 minutes from frozen. Microwaving works in a pinch but sacrifices the crispy texture that makes these so special.

    Troubleshooting Common Egg Roll Challenges

    Even experienced cooks encounter egg roll emergencies. If your wrappers tear during rolling, don’t panic—patch with a small piece of another wrapper using egg wash as “glue.” Filling oozing during frying usually means your oil isn’t hot enough (aim for 350°F) or your seals weren’t tight. If your rolls are browning too quickly but remain raw inside, your oil is too hot. For soggy results, try double-frying: a quick first fry, rest for 5 minutes, then fry again until golden. And remember that baking at 425°F for 15-20 minutes is a fantastic alternative to frying, giving you crispy results with less mess.

    Frequently Asked Questions

    Can I make Southern-Style BBQ Egg Rolls ahead of time?

    Absolutely! Assemble up to 24 hours ahead and refrigerate covered with a damp paper towel to prevent drying. For longer storage, freeze uncooked rolls and cook directly from frozen, adding 3-5 minutes to cooking time.

    What’s the best meat to use for authentic flavor?

    Pork shoulder slow-cooked until tender gives the most authentic Southern BBQ flavor, but chicken thighs, beef brisket, or even jackfruit for vegetarians work beautifully. The key is long, slow cooking with plenty of seasoning.

    Can I bake these instead of frying?

    Yes! Brush with oil and bake at 425°F for 15-20 minutes, turning halfway through. They’ll be slightly less crispy than fried but still delicious and much lighter.

    How do I prevent my egg rolls from becoming soggy?

    Drain filling ingredients thoroughly before assembling and let rolls rest 10-15 minutes after rolling. Ensure your oil is hot enough (350°F) before frying, and never crowd the pan.

    What sides pair well with these egg rolls?

    Serve with classic Southern sides like mac and cheese, collard greens, or cornbread. For a lighter option, a tangy vinegar-based slaw or pickled vegetables provide nice contrast.

    Final Thoughts

    Southern-Style BBQ Egg Rolls represent everything I love about modern comfort food—they’re creative, approachable, and packed with familiar flavors in a surprising package. They honor traditional BBQ techniques while bringing something new to the table. Whether you’re hosting a backyard gathering or looking for a unique potluck contribution, these crispy, savory bundles deliver big flavor in every bite. Don’t forget to share your creations on Pinterest and tag me—I’m always inspired by your personal BBQ egg roll variations!

  • Mississippi Little Smokies: Irresistibly Savory Snack You’ll Crave!

    Mississippi Little Smokies: Irresistibly Savory Snack You’ll Crave!

    Mississippi Little Smokies: Irresistibly Savory Snack You’ll Crave!

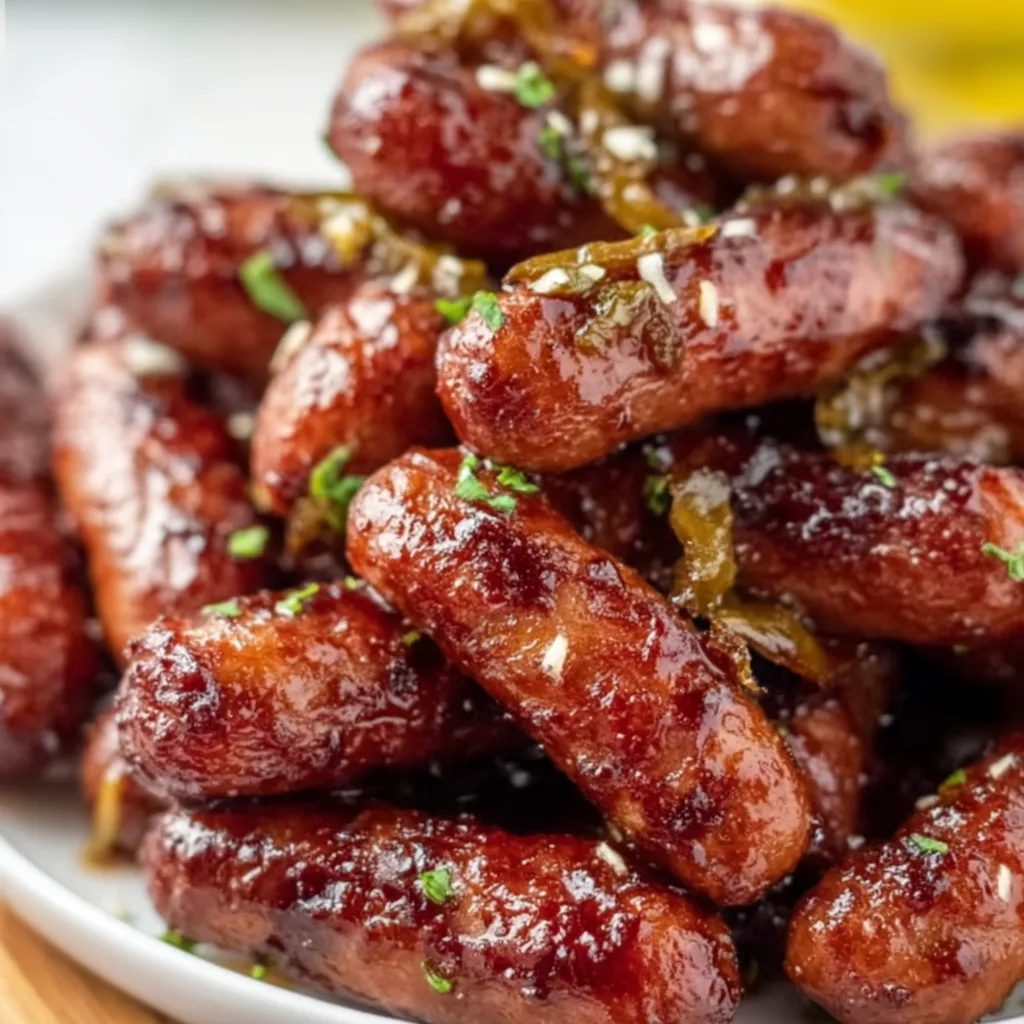
    Mississippi Little Smokies are my absolute weakness at any gathering — those tender, bite-sized sausages swimming in a sweet-tangy sauce that makes your taste buds dance! I discovered this recipe during a rainy Sunday potluck when my neighbor’s dish had everyone hovering around it like moths to a flame. The perfect blend of brown sugar, tangy mustard, and that signature Mississippi-style flavor transforms ordinary little smokies into an irresistible appetizer that disappears faster than you can say “seconds, please!” Perfect for game days, holiday gatherings, or anytime you need a crowd-pleasing dish that delivers big flavor with minimal effort. Let me show you how to make these addictive little morsels.

    Recipe

    Why You’ll Love These Mississippi Little Smokies

    Perfect Party Pleaser

    There’s something magical about watching people’s eyes light up when they taste these Mississippi Little Smokies for the first time. The caramelized exterior gives way to a juicy interior, creating that perfect bite that keeps everyone coming back for more. I made these for my sister’s housewarming, and within minutes, the platter was surrounded by guests asking for the recipe. They’re beautifully low-maintenance too – just toss everything in the slow cooker and let the magic happen while you focus on enjoying your company instead of being stuck in the kitchen.

    Simple Ingredients, Extraordinary Flavor

    What I adore about Mississippi Little Smokies is how they transform basic pantry staples into something extraordinary. The secret combination of ranch seasoning and pepperoncini peppers gives these little sausages their distinctive Mississippi-style flavor that’s simultaneously tangy, savory, and slightly sweet. When the brown sugar caramelizes around each smokie, it creates this gorgeous sticky glaze that coats your fingers (in the best possible way). I love recipes that deliver maximum flavor impact with minimal ingredients – and this one definitely delivers that perfect balance.

    Essential Tips & Tricks

    Mastering the Perfect Sauce Consistency

    The key to legendary Mississippi Little Smokies lies in achieving that perfect sauce consistency – not too thin, not too thick, but gloriously clingy and glossy. I learned this the hard way after my first batch turned out watery! Now I always simmer uncovered for the final 15-20 minutes if using a stovetop method, or prop the slow cooker lid slightly open for the last hour. This allows excess moisture to evaporate, concentrating those flavors and creating that signature sticky glaze that makes these irresistible. Remember to stir occasionally to prevent the sugar from burning at the bottom.

    Choosing the Right Sausages

    While traditional little smokies work beautifully, don’t be afraid to experiment with different varieties to find your perfect match. I personally love using smoked cocktail sausages for that extra depth of flavor, but you could also try turkey or chicken varieties for a lighter option. The key is selecting sausages with enough fat content to remain juicy throughout the cooking process. For an extra-special touch, try mixing two different varieties in the same batch – perhaps traditional and spicy – to give your guests options. This approach works wonderfully alongside other appetizers like these cream cheese avocado bacon bites.

    Serving Ideas & Creative Variations

    Beyond the Toothpick: Elevated Presentation

    Transform these humble Mississippi Little Smokies from casual snack to elegant appetizer with thoughtful presentation. I love serving them in a shallow ceramic dish with the sauce bubbling gently, garnished with thinly sliced green onions and sesame seeds for visual appeal. For a fun interactive element, provide small pretzel sticks instead of toothpicks as edible skewers. At my last holiday gathering, I arranged them around a small bowl of whole grain mustard for dipping, which added another flavor dimension. The key is elevating the presentation without sacrificing that comforting, approachable appeal.

    Flavor Variations to Keep Things Interesting

    Once you’ve mastered classic Mississippi Little Smokies, the flavor possibilities are endless! My personal favorite variation adds a pineapple twist – just mix in some crushed pineapple and a splash of juice for tropical sweetness. For a spicy kick, stir in a tablespoon of sriracha or your favorite hot sauce. Craving something more savory? Add a tablespoon of bourbon and some crumbled bacon. You can even create an Asian-inspired version with hoisin sauce and ginger. These variations pair beautifully with sweet chili pineapple shrimp for an impressive spread.

    Storage & Troubleshooting Guide

    Making Ahead and Proper Storage

    Mississippi Little Smokies are perfect for meal prep because they actually taste even better the next day! I often make a double batch specifically for leftovers. Store them in an airtight container in the refrigerator for up to 4 days – the flavors will continue to develop and meld beautifully. When reheating, add a splash of water or broth to loosen the sauce if it’s thickened too much. For longer storage, freeze portions in freezer-safe containers for up to 3 months. Just thaw overnight in the refrigerator before gently reheating on the stovetop or microwave.

    Fixing Common Issues

    If your Mississippi Little Smokies sauce seems too thin, don’t panic! Simply mix 1 tablespoon of cornstarch with 1 tablespoon of cold water to create a slurry, then stir it into the simmering sauce. It will thicken beautifully within minutes. For sauce that’s too thick or sticky, add a splash of chicken broth or apple juice to thin it out. If you accidentally oversalted, balance it with a tablespoon of brown sugar or honey. And if the sauce has separated or looks greasy, a quick whisking while reheating will bring it back together.

    Frequently Asked Questions

    Can I make Mississippi Little Smokies in an Instant Pot?

    Absolutely! Use the sauté function to brown the sausages first, then add remaining ingredients. Pressure cook on HIGH for 5 minutes with a quick release. Switch back to sauté to reduce the sauce if needed.

    What’s the difference between regular and Mississippi-style Little Smokies?

    Mississippi Little Smokies include ranch seasoning and pepperoncini peppers, giving them that distinctive tangy-savory flavor profile that sets them apart from traditional BBQ or honey-glazed versions.

    Can I use frozen little smokies without thawing?

    Yes, but add 30-45 minutes to your cooking time and ensure they reach an internal temperature of 165°F before serving for food safety.

    What can I substitute for pepperoncini peppers?

    Banana peppers work beautifully as a substitute, or try pickled jalapeños (use less if you’re sensitive to heat) or even a splash of pickle juice for that tangy element.

    How many Mississippi Little Smokies should I prepare per person?

    Plan for about 6-8 pieces per person as an appetizer, or 10-12 if it’s the main attraction at a potluck or game day spread.

    Final Thoughts

    Mississippi Little Smokies have become my signature party dish for good reason – they’re that perfect combination of effortless preparation and spectacular results. There’s something deeply satisfying about creating a dish that brings people together, sparks conversation, and leaves everyone asking for your recipe. Whether you’re hosting a game day gathering or contributing to a potluck, these sweet-tangy bites will earn you rave reviews every time. I hope you’ll give these Mississippi Little Smokies a try and discover why they’ve become a beloved classic in homes across America. Find more inspiration on Pinterest for your next gathering!

  • Pizza Hut Cheese Sticks: Irresistibly Cheesy & Perfectly Crispy!

    Pizza Hut Cheese Sticks: Irresistibly Cheesy & Perfectly Crispy!

    Pizza Hut Cheese Sticks: Irresistibly Cheesy & Perfectly Crispy!

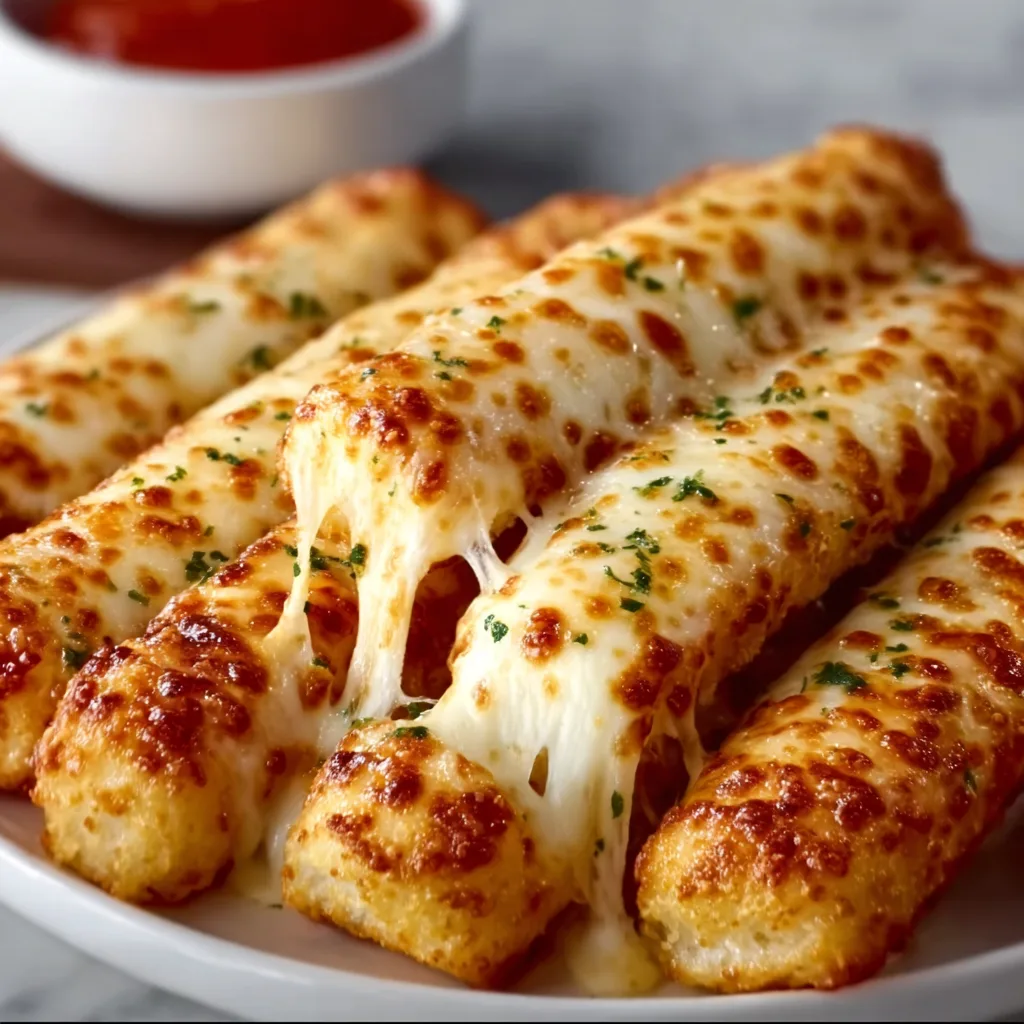
    Pizza Hut Cheese Sticks have been my guilty pleasure since college, when my roommates and I would order them for late-night study sessions. That perfect combination of soft, chewy dough and stretchy, golden cheese with a garlicky crust is simply irresistible. Today, I’m sharing my copycat recipe that brings that pizzeria magic right into your kitchen. These homemade cheese sticks are surprisingly easy to make and, dare I say, even better than the original. They’re perfect for game day, movie night, or anytime you need a comforting cheesy fix like I did last weekend when the rain wouldn’t stop.

    Recipe

    Why You’ll Love This Pizza Hut Cheese Sticks Recipe

    Perfect Texture Combination

    The secret to authentic Pizza Hut cheese sticks lies in achieving that perfect balance of textures. The dough should be soft and chewy inside while maintaining a slight crispness on the bottom. I’ve tested countless dough recipes and found that adding a touch of honey helps achieve that signature Pizza Hut flavor. The cheese needs to be stretchy but not greasy, which is why a blend of mozzarella and provolone works wonderfully. When you pull apart a warm stick and watch that cheese stretch dramatically, you’ll know you’ve nailed it!

    Simple Ingredients, Restaurant Results

    What makes this recipe truly special is how it transforms basic pantry staples into something that tastes professionally made. You’ll need just flour, yeast, water, olive oil, salt, and a pinch of sugar for the dough. For the topping, mozzarella is non-negotiable, but I like adding provolone for depth. The garlic butter brush gives these sticks their iconic flavor – just melted butter, minced garlic, and Italian herbs. I love how something so simple can create such a nostalgic taste experience that immediately transports me back to those pizza parlor booths.

    Essential Tips & Tricks

    Dough Preparation Secrets

    The foundation of perfect cheese sticks is properly prepared dough. Let your dough rise in a warm spot until it doubles in size – this develops those lovely air pockets that create the chewy texture. When stretching the dough, aim for an even rectangular shape about ¼-inch thick. If the dough springs back stubbornly, let it rest for 5 minutes before trying again. This relaxes the gluten and makes shaping easier. For that authentic Pizza Hut flavor, brush the edges with garlic butter before adding cheese, creating that distinctive golden crust similar to my Garlic Herb Dutch Oven Bread.

    Cheese Selection and Application

    Using the right cheese blend makes all the difference between good and great cheese sticks. Low-moisture mozzarella is essential – fresh mozzarella contains too much water and will make your sticks soggy. Shred your cheese by hand rather than using pre-shredded varieties, which contain anti-caking agents that prevent proper melting. Apply cheese generously but evenly, leaving a half-inch border around the edges. This border puffs up during baking to create that distinctive Pizza Hut crust. For extra flavor, sprinkle a little Parmesan or Romano on top before baking.

    Serving Ideas & Creative Variations

    Dipping Sauce Pairings

    The perfect cheese sticks deserve the perfect dipping companions. Classic marinara is traditional, but don’t stop there! I love serving these with a creamy garlic aioli, ranch dressing, or even a spicy arrabbiata sauce for heat lovers. My personal favorite is a pesto-ranch blend that adds herbaceous notes to the creamy base. For a sweet-savory contrast, try a honey-sriracha dip that complements the garlic butter beautifully. Make your marinara sauce from scratch for the freshest flavor, or doctor up store-bought sauce with fresh basil and a splash of good olive oil.

    Flavor Variations to Try

    While the classic version is perfection, these cheese sticks are incredibly versatile for customization. Try adding thinly sliced pepperoni under the cheese for a pepperoni cheese stick that rivals any Homemade Hawaiian Pizza. For herb lovers, mix fresh chopped basil, oregano, and thyme into the cheese. Feeling adventurous? Add jalapeño slices and pepper jack cheese for a spicy version. My family loves when I make half classic and half “loaded” with bacon bits and green onions. The possibilities are endless, and experimenting is half the fun!

    Storage & Troubleshooting Guide

    Proper Storage Methods

    To maintain that fresh-baked quality, store leftover cheese sticks properly. Let them cool completely, then place in an airtight container with parchment paper between layers to prevent sticking. They’ll keep in the refrigerator for up to 3 days. For longer storage, freeze them individually on a baking sheet until solid, then transfer to a freezer bag where they’ll last up to 2 months. To reheat refrigerated sticks, use a 350°F oven for 5-7 minutes. For frozen sticks, add an extra 3-5 minutes, avoiding the microwave which will make them tough.

    Fixing Common Problems

    Even experienced bakers encounter challenges with cheese sticks. If your dough isn’t rising, check your yeast’s expiration date and ensure your water isn’t too hot, which kills yeast. For cheese that’s sliding off, try creating a slight rim around the edges and make sure your dough is completely cool before adding toppings. Soggy bottoms can be fixed by preheating your baking sheet or using a pizza stone. If the edges are browning too quickly but the center isn’t done, cover the perimeter with foil strips. Remember that perfection comes with practice!

    Frequently Asked Questions

    Can I make Pizza Hut Cheese Sticks without a stand mixer?

    Absolutely! While a stand mixer makes the process easier, you can mix and knead the dough by hand. You’ll need about 10 minutes of kneading to develop the gluten properly for that signature chewy texture.

    What’s the best cheese to use for authentic flavor?

    Whole-milk mozzarella is essential for authentic Pizza Hut cheese sticks. Adding a bit of provolone or Monterey Jack (about 20% of your cheese mixture) enhances the flavor and improves meltability.

    Can I prepare these cheese sticks ahead of time?

    Yes! Prepare the dough and shape it, then refrigerate for up to 24 hours. Bring to room temperature for 30 minutes before adding toppings and baking for the freshest results.

    Why aren’t my cheese sticks as stretchy as Pizza Hut’s?

    The stretchiness comes from proper cheese selection and temperature. Use whole-milk mozzarella and serve the sticks while still hot (around 160°F) for maximum cheese pull.

    How do I get that signature Pizza Hut garlic flavor?

    The signature flavor comes from brushing the dough with a mixture of melted butter, minced garlic, garlic powder, and Italian seasoning both before baking and immediately after removing from the oven.

    Final Thoughts

    These homemade Pizza Hut Cheese Sticks have become a staple in my entertaining repertoire. There’s something magical about pulling apart those golden, garlicky sticks with perfectly melted cheese that brings people together. I’ve watched countless conversations pause mid-sentence as friends reach for “just one more.” Whether you’re recreating nostalgic flavors or discovering them for the first time, these cheese sticks deliver comfort and joy in every bite. Don’t forget to check out more of my cheesy creations on Pinterest for endless inspiration!

  • Pepperoni Pizza Monkey Bread: Irresistible, Cheesy Party Magic!

    Pepperoni Pizza Monkey Bread: Irresistible, Cheesy Party Magic!

    Pepperoni Pizza Monkey Bread: Irresistible, Cheesy Party Magic!

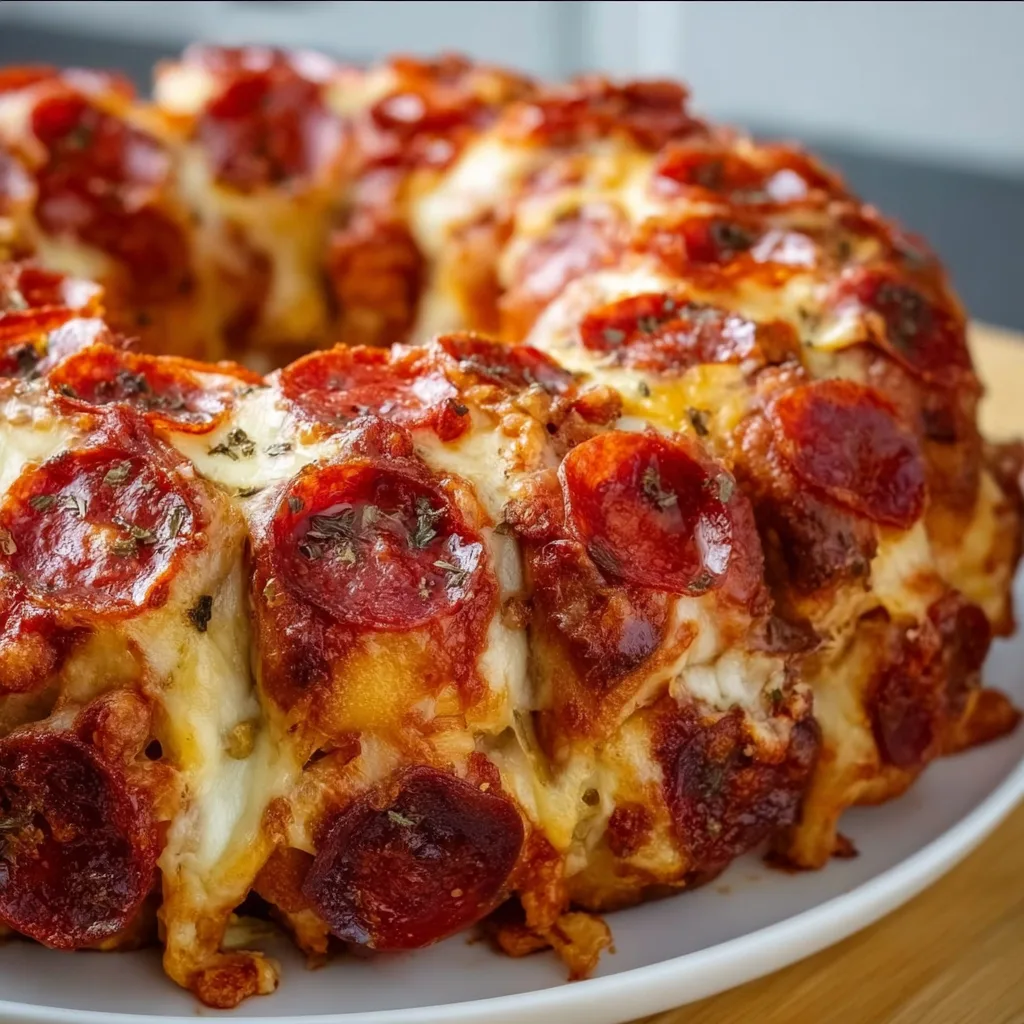
    Pepperoni Pizza Monkey Bread combines everything we love about pizza and pull-apart bread into one irresistible, shareable treat! Each pillowy bite is packed with zesty pepperoni, melty cheese, and Italian herbs, all coated in garlicky butter that creates the most incredible aroma as it bakes. I first made this for my nephew’s birthday party, and it disappeared faster than any other dish on the table! The beauty of this recipe is that it looks impressive but uses simple ingredients you probably already have. Perfect for game days, movie nights, or anytime you need a crowd-pleasing appetizer that brings everyone to the table. Check out my caramelized onion pizza for another family favorite!

    Recipe

    Why You’ll Love This Pepperoni Pizza Monkey Bread

    Perfect Party Food That Disappears Fast

    There’s something magical about pull-apart bread that brings people together. This Pepperoni Pizza Monkey Bread creates an instant gathering spot as everyone reaches for another cheesy, pepperoni-studded bite. The interactive nature makes it perfect for casual entertaining – no plates or utensils required! I love watching friends’ faces light up when they pull away their first piece and see the stretchy mozzarella strings forming. Plus, it’s substantial enough to satisfy hungry guests but fun enough that everyone wants to participate in the pulling-apart experience.

    Customizable For Everyone’s Tastes

    One of my favorite things about this Pepperoni Pizza Monkey Bread is how easily it adapts to different preferences. The basic formula works with countless variations! Have vegetarians in your group? Swap pepperoni for olives and bell peppers. Need more protein? Add cooked Italian sausage or ground beef. My sister’s kids are picky eaters, so I sometimes make half with just cheese and half loaded with toppings. You can even divide the dough into mini bundt pans for individual servings where everyone chooses their own adventure with toppings. The possibilities are endless!

    Essential Tips & Tricks

    Getting The Perfect Texture Every Time

    The secret to truly exceptional Pepperoni Pizza Monkey Bread lies in the dough preparation. Whether using refrigerated biscuits or homemade dough, ensure each piece is uniformly sized for even baking. I learned the hard way that cutting pieces too large results in doughy centers while too small pieces dry out quickly. Another game-changer is letting the assembled bread rest for 15 minutes before baking, which allows the flavors to meld and the dough to rise slightly. For that beautiful golden crust, brush with additional garlic butter during the last 5 minutes of baking rather than just at the beginning.

    Flavor-Boosting Ingredients Worth Adding

    Elevate your Pepperoni Pizza Monkey Bread with a few strategic additions that make all the difference. Mix dried Italian herbs directly into your butter mixture rather than just sprinkling on top – this infuses flavor throughout every bite. For an umami boost that had my neighbors begging for the recipe, add 2 tablespoons of grated Parmesan to your coating mixture. I also love tucking tiny cubes of mozzarella inside each dough ball rather than just sprinkling cheese throughout. For heat lovers, add red pepper flakes or try my spicy sausage pepper pizza approach by mixing in some finely diced jalapeños!

    Serving Ideas & Creative Variations

    Perfect Pairing Suggestions

    Serve your Pepperoni Pizza Monkey Bread with complementary dips that enhance the experience. A warm marinara sauce for dunking is classic, but I’ve found that a garlic-herb cream cheese dip takes things to another level! At my last book club, I paired this with a simple arugula salad dressed with lemon and olive oil – the peppery greens balanced the richness perfectly. For a complete meal, serve alongside grilled vegetables or a hearty minestrone soup. If you’re hosting a pizza-themed gathering, this pairs wonderfully with my honey pepperoni ricotta pizza for a fun contrast of textures.

    Unexpected Twists On The Classic

    While traditional Pepperoni Pizza Monkey Bread is delicious, I’ve experimented with some creative variations that always impress. Try a breakfast version with scrambled eggs, crispy bacon bits and cheddar folded into the dough balls – it’s become my Sunday morning tradition! For an elevated appetizer, incorporate sun-dried tomatoes, fresh basil and goat cheese for a Mediterranean twist. My personal favorite twist came from a happy accident: I once added leftover caramelized onions and blue cheese crumbles, creating a gourmet version that friends still request. You can even go sweet-savory with a drizzle of hot honey over the finished bread!

    Storage & Troubleshooting Guide

    Keeping It Fresh & Reheating Tips

    Pepperoni Pizza Monkey Bread is best enjoyed fresh from the oven when the cheese is perfectly melty and the bread is pillowy-soft. However, proper storage can maintain its deliciousness for days. Store leftovers in an airtight container in the refrigerator for up to 3 days. The microwave works for quick reheating, but for optimal results that restore that fresh-baked texture, wrap loosely in foil and heat in a 325°F oven for 10-15 minutes. I’ve found spritzing it with a tiny bit of water before reheating helps prevent drying. For make-ahead convenience, assemble the entire bread, refrigerate overnight, and add 5-7 minutes to the baking time.

    Solving Common Problems

    Even experienced bakers encounter challenges with Pepperoni Pizza Monkey Bread. If your bread turns out doughy in the center, your bundt pan might be too small for the amount of dough – try reducing the quantity or extending baking time by 5-minute increments. Cheese sticking to the pan is another common issue – I learned to be extremely generous with non-stick spray, focusing on all the nooks and crannies. If your bread lacks flavor, the culprit is likely under-seasoned butter – don’t be shy with garlic, herbs and salt! For soggy bread, try patting the pepperoni with paper towels before adding to remove excess oil.

    Frequently Asked Questions

    Can I make Pepperoni Pizza Monkey Bread ahead of time?

    Yes! Assemble up to 24 hours ahead and refrigerate unbaked. Allow to sit at room temperature for 30 minutes before baking, and add 5-7 minutes to the baking time. The flavors actually develop beautifully with this method.

    What’s the best dough to use for this recipe?

    Store-bought refrigerated biscuit dough works perfectly for convenience. For homemade flavor, a basic pizza dough or even Rhodes frozen dinner rolls (thawed) make excellent alternatives with a more artisanal texture.

    Can I freeze leftover Pepperoni Pizza Monkey Bread?

    Absolutely! Wrap individual portions in plastic wrap then foil and freeze for up to 3 months. Thaw overnight in the refrigerator and reheat in a 325°F oven until warmed through.

    How do I prevent my monkey bread from sticking to the pan?

    Use a non-stick bundt pan and spray generously with cooking spray, especially in all crevices. For extra insurance, you can dust with a little cornmeal after spraying.

    What if I don’t have a bundt pan for my Pepperoni Pizza Monkey Bread?

    A 9×13 baking dish works well as an alternative, though you’ll lose the classic ring shape. Reduce baking time by about 5 minutes and check for doneness earlier.

    Final Thoughts

    This Pepperoni Pizza Monkey Bread has become my go-to recipe whenever I need something that’s both impressive and comforting. There’s something magical about watching people gather around, reaching for just one more cheesy, pepperoni-packed bite. The combination of familiar pizza flavors in an interactive pull-apart format creates an instant conversation starter and memory maker. I hope this recipe brings the same joy to your table that it has to mine! For more delicious recipes that bring people together, check out my collections on Pinterest.

  • Smash Burger Tacos: Unbelievably Juicy & Irresistibly Crispy!

    Smash Burger Tacos: Unbelievably Juicy & Irresistibly Crispy!

    Smash Burger Tacos: Unbelievably Juicy & Irresistibly Crispy!

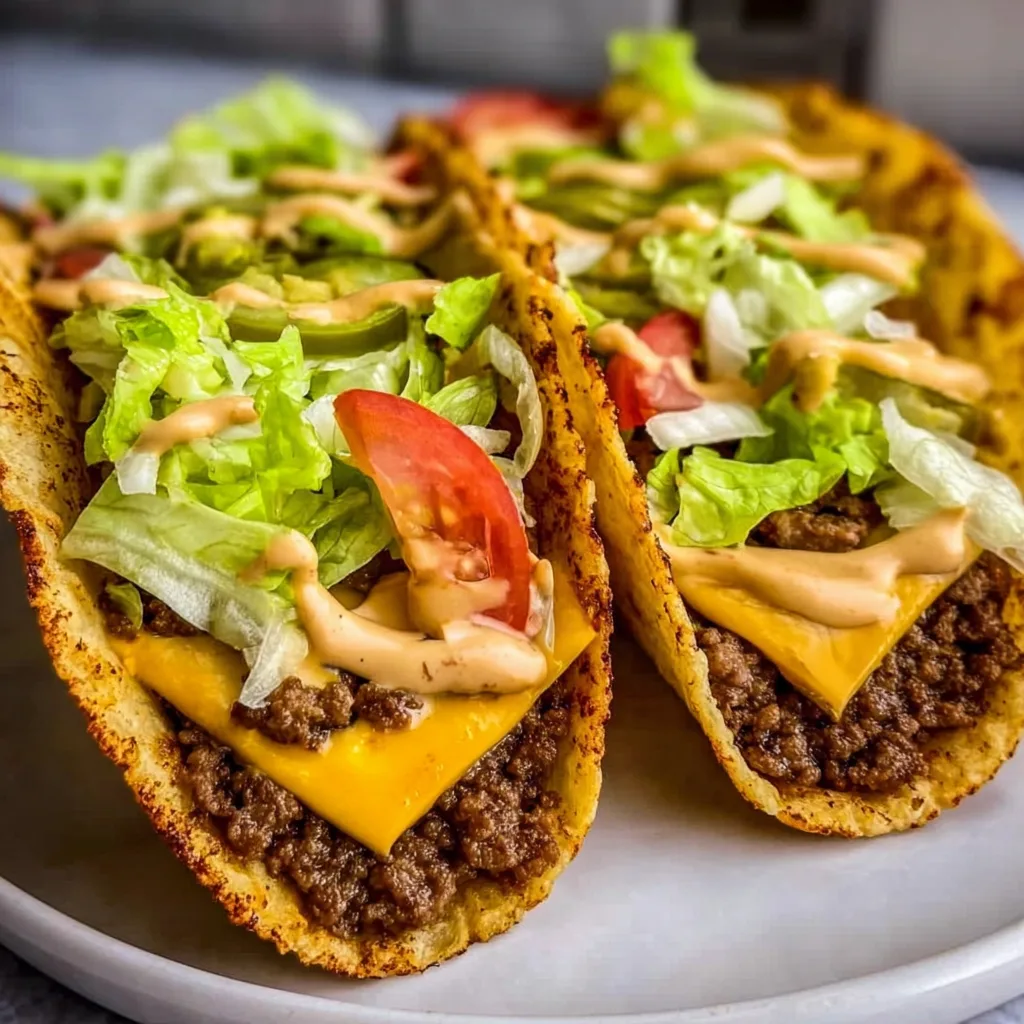
    Smash Burger Tacos are the ultimate fusion food that combines two of America’s most beloved comfort foods into one irresistible meal. I discovered this genius combo last summer when I was craving both tacos and burgers but couldn’t decide between the two. The first bite was pure magic—crispy-edged beef with that perfect smashed texture, nestled in a warm tortilla with all my favorite toppings. These aren’t just any tacos; they’re a game-changer for busy weeknights when you want something that feels special but comes together in minutes. Trust me, once you try these smash burger tacos, you’ll wonder why you didn’t think of this sooner!

    Recipe

    Why You’ll Love These Smash Burger Tacos

    Perfect Texture Combination

    There’s something absolutely magical about the textural contrast in these tacos. The ultra-crispy edges of smashed burger patties develop this incredible caramelization that regular taco meat just can’t achieve. I love how the thin patties still maintain a juicy center while the edges get that coveted crust. Paired with the soft tortillas, crisp lettuce, and creamy sauce, every bite delivers a perfect balance. The first time I made these for my family, my husband (who considers himself a burger purist) couldn’t stop raving about how the tortilla actually lets the beef flavor shine more than a traditional bun does.

    Quick & Customizable Meal Solution

    What makes smash burger tacos a weeknight hero is how ridiculously fast they come together. From start to finish, you can have dinner on the table in under 20 minutes. The beauty lies in the customization possibilities—set up a taco bar and let everyone build their perfect creation. My kids love loading theirs with extra cheese and pickles, while I go heavy on the special sauce and jalapeños. This has become our go-to solution for those hectic evenings when everyone has different activities but we still want to gather for a proper meal that satisfies everyone’s cravings.

    Essential Tips & Tricks

    The Perfect Smash Technique

    The secret to exceptional smash burger tacos lies entirely in the smashing method. Start with loosely formed balls of ground beef (about 2 oz each) and place them on a screaming hot cast iron skillet or griddle. Use a sturdy metal spatula and press down firmly for 10 seconds—you want them thin, about ¼-inch thickness. Don’t be gentle here! The pressure creates those crispy, lacy edges that make smash burgers extraordinary. I learned the hard way that smashing after the meat begins cooking doesn’t work; you must smash immediately while the meat is still cool to get that perfect texture that makes these tacos so special.

    Seasoning & Fat Content Secrets

    The quality and fat content of your beef makes all the difference in smash burger tacos. I always opt for 80/20 ground beef for the perfect balance of flavor and texture. The higher fat content creates that desirable crust while keeping the interior juicy. When it comes to seasoning, simplicity rules—kosher salt and fresh black pepper applied generously right before cooking is my standard approach. Don’t salt too early or you’ll draw moisture out. For an elevated version, I sometimes mix in a pinch of garlic powder and smoked paprika. Remember that smash burgers cook quickly, so having all your toppings ready before you start cooking ensures taco assembly happens while the meat is still hot.

    Serving Ideas & Creative Variations

    Toppings That Elevate

    The beauty of smash burger tacos lies in the endless topping possibilities that bridge burger and taco worlds. My signature special sauce (equal parts mayo, ketchup, pickle juice, and a dash of hot sauce) creates the perfect creamy base. For authentic burger vibes, add thin-sliced American cheese directly onto the hot patties so it melts perfectly. Shredded lettuce, diced onions, and pickles provide essential crunch and acidity. For a Mexican-inspired twist, try cotija cheese, pickled jalapeños, and cilantro. I’ve found that warming the tortillas slightly creates the perfect vessel—soft enough to fold but sturdy enough to hold all those delicious toppings without falling apart.

    Global Fusion Variations

    Take your smash burger tacos on a world tour by incorporating international flavors. For an Asian-inspired version, top with quick-pickled vegetables, sriracha mayo, and crushed peanuts—similar to the flavors in my Sweet Chili Pineapple Shrimp but with beef instead. Mediterranean versions with tzatziki, feta, and cucumber are surprisingly delicious. My family’s current obsession is Korean-inspired with gochujang mayo, kimchi, and scallions. For a breakfast twist, add a fried egg with runny yolk and bacon bits. The versatility is endless! I recently served a taco bar with multiple variations for a casual dinner party, and guests couldn’t stop mixing and matching different combinations.

    Storage & Troubleshooting Guide

    Make-Ahead Components

    While smash burger tacos are best enjoyed fresh, you can prep several components ahead of time to streamline the process. The special sauce keeps beautifully in the refrigerator for up to a week in an airtight container. Pre-chop all your toppings and store them separately in the refrigerator—they’ll stay fresh for 2-3 days. You can even form your beef into balls and refrigerate them (covered) for up to 24 hours before cooking. What doesn’t work well is pre-cooking the patties; they lose their magic when reheated. I’ve found the perfect compromise is having everything prepped so when hunger strikes, you’re just 5 minutes away from fresh, sizzling smash burger tacos.

    Solving Common Issues

    The most frequent challenge with smash burger tacos is soggy tortillas. The solution? Double up your tortillas or briefly toast them on a dry skillet until they develop slight char marks. Another common issue is patties sticking to the spatula during smashing—combat this by lightly oiling your spatula before each smash. If your edges aren’t getting crispy enough, your pan likely isn’t hot enough; patience in preheating is essential. For those concerned about grease splatters, use a splatter screen but don’t cover the pan completely as that traps steam and prevents proper crisping. Remember that smash burgers cook extremely quickly—about 45 seconds per side—so have everything else ready before the meat hits the heat.

    Frequently Asked Questions

    What’s the best meat for smash burger tacos?

    For authentic smash burger tacos, use 80/20 ground beef. The higher fat content creates those crispy, caramelized edges while keeping the interior juicy. Avoid lean ground beef as it will produce dry patties without the signature crust.

    Can I make smash burger tacos without a cast iron skillet?

    Yes! While cast iron provides ideal heat retention, any heavy-bottomed skillet or flat griddle works. The key is getting the cooking surface extremely hot before adding the meat and having a sturdy metal spatula for smashing.

    How do I prevent my tortillas from getting soggy?

    Double-up your tortillas or briefly toast them on a dry skillet. Another trick is to place a small piece of lettuce between the tortilla and patty to create a moisture barrier.

    What’s the best cheese for smash burger tacos?

    American cheese melts perfectly and provides that classic burger flavor. For Mexican fusion, try cotija or Oaxaca cheese. For best results, add cheese directly to the hot patty during the last 15-20 seconds of cooking.

    Can I prepare components of smash burger tacos ahead of time?

    Absolutely! Pre-chop toppings and make sauces up to 3 days ahead. You can even portion meat into balls and refrigerate. Just cook the patties right before serving for that perfect crispy-edged texture.

    Final Thoughts

    Smash Burger Tacos represent the best of both worlds—the satisfying crunch and beefy goodness of a perfect burger combined with the handheld convenience and endless customization options of tacos. They’ve become my secret weapon for everything from quick family dinners to casual entertaining. What makes them truly special is how they bring people together around the table, encouraging creativity and conversation as everyone builds their perfect bite. I hope you’ll give these smash burger tacos a try and discover your own favorite variations. Don’t forget to share your creations on Pinterest—I’d love to see how you make them your own!

  • Cheese Stuffed Pretzel Magic: Irresistibly Gooey & Crispy Delight!

    Cheese Stuffed Pretzel Magic: Irresistibly Gooey & Crispy Delight!

    Cheese Stuffed Pretzel Magic: Irresistibly Gooey & Crispy Delight!

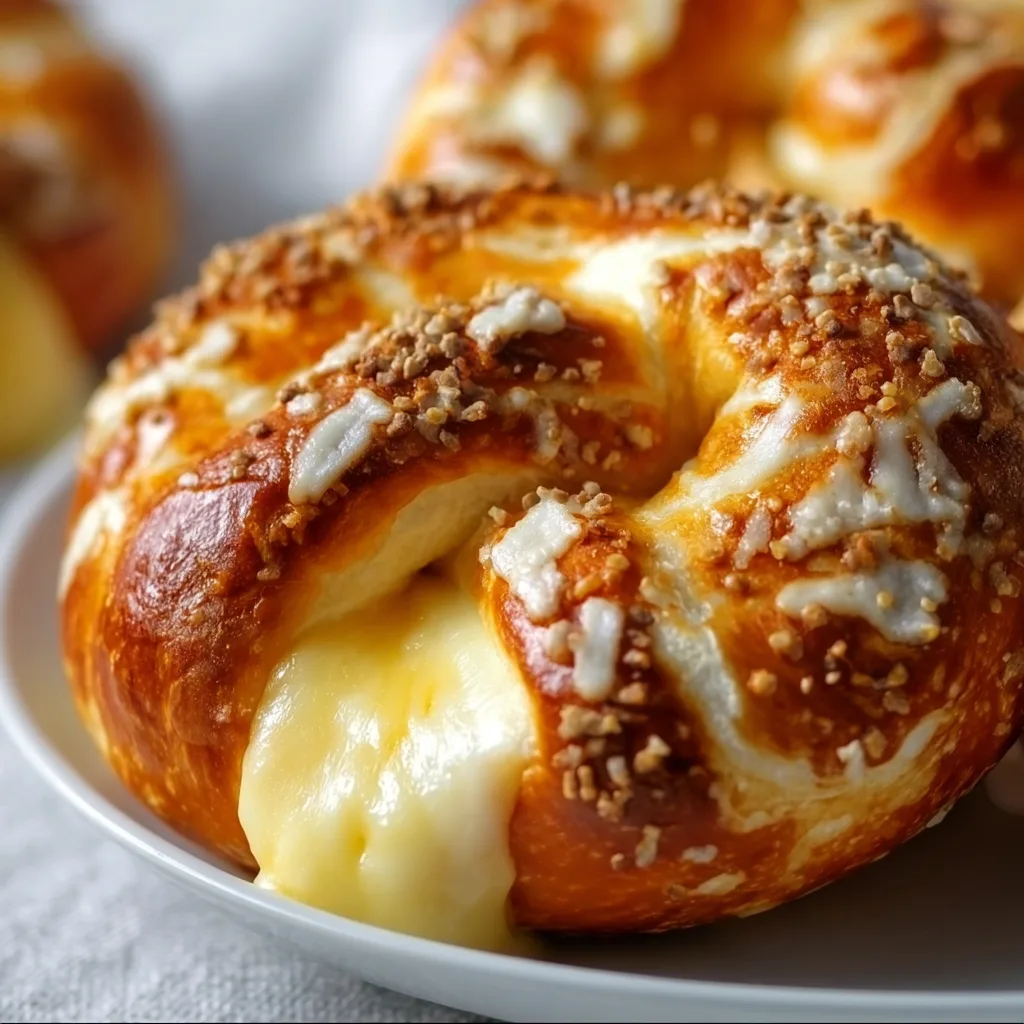
    Cheese stuffed pretzels combine everything I love about comfort food – the chewy exterior of a classic pretzel with a molten, gooey center that stretches with each bite. There’s something magical about that first tear, revealing a golden stream of melted cheese hiding inside the warm, salt-dusted dough. I discovered my love for these twisted treasures during a rainy afternoon at a local farmers market, and I’ve been perfecting my homemade version ever since. The best part? These pretzels are surprisingly simple to make, requiring just a few basic ingredients and some patience. Let me show you how to create these irresistible treats that will have everyone asking for seconds.

    Recipe

    Why You’ll Love These Cheese Stuffed Pretzels

    Perfect Combination of Textures

    There’s nothing quite like biting through the chewy, glossy exterior of a freshly baked pretzel to discover the melted cheese inside. That contrast between the slightly crisp, salt-flecked crust and the soft, pillowy interior makes these pretzels absolutely irresistible. I love watching friends’ faces light up when they take their first bite and the cheese pulls away in long, beautiful strands. The alkaline bath (using baking soda) before baking is what creates that distinctive pretzel texture that we all crave – giving you that authentic pretzel shop experience right in your own kitchen.

    Customizable Cheese Options

    While traditional cheese stuffed pretzels often feature cheddar or American cheese, the beauty of making them at home is that you can experiment endlessly with different cheese combinations. Sharp provolone adds a tangy bite, while pepper jack brings a pleasant heat. My personal favorite is a mixture of mozzarella and sharp cheddar – the mozzarella provides that Instagram-worthy cheese pull, while the cheddar delivers rich flavor. For a more sophisticated twist, try smoked gouda or even a creamy brie. The key is choosing cheeses that melt well and complement the slightly salty pretzel dough.

    Essential Tips & Tricks

    Mastering the Dough

    The foundation of perfect cheese stuffed pretzels is getting the dough just right. I’ve found that allowing the dough to rest properly makes all the difference in achieving that authentic chewy texture. After mixing, let it rise in a warm spot until doubled in size – about an hour. The dough should feel elastic and smooth, not sticky. When rolling out your ropes, work on a clean, unfloured surface – a little tackiness helps you create tension as you roll, resulting in better-shaped pretzels. If the dough springs back too much, let it rest for 5 minutes before trying again. This patience-rewarding process creates the perfect base for your cheese filling.

    The Alkaline Bath Secret

    The distinctive pretzel flavor and color come from a quick dip in an alkaline solution before baking. While professional bakeries use food-grade lye, baking soda works wonderfully at home. I recommend using 1/3 cup baking soda per 8 cups of water, brought to a gentle simmer. Each pretzel only needs about 20-30 seconds in this bath – any longer and they can develop a metallic taste. After the bath, place them on a parchment-lined baking sheet, brush with egg wash for shine, and sprinkle with coarse salt. This step seems fussy but creates that characteristic mahogany crust and distinctive pretzel flavor that makes them irresistible.

    Serving Ideas & Creative Variations

    Perfect Pairings

    These cheese stuffed pretzels shine as both a snack and a meal companion. Serve them piping hot from the oven when the cheese is at its most molten and stretchy. For casual gatherings, pair with a selection of mustards – stone ground, honey mustard, and spicy brown create a delightful tasting experience. For a heartier option, serve alongside a warm bowl of beer cheese soup for double the cheesy goodness. During fall and winter months, I love offering these with hot apple cider for a cozy treat that warms from the inside out.

    Beyond Basic Pretzels

    While classic cheese stuffed pretzels are divine, experimenting with additional fillings takes them to new heights. Try adding thin slices of pepperoni alongside the cheese for mini pizza pretzels. Diced jalapeños mixed with cheddar creates a spicy version with delightful heat. For breakfast-inspired pretzels, stuff with scrambled eggs, cheese, and crumbled bacon before baking. You can even go sweet by using cream cheese mixed with cinnamon sugar, then drizzling with glaze after baking. Shape variations work beautifully too – form into pretzel bites for easier sharing, or twist into pretzel sticks for simpler stuffing.

    Storage & Troubleshooting Guide

    Keeping Pretzels Fresh

    Cheese stuffed pretzels are at their absolute best when enjoyed fresh from the oven, but proper storage can help maintain their quality. If you have leftovers, allow them to cool completely before placing in an airtight container at room temperature for up to 2 days. To reheat, wrap in foil and warm in a 350°F oven for about 5 minutes until the cheese melts again. For longer storage, freeze the baked pretzels by wrapping individually in plastic wrap, then foil, and placing in a freezer bag for up to 3 months. Thaw in the refrigerator overnight before reheating.

    Solving Common Problems

    If your cheese is leaking out during baking, you likely need to seal the edges more thoroughly when shaping. Pinch the dough firmly and roll gently to ensure no seams remain. For pretzels that aren’t browning properly, check that your alkaline bath is warm enough and that you’re using enough baking soda. Pale pretzels usually indicate insufficient time in the bath or a solution that’s too weak. If your pretzels are tough rather than chewy, you may have overworked the dough – next time, knead just until the dough comes together and becomes smooth. Remember that practice makes perfect!

    Frequently Asked Questions

    Can I make cheese stuffed pretzels ahead of time?

    Yes! Prepare them through shaping and stuffing, then refrigerate for up to 24 hours. Bring to room temperature for 30 minutes before the alkaline bath and baking for best results.

    What’s the best cheese for stuffed pretzels?

    Cheeses that melt well work best – mozzarella, cheddar, American, and provolone are excellent choices. Avoid very aged hard cheeses that won’t achieve that gooey center.

    Can I freeze unbaked cheese stuffed pretzels?

    Yes, freeze them on a baking sheet until solid, then transfer to freezer bags. When ready to bake, thaw in the refrigerator overnight before proceeding with the alkaline bath.

    Why did my pretzels deflate after baking?

    This typically happens from underbaking. Make sure to bake until deeply golden brown, about 12-15 minutes at 425°F, to ensure the structure sets properly.

    How do I get that classic pretzel shine?

    The alkaline bath is crucial for the shine, but also brush with egg wash (1 egg beaten with 1 tablespoon water) before baking for that glossy, professional finish.

    Final Thoughts

    There’s something incredibly satisfying about pulling apart a homemade cheese stuffed pretzel and watching that perfect cheese stretch. I hope this guide inspires you to try making these at home – they’re easier than they look and so much more delicious than store-bought versions. The joy of creating something this delicious with your own hands is unmatched, and the smiles they bring to friends and family make the effort worthwhile. Don’t forget to check out more delicious recipes on Pinterest for endless inspiration. Happy baking!

  • Grilled Salsa Verde Pepper Jack Chicken That’ll Blow Your Taste Buds!

    Grilled Salsa Verde Pepper Jack Chicken That’ll Blow Your Taste Buds!

    Grilled Salsa Verde Pepper Jack Chicken That’ll Blow Your Taste Buds!

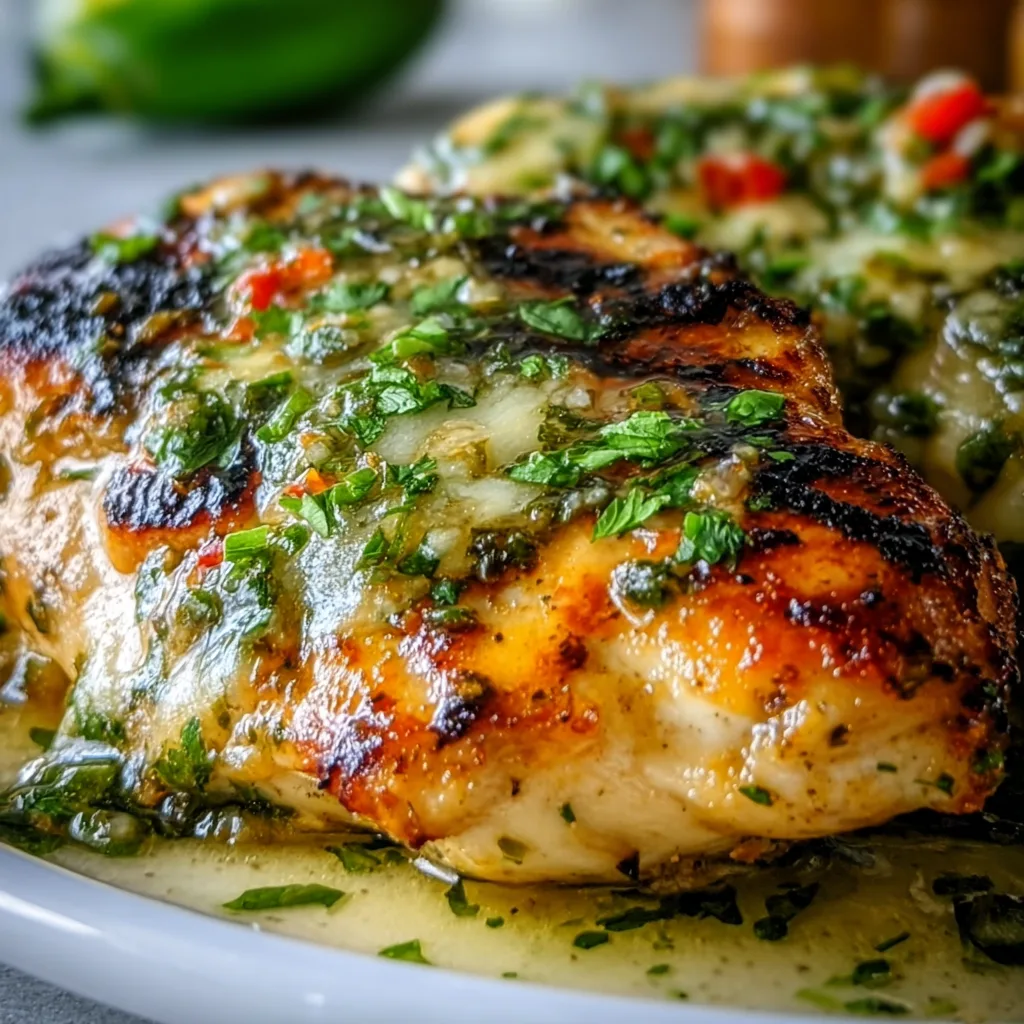
    Grilled Salsa Verde Pepper Jack Chicken brings together zesty tomatillos, smoky chilies, and creamy melted cheese in one spectacular dish that’s become my summer go-to. The first time I made this, the aroma of charring peppers and sizzling chicken filled my backyard, and my neighbors actually peeked over the fence to ask what I was cooking! There’s something magical about that moment when the pepper jack begins to melt into the tangy salsa verde, creating pockets of creamy heat that transform ordinary chicken into something crave-worthy. If you’re looking for a fresh pasta salad to serve alongside, I’ve got you covered too!

    Recipe

    Why You’ll Love This Grilled Salsa Verde Pepper Jack Chicken

    Perfect Balance of Flavors and Textures

    The beauty of this dish lies in its harmonious contrasts. The bright, tangy salsa verde cuts through the richness of the melted pepper jack cheese, while the smoky char from the grill adds depth to every bite. I love how the chicken stays incredibly juicy inside while developing a slight crust on the outside. The heat level is customizable too—you can dial up the spice with extra jalapeños in your salsa verde or keep it mild for family dinners. My husband, who usually reaches for hot sauce with everything, hasn’t touched the bottle since I started making this dish!

    Weeknight-Friendly Yet Impressive

    Don’t let the complex flavors fool you—this Grilled Salsa Verde Pepper Jack Chicken comes together in under 30 minutes of active time. I often prep the salsa verde on Sunday, which means I can have this on the table in about 15 minutes on busy weeknights. The visual impact when you pull this off the grill—with its bubbling cheese and vibrant green sauce—makes it perfect for casual entertaining too. Last month, I served this at a last-minute dinner party, and everyone thought I’d spent hours in the kitchen!

    Essential Tips & Tricks

    Mastering the Chicken

    For truly exceptional Grilled Salsa Verde Pepper Jack Chicken, start with even thickness throughout your chicken breasts. I place them between parchment paper and gently flatten the thicker ends with a rolling pin—no need for violent pounding! Marinating the chicken in a few tablespoons of the salsa verde for at least 30 minutes (or up to overnight) infuses it with flavor from the inside out. When grilling, resist the urge to flip too early—wait until the chicken releases easily from the grate, which signals that perfect sear has formed.

    Salsa Verde Secrets

    While store-bought works in a pinch, homemade salsa verde elevates this dish to restaurant quality. The key ingredient is properly roasted tomatillos—they should be blistered and slightly charred, not just warm. I add a splash of lime juice right at the end for brightness, and a tiny drizzle of honey balances the acidity without making it sweet. For an amazing one-pot meal with similar flavor profiles, check out my taco orzo recipe that uses many of these same ingredients!

    Serving Ideas & Creative Variations

    Perfect Pairings

    This Grilled Salsa Verde Pepper Jack Chicken shines alongside simple, complementary sides. My go-to combination includes cilantro-lime rice that soaks up the extra sauce and a quick avocado and jicama slaw for freshness and crunch. For a heartier meal, warm corn tortillas let everyone build their own tacos with the chicken sliced into strips. When entertaining, I serve it over a bed of grilled vegetables—the sauce mingles with the charred veggies creating an incredible flavor medley that has guests reaching for seconds.

    Exciting Twists

    The versatility of this recipe makes it perfect for creative spins! Try swapping the pepper jack for smoked gouda for a deeper, woodsy flavor profile. For a Mediterranean version, replace the salsa verde with a basil pesto and use fontina cheese instead. My favorite variation might be stuffing the chicken—butterfly the breasts, add a layer of the cheese and extra salsa verde inside before grilling. For a fun appetizer twist, cube the chicken for skewers with cherry tomatoes and bell peppers between pieces of the meat!

    Storage & Troubleshooting Guide

    Proper Storage for Maximum Flavor

    Leftover Grilled Salsa Verde Pepper Jack Chicken maintains its deliciousness when stored correctly. Allow the chicken to cool completely before refrigerating in an airtight container for up to three days. To reheat, I avoid the microwave which can toughen the meat—instead, I cover it with foil and warm in a 300°F oven until just heated through. The salsa verde actually develops deeper flavors overnight, making this dish perfect for meal prep. For freezing, wrap individual portions tightly and thaw overnight in the refrigerator before reheating.

    Common Issues Solved

    If your cheese is sliding off during grilling, you’re likely adding it too early. Cook the chicken almost completely (about 160°F internal temperature) before adding the cheese and closing the grill for the final few minutes. For those struggling with chicken sticking to the grill, ensure your grates are clean and well-oiled before cooking. If your salsa verde is too watery, remember to drain roasted tomatillos briefly on paper towels before blending. And for those who find their chicken dry, try brining it first—even 30 minutes in a simple salt solution makes a remarkable difference.

    Frequently Asked Questions

    Can I make Grilled Salsa Verde Pepper Jack Chicken without a grill?

    Absolutely! Use a cast-iron skillet or grill pan over medium-high heat. Cook the chicken for 5-7 minutes per side, then add cheese and cover briefly to melt. Finish with broiling for a minute if you want that charred effect.

    Is this recipe spicy?

    The heat level depends on your salsa verde and pepper jack cheese. For milder flavor, remove jalapeño seeds and membranes when making salsa verde, or substitute with monterey jack cheese.

    Can I use chicken thighs instead of breasts?

    Yes! Boneless, skinless chicken thighs work beautifully and often stay juicier. Adjust cooking time to about 6-7 minutes per side depending on thickness.

    How do I know when the chicken is done?

    Use a meat thermometer to ensure chicken reaches 165°F at its thickest point. The cheese should be fully melted and the salsa verde bubbling slightly.

    What’s the best way to make homemade salsa verde for this recipe?

    Roast 1 pound of tomatillos, 1 jalapeño, and 2 garlic cloves until charred. Blend with ½ cup cilantro, ¼ cup onion, 1 tablespoon lime juice, and salt to taste.

    Final Thoughts

    This Grilled Salsa Verde Pepper Jack Chicken has become my signature dish for good reason—it strikes that perfect balance between impressive and achievable that we’re all searching for in our cooking. The vibrant flavors transport me to sunny patios and relaxed gatherings even on the busiest weeknights. I find myself craving that perfect bite of tender chicken, tangy salsa, and melty cheese more often than I care to admit! For more inspiration, check out my Pinterest board where I share even more variations on this beloved recipe.