Author: Darleen Vance

  • Easter Cake Bliss: Irresistible Treats to Wow Your Family!

    Easter Cake Bliss: Irresistible Treats to Wow Your Family!

    Easter Cake Bliss: Irresistible Treats to Wow Your Family!

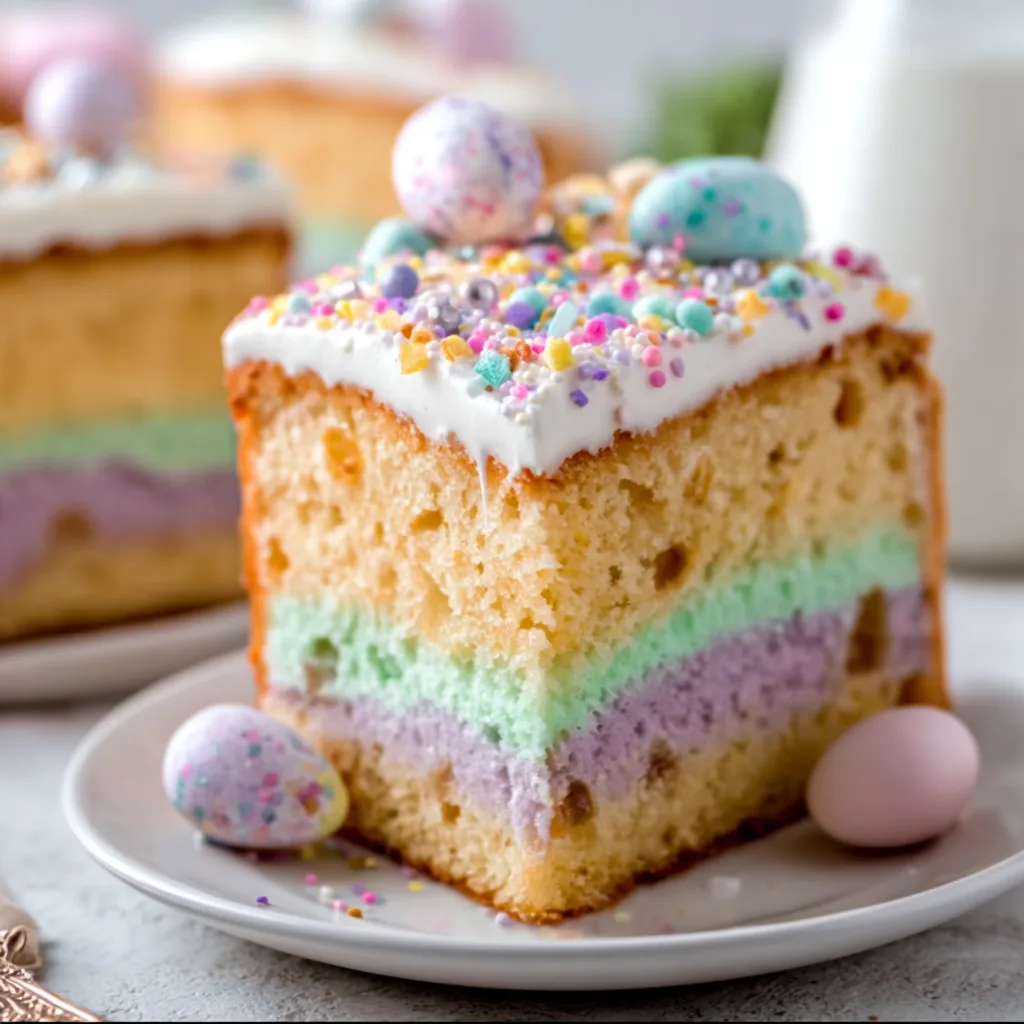
    This Easter cake is the centerpiece your holiday table deserves! Moist, tender layers of vanilla-scented cake adorned with pastel buttercream and festive spring decorations will have everyone reaching for seconds. I discovered this recipe during a particularly rainy Easter weekend when my usual dessert plans fell through. The smell of vanilla and butter filled my kitchen as rain tapped against the windows, and I’ve never looked back. It’s become our family tradition, bringing that perfect balance of elegance and whimsy to our celebrations. Let me show you how to create this showstopping Easter treat that’s as delicious as it is beautiful.

    Recipe

    Why You’ll Love This Easter cake

    Perfect Balance of Flavors and Textures

    This Easter cake strikes the perfect harmony between sweetness and substance. The crumb is delicately moist yet sturdy enough to support layers of silky buttercream without collapsing. What I adore most is how the vanilla notes shine through without being overpowering. The cake itself has that bakery-quality texture – tender and fluffy with just enough density to feel substantial on your fork. When you take that first bite, there’s a moment where the buttercream melts into the cake, creating this heavenly mouthfeel that makes everyone at the table fall silent for just a moment before the compliments begin.

    Stunning Yet Achievable Decoration

    Don’t let those picture-perfect Easter cakes on Pinterest intimidate you! This recipe is designed for bakers of all skill levels. The buttercream technique uses a simple swoop method that looks impressive without requiring pastry school training. I remember my daughter’s face lighting up when she helped decorate her first Easter cake – pure joy as she carefully placed candy eggs in a nest of tinted coconut. The pastel colors naturally evoke spring, and you can customize the palette to match your Easter decor. Best of all, any minor imperfections can be disguised with strategic placement of Easter candy decorations.

    Essential Tips & Tricks

    Room Temperature Ingredients Matter

    Here’s a secret that transformed my baking: room temperature ingredients create a superior cake texture. Set your eggs, butter, and milk on the counter about an hour before you begin. This simple step ensures everything incorporates properly, preventing that dreaded dense or uneven texture. I learned this the hard way after rushing through my niece’s birthday cake preparation. Cold ingredients created lumpy batter that never quite smoothed out. For this Easter cake, patience pays off! The butter should yield easily when pressed but still hold its shape. Your eggs should feel neutral to the touch, neither cold nor warm.

    Perfect Your Cake Layers

    Even cake layers are the foundation of a professional-looking Easter cake. After pouring batter into pans, give them a gentle tap on the counter to release air bubbles. For truly flat tops, I swear by cake strips – dampened fabric bands that wrap around your pans. They’re my baking secret weapon for preventing domed tops that need excessive trimming. If you don’t have cake strips, bake at 325°F instead of 350°F for a more even rise. Always test for doneness with a toothpick inserted in the center – it should come out with a few moist crumbs, not wet batter. These Easter mini egg cheesecakes use similar techniques for perfect results.

    Serving Ideas & Creative Variations

    Seasonal Flavor Adaptations

    While vanilla is the classic base for this Easter cake, don’t be afraid to experiment with seasonal twists. Adding lemon zest to the batter brings a bright, springtime flavor that pairs beautifully with the buttercream. For a more sophisticated palette, try infusing the milk with lavender before cooling and adding to the batter. My personal favorite variation includes folding in finely diced strawberries for bursts of natural sweetness and color throughout. Just remember to toss fruit pieces in a little flour first to prevent them from sinking to the bottom during baking.

    Stunning Presentation Options

    Elevate your Easter cake presentation with thoughtful serving details. Place it on a cake stand adorned with fresh spring flowers or decorative Easter grass for a showstopping table centerpiece. For a charming touch, create a nest on top using tinted coconut shreds and fill it with chocolate eggs or jelly beans. Individual slices look especially elegant when served with a small edible flower and a drizzle of warm fruit compote. For a fun family gathering, consider setting up a dessert buffet featuring this cake alongside smaller Easter treats.

    Storage & Troubleshooting Guide

    Proper Storage for Maximum Freshness

    To keep your Easter cake tasting fresh for days, proper storage is essential. An unfrosted cake can be wrapped tightly in plastic wrap and kept at room temperature for up to 2 days or frozen for up to 3 months. Once frosted, your cake needs airtight protection from air and odors. A cake keeper or large inverted bowl works perfectly. Refrigerate if your frosting contains perishable ingredients like cream cheese, but always bring to room temperature before serving (about 30 minutes) for the best flavor and texture experience. Cut slices can be stored individually wrapped to preserve moisture.

    Common Issues and Quick Fixes

    Even experienced bakers encounter challenges! If your cake layers sink in the middle, your oven was likely too hot or you opened the door too early. For dry cake, try adding a simple sugar syrup soak before frosting – just simmer equal parts sugar and water until dissolved, cool, and brush onto cake layers. Buttercream too soft? Refrigerate for 15-20 minutes before continuing. Too stiff? Add a teaspoon of milk at a time until spreadable. Crumbs in your frosting? Apply a thin “crumb coat” first, chill for 15 minutes, then add your final layer of frosting for a pristine finish.

    Frequently Asked Questions

    Can I make this Easter cake in advance?

    Absolutely! Bake layers up to 3 days ahead and store well-wrapped at room temperature. You can also freeze them for up to 3 months. Frost the day before or morning of serving for best results.

    How do I prevent my Easter cake from drying out?

    Don’t overbake – test with a toothpick at the minimum baking time. Apply a simple syrup soak to layers before frosting, and store properly in an airtight container.

    Can I use cake mix instead of making it from scratch?

    Yes! Enhance a boxed mix by adding an extra egg, substituting butter for oil, and using milk instead of water for a more homemade taste in your Easter cake.

    What’s the best way to color frosting for Easter themes?

    Use gel food colors for vibrant pastel shades without thinning your frosting. Start with tiny amounts on a toothpick and gradually build to your desired Easter palette.

    How can I make my Easter cake more kid-friendly?

    Create a decorating station with various sprinkles, small candies, and pastel-colored frosting in piping bags. Kids love personalizing their own cake slices!

    Final Thoughts

    This Easter cake brings together everything I love about spring celebrations – beauty, tradition, and flavors that make everyone smile. The moment when you carry it to the table and see eyes light up makes every step worthwhile. I treasure these sweet traditions that become part of our family story, creating memories that last far longer than the cake itself (though leftovers rarely survive the weekend!). Whether you’re baking for a crowd or an intimate gathering, this Easter cake deserves a place at your celebration. Find more seasonal inspiration on Pinterest.
  • Easter Cake Roll Recipe: Irresistibly Soft & Delightfully Festive!

    Easter Cake Roll Recipe: Irresistibly Soft & Delightfully Festive!

    Easter Cake Roll Recipe: Irresistibly Soft & Delightfully Festive!

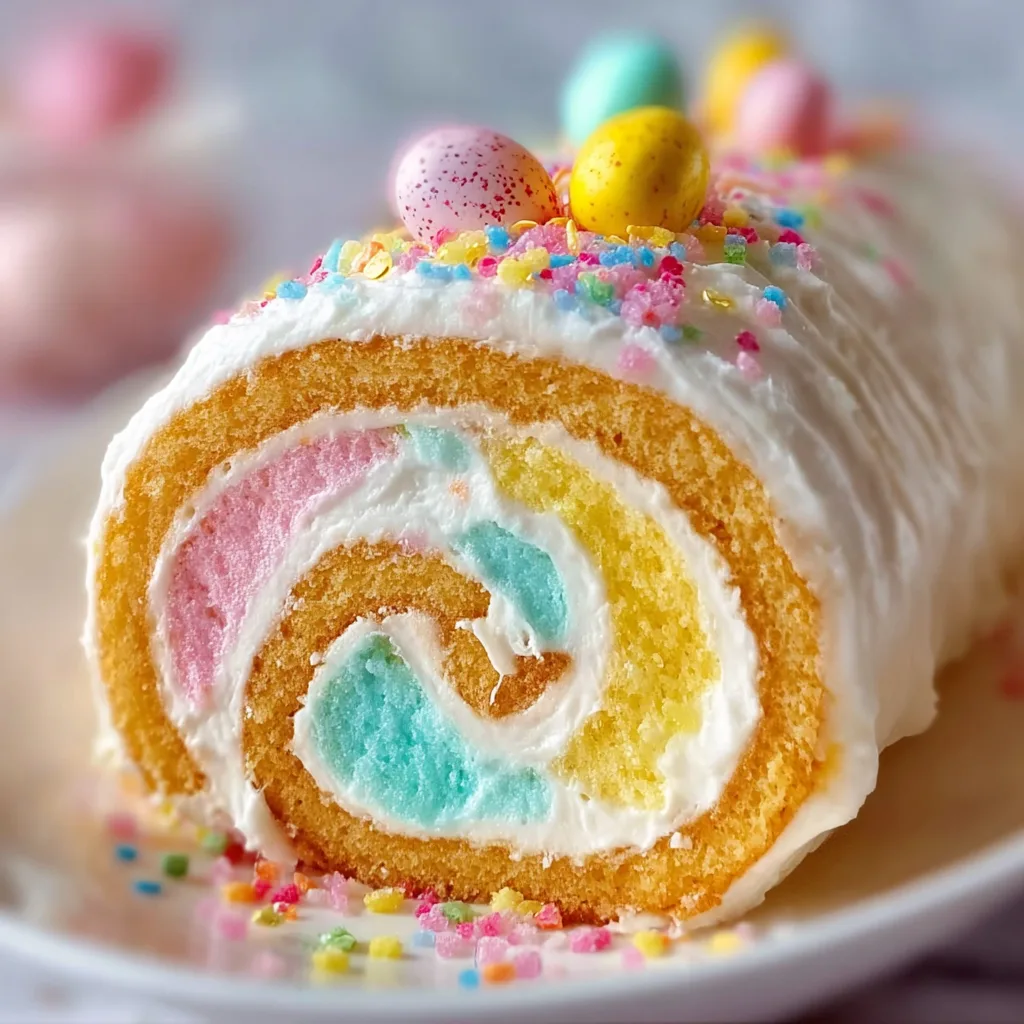
    This Easter Cake Roll cake has become my family’s springtime tradition! The delicate sponge cake, rolled with creamy filling and decorated with pastel Easter candies, creates a showstopping dessert that’s surprisingly simple to make. I discovered this recipe years ago when looking for something special to bring to our neighborhood Easter brunch. The first time I made it, my daughter’s eyes lit up with pure joy – that moment when the cake is unrolled to reveal that perfect spiral pattern is truly magical. Whether you’re a seasoned baker or trying your hand at a rolled cake for the first time, this Easter treat will become your new holiday favorite.

    Recipe

    Why You’ll Love This Easter Cake Roll cake

    Perfect Balance of Flavors and Textures

    There’s something utterly irresistible about the combination of light, airy sponge and rich, creamy filling in this Easter Cake Roll cake. The cake itself has a delicate vanilla flavor that pairs beautifully with whatever filling you choose. I personally love using a cream cheese frosting with a hint of lemon zest for that perfect spring zing. The texture contrast between the soft cake and silky filling creates a delightful mouthfeel that keeps everyone coming back for second slices. Plus, the visual appeal of those beautiful spirals makes this dessert as gorgeous as it is delicious.

    Versatile and Customizable

    What makes this Easter Cake Roll cake so special is how easily it adapts to your preferences. The basic recipe serves as a versatile canvas for creativity! You can tint the filling with pastel food coloring for a festive touch or fold in crushed candy pieces for extra texture. I’ve made versions with chocolate sponge and peppermint filling for Christmas, but the Easter variation with spring-colored sprinkles and mini chocolate eggs on top remains my family’s favorite. You can even experiment with different extracts in the batter – almond, coconut, or orange all work beautifully for a unique flavor profile.

    Essential Tips & Tricks

    Perfect Rolling Technique

    The most crucial step in creating a flawless Easter Cake Roll cake is mastering the rolling technique. The key is to roll the cake while it’s still warm from the oven, which prevents cracking. I learned this the hard way after my first attempt shattered into pieces! Line your baking sheet with parchment paper that extends beyond the edges, then dust generously with powdered sugar before turning out the hot cake. Roll the cake with the parchment paper inside, starting from the short end. Let it cool completely in this rolled position before unrolling to add filling. This “trains” the cake to hold its shape for the perfect spiral.

    Achieving the Ideal Texture

    For the dreamiest Easter Cake Roll cake, texture is everything. The cake batter needs precise handling – overmixing leads to a tough, rubbery cake that will crack when rolled. Fold in ingredients gently using a spatula rather than beating with an electric mixer. Another game-changer is proper baking time. Check your cake at the minimum suggested time by gently pressing the center – it should spring back without leaving an indentation. For extra insurance against dryness, try adding a simple syrup brush (equal parts sugar and water, heated until dissolved) over the unrolled cake before adding filling. Check out these Easter Mini Egg Cheesecakes for more festive dessert inspiration!

    Serving Ideas & Creative Variations

    Festive Presentation Touches

    Transform your Easter Cake Roll cake into a true centerpiece with thoughtful presentation details. I love creating a “nest” effect by placing the roll on a bed of tinted coconut flakes and surrounding it with chocolate eggs and spring flowers. For a more elegant look, dust the top with powdered sugar through a doily or stencil to create a lacy pattern. Serving slices on pastel plates with fresh berries and a mint sprig elevates the experience. For a whimsical touch, insert decorative Easter picks or small chocolate bunnies along the top of the roll. These simple extras make guests feel truly special.

    Flavor Combinations to Try

    Experiment with exciting flavor pairings to make your Easter Cake Roll cake truly memorable. My family’s current obsession is a strawberry-lemon combination – fold fresh diced strawberries into a lemon-infused cream cheese filling for bright, spring flavors. Another winner is white chocolate mousse filling with raspberry preserves swirled throughout. For chocolate lovers, try a vanilla sponge with chocolate ganache filling, topped with crushed Cadbury eggs. If you’re feeling adventurous, check out this No-Bake Cadbury Mini Eggs Cheesecake Dip for inspiration on incorporating Easter candies into your desserts!

    Storage & Troubleshooting Guide

    Proper Storage Methods

    Keep your Easter Cake Roll cake fresh and delicious with proper storage techniques. If serving within 24 hours, the filled and frosted roll can stay at room temperature, covered loosely with plastic wrap. For longer storage, refrigerate for up to 3 days – but be sure to place toothpicks around the cake before covering to prevent the plastic from sticking to your beautiful decoration. The unfilled cake can also be frozen for up to one month: cool completely, wrap tightly in plastic wrap, then aluminum foil. Thaw overnight in the refrigerator before unrolling, filling, and decorating. Always bring refrigerated cake to room temperature for about 30 minutes before serving for the best flavor.

    Fixing Common Problems

    Even experienced bakers encounter challenges with cake rolls. If your Easter Cake Roll cake cracks during rolling, don’t panic! Small cracks can be easily disguised with frosting or decorative toppings. For larger cracks, consider turning it into a trifle by cubing the cake and layering with filling and toppings in a glass dish – no one will know it wasn’t intentional! If your filling oozes out when rolling, it’s likely too soft. Refrigerate the filling for 15-20 minutes to firm it up before spreading. For a cake that’s too dry, brush with simple syrup or a flavored liqueur before adding filling to add moisture and flavor.

    Frequently Asked Questions

    Can I make this Easter Cake Roll cake ahead of time?

    Yes! You can bake and roll the cake up to 2 days ahead. Store the unfilled roll wrapped in plastic at room temperature, then unroll, fill, and decorate on the day of serving for best results.

    What’s the secret to preventing cracks in my Easter Cake Roll cake?

    Roll the cake while still warm from the oven using a kitchen towel dusted with powdered sugar. This “trains” the cake to hold its shape and prevents cracking when filled later.

    Can I use a different filling than the one in the recipe?

    Absolutely! Try cream cheese frosting, whipped ganache, or flavored buttercream. Just ensure the filling is spreadable but firm enough to hold its shape when rolled.

    How do I store leftover cake roll?

    Cover loosely with plastic wrap and refrigerate for up to 3 days. Bring to room temperature for about 30 minutes before serving for the best flavor and texture.

    What pan size works best for a cake roll?

    A standard 10×15-inch jelly roll pan is ideal. Using a different size pan will affect baking time and may make rolling more difficult.

    Final Thoughts

    This Easter Cake Roll cake has become more than just a dessert in our home—it’s a cherished tradition that signals spring has truly arrived. The joy of watching family members’ faces light up when they see those beautiful spirals never gets old. I love how this recipe balances impressive presentation with doable technique, making it perfect for both special occasions and weekend treats. Don’t be intimidated by the rolling process—with practice, you’ll master it quickly! Be sure to check out more Easter inspiration on our Pinterest board for additional festive ideas to complement your beautiful cake roll.

  • Chewy Giant Easter Cookie Cake: Irresistibly Soft & Delicious!

    Chewy Giant Easter Cookie Cake: Irresistibly Soft & Delicious!

    Chewy Giant Easter Cookie Cake: Irresistibly Soft & Delicious!

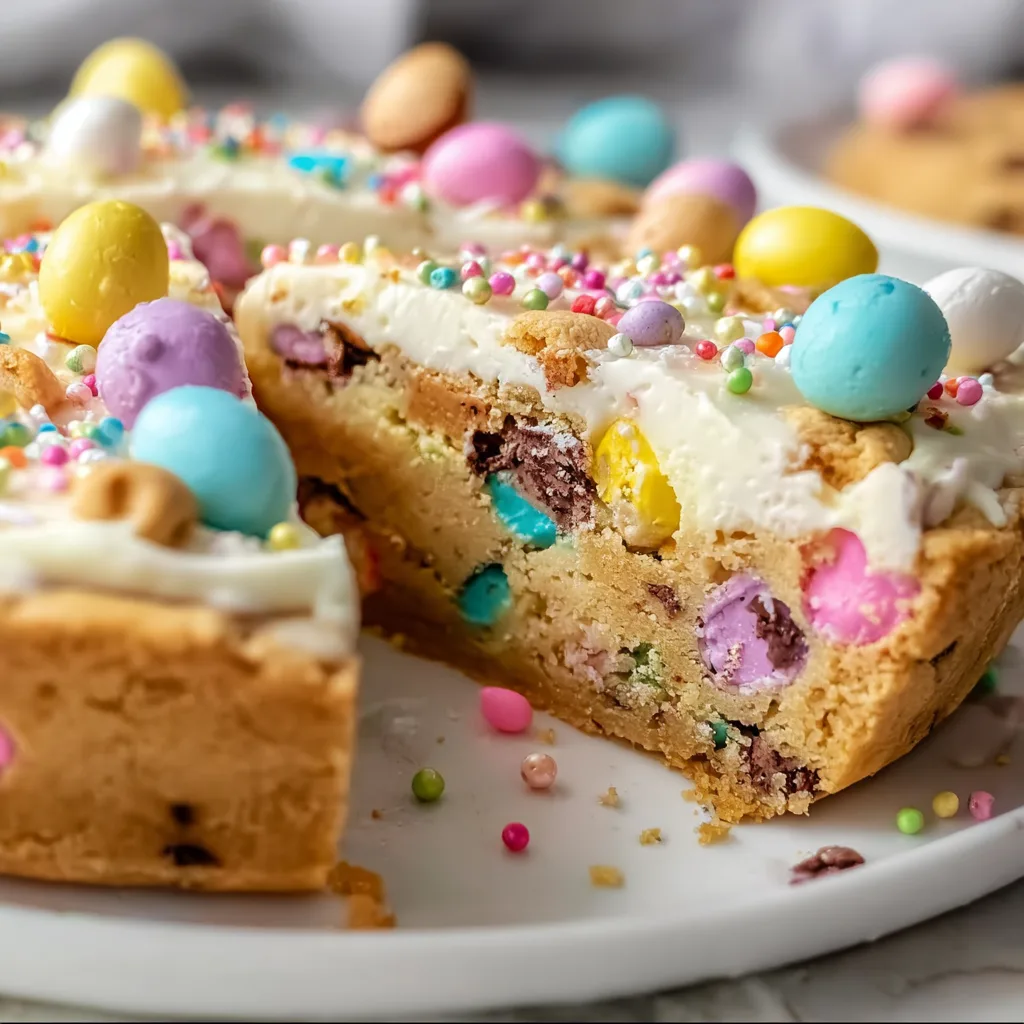
    This chewy Giant Easter cookie cake has become my absolute springtime obsession! There’s something magical about pulling a warm, golden-edged cookie cake from the oven that makes my heart flutter with excitement. The aroma of vanilla and butter fills my kitchen as colorful Easter candies nestle into that perfectly chewy texture. I first made this for my niece’s Easter egg hunt last year, and watching little hands reach eagerly for second slices told me everything I needed to know. It’s the perfect balance of festive and indulgent—just like those easy cinnamon swirl cookies we all adore, but sized up for celebration!

    Recipe

    Perfect Texture Every Time

    The secret to chewiness lies in the perfect ratio of brown to white sugar and a slightly shorter baking time than you might expect. I’ve tested this recipe countless times (my neighbors aren’t complaining!), and that edge-crisp, center-soft texture is guaranteed. When you bite into a slice, you’ll feel that gentle resistance before melting into pure vanilla-buttery bliss. The dough spreads just enough to create that classic cookie cake density without becoming cakey or too dense. Trust me, that first warm bite will transport you straight to cookie heaven.

    Festive and Customizable

    This cookie cake is a blank canvas for Easter creativity! I’ve pressed pastel M&Ms and chocolate mini eggs into the surface for a colorful spring vibe, but you can use whatever Easter candies make you smile. The beauty is in the simplicity—children can help decorate, making this a fun family activity. I love watching my niece’s concentration as she carefully arranges candy patterns on top. The contrast between the golden cookie base and vibrant Easter toppings creates an irresistible visual appeal that screams “celebration” before anyone takes their first bite.

    Essential Tips & Tricks

    Mixing and Preparation Secrets

    Room temperature ingredients make all the difference in achieving that perfect chewy texture. I learned this the hard way after one disappointing batch with cold eggs! The butter should be soft enough to leave a slight indentation when pressed, but not melty or greasy. When mixing, cream the butter and sugars until just fluffy—overmixing incorporates too much air and creates a cakey result. My personal touch? I add a tiny splash of almond extract alongside the vanilla for depth that guests always notice but can’t quite identify. It’s my little secret ingredient that elevates this treat.

    Baking for Perfect Results

    The visual cues matter more than strict timing when baking this cookie cake. Look for golden edges while the center remains slightly underdone—it will continue cooking after removal. I place my springform pan on the middle rack and rotate halfway through baking for even browning. Patience is crucial after baking; allow the cake to cool in the pan for at least 15 minutes before releasing the sides. If you’re adding a frosting border, wait until completely cool to prevent melting. That slight dome that forms while baking? It settles as it cools, creating that dense, chewy texture we’re after.

    Serving Ideas & Creative Variations

    Festive Presentation Styles

    Creating a showstopping display elevates this simple treat to dessert table stardom. I love serving it on a cake stand surrounded by fresh spring flowers or decorated Easter eggs. For birthday celebrations, add candles and personalize with colored frosting. My favorite presentation was when I used a pastry bag with a star tip to pipe buttercream around the edges, then nestled small chocolate bunnies between the frosting swirls. The contrast between the rustic cookie texture and polished decoration creates an impressive visual that’s perfect for holiday gatherings or special occasions.

    Flavor Adaptations

    While the classic vanilla base is timeless, this recipe welcomes creative twists. Fold in crushed Oreos for a cookies-and-cream version, or swirl in Nutella before baking for chocolate-hazelnut decadence. During Easter, I sometimes add orange zest to the batter for a bright, citrusy note that pairs beautifully with white chocolate chips. For chocolate lovers, replace ¼ cup of flour with cocoa powder. My neighbor requested a peanut butter version last year—I simply reduced the butter slightly and added ⅓ cup creamy peanut butter to the dough. The result was a chewy, nutty base that paired perfectly with chocolate Easter candies.

    Storage & Troubleshooting Guide

    Keeping It Fresh

    The ideal storage method depends on how quickly you’ll enjoy your cookie cake. For 2-3 days, store at room temperature in an airtight container with parchment between layers if sliced. The texture actually improves slightly overnight as flavors meld! For longer storage, wrap individual slices in plastic, then foil, and freeze for up to 3 months. I always make an extra to freeze—there’s nothing like discovering a slice waiting for me on busy days. When ready to enjoy, thaw at room temperature for about an hour. Surprisingly, the chewy texture remains intact after freezing, though any frosting may lose some definition.

    Common Problems Solved

    If your cookie cake turns out too cakey, you likely overmixed the batter or used too much leavening. Next time, mix just until ingredients combine and double-check your measurements. For cookies that spread too much, your butter was probably too warm—chill the dough for 30 minutes before baking. When my center remained undercooked while edges burned, I discovered my oven temperature was inaccurate. An oven thermometer solved this immediately! For cracking issues, try adding an extra egg yolk for moisture. Remember that minor imperfections add homemade charm, and most texture issues can be disguised with strategic frosting placement.

    Frequently Asked Questions

    Absolutely! Bake 1-2 days in advance and store in an airtight container. The flavors actually develop nicely overnight, and the texture remains perfectly chewy.

    What pan size works best?

    A 9-inch round springform pan is ideal. For thinner cookies, use a 10-inch pan. For thicker, chewier results, an 8-inch pan works beautifully—just add 3-5 minutes to baking time.

    Can I use different mix-ins besides Easter candy?

    Definitely! Try chocolate chips, crushed pretzels, or chopped nuts. The base recipe is versatile and accommodates about 1 cup of mix-ins without affecting texture.

    How do I know when it’s perfectly baked?

    Look for golden brown edges while the center appears slightly underdone—it will continue cooking as it cools. A toothpick inserted 2 inches from the edge should come out with a few moist crumbs.

    Is this recipe suitable for freezing?

    Yes! Wrap slices individually and freeze for up to 3 months. Thaw at room temperature for about an hour before serving for that fresh-baked chewy texture.

    Final Thoughts

    This chewy Giant Easter cookie cake has become my signature spring dessert—the one friends request months in advance. There’s something magical about the way it brings people together, creating those precious moments of shared delight around the table. The beauty lies in its simplicity and adaptability, perfect for both novice bakers and experienced kitchen enthusiasts. Whether decorated elaborately or served rustic-style, it captures the playful spirit of Easter while delivering that comforting, nostalgic cookie experience we all crave. Find more seasonal inspiration on Pinterest and make this your new tradition!

  • No Bake Cadbury Mini Eggs Cheesecake Dip – Irresistibly Creamy Joy!

    No Bake Cadbury Mini Eggs Cheesecake Dip – Irresistibly Creamy Joy!

    No Bake Cadbury Mini Eggs Cheesecake Dip – Irresistibly Creamy Joy!

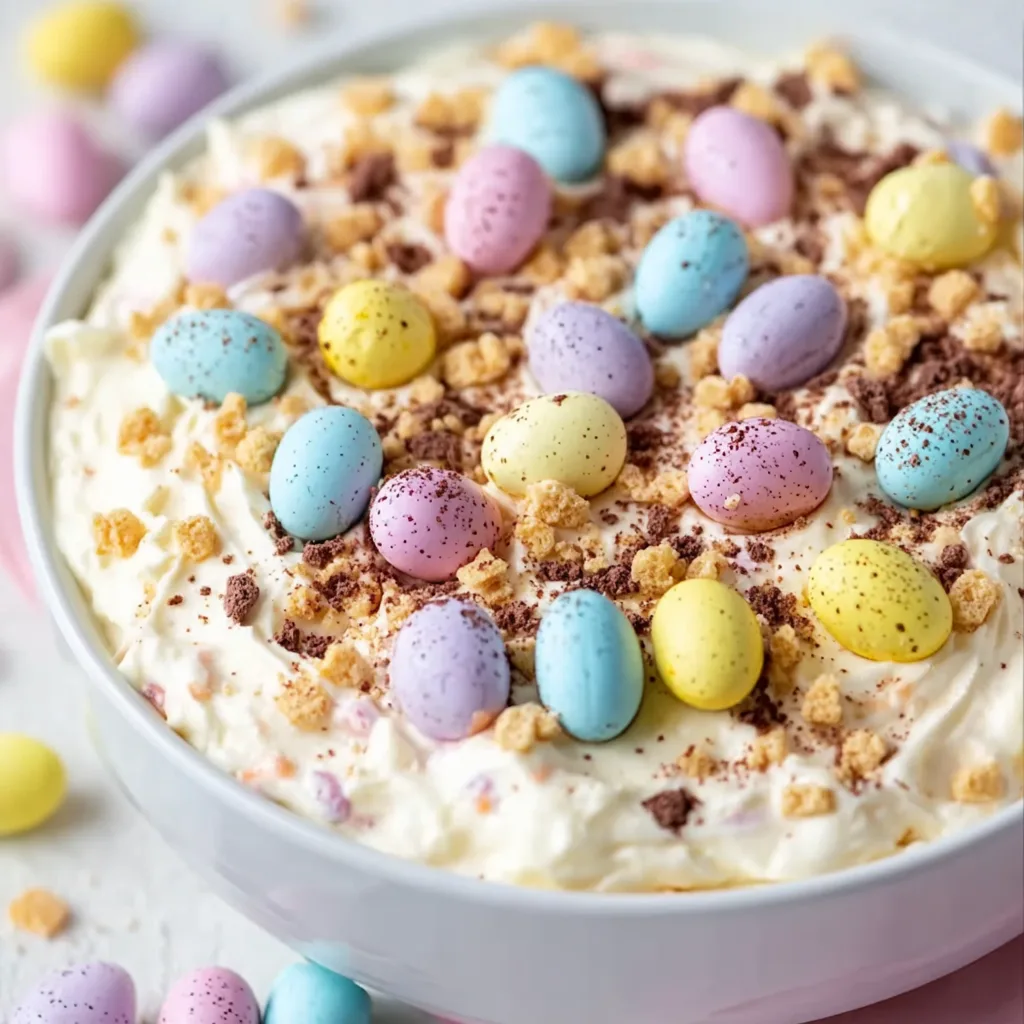
    No Bake Cadbury Mini Eggs Cheesecake Dip has become my ultimate spring dessert obsession! There’s something magical about the creamy, velvety texture of cheesecake filling combined with the iconic pastel crunch of those beloved chocolate eggs. I first made this for my niece’s birthday last Easter, and the way everyone’s eyes lit up as they dipped their first graham cracker into this pastel-speckled creation told me everything I needed to know. This quick, no-bake wonder takes just 15 minutes to prepare, making it perfect for last-minute gatherings or when you’re craving something sweet without heating up the kitchen. Like my easy cinnamon swirl cookies, it’s a crowd-pleaser that feels special without the fuss.

    Recipe

    Why You’ll Love This No Bake Cadbury Mini Eggs Cheesecake Dip

    Perfect Balance of Flavors and Textures

    The silky-smooth cream cheese base provides that familiar tangy cheesecake foundation we all crave, while the crushed Cadbury Mini Eggs add both chocolate richness and a delightful textural contrast. I love watching people’s expressions when they discover those little pockets of crunchy candy shell mixed with creamy chocolate. The subtle vanilla notes round everything out, creating a dessert that’s simultaneously familiar and exciting. What makes this dip truly special is how the different elements play together—each bite offering that perfect balance of creamy and crunchy that keeps you coming back for “just one more” dip.

    Quick and Stress-Free Preparation

    One of the biggest selling points of this Cadbury Mini Eggs Cheesecake Dip is how ridiculously easy it is to make. No oven preheating, no water baths, no worrying about cracks in your cheesecake. Just beat, fold, and chill. I’ve made this while simultaneously helping my nephew with homework and taking a work call—it’s that straightforward! The hands-on time is minimal, making it perfect for busy holidays or when you need a dessert that looks impressive but requires almost no effort. Plus, you can prepare it a day ahead, which is always a win when entertaining.

    Essential Tips & Tricks

    Getting the Perfect Consistency

    The key to achieving that dreamy texture lies in letting your cream cheese come fully to room temperature before beginning. I’ve learned this lesson the hard way—cold cream cheese will leave you with lumps no amount of beating can fix! For an extra-smooth result, beat the cream cheese alone first until completely fluffy before adding other ingredients. The heavy cream should be very cold when whipped separately, then gently folded into the cream cheese mixture. This contrast in temperatures creates that perfect mousse-like consistency that makes this dip so irresistible and easy to scoop with even delicate dippers like berry cheesecake dessert kabobs.

    Cadbury Mini Eggs: Crushing and Incorporating

    When it comes to those iconic pastel-shelled chocolates, how you crush and incorporate them makes all the difference. For the best texture contrast, I recommend crushing about 2/3 of your Mini Eggs into various sizes—some fine, some chunky—while keeping 1/3 whole or halved for garnish. A gentle tap with a rolling pin works better than a food processor, which can pulverize them too finely. To prevent the crushed candy from bleeding color into your dip, fold them in at the very last moment before chilling. This preserves those beautiful pastel speckles rather than turning your entire dip a murky purple-brown.

    Serving Ideas & Creative Variations

    Perfect Dippers and Presentation

    Creating an eye-catching display elevates this simple dip into a showstopping centerpiece. I like to serve it in a clear glass bowl to showcase the pretty pastel speckles, surrounded by a variety of dippers arranged in a circular pattern. Graham crackers, vanilla wafers, and strawberries are classics, but don’t overlook pretzels for that sweet-salty combination that’s utterly addictive. For extra visual appeal, sprinkle additional crushed Mini Eggs over the top just before serving, and consider adding fresh mint leaves for a pop of green. The contrast of colors and textures makes this dip as beautiful as it is delicious—perfect for spring celebrations or Easter gatherings like my no-bake grinch pie is for Christmas.

    Seasonal and Dietary Adaptations

    This versatile dip can be easily customized throughout the year or to accommodate different dietary needs. Outside of Mini Eggs season, try substituting other candy-coated chocolates like M&Ms in holiday colors. For a lighter version, use Neufchâtel cheese and light whipped topping instead of full-fat cream cheese and heavy cream. Those needing a gluten-free option can enjoy this dip with gluten-free graham crackers or fresh fruit. I’ve even made a dairy-free version using plant-based cream cheese and coconut cream that was surprisingly delicious! The basic formula stays the same—it’s the mix-ins and presentation that can change with the seasons.

    Storage & Troubleshooting Guide

    Proper Storage for Maximum Freshness

    This dip maintains its peak texture when properly stored in the refrigerator. Cover tightly with plastic wrap, pressing it directly onto the surface of the dip to prevent a skin from forming. When stored this way, it stays fresh for up to 3 days, though the Mini Eggs may soften slightly over time. If you’re planning to make it ahead for an event, consider adding a portion of the crushed candy just before serving to maintain that signature crunch. I don’t recommend freezing this dip, as the texture becomes grainy upon thawing and the candy shells can become soggy—a fresh preparation is always best for that perfect contrast between creamy and crunchy.

    Fixing Common Issues

    Even the simplest recipes can sometimes go awry, but most issues with this No Bake Cadbury Mini Eggs Cheesecake Dip are easily fixed. If your dip turns out too runny, it’s likely that either the heavy cream wasn’t whipped enough or the mixture was overmixed after folding. Simply return it to the refrigerator for an additional hour to firm up. For a dip that’s too stiff, gently fold in a tablespoon of milk until you reach your desired consistency. If the colors from the candy shells begin to bleed, creating a mottled appearance, embrace it as a marbled effect! Alternatively, you can cover any discoloration with a fresh layer of whipped cream and newly crushed Mini Eggs on top.

    Frequently Asked Questions

    Can I make this No Bake Cadbury Mini Eggs Cheesecake Dip ahead of time?

    Absolutely! Prepare it up to 24 hours in advance, but save some crushed Mini Eggs to sprinkle on top just before serving to maintain that perfect crunch factor.

    What can I use instead of Cadbury Mini Eggs when they’re out of season?

    Any candy-coated chocolate works beautifully—try M&Ms, Reese’s Pieces, or seasonal alternatives like candy corn for fall or peppermint candies for winter.

    Is this recipe freezer-friendly?

    I don’t recommend freezing this dip. The texture becomes grainy when thawed, and the candy shells lose their satisfying crunch. Fresh is definitely best!

    Can I make this lighter or lower in calories?

    Yes! Substitute Neufchâtel cheese for cream cheese, use light whipped topping instead of heavy cream, and reduce sugar by 25% without significantly affecting flavor.

    How thick should the final dip consistency be?

    The perfect consistency is like a soft mousse—thick enough to cling to your dipper without dripping off, but soft enough to easily scoop. Think traditional cheesecake filling.

    Final Thoughts

    This No Bake Cadbury Mini Eggs Cheesecake Dip has become my go-to spring dessert for good reason. It captures everything we love about classic cheesecake and those nostalgic candy-coated chocolate eggs, but in a format that’s approachable, shareable, and undeniably fun. The way people gather around it, chatting and laughing as they dip and discover new favorite combinations, makes it more than just a dessert—it’s an experience. Whether you’re hosting a springtime celebration or simply treating yourself on a Tuesday night, this creamy, crunchy, pastel-speckled creation delivers joy in every bite. Don’t forget to check out more seasonal inspiration on our Pinterest page!

  • Easter Mini Egg Cheesecakes: Irresistible Treats to Savor Today!

    Easter Mini Egg Cheesecakes: Irresistible Treats to Savor Today!

    Easter Mini Egg Cheesecakes: Irresistible Treats to Savor Today!

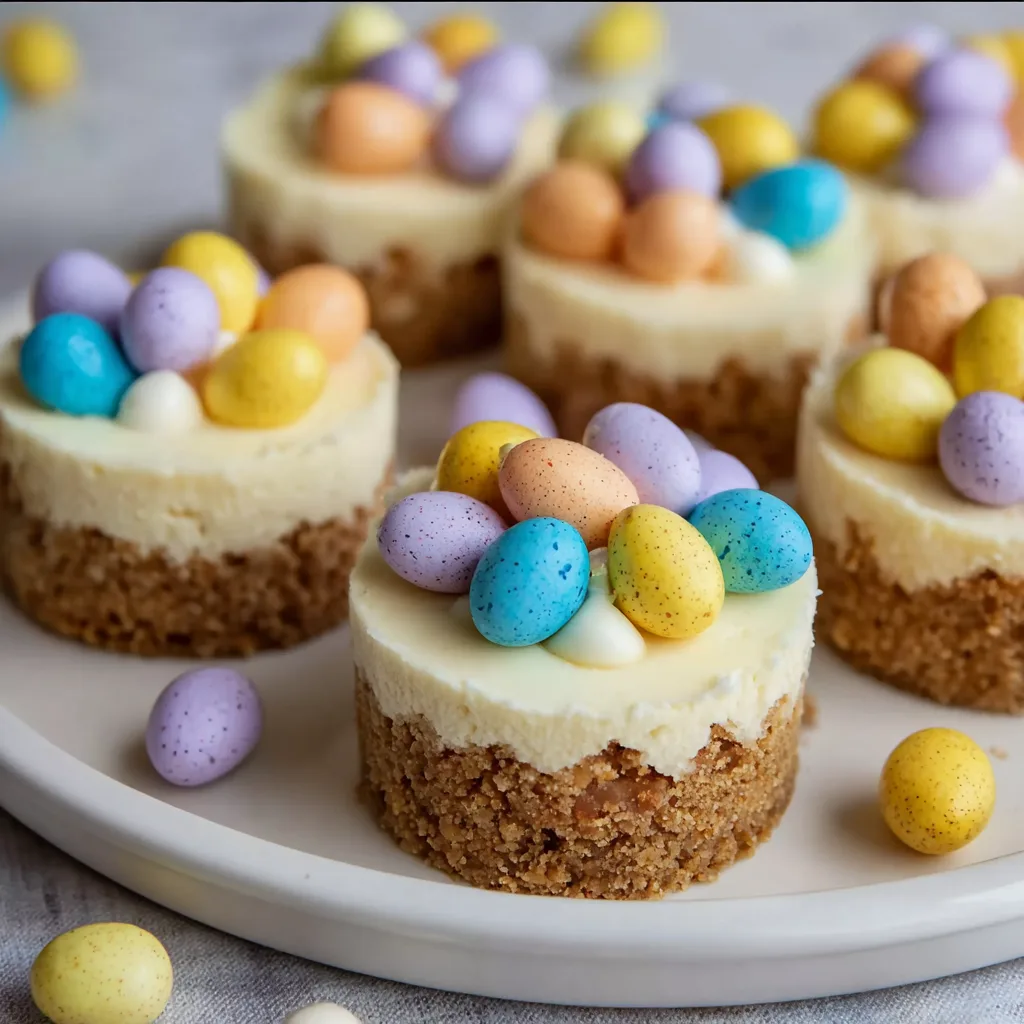
    Easter Mini Egg Cheesecakes are the perfect spring dessert that combines creamy cheesecake with the festive crunch of chocolate mini eggs. I first made these adorable individual treats for my family’s Easter gathering last year, and they disappeared faster than the Easter Bunny! The colorful speckled eggs nestled on top of velvety cheesecake create a dessert that’s as beautiful as it is delicious. The buttery graham cracker crust provides the perfect foundation for the rich, tangy filling, while the candy eggs add a playful touch that both kids and adults will love. These mini cheesecakes are surprisingly simple to make but look impressively elegant.

    Recipe

    Why You’ll Love These Easter Mini Egg Cheesecakes

    Perfect Make-Ahead Dessert

    These mini cheesecakes are a time-saving miracle when you’re planning an Easter gathering. I love that I can prepare them a day or two in advance, which means less stress on the holiday itself. The individual portions eliminate the need for cutting and serving, making them perfect for buffet-style meals. Plus, they set beautifully in the refrigerator overnight, allowing the flavors to meld together and intensify. The cheesecake texture becomes even more velvety after chilling, creating that perfect creamy-yet-firm consistency that makes cheesecake so irresistible.

    Customizable for Everyone

    One of the best features of these Easter mini egg cheesecakes is how easily adaptable they are to suit different preferences. You can swap the graham cracker crust for chocolate cookie crumbs or even crushed shortbread for a different flavor profile. For those who prefer white chocolate, simply fold some chopped white chocolate into the batter. I’ve made these with different food coloring swirled in for a marbled effect that looks stunning. You can even adjust the sweetness level by choosing different types of mini eggs—milk chocolate, dark chocolate, or even those with candy shells.

    Essential Tips & Tricks

    Perfect Cheesecake Texture

    The secret to achieving that silky-smooth texture in your Easter mini egg cheesecakes is bringing all ingredients to room temperature before mixing. Cold cream cheese will leave lumps no matter how long you beat it! I learned this the hard way during my first attempt when I rushed the process. Another crucial tip is to avoid overmixing once you add the eggs—beat just until incorporated. This prevents too much air from getting into the batter, which can cause cracks. For extra insurance against cracks, bake in a water bath by placing your muffin tin in a larger pan filled with hot water.

    Decorating Like a Pro

    Creating professional-looking Easter mini egg cheesecakes is easier than you might think! I recommend chilling the cheesecakes completely before adding toppings—at least 4 hours or overnight. For the most attractive presentation, pipe a small swirl of whipped cream on top using a star tip, then nestle 2-3 mini eggs into the cream. For an extra special touch, crush some additional mini eggs and sprinkle the colorful pieces around the edges. You can also drizzle melted chocolate across the top in a zigzag pattern for added visual appeal and flavor.

    Serving Ideas & Creative Variations

    Festive Easter Table Display

    Transform your Easter dessert table into a showstopping display with these mini cheesecakes as the centerpiece. I love arranging them on a tiered cake stand with fresh spring flowers tucked between the levels. Scatter some pastel-colored Easter grass around the base for a festive touch. You could also place each mini cheesecake in a colorful cupcake wrapper before serving to add more spring colors to your table. For an interactive element, set up a toppings bar with extra whipped cream, chocolate sauce, and various crushed candies so guests can customize their desserts.

    Seasonal Adaptations

    While these cheesecakes are perfect for Easter, you can easily transform them for other occasions throughout the year. Simply swap the mini eggs for different seasonal candies or toppings. For summer, top with fresh berries and a mint leaf. Fall calls for caramel drizzle and a sprinkle of cinnamon. Winter holidays? Use red and green M&Ms or crushed candy canes. Valentine’s Day is perfect for heart-shaped sprinkles and raspberry sauce. The base cheesecake recipe remains the same—it’s the decorations that change to keep this dessert relevant year-round.

    Storage & Troubleshooting Guide

    Proper Storage Methods

    For the freshest flavor and texture, store your Easter mini egg cheesecakes in an airtight container in the refrigerator for up to 5 days. I recommend placing them in a single layer to prevent the decorations from getting squished. If you need to stack them, place a piece of parchment paper between layers. These cheesecakes also freeze beautifully for up to 3 months—just wrap each one individually in plastic wrap, then place in a freezer-safe container. To thaw, transfer to the refrigerator overnight rather than using room temperature to avoid condensation making the crust soggy.

    Fixing Common Issues

    Even experienced bakers encounter problems sometimes! If your cheesecakes develop small cracks, don’t worry—they’re easy to hide with toppings. For sunken centers, which usually happen from cooling too quickly, fill the depression with extra whipped cream before adding your mini eggs. If your crust is crumbly, it likely needs more butter next time. For cheesecakes that stick to the pan, try lining with parchment paper circles or using silicone muffin cups. And if your mini eggs bleed color onto the cheesecake, place them on top just before serving rather than hours in advance.

    Frequently Asked Questions

    Can I make Easter Mini Egg Cheesecakes without a muffin tin?

    Yes! You can use small mason jars, ramekins, or even silicone muffin cups. Adjust baking time accordingly—larger containers will need more time, while smaller ones may bake faster.

    How do I prevent my mini eggs from sinking into the cheesecake?

    Add the mini eggs after baking and cooling. Place them on a layer of whipped cream or gently press them into the set cheesecake surface just before serving.

    Can I use regular-sized eggs instead of mini eggs?

    Absolutely! Chop larger chocolate eggs into smaller pieces to distribute throughout the cheesecake or use as decoration on top.

    Is there a dairy-free alternative for these cheesecakes?

    Yes, substitute dairy-free cream cheese, coconut cream instead of heavy cream, and dairy-free chocolate eggs. The texture will be slightly different but still delicious.

    How far in advance can I make Easter Mini Egg Cheesecakes?

    You can make these cheesecakes up to 3 days in advance and store them in the refrigerator. Add the mini egg decoration just before serving for the best appearance.

    Final Thoughts

    These Easter Mini Egg Cheesecakes have become a beloved tradition in my home, bringing smiles to faces young and old each spring. There’s something magical about the combination of creamy cheesecake and chocolate candy that captures the joy of the season. Whether you’re hosting a grand Easter celebration or simply want to treat yourself to something special, these mini desserts deliver big flavor in an adorable package. I hope they bring as much delight to your table as they have to mine! Don’t forget to check out more seasonal recipes on Pinterest.

  • Easter Egg Cheesecake Jars: Irresistibly Cute & Delicious Treats!

    Easter Egg Cheesecake Jars: Irresistibly Cute & Delicious Treats!

    Easter Egg Cheesecake Jars: Irresistibly Cute & Delicious Treats!

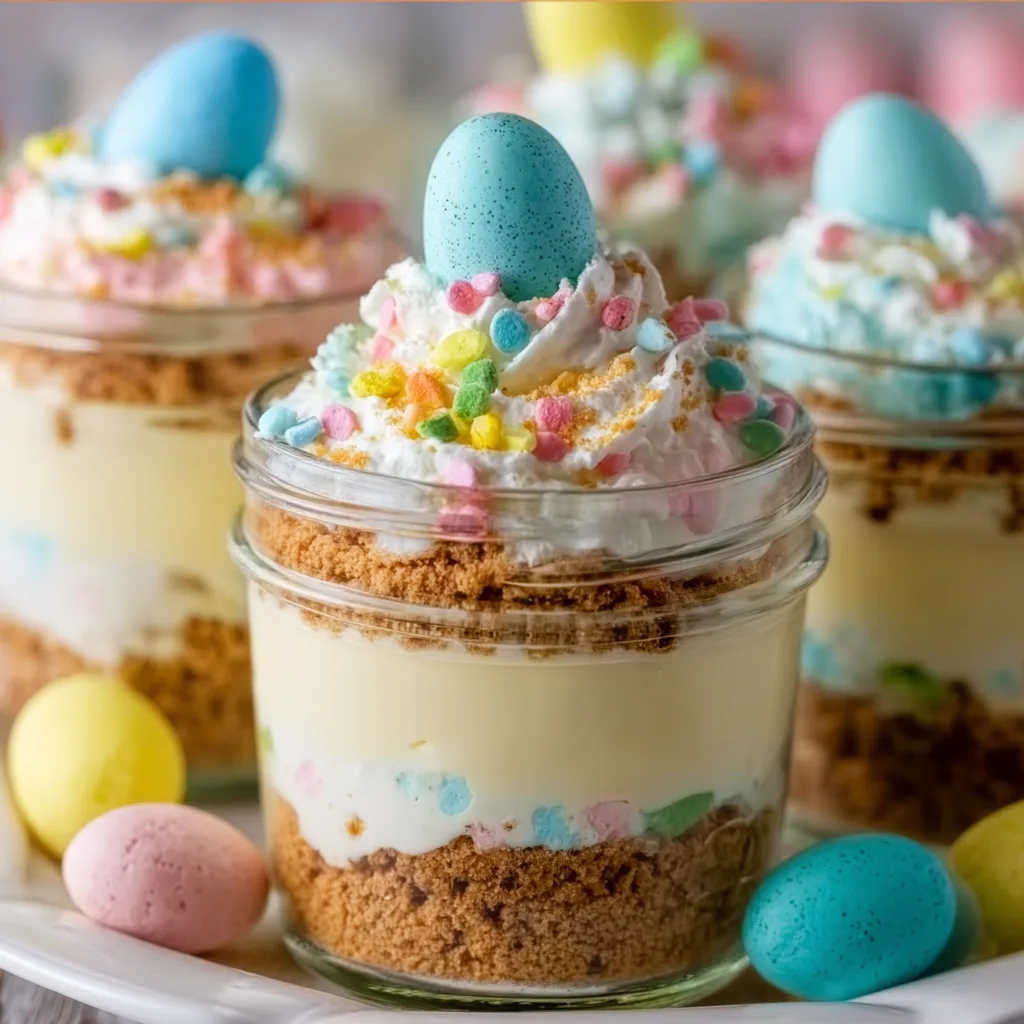
    Easter Egg Cheesecake Jars are the perfect springtime dessert that combines creamy no-bake cheesecake with festive pastel Easter candy. I created these adorable treats for my family’s Easter brunch last year, and they disappeared faster than the kids could find eggs in the garden! There’s something magical about layering velvety cheesecake filling with crushed cookies and colorful candies that makes everyone smile. The best part? You can prepare them ahead of time, leaving you free to enjoy the holiday festivities instead of being stuck in the kitchen. These individual jars are as delightful to look at as they are to eat!

    Recipe

    Why You’ll Love These Easter Egg Cheesecake Jars

    Perfect for Any Celebration

    These adorable dessert jars aren’t just for Easter—they’re a hit at baby showers, spring birthdays, or any gathering that calls for something special. I love how the layers create such a pretty visual effect in clear glass jars. The combination of creamy cheesecake, crunchy cookie base, and colorful candy toppings creates a delightful texture contrast in every spoonful. Plus, the individual portions mean no cutting or serving stress—just hand them out and watch faces light up! They’re particularly perfect for outdoor gatherings where traditional cake might be challenging to serve.

    Make-Ahead Magic

    As a busy mom who loves to entertain, I’ve learned that prep-ahead desserts are absolute lifesavers. These cheesecake jars can be made up to two days before your celebration—just add the final candy toppings right before serving for maximum freshness and visual impact. The flavors actually develop and meld together beautifully during their time in the refrigerator, making them taste even better. I’ve found myself making an extra jar just for me to enjoy the next day when the house is quiet! The convenience factor alone makes these worth adding to your regular dessert rotation.

    Essential Tips & Tricks

    Getting the Perfect Texture

    The secret to silky-smooth cheesecake filling lies in two simple steps that make all the difference. First, ensure your cream cheese is completely softened to room temperature—I leave mine out for at least an hour before mixing. Second, beat the cream cheese alone before adding other ingredients to eliminate any lumps completely. For the cookie base, crush graham crackers to a fine consistency with some slightly larger pieces for texture contrast. I’ve found that a food processor pulsed just 5-6 times gives that perfect mix of fine crumbs with a few bigger bits for interest.

    Creative Customization

    While traditional graham crackers make a wonderful base, don’t be afraid to experiment with different cookies! I’ve used crushed Oreos for a chocolate version that was absolutely divine. For the filling, try seasonal flavor additions like a tablespoon of lemon zest for brightness or a teaspoon of cinnamon for warmth. The candy toppings offer endless possibilities—pastel M&Ms, mini chocolate eggs, or even crushed Robin’s eggs all work beautifully. My daughter loves helping to choose different color combinations for each jar, making this a fun family activity.

    Serving Ideas & Creative Variations

    Presentation Perfection

    Elevate these treats with thoughtful presentation details that make them extra special. Tie a pastel ribbon around each jar with a small wooden spoon attached, or create custom tags with guests’ names for a personalized touch. For a stunning display, arrange jars of varying heights on a decorated cake stand surrounded by fresh flowers or Easter grass. I served these at my sister’s baby shower with tiny “Ready to Hatch” tags, and guests couldn’t stop taking photos! Consider adding edible flower petals on top for an elegant spring touch that complements the berry cheesecake dessert kabobs I served alongside them.

    Flavor Variations

    While the classic vanilla cheesecake filling is always a crowd-pleaser, exploring seasonal flavor combinations can make these jars even more special. Try adding 2 tablespoons of lemon curd swirled through the filling for a bright citrus version, or fold in 1/4 cup of crushed freeze-dried strawberries for a pretty pink berry variation. For chocolate lovers, mix in 3 tablespoons of cocoa powder and top with chocolate shavings. My personal favorite twist is adding a thin layer of salted caramel between the crust and filling—the sweet-salty contrast is absolutely irresistible and always earns rave reviews from guests.

    Storage & Troubleshooting Guide

    Proper Storage Techniques

    To maintain that perfect creamy texture, store your cheesecake jars in the refrigerator with lids tightly sealed. They’ll keep beautifully for up to 3 days, though the cookie base may soften slightly over time (which many people, including me, actually prefer!). If you’re making these well ahead, consider layering the crust and filling but waiting to add any candy toppings until serving day to prevent color bleeding or texture changes. For potlucks or picnics, transport them in a cooler with ice packs to keep them chilled. I’ve found that metal mason jar lids create a better seal than plastic for longer storage.

    Common Issues & Solutions

    If your filling seems too soft, the most likely culprit is under-whipped cream. Make sure to beat the heavy cream to firm peaks before folding it into the cream cheese mixture. If you notice your filling developing tiny lumps, it’s usually because the cream cheese wasn’t soft enough before mixing—fix this by letting the mixture come fully to room temperature and then beat again until smooth. For crumbly crusts that won’t hold together, add an extra tablespoon of melted butter to help bind the crumbs. If your candy toppings are bleeding color into the filling, try placing them on just before serving or choose candies with harder sugar shells.

    Frequently Asked Questions

    Can I make Easter Egg Cheesecake Jars without a mixer?

    Yes! While a mixer makes the process easier, you can hand-whisk these jars. Ensure your cream cheese is very soft and use a sturdy whisk. The filling might be slightly less airy but will still taste delicious.

    How far in advance can I prepare these?

    You can make these up to 2 days ahead. Store them covered in the refrigerator, but add candy toppings just before serving for the best appearance and texture.

    Can I freeze these cheesecake jars?

    Yes, they freeze well for up to 1 month. Thaw overnight in the refrigerator, though note that the texture might change slightly. Add fresh toppings after thawing.

    What can I substitute for graham crackers?

    Any crisp cookie works beautifully—try digestive biscuits, shortbread, vanilla wafers, or chocolate cookies. Adjust butter amounts slightly if needed for proper binding.

    Are Easter Egg Cheesecake Jars gluten-free?

    They can be! Simply substitute the graham crackers with gluten-free cookies and verify all your candy toppings are gluten-free. The cheesecake filling itself contains no gluten.

    Final Thoughts

    These Easter Egg Cheesecake Jars have become a cherished tradition in my home, bringing smiles and creating sweet memories around our holiday table. The joy of watching guests discover the colorful layers and creamy texture makes all the preparation worthwhile. I love how versatile they are—elegant enough for special occasions yet simple enough for everyday treats. Whether you’re celebrating Easter, springtime, or just need a cheerful dessert to brighten someone’s day, these festive jars deliver both beauty and flavor in perfect balance. Don’t forget to share your creations on Pinterest!

  • Easter Bunny Coconut Tails Recipe – Irresistibly Fluffy & Fun!

    Easter Bunny Coconut Tails Recipe – Irresistibly Fluffy & Fun!

    Easter Bunny Coconut Tails Recipe – Irresistibly Fluffy & Fun!

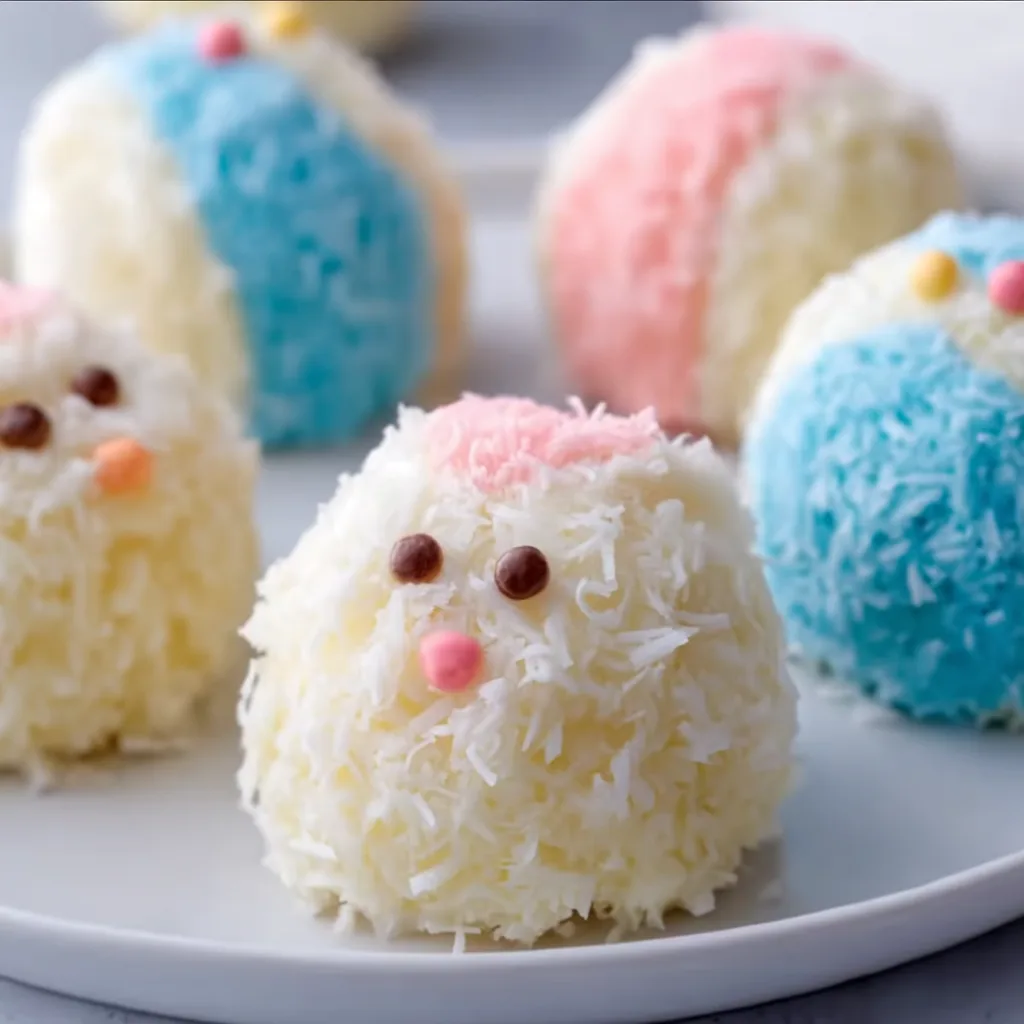
    Easter Bunny Coconut Tails have become my absolute favorite springtime treat to share with family and friends. These adorable, sweet confections combine the tropical bliss of coconut with rich chocolate and festive decorations that bring the Easter spirit to life. The first time I made these for my niece’s Easter egg hunt, the children’s eyes lit up with such joy that I’ve made them a tradition ever since. What makes these treats special isn’t just their delicious flavor, but how they transform an ordinary gathering into a magical Easter celebration. The best part? They’re surprisingly simple to create!

    Recipe

    Why You’ll Love This Easter Bunny Coconut Tails

    Perfect Balance of Flavors and Textures

    These Easter Bunny Coconut Tails offer the most satisfying texture contrast you can imagine. The exterior coating of shredded coconut provides a delightful chewiness, while the interior remains soft and tender. I love how the sweetness of the coconut paste balances perfectly with the rich chocolate dip. Each bite delivers a wonderful mouthfeel that’s both substantial and delicate. The subtle vanilla notes complement the coconut without overpowering it, creating a treat that even coconut skeptics find irresistible. My husband, who typically avoids coconut desserts, asks for these every spring!

    Impressive Yet Easy to Create

    Don’t let their adorable appearance fool you – these bunny tails are remarkably beginner-friendly! Unlike complicated Easter desserts that require special equipment or advanced techniques, these cute treats come together with basic ingredients and simple steps. I remember panicking when I volunteered to bring dessert to a family Easter brunch, but these saved the day with just 30 minutes of active preparation. The rolling technique creates perfectly round shapes every time, and the decorating process is forgiving enough that kids can join in. They look professional without requiring professional skills!

    Essential Tips & Tricks

    Perfecting the Coconut Mixture

    The secret to exceptional Easter Bunny Coconut Tails lies in the coconut mixture consistency. I’ve found that chilling the mixture for at least 30 minutes before rolling makes handling infinitely easier. If your mixture feels too wet, gradually add more powdered sugar, one tablespoon at a time, until it reaches a moldable consistency. For extra coconut flavor, replace vanilla extract with coconut extract, or use half of each. When incorporating the shredded coconut, fold gently rather than stirring vigorously to maintain the light texture. This approach has given me perfect results every time I’ve made them for Easter gatherings.

    Mastering the Chocolate Coating

    Temperature control is crucial when working with the chocolate coating. I learned the hard way that overheated chocolate becomes grainy and unusable! Melt your chocolate in 30-second intervals, stirring between each, until just smooth. Adding a teaspoon of coconut oil to the melted chocolate creates the perfect consistency for dipping. For a cleaner finish, use a fork to dip each coconut ball, tapping gently to remove excess chocolate. If you’re making these in warm weather, place the chocolate-dipped tails in the refrigerator for 5 minutes before adding decorations to prevent smudging your creative designs.

    Serving Ideas & Creative Variations

    Festive Presentation Techniques

    Transform these treats into a showstopping Easter display with thoughtful presentation touches. Arrange your Easter Bunny Coconut Tails in small paper cupcake liners and place them in a basket lined with colorful Easter grass. For an elegant table centerpiece, create a “bunny garden” by inserting toothpicks into the tails and anchoring them in a block of floral foam covered with artificial moss. I love adding fresh spring flowers around the display for a natural touch. For children’s parties, create individual favor bags with two or three tails tied with pastel ribbons. These presentations elevate the treats from simple sweets to memorable Easter moments.

    Exciting Flavor Twists

    While traditional Easter Bunny Coconut Tails are delicious, experimenting with flavor variations keeps this recipe fresh year after year. Try infusing the coconut mixture with a tablespoon of lemon zest for a bright, citrusy version that pairs beautifully with spring teas. For chocolate lovers, fold mini chocolate chips into the coconut mixture before rolling. My personal favorite variation includes a teaspoon of almond extract and finely chopped dried cherries for sophisticated flavor. For a tropical twist, replace some of the liquid with pineapple juice and decorate with tiny pieces of dried pineapple “ears” to create bunny-pineapple hybrids that children find absolutely hilarious.

    Storage & Troubleshooting Guide

    Proper Storage Techniques

    To maintain the perfect texture of your Easter Bunny Coconut Tails, proper storage is essential. Store finished tails in an airtight container in the refrigerator, where they’ll keep beautifully for up to one week. Place parchment paper between layers to prevent sticking. If you need to make them further in advance, these treats freeze exceptionally well! Simply place fully set tails in a freezer-safe container with parchment between layers and freeze for up to three months. When ready to serve, thaw overnight in the refrigerator, then let stand at room temperature for 20 minutes for the best flavor and texture experience.

    Solving Common Problems

    Even experienced bakers encounter challenges! If your coconut mixture is too crumbly to form balls, add a teaspoon of milk or cream until it reaches the right consistency. Conversely, if your mixture is too sticky, refrigerate it longer or roll your hands in powdered sugar before forming each ball. For chocolate coating that’s hardening too quickly, add an additional half-teaspoon of coconut oil to extend working time. If decorations won’t adhere to the chocolate, your coating may have set too firmly—try gently pressing decorations into the chocolate immediately after dipping, or add a tiny dot of melted chocolate as “glue” for each decoration.

    Frequently Asked Questions

    Can I make Easter Bunny Coconut Tails without sweetened condensed milk?

    Yes! Substitute 4 ounces of cream cheese (softened) mixed with ¼ cup honey or maple syrup. This alternative provides the right consistency while maintaining the sweetness needed for authentic flavor.

    How do I prevent the coconut from falling off the Easter Bunny Coconut Tails?

    Roll the formed balls in slightly dampened hands before coating in coconut. The moisture helps the coconut adhere better, and a gentle pressing motion secures the coconut in place.

    Can I make these dairy-free?

    Absolutely! Use coconut condensed milk instead of regular, and select dairy-free chocolate for dipping. The results are equally delicious and perfect for guests with dairy sensitivities.

    What’s the best coconut to use for this recipe?

    I recommend unsweetened shredded coconut for the coating and sweetened coconut for the mixture. This balance provides the perfect sweetness level and creates the most authentic texture.

    How far in advance can I make these for an Easter party?

    You can prepare Easter Bunny Coconut Tails up to 3 days ahead and store them in the refrigerator. For the freshest presentation, add any delicate decorations the day of serving.

    Final Thoughts

    Easter Bunny Coconut Tails bring together everything I love about holiday baking—simplicity, deliciousness, and that magical ability to create lasting memories. The joy on everyone’s faces when they spot these adorable treats on the Easter table makes every minute of preparation worthwhile. Whether you’re a seasoned baker or trying your hand at homemade Easter treats for the first time, these coconut tails deliver both impressive results and genuine happiness. I hope they become a beloved tradition in your home, just as they have in mine. Happy Easter baking, friends!

    Check out more festive recipes on Pinterest!

  • Cadbury Egg Oatmeal Cookies | Irresistible Easter Chocolate Treats

    Cadbury Egg Oatmeal Cookies | Irresistible Easter Chocolate Treats

    Cadbury Egg Oatmeal Cookies | Irresistible Easter Chocolate Treats

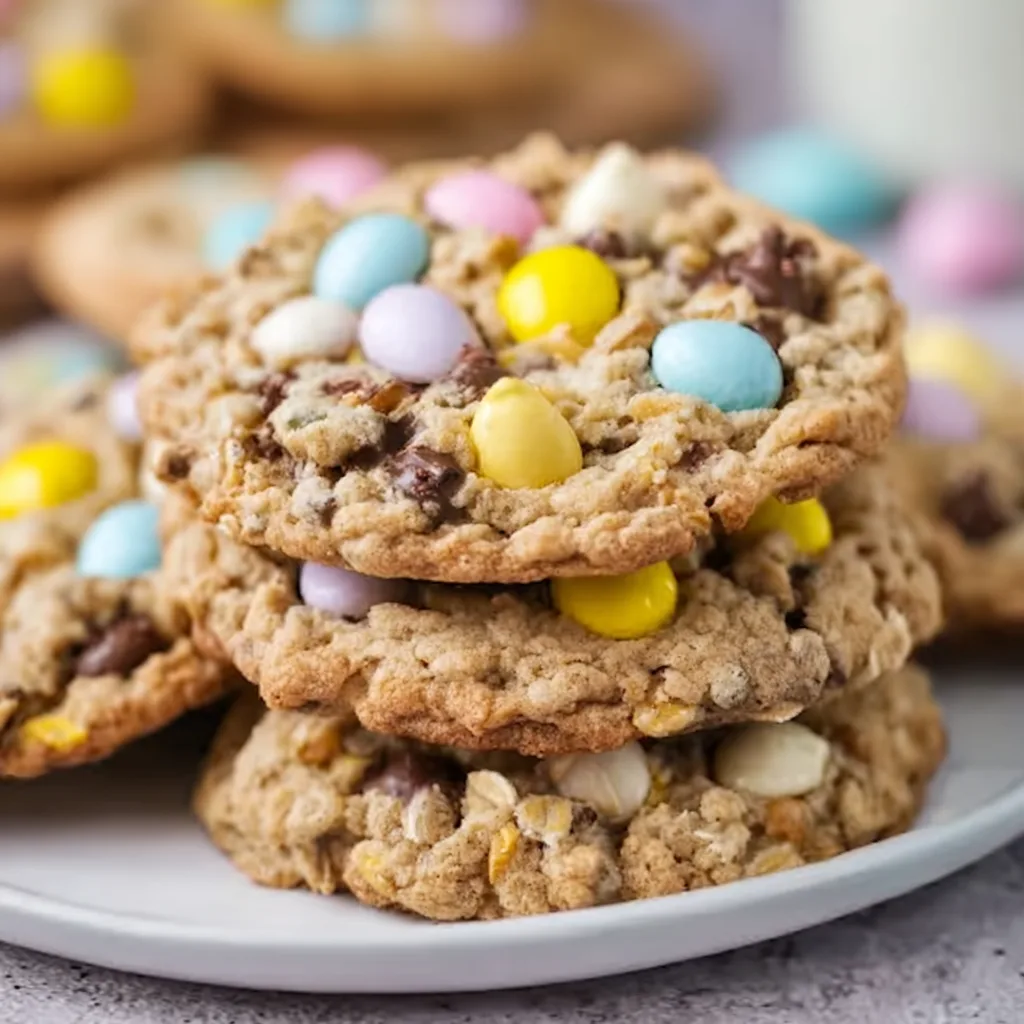
    Cadbury Egg Oatmeal Chocolate Chip Easter Cookies are the ultimate spring treat that combines the nostalgic charm of Easter candy with the comforting warmth of homemade cookies. Every bite delivers the perfect balance of chewy oatmeal, melty chocolate chips, and those irresistible candy-coated chocolate eggs that remind me of childhood Easter basket hunts. I’ve perfected this recipe over years of springtime baking sessions with my kids, watching their faces light up as they crush the colorful Cadbury eggs. These cookies have become our family’s most requested Easter tradition, and I’m thrilled to share the magic with you at Recipes Darleen.

    Recipe

    Why You’ll Love These Cadbury Egg Oatmeal Chocolate Chip Easter Cookies

    Perfect Texture Combination

    The chewy oatmeal base creates the ideal foundation for these cookies, offering a heartier bite than your standard chocolate chip cookie. I’ve carefully balanced the ratio of brown to white sugar to ensure they stay soft in the center with slightly crisp edges. The oats add a wonderful texture that contrasts beautifully with the smooth chocolate chips and the candy-coated crunch of the Cadbury eggs. When you bite into one of these cookies still warm from the oven, the melted chocolate mingles with bits of candy shell in a way that’s absolutely magical. It’s like experiencing the best parts of an Easter basket in cookie form!

    Simple Yet Impressive

    Despite their show-stopping appearance, these Easter cookies are surprisingly straightforward to make. The dough comes together in just one bowl (fewer dishes is always a win in my kitchen!), and you don’t need any fancy equipment beyond a mixer and a cookie sheet. I love that these cookies look professionally made with minimal effort—those vibrant Cadbury egg pieces create a naturally festive appearance that’s perfect for Easter gatherings. Kids can help crush the eggs and fold them into the dough, making this a wonderful family baking project that creates memories alongside delicious treats.

    Essential Tips & Tricks

    The secret to exceptional texture in these cookies lies in how you handle the ingredients. Always bring your butter to room temperature naturally (about 1 hour on the counter) rather than microwaving it, which can cause uneven melting. When incorporating the oats, pulse them briefly in a food processor for a more uniform texture that still maintains their hearty character. For the Cadbury eggs, I’ve found that placing them in a zip-top bag and giving them a few gentle taps with a rolling pin creates the perfect mixture of small and medium pieces—you want some powder for flavor throughout and some chunks for those delightful candy bites. Check out my Easy Cinnamon Swirl Cookies Recipe for more cookie-making techniques!

    Strategic Mix-Ins

    The mix-in timing is crucial for these cookies. Fold in your chocolate chips first, distributing them evenly throughout the dough. Then—and this is important—add the crushed Cadbury eggs last with just a few gentle folds. Over-mixing will cause the colorful candy coating to bleed into your dough, muddying the vibrant appearance. I reserve about ¼ cup of the crushed eggs to press into the tops of the cookies right before baking, which creates that beautiful bakery-style presentation. For the best flavor balance, use semi-sweet chocolate chips rather than milk chocolate, as the Cadbury eggs already provide plenty of sweetness.

    Serving Ideas & Creative Variations

    Easter Celebration Presentations

    These cookies make a stunning centerpiece for any Easter gathering. I love arranging them on a tiered cake stand surrounded by fresh spring flowers for a beautiful dessert table display. For Easter brunch, try serving them alongside a spring-inspired charcuterie board with pastel-colored fruits, light cheeses, and honey for a sweet-savory balance. If you’re hosting an Easter egg hunt, these make perfect prizes—wrap individual cookies in cellophane bags tied with pastel ribbons. For a truly decadent treat, sandwich vanilla ice cream between two cookies and roll the edges in additional crushed Cadbury eggs for an Easter cookie ice cream sandwich that will have everyone talking!

    Seasonal Adaptations

    While these cookies are Easter classics, you can easily modify them for year-round enjoyment. In summer, swap the Cadbury eggs for M&Ms in patriotic colors for July 4th celebrations. Come fall, substitute with chopped Reese’s Pieces or butterscotch chips for a harvest-inspired version. During winter holidays, use red and green M&Ms or crushed peppermint candies. The versatile oatmeal base pairs beautifully with nearly any mix-in! For a grown-up version, try adding a tablespoon of orange zest and a splash of bourbon to the dough—it creates a sophisticated flavor profile that pairs wonderfully with after-dinner coffee, similar to my Creamy Tomato Orzo with Chicken for a complete meal.

    Storage & Troubleshooting Guide

    Keeping Cookies Fresh

    To maintain the perfect texture of your Cadbury Egg Oatmeal Chocolate Chip Cookies, store them in an airtight container at room temperature with a slice of bread. The bread will release moisture, keeping your cookies soft and chewy for up to 5 days. If you need to stack them, place a sheet of parchment paper between layers to prevent sticking and protect those beautiful candy pieces. These cookies also freeze beautifully—arrange them in a single layer on a baking sheet until frozen solid, then transfer to a freezer bag. They’ll keep for up to 3 months, and you can thaw individual cookies at room temperature for about 20 minutes when the craving strikes!

    Fixing Common Issues

    If your cookies spread too much during baking, your butter was likely too warm. Pop the prepared dough in the refrigerator for 30 minutes before baking to firm it up. For cookies that don’t spread enough, try flattening the dough balls slightly before baking. If your Cadbury eggs are melting too quickly and creating a messy appearance, try freezing the crushed pieces for 15 minutes before folding them into the dough. This helps them hold their shape and color during baking. For cookies that are browning too quickly on the bottom, try using parchment paper instead of greasing your baking sheet, and position your oven rack in the upper third of the oven.

    Frequently Asked Questions

    Can I use regular Cadbury Creme Eggs instead of the mini eggs?

    While you can, the creme filling tends to melt completely and create pockets in the cookies. The candy-coated mini eggs hold their shape better and provide that signature crunch. I recommend sticking with the mini eggs for best results.

    Fold the crushed Cadbury eggs in very gently and minimally at the end of mixing. You can also freeze the crushed eggs for 15 minutes before adding them to help the colors stay intact during mixing and baking.

    Can I make the Cadbury Egg Oatmeal Chocolate Chip Easter Cookies ahead of time?

    Absolutely! The dough can be refrigerated for up to 3 days or frozen for up to 3 months. If frozen, thaw overnight in the refrigerator before scooping and baking.

    Are these cookies suitable for shipping as Easter gifts?

    Yes, but pack them carefully with parchment paper between layers and use a sturdy container. Ship with expedited service to ensure freshness, and consider adding a slice of bread to maintain moisture.

    Can I make these cookies gluten-free?

    Yes, substitute a 1:1 gluten-free flour blend and certified gluten-free oats. Just verify your Cadbury eggs are gluten-free, as candy manufacturing processes can vary.

    Final Thoughts

    These Cadbury Egg Oatmeal Chocolate Chip Easter Cookies have become my family’s most treasured spring tradition. The joy of watching loved ones bite into these perfectly chewy, colorful treats makes all the baking worthwhile. There’s something truly special about how these cookies capture the playful spirit of Easter while delivering serious flavor. I hope they bring the same warmth and celebration to your home as they have to mine. Don’t forget to share your creations on Pinterest and tag me—I absolutely love seeing how these festive cookies brighten your Easter celebrations!