Pumpkin Pie Oatmeal isn’t just breakfast in my house—it’s a hug in a bowl, the kind that makes chilly mornings feel a little less rushed and a lot more comforting.
Hey! I’m Darleen Vamce—34, Salt Lake City native, and a woman who used to think slow cookers were just for potlucks and overly mushy stews. I was wrong. Very wrong. Now, this humble little machine is basically my co-chef, my weekday dinner savior, and, as I learned one autumn morning, the secret to turning simple oats into a dessert-like breakfast that still feels wholesome.
It all started during what I call “The Great Mealtime Struggle”: three hungry kids, a job that didn’t quit at 5, and a kitchen that seemed to mock me every evening. One October morning, with the leaves blazing gold outside, I tossed oats, pumpkin puree, spices, and a splash of maple syrup into the slow cooker—baby balanced on my hip, coffee cooling on the counter. Hours later, the smell hit me first: warm cinnamon, nutmeg, and that creamy pumpkin goodness. My kids swore I’d made pie for breakfast. That’s the moment I realized this wasn’t just oatmeal—it was magic.
Table of Contents
Recipe
Unlocking the Flavor Potential of Pumpkin Pie Oatmeal
When it comes to comfort breakfasts, Pumpkin Pie Oatmeal has an edge—it blends the warmth of autumn spices with the creamy texture of slow-cooked oats. But even the coziest recipe can be elevated. With a few intentional tweaks, you can turn this already delightful dish into a breakfast that makes you linger at the table just a little longer.
The key is thinking beyond “just follow the recipe.” Instead, imagine layering flavors, textures, and aromas so that every spoonful feels like the best bite. Here’s how to start.
Choose the Right Oats for a Creamier Texture
For a truly indulgent creamy pumpkin spice oatmeal, start with steel-cut oats. They hold their shape during the long cooking process in a slow cooker and absorb the pumpkin puree and maple syrup slowly, creating a rich, velvety consistency. If you prefer something softer, rolled oats will deliver a comforting, porridge-like texture that still feels satisfying.
Elevate Your Spice Game
While cinnamon and nutmeg are classic for spiced pumpkin breakfast porridge, adding a pinch of ground ginger or cardamom can bring out deeper, more complex flavors. Toast your spices for a minute before adding them to the pot—this simple step unlocks their natural oils and intensifies their aroma.
Adding Layers of Flavor and Texture
The beauty of Pumpkin Pie Oatmeal is that it’s a canvas for creativity. Once you’ve got your base simmering away in the slow cooker, you can start thinking about flavor pairings and textures that turn each bowl into something special. These little enhancements can transform your breakfast from a comforting classic into something guests will talk about long after the morning meal.
Sweeteners That Make a Difference
Maple syrup brings a warm richness, while brown sugar adds molasses depth. For a lighter healthy pumpkin oatmeal breakfast, try honey or coconut sugar. For a full pumpkin spread, pair your oatmeal with 10-Minute Greek Yogurt Pumpkin Muffins.
Toppings That Add Crunch
Toasted pecans, walnuts, or pumpkin seeds add the perfect contrast to creamy pumpkin spice oatmeal. A sprinkle of granola or crushed ginger snaps turns it into a treat. And for more pumpkin dessert ideas, check out 5 Pumpkin Pie Crisp Recipes.
Boosting Aroma and Presentation
A bowl of Pumpkin Pie Oatmeal should delight your senses before the first bite. The slow cooker does much of the work, but a few thoughtful touches can make the experience unforgettable.
Infuse with Irresistible Aromas
While the slow cooker works its magic, add a cinnamon stick, a splash of vanilla extract, or even a bit of orange zest to the pot. These small additions transform a simple spiced pumpkin breakfast porridge into something that feels bakery-fresh. The aroma will fill your kitchen and create that cozy fall atmosphere before the oatmeal is even served.
Make It Beautiful in the Bowl
Add your favorite toppings to pumpkin pie oatmeal for extra flavor.
We eat with our eyes first, so take a moment to garnish your crockpot pumpkin pie oatmeal. A dollop of whipped cream or Greek yogurt, a light dusting of cinnamon, and a drizzle of maple syrup make it look—and feel—like a treat. For a healthier option, top with sliced bananas or fresh berries for color and freshness.
Make-Ahead Magic and Easy Morning Wins
One of the best things about Pumpkin Pie Oatmeal is how it fits into busy mornings without sacrificing flavor. By prepping ahead, you can enjoy a steaming, fragrant bowl any day of the week.
Make-Ahead Pumpkin Oatmeal for Stress-Free Breakfasts
Prepare your Pumpkin Pie Oatmeal the night before by adding oats, pumpkin puree, milk, spices, and your favorite sweetener to the slow cooker. Set it to low, and by morning, you’ll wake up to the rich scent of creamy pumpkin spice oatmeal filling your home. This method not only saves time but also allows the flavors to meld, creating an even more indulgent bowl.
Double the Batch for Easy Reheats
Cooking a larger amount of Pumpkin Pie Oatmeal means you can portion it into containers for the week. Simply reheat with a splash of milk, and it’s as cozy and satisfying as the first day. This works beautifully for healthy pumpkin oatmeal breakfast meal-prepping, especially when topped with nuts, fruit, or a swirl of maple syrup.
With a little planning, your Pumpkin Pie Oatmeal becomes more than a recipe—it’s a fall morning tradition that’s ready whenever you are.
Conclusion: Your New Favorite Cozy Breakfast
With a slow cooker, a few pantry staples, and a touch of creativity, Pumpkin Pie Oatmeal becomes more than just a seasonal recipe—it turns into a morning ritual that brings comfort and joy. From enhancing flavors with warm spices to adding crunch with nuts and seeds, each of these six ideas makes your oatmeal richer, creamier, and more satisfying.
So, the next time you crave something warm and spiced, let Pumpkin Pie Oatmeal be your go-to. Prep it the night before, wake up to its irresistible aroma, and savor every spoonful. If you try these tips, share your delicious bowl on Pinterest and tag me—I’d love to see how you make your Pumpkin Pie Oatmeal better than ever.
FAQ: Pumpkin Pie Oatmeal
How do I make Pumpkin Pie Oatmeal in a slow cooker?
To make Pumpkin Pie Oatmeal in a slow cooker, combine oats, pumpkin puree, milk, water, spices like cinnamon and nutmeg, and your preferred sweetener. Cook on low for 6–8 hours, or until the oats are tender and creamy. This method creates a crockpot pumpkin pie oatmeal that’s rich in flavor and perfect for cozy mornings.
Can I make Pumpkin Pie Oatmeal ahead of time?
Yes! Pumpkin Pie Oatmeal is ideal for make-ahead breakfasts. Store cooled portions in airtight containers in the fridge for up to five days. Reheat with a splash of milk for a creamy pumpkin spice oatmeal texture.
What toppings go well with Pumpkin Pie Oatmeal?
Great toppings for Pumpkin Pie Oatmeal include toasted pecans, walnuts, pumpkin seeds, granola, fresh fruit, or a drizzle of maple syrup. For a more indulgent treat, add whipped cream or a spoonful of Greek yogurt.
Is Pumpkin Pie Oatmeal healthy?
Pumpkin Pie Oatmeal can be a healthy breakfast, especially when made with whole oats, pure pumpkin puree, and natural sweeteners. It’s full of fiber, vitamin A, and warming spices, making it a nutritious choice for a healthy pumpkin oatmeal breakfast.
10-Minute Greek Yogurt Pumpkin Muffins aren’t just another quick recipe—they’re the reason my mornings don’t end in cereal-for-dinner chaos. Hey! I’m Darleen Vamce—34, Salt Lake City native, and a woman who used to think slow cookers were my only “easy meal” trick. I was wrong. One crisp fall morning, with a baby on my hip and three hungry kids circling like sharks, I whisked together Greek yogurt, pumpkin puree, and warm spices. By the time the oven timer beeped, the house smelled like a coffee shop in October, and my crew thought I’d worked some kind of magic. Truth? It took 10 minutes to mix. Now, these muffins are my secret weapon for cozy mornings without the chaos.
Table of Contents
Recipe
Why These 10-Minute Greek Yogurt Pumpkin Muffins Work
If you love a muffin that’s moist, fluffy, and just the right amount of sweet, these 10-Minute Greek Yogurt Pumpkin Muffins will win you over. They’re quick enough for busy mornings yet cozy enough to feel like a fall treat. The Greek yogurt keeps them light and tender, while the pumpkin puree adds that rich autumn flavor we all crave. With cinnamon, nutmeg, and a hint of pumpkin spice, each bite tastes like a hug in muffin form. Plus, they’re made in one bowl—less mess, more joy.
A Healthy Twist on a Fall Favorite
Unlike many traditional pumpkin muffin recipes loaded with oil, these are naturally lighter thanks to the Greek yogurt swap. That simple change boosts the protein, making them a satisfying grab-and-go breakfast or snack. Pair that with whole wheat flour and just enough sweetness, and you’ve got a treat that feels indulgent but still fits into a balanced lifestyle. Whether you’re looking for healthy pumpkin muffins, a quick pumpkin muffin recipe, or the perfect low-fat pumpkin muffins for your family, this one checks all the boxes.
How to Make 10-Minute Greek Yogurt Pumpkin Muffins
The beauty of these muffins is that you don’t need fancy equipment—just a mixing bowl, a whisk, and a muffin tin. In 10 minutes, the batter is ready for the oven, which means you can have warm, fluffy pumpkin muffins on the table in less than half an hour. Start by whisking together Greek yogurt, pumpkin puree, eggs, and a splash of vanilla. Then fold in the dry ingredients—whole wheat flour, baking powder, pumpkin spice, and a pinch of salt—just until combined.
Quick Baking Tips for Perfect Results
For the best texture, avoid overmixing the batter. Overworking it can make muffins dense instead of light and tender. Use a cookie scoop to portion the batter evenly so every muffin bakes at the same pace. If you like extra sweetness, sprinkle a little cinnamon sugar on top before baking. And here’s a bonus tip: these muffins freeze beautifully, making them an easy breakfast muffin recipe you can prep ahead. Just reheat in the microwave for a fresh-from-the-oven feel any morning of the week.
Fun Variations for 10-Minute Greek Yogurt Pumpkin Muffins
One of the best things about 10-Minute Greek Yogurt Pumpkin Muffins is how easy they are to customize. If you’re in the mood for something extra cozy, fold in a handful of dark chocolate chips for a dessert-style treat. For a bit of crunch, sprinkle chopped pecans or walnuts on top before baking. You can also swap half the whole wheat flour for oat flour to create a slightly denser, heartier muffin that pairs beautifully with your morning coffee.
Seasonal Flavor Twists
Come holiday season, a pinch of ground ginger and cloves can turn these into classic pumpkin spice muffins with yogurt. Or, pair a warm muffin with a spoonful of homemade pumpkin butter for an extra cozy treat — I’ve got 5 fantastic ways to make pumpkin butter in the crockpot you’ll love. And if you can’t get enough pumpkin desserts, these 5 pumpkin pie crisp recipes are a must-try.
Serving Ideas for 10-Minute Greek Yogurt Pumpkin Muffins
Fresh out of the oven, 10-Minute Greek Yogurt Pumpkin Muffins are perfect on their own, but they’re even better with a pat of butter or a drizzle of honey. They make a cozy breakfast alongside a hot cup of coffee or tea, and they’re a hit tucked into lunchboxes for a mid-morning treat. For a weekend brunch, serve them with scrambled eggs and fresh fruit for a balanced spread that feels special but comes together in minutes.
Warm muffins served with coffee for the perfect fall breakfast.
Storing and Freezing Your Muffins
These fluffy pumpkin muffins stay moist for up to three days when stored in an airtight container at room temperature. For longer storage, freeze them in a single layer on a baking sheet, then transfer to a freezer-safe bag. This way, they won’t stick together, and you can grab just what you need. To reheat, pop a muffin in the microwave for about 20 seconds or warm it in the oven at a low temperature. Whether you make a batch for the week or keep some frozen for quick snacks, this easy breakfast muffin recipe will be ready whenever you need it.
Make-Ahead & Storage Hacks for 10-Minute Greek Yogurt Pumpkin Muffins
One reason I adore these 10-Minute Greek Yogurt Pumpkin Muffins is how well they work for meal prep. Bake a double batch on Sunday, and you’ve got breakfast covered all week. Store them in an airtight container at room temperature for up to three days, or keep them in the fridge if you prefer a slightly denser, chilled muffin.
For long-term storage, wrap each muffin individually in plastic wrap and place them in a freezer-safe bag. This method keeps freezer burn away and locks in that fresh-baked taste. When you’re ready to enjoy one, just microwave it for 20 seconds or warm it in a toaster oven. It’s an easy breakfast muffin recipe that’s always ready when life gets busy.
Conclusion
10-Minute Greek Yogurt Pumpkin Muffins prove that you don’t need hours in the kitchen to bake something warm, cozy, and absolutely delicious. From busy school mornings to lazy fall weekends, this recipe delivers on flavor, texture, and simplicity every single time. The Greek yogurt keeps them moist, the pumpkin adds rich seasonal flavor, and the one-bowl method makes cleanup a breeze.
So, preheat your oven, grab your mixing bowl, and let these muffins fill your home with that irresistible autumn aroma. When you bake them, tag me on Facebook and social media—I’d love to see your batch and hear how they turned out!
FAQ – 10-Minute Greek Yogurt Pumpkin Muffins
1. Can I make these muffins gluten-free?
Yes! Simply swap the whole wheat flour for a 1:1 gluten-free baking blend. The Greek yogurt and pumpkin puree will still keep the muffins moist and tender.
2. Can I use plain yogurt instead of Greek yogurt?
You can, but Greek yogurt is thicker and adds more protein, which helps the muffins hold their shape and stay fluffy. If you use plain yogurt, reduce the liquid slightly.
3. How do I keep my muffins from being dense?
Avoid overmixing the batter. Stir just until the dry ingredients are combined—this helps keep your fluffy pumpkin muffins light and airy.
4. Can I make these muffins without added sugar?
Yes, replace the sugar with mashed ripe bananas or unsweetened applesauce. You’ll still get naturally sweet, healthy pumpkin muffins that are perfect for breakfast.
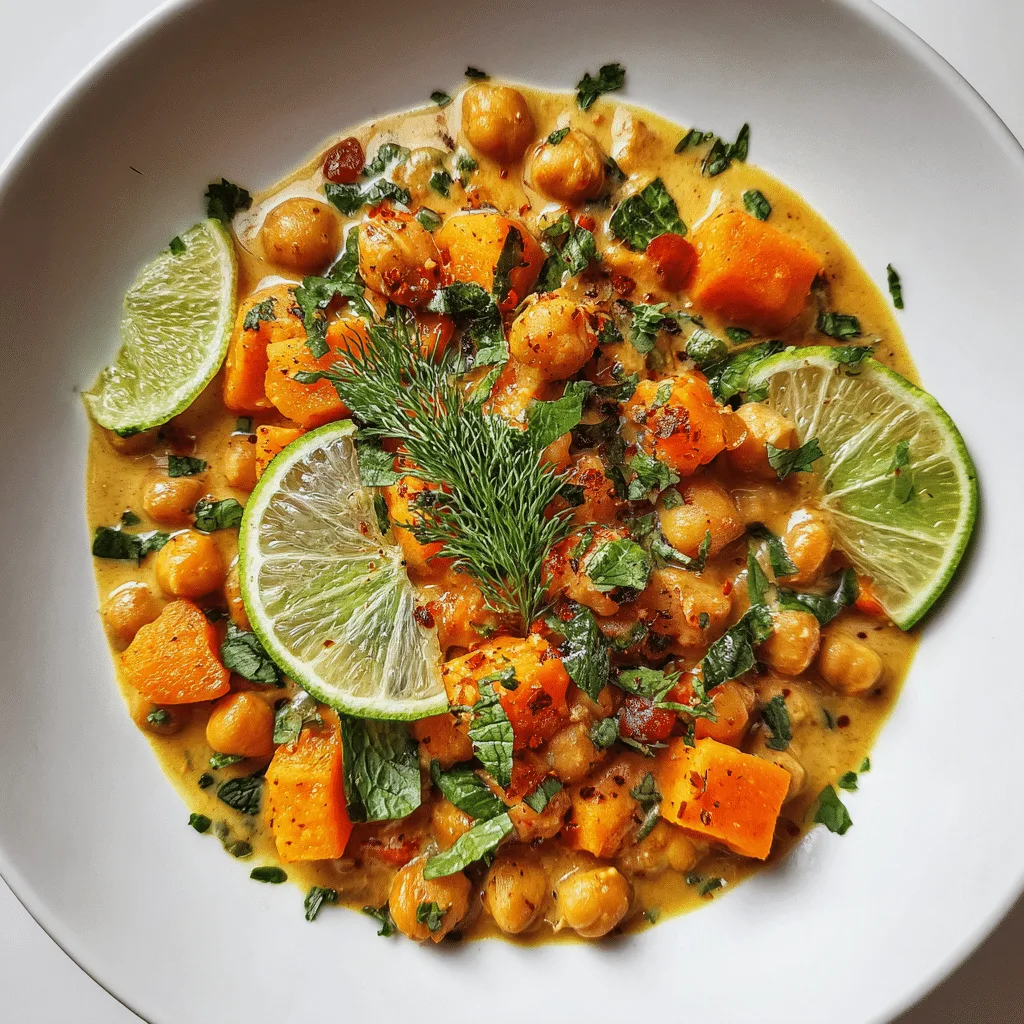
Pumpkin Coconut Curry Chickpeas weren’t always part of my weeknight magic—but one hectic fall evening changed everything.
I had three hungry kids orbiting the kitchen, a work email still blinking at me, and a leftover can of pumpkin purée staring from the pantry like it had a secret to tell.
My slow cooker, the same one that rescued me during “The Great Mealtime Struggle,” was already on the counter. So, in a swirl of coconut milk, tender chickpeas, curry spice, and that golden pumpkin, I let the pot work its quiet magic.
Hours later, the aroma alone had everyone at the table early. The first spoonful? Cozy, bright, and just the right squeeze of lime to make you wonder why you hadn’t been making this for years.
Table of Contents
Recipe
The Cozy Magic of Pumpkin Coconut Curry Chickpeas and Lime
Why This Recipe Became My Autumn Essential
When autumn air cools and daylight slips away too early, I turn to comfort food that feels like a warm blanket. That’s when coconut curry chickpeas with pumpkin and lime step in. The slow cooker transforms pantry basics into something that tastes like it took all day to craft—because it did, without me standing over the stove. The pumpkin melts into a creamy base, coconut milk swirls in richness, and curry spices deepen into a warm, earthy aroma.
This dish was born on a Tuesday night in October, when I had hungry kids, a to-do list that wouldn’t quit, and a can of pumpkin purée looking lonely in the pantry. Chickpeas went in because they’re reliable, curry powder because it’s my flavor anchor, and lime because every cozy dish needs a bright note to wake it up. Hours later, the scent pulled everyone to the table early, and one bite made it clear—this would be our new cold-weather ritual.
The Heart of the Recipe
What makes coconut curry chickpeas with pumpkin and lime unforgettable is how it weaves creamy comfort with vibrant flavor. The pumpkin purée blends into coconut milk for a silky, golden sauce that hugs each chickpea. Curry powder adds spice without overpowering, while fresh lime cuts through with a bright, tangy lift at the very end.
It’s the kind of slow cooker pumpkin curry you can start in the morning and forget about until evening—only to return to a kitchen filled with the scent of dinner done right. And when you spoon it over rice or scoop it with warm naan, you’ll know why it’s the recipe I reach for whenever I want dinner to feel like home.
Building Layers of Flavor
Starting with Simple Ingredients
The beauty of coconut curry chickpeas with pumpkin and lime is that you don’t need anything fancy to make it taste extraordinary. The pantry supplies most of the essentials—canned chickpeas, pumpkin purée, and coconut milk—while fresh onion, garlic, and lime bring the dish to life. Curry powder, ground cumin, and a pinch of smoked paprika create the backbone of flavor, giving every bite warmth and depth.
I still remember the first time I made this. I stood at my counter, stacking ingredients like puzzle pieces, and wondering if the pumpkin would play nicely with the curry. Spoiler: they became fast friends. The slow cooker handled the rest, letting the flavors mingle until they tasted as though they’d been cooking in a cozy kitchen all day. If you love this type of one-pot comfort, you might also enjoy my Slow Cooker Red Lentil Curry—it’s equally hearty, but with a different legume twist.
How the Magic Happens
When you make coconut curry chickpeas with pumpkin and lime, you’re not just throwing ingredients into a pot—you’re building a sauce that hugs every chickpea in creamy, spiced goodness. The pumpkin blends with coconut milk to create a velvety base, while chickpeas absorb the seasoning like little sponges. Hours of gentle heat allow the curry to mellow and the cumin to release its warm, nutty aroma.
And then comes the lime. Just before serving, a generous squeeze brightens the entire dish, cutting through the richness and leaving a lingering freshness on the palate. It’s that final note—the one you didn’t know you needed—that makes this vegan pumpkin curry recipe stand out from all the rest. For another slow cooker option with a rich, spiced profile, check out my Crockpot Butter Chicken Rice—it shares that same “come home to dinner already done” magic.
Serving and Savoring Every Bite
Bringing It to the Table
By the time coconut curry chickpeas with pumpkin and lime are ready, the slow cooker has filled the air with a rich, spiced perfume. The lid lifts to reveal golden, creamy chickpeas swimming in a velvety pumpkin-coconut sauce, flecked with tender onions and warm curry spices.
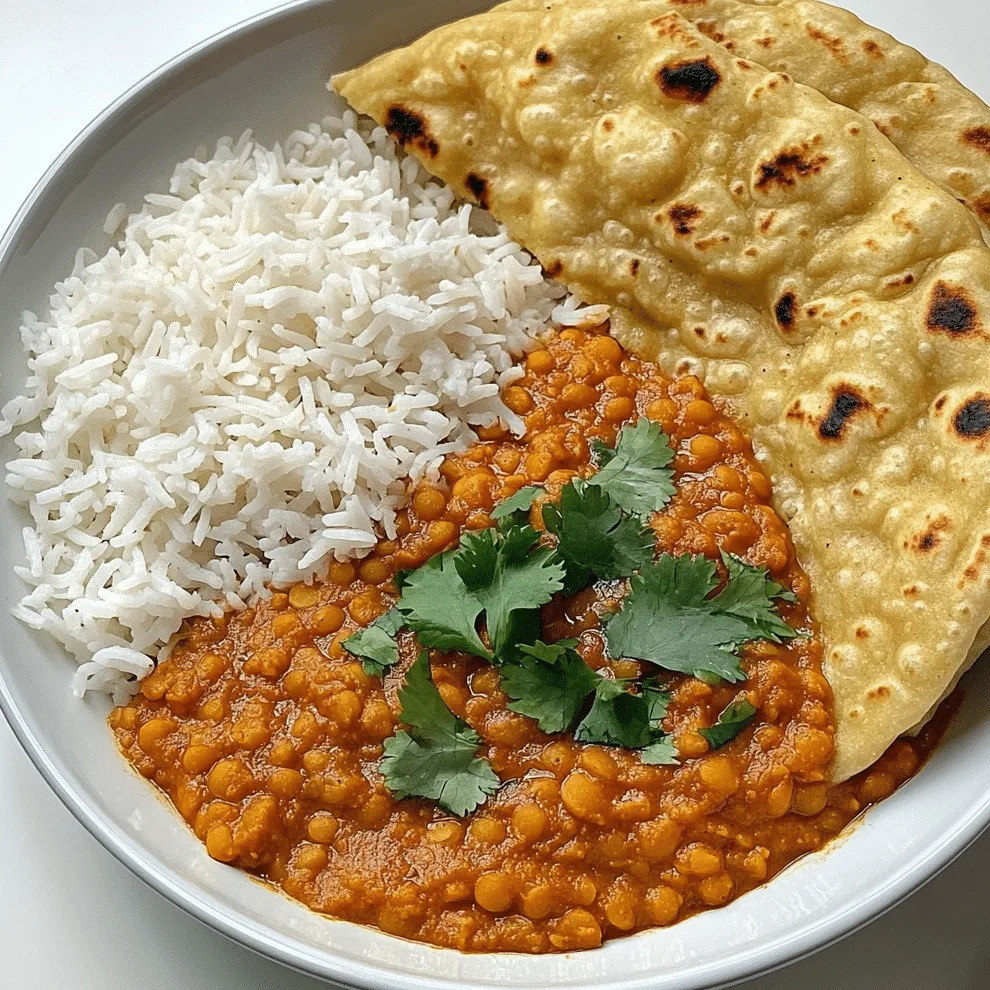
For me, serving this dish is just as much a part of the ritual as cooking it. I spoon it generously over fluffy basmati rice, letting the sauce seep into every grain. Sometimes, I swap the rice for warm naan, tearing pieces to scoop up the chickpeas like little edible shovels. The combination of creamy pumpkin curry chickpeas and bright lime makes every bite layered—comforting at first, then lifted with a gentle citrus spark.
Making It Your Own
One of the best things about coconut curry chickpeas with pumpkin and lime is its flexibility. You can add a handful of fresh spinach in the last 10 minutes for a pop of green, or stir in roasted red peppers for sweetness. Want more heat? A pinch of cayenne will do the trick.
No matter how you adapt it, the heart of the dish remains the same: a slow cooker meal that blends the creaminess of pumpkin, the richness of coconut milk, and the brightness of lime into one perfect bowl. It’s the kind of meal you can make on a busy weeknight or for friends on a Sunday, knowing it will taste like you spent all day on it—even if you didn’t.
If you’re curious about the benefits of cooking with chickpeas, the Harvard School of Public Health has a great breakdown of their nutrition and health impact.
The Comfort Dish You’ll Make Again and Again
Why It Stays in My Recipe Rotation
Every season has its signature dish in my kitchen, and in the cooler months, coconut curry chickpeas with pumpkin and lime reign supreme. It’s not just the flavor—though that creamy pumpkin base, fragrant curry, and fresh lime are unbeatable—it’s the way it fits into my life. This recipe doesn’t demand constant attention. It lets me prep in the morning, go about my day, and still serve something that feels thoughtful and home-cooked by evening.
I’ve made it for quick weeknight dinners, rainy Saturday lunches, and even as a vegetarian main for holiday gatherings. Without fail, someone always asks for the recipe. They think it’s a secret family dish, passed down and guarded. I just smile and tell them it’s as simple as a can of pumpkin, a few pantry staples, and the magic of a slow cooker.
The Small Details That Make It Special
What elevates coconut curry chickpeas with pumpkin and lime from good to unforgettable are the details. Using full-fat coconut milk gives the sauce that luscious texture. Letting the curry simmer low and slow allows the spices to deepen. Finishing with freshly squeezed lime instead of bottled juice keeps the flavor bright and alive.
Even the way you serve it can change the mood—over rice for a hearty dinner, with crusty bread for a rustic feel, or in small bowls with fresh herbs scattered on top for something elegant. However you enjoy it, this dish carries the same promise every time: comfort, warmth, and the kind of flavor that stays with you long after the last bite.
Conclusion
Every time I make coconut curry chickpeas with pumpkin and lime, I’m reminded that the best comfort food doesn’t have to be complicated. It’s about simple ingredients, a little patience, and a few thoughtful touches that turn a weeknight dinner into something memorable. The pumpkin lends its golden sweetness, the coconut curry wraps everything in richness, and the lime’s brightness lifts the whole dish to a place you’ll want to revisit again and again.
Whether you ladle coconut curry chickpeas with pumpkin and lime over rice, pair it with naan, or serve it in deep bowls by the fire, this recipe is more than a meal — it’s a moment to slow down, breathe in the aroma, and savor every bite.
Now it’s your turn — try coconut curry chickpeas with pumpkin and lime in your own kitchen, and see how quickly it becomes part of your comfort food rotation. And when you do, share a photo, leave a comment, or tag me so I can see how you made it your own. Because good food is even better when it’s shared.
Frequently Asked Questions
Can I make coconut curry chickpeas with pumpkin and lime without a slow cooker?
Absolutely. While the slow cooker makes it hands-off, you can use a stovetop method. Just simmer the chickpeas, pumpkin purée, coconut milk, and spices on low heat for about 30–40 minutes, stirring occasionally. Finish with fresh lime juice before serving.
Can I use fresh pumpkin instead of canned?
Yes. Roast fresh pumpkin until tender, then blend or mash it before adding it to the recipe. The flavor will be slightly sweeter and earthier than canned, but it pairs beautifully with the coconut curry base.
Is this recipe vegan and gluten-free?
Yes, coconut curry chickpeas with pumpkin and lime is naturally vegan and gluten-free, making it perfect for a variety of dietary needs without sacrificing flavor.
How can I store and reheat leftovers?
Store leftovers in an airtight container in the refrigerator for up to four days. Reheat gently on the stovetop or in the microwave, adding a splash of coconut milk or vegetable broth to loosen the sauce if needed.
Pumpkin pie crisp wasn’t something I grew up eating. We were a “pumpkin pie at Thanksgiving” family, and that was that. But one hectic fall afternoon, with three kids buzzing around and zero interest in rolling pie dough, I discovered this little game-changer. I had a jar of my homemade pumpkin butter on the counter, oats in the pantry, and a crisp topping idea in my head. Forty-five minutes later, the house smelled like a pumpkin spice dream and my kids were standing over the oven asking if it was ready yet. That was the day pumpkin pie crisp became a family tradition.
Table of Contents
Recipe
Why Pumpkin Pie Crisp Deserves a Spot at Your Table
The Shortcut That Changed My Fall Baking
The first time I made pumpkin pie crisp, it was purely out of desperation. It was one of those chaotic days — homework battles at the table, laundry mountain in the corner, and me standing in the kitchen realizing I’d promised dessert for dinner guests.
A pie crust was not happening. But I had pumpkin butter, oats, brown sugar, and butter. I thought, “What if pumpkin pie had a cousin that didn’t need a crust?” That night, pumpkin pie crisp was born — creamy, spiced pumpkin filling under a crunchy, buttery topping. No rolling pins. No stress. Just pure fall comfort.
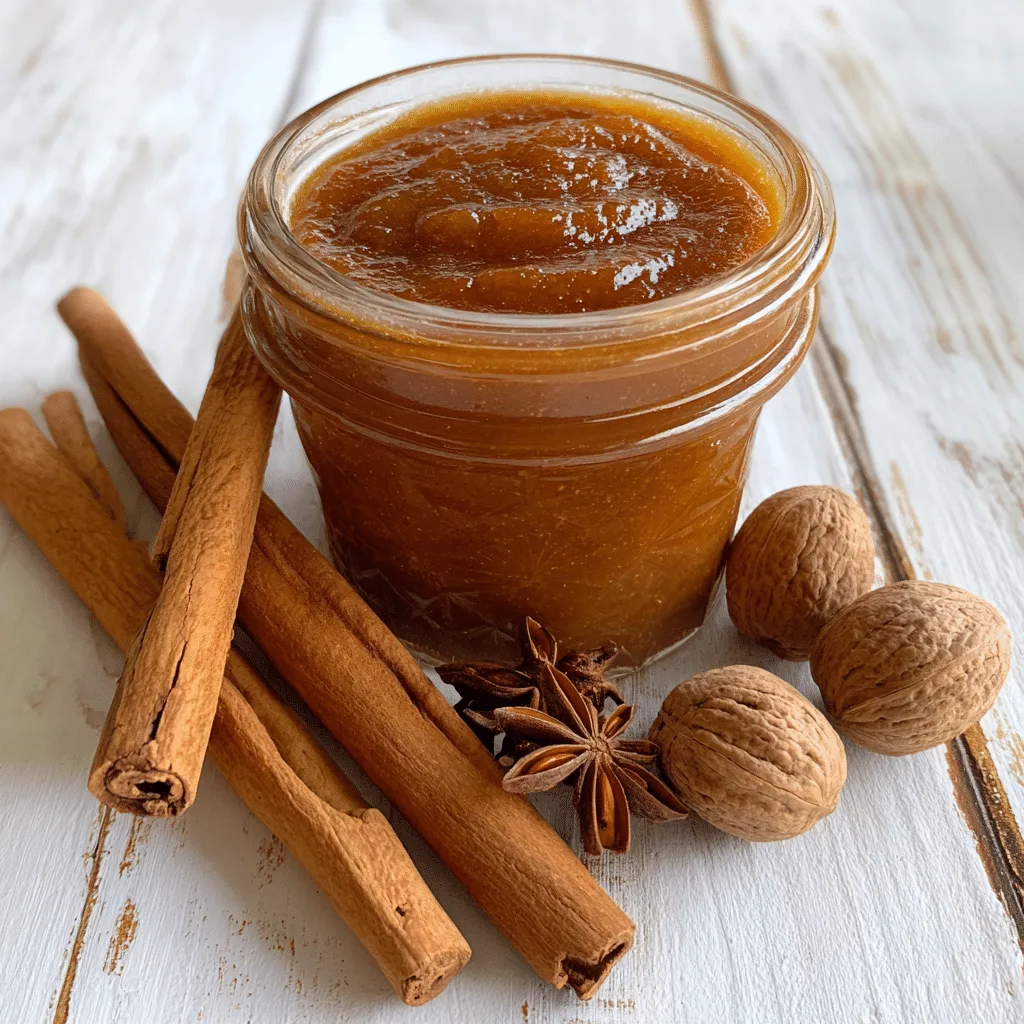
Pumpkin Butter: The Flavor Upgrade
Here’s the secret — pumpkin butter takes this crisp from good to unforgettable. It’s already packed with cinnamon, cloves, nutmeg, and just the right sweetness. By starting with pumpkin butter instead of plain puree, you skip extra steps and still get a rich, caramelized depth of flavor. It’s my shortcut to instant cozy.
Ingredients You’ll Need
When I’m making pumpkin pie crisp, I think of it in two parts — the silky pumpkin layer and the golden, crumbly topping. Both come together with pantry basics, which means you can whip this up whenever the craving hits.
For the Filling
Pumpkin butter – My secret weapon. Homemade or store-bought works, but homemade makes it extra special.
Eggs – For structure, so the filling sets like a custard.
Evaporated milk or heavy cream – Adds richness and a smooth texture.
For the Crisp Topping
Old-fashioned oats – The heart of that crumbly, chewy crisp.
All-purpose flour – Helps bind the topping so it stays together.
Brown sugar – For sweetness and that hint of molasses.
Cold butter, cubed – The magic that makes the topping golden and crisp.
Cinnamon – Because you can never have too much warm spice in a fall dessert.
Pinch of salt – Just enough to make every flavor pop.
With this lineup, you’re minutes away from a dessert that feels special but is secretly simple — exactly how I like to bake on busy days.
Step-by-Step Instructions
I always say that pumpkin pie crisp is one of those desserts that makes your kitchen smell like you’ve been baking all day — when really, you’ve only spent ten minutes putting it together. Here’s how it goes:
Preheat the oven – Set it to 350°F (175°C). Grease a 9×9-inch baking dish.
Mix the filling – In a medium bowl, whisk together the pumpkin butter, eggs, and evaporated milk until it’s smooth and creamy. This step always makes me want to grab a spoon right there.
Pour and smooth – Spread the filling evenly into your prepared baking dish.
Make the topping – In another bowl, combine the oats, flour, brown sugar, cinnamon, and salt. Add the cold butter cubes and cut them in with a pastry cutter (or your fingertips) until the mixture looks like coarse crumbs.
Assemble – Sprinkle that buttery crumble evenly over the pumpkin layer.
Bake – Slide it into the oven and bake for 40–45 minutes, until the topping is golden and the filling is set around the edges.
Serve – Warm is best, with a scoop of vanilla ice cream or a dollop of whipped cream melting on top.
By the time you open the oven door, the cinnamon-scented air will have drawn everyone into the kitchen like moths to a flame.
Tips, Variations & My Favorite Serving Ideas
The beauty of a good pumpkin pie crisp is that it’s both forgiving and endlessly adaptable. Once you’ve made the basic recipe, you can start adding your own twists to make it perfect for your table. Here’s how I keep my pumpkin pie crisp turning out golden, flavorful, and irresistible every time.
Tips for the Best Pumpkin Pie Crisp
Cold butter is your friend – It’s the secret to a topping that stays crunchy and crumbly. Warm butter will melt into the oats and flour too quickly, giving you a flat, less satisfying crisp.
Let it rest before serving – The pumpkin filling sets as it cools, making it easier to scoop and keeping the layers distinct.
Glass baking dishes work wonders – You can see when the edges of your pumpkin pie crisp are perfectly toasted, plus they help it bake evenly.
Don’t skimp on spice – Pumpkin pie crisp shines when the cinnamon, cloves, and nutmeg are bold enough to stand up to the sweet pumpkin layer.
Variations to Keep Pumpkin Pie Crisp Exciting
Nut Lover’s Pumpkin Pie Crisp – Sprinkle chopped pecans or walnuts into the topping for extra crunch and a rich, toasty flavor.
Gluten-Free Pumpkin Pie Crisp – Swap almond flour or certified gluten-free oat flour for the all-purpose flour in the topping.
Maple Pumpkin Pie Crisp – Drizzle pure maple syrup over the topping before baking for an added layer of sweetness and autumn aroma.
Savory-Sweet Pumpkin Pie Crisp – Pair the dessert with roasted turkey or pork for a surprising, crowd-pleasing side.
Serving Ideas That Make Pumpkin Pie Crisp Even Better
Classic & Cozy – Serve your pumpkin pie crisp warm with vanilla ice cream melting over the top.
Morning Treat – Cold pumpkin pie crisp with Greek yogurt is basically breakfast disguised as dessert.
Holiday Showstopper – Dress up each serving with candied pecans, a swirl of whipped cream, and a sprinkle of cinnamon sugar.
Whether you’re serving it for Thanksgiving, a cozy fall dinner, or just because the air smells like cinnamon outside, pumpkin pie crisp will always find a way to steal the spotlight. And with these tips and variations, it’ll taste just as amazing the tenth time you make it as it did the first.
5 Pumpkin Pie Crisp Recipes Everyone Will Love
When I made my first crisp, I thought there was only one way to do it — silky pumpkin filling, buttery topping, end of story. But over the years, I started experimenting. A sprinkle of nuts here, a swirl of chocolate there, and suddenly I had five versions that my family requests all season long.
1. The Classic
The original that started it all — smooth spiced pumpkin butter base with a golden, crumbly oat topping. Best served warm with a scoop of vanilla ice cream.
2. Maple Pecan
Nutty and sweet, this one is perfect for holidays. Stir ½ cup chopped pecans into the topping, then drizzle on 2 tablespoons maple syrup before baking.
3. Apple Cinnamon
A cozy mash-up of two fall favorites. Layer thin slices of apple between the filling and topping for extra texture and a hint of tartness.
4. Chocolate Swirl
For chocolate lovers, melt ½ cup semi-sweet chips and swirl them into the filling before adding the topping.
5. Savory-Sweet
Reduce the sugar in the topping by one-third and stir in a teaspoon of fresh rosemary. Surprisingly good alongside roasted pork or turkey.
Each one keeps that comforting mix of creamy filling and crisp topping, but with its own personality — so you can choose your favorite or try them all.
Conclusion – The Dessert That Saves the Day
Pumpkin pie crisp is my go-to when I want pumpkin pie flavor without the crust drama. It’s quick to make, full of warm spices, and just as welcome at a Thanksgiving table as it is on a random Tuesday night. That first time I pulled it from the oven, the topping golden and the pumpkin filling bubbling gently underneath, I knew I’d found a keeper.
Now, I make it when I’m short on time but still want to wow — and I’ve yet to see anyone turn down a second helping.
Slow cooker pumpkin butter wasn’t always a staple in my kitchen. In fact, there was a time when I thought spreads were something you bought in a jar, slapped on toast, and forgot about. That was before the chaos—three hungry kids, a job that didn’t quit at five, and me, standing in a kitchen where dinner felt like a daily battle.
One autumn afternoon, with a baby on my hip and a pumpkin staring at me from the counter, I decided to give my dusty crockpot a mission. I tossed in fresh pumpkin, sugar, spices—nothing fancy, just what I had. Hours later, my entire home smelled like the best parts of fall: warm cinnamon, sweet pumpkin, and comfort.
The first spoonful was magic—smooth, spiced, and so rich it made store-bought spreads taste like cardboard. That moment turned into a tradition, and now every fall, my slow cooker hums away, making batches of pumpkin butter for toast, pancakes, and sometimes, straight from the spoon. Today, I’m sharing 5 fantastic ways to make pumpkin butter in a crockpot so you can fill your home with the same cozy magic.
Table of Contents
The Cozy Secret Behind Pumpkin Butter
Why Crockpot Pumpkin Butter Is Pure Fall Magic
Pumpkin butter isn’t just a spread—it’s autumn in a jar. When you let a crockpot do the work, the transformation is slow and mesmerizing. The pumpkin softens, the spices mingle, and the sugar caramelizes into something richer than jam and more decadent than frosting. The best part? You barely lift a finger while it happens.
This isn’t like stovetop cooking, where you’re chained to the pot and afraid it might scorch. A slow cooker lets you get on with your day—whether you’re wrangling kids, working from home, or curled up under a blanket with a book—while it quietly works its magic in the background.
I’ve learned that when you make pumpkin butter this way, you’re not just creating food—you’re creating a mood. The warm, sweet scent that fills your home feels like an open invitation to slow down and savor the season.
Choosing the Right Pumpkin for the Job
Before you even plug in the crockpot, the pumpkin you choose matters. I used to think “pumpkin is pumpkin,” but trust me—choosing the right one makes all the difference. Sugar pumpkins (also called pie pumpkins) are smaller, sweeter, and less watery than the big carving types. Their flavor is concentrated, which means your pumpkin butter will have that deep, almost dessert-like richness.
If you can’t find fresh pumpkins—or just want to skip the peeling and chopping—go for canned pure pumpkin puree. Just make sure it’s 100% pumpkin, not pie filling, which comes pre-sweetened and spiced. You want control over your flavors.
Pro tip from my kitchen: roast your fresh pumpkin before pureeing it. That extra step intensifies the flavor and gives your pumpkin butter a subtle, almost toasty undertone that makes people ask, “What’s your secret?”
5 Fantastic Ways to Make Pumpkin Butter in a Crockpot
1. The Classic – Sweet, Spiced, and Comforting
2. Maple-Kissed Pumpkin Butter
Sweet and luxurious pumpkin butter infused with pure maple syrup.
If the classic version is like a warm hug, this one is like a cozy flannel blanket by the fireplace. Maple syrup adds depth and a natural sweetness that feels downright luxurious.
I started making this variation one chilly November after finding a bottle of pure Vermont maple syrup hiding in the back of the pantry. One taste and I was hooked—it’s now my go-to when I want to give a jar as a gift.
Ingredients:
6 cups pure pumpkin puree
1 ½ cups brown sugar
½ cup pure maple syrup
2 tsp cinnamon
1 tsp allspice
1 tsp vanilla extract
Method:
Combine all ingredients in the crockpot.
Cook on low for 7–8 hours, stirring occasionally.
Once thick and glossy, spoon into jars and refrigerate.
This version pairs beautifully with pancakes, waffles, or even as a glaze for roast pork.
3. Spicy Kick Pumpkin Butter
This one was born out of curiosity—and a jar of cayenne that fell out of my spice cabinet. I’d been making pumpkin butter for years, but one fall, I decided to see what would happen if I added a little heat to the sweet.
The result? Incredible. The spice doesn’t overpower; it lingers gently, making each bite just a little more interesting.
Ingredients:
6 cups pure pumpkin puree
1 ½ cups brown sugar
1 tsp cinnamon
½ tsp ground ginger
¼ tsp cayenne pepper (or more if you’re bold)
1 tsp vanilla extract
Method:
Mix all ingredients in the crockpot until smooth.
Cook on low for 6–7 hours, stirring now and then.
Let it cool slightly before storing in jars.
Perfect for pairing with sharp cheeses or spreading on cornbread for a sweet-and-spicy surprise.
4. Apple-Pumpkin Fusion Butter
Apples and pumpkins share the same season, so why not let them share the same pot? This version is lighter and a little tangier, perfect for those who like a fruitier spread.
I made this first after a trip to the orchard, when I came home with more apples than anyone could possibly eat. Now, it’s the variation my mom asks for every year.
Ingredients:
4 cups pure pumpkin puree
2 cups unsweetened applesauce
1 ½ cups brown sugar
1 tsp cinnamon
½ tsp nutmeg
1 tsp lemon juice
Method:
Add all ingredients to your crockpot and stir well.
Cook on low for 8–9 hours until thick and fragrant.
Store in jars and refrigerate.
Delicious on scones, muffins, or stirred into oatmeal on a chilly morning.
5. Bourbon Lovers’ Pumpkin Butter
This one’s for the adults in the room. The bourbon adds warmth, a touch of smokiness, and a complexity that makes this perfect for cheese boards or holiday gifting.
I first made this for a Thanksgiving appetizer spread, and it was gone before the turkey even came out of the oven.
Ingredients:
6 cups pure pumpkin puree
1 ½ cups brown sugar
¼ cup bourbon
2 tsp cinnamon
1 tsp vanilla extract
½ tsp ground cloves
Method:
Stir all ingredients together in the crockpot.
Cook on low for 6–7 hours, stirring occasionally.
Let cool, then store in sterilized jars.
This one’s a conversation starter—trust me, someone will ask for the recipe.
Creative Ways to Use Pumpkin Butter
Once you’ve made your first batch of crockpot pumpkin butter, it’s hard not to grab a spoon and eat it straight from the jar. (No judgment—it’s the cook’s privilege.) But the real fun comes when you start finding new ways to enjoy it.
Swirl into oatmeal for a warm, spiced breakfast that tastes like fall in a bowl.
Spread on pancakes or waffles instead of syrup for a rich, seasonal twist.
Layer in parfaits with creamy yogurt and crunchy granola.
Use as a cake filling with tangy cream cheese frosting for a holiday-worthy dessert.
Stir into coffee for a quick DIY pumpkin spice latte at home.
Glaze roasted carrots or sweet potatoes for a sweet-savory side that wows.
One of my favorite fall snack hacks? Pairing a warm mug cake with a spoonful of pumpkin butter. It’s quick, comforting, and tastes like a bakery treat. If you haven’t tried it yet, this Pumpkin Mug Cake – 5 Minute Recipe is the perfect match. The soft, spiced cake soaks up the richness of the pumpkin butter, making it a dessert you’ll want to make on repeat.
Conclusion – Your Slow Cooker, Your Fall Magic
Pumpkin butter may seem like a small thing, but it’s a small thing with big impact. It turns ordinary mornings into something worth lingering over, transforms simple snacks into treats, and fills your home with the scent of cinnamon and comfort.
I still remember that first batch—the way it felt like a victory after a chaotic day, the way my kids hovered by the kitchen, the way one spoonful made me close my eyes and just breathe.
Now, it’s your turn. Pick your favorite from these 5 fantastic ways to make pumpkin butter in a crockpot, or try them all. Make a batch for yourself, one to gift, and maybe—just maybe—hide a jar in the back of the fridge for those moments when you need a taste of cozy fall magic.
If you’re ready for more cozy, slow-cooked recipes, check out my Slow Cooker Apple Butter for another autumn classic, or warm up your dinner table with a hearty Crockpot Chicken Chili.
Try it at home and tag me on facebook or social media—let’s make this the season of pumpkin butter! ????????
FAQ – Your Pumpkin Butter Questions, Answered
How long does pumpkin butter last?
Stored in an airtight jar in the refrigerator, it will keep for about 2–3 weeks. For longer storage, freeze it for up to 6 months.
Can I can pumpkin butter?
The USDA advises against home canning pumpkin butter due to its low acidity. Freezing is the safest way to store it long-term.
Can I use butternut squash instead of pumpkin?
Absolutely! Butternut squash has a similar texture and a slightly sweeter flavor, making it a perfect substitute.
What can I serve pumpkin butter with?
Toast, biscuits, pancakes, waffles, muffins, oatmeal, yogurt… and, if you’re anything like me, straight off the spoon.
Slow Cooker Red Lentil Curry completely changed the way I cook on busy weekdays. Hey! I’m Darleen Vamce—34, Salt Lake City native, and a woman who used to think slow cookers were just for potlucks and overly mushy stews. I was wrong. Very wrong. Now, this humble little machine is basically my co-chef, my weekday dinner savior, and the secret weapon behind most of the meals that make my family think I have superpowers.
It all started during “The Great Mealtime Struggle”: three hungry kids, a day job that didn’t quit at 5, and a mocking kitchen. Out of desperation, I pulled down a dusty slow cooker, tossed in red lentils, coconut milk, and curry spices—one-handed, baby in tow. The result? Magic. Slow Cooker Red Lentil Curry has been our go-to comfort food ever since. It’s budget-friendly, protein-packed, and tastes even better the next day. And the best part? It practically cooks itself while I live my life.
Table of Contents
Slow Cooker Red Lentil Curry Recipe
This Slow Cooker Red Lentil Curry is the ultimate one-pot wonder—rich, creamy, and loaded with comforting spices. Just dump, stir, and let your slow cooker work its magic. It’s naturally vegan, freezer-friendly, and perfect for busy weeknights or cozy meal prep.
Why Slow Cooker Red Lentil Curry Is a Weeknight Hero
Comfort Food Without the Fuss
Slow Cooker Red Lentil Curry isn’t just tasty—it’s a sanity saver. On chaotic nights, I need dinner to handle itself. This curry does just that. You toss in your ingredients, stir once, and walk away. By the time homework is done and the baby’s bathed, dinner’s ready. No hovering. No stress. Just flavor-packed comfort in a bowl.
Red lentils cook quickly and break down beautifully in the slow cooker. That means no crunchy beans, no soaking, no guesswork. The result is creamy, bold, and naturally thick. It’s like it was made to be cooked low and slow.
Healthy, Hearty, and Naturally Vegan
Not only is Slow Cooker Red Lentil Curry easy, but it’s also nourishing. Lentils bring fiber, iron, and plant-based protein to the table. Coconut milk adds creaminess without dairy. And those curry spices? They boost your mood and your metabolism.
Everything you need to make this vibrant red lentil curry
You can serve it with rice, scoop it with naan, or ladle it over sweet potatoes. It’s one of those meals that adapts to your cravings, your pantry, and your schedule. Make a big batch and thank yourself tomorrow—because the leftovers? Even better.
The Flavors That Make Slow Cooker Red Lentil Curry Irresistible
Layers of Bold, Warming Flavor
What makes Slow Cooker Red Lentil Curry so craveable? It’s all about the spice blend. Think cumin, turmeric, garlic, and a touch of cinnamon. These spices bloom slowly as they cook, filling your kitchen with warmth and anticipation. The curry doesn’t overpower—it balances. Every spoonful tastes like it simmered for hours, but you barely lifted a finger.
And don’t forget the ginger. Fresh or ground, it adds a kick that lingers just enough. Pair that with creamy coconut milk and soft lentils, and you’ve got a dish that satisfies every time.
Customizable for Any Palate
One of the best things about Slow Cooker Red Lentil Curry is how flexible it is. Want it spicy? Add extra chili flakes. Prefer a more mellow bowl? Go easy on the curry powder. You can throw in spinach, carrots, or whatever’s wilting in your fridge. It’s forgiving, flavorful, and perfect for picky eaters and adventurous foodies alike.
Even the texture can be tweaked. Like it thick? Let it cook longer with the lid off for the last 30 minutes. Prefer it soupy? Add a bit more broth. This curry works with you, not against you.
How to Nail Slow Cooker Red Lentil Curry Every Time
Tips for Perfect Texture and Taste
Making Slow Cooker Red Lentil Curry is easy, but a few pro tips will take it from good to unforgettable. First, sauté your onions and garlic before adding them to the slow cooker. It’s an optional step—but it deepens the flavor fast. If you’re short on time, skip it. The curry still delivers.
Second, rinse your red lentils well. This removes excess starch and helps the curry stay smooth, not sticky. Add your coconut milk toward the end of the cook time for extra creaminess without breaking or curdling.
Batch Cooking and Freezer-Friendly Magic
One of the reasons I always keep red lentils stocked? This dish freezes like a dream. Make a double batch of Slow Cooker Red Lentil Curry and store half in the freezer. On your next wild weekday, you’ll thank yourself.
It reheats beautifully on the stove or in the microwave. Just add a splash of broth or water to loosen the texture. In fact, many say it tastes even better after a day or two—the flavors settle and blend.
Make once. Eat twice. Win the week.
For another effortless dinner idea, check out our Slow Cooker Poor Man’s Stew—it’s hearty, budget-friendly, and made with pantry staples.
What to Serve with Slow Cooker Red Lentil Curry
The Perfect Pairings
Slow Cooker Red Lentil Curry is a full meal on its own—but with the right sides, it becomes a feast. Fluffy basmati rice is the classic go-to. Its light, fragrant grains balance the rich curry beautifully. If you’re after something heartier, try garlic naan. Warm, chewy, and perfect for scooping up every last bit.
You can also pair it with roasted veggies like cauliflower or sweet potatoes. The sweetness plays well with the curry’s bold spices. Want crunch? A simple cucumber salad with lemon juice does the trick.
Pin or print this Slow Cooker Red Lentil Curry recipe for easy access
Making It Part of Your Weekly Routine
Here’s the best part—Slow Cooker Red Lentil Curry fits seamlessly into meal prep. Make a big batch on Sunday. Store in glass containers. Add fresh toppings like cilantro, chili oil, or a squeeze of lime each day to keep things exciting.
It’s vegan, gluten-free, and endlessly versatile. Whether it’s lunch for one or dinner for the whole family, this dish saves time, tastes amazing, and keeps your week running smooth.
Conclusion: Time to Make Slow Cooker Red Lentil Curry Yours
By now, it’s clear why Slow Cooker Red Lentil Curry deserves a spot in your weekly lineup. It’s fast, comforting, healthy, and incredibly flexible. Whether you’re feeding picky toddlers, impressing guests, or just trying to get through a Wednesday—this curry has your back.
It doesn’t demand your time, just your trust. Let your slow cooker do the heavy lifting while you focus on the things that matter most.
Now it’s your turn! Try this recipe at home and tag me on Instagram or Pinterest @RecipesDarleen. I love seeing your spins on the classics—and your brilliant slow-cooker hacks.
Frequently Asked Questions
Can I make Slow Cooker Red Lentil Curry with green lentils?
Technically yes, but it’s not ideal. Green lentils hold their shape and don’t break down like red lentils. Slow Cooker Red Lentil Curry works best with red lentils because they cook faster and create that creamy, stew-like texture you want.
How long does Slow Cooker Red Lentil Curry last in the fridge?
Stored properly in an airtight container, Slow Cooker Red Lentil Curry lasts up to 5 days in the fridge. It actually gets better after a day as the flavors develop. Just reheat gently and add a splash of water or broth if needed.
Is Slow Cooker Red Lentil Curry freezer-friendly?
Absolutely! It freezes beautifully. Let it cool completely before transferring to freezer-safe containers. When ready to eat, thaw overnight and reheat on the stove or microwave. Stir in coconut milk or broth to restore the creamy texture.
What protein can I add to Slow Cooker Red Lentil Curry?
Red lentils provide solid plant protein, but you can boost it. Add chickpeas, tofu, or even shredded rotisserie chicken (after cooking if you’re not vegan). Just be sure not to overwhelm the curry’s base flavors.
Crockpot Butter Chicken & Rice changed my life—literally. Hey! I’m Darleen Vamce—34, Salt Lake City native, and a woman who used to think slow cookers were just for potlucks and overly mushy stews. I was wrong. Very wrong. Now, this humble little machine is basically my co-chef, my weekday dinner savior, and the secret weapon behind most of the meals that make my family think I have superpowers.
It all started during The Great Mealtime Struggle: three hungry kids, a day job that didn’t quit at 5, and a mocking kitchen. Crockpot Butter Chicken & Rice? That was my turning point.
Table of Contents
Easy Prep, Incredible Payoff
Why Crockpot Butter Chicken & Rice Works for Busy Days
Crockpot Butter Chicken & Rice isn’t just delicious—it’s a lifesaver. On chaotic weekdays, when you barely have time to breathe between Zoom calls, school runs, and laundry piles, this dish steps up. The slow cooker handles the heavy lifting while you crush your to-do list.
Prep takes just 10 minutes. Toss in the marinated chicken, tomato sauce, garlic, butter, and spices. Add the rice toward the end, or serve it separately for ultimate texture control. The result? Creamy, melt-in-your-mouth chicken layered with bold, spiced flavor—without hovering over a hot stove.
This meal isn’t just about convenience. It’s about confidence. You’ll serve something rich and comforting that tastes like it simmered for hours—because it did. Even picky eaters go back for seconds, and leftovers? Rarely survive the night.
The best part? You don’t need fancy ingredients. Everything is pantry-friendly: canned tomatoes, cream, onion, garam masala, garlic, butter, and boneless chicken thighs or breasts. You control the spice level. You control the richness. The slow cooker just makes it magic.
Here’s the beauty: you can prep Crockpot Butter Chicken & Rice before work. Dump it all in, hit low for 6–7 hours, and come home to a kitchen that smells like an Indian restaurant at golden hour. The rice can be made in the slow cooker too, or separately for fluffier results.
Bonus tip: prep two freezer bags on Sunday—one for now, one for next week. No extra dishes. No last-minute takeout. Just foolproof comfort food that greets you at the door.
Flavor That Builds Itself
The Ingredients That Make Crockpot Butter Chicken & Rice Shine
When you make Crockpot Butter Chicken & Rice, the ingredients do more than blend—they bloom. The magic comes from simple pantry staples used in just the right order. Start with boneless chicken thighs or breasts. Thighs stay juicy through long cooking, but breasts work beautifully if you prefer leaner meat.
Next, the sauce. Canned crushed tomatoes bring the base, while butter adds richness. A dash of cream gives it that signature silky texture. But what truly transforms the dish is the spice blend—garam masala, cumin, paprika, turmeric, and just enough cayenne to tingle. Add garlic and fresh grated ginger for a warm, deep finish.
What’s surprising is how this dish layers flavor over time. Unlike stovetop versions that require stirring and watching, the crockpot slow-releases every spice. Each hour brings deeper aroma and richer taste. By dinnertime, your kitchen smells like you’ve been cooking all day—because you have, without even trying.
Rice Tips for the Perfect Crockpot Butter Chicken Pairing
You can make the rice right in the slow cooker by adding it during the last 30 minutes, but for best results, many prefer cooking it separately. Fluffy jasmine or basmati rice soaks up the buttery sauce perfectly, offering contrast in texture that elevates every bite.
Let the slow cooker do the work
If you’re meal-prepping, store rice and chicken separately. The sauce thickens overnight, and the flavors become even deeper. That means Crockpot Butter Chicken & Rice is not only easy—it actually tastes better the next day. Double the recipe and thank yourself later.
Meal Prep That Actually Saves You Time
Crockpot Butter Chicken & Rice Makes Leftovers You’ll Crave
One of the most underrated things about Crockpot Butter Chicken & Rice? It’s a meal prep champion. Most slow cooker recipes fall apart in the fridge—this one gets better. The spices deepen, the butter soaks in, and the rice takes on every drop of that creamy tomato sauce.
Whether you’re feeding a crowd or planning weekday lunches, Crockpot Butter Chicken & Rice gives you full return on investment. Make a double batch on Sunday, and you’ve got 3–4 meals that reheat beautifully. Toss leftovers into meal-sized containers and add a fresh splash of cream before microwaving to revive the saucy goodness.
Batch, Freeze, Repeat: A Smart Cook’s Favorite Trick
Want to go even further? Make Crockpot Butter Chicken & Rice in batches and freeze it. Store the sauce and chicken together, then freeze cooked rice separately. When you’re ready, reheat and serve—it’s just as comforting as fresh, maybe more.
This meal also scales up effortlessly. Hosting? Serve it buffet-style with naan, rice, and a cucumber salad. Weeknight rush? Warm a portion from the fridge, add a sprinkle of cilantro, and dinner’s done. No last-minute stress, no mystery freezer bags, just food that feels like home.
Here’s the truth: if you’ve got 10 minutes and a slow cooker, you’re three steps away from the best kind of dinner. And Crockpot Butter Chicken & Rice doesn’t just solve the “what’s for dinner” problem—it makes you excited to eat leftovers.
Want more meals that improve overnight? Our Slow Cooker Crack Chicken Soup is creamy, cheesy, and even better the next day.
Family Favorite, Foolproof Every Time
Crockpot Butter Chicken & Rice Is a Guaranteed Win
Ask anyone who’s tried it—Crockpot Butter Chicken & Rice never disappoints. It’s the one dish that everyone in the house will actually agree on. Rich, buttery, spiced just right, and served over fluffy rice? It hits every comfort note without being too heavy or bland.
And here’s what’s even better: you don’t need to babysit the process. Whether it’s your first time using a slow cooker or your 100th, Crockpot Butter Chicken & Rice is a low-risk, high-reward meal. There’s no tricky timing, no hovering, and no cleanup chaos. It’s a one-pot wonder that makes you feel like a kitchen genius.
The flavors are cozy enough for picky kids and bold enough for adults. Want a little heat? Add more cayenne. Need it dairy-free? Sub coconut milk for cream. This recipe flexes with your needs—and still tastes like something off your favorite takeout menu.
Versatile, Affordable, and Crowd-Pleasing
Whether it’s a casual weeknight, a cozy Sunday dinner, or a freezer-stock-up session, Crockpot Butter Chicken & Rice fits the moment. It’s affordable, easy to scale, and makes everyone think you put in way more effort than you actually did.
Got guests? Pair it with naan and a yogurt cucumber salad for a full meal. Feeding toddlers? Skip the cayenne and let the butter shine. Hosting game night? Serve in bowls with warm rice and let everyone help themselves. It’s food that adapts—and delights.
And best of all? You can make it today. With ingredients already in your pantry and a slow cooker on standby, Crockpot Butter Chicken & Rice is more than a recipe—it’s your new go-to.
Smart Swaps & Creative Twists
Make Crockpot Butter Chicken & Rice Your Own
The beauty of Crockpot Butter Chicken & Rice is its flexibility. With just a few swaps, you can customize it for dietary needs, new flavors, or what’s already in your pantry.
Want it lighter?
Use half-and-half instead of heavy cream, or try Greek yogurt for a protein boost with less fat. Still creamy, still comforting—just a bit more weekday-friendly.
Need it dairy-free?
Coconut milk or cashew cream bring richness without a drop of dairy. Add a touch of lemon juice for brightness and balance.
No garam masala?
Mix 1 part cumin, 1 part coriander, and a pinch of cinnamon for a quick substitute. It won’t be exact, but it’ll still deliver that warm, spiced essence that defines Crockpot Butter Chicken & Rice.
Go global with flavor
Add a spoonful of Thai red curry paste for heat and zing, or stir in smoked paprika and chipotle for a smoky Tex-Mex version. Even a splash of BBQ sauce creates a fusion-style surprise that’s bold and delicious.
Stretch It Further Without Stretching Your Budget
You can also bulk up Crockpot Butter Chicken & Rice with canned chickpeas, cauliflower, or peas. These additions soak up the sauce beautifully and make the meal even more satisfying. Ideal for feeding more people or making the dish stretch an extra day.
When a recipe is this forgiving, you never get bored. You just keep winning—one slow-cooked meal at a time.
Crockpot Butter Chicken & Rice isn’t just a meal—it’s a mealtime breakthrough. It turns ordinary ingredients into something extraordinary, even on your busiest days. Whether you’re meal-prepping, feeding a family, or craving comfort food that doesn’t demand a chef’s skill, this dish delivers.
Give it a try and let your slow cooker surprise you. Then tag me in your creations—I want to see your kitchen wins!
Frequently Asked Questions
Can I cook the rice in the slow cooker with the chicken?
Yes, but timing matters. If you want to cook the rice with the chicken, add it during the last 30 minutes of cooking. Otherwise, it may become mushy. For fluffier texture, cook rice separately and serve it with your Crockpot Butter Chicken & Rice.
What type of chicken works best for this recipe?
Boneless, skinless chicken thighs are ideal—they stay tender during long cooking. However, chicken breasts also work well if you prefer leaner meat. Both absorb the rich sauce beautifully in Crockpot Butter Chicken & Rice.
Can I make Crockpot Butter Chicken & Rice dairy-free?
Absolutely! Use coconut milk instead of cream, and replace butter with a vegan alternative. The result is still rich and flavorful with a slightly tropical twist.
How long does Crockpot Butter Chicken & Rice last in the fridge?
Stored properly in airtight containers, it lasts up to 4 days in the fridge. It also freezes well for up to 2 months. Reheat gently and stir in a little cream or broth to revive the sauce.
Slow Cooker Tripe Stew isn’t just a meal—it’s a comeback story. Hey! I’m Darleen Vamce—34, Salt Lake City native, and a woman who used to think slow cookers were just for potlucks and overly mushy stews. I was wrong. Very wrong. Now, this humble little machine is basically my co-chef, my weekday dinner savior, and the secret weapon behind most of the meals that make my family think I have superpowers.
It all started during “The Great Mealtime Struggle”: three hungry kids, a day job that didn’t quit at 5, and a mocking kitchen. Out of desperation, I pulled down a dusty slow cooker, tossed in chicken, beans, tomatoes, and spices one-handed—baby in tow. The result? Magic. Since then, it’s my second brain. I prep in the morning, toss it in, and let life happen while dinner cooks. That same slow-cooked magic now brings you this rich, hearty Slow Cooker Tripe Stew—a dish that’s surprisingly tender, deeply flavorful, and anything but boring.
Table of Contents
5 Reasons to Love Slow Cooker Tripe Stew
1. It Transforms a Humble Cut into Something Amazing
Slow cooker tripe stew has a reputation to overcome—but once you try it, you’ll wonder why it took so long. Cooking tripe low and slow completely changes its texture and flavor. What starts out firm becomes soft, buttery, and rich. The stew base—built from garlic, onions, herbs, and tomatoes—elevates the flavor even more.
You don’t need fancy tools or hard-to-find ingredients. Just your slow cooker, a few pantry staples, and patience. As the stew simmers, it breaks down collagen in the tripe and releases deep, comforting aromas that fill the kitchen.
For anyone who’s ever doubted tripe, this stew is the turning point.
2. It’s Surprisingly Nutritious
Not only is slow cooker tripe stew hearty and satisfying—it’s incredibly good for you. Tripe is packed with protein, low in fat, and loaded with collagen. It supports joint health, digestion, and even skin elasticity.
Add in fiber-rich vegetables like carrots, celery, or greens, and you’ve got a complete, nutrient-dense meal. The long cook time allows every ingredient to meld together, enhancing both taste and nutritional value.
If you’re feeding a family, this is the kind of meal that covers both comfort and health—without compromise.
3. It Honors Food Traditions Around the World
Slow cooker tripe stew might be trending now, but it’s been cherished for centuries. From Mexican menudo to Italian trippa alla romana, families everywhere have their own take on slow-simmered tripe. Modern home cooks are rediscovering this heritage—just like they’ve done with dishes such as Slow Cooker Birria Tacos.
By using a slow cooker, you preserve these traditions in a modern way. The flavors stay authentic, but the process becomes simple. You don’t need to hover over a stove for hours. Prep it in the morning, then let the slow cooker do the work while you go on with your day.
Cooking this dish means honoring the past while feeding the present.
4. It’s Budget-Friendly and Family-Wise
Let’s face it—dinner costs add up. But slow cooker tripe stew is one of the best values you’ll find. Tripe is inexpensive, but it stretches far. With just a few vegetables and broth, one pot can feed a large family or give you leftovers for days.
It’s also the perfect freezer-friendly meal. Cook once, portion it out, and enjoy it later without extra work. The stew gets even better with time, so reheated servings still taste fresh and full of flavor.
This isn’t just a smart recipe—it’s a smart habit for any home cook. If budget-friendly classics are your thing, you’ll love my Slow Cooker Poor Man’s Stew too—it’s a nostalgic bowl of simplicity.
5. It’s a Blank Canvas for Flavor
The beauty of slow cooker tripe stew lies in its flexibility. Want something spicy? Add chilies or smoked paprika. Craving something rustic? Toss in beans, potatoes, or even corn. Looking for a fusion twist? Stir in curry paste or miso toward the end.
This dish lets you explore. It’s perfect for home cooks who love to experiment but don’t want to risk a flop. Once the tripe is tender, the rest is up to you.
Every family ends up making it their own—and that’s exactly what makes it worth loving.
Slow Cooker Tripe Stew Recipe (Comforting & Bold)
The Deep Appeal of Slow Cooker Tripe Stew
Why This Dish Deserves Your Attention
Slow Cooker Tripe Stew has long been misunderstood. For many, it conjures images of bland cafeteria fare or forgotten dishes from another era. But let’s be clear—this is no ordinary stew. When tripe is cooked low and slow, magic happens. The texture becomes soft and buttery, the flavors deepen, and the broth gains a richness that rivals high-end cuts of meat.
In a world where weeknight dinners often mean rushing or reheating, this dish stands apart. You prep in the morning, go about your day, and come home to a meal that tastes like you hovered over the stove for hours. But instead, your slow cooker tripe stew did all the work.
And here’s the real surprise: even those who claim to “hate tripe” tend to change their minds after one bite. Why? Because this stew doesn’t mask the tripe—it elevates it. Combined with aromatics, vegetables, and a rich tomato base, every spoonful delivers bold, comforting satisfaction.
More Than a Stew—It’s a Smart Cooking Strategy
This dish isn’t just flavorful; it’s practical. Tripe is budget-friendly, packed with protein, and becomes exceptionally tender when cooked slowly. If you’re feeding a crowd or planning meals ahead, slow cooker tripe stew stretches your dollar while delivering serious flavor.
Additionally, it stores well, making it ideal for batch cooking. Whether you freeze it or refrigerate leftovers, the stew only improves over time. That’s the beauty of the slow cooker method—layered flavor, minimal effort, and consistent results.
The next time you’re tempted to skip dinner or settle for something bland, remember this: slow cooker tripe stew might just be the most underrated comfort food in your rotation.
Nutrition and Tradition in Slow Cooker Tripe Stew
Packed with Nutrition, Perfect for Busy Families
If you’re looking for a meal that’s both hearty and healthy, slow cooker tripe stew checks every box. Tripe is rich in protein and low in fat, making it ideal for families trying to cut back on red meat without sacrificing flavor. It’s also a great source of important nutrients like vitamin B12, zinc, and selenium—minerals your body needs for energy and immunity.
Unlike many high-protein meals, this one is easy on the wallet and on your schedule. The slow cooking process extracts every bit of nutrition and turns humble ingredients into a satisfying, slow-simmered masterpiece. And because slow cooker tripe stew is naturally high in collagen, it supports joint health and skin elasticity—benefits most people don’t expect from a comfort food dish.
Another advantage? You can load this stew with vegetables like carrots, onions, celery, or even leafy greens for extra fiber and vitamins. The longer it cooks, the more those ingredients blend into the broth, deepening the flavor and enhancing its health profile.
Rooted in Culture, Adapted for Today
Slow cooker tripe stew isn’t just nutritious—it’s a dish with deep cultural roots. Variations of this stew exist around the globe. From Mexican menudo to Italian trippa alla romana, families have relied on slow-cooked tripe for generations. Why? It stretches ingredients, fills bellies, and honors the whole animal—no waste, just flavor.
Today’s home cooks are rediscovering these old-world recipes with new-world tools. The slow cooker makes it easy to respect tradition without spending hours in the kitchen. Whether you grew up eating tripe or you’re trying it for the first time, slow cooker tripe stew connects the past to the present in the most delicious way possible.
Tips, Tricks, and Creative Twists on Slow Cooker Tripe Stew
How to Make It Foolproof Every Time
Cooking slow cooker tripe stew doesn’t require culinary training—just smart steps and quality ingredients. First, always clean the tripe thoroughly. Rinse it well, then soak it in lemon water or vinegar to reduce any lingering odor. Parboiling before adding it to the slow cooker also helps improve texture and flavor.
Next, build a flavorful base. Start with onions, garlic, celery, and carrots. Sautéing these in a pan before adding them to the cooker boosts the stew’s depth. Add crushed tomatoes, broth, herbs like oregano or thyme, and a bay leaf or two. Then, let your slow cooker tripe stew simmer low and slow—8 hours on low is ideal.
Don’t forget salt and acid. A splash of vinegar or squeeze of lemon at the end balances the richness and brings brightness. Taste and adjust seasoning just before serving. These small touches turn a basic dish into something unforgettable.
Unique Ways to Make It Your Own
One of the best things about slow cooker tripe stew is how customizable it is. Want a little heat? Add sliced jalapeños or crushed red pepper flakes. Prefer it smoky? Stir in smoked paprika or a bit of chorizo. You can even blend cultural influences—think curry powder for a Caribbean twist or ginger and soy for Asian flair.
For those who love texture, add canned beans, hominy, or potatoes in the final hour of cooking. These ingredients absorb flavor while thickening the broth. Crusty bread or rice on the side turns it into a full meal.
Whether you stick to tradition or go bold with new flavors, slow cooker tripe stew adapts beautifully. It’s a canvas waiting for your creativity—and your family’s approval.
Serving, Storing, and Reheating Slow Cooker Tripe Stew
The Best Ways to Serve It for Any Occasion
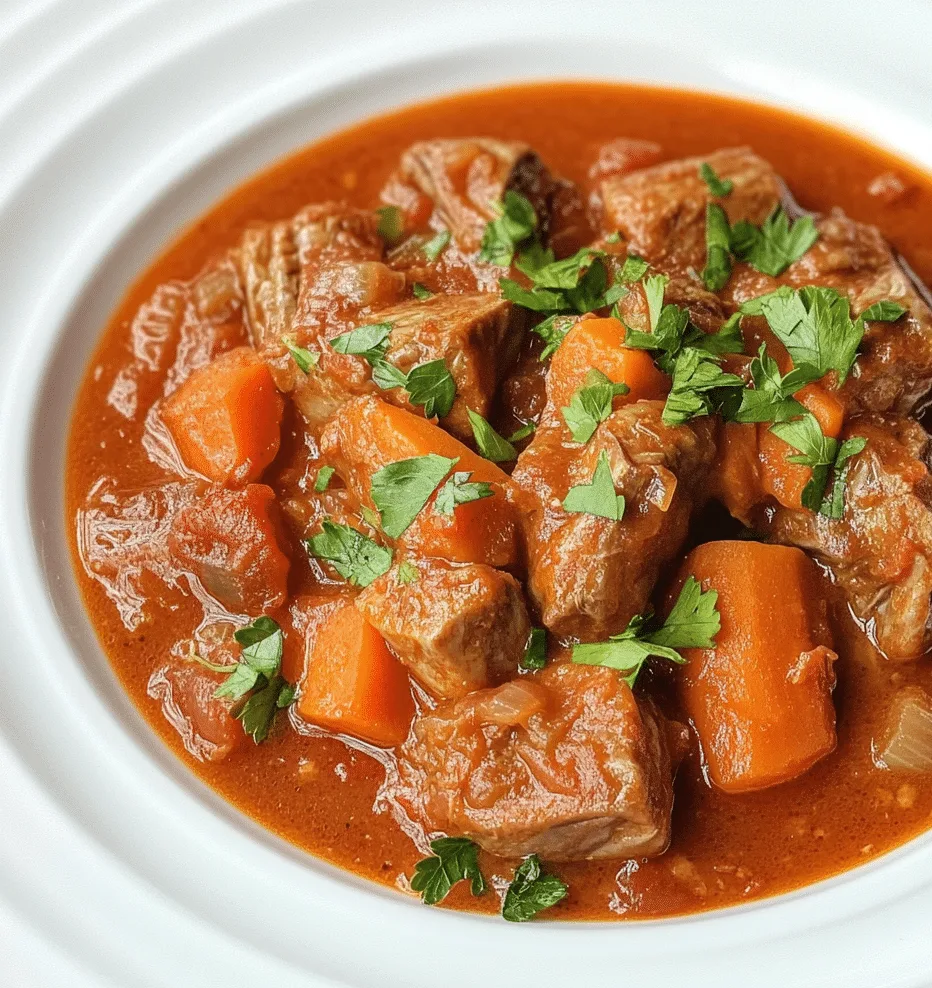
You’ve waited hours for that rich aroma to fill your kitchen—now it’s time to serve your slow cooker tripe stew. Presentation is simple but powerful. Spoon the stew into deep bowls and top with freshly chopped parsley or cilantro. A squeeze of lemon brightens every bite and balances the richness of the tripe.
For heartier meals, pair it with steamed rice, crusty sourdough, or buttered cornbread. If you’re serving a crowd, a side of roasted vegetables or a crisp green salad adds color and texture to the plate. Don’t forget a spicy hot sauce on the side—some love the extra heat.
Hosting a dinner? Serve the stew in a large Dutch oven right at the table. It invites conversation and adds rustic charm. No matter the setting, slow cooker tripe stew is comfort food that feels thoughtful without being fussy.
Serve it hot with crusty bread or rice on the side
Store and Reheat Like a Pro
One of the best things about slow cooker tripe stew is how well it keeps. Let leftovers cool, then transfer to airtight containers. Refrigerated, it lasts up to four days. The flavor actually deepens with time, making next-day servings even better.
For long-term storage, freeze portions in freezer-safe bags or containers. Lay them flat for quicker thawing. When you’re ready to reheat, do so gently—low and slow in a pot or microwave works best. Add a splash of broth or water to loosen the texture and refresh the flavor.
Avoid boiling during reheating to prevent the tripe from turning rubbery. Treated with care, your slow cooker tripe stew will taste just as delicious the second—or even third—time around.
Conclusion: Why Slow Cooker Tripe Stew Belongs in Your Kitchen
Slow cooker tripe stew isn’t just another recipe—it’s a transformation. It turns an underused ingredient into a deeply flavorful, budget-friendly, family-approved meal that cooks itself while you live your life. Whether you’re feeding picky eaters, exploring traditional flavors, or looking for something new that doesn’t break the bank, this stew delivers.
You don’t need to babysit the stove or have hours to cook. You don’t need to convince your family it’s worth trying—the first bite will do that for you. With rich broth, tender tripe, and your favorite aromatics, slow cooker tripe stew proves that real comfort food doesn’t have to be complicated.
So give it a chance. Try the recipe, make it your own, and don’t be surprised when it ends up in your regular rotation. When you do, tag me on social—because I can’t wait to see what your version looks like.
Frequently Asked Questions About Slow Cooker Tripe Stew
What does tripe taste like in a slow cooker?
When cooked low and slow, tripe becomes tender and absorbs the rich flavors of broth, tomatoes, and spices. In slow cooker tripe stew, it tastes savory, slightly earthy, and deeply satisfying—nothing like its reputation suggests.
How long should I cook tripe in a slow cooker?
For best texture, slow cooker tripe stew should cook for 8 hours on low or 5 hours on high. This slow process breaks down the collagen, resulting in soft, flavorful bites every time.
Can I freeze slow cooker tripe stew?
Yes! Slow cooker tripe stew freezes beautifully. Let it cool completely, store it in an airtight container or freezer bag, and freeze for up to 3 months. Thaw overnight before reheating on the stove.
Is tripe healthy to eat?
Absolutely. Tripe is high in protein, low in fat, and rich in nutrients like B12 and zinc. When used in slow cooker tripe stew, it becomes a hearty, wholesome meal that supports energy, digestion, and immune health.