Author: Darleen Vance

  • Smothered Cajun Chicken – Irresistibly Creamy Comfort

    Smothered Cajun Chicken – Irresistibly Creamy Comfort

    Smothered Cajun Chicken is what I make when life gets loud and dinner still needs to be cozy. Last Tuesday, my smoke alarm serenaded us because I got chatty with a neighbor while searing, and my son declared it “the dinner timer.” Smothered Cajun Chicken came to the rescue anyway—creamy gravy, bold Cajun spice, and tender chicken saved the night. I plated it over rice, tossed a salad, and we were good. If you love an easy, homemade one-pan meal that tastes like a hug, this is your new weeknight comfort food.

    Smothered Cajun Chicken with creamy Cajun gravy

    Recipe

    Why You’ll Love Smothered Cajun Chicken

    What Makes This Smothered Cajun Chicken So Irresistible

    I learned quickly that Smothered Cajun Chicken wins even on the messiest nights. The first time I filmed this, my tripod slipped into a bowl of sliced peppers, and we laughed our way to dinner anyway. Smothered Cajun Chicken still turned out rich, creamy, and bursting with soulful spice—the kind of homemade comfort food that makes an easy dinner feel special. If your weeknight needs a one-pan meal with bold flavor and a cozy vibe, this is it. Smothered Cajun Chicken is simple, reliable, and big on comfort without fuss.

    • One-pan wonder: Minimal dishes, maximum flavor—true one-pan meal ease.
    • Quick prep: About 15 minutes to prep and 30 to cook—weeknight friendly.
    • Comforting and creamy: Silky Cajun gravy hugs every bite of tender chicken.
    • Flexible heat: Dial the spice up or down for a family-friendly easy dinner.
    • Simple ingredients: Pantry spices and peppers you likely already have.

    Ready to make Smothered Cajun Chicken that tastes like home? Let’s dive into the recipe card below.

    Beyond comfort food nostalgia, Smothered Cajun Chicken brings viral-worthy creaminess with a bold homemade twist. It’s an easy recipe that looks chefy for company but cooks fast enough for Tuesday night. The skillet gravy adds that restaurant-style finish people love sharing on social—especially when swirled over rice with glossy peppers. Smothered Cajun Chicken also works with chicken thighs or breasts, and leftovers reheat beautifully, which keeps it trending for meal-prep fans and budget-minded cooks alike.

    Tips, Tricks & Expert Secrets for Smothered Cajun Chicken

    Chef Tips for Perfect Smothered Cajun Chicken Every Time

    In a cooking class years ago, I rushed the roux and learned the hard way: lumps follow impatience. With Smothered Cajun Chicken, a 60-second roux and a slow splash of broth make all the difference. Here’s how to nail it every time.

    • Dry and season well: Pat chicken dry and season generously; dry surfaces sear better for that flavorful fond.
    • Sear, then simmer: Sear until deeply golden; finish cooking gently in the gravy to keep chicken juicy.
    • Roux patience: Cook the flour 1 minute; whisk broth gradually to avoid lumps and ensure a silky, homemade version of Cajun gravy.
    • Taste in stages: Cajun blends vary in salt and heat—season the gravy, then adjust at the end for a perfect quick fix.

    Smart Ingredient Swaps & Practical Cooking Advice

    • Lighter option: Swap heavy cream for evaporated milk or half-and-half; reduce heat to avoid curdling.
    • Gluten-free: Use a 1:1 gluten-free flour for the roux and a certified GF Cajun seasoning.
    • Dairy-free: Use olive oil + a splash of coconut milk or cashew cream; the flavor stays rich and bold.
    • What not to do: Don’t boil the cream—keep the gravy at a gentle simmer to prevent breaking or a grainy texture.

    With these cooking tips, you’ll master Smothered Cajun Chicken as an easy recipe that’s weeknight-ready and wonderfully homemade.

    Serving Ideas & Creative Variations

    How to Serve Smothered Cajun Chicken for Maximum Enjoyment

    When I served Smothered Cajun Chicken at a last-minute porch dinner, I piled it onto a platter over buttered rice, let the gravy run, and watched friends scoop seconds. A few smart plating suggestions make this cozy skillet shine.

    • Classic pairing: Spoon over steamed rice, mashed potatoes, or creamy grits for a true Southern-style serving idea.
    • Greens and crunch: Pair with garlicky green beans, cornbread, or a crisp slaw to balance the creamy gravy.
    • Beverage buddy: A citrusy lemonade or chilled white wine cuts through richness beautifully.

    Flavor Twists and Seasonal Variations

    • Smoky bacon twist: Render 2 slices of chopped bacon first; cook onions/peppers in the drippings, then proceed for a deeper flavor variation.
    • Veggie-forward: Stir in sautéed mushrooms or okra during the simmer for a heartier seasonal twist.
    • Spice route: Add andouille slices for extra Cajun character, or fold in a spoonful of Creole mustard for tangy heat.

    Sharing on social? Style the plate with a rice mound, cascade the gravy, tuck in peppers for color, and finish with parsley. For more cozy mains and side-dish inspiration, peek at my Garlic Parmesan Crockpot Chicken and Potatoes and this reader-favorite creamy classic, Crockpot Creamy Sun-Dried Tomato Chicken.

    Smothered Cajun Chicken with creamy Cajun gravy
    Smothered Cajun Chicken with creamy Cajun gravy

    Storage & Troubleshooting Guide

    How to Store and Reheat Smothered Cajun Chicken

    Leftover Smothered Cajun Chicken is a gift. I stash a portion for my next-day lunch, and the creamy Cajun gravy tastes even better after resting. Here’s how to keep it fresh.

    • Room temperature: Do not leave Smothered Cajun Chicken out for more than 2 hours.
    • Refrigerate: Store in an airtight container 3 to 4 days. Place rice separately so it doesn’t soak up all the sauce.
    • Freeze: Up to 2 months in freezer-safe containers. Thaw overnight in the fridge.
    • Reheat: Warm gently in a covered skillet over medium-low heat, adding a splash of broth or milk to loosen the gravy. Microwave in 30-second bursts or use the air fryer for 3 to 4 minutes at 350°F to rewarm the chicken, then ladle hot gravy over.

    Troubleshooting Common Smothered Cajun Chicken Issues

    • Gravy too thick: Whisk in warm broth, a little at a time, until the texture loosens.
    • Gravy too thin: Simmer uncovered a few minutes or whisk in a tiny cornstarch slurry (1 tsp cornstarch + 1 tsp cold water).
    • Too salty or spicy: Add a splash of cream or a squeeze of lemon to rebalance, then taste again.
    • Chicken dry: Next time, reduce the sear time slightly and finish cooking gently in the sauce to 165°F internal.
    • Broken sauce: Keep heat to a gentle simmer; if it breaks, whisk in a tablespoon of cold cream off heat to bring it back.

    With this storage advice, Smothered Cajun Chicken stays delicious from skillet to leftovers. You’ve got this!

    FAQs

    Can I make Smothered Cajun Chicken ahead?

    Yes. Cook completely, cool, and refrigerate up to 4 days. Reheat gently with a splash of broth or milk to refresh the gravy.

    What’s the best cut of chicken for Smothered Cajun Chicken?

    Boneless thighs stay juicier, but breasts work well when finished in the sauce to 165°F. Adjust simmer time to avoid overcooking.

    How do I reduce the heat level?

    Use a mild Cajun blend and skip cayenne and hot sauce. You can also stir in extra cream at the end to mellow the spice.

    Can I make Smothered Cajun Chicken dairy-free?

    Yes. Use olive oil instead of butter and swap cream with coconut milk or cashew cream. Keep the sauce at a gentle simmer to prevent separation.

    Conclusion

    When dinner needs to be bold, creamy, and weeknight-easy, Smothered Cajun Chicken is the skillet hero. The silky homemade gravy, peppers, and tender chicken create a comfort food classic that still fits the “quick dinner” box. Whether you serve it over rice, grits, or mashed potatoes, Smothered Cajun Chicken brings cozy flavor with simple ingredients, one-pan ease, and dependable results. If you love Southern-inspired meals, bookmark this, then explore my recipe collection for more easy dinner ideas. Try this at home and tag me—I can’t wait to see your Smothered Cajun Chicken in action!
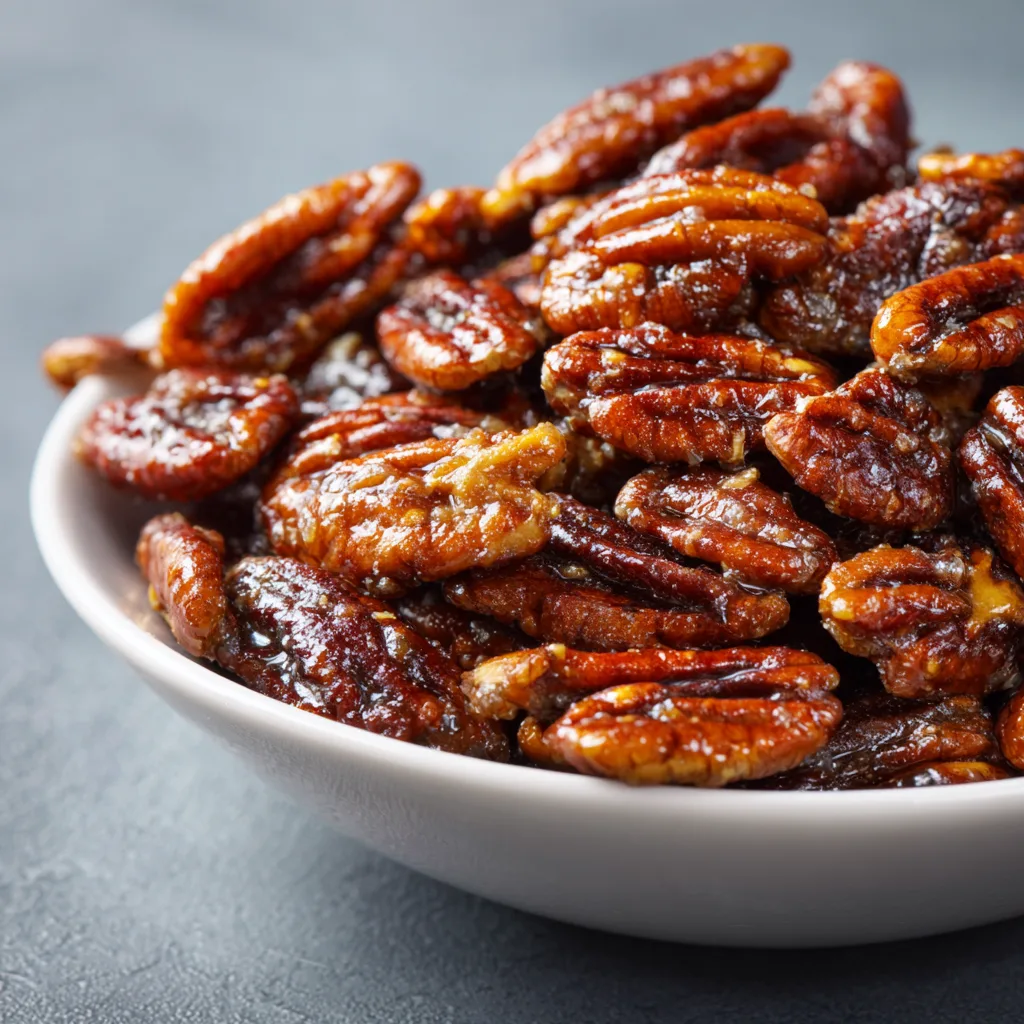
  • Slow Cooker Candied Pecans – Crunchy and Irresistible

    Slow Cooker Candied Pecans – Crunchy and Irresistible

    Slow Cooker Candied Pecans are my shortcut to holiday magic with zero stress. Last December, I, Darleen Vance, let the slow cooker do the heavy lifting while my youngest staged a cinnamon “snowstorm” across the counter. The house smelled like a candy shop, and the only thing sticking to the floor was my pride. Slow Cooker Candied Pecans saved the day again—crunchy, glossy, and perfectly spiced without babysitting a pan. I jar them for easy gifts, scatter them on salads, and snack shamelessly while wrapping presents. If you love set-it-and-forget-it treats, you’ll love this.

    Slow Cooker Candied Pecans

    Recipe

    Why You’ll Love This Recipe

    What Makes This Slow Cooker Candied Pecans So Irresistible

    I once made Slow Cooker Candied Pecans while hunting for the slow cooker lid—spoiler: it was in the kids’ dress-up bin, tiara and all. Even with the chaos, these Slow Cooker Candied Pecans came out crunchy, shiny, and completely snackable. When life gets hectic, I love leaning on a slow cooker treat that feels indulgent and homemade without hovering over a pan. Slow Cooker Candied Pecans bring cozy, cinnamon-sugar comfort food vibes to your kitchen with minimal effort and maximum payoff.

    • Ultra-easy prep: whisk, toss, and let the slow cooker do the work—an easy recipe even on busy nights.
    • Foolproof texture: the water-at-the-end trick creates that classic glossy candy shell.
    • Simple pantry ingredients: pecans, sugar, cinnamon—homemade goodness without fancy tools.
    • Family-friendly and giftable: jar these for teachers, neighbors, or holiday party favors.
    • Versatile: snack, salad topper, charcuterie add-on, or sweet crunch on dessert.

    Slow Cooker Candied Pecans also play nicely with your menu planning. If your slow cooker is already out, pair them with a cozy dessert like Slow Cooker Apple Crisp or keep the cinnamon theme going with Crockpot Cinnamon Sugar Monkey Bread. This homemade, one-pot, comfort snack will make your kitchen smell like a bakery and your to-do list feel lighter. Ready to make a batch? Let’s dive into the recipe card!

    Slow Cooker Candied Pecans Tips, Tricks & Expert Secrets

    Chef Tips for Perfect Slow Cooker Candied Pecans Every Time

    The first time I taught a friend this easy recipe, I grabbed baking soda instead of cinnamon—thankfully I caught it before the first stir. Lesson learned: mise en place matters. For consistently great Slow Cooker Candied Pecans, these cooking tips turn a homemade version into a pro-level finish.

    • Pre-coat well: Froth the egg white (or aquafaba) until foamy; it’s the edible glue that helps sugar cling for evenly coated Slow Cooker Candied Pecans.
    • Stir on schedule: Every 30 minutes prevents hot spots and keeps the texture evenly crunchy.
    • Water magic: Adding 1/4 cup water in the last hour is the quick fix that creates that signature candy shell.
    • Vent carefully: Prop the lid slightly ajar during the final 15 minutes if steam builds—this keeps the coating from getting tacky.

    Smart Ingredient Swaps & Practical Cooking Advice

    • Vegan/dairy-free: Swap the egg white with 3 tbsp aquafaba; skip butter and use a teaspoon of neutral oil for shine.
    • Lower refined sugar: Use coconut sugar for half the mix; pecans will be slightly darker with a toffee flavor.
    • Spice profile: Not a cinnamon fan? Try pumpkin spice or chai spice for a seasonal twist.
    • What not to do: Don’t crank the heat to High—Slow Cooker Candied Pecans can scorch fast, turning bitter before they set.

    With these cooking tips, your Slow Cooker Candied Pecans will be glossy, crisp, and fragrant, every single batch—an easy recipe that feels like a win even on hectic days.

    Serving Ideas & Creative Variations for Slow Cooker Candied Pecans

    How to Serve Slow Cooker Candied Pecans for Maximum Enjoyment

    When friends drop by, I set out Slow Cooker Candied Pecans in a pretty bowl and they vanish before I can say “save room for dessert.” For serving ideas that impress, think balance: a little salt, a little creaminess, and something cozy.

    • Charcuterie upgrade: Pair Slow Cooker Candied Pecans with sharp cheddar, blue cheese, and crisp apple slices.
    • Dessert topper: Sprinkle over vanilla ice cream, yogurt parfaits, or brownies for instant crunch.
    • Salad sparkle: Toss onto spinach with goat cheese, pears, and a maple-balsamic dressing.

    Hosting a treat spread? Add a chocolatey companion like Crockpot Chocolate Peanut Clusters—the contrast makes Slow Cooker Candied Pecans shine. For creators sharing on social, a simple plating suggestion: style pecans on parchment with a dusting of cinnamon and a vintage spoon; shoot in natural light to highlight the glossy coating.

    Flavor Twists and Seasonal Variations

    • Maple-vanilla: Replace 1/4 cup granulated sugar with maple sugar; add seeds from 1/2 vanilla bean.
    • Pumpkin spice latte: Use pumpkin pie spice plus 1 tsp espresso powder for cozy fall vibes.
    • Sweet heat: Add 1/4–1/2 tsp cayenne and a pinch of smoked paprika for a grown-up twist.

    These flavor variations keep Slow Cooker Candied Pecans fresh and fun from back-to-school through New Year’s, inviting plenty of seasonal twist experiments and shareable moments.

    Slow Cooker Candied Pecans – Crunchy and Irresistible
    Slow Cooker Candied Pecans – Crunchy and Irresistible

    Storage & Troubleshooting Guide

    How to Store and Reheat Slow Cooker Candied Pecans

    I once found a rogue bag of Slow Cooker Candied Pecans in my coat pocket—still crisp a week later. For best results and to keep fresh longer, follow this storage advice:

    • Room temperature: Store fully cooled pecans in airtight jars or zip bags for 1–2 weeks.
    • Refrigerator: Up to 3 weeks in a tightly sealed container; bring to room temp before serving.
    • Freezer: Up to 2 months; thaw uncovered at room temp for the best texture.
    • Re-crisp: If they soften, warm on a baking sheet at 250°F for 5–8 minutes or in an air fryer at 300°F for 2–3 minutes.

    Troubleshooting Common Slow Cooker Candied Pecans Issues

    • Too sticky: Cook 10–15 minutes longer with the lid slightly ajar, stirring once; humidity can slow the set.
    • Watery coating: You likely added the water too soon. Next time, add it in the final hour only.
    • Uneven texture: Stir every 30 minutes and avoid overloading the cooker—a crowded pot won’t candy evenly.
    • Overcooked/bitter: The slow cooker ran too hot. Keep on Low and never skip the stirs.
    • Not glossy: Add the 1/4 cup water in the last hour and finish by cooling pecans fully on parchment.

    With a few quick fixes, your Slow Cooker Candied Pecans will return to their crunchy, craveable best. You’ve got this—sweet success is only a stir away.

    FAQs

    Can I make Slow Cooker Candied Pecans without egg white?

    Yes—use 3 tablespoons aquafaba (the liquid in a can of chickpeas). It froths like egg white and helps the sugar adhere.

    How do I keep Slow Cooker Candied Pecans from getting sticky?

    Let them cool completely on parchment and store airtight. If they soften, re-crisp in a 250°F oven for 5–8 minutes.

    Can I reduce the sugar?

    Yes, reduce the total sugar by 1/4 cup and expect a thinner shell. For deeper flavor, swap some sugar with coconut sugar or maple sugar.

    Are Slow Cooker Candied Pecans gluten-free?

    Yes, naturally gluten-free. Always check labels on spices and vanilla to be safe.

    Conclusion

    From weeknight cravings to holiday gifting, Slow Cooker Candied Pecans deliver big flavor with little effort. This easy, homemade recipe turns pecans into glossy, cinnamon-kissed bites that feel like comfort food and taste like a bakery treat. With smart cooking tips, serving ideas, and seasonal flavor variation options, you’ll have Slow Cooker Candied Pecans on repeat for parties, snacks, salads, and dessert toppers. If you’re already in a cozy slow cooker mood, try pairing them with Slow Cooker Apple Crisp for a crowd-pleasing duo. Make a batch of Slow Cooker Candied Pecans at home and tag me—I can’t wait to see your crunchy, irresistible creations!

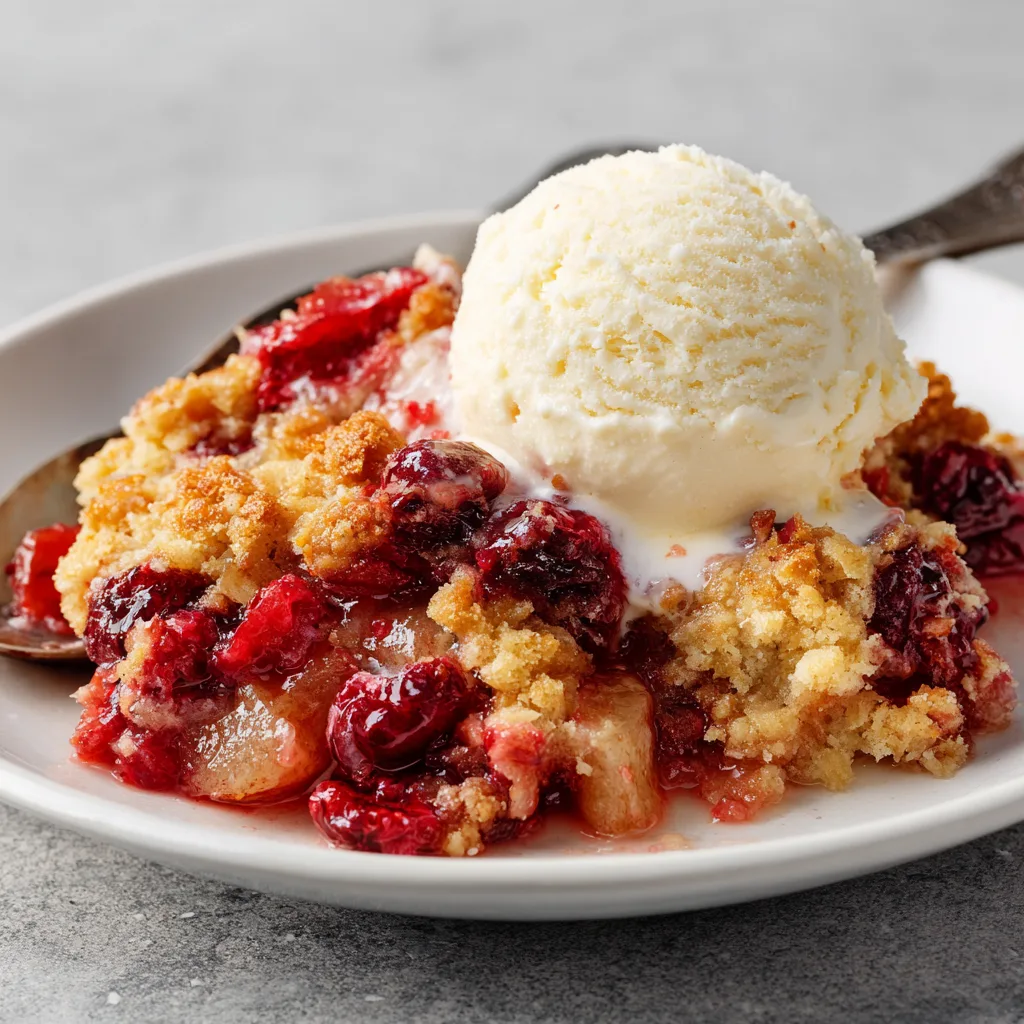
  • Slow Cooker Cranberry Apple Cobbler – Easy and Irresistible

    Slow Cooker Cranberry Apple Cobbler – Easy and Irresistible

    Slow Cooker Cranberry Apple Cobbler saved my holiday sanity last year. I was juggling a turkey, two sides, and a kid who “borrowed” my cinnamon for a science project. So I tossed apples and cranberries in the crock, dropped a quick biscuit topping on, and let the Slow Cooker Cranberry Apple Cobbler do its cozy magic. The house smelled like a cinnamon candle my aunt would approve of, and dessert practically cooked itself while I found the cinnamon under a couch cushion. True story, Darleen-style chaos included.

    Hungry? Let’s make dessert that feels like a warm hug.

    Slow Cooker Cranberry Apple Cobbler saved my holiday sanity last year.

    Recipe

    Why You’ll Love Slow Cooker Cranberry Apple Cobbler

    What Makes This Slow Cooker Cranberry Apple Cobbler So Irresistible

    I love a dessert that behaves. Slow Cooker Cranberry Apple Cobbler is the definition of reliable comfort food. It delivers that sweet-tart pop of cranberry, tender apples, and a buttery, homemade biscuit crown without babysitting the oven. When I’m hosting, I set the crockpot and let this homemade treat perfume the kitchen while I handle the main event. The texture is dreamy, the flavor is balanced, and clean-up is a one-pan miracle.

    • Quick prep: 15 minutes of easy chopping and stirring, then hands-off cooking.
    • Comfort-in-a-bowl: warm fruit, cinnamon, and a golden, tender topping.
    • Simple pantry staples: apples, cranberries, flour, oats, sugar—done.
    • Family-friendly and holiday-worthy: a homemade dessert that feels special.
    • One-pot ease: slow cooker convenience, minimal dishes, maximum flavor.

    Whether you’re planning an easy dinner party finale or a weeknight treat, Slow Cooker Cranberry Apple Cobbler tastes like you worked all day—without actually doing it. If you love fruity comfort recipes, peek at my Slow Cooker Apple Crisp and my cozy Slow Cooker Caramel Apple Dump Cake for more homemade inspiration. Ready to scoop?

    Two words: set-and-forget. Slow Cooker Cranberry Apple Cobbler is trending because it’s that perfect homemade, comfort food dessert with a quick fix mentality. The sweet-tart fruit keeps it lively, while the topping brings buttery comfort. It’s the dessert your crockpot was born to make—especially when oven space is jam-packed. If nostalgia could be served warm, it would be this cobbler. Let’s jump into the recipe card next.

    Pro Tips for Slow Cooker Cranberry Apple Cobbler

    Chef Tips for Perfect Slow Cooker Cranberry Apple Cobbler Every Time

    Years ago, a bakery chef taught me the simplest trick: “Don’t overmix your biscuit dough.” That advice transformed my Slow Cooker Cranberry Apple Cobbler. Keep it shaggy and you’ll get tender, cloud-like mounds instead of tough pucks. Here are more friendly, expert cooking tips:

    • Use a towel trick: Lay a clean kitchen towel under the lid to catch condensation. This keeps the topping from getting soggy and is my favorite cooking tip.
    • Slice apples evenly: 1/2-inch slices cook at the same pace for consistent texture.
    • Balance the tart: If your cranberries are extra tart, bump the brown sugar by 1–2 tablespoons or add a splash more cider.
    • Don’t lift the lid early: Heat escapes fast; let the crockpot build gentle steam for the best homemade version.
    Slow Cooker Cranberry Apple Cobbler
    Slow Cooker Cranberry Apple Cobbler

    Smart Ingredient Swaps & Practical Cooking Advice

    • Gluten-free: Swap flour for a 1:1 gluten-free blend; verify oats are certified GF. It’s an easy recipe to adapt.
    • Vegan: Use plant butter and unsweetened almond milk; the result is still rich and cozy.
    • Lower sugar: Cut granulated sugar to 1/3 cup and use a tart-sweet apple blend; a drizzle of maple at serving adds roundness.
    • Cake-mix shortcut: In a hurry? Crumble 1/2 box vanilla cake mix with 4 tablespoons melted butter for a quick fix topping.

    What not to do: Don’t overmix the topping or you’ll lose that tender bite. And avoid overcooking; if the edges look dry, switch to Warm. With these tips, your Slow Cooker Cranberry Apple Cobbler will be reliably golden and delicious, every single time.

    Serving Ideas and Variations for Slow Cooker Cranberry Apple Cobbler

    How to Serve Slow Cooker Cranberry Apple Cobbler for Maximum Enjoyment

    I once set this Slow Cooker Cranberry Apple Cobbler on the buffet next to a DIY topping bar because a friend said, “Make it look like a pie shop.” Scoops of vanilla bean ice cream, whipped cream, and caramel sauce disappeared faster than I could blink. For easy hosting, keep the cobbler warm in the crock and bring toppings to the table. A few serving ideas:

    • Classic duo: Warm cobbler with vanilla ice cream or lightly sweetened whipped cream.
    • Breakfast twist: Spoon cobbler over Greek yogurt with granola for a cozy brunch.
    • Sip and savor: Pair with spiced chai, mulled cider, or an after-dinner bourbon.

    For another festive slow-cooker sweet, peek at my pull-apart Crockpot Cinnamon Sugar Monkey Bread—a true crowd-pleaser.

    Flavor Twists and Seasonal Variations

    • Maple-Pecan Streusel: Swap oats for chopped pecans and drizzle 1–2 tablespoons maple syrup into the topping for a nutty, amber note.
    • Pear-Ginger Cobbler: Replace half the apples with pears and add 1 teaspoon grated fresh ginger for a bright, cozy seasonal twist.
    • Orange-Cranberry Glow: Double the orange zest and add 1/4 teaspoon almond extract for a bakery-style flavor variation.

    Plating suggestion: Serve in warm bowls, add a scoop of ice cream, then finish with a light dusting of cinnamon. Photograph from a 45-degree angle to capture that bubbly fruit and craggy biscuit top—Instagram will notice. However you riff it, Slow Cooker Cranberry Apple Cobbler shines in every season.

    Storage & Troubleshooting for Slow Cooker Cranberry Apple Cobbler

    How to Store and Reheat Slow Cooker Cranberry Apple Cobbler

    Leftovers of Slow Cooker Cranberry Apple Cobbler rarely survive the night here, but when they do, I label a container “hands off” (no one listens). Here’s how to keep this comfort dessert fresh:

    • Room temperature: Up to 2 hours max for food safety.
    • Refrigerator: 3–4 days in an airtight container; place a paper towel over the cobbler to absorb moisture before sealing.
    • Freezer: Up to 3 months. Wrap tightly in a freezer-safe container; thaw overnight in the fridge for best texture.
    • Reheat: Oven at 325°F for 10–15 minutes (best texture). Air fryer at 320°F for 6–8 minutes. Microwave 45–60 seconds per serving. A skillet with a dab of butter also works in a pinch.

    Troubleshooting Common Slow Cooker Cranberry Apple Cobbler Issues

    • Too watery: Stir in a quick cornstarch slurry (1 teaspoon cornstarch + 1 tablespoon cold water) and cook 10–15 minutes longer with the lid cracked or towel in place.
    • Topping too soft: Use the towel trick from the start; if still soft, transfer the insert to the oven to broil briefly if oven-safe, or scoop topping onto a baking sheet to brown.
    • Too tart: Drizzle with honey or maple syrup at serving, or add a spoonful of whipped cream.
    • Too dry: Fold in 1–2 tablespoons warm cider and cover on Warm for 10 minutes.
    • Uneven texture: Slice apples evenly and avoid lifting the lid early to maintain steady heat.

    With these storage tips and quick fixes, your Slow Cooker Cranberry Apple Cobbler will taste bakery-fresh even the next day. You’ve got this—Darleen-approved.

    FAQs

    Can I make Slow Cooker Cranberry Apple Cobbler ahead?

    Yes. Assemble the fruit base up to 24 hours ahead, refrigerate, and add the topping just before cooking. Or cook fully, cool, and reheat before serving.

    What apples work best for Slow Cooker Cranberry Apple Cobbler?

    A mix of tart and sweet is ideal. Try Granny Smith with Honeycrisp or Braeburn for balanced flavor and texture.

    Can I use frozen cranberries in Slow Cooker Cranberry Apple Cobbler?

    Absolutely. Use them straight from the freezer—no thawing needed. You may add 10–15 minutes to the cook time if your slow cooker runs cool.

    How do I keep the topping from getting soggy in Slow Cooker Cranberry Apple Cobbler?

    Use the towel-under-the-lid trick to absorb condensation and avoid lifting the lid during cooking.

    Conclusion

    Slow Cooker Cranberry Apple Cobbler is my kind of dessert—homemade, low-effort, and loaded with sweet-tart flavor. The crockpot does the work while you enjoy the evening, and the result is pure comfort food bliss with a tender biscuit crown. This easy recipe fits busy weeknights and special holidays alike, and it’s endlessly adaptable with seasonal twists and smart swaps. If cozy bowls of fruit-forward goodness speak your love language, bookmark this Slow Cooker Cranberry Apple Cobbler and make it your new tradition. Try it at home and tag me so I can celebrate your creation! For more warm-and-fuzzy inspiration, browse the latest on Recipes Darleen.

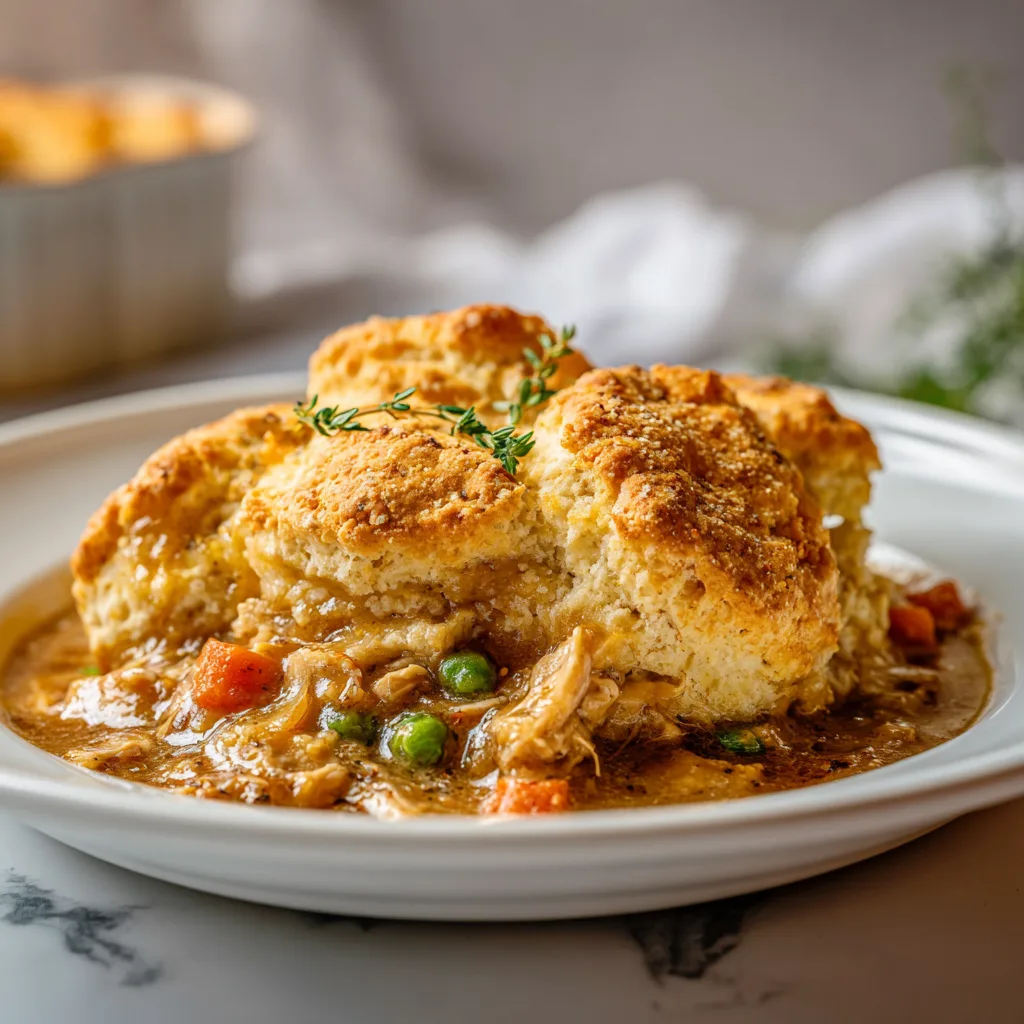
  • Chicken Cobbler – Creamy, Irresistibly Easy

    Chicken Cobbler – Creamy, Irresistibly Easy

    Chicken Cobbler crashed into my kitchen the same night the smoke alarm serenaded us during homework time. I dropped a casserole mitt, the dog stole my spatula, and yet Viral TikTok Chicken Cobbler still came out golden, bubbly, and downright comforting. I’m Darleen Vance, and this is the one-pan wonder I now reach for when life is loud and dinner needs to be cozy-fast. Layer, don’t stir, and let the oven do the magic. It’s the kind of easy dinner that makes you feel like a kitchen hero even on a chaotic Tuesday.

    Chicken Cobbler crashed into my kitchen the same

    Recipe

    Why You’ll Love Chicken Cobbler

    What Makes This Chicken Cobbler So Irresistible

    On the night I first baked Chicken Cobbler, I told my family, “Do not stir,” like it was a sacred chant. Chicken Cobbler rewards patience—the buttery bottom, the creamy center, the biscuit crown. It’s the definition of homemade comfort food with an easy recipe rhythm anyone can follow. Whether you’re new in the kitchen or a pro craving a quick fix, this one-pan meal makes dinner taste like a warm hug.

    • Comforting and creamy: A cozy, casserole-style bake with a biscuit-like cobbler top.
    • Simple, layered method: Just pour and don’t stir—really.
    • Quick prep, weeknight-friendly: Minimal chopping, maximum flavor.
    • Family-approved: Crowd-pleasing, kid-friendly, and great for leftovers.
    • Flexible ingredients: Rotisserie chicken, pantry staples, and easy swaps.

    Trending or not, Viral TikTok Chicken Cobbler earns a permanent place in your easy dinner rotation. It’s a homemade, one-pan meal worthy of repeat cravings. Ready to bake this comfort food classic? Let’s get to the recipe card below.

    People love a recipe that respects their time and still tastes like a weekend cooking project. Viral TikTok Chicken Cobbler is that magic: a casserole with biscuit mix that practically assembles itself. The no-stir method ensures the layers bake into distinct textures—creamy filling beneath, tender cobbler above. It’s part science, part comfort, and wholly delicious. If you adore easy dinner wins, you’ll see why Viral TikTok Chicken Cobbler keeps buzzing across timelines and family chats.

    Chicken Cobbler Tips, Tricks & Expert Secrets

    Chef Tips for Perfect Viral TikTok Chicken Cobbler Every Time

    I once taught a quick weeknight class where every student tried Viral TikTok Chicken Cobbler. The “aha” moment came when they saw how the hands-off layering created that signature cobbler texture. Here are the secrets I swear by:

    • Use melted butter first: Coat the pan well so the cobbler lifts easily and the edges crisp.
    • Season each layer: A little salt, pepper, thyme, and garlic powder on the chicken and veggies makes a big difference.
    • Don’t stir the layers: The biscuit batter and soup mixture must stay separate to cobble properly.
    • Let it rest: 10–15 minutes after baking helps the creamy center set for clean slices.

    Smart Ingredient Swaps & Practical Cooking Advice

    • Gluten-free hack: Use a gluten-free biscuit or baking mix and a certified GF cream soup.
    • Lighter version: Swap 2% milk and reduce butter to 6 tablespoons; use low-sodium broth.
    • Dairy-free: Use unsweetened almond or oat milk and plant-based butter; try a dairy-free condensed soup alternative.
    • What not to do: Don’t overmix the batter. Stir just until combined to keep the crumb tender.

    These cooking tips keep your easy recipe consistent and dreamy. If you love this homemade version of comfort food, you might also enjoy my Crockpot Creamy Sun-Dried Tomato Chicken for another weeknight win.

    Serving Ideas & Creative Variations for Chicken Cobbler

    How to Serve Chicken Cobbler for Maximum Enjoyment

    When friends pop by unannounced, I serve Chicken Cobbler right out of the dish with a sprinkle of parsley. It’s rustic, generous, and deeply satisfying. To make the most of this cozy bake, try these serving ideas:

    • Fresh counterbalance: Serve with a crisp green salad tossed in lemony vinaigrette.
    • Saucy accent: A drizzle of hot honey or a spoon of cranberry relish brings a sweet-heat contrast.
    • Beverage pairing: A chilled Chardonnay or sparkling water with citrus keeps things bright.
    Serving Ideas & Creative Variations for Chicken Cobbler

    For content creators, a simple plating suggestion: Cut clean squares, plate with a bright salad, and photograph in soft daylight for that craveable, Pinterest-ready glow.

    Flavor Twists and Seasonal Variations

    • Herb garden twist: Add fresh dill and chives to the batter for a springy lift.
    • Autumn cozy: Stir in roasted butternut squash and a pinch of sage for a fall seasonal twist.
    • Buffalo ranch: Toss chicken with buffalo sauce and a touch of ranch seasoning before layering.
    • Cheddar-jalapeño: Fold shredded cheddar and minced jalapeños into the batter for a gentle kick.

    Craving Tex-Mex vibes? After this Viral TikTok Chicken Cobbler, try my Crockpot Tex-Mex Chicken and Rice Bake for bold, weeknight-friendly comfort. And if you’re planning dessert, pair this dinner with my Slow Cooker Apple Crisp to round out the cozy menu.

    Storage & Troubleshooting Guide for Viral TikTok Chicken Cobbler

    How to Store and Reheat Chicken Cobbler

    The first time I made a double pan of Viral TikTok Chicken Cobbler, I learned that leftovers are gold. Here’s how to keep them fresh:

    • Room temperature: Keep out no longer than 2 hours.
    • Refrigerator: Store in airtight containers 3–4 days. For best texture, keep pieces in a single layer.
    • Freezer: Wrap individual portions, then place in freezer bags for up to 3 months.

    Reheating methods:

    • Oven: 350°F (175°C) for 12–15 minutes, covered loosely with foil.
    • Air fryer: 325°F (165°C) for 5–7 minutes for a crisp top.
    • Skillet: Low heat with a splash of broth to rehydrate, covered, 6–8 minutes.

    Troubleshooting Common Chicken Cobbler Issues

    • Too watery: Bake 5–10 minutes longer; let it rest 10–15 minutes to set. Next time, reduce broth by 1/4 cup.
    • Too dry: Check oven calibration. Add a splash of broth over servings when reheating to fix texture.
    • Uneven browning: Move your baking dish to the center rack, and use a light-colored metal pan.
    • Gummy center: Don’t stir layers; ensure oven is fully preheated and bake until the top is deep golden.

    With these storage tips and quick fixes, you’ll keep Viral TikTok Chicken Cobbler tasting homemade-fresh and weeknight-ready. You’ve got this—your kitchen confidence just went up a notch.

    FAQs

    Can I use canned chicken?

    Yes. Drain well and pat dry before layering. Rotisserie or leftover roasted chicken offers the best flavor, but canned works in a pinch.

    Do I have to thaw the vegetables?

    Lightly thawing helps even baking. If using fully frozen veggies, add 5–10 minutes to the bake time.

    Why can’t I stir the layers?

    Not stirring keeps the batter and soup separate so the top can cobble while the center stays creamy—signature Viral TikTok Chicken Cobbler texture.

    Can I make it ahead?

    Assemble up to the soup layer, cover, and refrigerate 6–8 hours. Add 5 minutes to the bake time or let the dish sit at room temp 20 minutes before baking.

    Conclusion

    When you crave comforting, homemade goodness without the fuss, Viral TikTok Chicken Cobbler delivers. It’s an easy dinner with one-pan convenience, a creamy center, and a biscuit-style top that turns golden and irresistible. From busy weeknights to casual Sunday suppers, Viral TikTok Chicken Cobbler is the cozy, family-friendly bake you’ll want on repeat. If you love simple comfort food and quick fix meals that still feel special, this recipe is your new favorite. Try it at home and tag me—let’s see your bubbly, golden pans of joy come to life!

  • Crockpot Swamp Potatoes – Comforting and Irresistible

    Crockpot Swamp Potatoes – Comforting and Irresistible

    Crockpot Swamp Potatoes saved my Tuesday. I tossed everything in the slow cooker, then the dog escaped, the kids hid my ladle, and dinner still tasted like a cozy hug. Crockpot Swamp Potatoes deliver bold flavor with zero fuss, and my family now requests them weekly. I’m Darleen Vance, and this is the creamy, Cajun-kissed comfort food I lean on when life gets loud.

    Crockpot Swamp Potatoes – Comforting and Irresistible

    Recipe

    WHY YOU’LL LOVE THIS RECIPE

    What Makes This Crockpot Swamp Potatoes So Irresistible

    I was halfway through dicing onions when the doorbell rang, the timer beeped, and my dog decided the bag of potatoes was a chew toy. Crockpot Swamp Potatoes came to the rescue. With Crockpot Swamp Potatoes, everything goes in one pot, and dinner still tastes like your favorite diner’s skillet special. This easy dinner delivers homemade comfort food with minimal effort and big payoff.

    • Set-and-forget ease: a true one-pot, one-pan meal feel with slow cooker convenience.
    • Comforting flavor: buttery, Cajun-spiced potatoes, peppers, onions, and smoked sausage.
    • Family-friendly: familiar ingredients and a cozy, creamy vibe everyone loves.
    • Flexible: make it a hearty side or a full easy dinner with protein built right in.
    • Meal-prep friendly: warms beautifully for midweek lunches or quick fix suppers.

    Everyone’s sharing Crockpot Swamp Potatoes because it’s the kind of homemade recipe that looks like a chef cooked it, yet it’s ridiculously simple. This comfort food is perfect for busy weeknights and football weekends. The savory aroma fills the kitchen, the texture stays creamy and tender, and the Cajun kick makes it memorable. If you crave a cozy bowl that feels like a hug, this is it. Ready to dive in? Let’s get to the recipe card and make tonight delicious.

    TIPS, TRICKS & EXPERT SECRETS

    Chef Tips for Perfect Crockpot Swamp Potatoes Every Time

    My biggest breakthrough came after a tiny kitchen mishap: I forgot to melt the butter first. That’s when I learned how evenly the seasoning distributes when the butter is whisked with broth. For the most consistent Crockpot Swamp Potatoes, try these cooking tips and quick fixes for a foolproof, easy recipe and a polished homemade version every time.

    • Slice evenly: 1/4-inch potato slices cook at the same pace and stay tender, not mushy.
    • Whisk the seasoning: combine melted butter, broth, and spices so every layer gets flavor.
    • Layer wisely: potatoes on the bottom, then onions, peppers, and sausage for even heat.
    • Low and slow wins: Low for 5 to 6 hours delivers creamy texture with Cajun fragrance.

    Smart Ingredient Swaps & Practical Cooking Advice

    • Vegan version: swap butter for vegan butter or olive oil; use vegan sausage and vegetable broth.
    • Gluten-conscious: most smoked sausages are gluten-free, but check labels; use certified GF broth.
    • Lighter take: reduce butter to 1/4 cup and add an extra 1/2 cup broth to keep potatoes juicy.
    • What not to do: don’t over-stir mid-cook—opening the lid drops heat and can break the potatoes.

    Use this cooking tip list like a checklist, and your Crockpot Swamp Potatoes will come out silky, savory, and perfectly seasoned.

    SERVING IDEAS & CREATIVE VARIATIONS

    How to Serve Crockpot Swamp Potatoes for Maximum Enjoyment

    When friends pop over, I ladle Crockpot Swamp Potatoes into a shallow bowl and sprinkle a confetti of green onions and parsley. It’s the kind of plating suggestion that makes comfort food feel special. For simple serving ideas and pairings, this recipe is a dream easy dinner.

    • Pair with a crisp green salad and lemony vinaigrette to balance the buttery, savory heat.
    • Serve alongside roast chicken, grilled pork chops, or these game-day-ready Crockpot Sweet and Spicy Honey Garlic Wings.
    • Add a cooling sauce: a dollop of sour cream or garlicky yogurt cuts the Cajun spice beautifully.

    Flavor Twists and Seasonal Variations

    • Cheesy bayou: stir in 1 cup shredded cheddar at the end for a creamy, gooey finish.
    • Smoky bacon twist: swap half the sausage for cooked, crumbled bacon to deepen the smoky notes.
    • Fall harvest: fold in 1 cup cubed sweet potatoes or butternut squash for a seasonal twist and natural sweetness.

    For content creators, shoot overhead to capture the colorful peppers and rustic potato slices; a sprinkle of parsley and a linen napkin add instant Pinterest appeal. If you love this cozy comfort food vibe, you’ll also adore my Garlic Parmesan Crockpot Chicken and Potatoes and the sweet finish of Slow Cooker Apple Crisp.

    Crockpot Swamp Potatoes – Comforting and Irresistible
    Crockpot Swamp Potatoes – Comforting and Irresistible

    STORAGE & TROUBLESHOOTING GUIDE

    How to Store and Reheat Crockpot Swamp Potatoes

    Leftover Crockpot Swamp Potatoes are my favorite “cook once, eat twice” trick. On busy Thursdays, I reheat a bowl and dinner is done. To keep Crockpot Swamp Potatoes tasting fresh, follow this storage advice and reheat plan.

    • Room temperature: keep out no longer than 2 hours for food safety.
    • Refrigerator: store in an airtight container up to 4 days. Press parchment against the top to minimize oxidation.
    • Freezer: freeze in freezer-safe bags or containers up to 2 months. Thaw overnight in the fridge.
    • Reheat: in a covered skillet with a splash of broth; or oven at 350°F for 10–15 minutes; or air fryer at 320°F for 6–8 minutes to revive crisp edges.

    Troubleshooting Common Crockpot Swamp Potatoes Issues

    • Too watery: uncover the slow cooker for the last 20 minutes or stir in a tablespoon of instant mashed potato flakes to fix texture.
    • Too dry: add 1/4–1/2 cup warm broth and gently fold; keep covered to rehydrate.
    • Uneven texture: ensure even 1/4-inch slices and avoid frequent peeking—heat loss stalls cooking.
    • Overcooked: fold gently and finish with a pat of butter and fresh herbs to refresh flavor.

    You’ve got this. With a little know-how, Crockpot Swamp Potatoes will stay creamy, savory, and satisfying—even on day two.

    FAQs

    Can I make Crockpot Swamp Potatoes without sausage?

    Yes. Skip the sausage for a vegetarian version and use vegetable broth. Boost umami with smoked paprika or a splash of soy-free liquid smoke.

    What potatoes work best for Crockpot Swamp Potatoes?

    Russets turn creamy and tender, while Yukon Golds hold shape slightly better. Both are great; slice to 1/4-inch for even cooking.

    Are Crockpot Swamp Potatoes spicy?

    The heat level depends on your Cajun seasoning and sausage. Start mild; you can always add cayenne, hot sauce, or extra Cajun spice to taste.

    How do I double the recipe?

    Use an 8-quart slow cooker, maintain the layering, and add 30–60 minutes to the Low cook time. Avoid overfilling past two-thirds capacity.

    Conclusion

    Crockpot Swamp Potatoes deliver everything we crave in weeknight comfort food: a homemade, easy dinner that practically cooks itself, tastes like a hug, and fills the kitchen with buttery, Cajun aroma. Whether you serve them as a cozy side or a one-pot main, these Crockpot Swamp Potatoes are the definition of simple, satisfying, and crowd-pleasing. If you’re new to slow cooker potatoes or just need a no-stress win, this recipe will become your dependable favorite. Try it at home and tag me—I can’t wait to see your skillet-style bowls and comfort-driven spins.

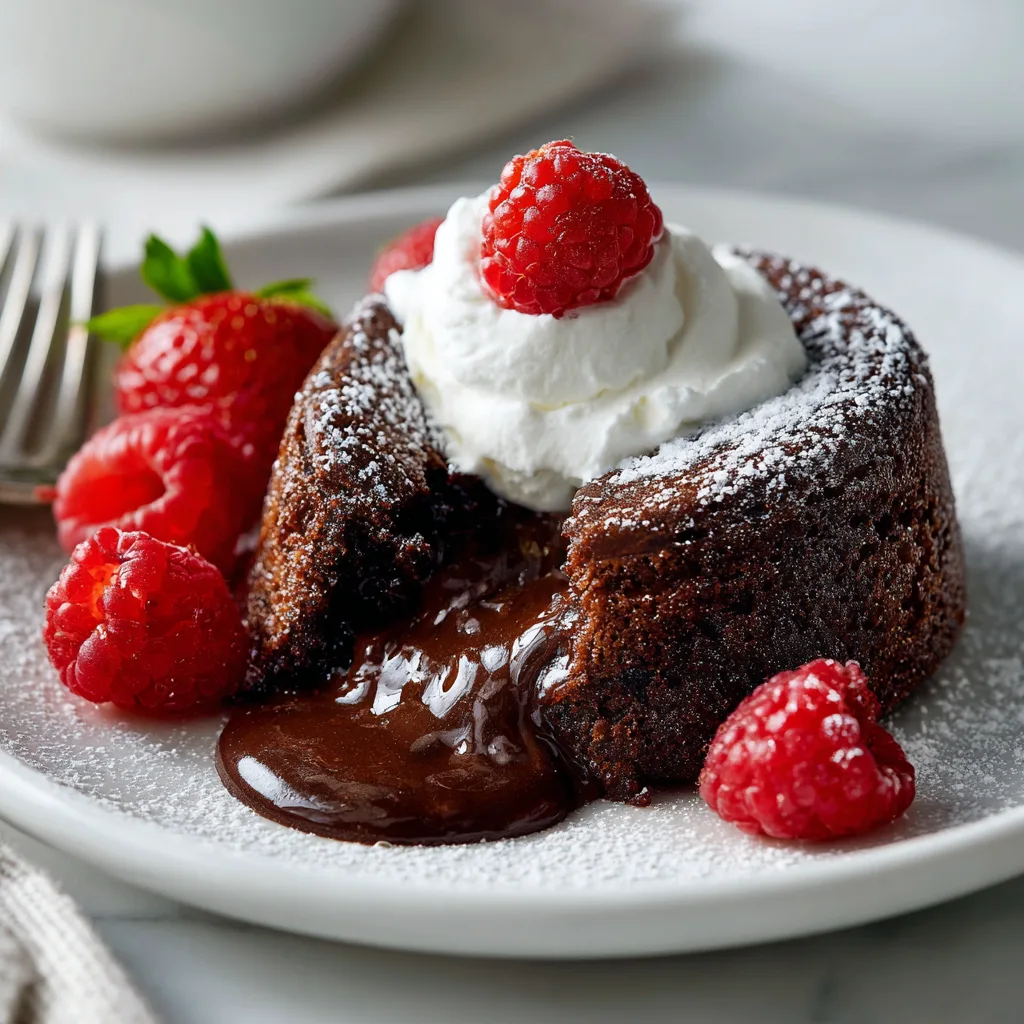
  • Slow Cooker Chocolate Lava Cake – Irresistible and Decadent

    Slow Cooker Chocolate Lava Cake – Irresistible and Decadent

    Slow Cooker Chocolate Lava Cake is the dessert I pull out when the day needs a warm chocolate hug. Last week, I tested timing while my toddler used the measuring cups as maracas and the dog camped under the counter like a hopeful sous chef. The beauty of Slow Cooker Chocolate Lava Cake is that it rewards chaos with gooey, fudge-puddle bliss—no fussy layers, no oven juggling, just pure chocolate comfort.

    Slow Cooker Chocolate Lava Cake

    Recipe

    WHY YOU’LL LOVE THIS RECIPE

    What Makes This Slow Cooker Chocolate Lava Cake So Irresistible

    I first baked this Slow Cooker Chocolate Lava Cake on a rainy Tuesday when the oven was already busy with dinner, and it felt like discovering a secret chocolate portal. This Slow Cooker Chocolate Lava Cake is the definition of comfort food: it’s homemade, ridiculously easy, and the slow cooker turns simple ingredients into a spoonable, fudge-filled dream. The molten center and tender crumb make every scoop feel like a warm hug. It’s the one-pot dessert that frees you to set the table, help with homework, or simply breathe while the house fills with the aroma of chocolate bliss.

    • Hands-off ease: quick prep, then the slow cooker takes over—perfect for weeknights or company.
    • Ultra-gooey texture: pudding + chips create a luscious lava layer without fancy techniques.
    • Pantry-friendly: cake mix, instant pudding, milk, and chocolate chips—simple, reliable staples.
    • Family-friendly comfort food: familiar flavors, cozy vibes, and scoop-and-serve simplicity.
    • One-pot clean-up: no juggling sheet pans; just line the crock, lift, and rinse.

    Ready to ladle up chocolate coziness? Let’s dive into the recipe card and make this comforting, homemade classic.

    Beyond the melt-in-your-mouth appeal, this dessert is trending because it solves a real kitchen problem: oven space and timing. Whether you’re hosting a casual potluck, batch-cooking soups, or searing steaks, the slow cooker works in the background. The result is a rich, chocolatey treat that feels like a bakery indulgence, but it’s your easy, one-pot homemade version. No surprise it’s all over Pinterest—this is the kind of shareable comfort that gets saved and made again.

    TIPS, TRICKS & EXPERT SECRETS

    Chef Tips for Perfect Slow Cooker Chocolate Lava Cake Every Time

    Confession: I learned the towel trick after a steamy lid rained on my cake and turned the center into a puddle—yep, been there. Here are the smart cooking tips I wish I had sooner for a fail-proof, easy recipe:

    • Trap condensation: Drape a clean kitchen towel under the lid to keep drips off the batter for better texture.
    • Don’t stir layers: Pudding and chips should sit on top—resist the urge to mix, and you’ll get dreamy lava pockets.
    • Know your slow cooker: High for 2–2 1/2 hours or Low for 3 1/2–4 hours; start checking early because machines vary.
    • Rest before serving: A 10–15 minute rest lets the sauce thicken into silky spoonfuls.

    Smart Ingredient Swaps & Practical Cooking Advice

    • Gluten-free: Use a gluten-free chocolate cake mix and confirm your pudding mix is GF-friendly.
    • Dairy-free/vegan: Swap in oat or almond milk for both batter and pudding, use dairy-free chocolate chips, and replace eggs with flax “eggs” (1 tbsp ground flax + 3 tbsp water per egg). Choose a vegan cake mix and instant pudding that set with plant milk.
    • Flavor boost: Use milk instead of water in the cake batter, add a teaspoon of vanilla, and a pinch of salt to sharpen the chocolate.
    • What not to do: Don’t overmix the batter; it can turn gummy. Mix until just combined for a tender crumb.

    These cooking tips turn an already easy homemade dessert into a consistent, crowd-worthy showstopper—your quick fix to chocolate bliss.

    SERVING IDEAS & CREATIVE VARIATIONS

    How to Serve Slow Cooker Chocolate Lava Cake for Maximum Enjoyment

    When I served this at a last-minute game night, I set out a topping bar and let everyone customize their bowls. A warm scoop of Slow Cooker Chocolate Lava Cake is fabulous on its own, but the right pairing takes it over the top.

    • Classic: Vanilla ice cream or softly whipped cream to cool the molten chocolate.
    • Sweet and salty: Sprinkle flaky sea salt and drizzle warm caramel.
    • Coffeehouse vibe: Serve with espresso or strong coffee; the bitterness balances the sweetness.

    Hosting a dessert spread? Pair alongside my Slow Cooker Apple Crisp or sticky-sweet Crockpot Cinnamon Sugar Monkey Bread for a cozy buffet of comfort desserts.

    Flavor Twists and Seasonal Variations

    • Mint chocolate: Add 1/2 teaspoon peppermint extract to the batter and swap half the chips for mint chips.
    • Peanut butter swirl: Dollop 1/3 cup warmed peanut butter over the pudding before cooking; swirl lightly.
    • Raspberry truffle: Scatter 1 cup fresh raspberries over the batter and top with dark chocolate chips.
    • Holiday cheer: Crush candy canes over each serving or finish with orange zest for a seasonal twist.

    Plating suggestion: Scoop into shallow bowls, spoon extra lava over the top, and finish with a dramatic ribbon of chocolate sauce. Photographers, shoot with side light to catch the gloss of the molten center—Instagram will swoon.

    STORAGE & TROUBLESHOOTING GUIDE

    How to Store and Reheat Slow Cooker Chocolate Lava Cake

    Leftovers are rare, but when they happen, future-you will be thrilled. I’ve tucked bowls of this cake behind the yogurt to keep it safe—no shame.

    • Room temperature: Keep out no longer than 2 hours for food safety.
    • Refrigerator: Store in airtight containers for 3–4 days. Press a piece of parchment directly on the surface to minimize skin on the sauce.
    • Freezer: Portion into freezer-safe containers and freeze up to 2 months. Thaw overnight in the fridge.
    • Reheat: Microwave 20–30 seconds per serving until warm and saucy. Or reheat in a 300°F oven (ramekins covered with foil) for 10–12 minutes. Air fryer option: 300°F for 4–5 minutes in an oven-safe dish.

    Troubleshooting Common Slow Cooker Chocolate Lava Cake Issues

    • Too dry: Overcooked. Next time, check 15 minutes earlier; aim for set edges and a jiggly center.
    • Watery or thin sauce: Lid condensation likely dripped in. Use the towel trick, and let it rest 10–15 minutes to thicken.
    • Uneven texture: Avoid stirring the layers. Keep pudding and chips on top to form lava pockets.
    • Burnt edges: Your slow cooker runs hot. Use Low setting, add a parchment sling, and check early.
    • Not chocolatey enough: Use milk instead of water in the batter, add a pinch of salt, and use high-quality chips.

    With these storage tips and quick fixes, your Slow Cooker Chocolate Lava Cake will stay decadent and reliable. You’ve got this!

    FAQs

    Can I make Slow Cooker Chocolate Lava Cake without cake mix?

    Yes. Use your favorite homemade chocolate cake batter sized for a 9×13-inch pan, then layer instant pudding and chips on top as directed.

    Can I double the recipe?

    Use an 8-quart slow cooker and extend cook time slightly. Avoid overfilling; the crock should be no more than two-thirds full.

    Will plant-based milk set the instant pudding?

    Some brands do, others don’t. Choose a “cook and serve” style or a plant milk–friendly instant pudding, or reduce the milk by 1/4–1/3 cup.

    What’s the best way to serve leftovers?

    Warm gently and add a splash of milk if the sauce thickens. A fresh scoop of ice cream revives the lava effect.

    Conclusion

    If you’re craving a homemade, comfort food dessert that’s simple and spectacular, this Slow Cooker Chocolate Lava Cake is your new signature sweet. It’s rich, cozy, and wonderfully easy—ideal for weeknights, potlucks, and special occasions. For more slow cooker treats, peek at my Crockpot Chocolate Peanut Clusters. Try it at home and tag me—let’s see those gooey lava scoops!

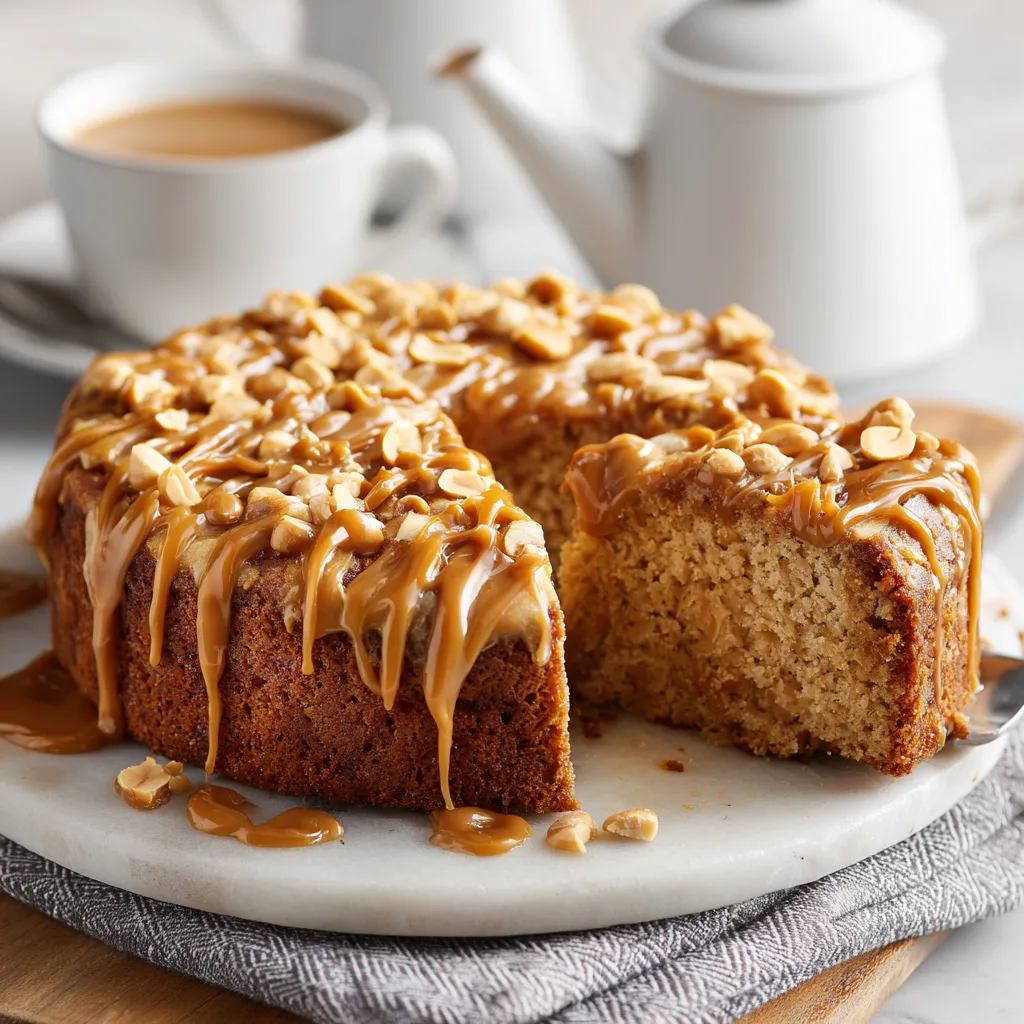
  • Slow Cooker Peanut Butter Cake – Irresistible and Cozy

    Slow Cooker Peanut Butter Cake – Irresistible and Cozy

    Slow Cooker Peanut Butter Cake is my go-to when the sweet tooth calls and the oven is full of sheet pans. Slow Cooker Peanut Butter Cake happened the first time after I accidentally preheated my oven with a skillet of bacon still inside—cue the smoke alarm chorus. I flipped on the crockpot, whisked a quick homemade batter, and two hours later had the most comforting, creamy, peanut-buttery dessert. My kids called it “PB fudge cake,” and I called it a win. If you love set-it-and-forget-it comfort food, this one is a keeper. P.S. If you’re a slow cooker dessert fan, peek at my Slow Cooker Apple Crisp next.

    Slow Cooker Peanut Butter Cake

    Recipe

    WHY YOU’LL LOVE THIS RECIPE

    What Makes This Slow Cooker Peanut Butter Cake So Irresistible

    I learned the magic of a good slow cooker dessert on a busy Tuesday when a soccer uniform, a science project, and dinner all collided. Slow Cooker Peanut Butter Cake saved the night with hardly any dishes. The first two bites were pure comfort food bliss—warm, creamy, and deeply peanut-buttery. Slow Cooker Peanut Butter Cake doesn’t need a mixer, a fancy pan, or your full attention. It’s the homemade, easy recipe that loves you back when life is extra.

    • Set-it-and-forget-it ease: quick prep, hands-off cook time.
    • Cozy, self-saucing texture—tender cake with a creamy peanut butter sauce.
    • Simple pantry ingredients: flour, sugar, peanut butter, butter, milk, vanilla.
    • Family-friendly and crowd-pleasing; weeknight dessert or potluck hero.
    • Reliable results with a forgiving, one-bowl homemade batter.

    If you’re craving an easy, comforting dessert that behaves like a one-pan meal for your sweet tooth, this Slow Cooker Peanut Butter Cake is your new favorite. Ready to dive in? Let’s head to the recipe!

    Short on time but big on flavor is the vibe right now, and this slow cooker dessert nails it. TikTok adores self-saucing cakes and anything that feels like a warm hug. With Slow Cooker Peanut Butter Cake, you get a homemade version of that viral comfort—no oven, no stress. It’s a smart, quick fix for busy cooks who still want that fresh-from-scratch taste. One spoonful and you’ll see why this easy recipe is trending in the best way.

    TIPS, TRICKS & EXPERT SECRETS

    Chef Tips for Perfect Slow Cooker Peanut Butter Cake Every Time

    During a cooking class, I once forgot to put a towel under the lid. The condensation rained down, and my cake got a soggy top. Lesson learned! Here’s how I now guarantee a perfect Slow Cooker Peanut Butter Cake, every time.

    • Lid towel trick: If your slow cooker allows, place a clean kitchen towel under the lid to catch condensation and keep the top tender, not wet.
    • Don’t overmix: Stir the batter until just combined to keep the crumb soft and plush.
    • Check early: Slow cookers vary—start checking at 1 hour 45 minutes; the edges should be set with a slightly soft center.
    • Rest to thicken: After cooking, let it sit covered for 10–15 minutes so the peanut butter sauce becomes silky.

    Smart Ingredient Swaps & Practical Cooking Advice

    • Gluten-free: Use a 1:1 gluten-free baking flour with xanthan gum. Texture stays tender.
    • Dairy-free/vegan: Swap milk for oat or almond, butter for vegan butter, and the egg for a flax egg (1 tablespoon ground flax + 3 tablespoons water). Use dairy-free chocolate chips.
    • Less sugar: Reduce brown sugar in the sauce to 1/3 cup or use coconut sugar for a more caramel-like, homemade flavor.
    • Natural peanut butter: If using unsweetened natural PB, add 1–2 tablespoons extra sugar to the batter for balance.
    • What not to do: Don’t stir after pouring on the hot water sauce; that self-saucing layer is the secret to Slow Cooker Peanut Butter Cake magic.

    With these cooking tips, your easy recipe will be consistent, cozy, and delightfully rich—just the homemade comfort food you’re craving.

    SERVING IDEAS & CREATIVE VARIATIONS

    How to Serve Slow Cooker Peanut Butter Cake for Maximum Enjoyment

    Serve Slow Cooker Peanut Butter Cake for Maximum Enjoyment
    Serve Slow Cooker Peanut Butter Cake for Maximum Enjoyment

    I served this Slow Cooker Peanut Butter Cake at a casual game night and set out a “toppings bar.” Suddenly, everyone was a pastry chef. The warm cake, plus the creamy sauce, is a dream canvas.

    • Classic: Scoop into bowls and top with vanilla ice cream and a drizzle of warm peanut butter.
    • Peanut butter cup style: Add chocolate sauce and chopped peanut butter cups.
    • Coffeehouse vibe: Pair with hot coffee or a cold brew; the bitter notes balance the sweet, rich sauce.

    For social sharing, scoop while warm so the sauce glistens. Use a light-colored bowl and a small spoon for contrast—simple plating suggestions that make photos pop.

    Flavor Twists and Seasonal Variations

    • PB&J Swirl: Dollop 1/3 cup strawberry or raspberry jam over the batter before cooking; swirl lightly for a gorgeous flavor variation.
    • Elvis Style: Add 1 sliced ripe banana to the batter and finish with a honey drizzle and chopped peanuts.
    • Salted Caramel Pretzel: Sprinkle 1/2 cup crushed pretzels over servings and finish with a pinch of flaky sea salt and caramel sauce.
    • Autumn Cozy: Add 1 teaspoon cinnamon to the batter and serve alongside my Crockpot Pumpkin Cheesecake Pudding Cake for a seasonal slow cooker dessert spread.
    • Chocolate Lover: Fold in 1/2 cup chocolate chips and check out my ultra-gooey Crockpot Gooey Chocolate Lava Brownie Cake for your next cocoa craving.

    Whether you keep it classic or go seasonal, Slow Cooker Peanut Butter Cake is the flexible, homemade dessert that always satisfies.

    STORAGE & TROUBLESHOOTING GUIDE

    How to Store and Reheat Slow Cooker Peanut Butter Cake

    Leftovers don’t last long in my house, but when they do, here’s how I keep Slow Cooker Peanut Butter Cake fresh and luscious.

    • Room temperature: Up to 1 day, covered. Ideal if your kitchen is cool.
    • Fridge: 3–4 days in an airtight container; the sauce thickens and stays creamy.
    • Freezer: Up to 2 months. Portion into freezer-safe containers; thaw overnight in the fridge.
    • Reheat: Microwave 20–30 seconds per serving or warm in a 300°F oven for 10–12 minutes. An air fryer at 300°F for 4–6 minutes also works well.

    Troubleshooting Common Slow Cooker Peanut Butter Cake Issues

    • Too dry: Cooked too long. Next time, check 15–30 minutes earlier and aim for set edges with a soft center. Add 1–2 tablespoons extra milk to the batter for more moisture.
    • Watery sauce: Didn’t rest. Let the cake sit covered for 10–15 minutes after cooking so the sauce thickens. Also ensure the lid towel absorbs condensation.
    • Uneven texture: Overmixing can create tunnels. Stir just until the flour disappears.
    • Overly sweet: Reduce brown sugar in the sauce to 1/3 cup or balance with a pinch of flaky salt on top.
    • Edges too dark: Your slow cooker runs hot. Drop the cook time by 10–15 minutes or switch to LOW for the last 30 minutes.

    With these storage tips and quick fixes, you’ll keep every slice of Slow Cooker Peanut Butter Cake tasting homemade, warm, and comforting. You’ve got this—sweet success is guaranteed.

    FAQs

    Can I make Slow Cooker Peanut Butter Cake ahead?

    Yes. Cook, cool, and refrigerate for up to 4 days. Reheat gently to bring back the silky sauce.

    Can I use natural peanut butter?

    Yes, but add 1–2 tablespoons extra sugar to the batter for balance, and stir well since natural PB separates.

    What size slow cooker works best?

    A 4- to 6-quart slow cooker is ideal. Wider models cook a bit faster; start checking early.

    How do I know when it’s done?

    The edges are set, the center is slightly jiggly, and a toothpick into the cake (not the sauce) comes out with a few moist crumbs.

    Conclusion

    Slow Cooker Peanut Butter Cake is the cozy, homemade dessert that turns weeknights into celebrations. With minimal prep, a single bowl, and the gentle heat of your crockpot, you get a tender cake and a creamy, self-saucing peanut butter layer—true comfort food. Whether you serve it classic with vanilla ice cream or spin it into PB&J swirls and caramel crunch, this easy recipe is pure joy in a bowl. Try it tonight, savor the warm spoonfuls, and enjoy the hands-off simplicity. When you make Slow Cooker Peanut Butter Cake, share your creations and tag me—let’s spread the peanut buttery love!

  • Mississippi Chicken Chili – Cozy and Irresistible

    Mississippi Chicken Chili – Cozy and Irresistible

    Mississippi Chicken Chili started in my kitchen on a day when the dishwasher rebelled and the dog stole a pepperoncini. I tossed everything in the slow cooker and hoped for dinner magic. Mississippi Chicken Chili rewards chaos with comfort—rich, tangy, and irresistibly creamy. By the time the kids set the table (after a polite reminder or three), the house smelled like a cozy hug. If you love slow cooker wins like this creamy Crockpot chicken or a hearty bowl like beef barley stew, this is your next easy dinner favorite. More comfort cooking inspo lives on my homepage at Recipes Darleen.

    Mississippi Chicken Chili

    Recipe

    Why You’ll Love Mississippi Chicken Chili

    What Makes This Mississippi Chicken Chili So Irresistible

    I first made Mississippi Chicken Chili after a rainy-day grocery run where I forgot half my list and still came home with pepperoncini. Classic Darleen. Mississippi Chicken Chili has the bold, tangy backbone you crave from the Mississippi roast universe, swirled into a creamy chili that tastes like homemade comfort food. It’s the easy dinner you’ll crave on weeknights and the one-pan meal you’ll proudly serve to guests. Mississippi Chicken Chili practically cooks itself while you live your life.

    • Quick prep, slow-cooker payoff: toss, set, and come back to silky, shreddy goodness.
    • Comforting taste: ranch seasoning, au jus, and pepperoncini create big, cozy flavor.
    • Simple ingredients: pantry staples and a few fresh touches make it truly homemade.
    • Family-friendly: mild heat with customizable toppings for picky eaters.
    • Flexible meal prep: reheats like a dream for lunches and freezer-friendly dinners.

    Trending across Pinterest and dinner tables alike, Mississippi Chicken Chili is the kind of easy recipe that bridges seasons and schedules. If you’ve ever wished your weeknight pot could deliver creamy heat, tangy zip, and a satisfying finish, Mississippi Chicken Chili is the answer. Let’s jump into the recipe card and get that slow cooker humming.

    People love how Mississippi Chicken Chili merges pepperoncini brightness with rich, slow-simmered chicken in a homemade version of comfort food that feels restaurant-worthy. It’s an easy dinner that solves the “what’s for dinner?” question with a one-pot meal and minimal cleanup—exactly the kind of quick fix we all need.

    Tips, Tricks & Expert Secrets

    Chef Tips for Perfect Mississippi Chicken Chili Every Time

    My turning point for Mississippi Chicken Chili came during a cooking class when I accidentally added the pepperoncini brine instead of vinegar. Best mistake ever. Now I always add a splash for brightness. This easy recipe loves low-and-slow patience and just a few smart moves.

    • Bloom your spices: Stir chili powder, cumin, and smoked paprika into a spoonful of hot broth before adding—your Mississippi Chicken Chili will taste deeper and more homemade.
    • Balance the salt: Ranch and au jus bring sodium. Use low-sodium broth and salt at the end to keep Mississippi Chicken Chili from tipping too salty.
    • Shred at the right time: When chicken pulls apart with gentle pressure, shred and fold it back so the chili absorbs all those juices.
    • Creamy finish: Stir in softened cream cheese off heat. It melts smoothly and keeps the texture lush.

    Smart Ingredient Swaps & Practical Cooking Advice

    • Dairy-light: Swap cream cheese for evaporated milk or Greek yogurt at the end (temper yogurt with a little hot liquid first).
    • Gluten-free: Use certified GF ranch and a GF brown gravy mix instead of au jus, making your Mississippi Chicken Chili wheat-free.
    • Low-fat: Use chicken breasts, skip the butter, and add an extra half cup of broth for a lighter homemade version.

    What not to do: Don’t cook Mississippi Chicken Chili on high the whole time and then walk away for hours—overcooked chicken turns stringy and dry. Keep it gentle, and your easy dinner will stay juicy, flavorful, and perfectly spoonable.

    Serving Ideas & Creative Variations

    How to Serve Mississippi Chicken Chili for Maximum Enjoyment

    When I served Mississippi Chicken Chili to friends for game night, I put out a topping bar and watched the bowls disappear. Think creamy base, bright pepperoncini pop, and lots of crunchy finishes. Mississippi Chicken Chili loves a cozy bowl and a confident sprinkle.

    • Pairings: Spoon over rice or cornbread, or serve with warm tortillas for a weeknight “chili taco” vibe.
    • Toppers: Cheddar, scallions, crushed tortilla chips, avocado, sour cream, or a squeeze of lime for balance.
    • Sips: A crisp lager or a lightly oaked Chardonnay complements the tangy richness.

    Flavor Twists and Seasonal Variations

    • Smoky Southwest: Add chipotle in adobo and roasted corn for a deeper kick in your Mississippi Chicken Chili.
    • Autumn Harvest: Stir in diced butternut squash and a pinch of cinnamon for a sweet-savory seasonal twist.
    • Green Goodness: Skip tomatoes and add extra green chiles and spinach for a white-style Mississippi Chicken Chili.

    Serving ideas for content creators: Style Mississippi Chicken Chili in a matte black bowl, top with bright cilantro, and layer textures—crema drizzle, crunchy chips, and pepperoncini slices. Shoot near a window for soft light and let the steam tell the story. For more slow cooker inspiration, try dessert night with Slow Cooker Apple Crisp after this cozy chili.

    Mississippi Chicken Chili

    Storage & Troubleshooting Guide

    How to Store and Reheat

    When our family makes a double batch of Mississippi Chicken Chili, I stash some for easy lunches before anyone notices. Mississippi Chicken Chili keeps beautifully and tastes even better the next day—proof that comfort food loves a little rest.

    • Room temperature: Keep out no more than 2 hours.
    • Fridge: Store Mississippi Chicken Chili in airtight containers up to 4 days. Use shallow containers to cool quickly and keep fresh.
    • Freezer: Portion Mississippi Chicken Chili into freezer bags or containers for up to 3 months. Press bags flat for fast thawing.
    • Reheat: Warm gently on the stovetop over medium-low, adding a splash of broth if needed. Microwave in short bursts, stirring between. Avoid boiling to preserve texture.

    Troubleshooting Common Mississippi Chicken Chili Issues

    • Too thick: Stir in warm broth 1/4 cup at a time until the Mississippi Chicken Chili is spoonable.
    • Too thin: Simmer uncovered 10–15 minutes to reduce, or mash a few beans to thicken.
    • Too salty: Add unsalted broth, a squeeze of lime, or a small peeled potato while simmering, then remove the potato.
    • Dry chicken: Fold in a bit more broth and a pat of butter, then rest 5 minutes to rehydrate.

    With these storage tips and quick fixes, your Mississippi Chicken Chili will stay silky, satisfying, and weeknight-ready. You’ve got this!

    FAQs

    Can I make Mississippi Chicken Chili on the stovetop?

    Yes. Simmer shredded rotisserie chicken with the remaining ingredients for 20–25 minutes, then finish with cream cheese and lime.

    Is Mississippi Chicken Chili spicy?

    It’s mild with a tangy bite from pepperoncini. For more heat, add jalapeño or extra green chiles.

    Can I use chicken thighs instead of breasts?

    Absolutely. Thighs stay extra juicy in the slow cooker and shred beautifully.

    How can I make Mississippi Chicken Chili dairy-free?

    Skip the butter and cream cheese. Add extra broth plus a splash of coconut milk for creaminess.

    Conclusion

    Mississippi Chicken Chili is the weeknight comfort food I reach for when I want big flavor without fuss. The tangy pepperoncini, ranch warmth, and creamy finish make Mississippi Chicken Chili a cozy, homemade staple that checks every easy dinner box. It’s a one-pot meal with tender chicken, rich broth, and just the right kick—perfect for family nights, potlucks, or meal prep. If you love slow cooker ease, try this soon and taste why it’s trending. Make this recipe tonight, share your bowl, and tag me so I can cheer on your delicious success!